


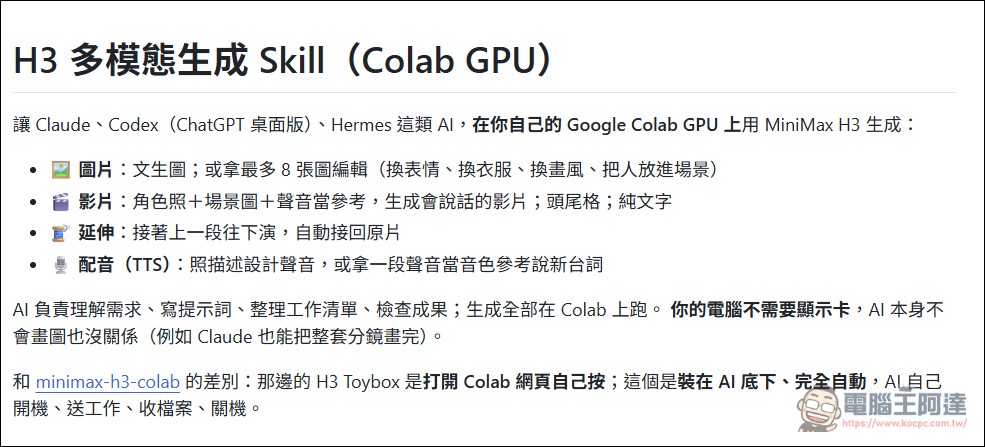
We previously introducedMethod for calling Google Colab through Codex and generating videos with MiniMax H3This time, Ada switched to open-source tools from a different author:dseditor (also known as the well-known AI teacher “松音”) has open-sourced the H3 multimodal generation Skill.It integrates image generation, image editing, video generation, video extension, and TTS dubbing into a workflow, letting AI handle startup, upload, inference, download, and shutdown. In addition to outlining the installation methods, this article also runs a continuous real-world case study of “original character image → scene change → character video” to see what it can do, how long it takes, and how the quota is calculated.

Let an AI Agent generate images and make videos for you! Songyin H3 Multimodal Generation Skill
To clarify one point first: this Skill is a tool and workflow that lets an Agent automatically operate Google Colab GPU to create videos with MiniMax H2—it is not a video generation service provided directly by Google. The actual generation runs on Colab GPU using the credits included free with your own AI Pro subscription. You can use any current mainstream AI Agent, such as Codex, Claude Code, Antigravity, or Hermes; in this example, Codex operates it. Your local computer handles preparing materials, submitting jobs, and receiving the finished products. It is simpler than the previous tutorial workflow: just paste the command and approve the authorization prompts along the way, and it is done. It can also do more than generate videos—images, voiceovers, and extensions are all possible.
How is this different from the previous tutorial? This is another Skill.
Both projects use Google Colab GPU computing and download the MP4 back to the local machine after completion. The previous post introduced killkli/minimax-h3-colab-skill, mainly following the H3 reference video workflow; this time it is dseditor/h3-colab-skill, the name of the skill after installation is h3-multimodal-colab, with more features and easier to use.
| Item | The tool introduced in the previous post | Tools used in this article |
|---|---|---|
| Project | killkli/minimax-h3-colab-skill | dseditor/h3-colab-skill |
| Main operating range | Character reference video; the current document also lists a first-frame mode. | Image generation, image editing, video, extension, TTS |
| Execution method | The runner runs the included Colab inference Notebook. | runner deploys ComfyUI and H3 Toybox on Colab, then submits generation jobs. |
| GPU selection | The Shell launcher defaults to A100 high memory and is adjustable. | Default is L4, and other supported GPUs can also be selected as needed. |
All videos generated in this article use L4/PRISM INT8/8 steps Combination; for images, use the P-H3-Image route provided by this project.
Songyin H3 Multimodal Generation Skill (please go click the little star)
What do you need to prepare? First, confirm you have a Google account with available credit.
Prepare an AI tool that can run commands and install skills on your local machine, along with a Google account that can use Colab GPU. This article uses Codex on Windows and an existing WSL environment; the project also provides installation methods for Windows, macOS, and Linux. You do not need to install the H3 model locally, nor do you need to install a high-end graphics card. All model weights are downloaded to Colab’s temporary environment.
Note that even if you have a Google AI membership, it does not mean that every account currently logged in has Colab compute units.Google Official AI Pro descriptionList the Colab benefits as “OnlyAvailable to family plan administrators; family accounts will show 0 CU available for use, so if your AI Pro is shared with someone else, it may not be usable.
Installation: Paste this text into Codex.
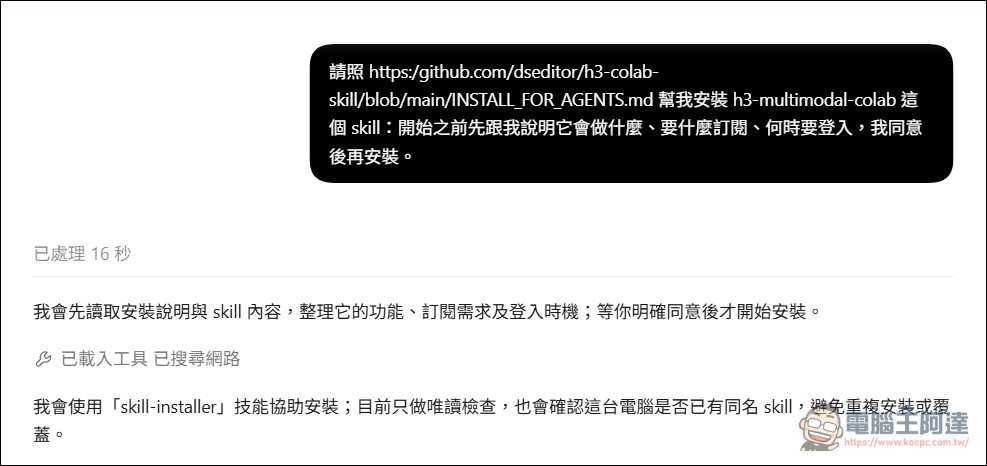
Open an AI Agent that can operate the local machine; here, Codex is used as an example. Paste the following content. Before installation, have it explain what it will download, where it will run, and what the Google authorization is for:
請照 https://github.com/dseditor/h3-colab-skill/blob/main/INSTALL_FOR_AGENTS.md 幫我安裝 h3-multimodal-colab 這個 skill:開始之前先跟我說明它會做什麼、要什麼訂閱、何時要登入,我同意後再安裝。我要優先使用 Google Colab,先以 L4 測試;也要使用生圖功能。
The project installation process will set up skills, Python, and the Google Colab CLI. The official installation documentation currently specifies the verified CLI 0.7.4; if the version changes in the future, have the AI check the documentation for compatibility and install accordingly—this is generally done automatically.
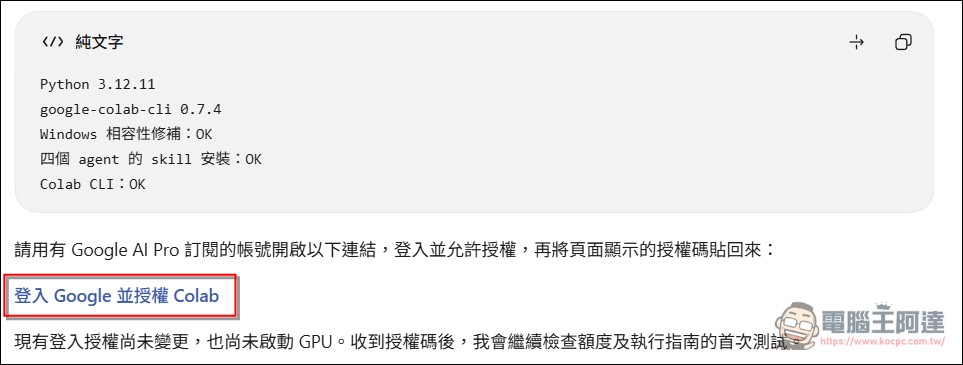
Google authorization is completed by you personally.
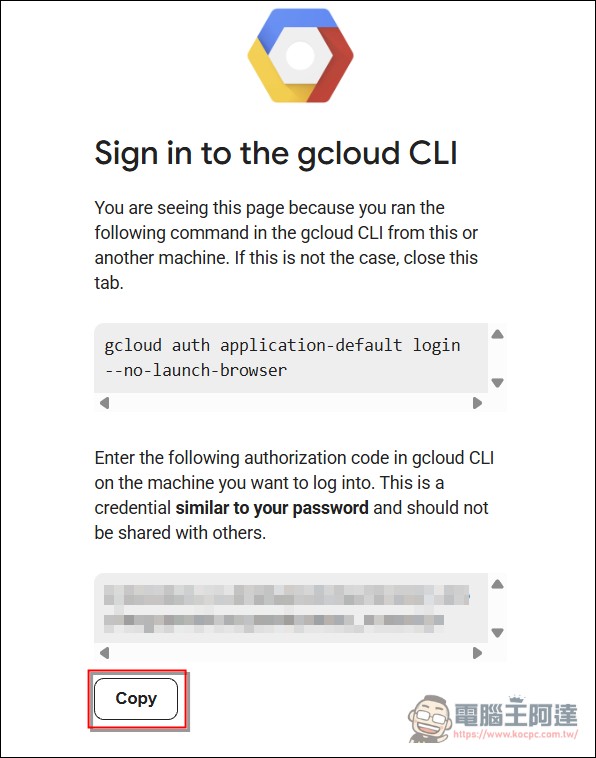
On first use, the AI will provide a Google authorization URL. Please verify the URL and the account you intend to sign in with, complete the password, two-step verification, and permission confirmation yourself, and then complete authorization following the tool’s workflow.
Once completed, give the Token key below to the AI assistant and setup is complete:
You can ask the AI to perform the following checks: report whether the account is correct, how many CUs remain, and whether there are any GPUs still running (optional). If you also have multiple Google accounts, ask it to record the correct account and the login environment used in its own SKILL, so that every future check and generation uses the same environment.
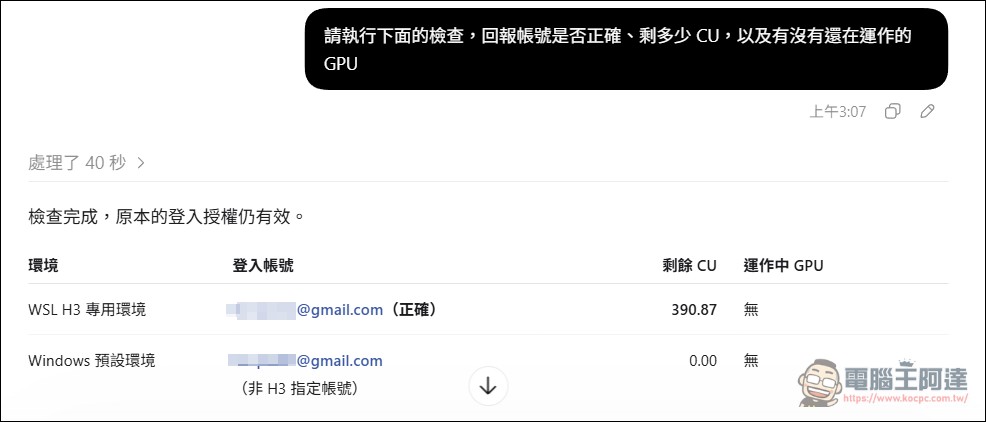
Ability Test
Hands-on Case 1: Generating Images from Text
First, test the text-to-image function. Instead of using an existing well-known character, I chose to create an orange delivery robot (you can set it yourself; the following is just an example): a dark teal screen face, two round white eyes, three-fingered mechanical hands, rubber feet, and a brown crossbody delivery bag. First give the appearance a few easily recognizable key features, so that in the next stage we can check whether it maintains the same character.
提示詞:用雲端 H3 生圖功能,生成一隻原創橘色配送機器人,深青色螢幕臉、兩個白色圓眼、三指機械手、棕色斜背包。暖白攝影棚背景,完整角色入鏡,精緻 3D 動畫風格,16:9、2K,不要文字、Logo 或浮水印。
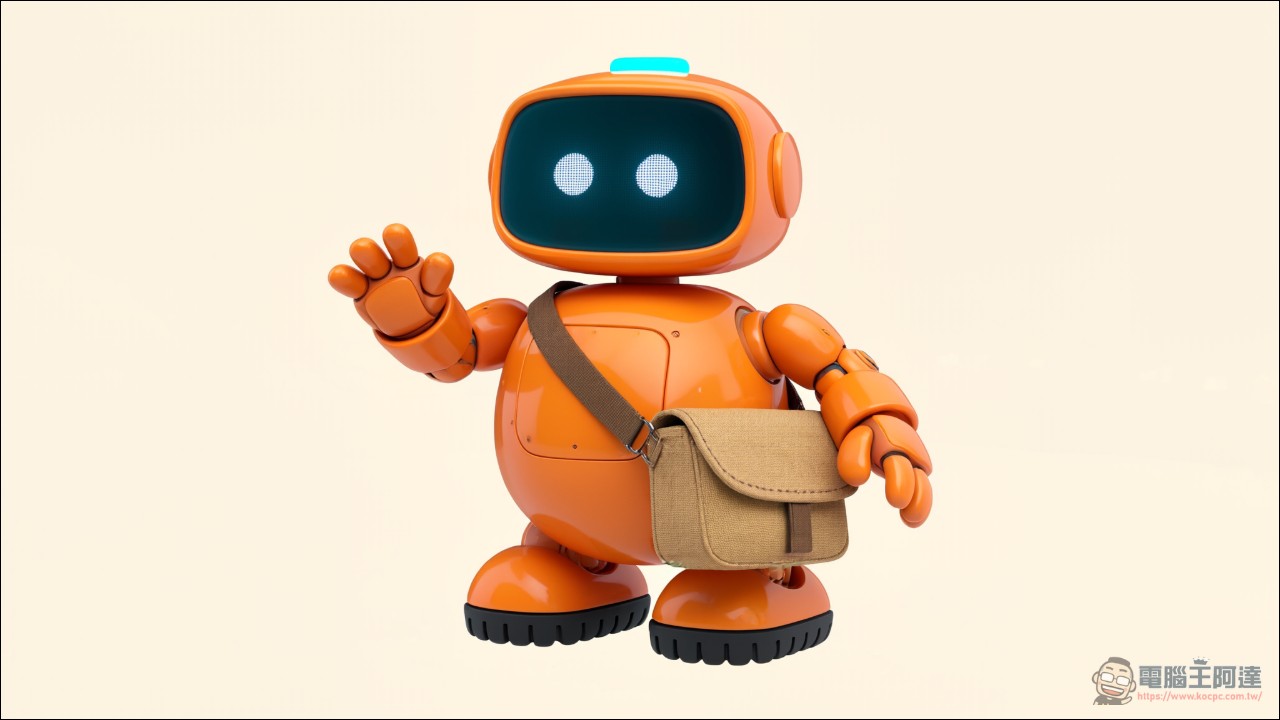
Test Case 2: Retain the character and set a specified scene (image-to-image).
Next, use the previous result directly as the input for image editing, requiring the robot’s geometry, color scheme, eyes, and bag to be preserved while replacing the background with a post-rain street in Taipei at blue hour. This is more meaningful than simply swapping in a new image: the point is to see whether the character remains recognizable after the background change, rather than just judging whether a single image looks pretty.
提示詞:以上一張機器人為角色參考,保留外形、橘色機身、青色螢幕、眼睛與棕色包包。換到台北雨後的行人街道,旁邊是暖光咖啡店櫥窗,地面有濕潤反光,角色完整入鏡,16:9、2K。不要可讀招牌文字。
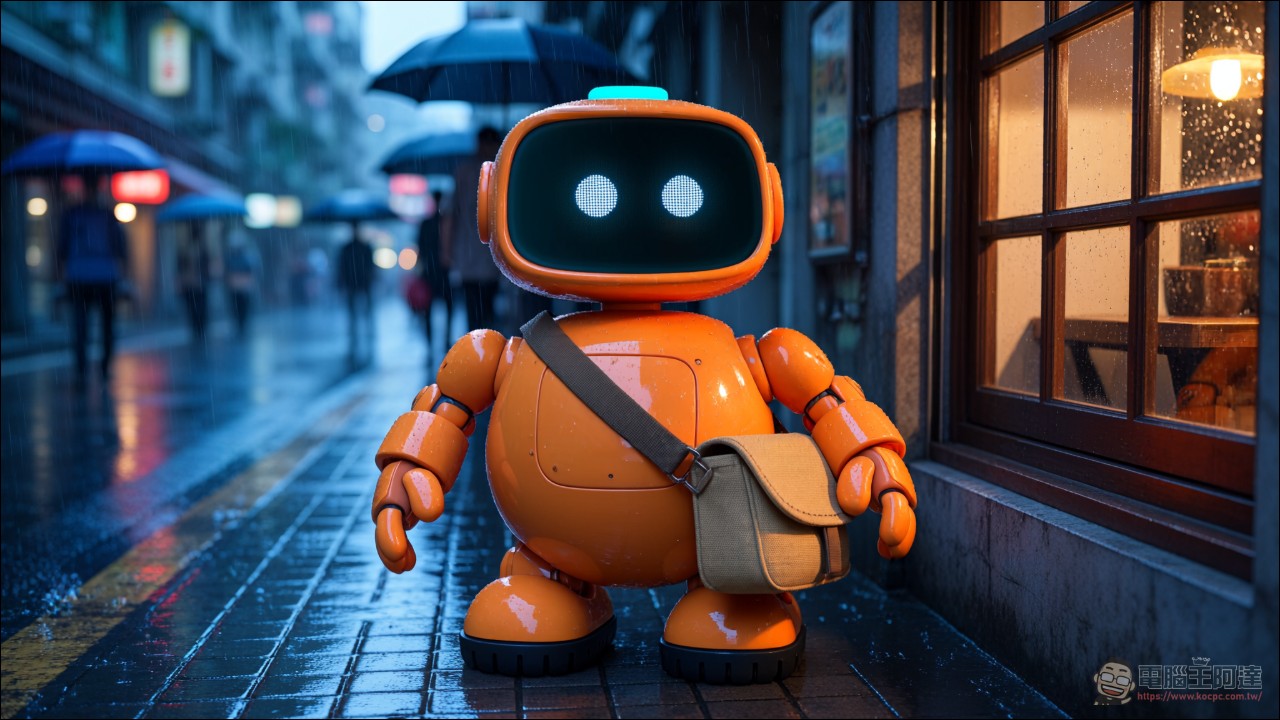
Practical test case 3: two reference images followed by generating an 8-second video (image-to-video)
In the third step, give the AI the studio character image and the rainy night scene image together, and enter the prompt.
提示詞:使用這兩張圖製作 8 秒、16:9、720P 級影片。第一張鎖定機器人的外觀,第二張提供雨夜咖啡店場景。機器人向暖光走一小步,轉向鏡頭揮手兩次,再放下手。保留包包與配色,鏡頭緩慢靠近,搭配細雨、機械關節聲與輕柔配樂,不要台詞和字幕。使用 Colab L4,完成後下載並關閉本次 GPU。
After submission, the Agent will organize the requirements into an English prompt for H3, filling in the reference characters, scenes, timeline, ambient sound, and background music. The AI will use MiniMax H3 to automatically handle everything through to completion and deliver the result:
Bonus: Live-action-style dance video (image-to-video)
I gave the AI a character image and told it to make a 15-second dancing video, and the likeness was pretty good:
How long exactly do you have to wait, and how many CUs does it cost? Look at generation time and batch time separately.
Next, I’ll share the CU used (Compute Units; Computing Units:This can be understood as Google Colab’s “compute points”) and usage time. It also includes startup, installation, model download, asset transfer, and file collection. The quota difference is obtained by subtracting the value displayed after shutdown from the value displayed at the start; since the display is rounded, it cannot be calculated precisely as a per-second rate.
| Test | Single-item generation time | Batch / Quota |
|---|---|---|
| Character text-to-image for this article, 2K | 112.5 seconds | The three items in this post share a single L4; see the actual test records below for the full batch and CU. |
| This post’s reference image for the scene modification, 2K. | 48.2 seconds | |
| Main character video, 8 seconds, 720P quality. | 380.8 seconds | |
| Previous dance, 10 seconds, vertical 720P-class | 456.9 seconds (about 7 minutes 37 seconds) | Entire batch approx. 12 minutes / approx. 0.29 CU |
| Earlier slight dance, 15 seconds, vertical 720P quality. | 729.3 seconds (about 12 minutes 9 seconds) | Whole batch: approx. 16.4 minutes / approx. 0.43 CU |
Summary
dseditor/h3-colab-skillThe project also offers standalone TTS, reference voices, video extension, and other features, and supports connecting to local ComfyUI Desktop. This article focuses on the newly added hands-on tests of image generation, image editing, and reference videos; those interested can try it out with an AI Agent themselves. If your goal is short film pitches, character design, or short social media assets, this approach of letting AI manage Colab is very convenient, and you can generate images and videos without spending a lot on hardware. However, the prerequisite is that you need an AI Pro membership. I personally think it’s well worth buying, because it also includes ad-free YouTube, AntiGravity quota, Google Drive cloud storage, more Gemini usage quota… all extra benefits. Although Google’s current AI models are commonly nicknamed the “cute dragon,” they’re still sufficient for general use. Give it a try!
Source: KOCPC Chinese