


I believe many users want to try out the new interface design of Windows 11. However, upgrading now is a bit risky, and you may encounter many bugs or software support issues. In fact, there are other ways to pseudo-experience it, which is by changing the Windows 10 theme and icon. This article will teach you how to operate it.
Also, let me remind you that there are a lot of steps and it will take some time.
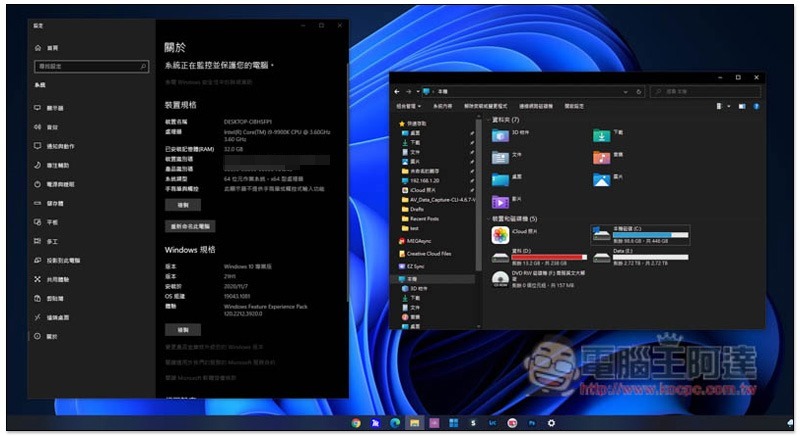
Tutorial on how to turn Windows 10 into a Windows 11-like theme
You will need to download 8 files to complete all operations, but if you don’t center the application icon in the toolbar, you only need to download the first 6 files.
- UltraUXThemePatcher
- tablecloth
- Imitation Windows 11 theme
- Imitation Windows 11 icon design
- OldNewExplorer
- 7TSP GUI 2019
————– Files needed only when the toolbar icon is centered ————-
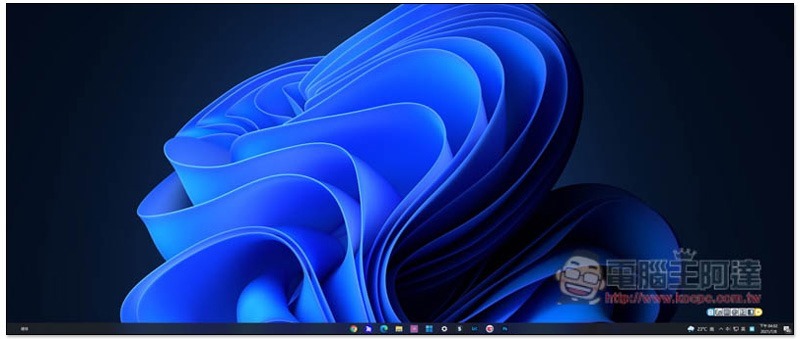
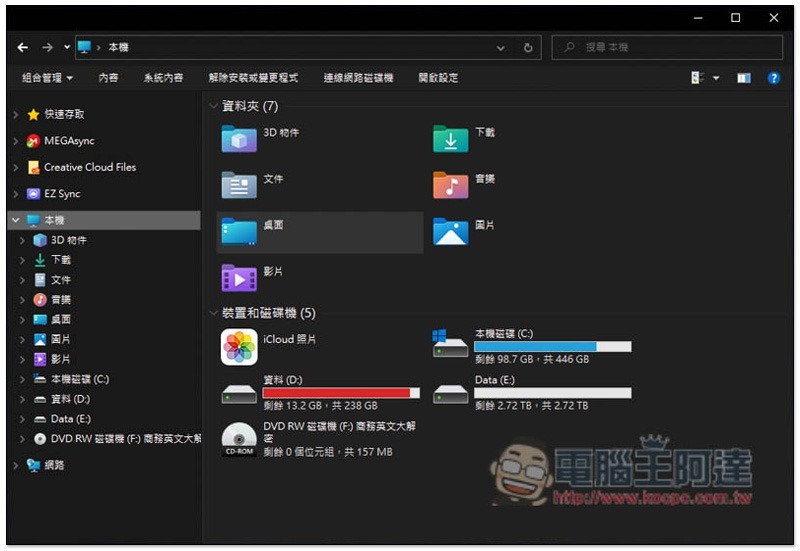
Let’s take a look at some final renderings first. I’m using a 21:9 wide screen, so the screenshots are so long:
File manager:
Step 1 – Install UltraUXThemePatcher
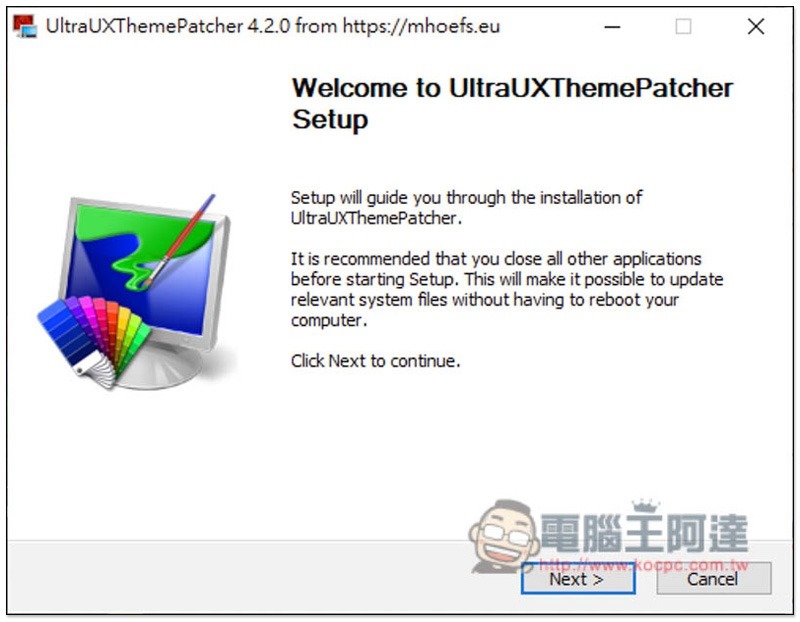
Be sure to install this set when changing Windows 10 themes and icons UltraUXThemePatcher, otherwise the interface color of some software will become strange after the modification. Press UltraUXThemePatcher on the right to download:
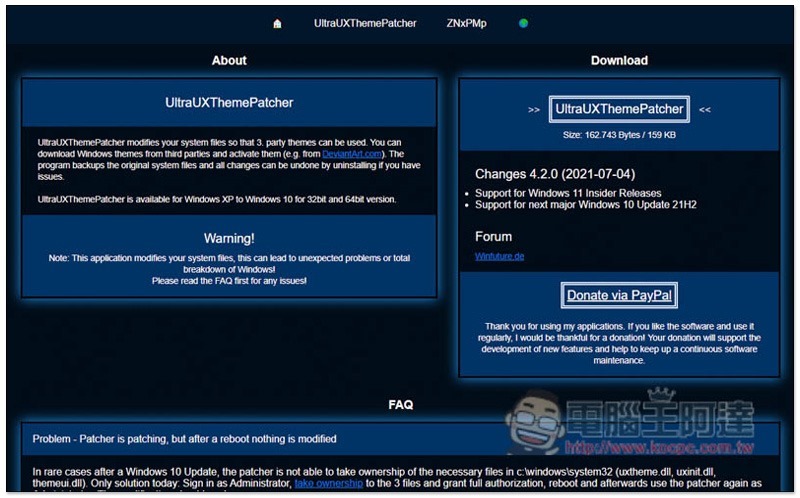
Just keep pressing Next during the installation process:
Step 2 – Set up Windows 11 wallpaper
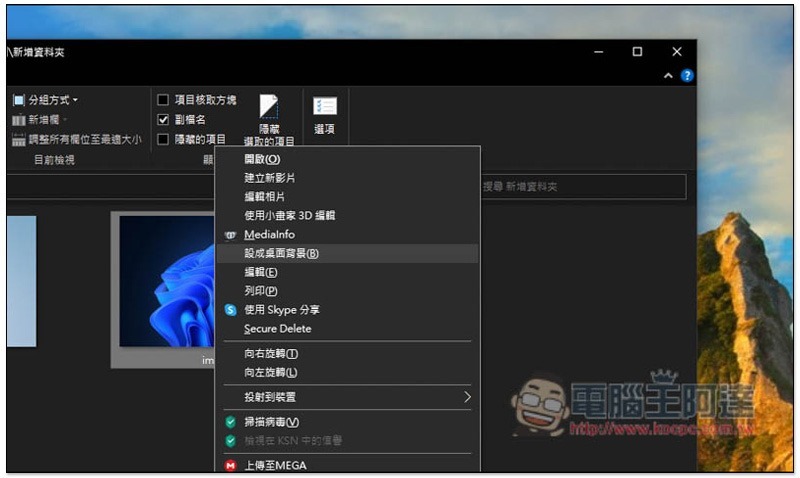
Choose which one you like, open the right-click menu after selecting it, and “Set as desktop background”:
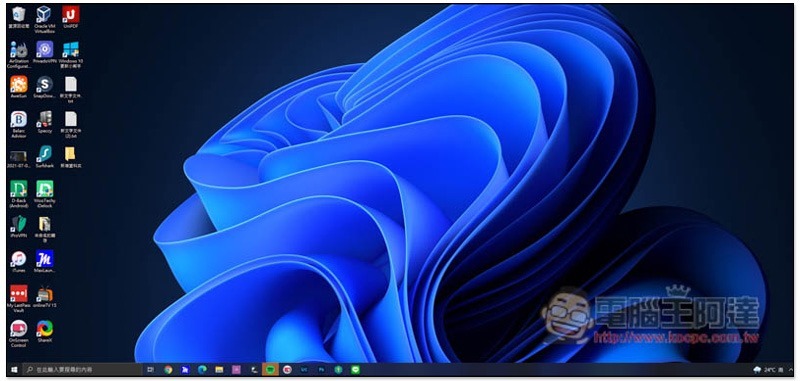
The desktop will look like this:
Step 3 – Download the Fake Windows 11 Theme
enterImitation Windows 11 theme pageAfter that, you can find the Download button on the right:
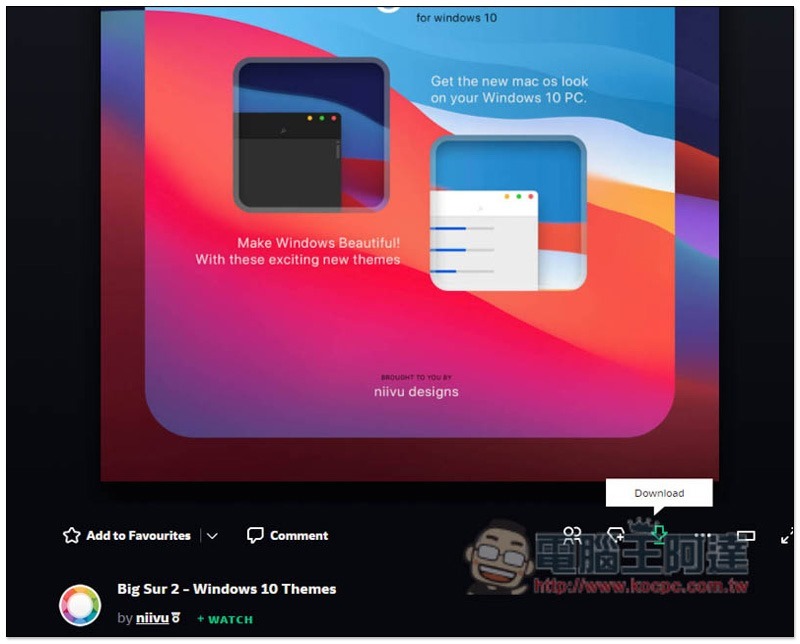
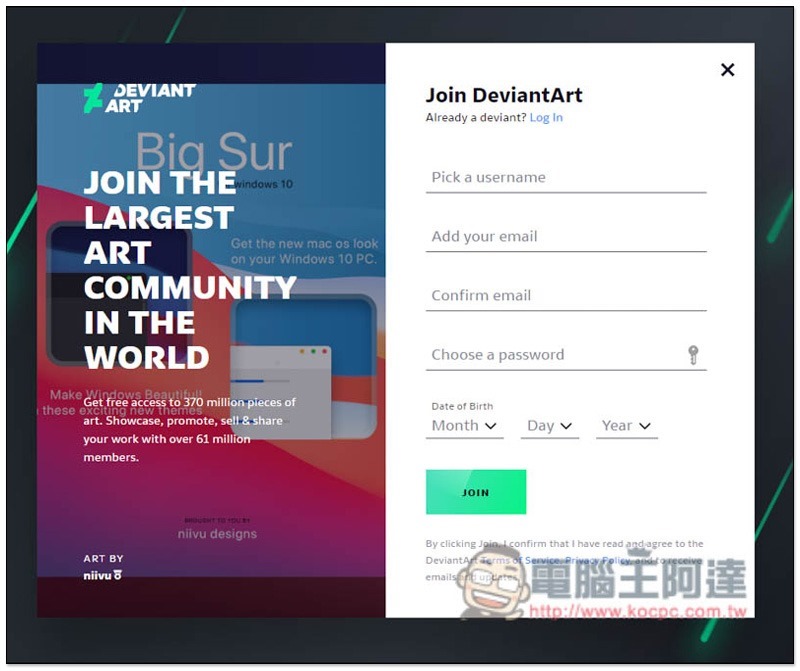
However, you need to register for free before downloading. A confirmation letter will be sent to your email address, so remember not to fill in the email address randomly. You can do anything else:
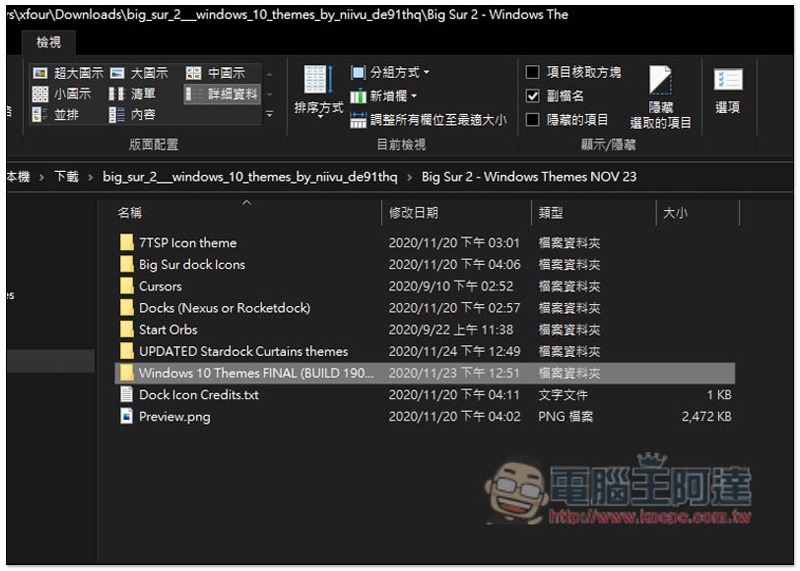
After downloading and unzipping, find the Windows 10 Themes FINAL folder:
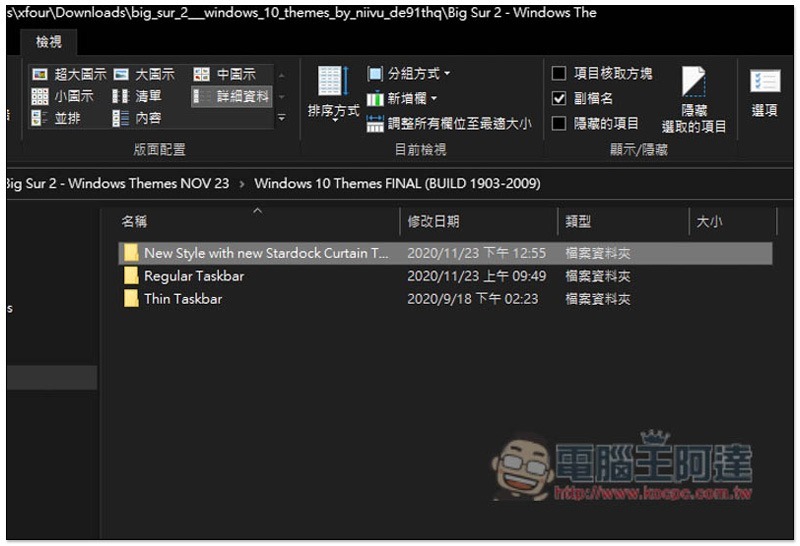
There are three folders inside, enter New Style with new Stardock Curtain…. This one:
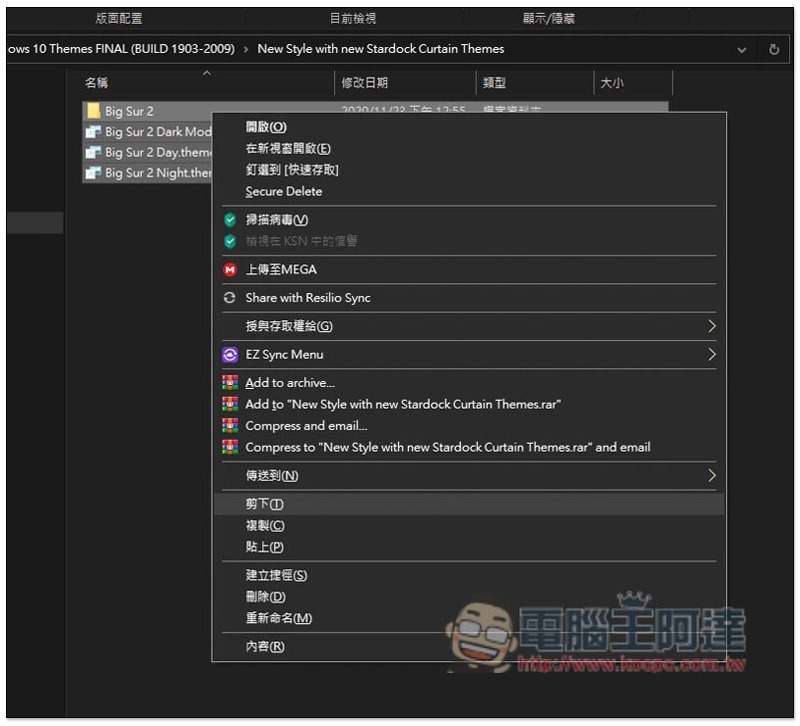
Cut out all four Big Sur 2 files inside and paste them into another computer folder:
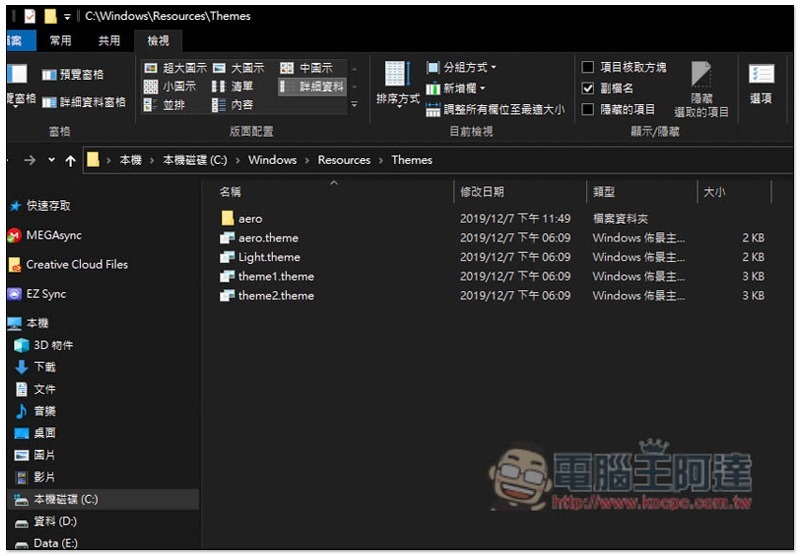
Enter the C slot -> Windows -> Resources -> Themes, then press the paste Ctrl+V shortcut key, or use the paste function of the right-click menu:
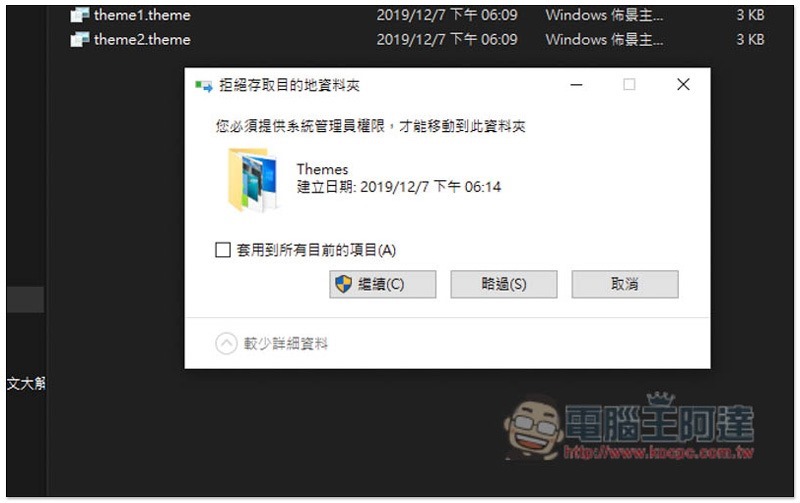
You will need system administrator rights to move, press “Continue”:
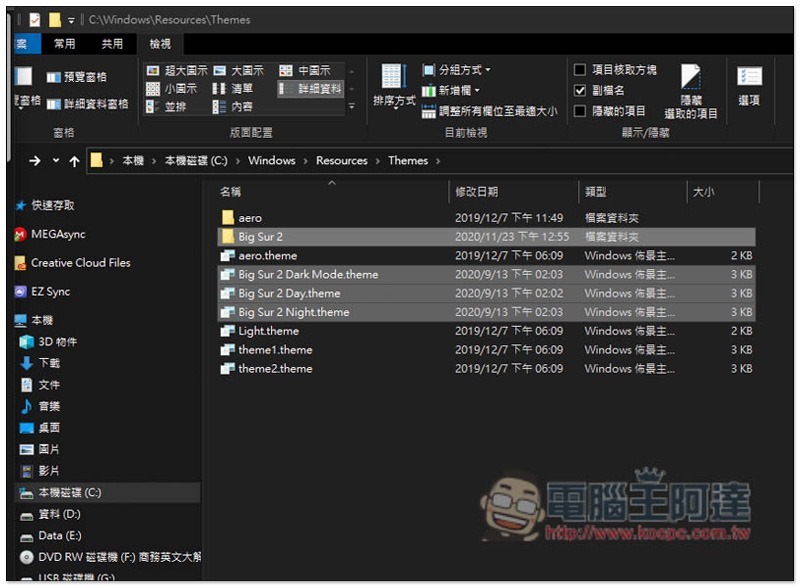
Confirm that all four files have been successfully moved to the Themes folder:
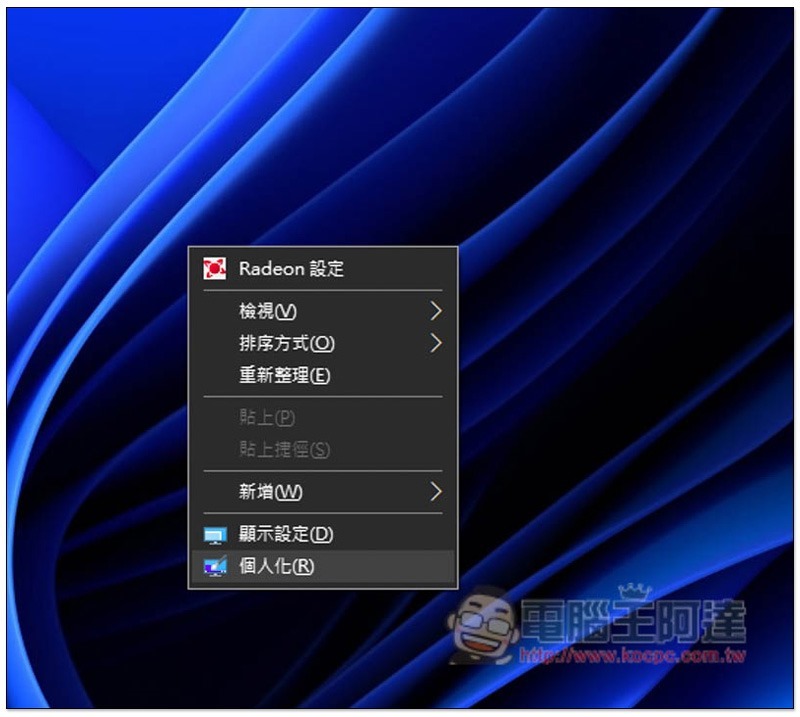
Open the right-click menu on a blank space on the desktop and enter “Personalization”:
Under the change theme, you will see the Big Sur 2 series that has just been moved. It depends on which one you like. I use Big Sur 2 Day as an example:
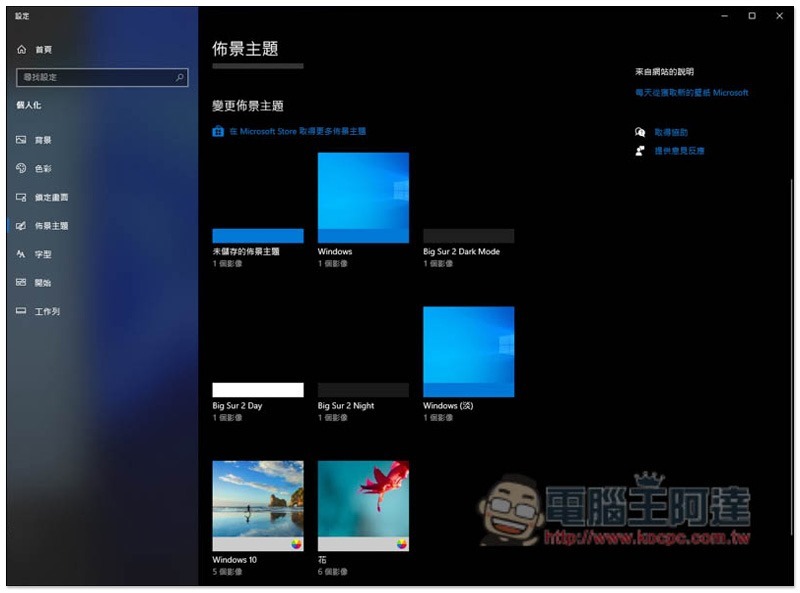
After clicking, it will be applied. You need to wait for a few seconds. The toolbar below Big Sur 2 Day will turn gray-white, as will the folders, browsers, etc.:
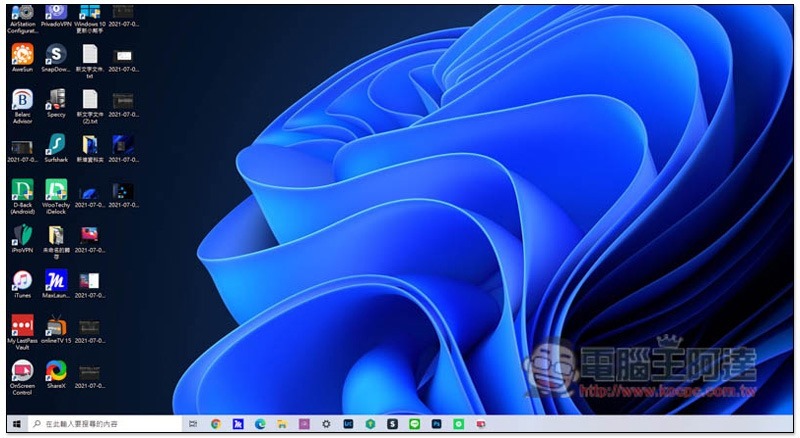
Step 4 – Install the OldNewExplorer software to change the File Explorer display
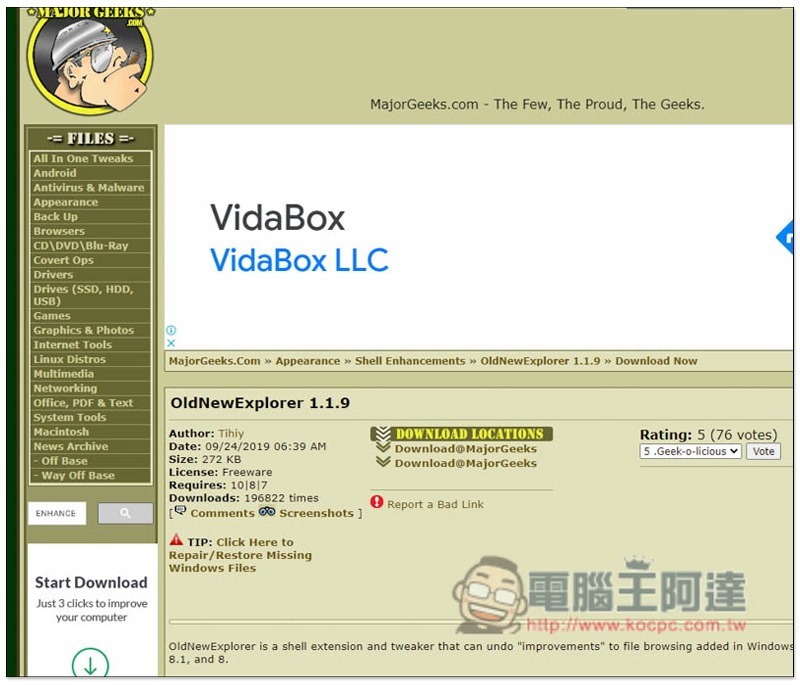
enter OldNewExplorer After the website, press Download locations to download:
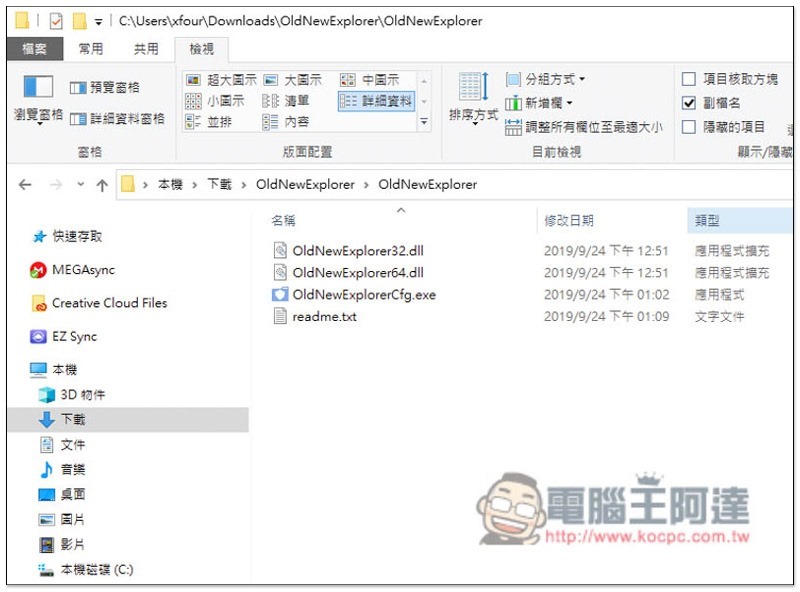
After decompression, click the left mouse button twice to open the OldNewExplorerCfg.exe file:
Please set the settings as shown below, check the three Hide options, and click Install above if there is no problem:
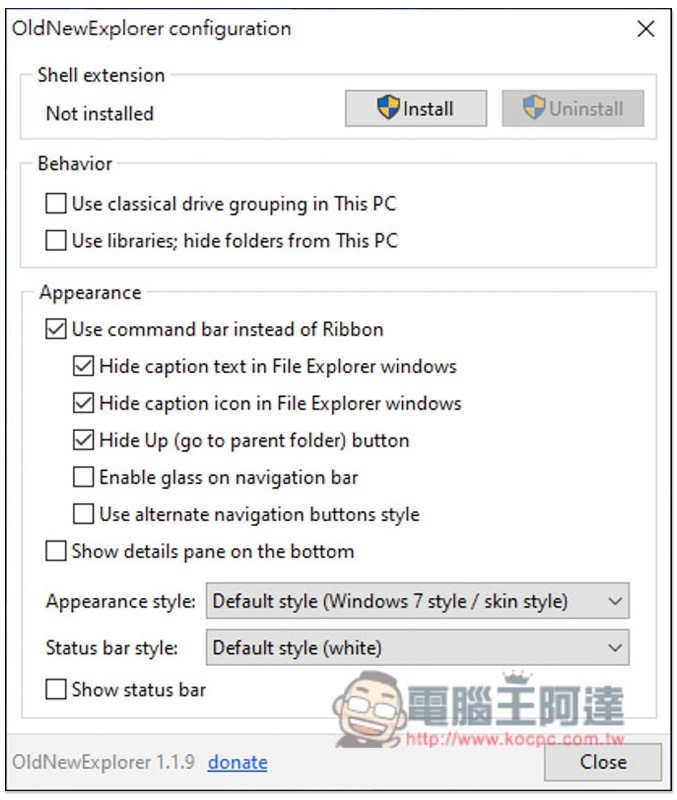
Wait for a while, the right side of Installed turns into Uninstall and lights up, which means the installation is successful:
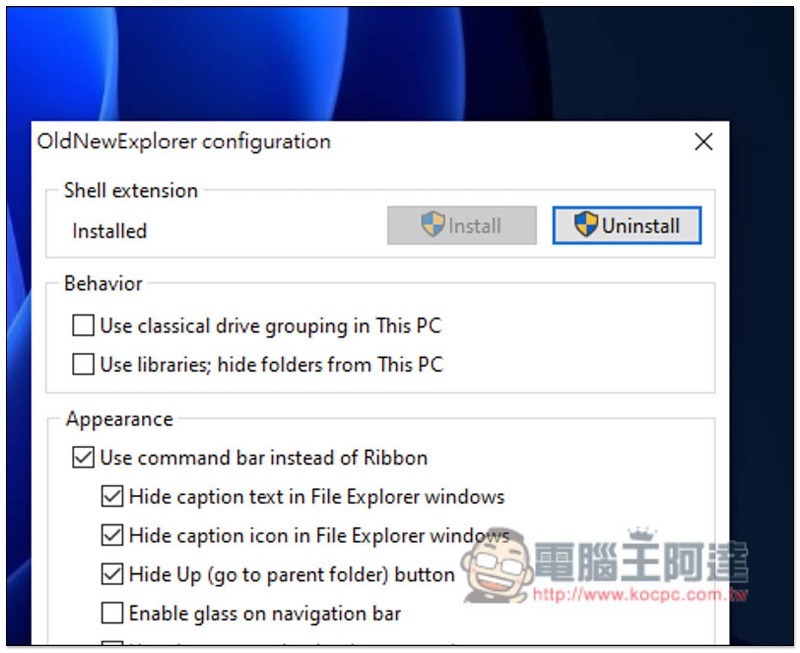
Step 4 – Download the faux Windows 11 icon design
EnterImitation Windows 11 icon designAfter entering the page, press Download on the right to download:
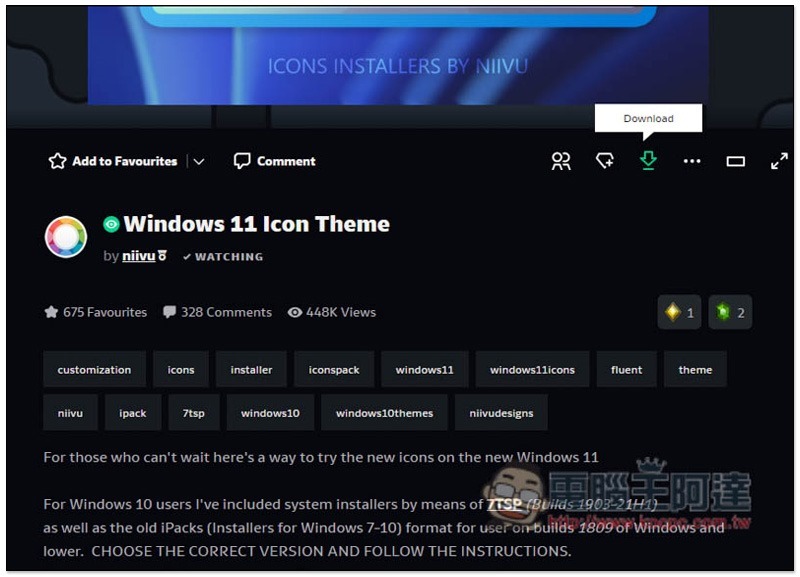
After decompression, you need to change the file extension of the default file:
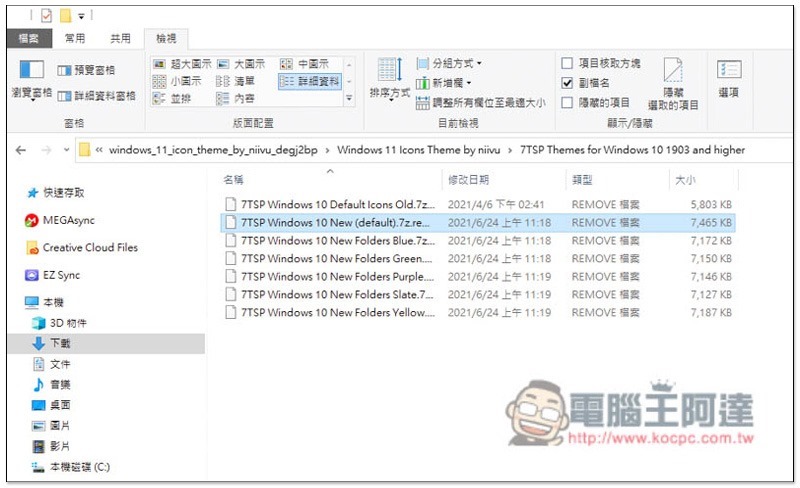
Remove the following .remove and retain the previous text, as shown below:
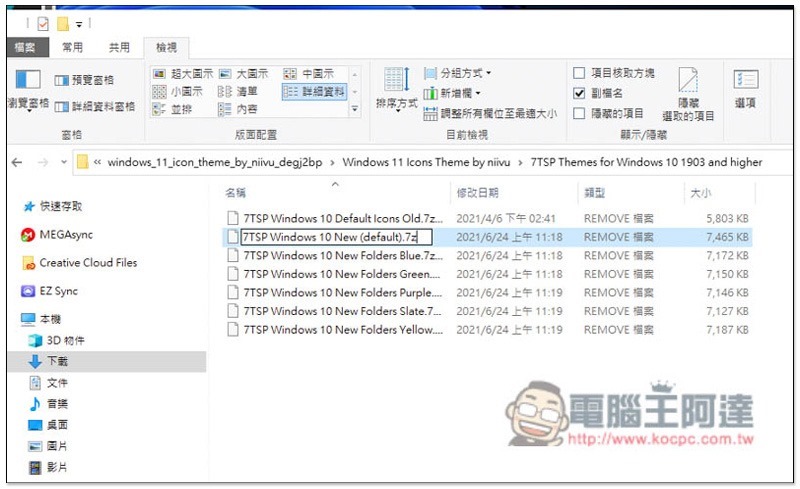
After refreshing the page, the file will become a compressed file icon:
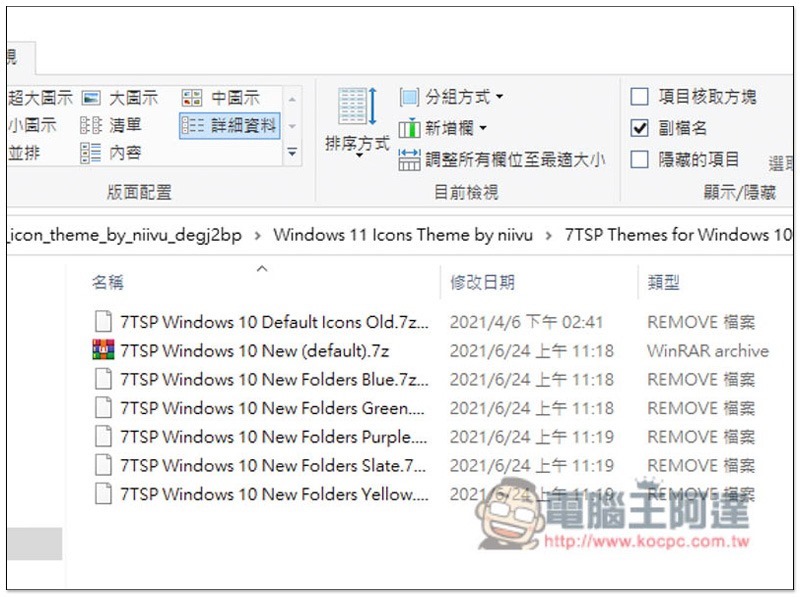
Step 6 – Download the 7TSP GUI 2019 software required to change the icon
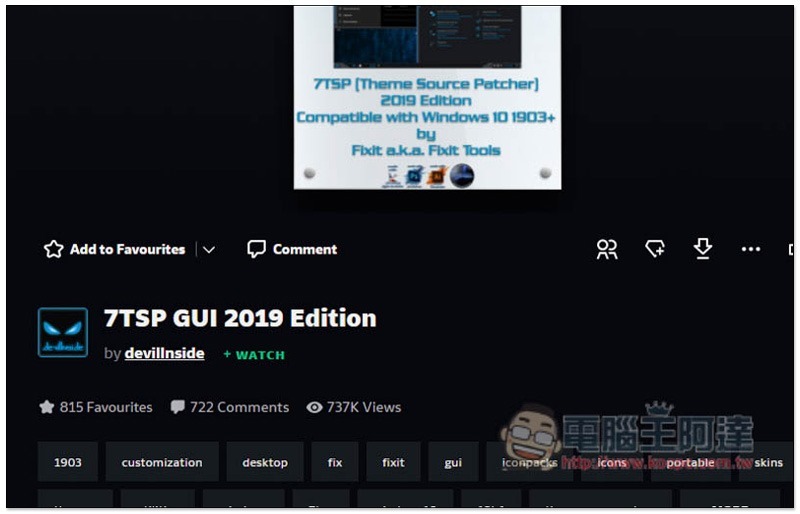
Next is downloading 7TSP GUI 2019 For this set of software, click Download on the right to download:
After decompression, you will see three files. You also need to rename the file extension. The .ee file:
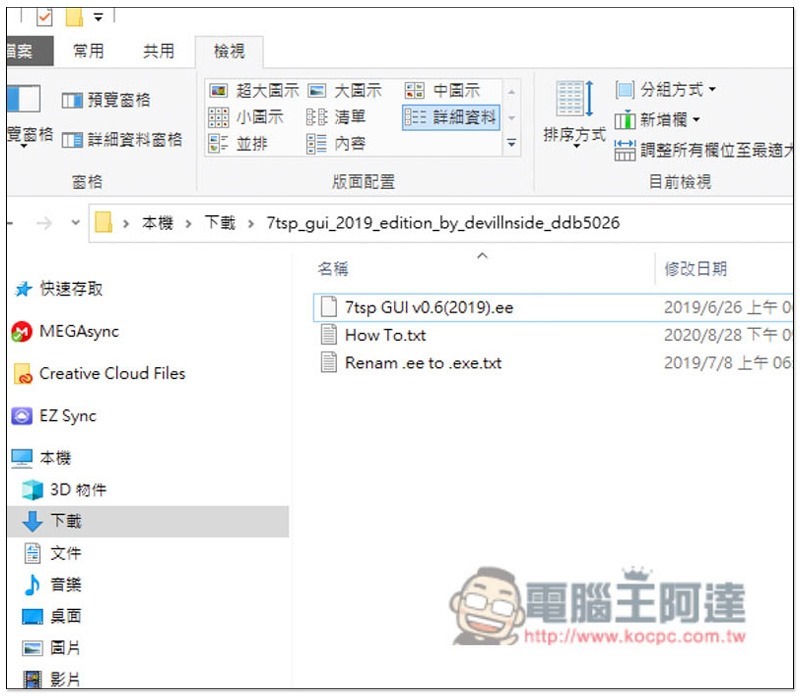
Change it to .exe, that is, add x in the middle of the original .ee:
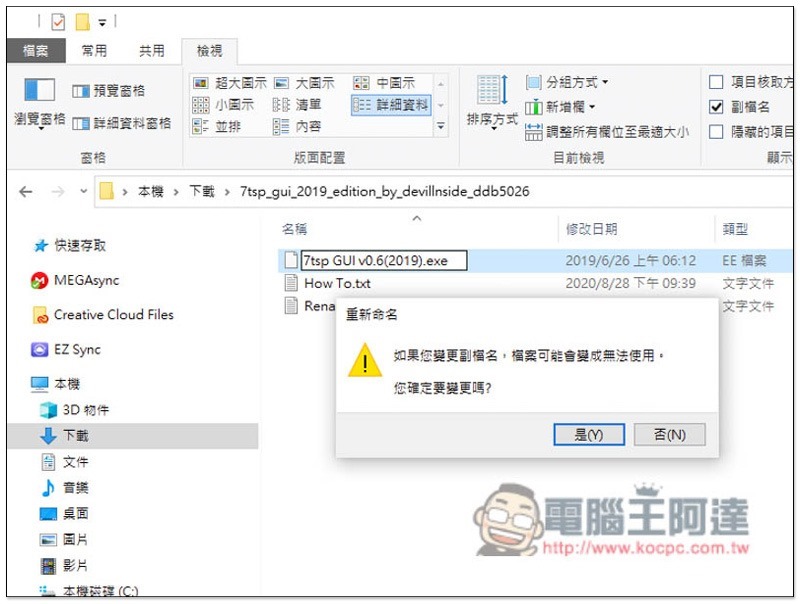
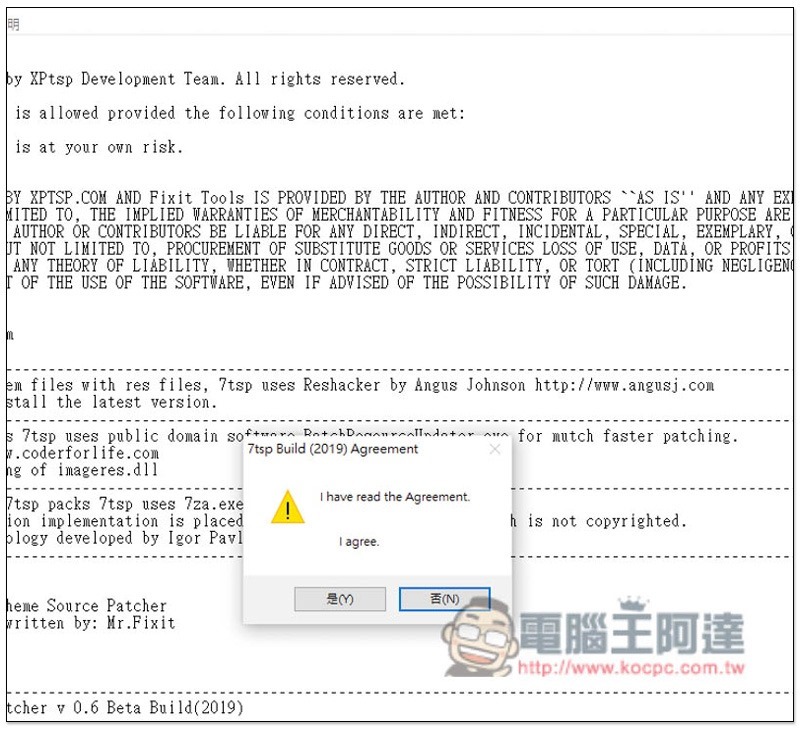
After changing the file extension, open it. A consent message will pop up first, click “Yes”:
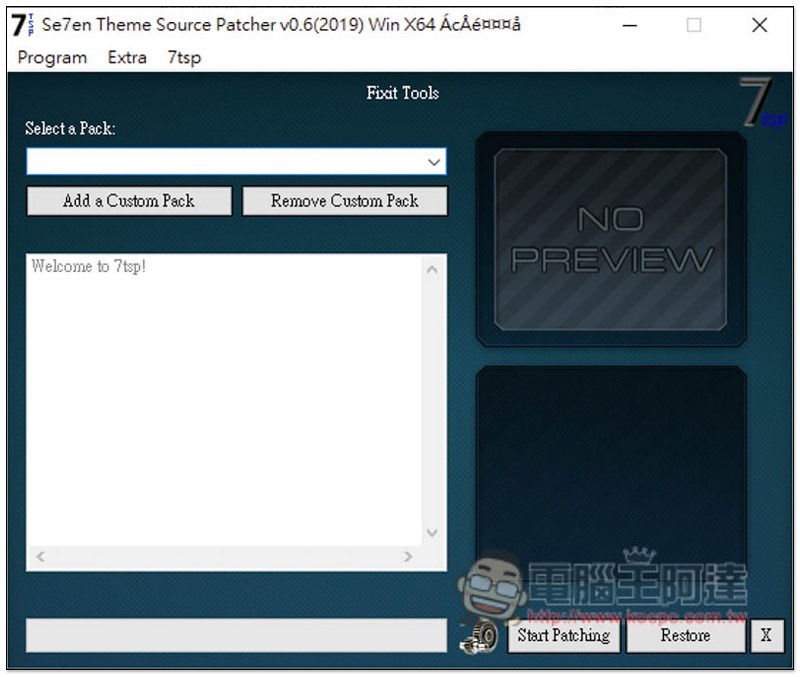
After enabling the software interface, click Add a Custom Pack in the upper left corner:
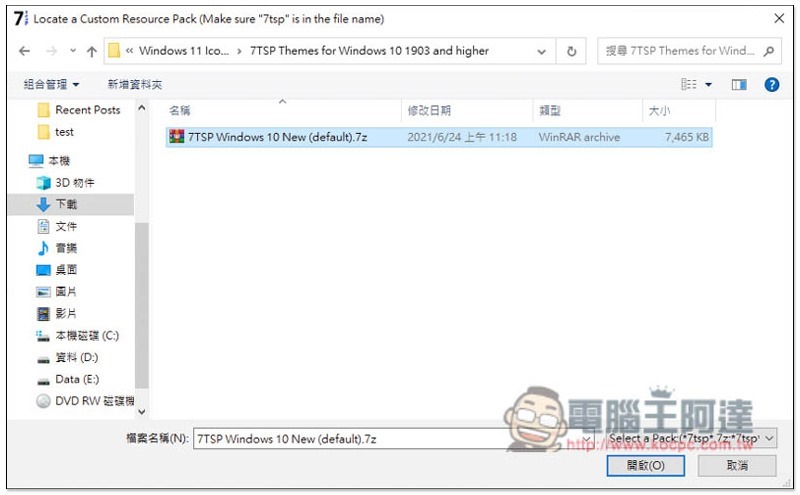
Import the default.7z file renamed in the previous step:
Then press the Start Patching function in the lower right corner, this will take a while:
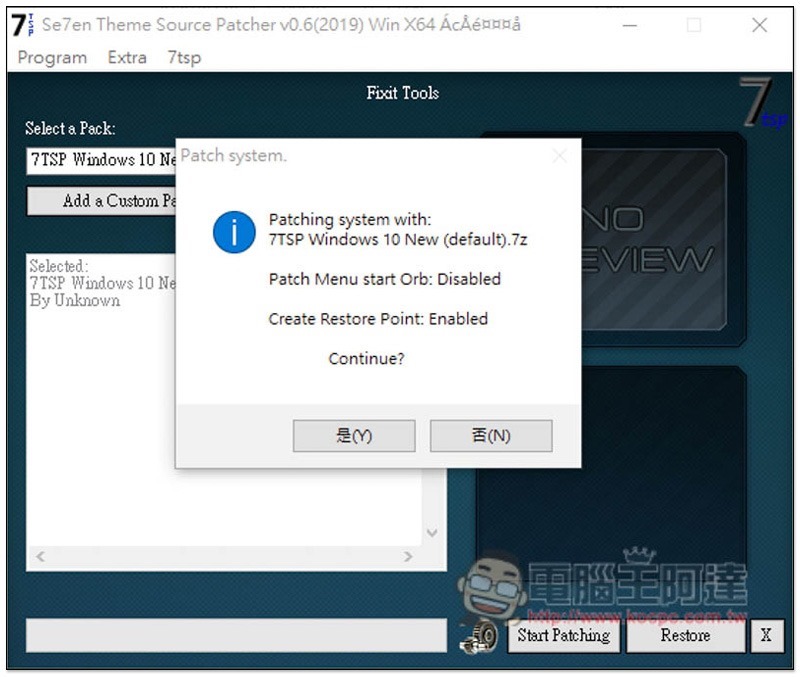
After the run is completed, you will be asked to reboot, click “Yes”:
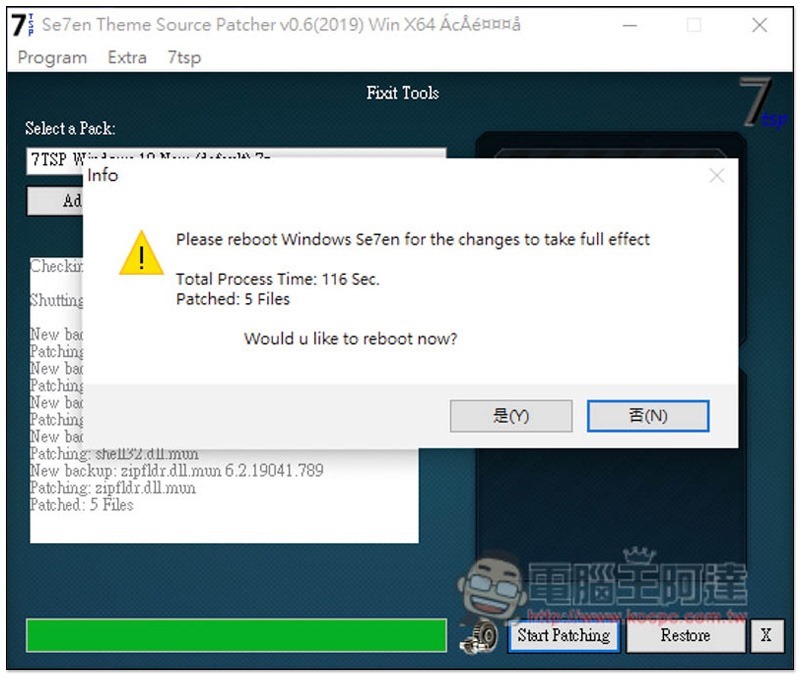
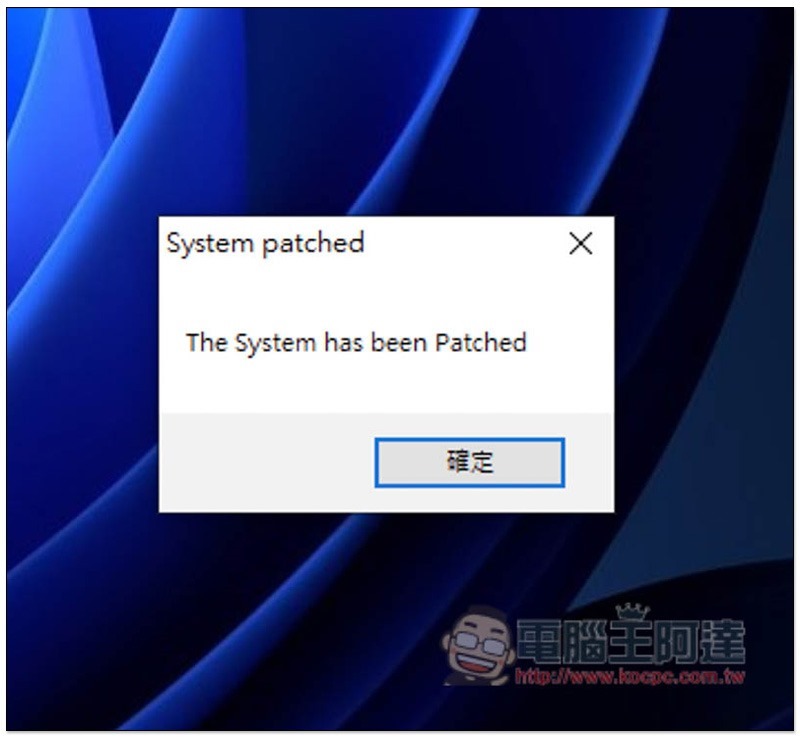
When the reboot is complete, this message will pop up, indicating success:
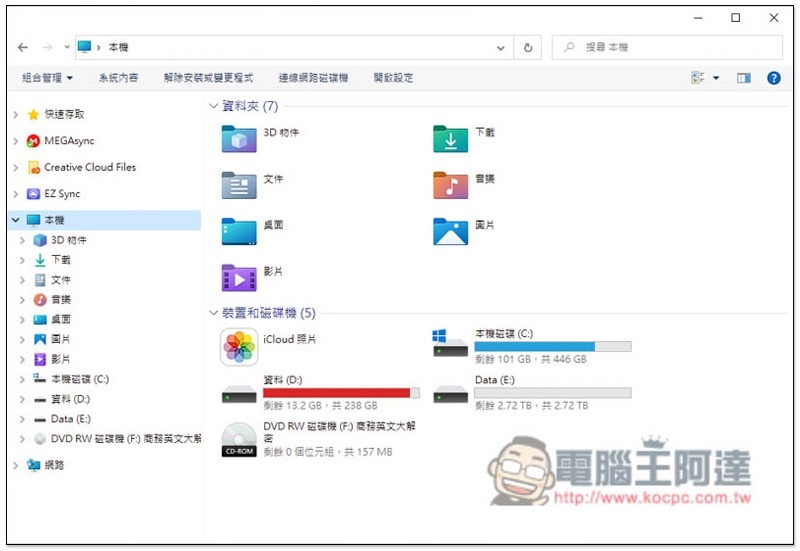
The folder icon icon will change to Windows 11 style:
The above can change the interface of Windows 10 to imitate Windows 11. If you want the toolbar to be centered, please continue.
Step 7 – Install Classic Shell
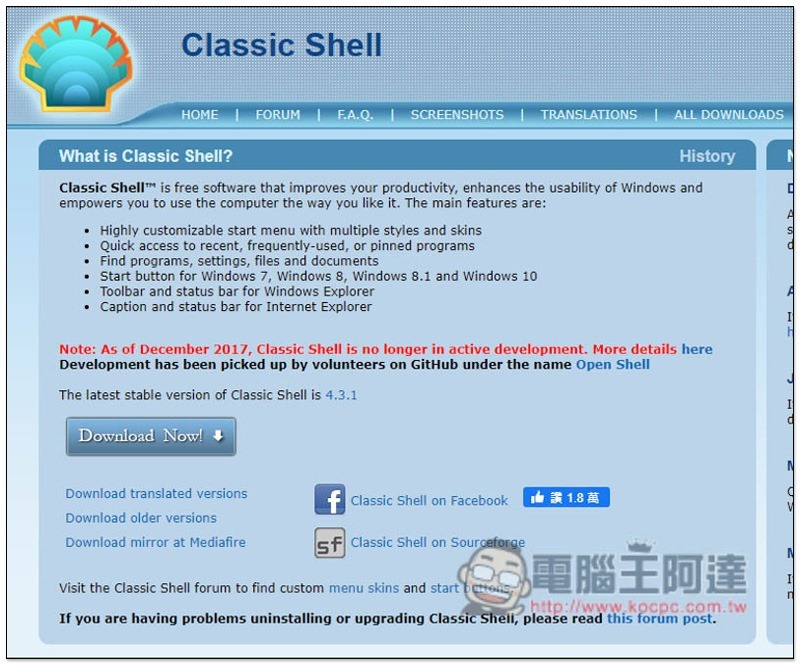
This set Classicshell The software can hide the original Windows icon in the lower left corner and click Download Now on the screen to download:
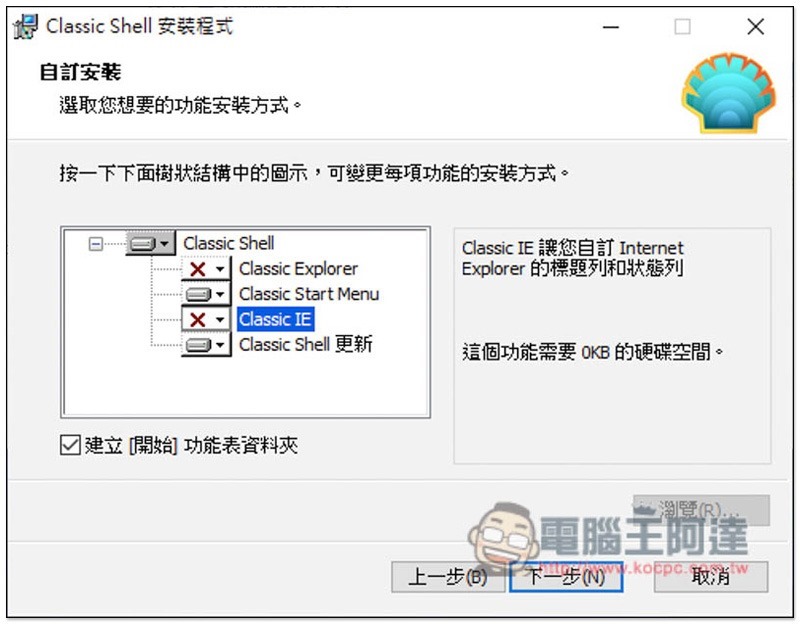
During installation, please change Classic Explorer and Classic IE to
Step 8 – Download Center Start Menu
The next step is to make another start function icon that can be placed in the toolbar, please download Center Start menu, and put the folder in the C slot after decompression:
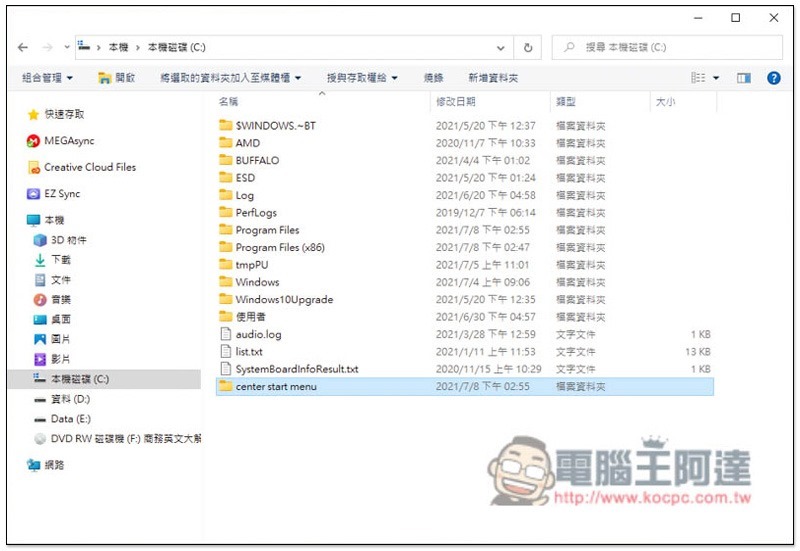
Enter the center start menu folder and transfer Start.exe to the desktop as a shortcut:
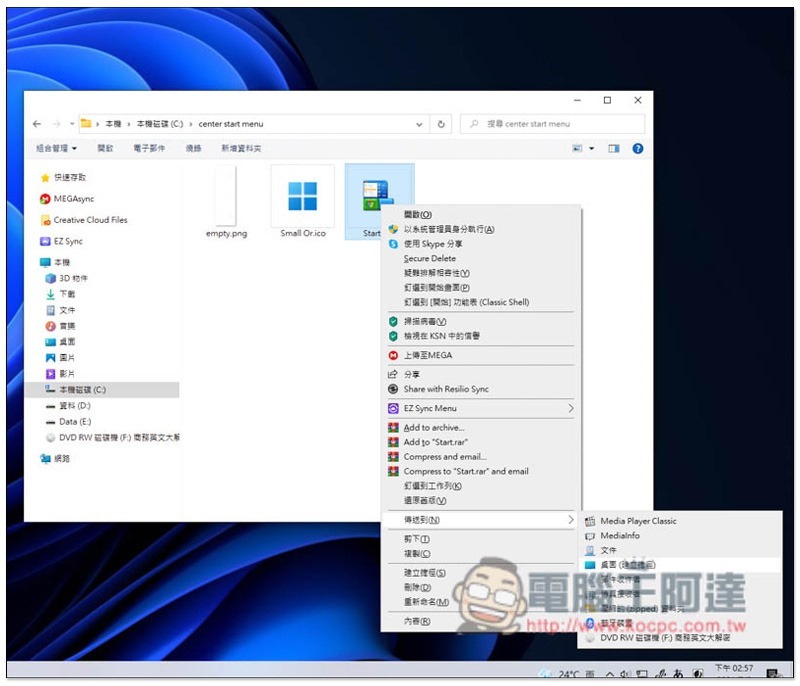
You can delete the shortcut to the name and open the right-click menu:
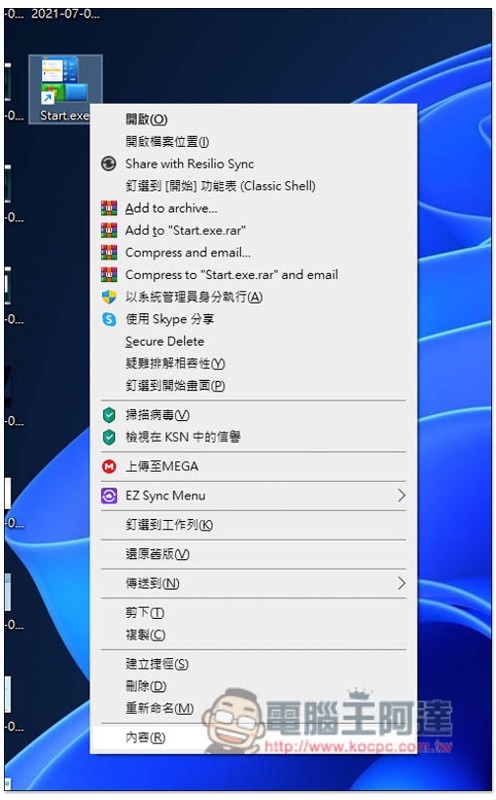
Click “Change Icon” below:
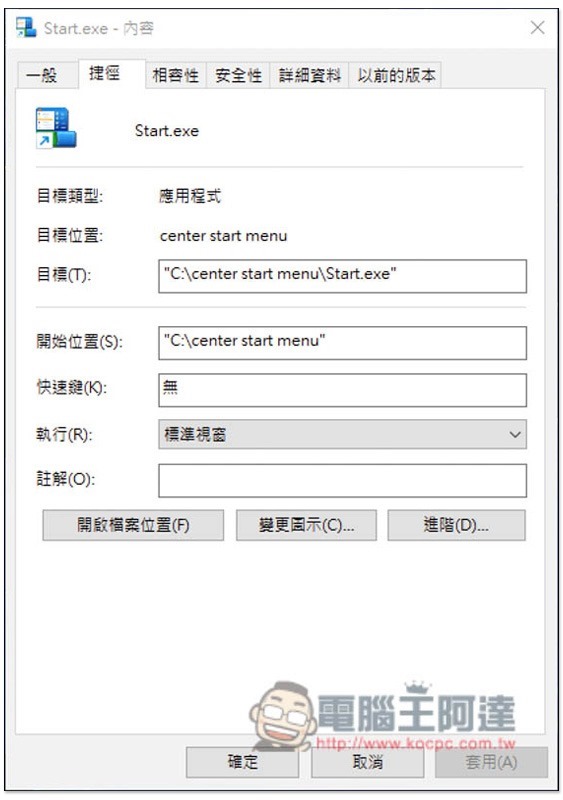
Press “Browse” above:
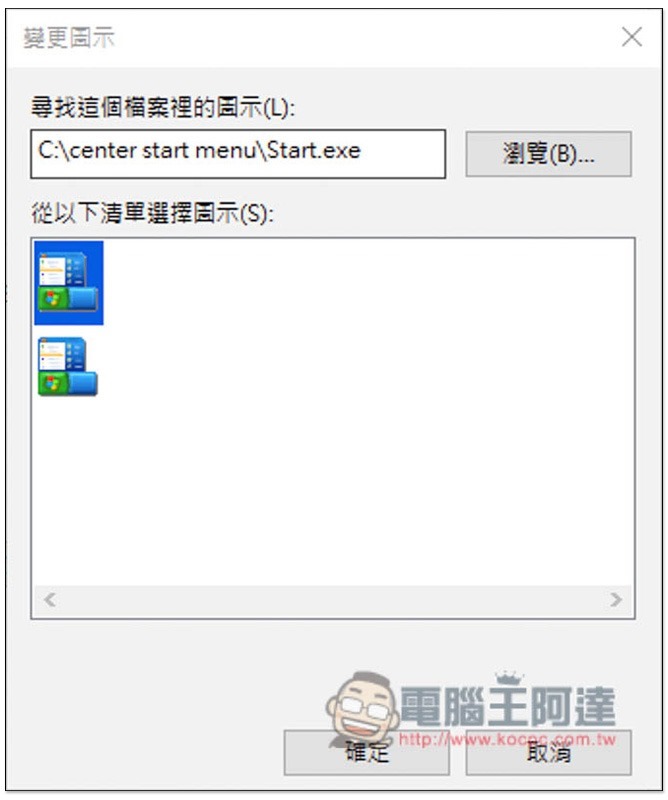
In the center start menu folder, you can see a Small OR.ico that simulates the Windows 11 start icon. Please select it:
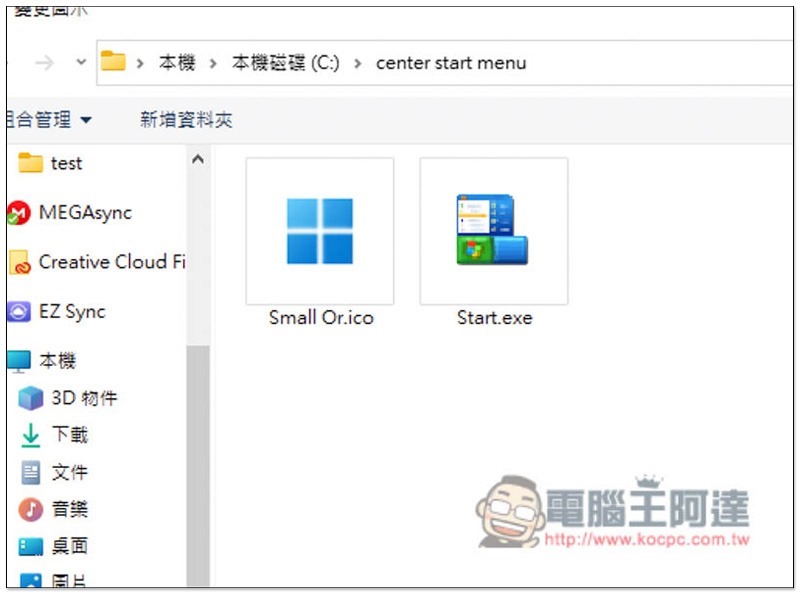
The shortcut icon will change to the Windows 11 version:
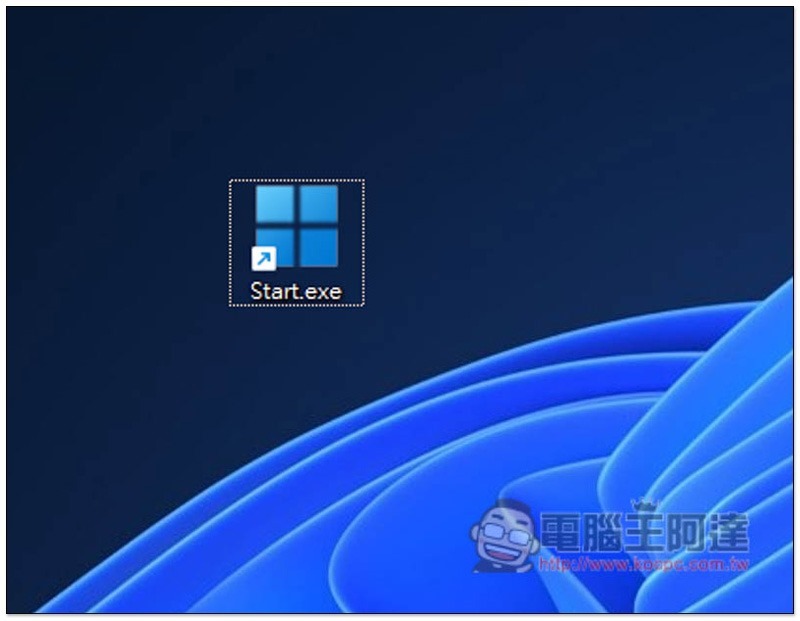
Drag it to the toolbar:
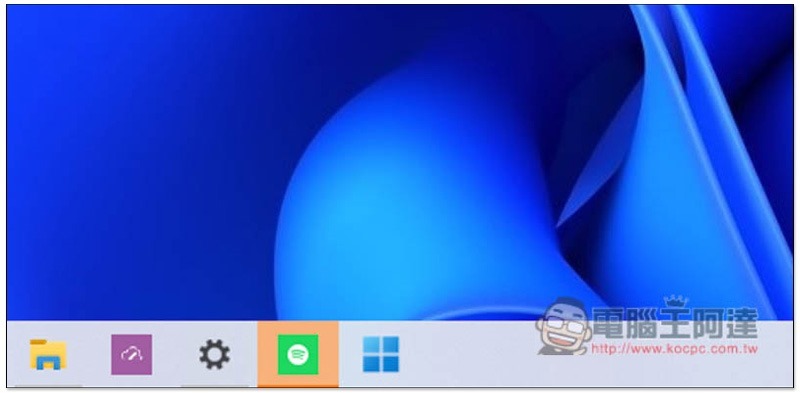
Step 9 – Hide the original Windows start icon
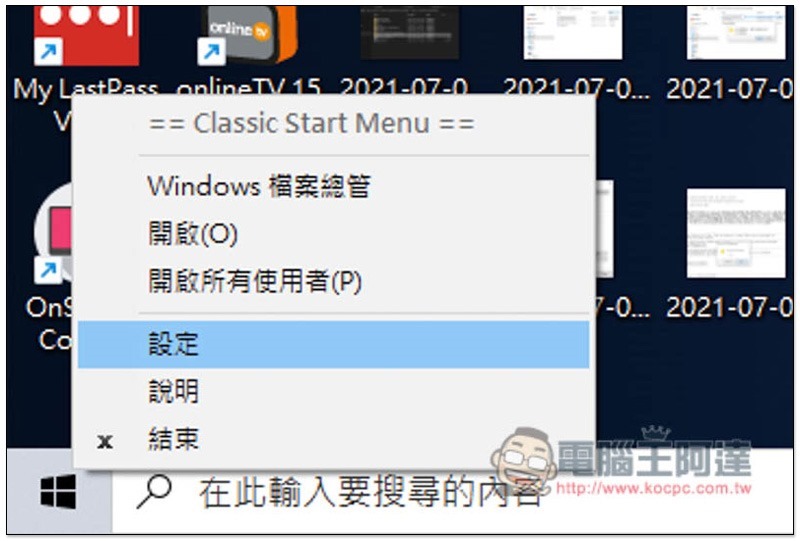
After creating another Windows 11 start icon, hide the original one in the lower left corner of Windows 10 and open the “Settings” in the right-click menu:
Check the box below to replace the Start button and select Customize –> Pick an image:
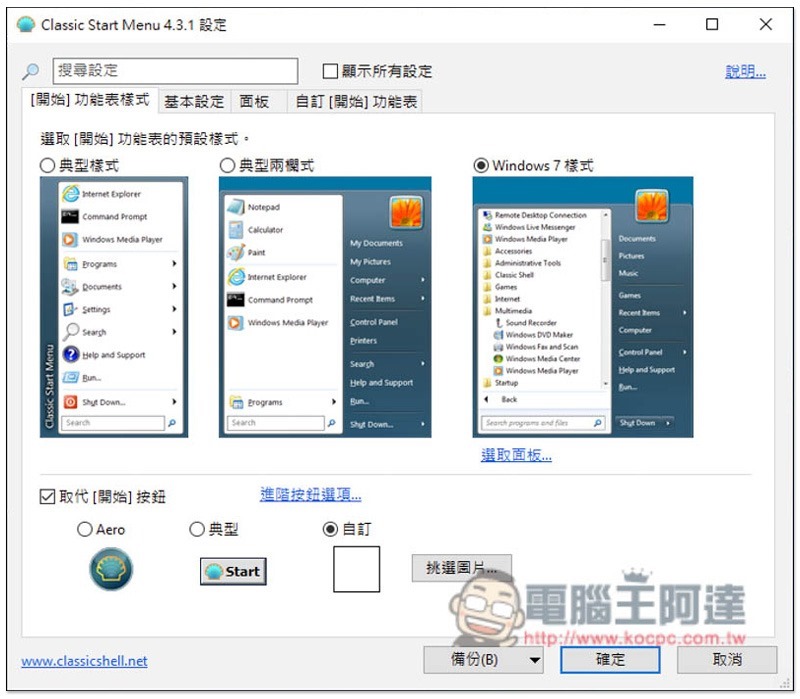
There is also an empty.png found in the center start menu, please select it:
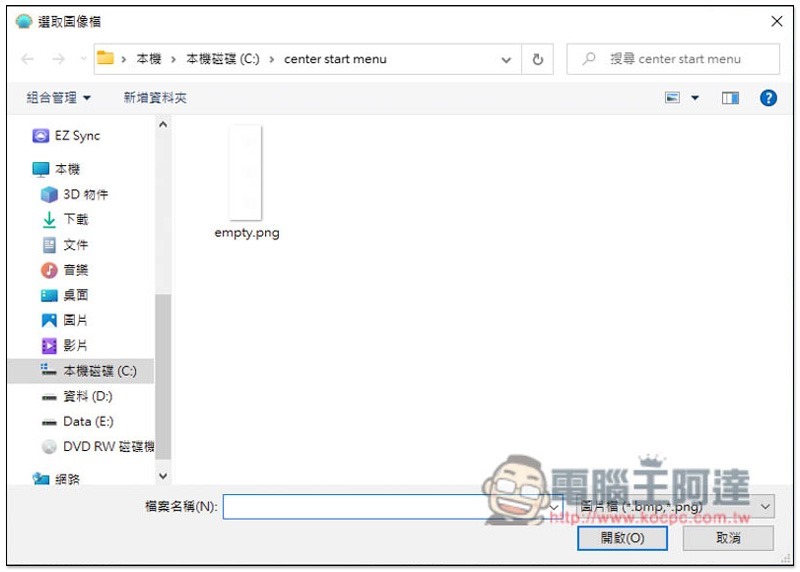
Then the Windows 10 start icon in the lower left corner disappeared:
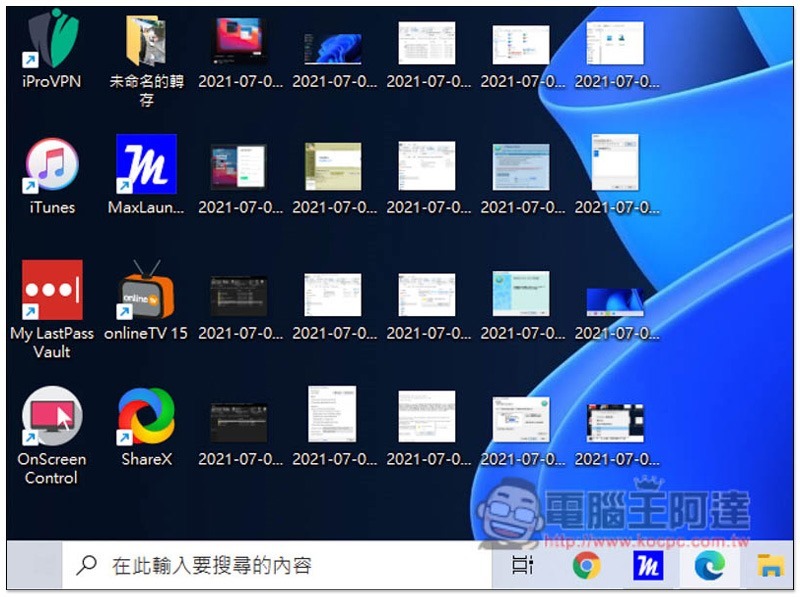
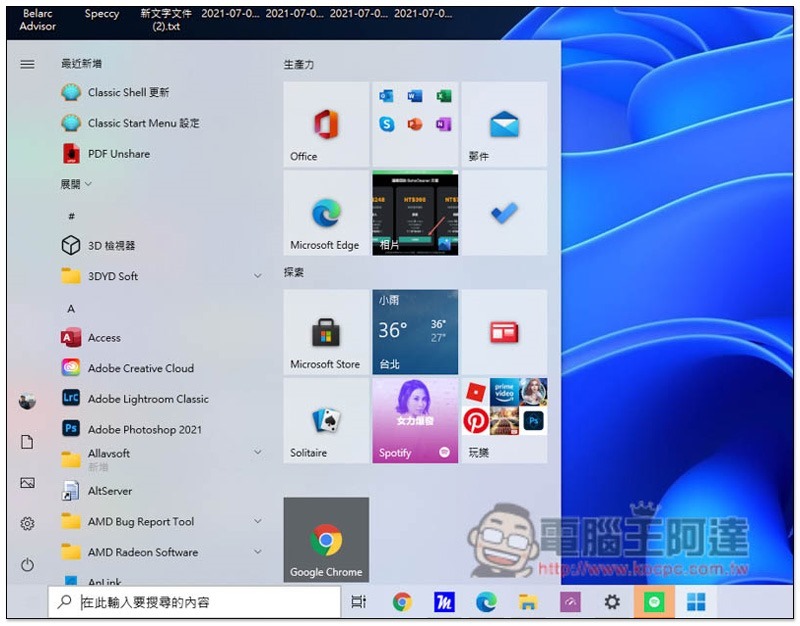
If you want to open the Start menu later, click on the Windows 11-like Start icon, and it will still open from the left:
Step 10 – Center the application icon via the link function in the toolbar
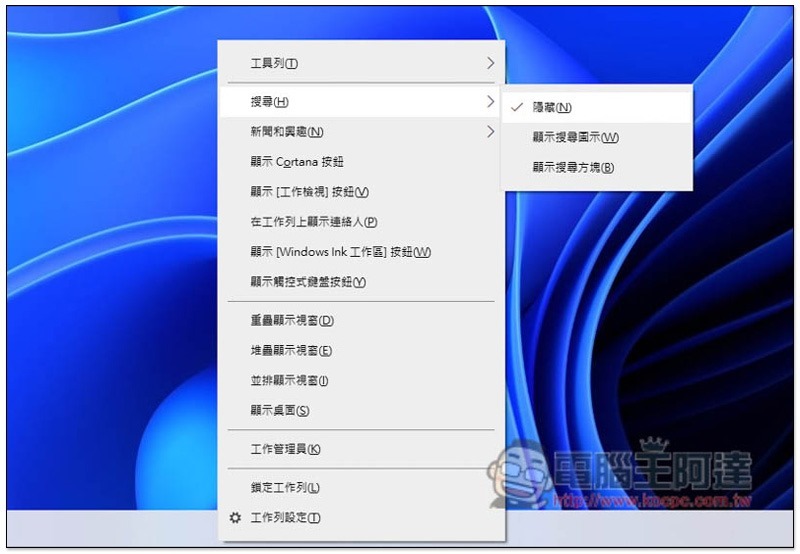
Before enabling the link function, please uncheck all display options, as shown in the figure below. Right-click on the toolbar to open this menu:
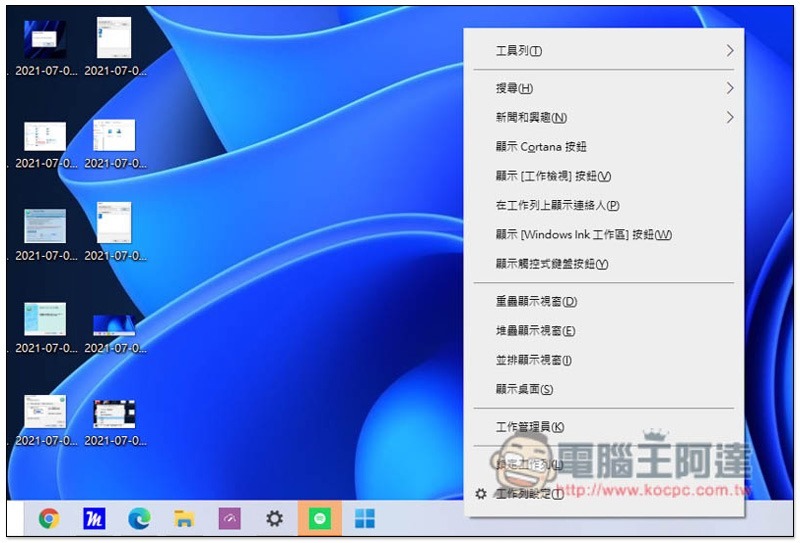
Windows 10 searches are also hidden:
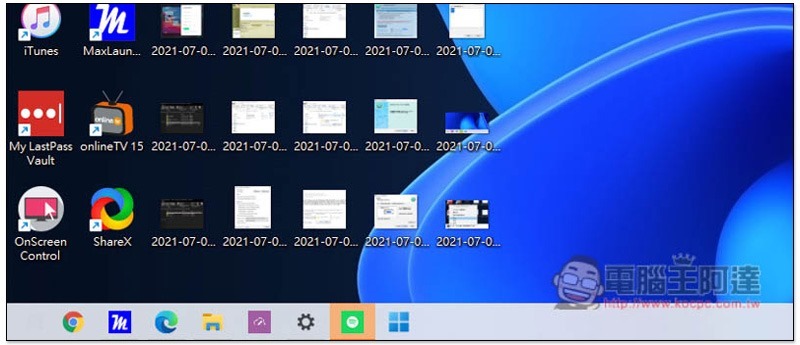
The toolbar will now be very clean:
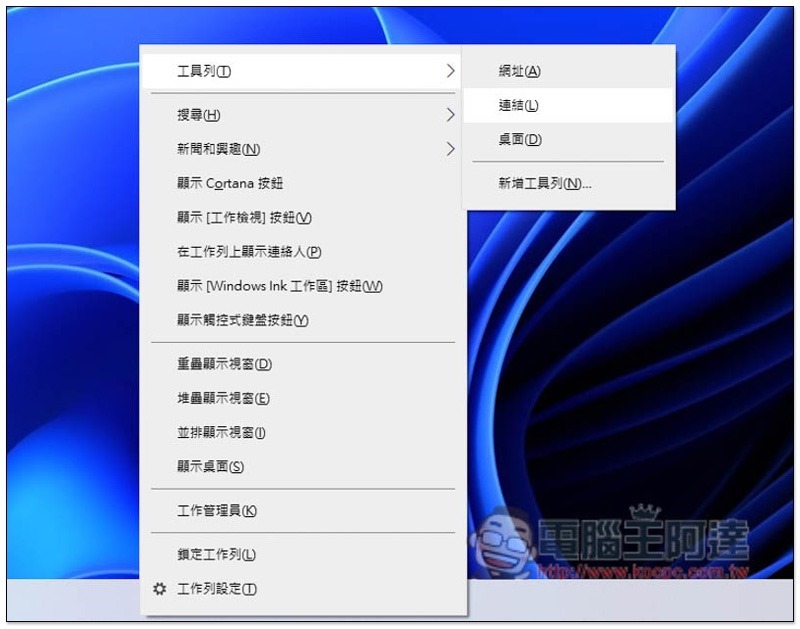
Then please open the toolbar –> link:
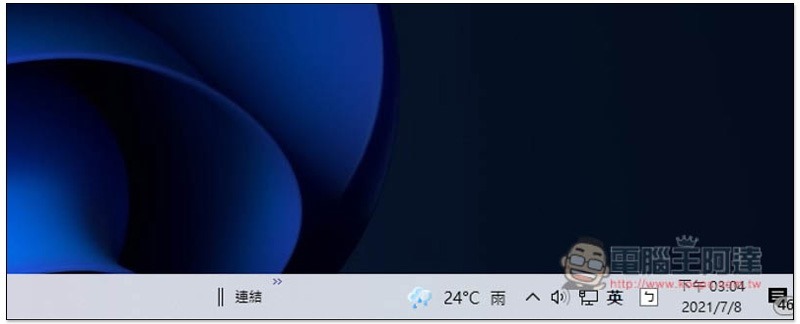
A “Link” will appear on the far right side of the toolbar, please drag the “||” on the left:
After moving to the far left side of the toolbar, you will see that all icons will come out from the right:
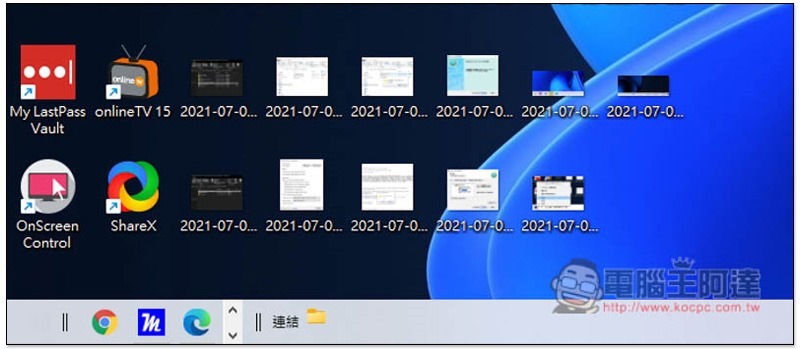
As shown in the figure below, drag the || on the left side of the application icon and move it to the middle of the toolbar:
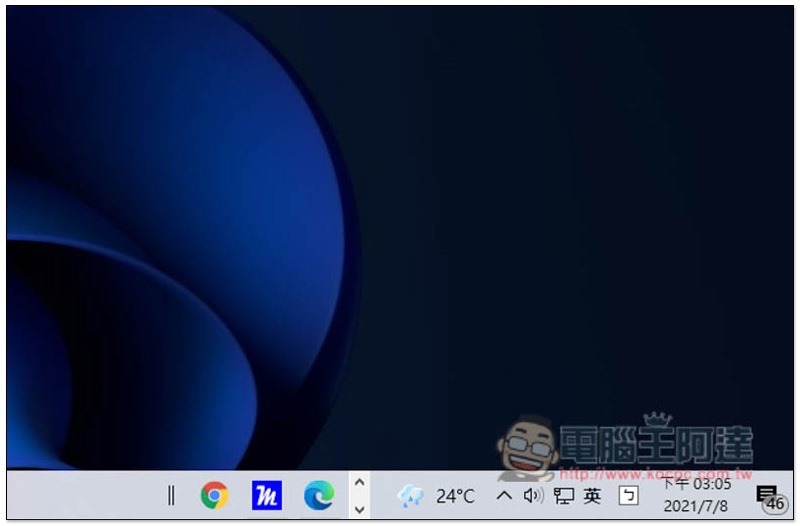
Like this, I forgot to install UltraUXThemePatcher at the beginning, so the icon was not centered when Windows 11 started. Logically speaking, it will be automatically centered. You can refer to the first picture of the article:
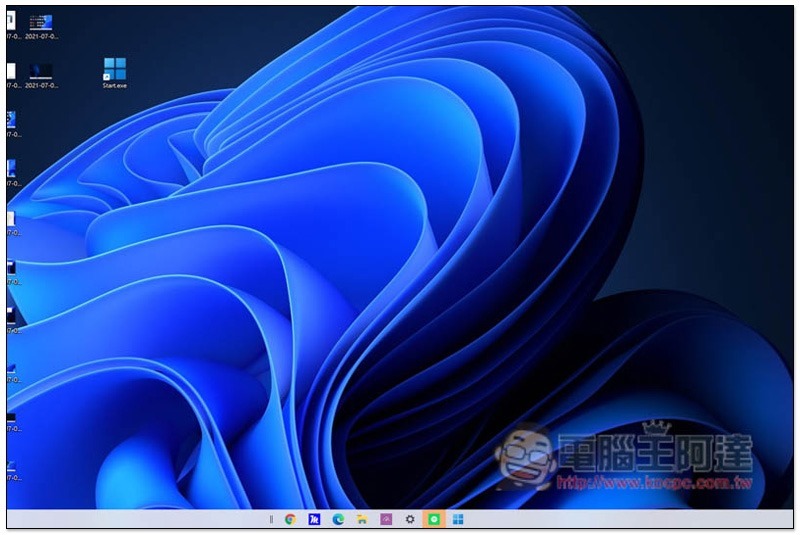
After the position is fixed, check the lock toolbar so that || will disappear:
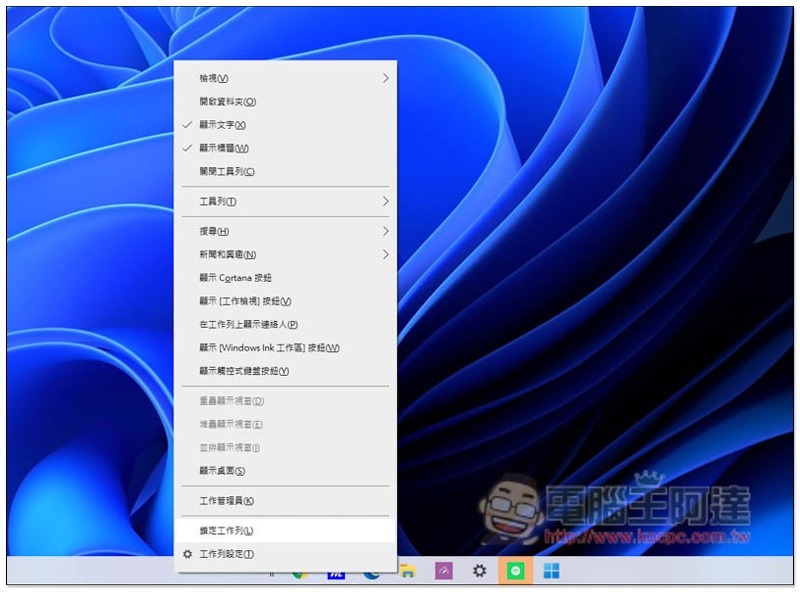
As shown below:
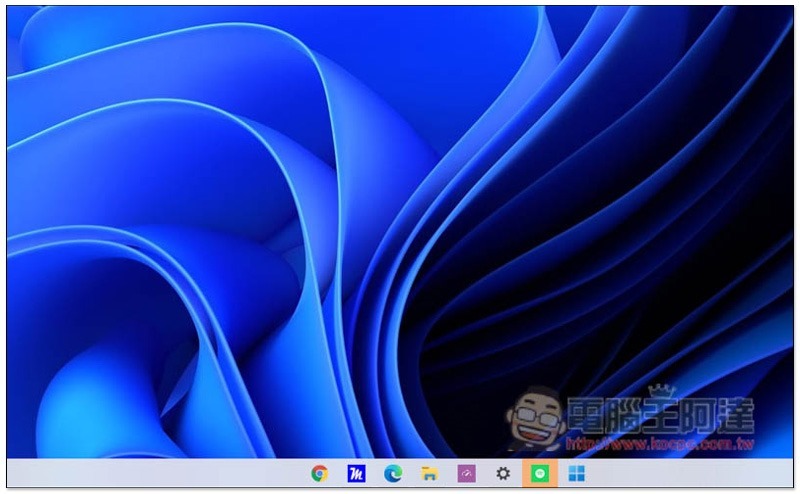
Summarize
That’s it for all the steps, it takes a while to set up.
In addition, if you don’t want to continue using this Windows 11-like interface, the detailed operation is too long.Please refer to another tutorial on how to delete and restore the original Windows 10 theme.。
Source: KOCPC Chinese