


With the M1 MacBook series now on sale in Taiwan, I believe many old MacBook users are very interested, especially after reading so many reviews that show that the M1 has greatly improved performance, lower power consumption, and longer battery life. You will definitely consider selling your old MacBook to subsidize some budget. At this time, this “NB Doctor” free software can help you test whether there are any problems with your MacBook hardware, from screen, microphone, keyboard, touch There are everything from bars to speakers to internal fans, and almost all can be operated with one button. Even people who are not familiar with computers and technology products can easily get started without having to go to the store for help. Not only does it save testing costs, but having test results from third-party professional software will also give people who are interested in buying it more peace of mind (and of course, you can get a better price).
In addition to the old MacBook, this model also currently supports the M1 version of the MacBook series. People with M1 who want to test whether the hardware is working properly can also use this set.
NB Doctor download link (Windows)
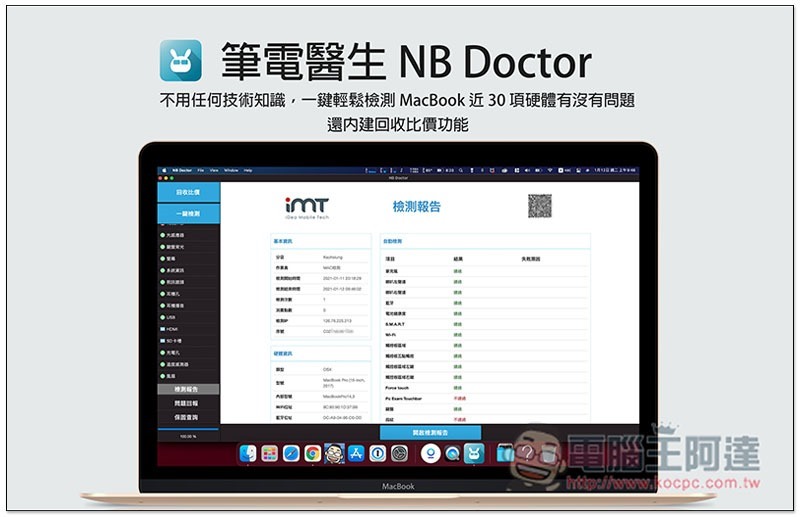
NB Doctor review introduction
Laptop Doctor supports Mac and Windows operating systems, which means not only the MacBook to be introduced in this article, but also Windows laptops can use it to detect hardware, and it is completely free.
In addition, like Mobile Doctor, Laptop Doctor also provides a price check function. For those who don’t know how much their MacBook should cost, they can use this function to compare prices. As for Windows laptops, probably because there are not many channels for public recycling quotes, there is no relevant information on Laptop Doctor. Those who need to understand the market situation should check it out themselves.
NB Doctor download link (Windows)
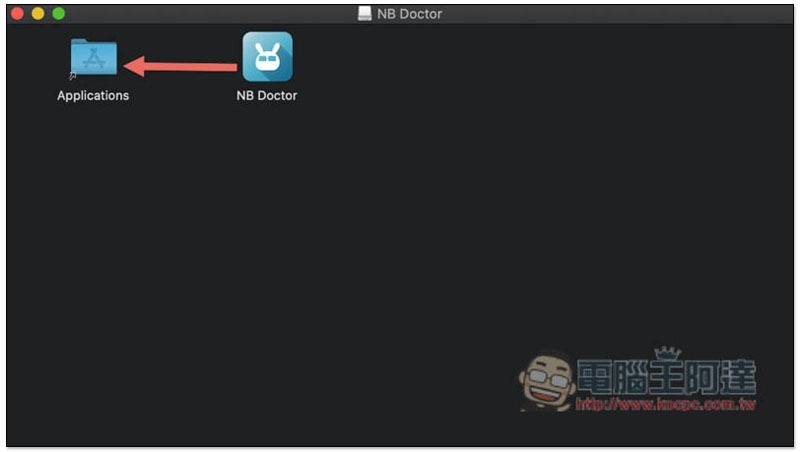
The installation process is very simple. For Windows version, just keep clicking Next. For Mac version, just drag the application to the folder on the left:
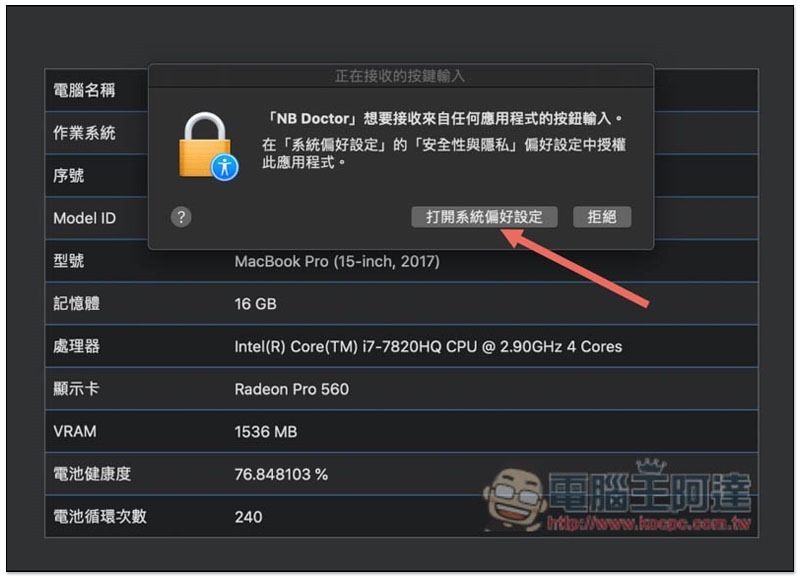
After opening, it will first scan your MacBook hardware, but before you start using it, you need to enter the System Preferences authorization so that it can test your hardware. Click “Open System Preferences”:
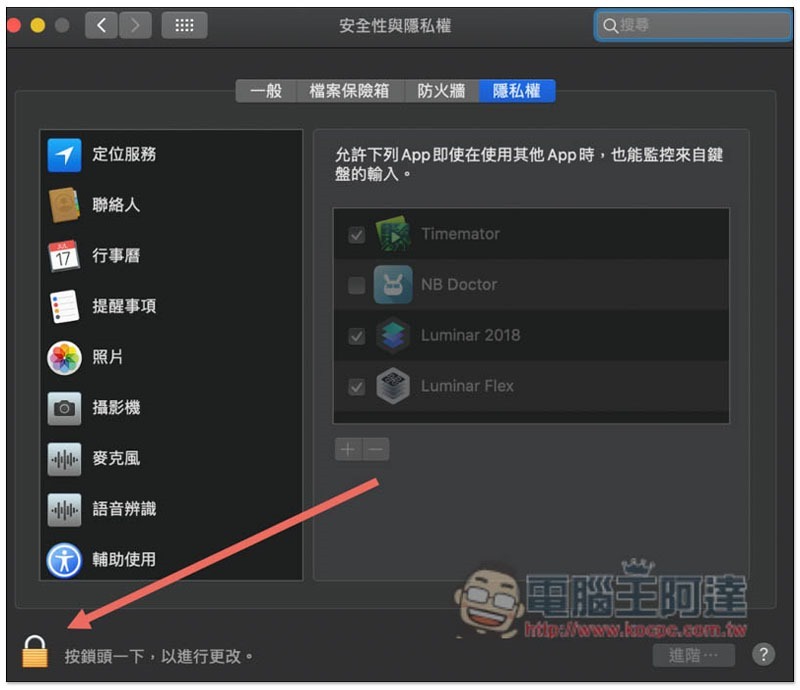
Press the lock in the lower left corner to unlock and you will be asked to enter your login password:
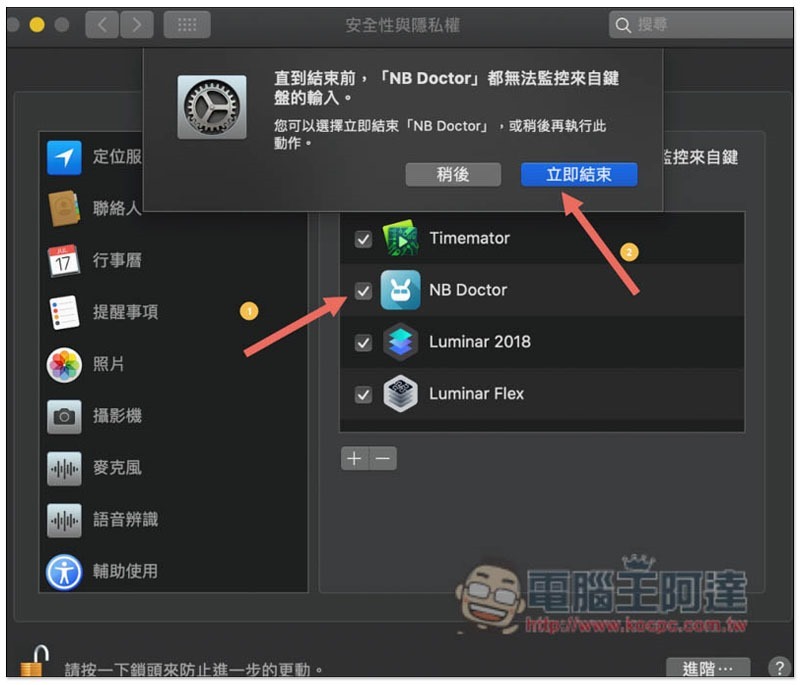
Then find NB Doctor in the menu on the right, tick the box on the left, and click Finish:
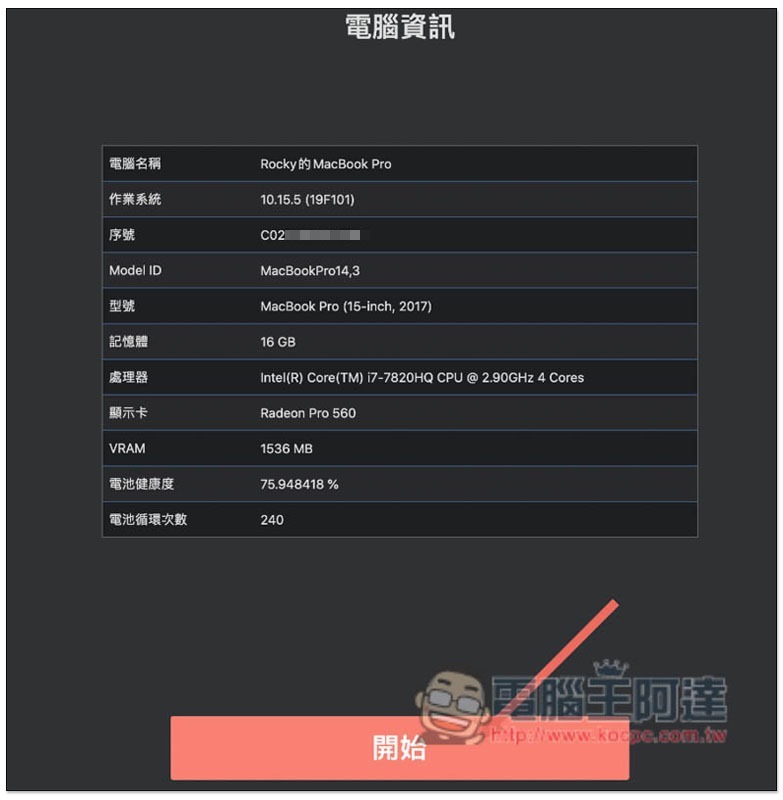
People who don’t know the hardware information of their MacBook can take a screenshot at this time, and each item is written very clearly, such as: which year (model) is the MacBook, which processor is it, the clock speed and cores, etc. Even the “battery health” and “battery cycle times” will tell you, this is really good, and you don’t need to rely on other software. If there is no problem, press start:
Easily perform MacBook hardware detection with one click, no difficulty at all
Just like a mobile doctor, this set of testing process is designed to be very user-friendly and simple. It does not require any technical or computer knowledge. Just follow the steps step by step on the screen to complete all the tests.
After the software is opened, you can find the “One-click Test” function in the upper left corner. There are 28 test items in total. If you want to test them all, then press this function and the test will continue downwards according to the list on the left. Of course, you can also test one item individually:
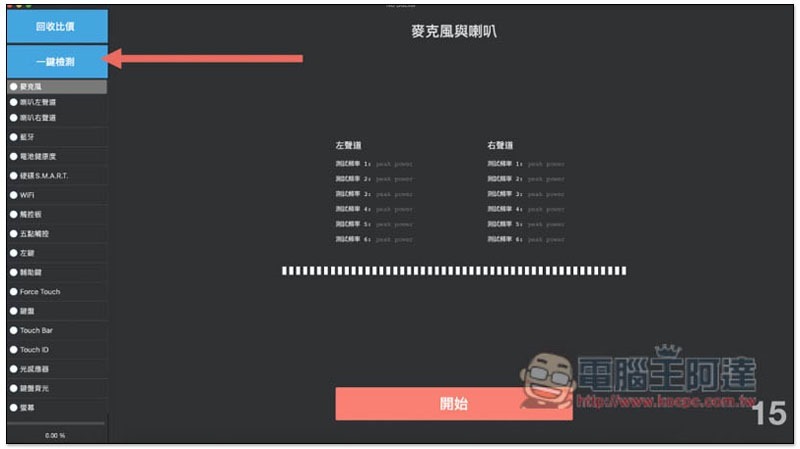
Here are the 28 items currently tested by laptop doctors:
- microphone
- Speaker left channel
- Speaker right channel
- Bluetooth
- Battery health
- Hard drive S.M.A.R.T
- WIFI
- trackpad
- Five-point touch
- left click
- Auxiliary keys
- Force Touch
- keyboard
- Touch Bar
- Touch ID
- light sensor
- Keyboard backlight
- screen
- System information
- video camera
- Headphone jack
- Headphone broadcast
- USB
- HDMI
- SD card slot
- Charging hole
- temperature sensor
- fan
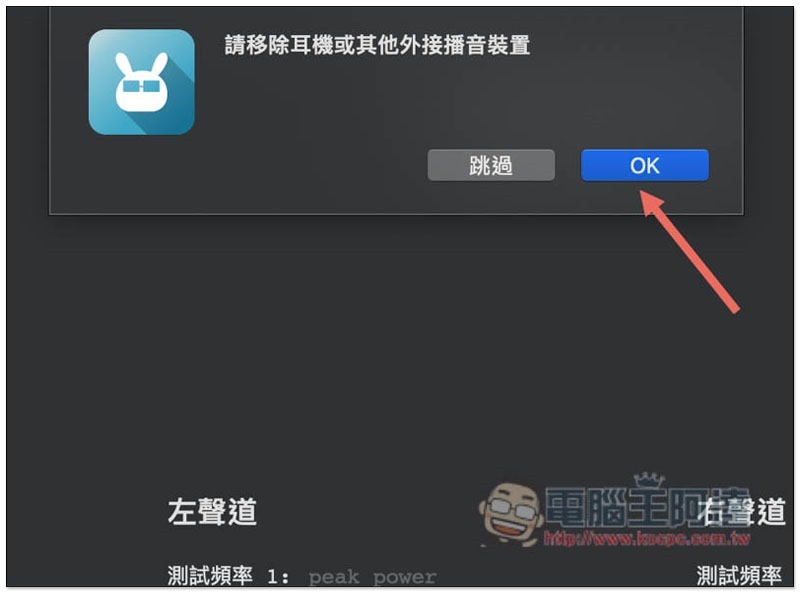
Each test item will basically pop up a prompt telling you what to pay attention to. For example, the first “Microphone” will prompt you “Please remove headphones or other external broadcast devices” to avoid test failures or errors. Press OK to continue:
Some tests also require access to the MacBook’s hardware permissions, remember to press “OK”:
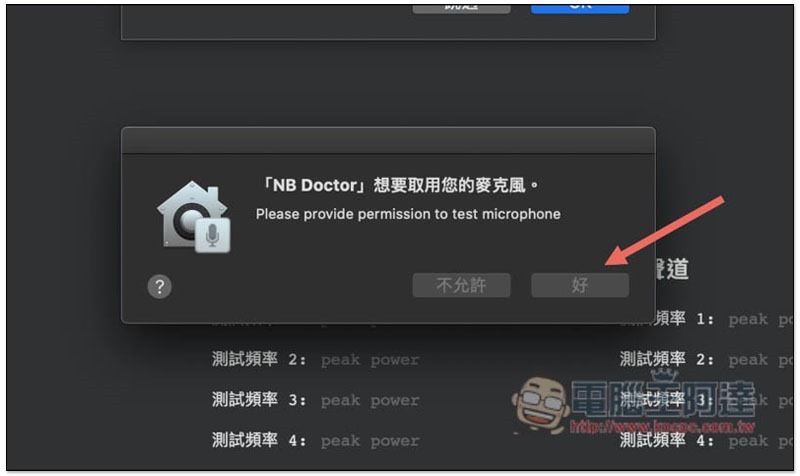
Microphone, speaker left and right channel detection
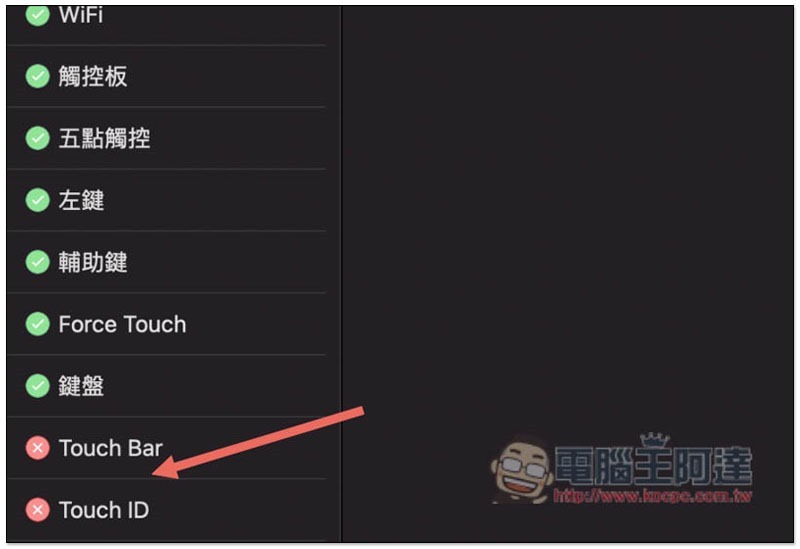
During the test process of the microphone and speaker left and right channels, the MacBook will briefly emit sound, so remember to perform it in an environment where sound can be played. Each test is very fast and will basically be completed in a few seconds. If there is an X mark like the picture below, there may be a problem with the hardware, or an error occurred during the test (for example, you did not follow the prompts). It is recommended that you try again after running all the tests. If it shows green, it means the hardware is normal:
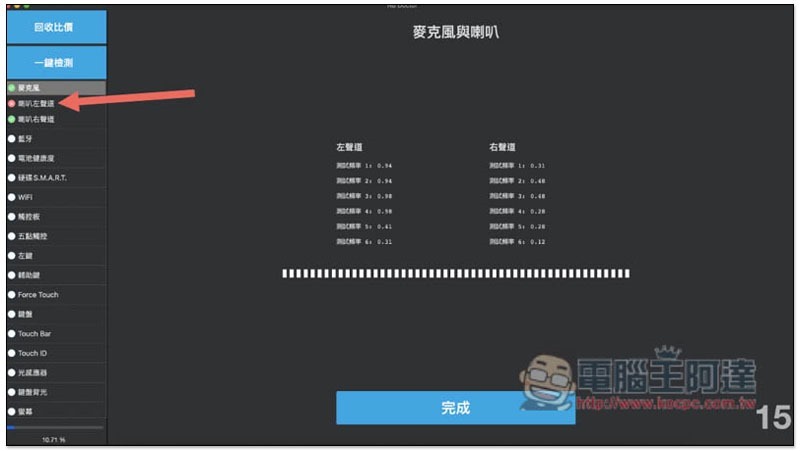
Bluetooth detection
The Bluetooth test method is also very simple. It depends on whether a Bluetooth device can be detected. Mobile phones and iPhones can be used as Bluetooth devices. After opening the Bluetooth settings screen, it will appear on the list:
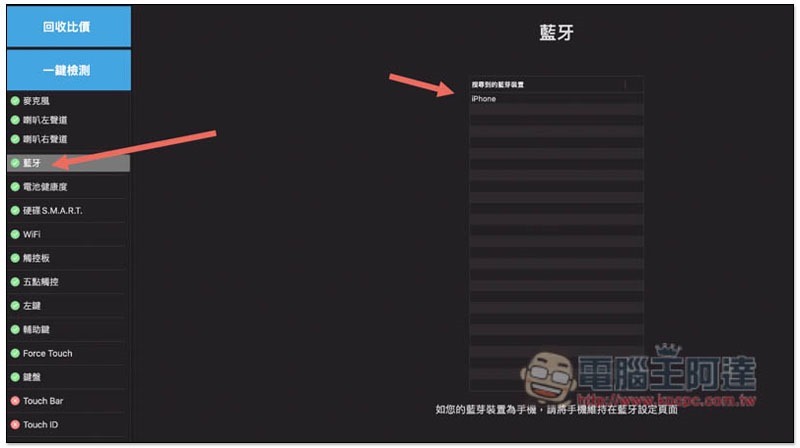
Battery health check
Battery health is a very important piece of information when selling a MacBook. Basically, many people ask about it, especially those models that are several years old. The test will pass in an instant, and then jump to the next test. You can wait until all runs are completed and then come back to check the health status. For me, it is still 77%. Basically, as long as it is above 60%, it is fine. If it is too low, it may run out of battery quickly and cannot be fully charged:
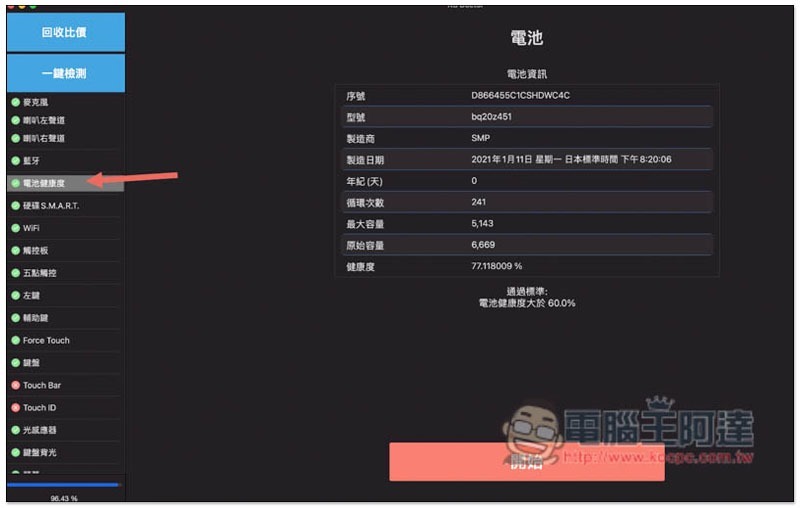
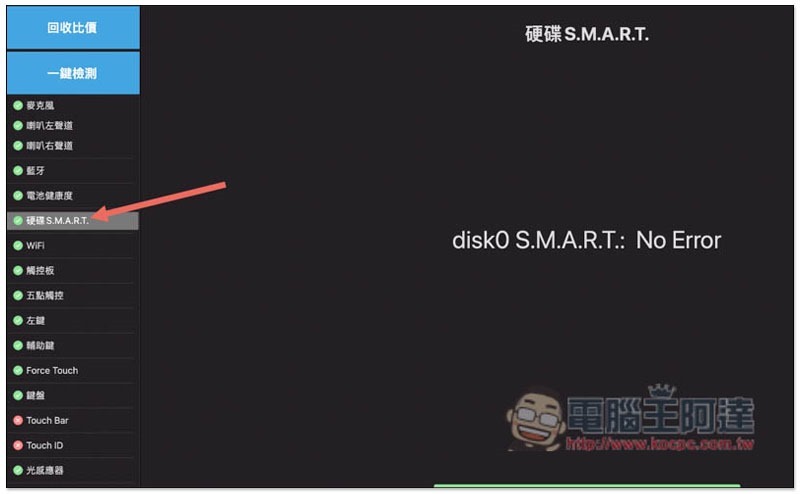
Hard drive S.M.A.R.T. detection
This is just to check whether there are any errors on the hard disk, and it will pass in an instant. If No Error is displayed, it means nothing is wrong:
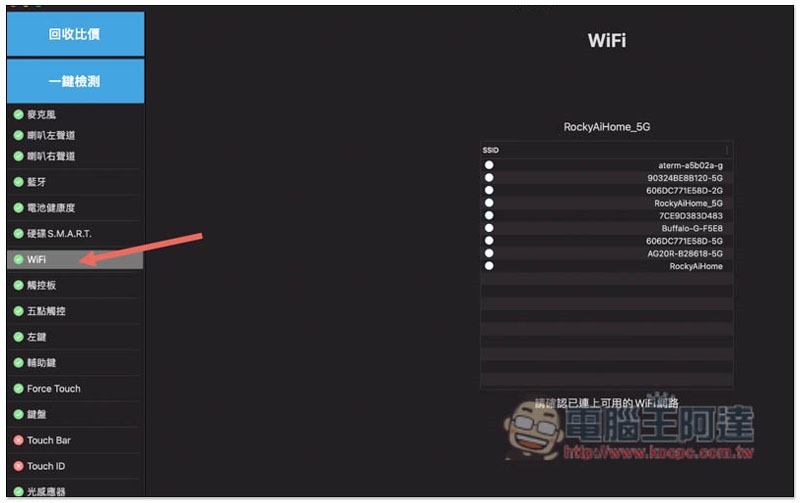
WIFI detection
This requires connecting to a wireless network. If your MacBook is already connected to WIFI, then this test will scan directly without doing anything:
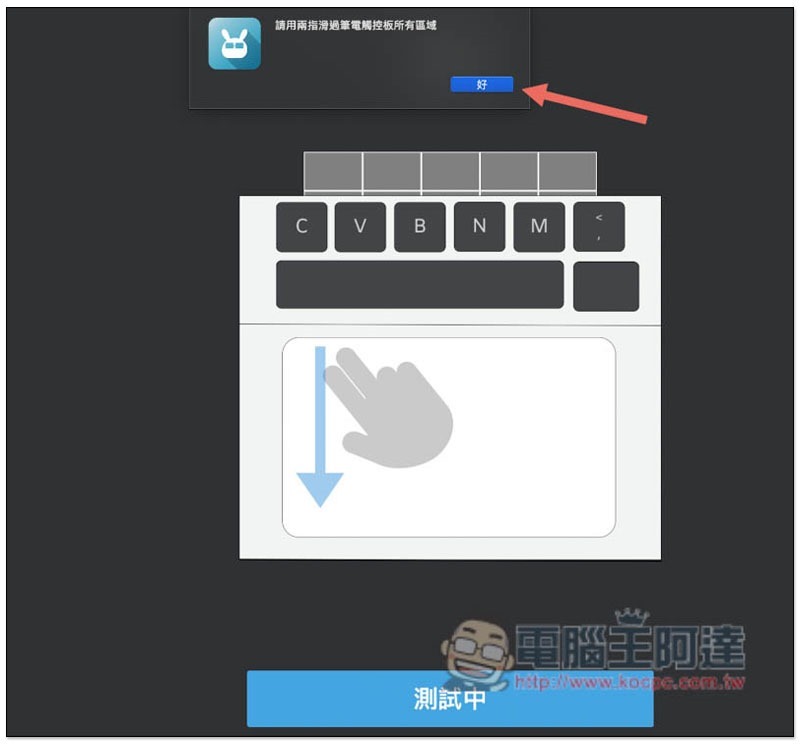
Touchpad detection
Use two fingers to slide across all areas of the laptop’s touchpad, that is, as shown below, use two fingers to slide down from the left, then move to the right and repeat until all the touchpad areas have been slid:
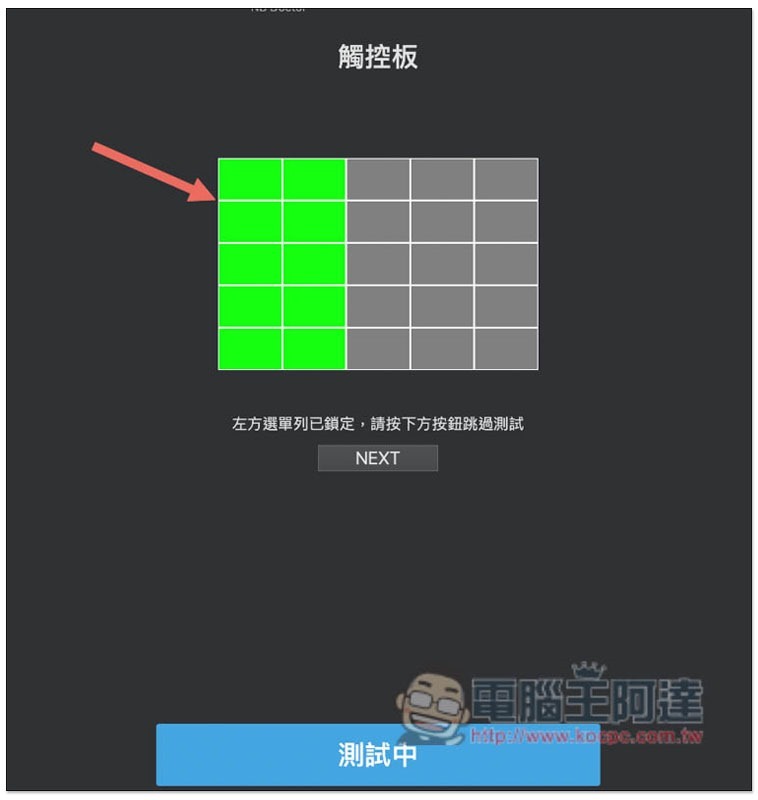
The green color indicates that you have swiped and the test is normal, while the gray area means that you have not swiped yet:
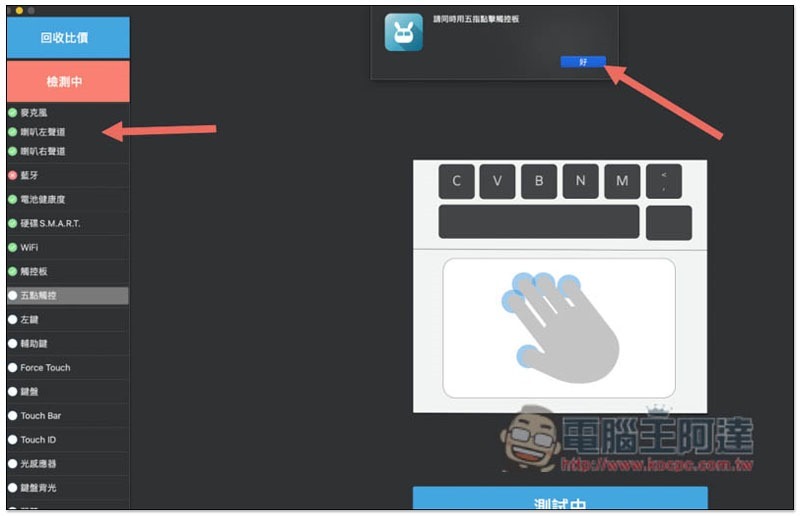
Five-point touch detection
The same test is done on the MacBook’s touchpad, but this time just use five fingers to click on the touchpad at the same time. This is mainly to confirm whether the five-point touch function of the touchpad is normal:
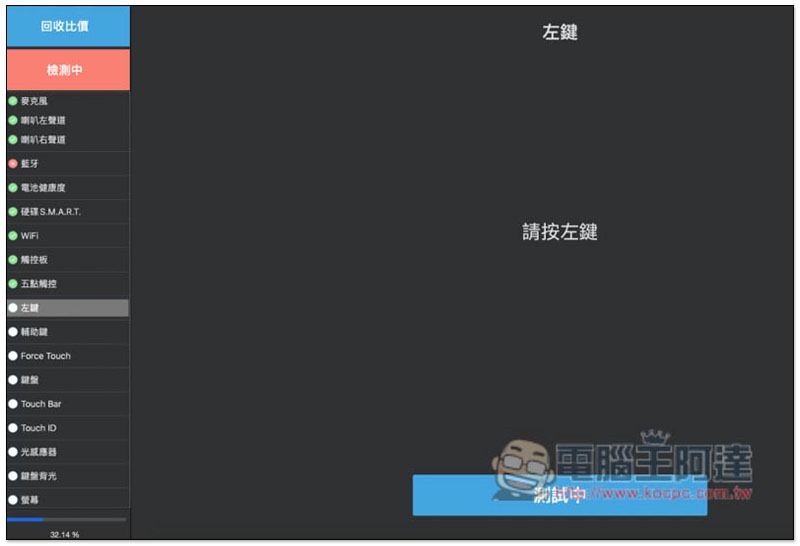
Left button detection
Test the left button of the trackpad, so remember not to use an external mouse, just press the left button of the trackpad:
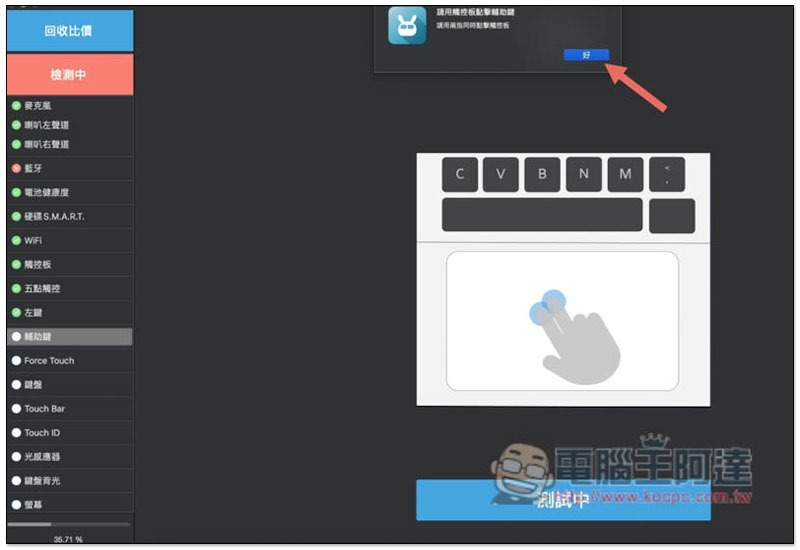
Auxiliary key detection
Click the touchpad with two fingers at the same time to detect:
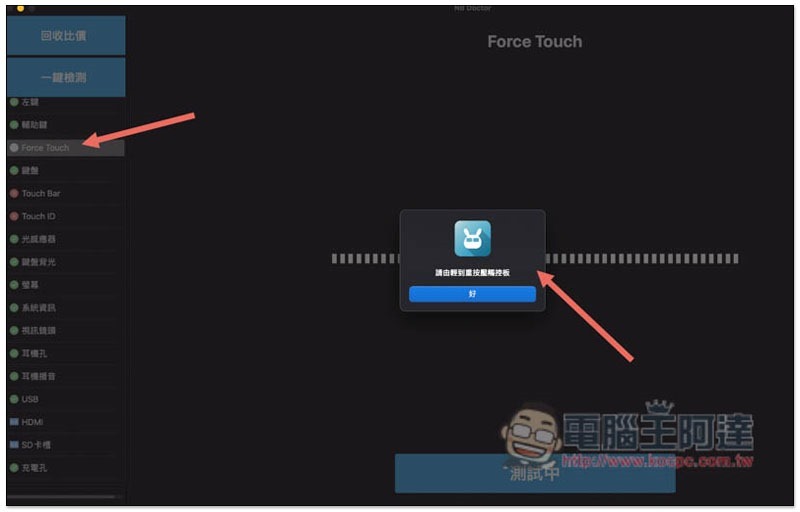
Force Touch detection
Check whether the pressure detection of the touchpad is normal, so use your fingers to slowly press the touchpad with light to heavy force. The bar on the back will show the current pressure of your pressure:
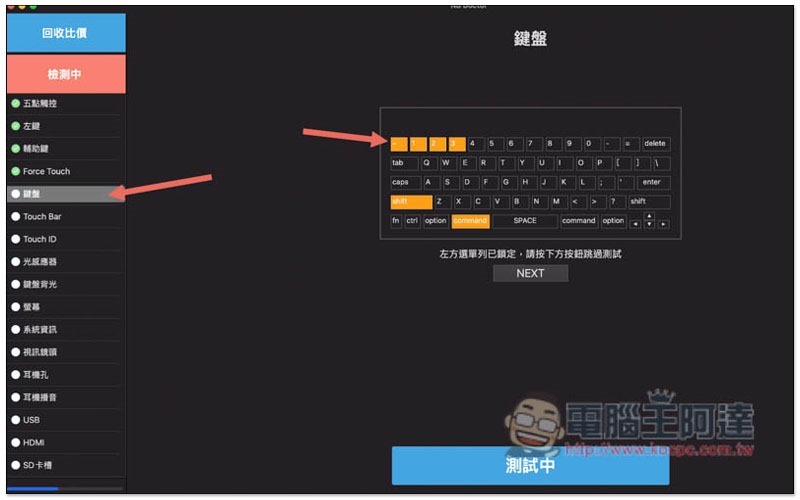
Keyboard detection
You will be asked to press each key on the keyboard. If it displays yellow, it means it has been pressed and it is normal:
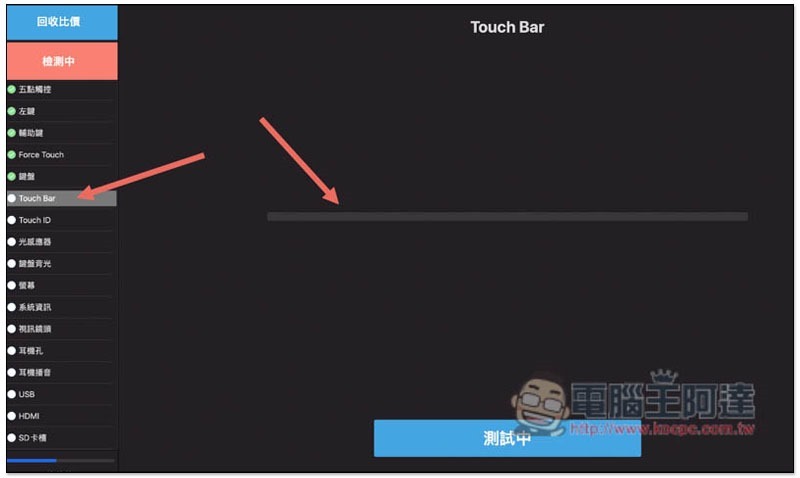
Touch Bar and Touch ID detection
Touch Bar will require moving the slider on the screen, and Touch ID will test whether fingerprints can be recognized normally. However, my Touch Bar and Touch ID are broken. This MacBook Pro 15 was previously eroded by coffee, so it cannot be used:
If it fails, an X fault will be displayed:
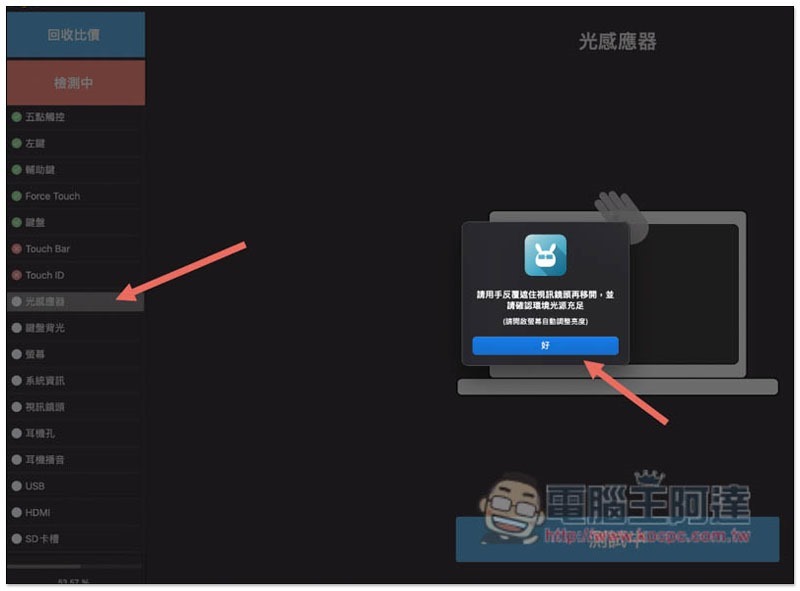
Light sensor detection
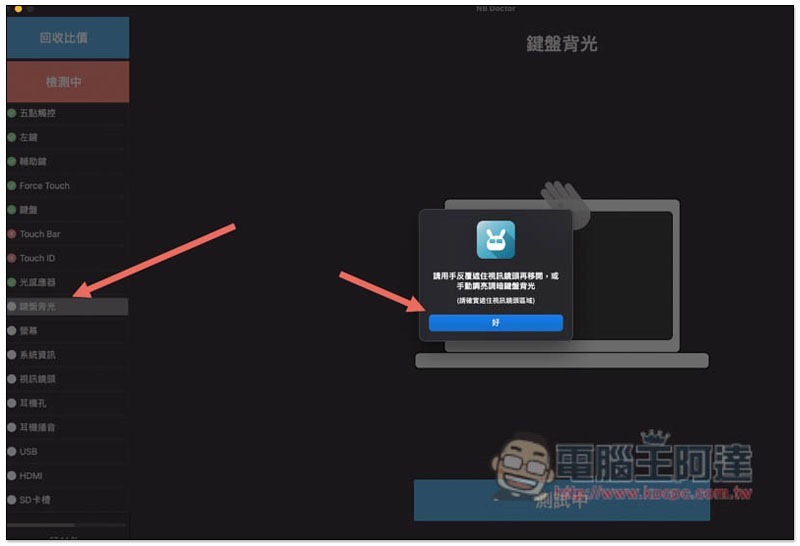
To check whether the MacBook’s light sensor is functioning properly, just cover the video lens with your hand repeatedly and then remove it. It’s very simple:
Keyboard backlight detection
The same goes for the keyboard backlight, but those who don’t want to use this method can also manually adjust the keyboard backlight brightness:
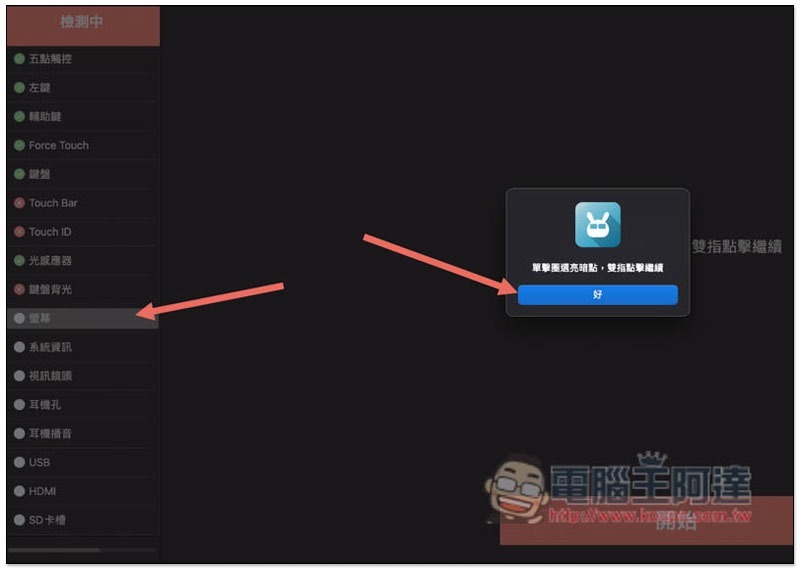
Screen detection
This is to see if there are bright or dark spots on your screen. The screen will alternate between completely white and completely black. If you don’t see any bright or dark spots, just click with two fingers to continue. If you see them, you need to click to circle:
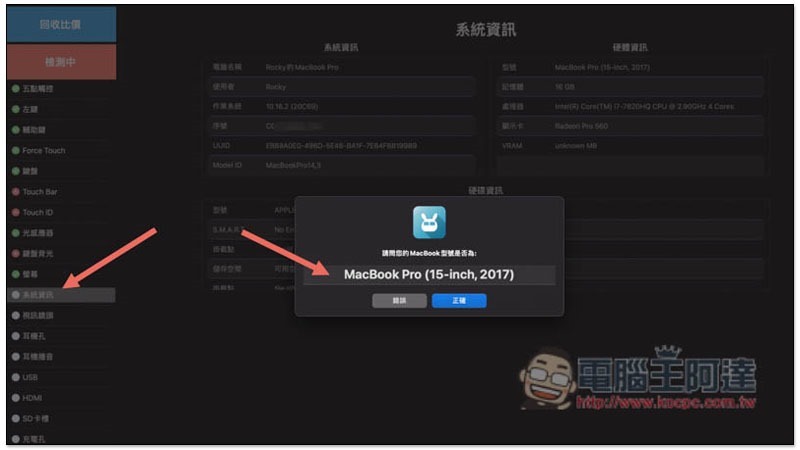
System information detection
This is somewhat similar to the hardware information at the beginning, except that it asks you for more actions, such as: if the model, memory, hard disk capacity and other information are correct, click OK if it is correct:
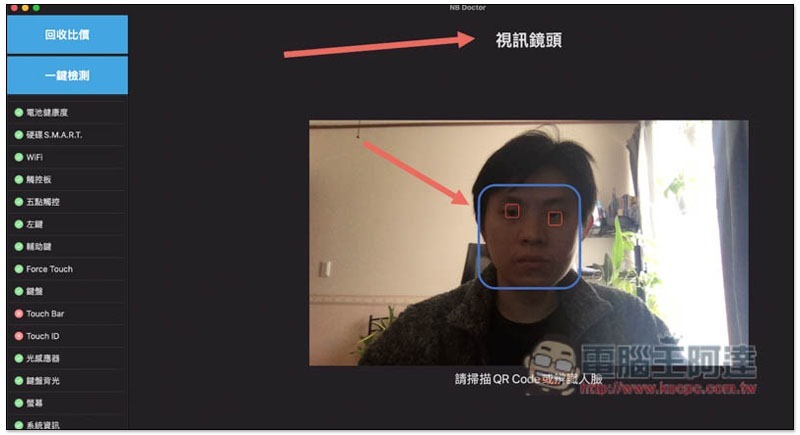
Video lens inspection
This step will test whether the video lens can correctly recognize faces or QR Codes. It is recommended to remove the glasses during the test, which will make the recognition more accurate:
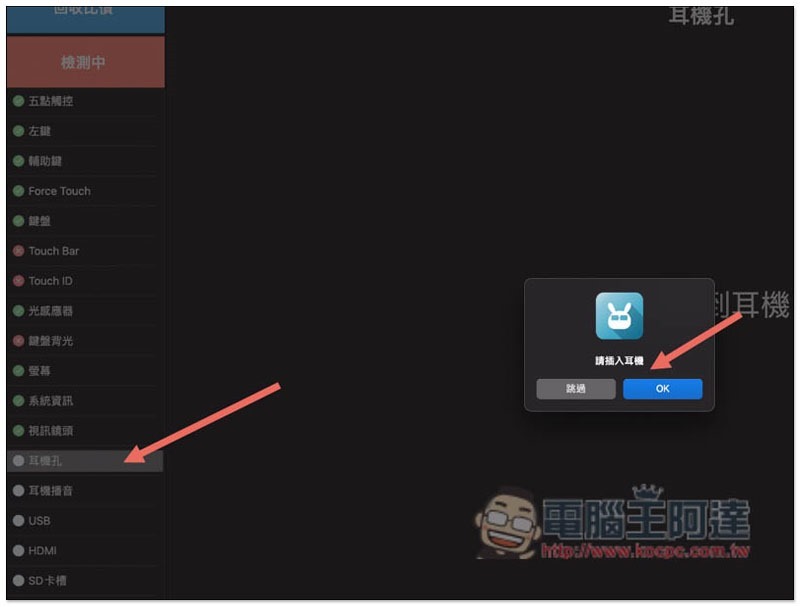
Headphone jack detection
The headphone jack test is also very simple. Just plug in the headphones. If it is detected, it means it is normal:
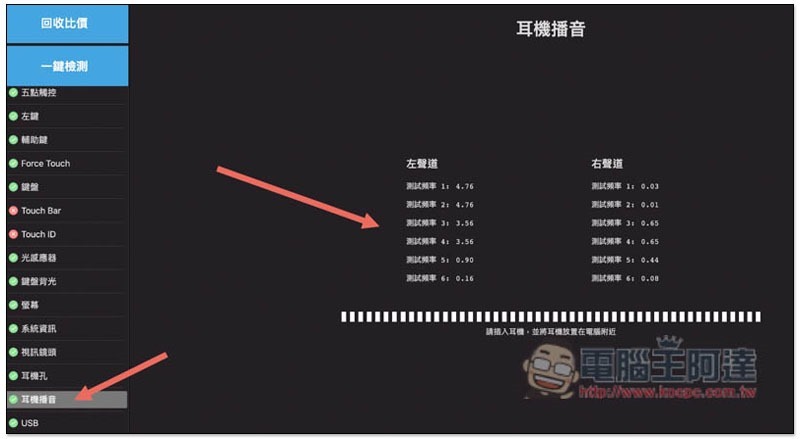
Headphone broadcast detection
The test method is the same as the left and right channels of the speaker at the beginning, except that it is played through headphones, so the headphones must continue to be plugged in:
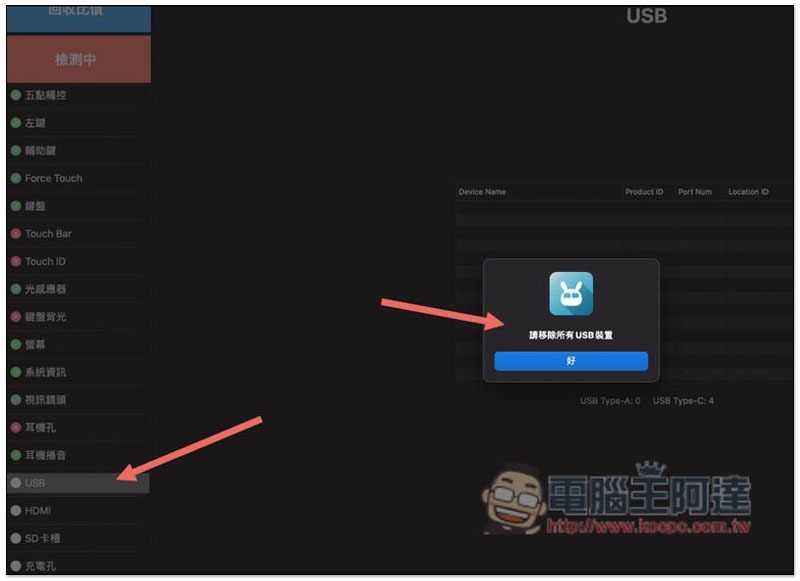
USB, HDMI and SD card slot detection
At the beginning, you will be asked to remove all USB devices, and then insert the USB device into any hole. USB HUB is also acceptable, not necessarily a portable hard drive. My MacBook Pro 15 has Type-C holes on all sides and no HDMI and SD card slots, so I skipped these two items:
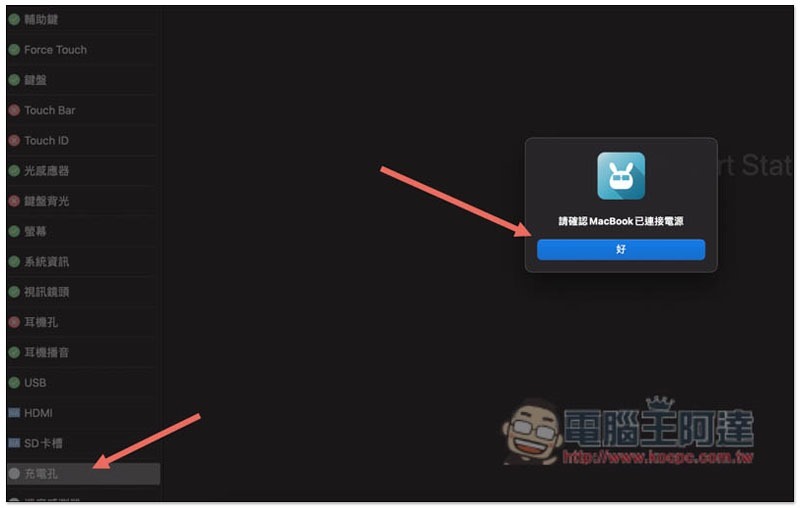
Charging hole detection
Just like the headphone jack, just connect the charging cable to the MacBook:
Temperature sensor detection
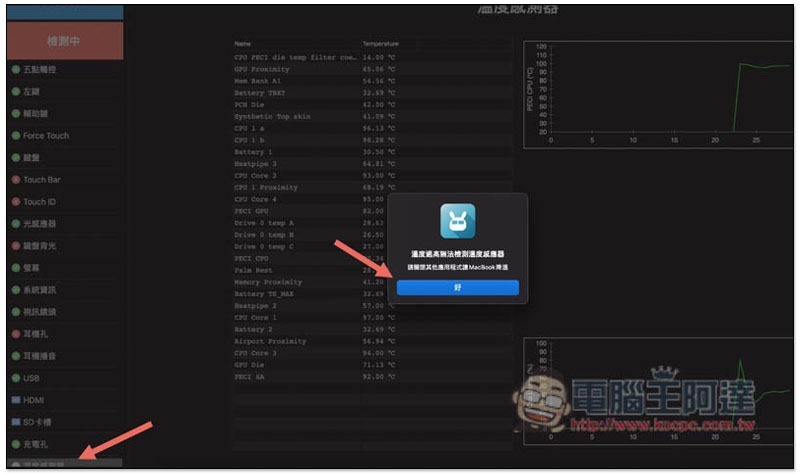
I really didn’t expect that this set could also detect the MacBook’s temperature sensor. It is recommended to turn off all other software during testing to prevent the temperature from being too high:
Fan detection
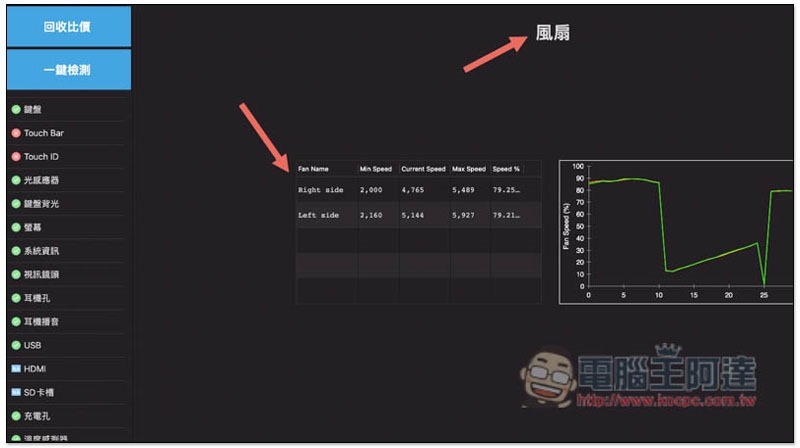
It will test whether the MacBook’s fan is working properly. For my MacBook Pro 15, there are cooling fans on the left and right sides, so it will be tested. The screen will also display numerical values and trend charts for your reference:
After running all the test procedures, you will immediately get a professional-grade test report
This can be said to be the best feature of Laptop Doctor. It not only helps us test the hardware condition of MacBook, but also integrates all test results into a report, and it is written in very detail.
After running all the test processes, you will get the MacBook test report. In addition to recording the results of the 28 items (passed or not), there is also detailed information about various hardware. It is recommended that you click “Open Test Report” below to open this page with a browser, so that you can save the entire page as a PDF for collection:
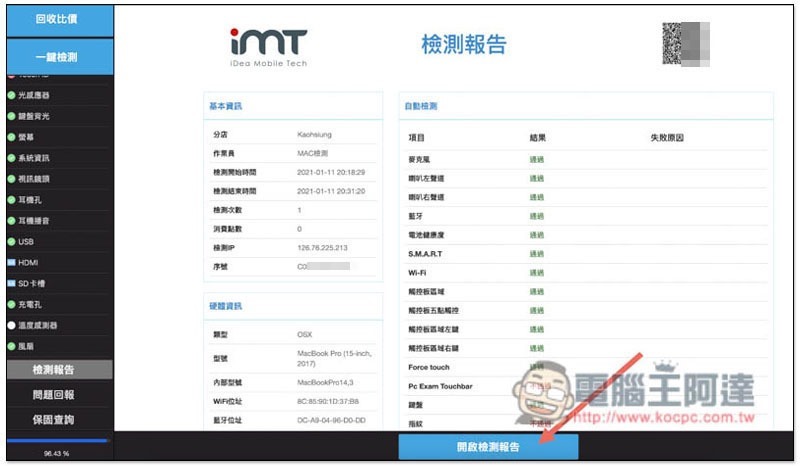
As shown below:
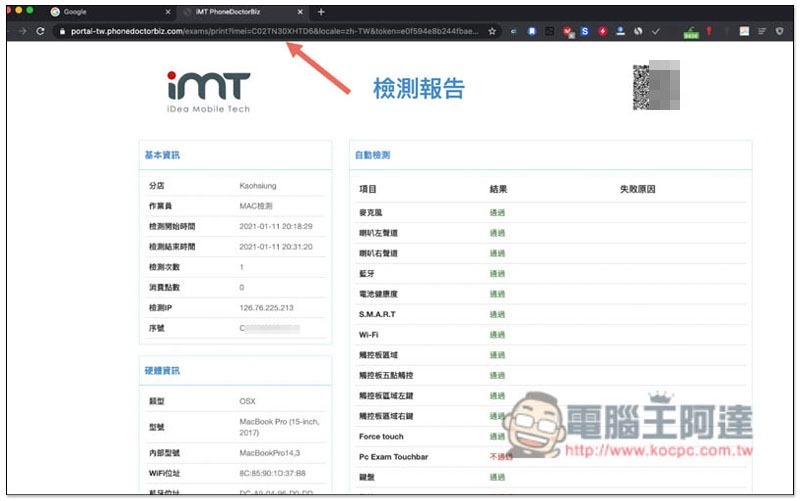
This report is really super detailed. It not only contains several hardware specifications that were already known before, but also some information that can only be found using professional software. For example, the disk information in the picture below includes the model and serial number:
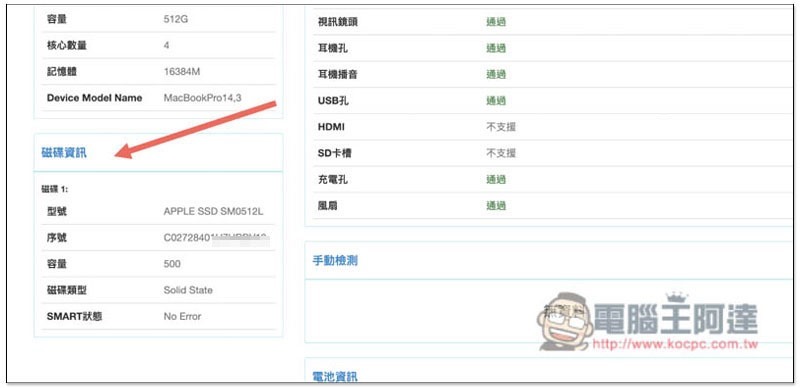
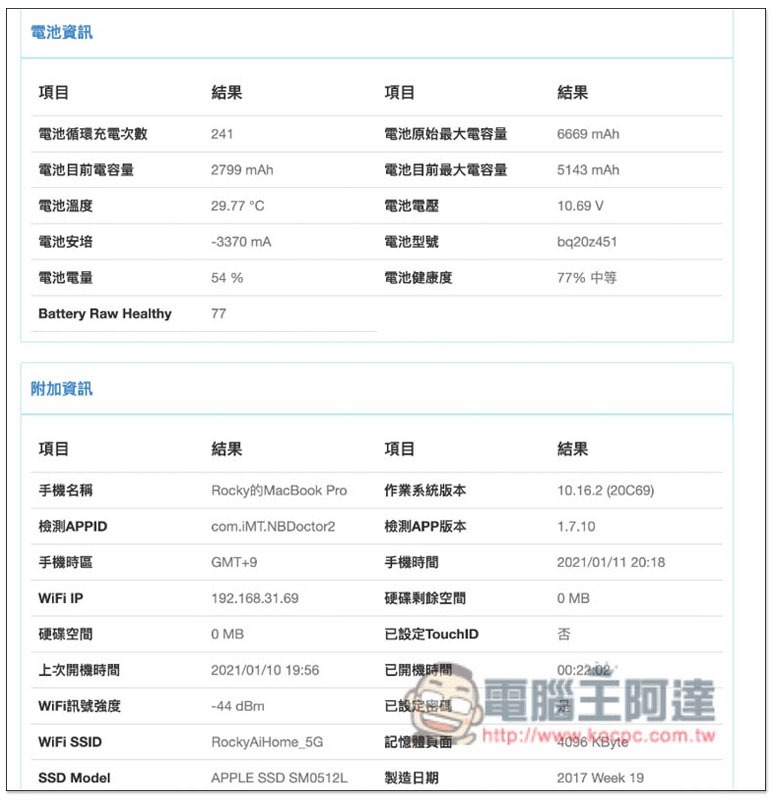
There is also battery information, additional information, etc. Basically, you can find all the hardware information you may need to know or use in this report. With this report, whether you are auctioning online or looking for a store to collect, you will have a basis. You don’t have to worry about being deceived by others, such as saying there is a problem with the hardware and asking for a lower price:
Don’t know if your MacBook is still under warranty? This set also provides one-click query function
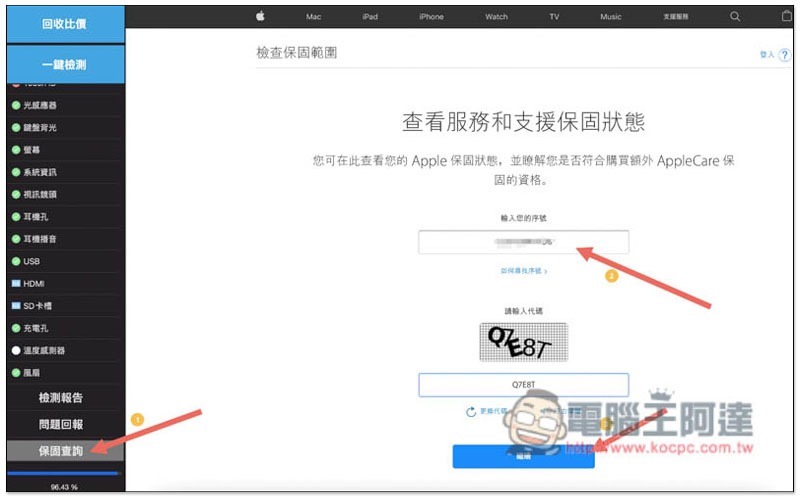
Although you can check the warranty status on Apple’s official website by simply entering your MacBook’s serial number, usually many people don’t know where to find the serial number. What’s very considerate about this set is that it not only has a built-in warranty query function, but the serial number will also be automatically filled in for you. This means that you only need to enter the robot identification code below to quickly query:
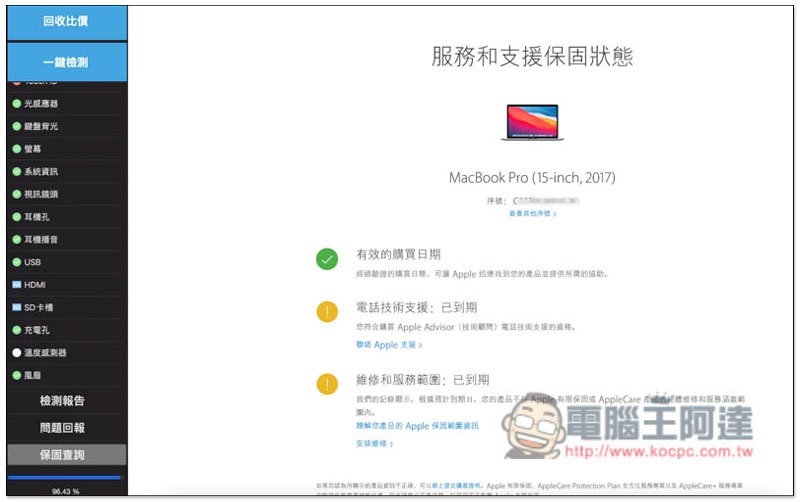
Like this, the screen immediately tells you the current warranty status of this MacBook. In my case, it has been more than 3 years after all. Of course, the warranty has expired long ago, and the telephone technical support, repair and service scope have expired:
Built-in recycling price comparison function allows you to quickly know how much your MacBook can be sold for
In addition to the detection and warranty query functions, Notebook Doctor also provides a recycling price comparison function, which can quickly find out the approximate price of your MacBook at various stores. Not only does it not have to spend time in the store, it saves a lot of time. When you want to auction it online, you also have a reference price.
You can find the “Recycling Price Comparison” function at the top of the left, select the model, size, year, memory and hard drive you want to query. For those who don’t know, these can be found in the test report:
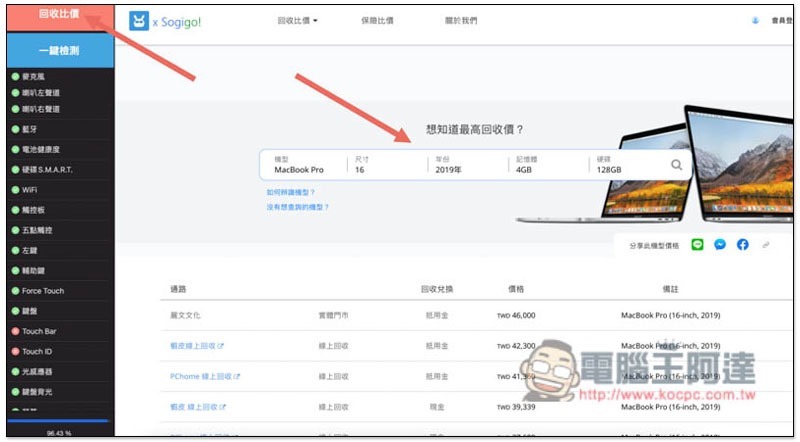
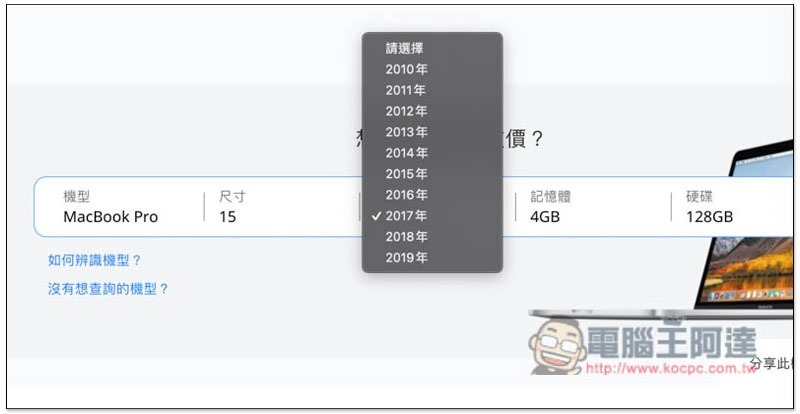
Currently, all versions before 2019 can be found:
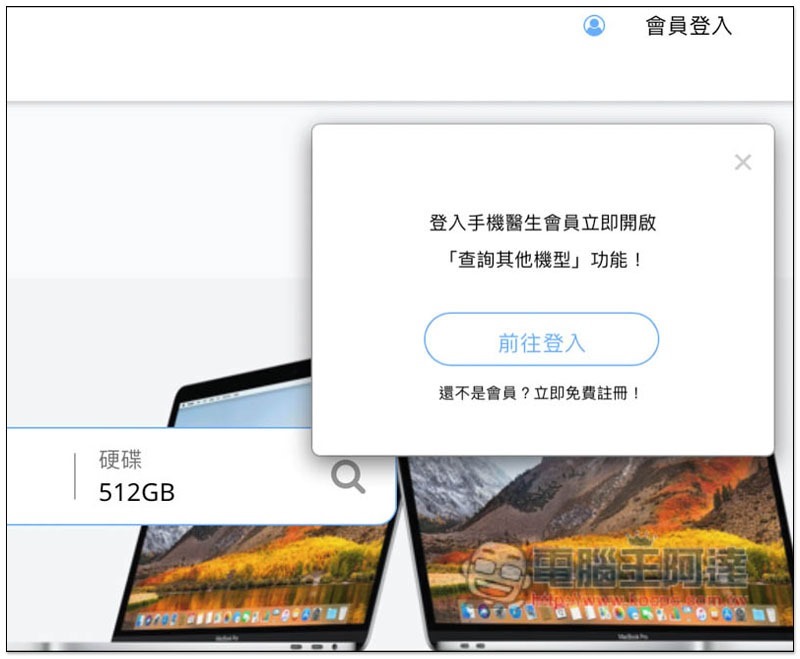
You need to log in as a mobile doctor member before making inquiries. Those who do not have one can register for free:
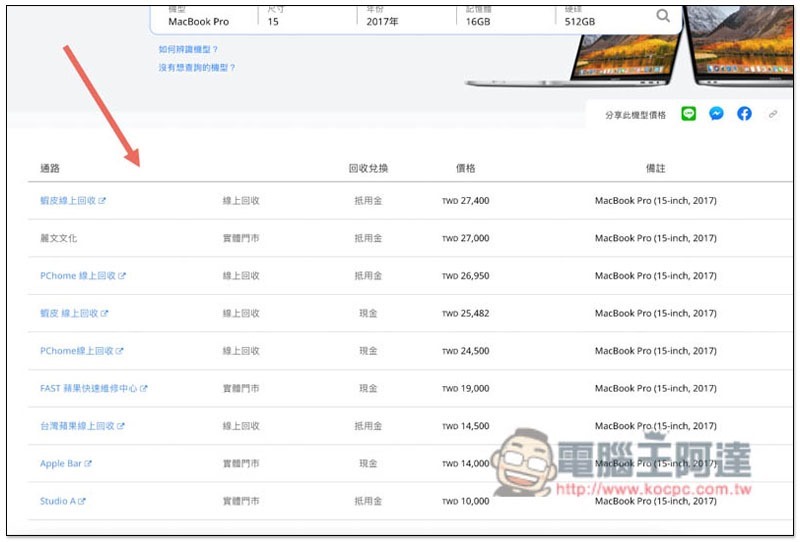
The recycling price of the model you are looking for will be listed below. My unit is currently the most recyclable on Shopee, and can be sold for NT$27,400. Studio A is the lowest, only NT$10,000. The price difference is as high as NT$17,400. I didn’t expect the difference to be so big! In addition, the recycling on some platforms is converted into credits. If you want to get cash, remember to look for the recycling exchange with “cash” written on it:
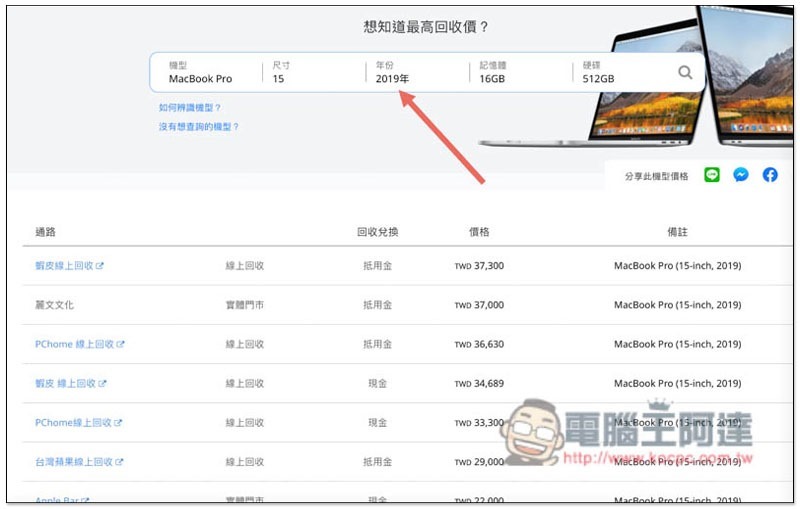
The 2019 MacBook Pro 15-inch can be sold for up to NT$37,300, but it is only NT$10,000 more than the 2017 version. This makes it more cost-effective to sell it online:
Summarize
This laptop doctor is basically a set of free tools that everyone who intends to sell their MacBook must install! Without any technical background, you can check up to 28 internal hardware problems for free, and each test operation is quite simple. People who are not familiar with computers can easily complete all processes. In addition, there is a super convenient recycling and price comparison function. You can immediately know whether your MacBook is still worth the money, and check whether it is under warranty with one click. This set meets the three things you need to know most when selling a MacBook.
After the MacBook has been tested, it is confirmed that there is no problem with the hardware, and it is relatively safe and secure to sell. You don’t have to worry about the other party buying it back and saying there is a problem, which reduces transaction disputes. The results are right in front of you, and you can even show the test report directly to the other party before selling it.
In fact, not only those who want to sell MacBook, but also those who suspect that their MacBook hardware is faulty or want to know the current situation can also use this set to test it. I highly recommend it to everyone.
Source: KOCPC Chinese