



Hello hello! I’m virtual YouTuber Luluoluo, and in this video I’m bringing you the five-star Cryo character debuting in Genshin Impact Version 8.0, who’s also the first character of the brand new Star Superconduct reaction system—SandogneThe Complete Guide to Cultivating/RaisingAs the Fatui Harbinger of the Seventh Seat, codenamed “puppetElegant lady, Sandomere is here again with an all-newstellar superconductivity reactionof the systemIce element main DPSShe finally arrives. Her biggest selling point is her dragon-like ranged spray attacks, plus the ability to clear enemies at super long range while moving around. She even comes with a comfortable “true wheelchair” for exploring the open world—it’s incredibly comfortable whether you’re fighting or traversing. But what exactly is this new Star Superconductor? What are the details to watch out for in Sandrone’s spray technique? How should you choose her weapons and artifacts? And what teammates maximize her damage output?Shortly, Luoluo will bring a quick introduction about the brand new “Stellar Superconductor” reaction and Sandomne’s…Role positioning、Innate Skills、weaponandArtifact Selection、Combat SquadDemonstrationConstellation Strength Analysisand the matching exclusive weaponExtract suggestionsRemember to watch until the end!
[Genshin Impact] Soutine Complete Build Guide 🌠 — Superconduct On-Field Main DPS Has Arrived! Mechanical Version of the Dragon King? Superconduct Reaction Quick Guide! C1 or Signature Weapon First? Role/Weapons/Artifacts/Constellations/Team Comp ▹Lulu Lu Lu◃
00:00 chapter
02:14 Role Analysis and Positioning
03:15 Stellar superconductivity reaction
05:06 Normal attack
05:48 Calculated Power (Overheat Mechanism)
06:21 Elemental Skill
07:24 Inherent Talent
07:45 Elemental Burst
08:14 Inherent Talent 2
08:23 Inherent Talent 3
08:47 Innate Talent 4
08:54 ★Practical Tactics
09:34 Skill upgrade priority
09:42 Constellation Effects
11:32 Constellation Recommendations
12:05 Weapon Recommendations
13:08 Artifact Recommendations
13:27 Primary/Secondary Attribute Selection
13:45 Graduation Panel Reference
14:26 Team building strategy
15:00 Deadweight position
15:50 Ice hanging level
16:23 Other auxiliary positions
16:39 Pingmin Star Superconductor
17:33 Stars and Moon Together
17:52 Should I pull for Soutine?
18:54 Constellation and Signature Weapon Pull Order
19:21 END
Role Analysis and Positioning
Sando Nyer isFive-starIce ElementTwo-handed sword characterthe positioning is brand newStellar superconductivity regimeinCryo on-field main DPS。Her most fundamental method of output is summoning a fully functional, general-purpose automaton “FajeosubsequentlyHold the normal attackit will continuously fire rays forward; and in the Star Superconductivity field, these jet damages will also be upgraded toStar Superconductor DamageThe damage is quite substantial. Sandrone’s damage output actually shares some similarities with Hydro Sovereign Neuvillette. First of all, they both can perform long-range spray attacks by holding their normal attacks, and Sandrone, possessing the high technology of Snezhnaya, her spray attack can even…wall-penetratingMore advanced than the Hydro Dragon King’s water pillar. But Sandrone also has a small drawback like Neuvillette at 0 constellations, which is during the jetting processNot very resilient to interruptionsAdditionally, none of her later constellations provide anti-interruption like the Dragon Sovereign’s C1, so when building a team for Sandomere, it’s best to pair her with characters who can provide shields or anti-interruption to avoid the awkward situation of your damage getting interrupted mid-attack. Not only does Sandomere have a very easy rotation, but she also comes with her own exploration tool—just use her E skill to summon a “tea party floating mechanism” that glides through the air at higher speed, even allowing seamless transitions. The experience is amazing. She can truly be called the new open-world exploration god.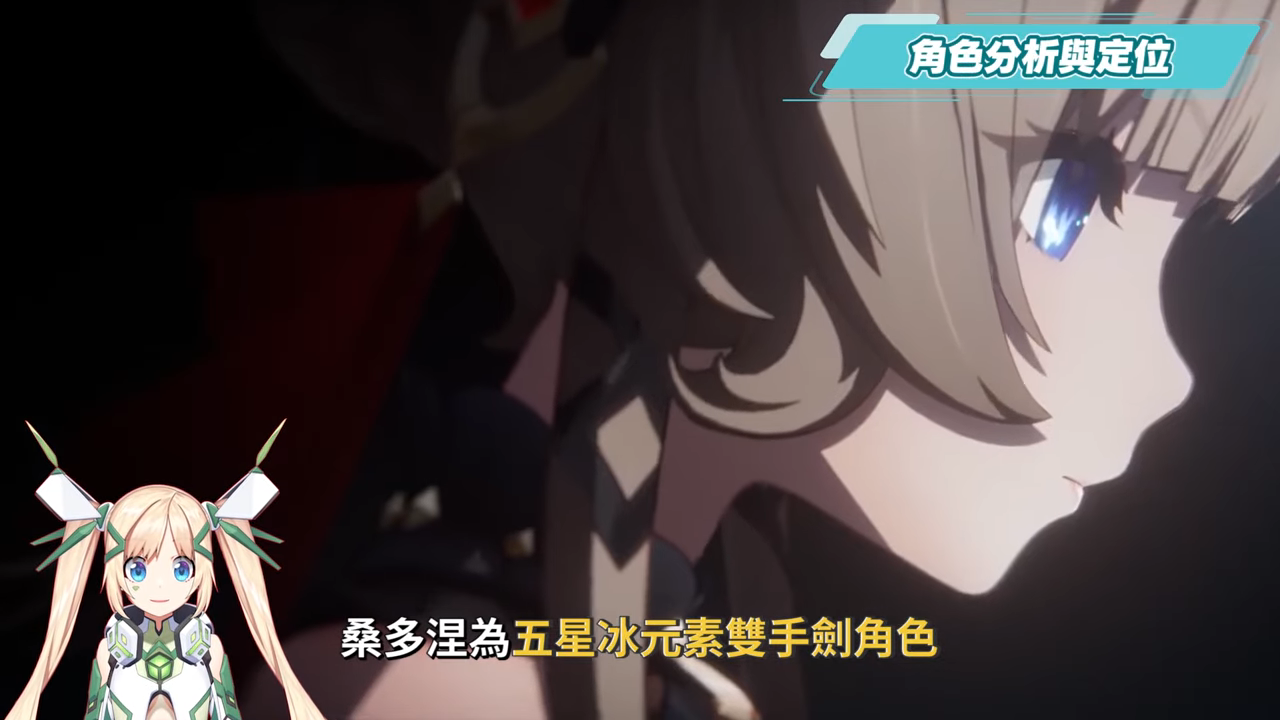
Stellar superconductivity reaction
Well, before we officially dive into Soutine’s skill mechanics, Luoluo here will first take everyone through the brand new “Star SuperconductivityQuickly grasp the elemental reactions, so it will be easier to understand when looking at skills and team building later.Essentially, Star Superconduct can be directly compared to the previous “Moon Reaction.” Because as long as Sandrone is in the team, the entire team…ice+ThunderAll “superconducting” reactions triggered by elements will be replaced with “Star Superconductor“」, while simultaneously summoning a massive domain on the ground with a blue star in its center and a light purple border around it, called 「Polaris Realm of Splendor」, continue6 secondsRepeatedly triggering the Star Superconductor reaction can refresh its duration.Enemies in the area will beReduce physical resistance by 40%and continuously record the entire team’sIce/Lightning Element Stack Countis not causing harm,Every 4 seconds, the base reaction coefficient for Superconduct damage is increased based on the number of applications, stacking up to 12 times. When fully stacked, it provides…40% Ice/Lightning Elemental DMG Bonus。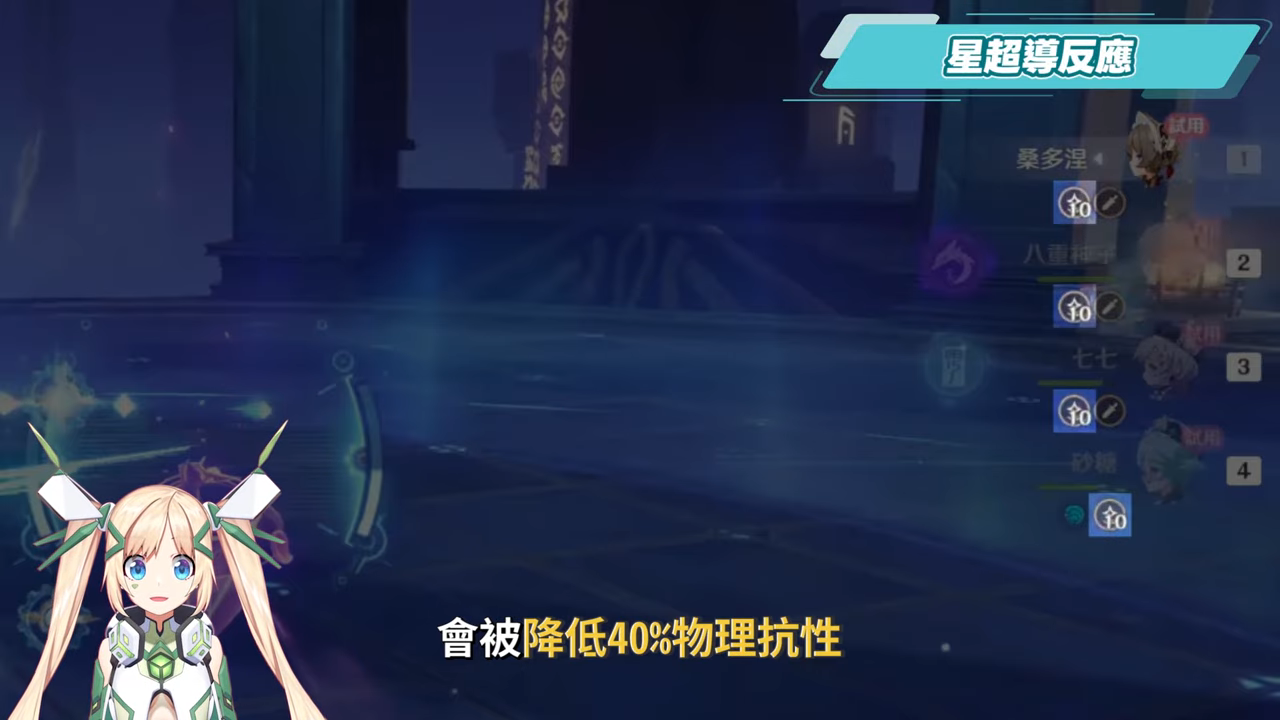
Star Superconductor itself andNo reaction damageIts function is to upgrade the original ice and thunder elemental direct damage into higher tiersStellar Superconduct Damage,Therefore, the Superconduct reaction damage triggered by Electro characters will be light purple, while the Superconduct reaction damage triggered by Cryo characters will be light blue.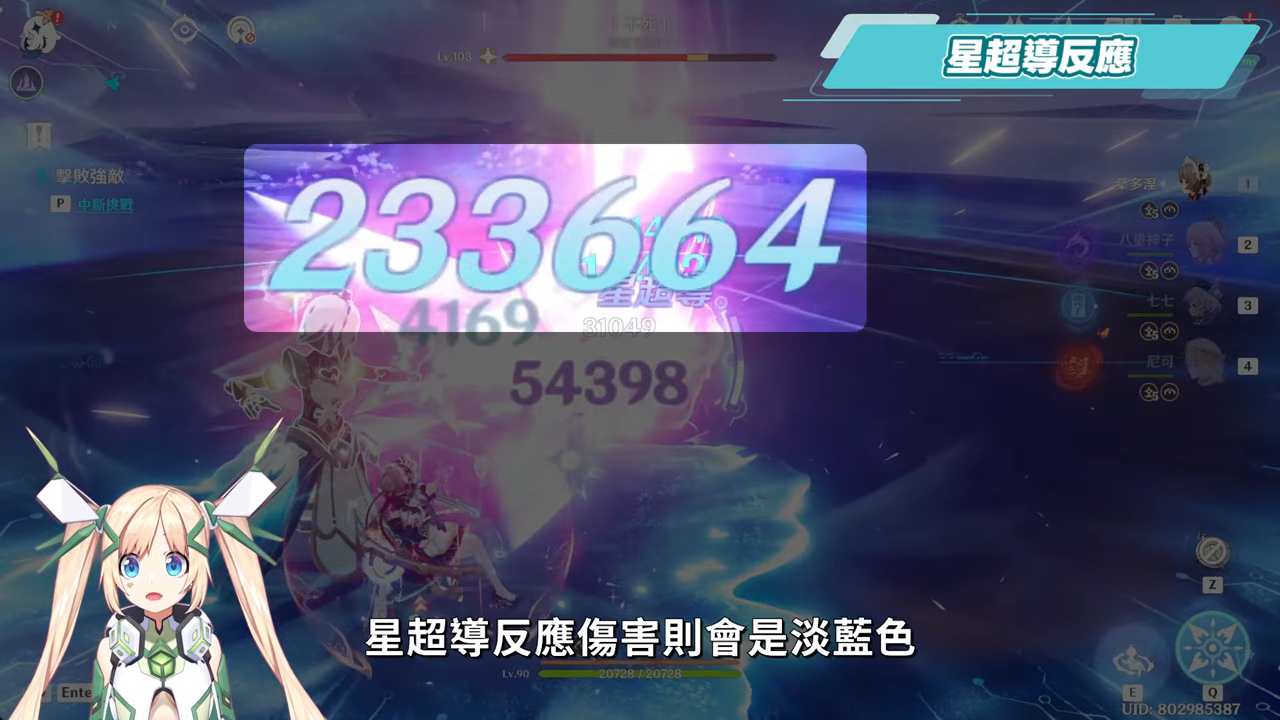
Overall it’s quite similar to “Moon Bloom” — triggering reactions is just to allow the character to deal superconduct damage that counts as direct damage.For regular players, you really only need to remember 4 key points:First, the bonus of Star Superconduct andMonthly responseIt’s very similar, and since it falls under “cataclysmic reactions,” it deals damage.Ignore Defense, alsoImmune to conventional damage amplificationTherefore, things like ice damage from ice damage goblets and charged attack damage from the Hunter set are not affected by Stellar Superconduct at all; it only applies toATK, CRIT Rate/CRIT DMG, Elemental Mastery, Superconduct damage bonusorpromotealsoresistance reductionEffect of the multiplication zoneSecond, the Polar Star Radiant Domain of Star Superconductor requiresIce + ThunderTwo elements are needed to trigger it, so Soutine’s team must include at least one Electro off-field unit.Third, this Polar Star Radiant Domain is…stackableEnemies within the field are recorded when hit by Cryo or Electro damage. A settlement occurs every 4 seconds. The higher the stacks,Ice/Lightning DMG BonuswithThe higher the star rating, the greater the Superconduct damage。Fourth, continuing the mechanism from point 3, if a team can include members who haveTeammates who frequently get frozen and struck by lightningThis way you can stack layers faster, so this will also be the main team-building strategy for future superconduct builds.Once you master these four points, we can officially get to today’s main character. As for the other 7 buffed legacy characters, Luoluo will also give a detailed breakdown in another video.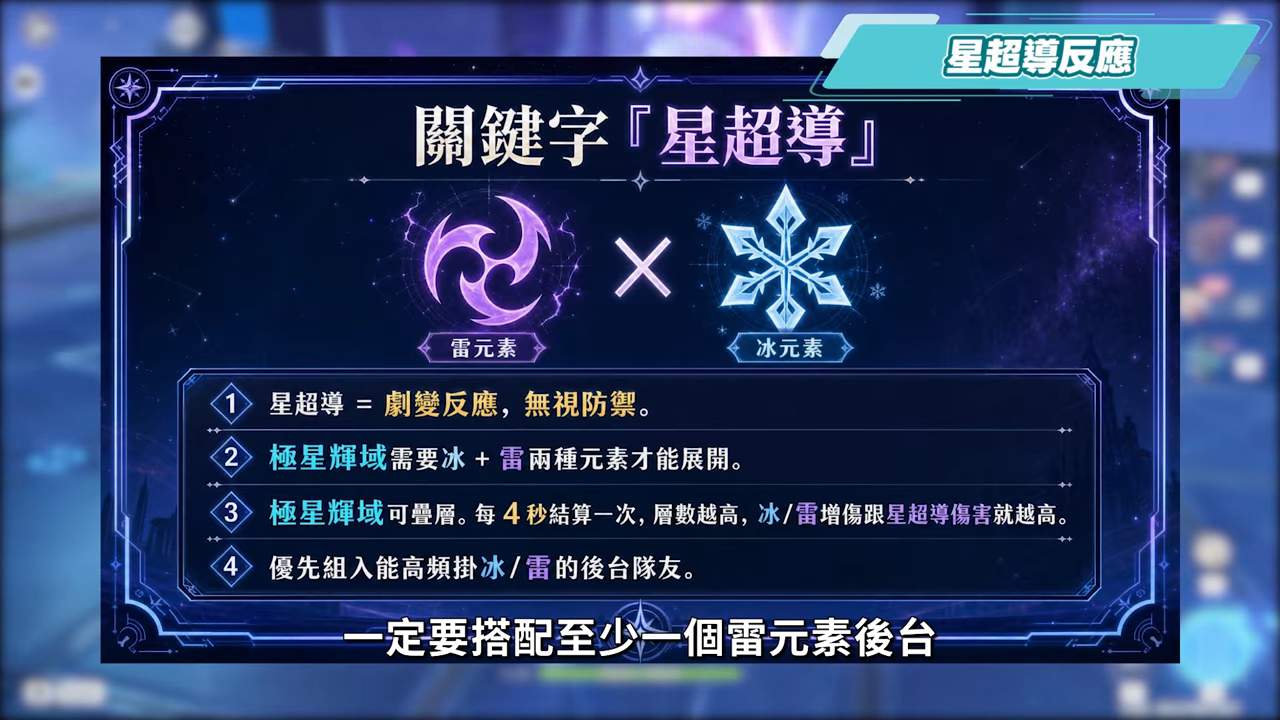
Talent Skill Guide
Basic attack
Sandrone’s normal attack consists of 3 hits. True to her lady-like etiquette, she doesn’t wield her weapon directly during normal attacks—only taking it out when she’s been hit. However, Sandrone’s true damage core lies in her charged attack, and the charged attack doesn’t consume stamina since it’s executed by the mechanical maid. As long as you hold the normal attack button, Sandrone will summon her mechanical maid “Fachelle” and switch to “Computation” mode, firing sustained shots at enemies in front and periodically releasing condensation rays. It’s important to distinguish here that this rapid-fire barrage isIce AOE damageand the one that fires every 1 secondcondensation raythis is the main source of Superconduct damage. As long as Sandrone is inside the Superconduct field, the damage of Condense Ray becomes absolutely insane. At C0, the same Condense Ray can go from just a few thousand when outside the field, all the way up to over tens of thousands, and the anti-air capability is also outstanding—it can even hit dragon beasts flying in the sky.
Computation Power (Overheating Mechanism)
However, Sandonezh can’t spray indefinitely. During the long-press spray, you can observe the ‘Resolution Power’ bar beside Sandonezh,When firing, you’ll see Faye’s “Computing Power” continuously increasing—think of it as a “mechanical overheat value” with a cap of 100. At constellation 0, it’s about whenTriple Condensation RayThe power will max out and enter “overload.” When it overheats, the mechanical maid’s jet speed will slow down, and it won’t be able to fire the condensation beam.So how do you cool it down? One way is to let it cool down gradually, but that takes too long and isn’t recommended.The frontend takes 20 seconds to load, and switching to the backend also takes 6 seconds.So they usually go with the second method, the one that’s actually used in combat—using the E skill for an instant reset.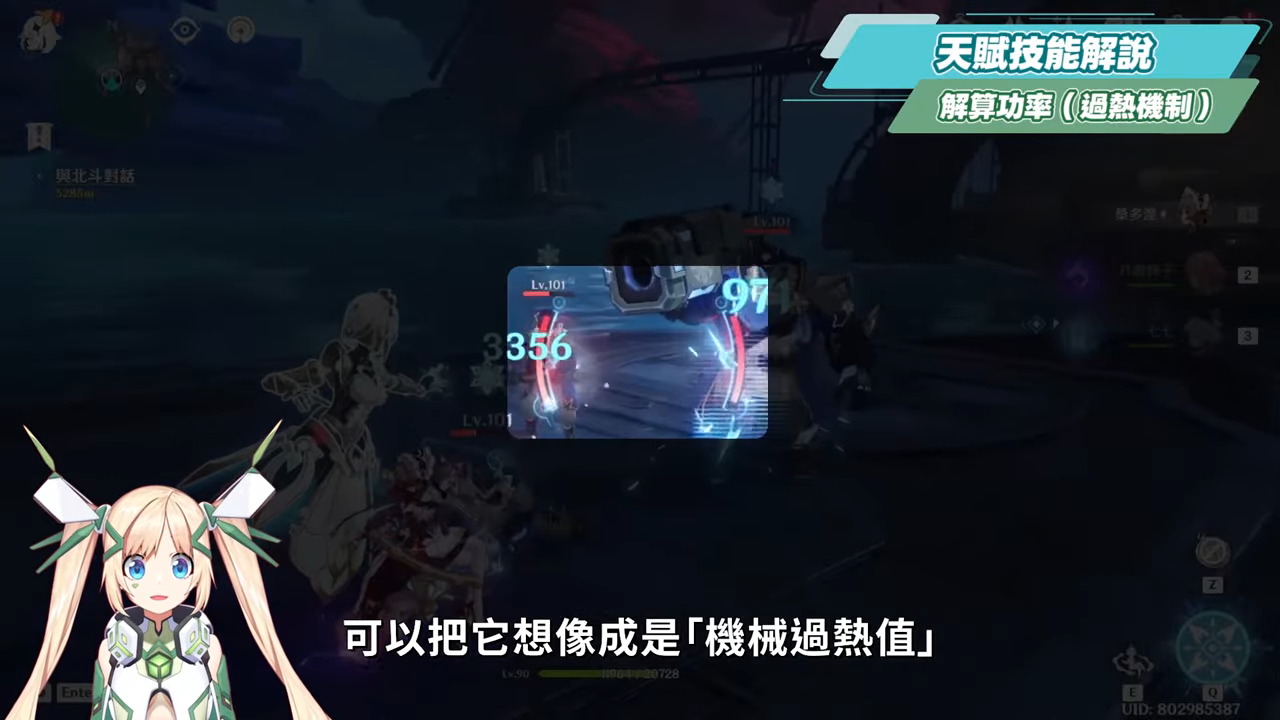
Elemental Skill
After casting her E skill, Sandofny mounts the tea party-themed tactical assault hover mechanism and can float forward.6 secondsCool down4 seconds。Hitting enemies while casting produces1Ice Element Particles; subsequent charged attacks that deal Ice Element damage generate [effect] every 3 seconds1 pieceIce elemental particles are generated, but if you use a charged attack directly without casting the E skill, no particles will be produced.In terms of graphics rendering, since the cooldown is shorter than the duration, you canSeamless LevitationAnd also if it is throughPress E + SprintThis technique not only allows faster movement than normal sprinting with less stamina consumption, but is also stronger than the Wanderer’s Vacuum Slug. When crossing water, there’s a small trick: right when the E skill ends and the character puts their legs down, press E again (don’t press direction keys during this), or intersperse a stamina-free heavy attack in between to achieve seamless water walking, very elegant. You can even climb walls like Chasca, making traversal both elegant and fun. In combat, the moment you cast E, if enemies are nearby, it summons a Prism Resonator that fires 2 prism projectiles, though the damage isn’t particularly high. So the main value of E lies in instantly emptying Fajeo’s calculation power, essentially cooling down the machine instantly. Additionally, the moment you press E to mount the wheelchair, there’sinvincible framesTherefore, it can be done through the point E methodDodge buttonUse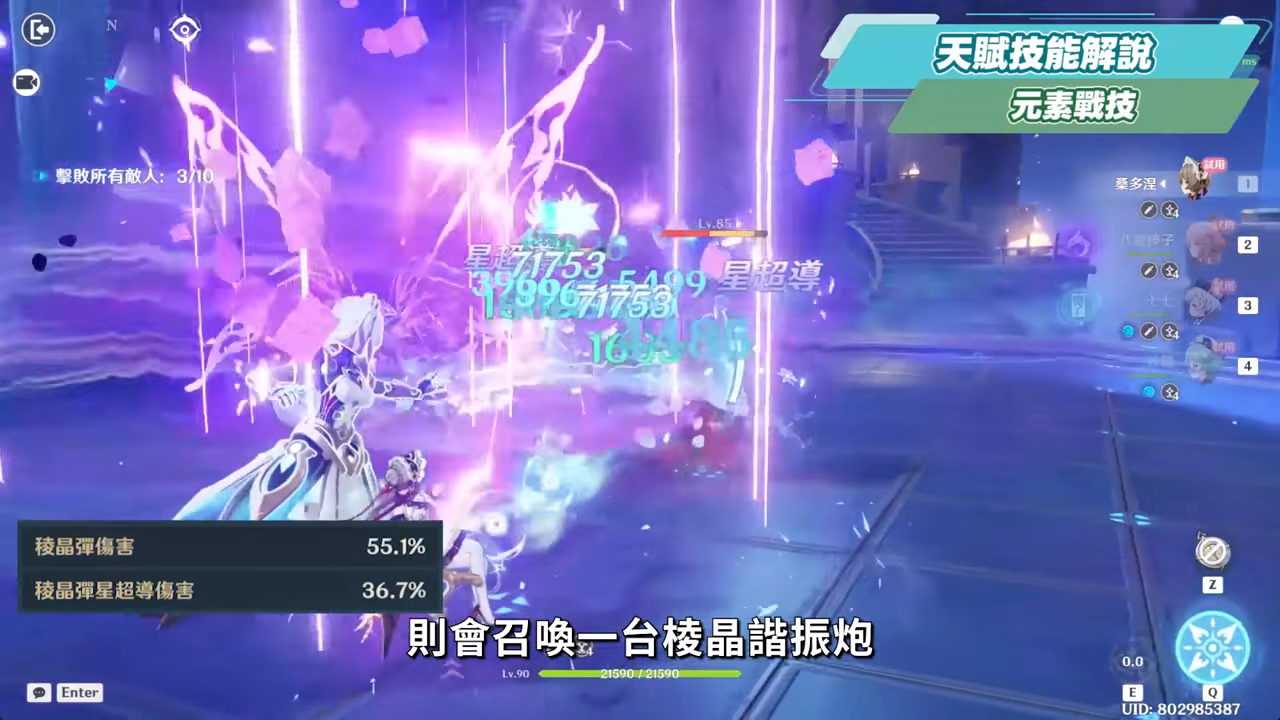
Inherent Talent 1
Combined with the effect of Passive Talent 1, when we cast the E skill to reset the resolution power, if at this time the powermore than halfwill cause the second fired prism projectile to deal an additional 400% damageSimultaneously eliminated power,For every 10 points loweryou will gain 1 stack of ‘Tactical Improvement’, maximum stacking10th floorLasts 60 seconds. These 10 stacks are fully consumed upon casting the ultimate, which greatly increases the ultimate’s damage based on the number of stacks consumed.
Elemental Burst
Sandrohne’s ultimate requires60 pointsEnergy: Upon casting, first takes a sip of coffee from Catherine, then summons multiple turrets to launch a wide-area bombardment ahead, followed by beam attacks that deal ice element AOE damage.There are 4 instances of damage, but only the first hit can apply Cryo.And when in the luminous state, the following light beam will be considered asStar Superconduct Cryo DamageHowever, one thing to note is that opening with the burst right away will result in damage loss. Therefore, you need to stack the “Improved Tactics” layers mentioned in the first innate talent. Wait for the first round to trigger Overload, then press E to consume the stacks and obtain 10 layers of “Improved Tactics” before using the burst. This way, the burst damage can reach its maximum potential.
Inherent Talent 2
After unlocking Constellation 2, Elemental Mastery can be increased based on Sandrone’s ATK, as long as the stat reaches2000 Attack PowerWhen the time comes, you can eat until you’re full, with a maximum boost of160 Mastery Points。
Inherent Talent 3
Constellation 3 is also Sandrone’s key constellation. It is also the key to triggering the Stellar Superconduct reaction. As long as Sandrone is within the Polar Star Radiance domain, she will enter the “Radiant Echo · Stellar Superconduct” state, which converts her main attack into Stellar Superconduct damage. Otherwise, she can only deal normal Cryo damage.Additionally, characters in the team will also gain increased Stellar Superconduct damage based on Sandrone’s ATK, similar to Nekomata’s talent, with every 100 ATK increasing Stellar Superconduct damage by 0.7%, up to14%is the same as2000 attack powerEat until you’re full.
Inherent Talent 4
And finally, for the life talent, when Soutine goes to turn in daily commissions to Katherine, she can receive extra snack rewards—after all, Katherine was designed by Soutine herself.
Practical techniques
Here, let me also summarize Sethos’s basic damage output rotation. As mentioned earlier, starting directly with a charged attack won’t generate Cryo elemental particles, and if you have Beidou on the team, only 1 of the 2 projectiles from Sethos’s elemental skill can apply weak Cryo. This also makes it impossible to quickly clear Beidou’s E skill’s strong Electro aura.So the opening move is usually to press E and then start heavy attacking. After that, observe the calculation power meter until it overheats. After about three rounds of Biu Biu Biu, it will overheat, then press E to reset and continue heavy attacking until you’ve confirmed the improved tactic of stacking 10 layers is sufficient.Press E to remove all power, then weave in your ultimate after one of the heavy attacks ends. After that, finish 3 more rounds and you can basically step off the field.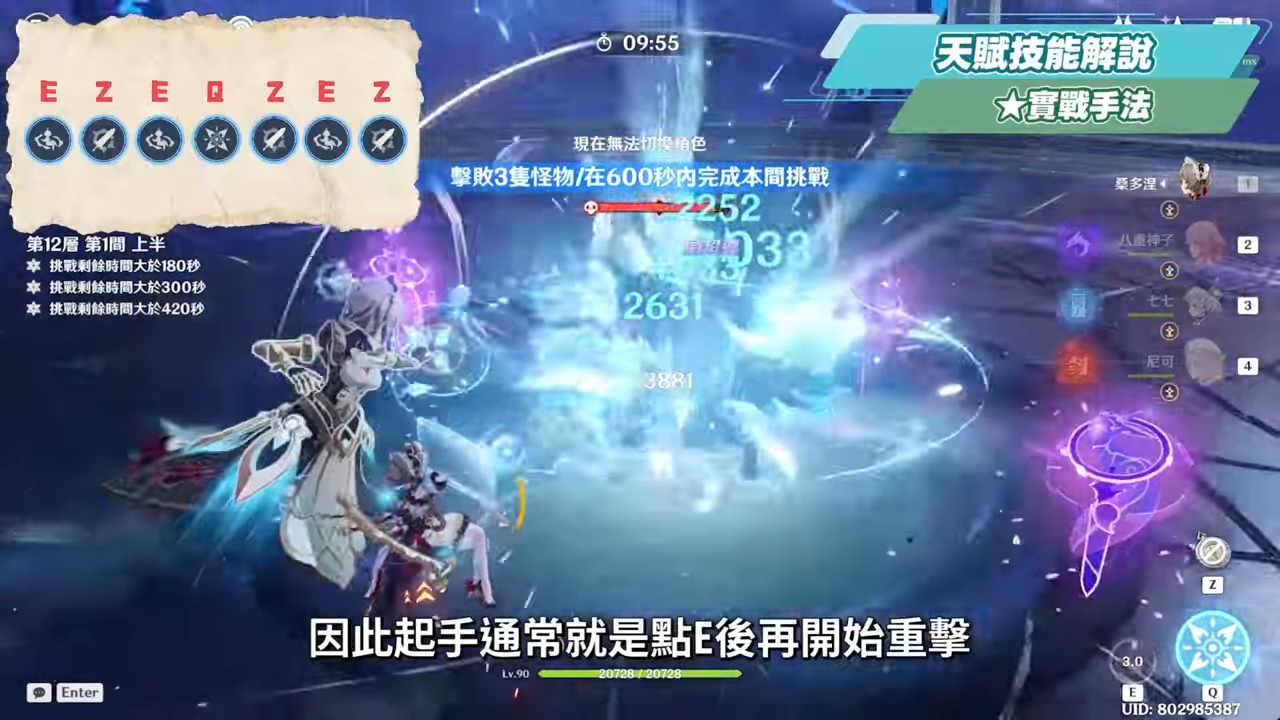
Skill Upgrade Priority Order
Regarding skill upgrade priority for Sandrone, since Sandrone’s main charged attack jet damage scales with normal attack multiplier, when it comes to upgradesNormal attackPrioritize maxing this out first, then…UltimateFinallyCombat techniques。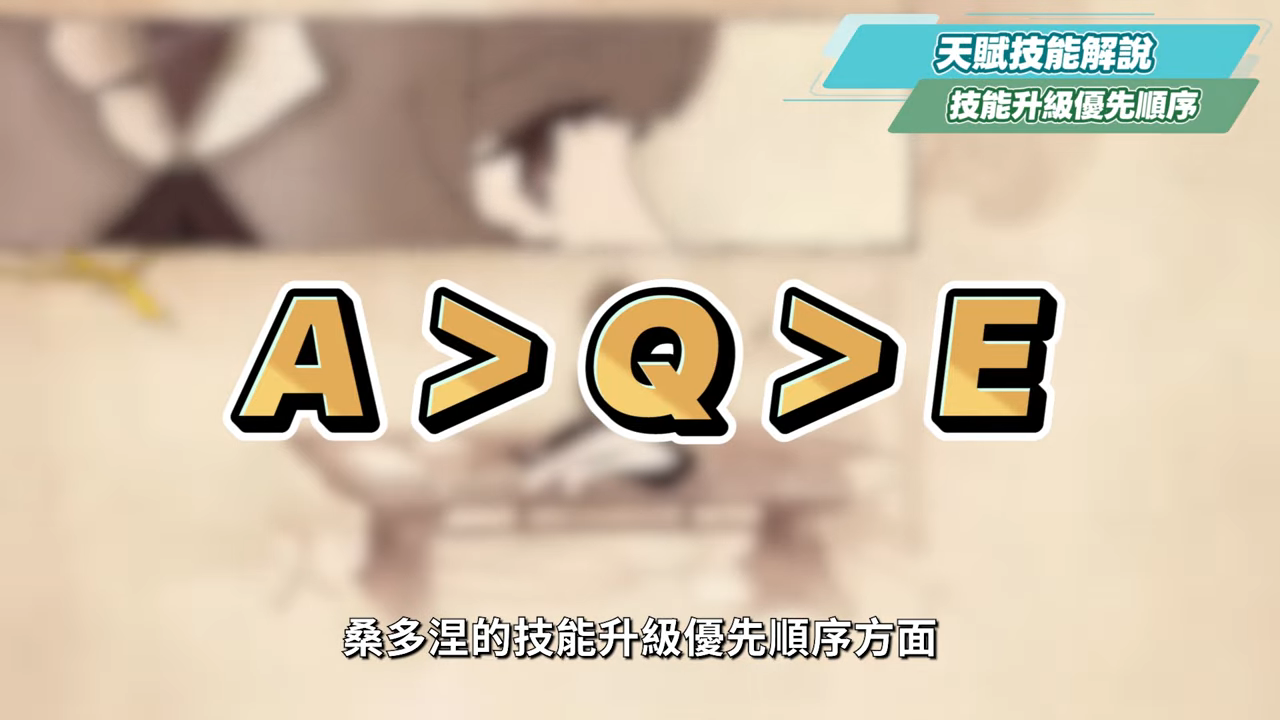
The Impact of Constellations
Regarding constellation effects, Soutine’s constellations offer steady progression, with each constellation providing meaningful benefits.
1 life
Constellation 1 has two effects. In Solver mode, it reduces Farjeor’s entry into Overload state by 50%, which effectively doubles the ray spray cycle from 3 rays per rotation to 6 rays. It also reduces the frequency of E skill cooldown usage, requiring only one E skill cast per rotation. The second effect causesStar Superconduct damage increased by 30% for the entire teamalso aHalo supportThis effect can also be triggered when paired with future Star Superconductor teammates.
C2 (2nd constellation)
After unlocking the 2nd constellation, you canIncrease Freeze Ray critical damage by 40%Moreover, each ray can also add an additional 20% critical damage, and during each resolution mode, it can stack up to 3 layers, which means60%The longer you keep spraying, the higher the damage becomes, making this a constellation with quite significant improvements in numerical value.
3 lives
Constellation 3 is an improvementBasic Attack Level Cap +3Additionally, since charged attacks scale with normal attack multipliers, constellation 3 also provides approximately 10% improvement. If you’re not going for max constellation, constellation 3 can serve as the pulling limit.
4th life
When Superconduct damage hits an enemy, it will additionally summon a Resonant Prism Cannon to assist in the attack, dealing Cryo Superconduct damage equivalent to 125% of Sandrone’s ATK, once per 4 seconds maximum. The additional damage isn’t particularly high, and the assist attack can also slightly improve self energy regeneration. It’s considered a transitional constellation.
5 lives
The 5th constellation increases Burst level by 3, making it a transitional constellation.
C6
At C6, the ultimate form allows Sandrone, during Calculation Mode’s jetting, to convert Faruzan’s third Condensation Ray into a sustained, more powerful “Cluster-type Condensation Ray.” Originally it fires da-da-da, Pew! repeated three times, but with C6 Sandrone, the third shot becomes a sustained beam like the Hydro Sovereign’s water jet, essentially a qualitative transformation in her damage output. Additionally, while the ray is firing, it can deal up to 4 hits of AoE Cryo damage, each equivalent to 100% of Sandrone’s ATK, effectively increasing the multiplier of Sandrone’s charged attacks. If triggered during the Radiant Reflection state, it converts into 4 hits of AoE Astral Superconduct damage, each equivalent to 80% of Sandrone’s ATK, and grants SandroneStar Superconduct damage increased by 20%It is also a precious independent multiplier category, so the damage boost for Sandofny herself is also at the large-cup level.
Constellation recommendations
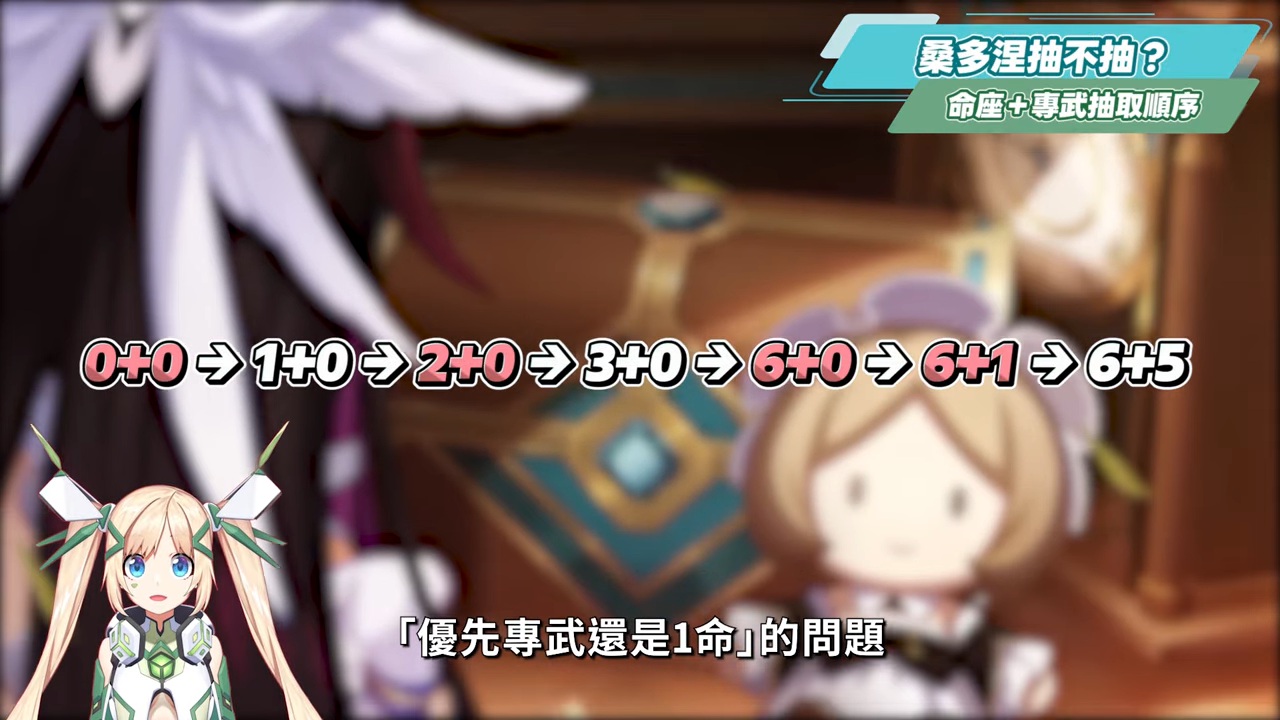
Regardless of which of Soutine’s constellationsC1, C2, C3, C6All of these are very worth considering pull targets, and the signature weapon’s mechanics aren’t too restrictive, so you can wait until C6 to pull for it without any issues. As long as you have a substitute weapon, you can fully prioritize constellations to strengthen your account. C1 is mainly a mechanic-type constellation that provides full-team Superconduct damage bonuses and simplifies rotations—very cost-effective. After C2, it starts boosting the character’s own damage with a noticeable increase. C3 further steadily enhances the main charged attack multipliers, while C6 is the top choice for whales looking to significantly boost the character’s burst damage. It can also transform the original beam-like ray into something more resembling a mechanical Death Ray.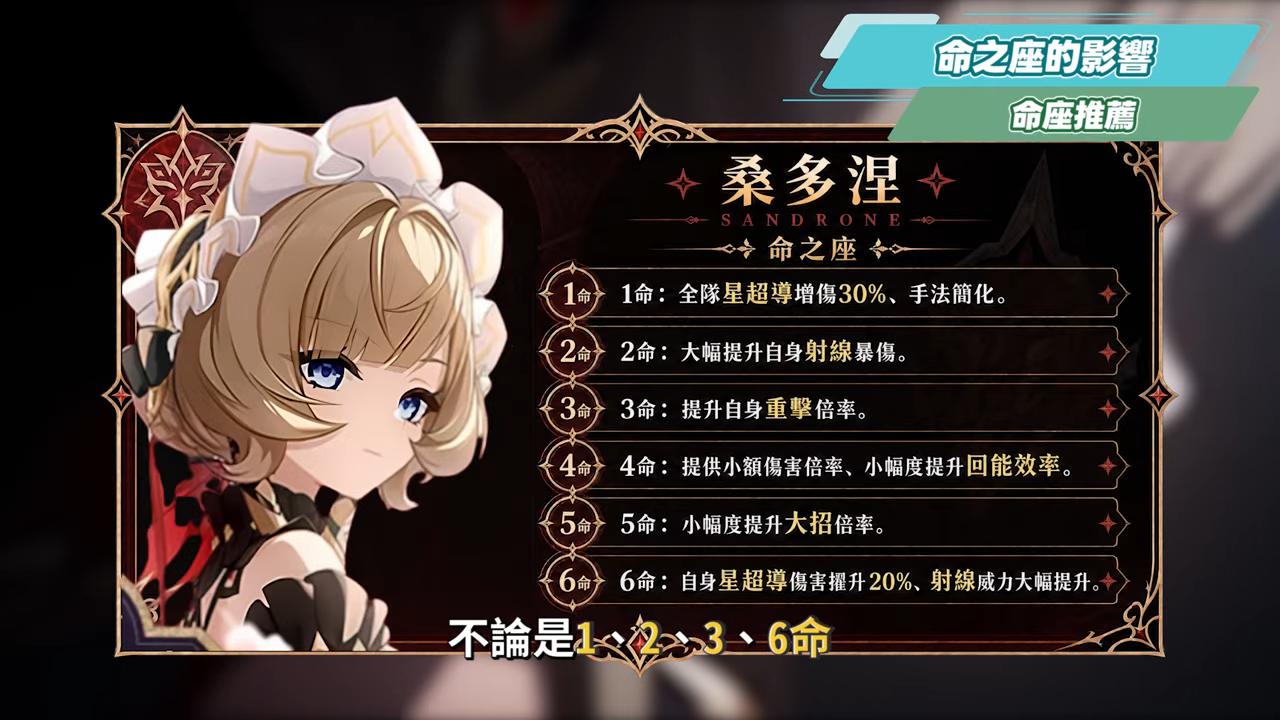
Weapon Recommendations
Five-Star Weapons
For Soutine, the top priority five-star weapon is her signature weapon, but I don’t have confirmed information about its exact name.The Key to Transcendence“”, the weapon attack base value at max level is674secondary attribute ismassive damageThe effect provides attack bonus and superconduct reaction damage boost, covering her entire damage window, and the damage consistently ranks first among all claymores.If you don’t have the signature weapon, the top substitute would be the Pyro Archon’s signature weapon, which is…Burning Light of a Thousand Sunshas an attack base stat of 741, with an effect that also provides attack and critical damage bonuses, and its power can reach about 90% of the signature weapon’s effectiveness.Scroll down to select a higher refinement optionThe Wolf’s Demise。or Navia’s signature weaponJudge」, Dehya’s signature weapon「Reed Sea BeaconEt cetera, these pieces can also reach around 90%, but the Wave Seeker Beacon has higher crit rate, making it easier to overcap, so you’ll need to pay a bit more attention when building stats.Other options to consider also include “Unfinished GreatswordFaruzan’s Signature Weapon「The Wolf’s Kung Fu Song」, Kinich signature weapon「Mountain King Longtooth“, Eula’s signature weapon「When the wind sighs through the pines」, Itto’s signature weapon「Red Horn Stone Pestleetc. The main goal is to find weapons that offer either double crit stats or high attack. Therefore, there’s actually a wide variety of weapons to choose from.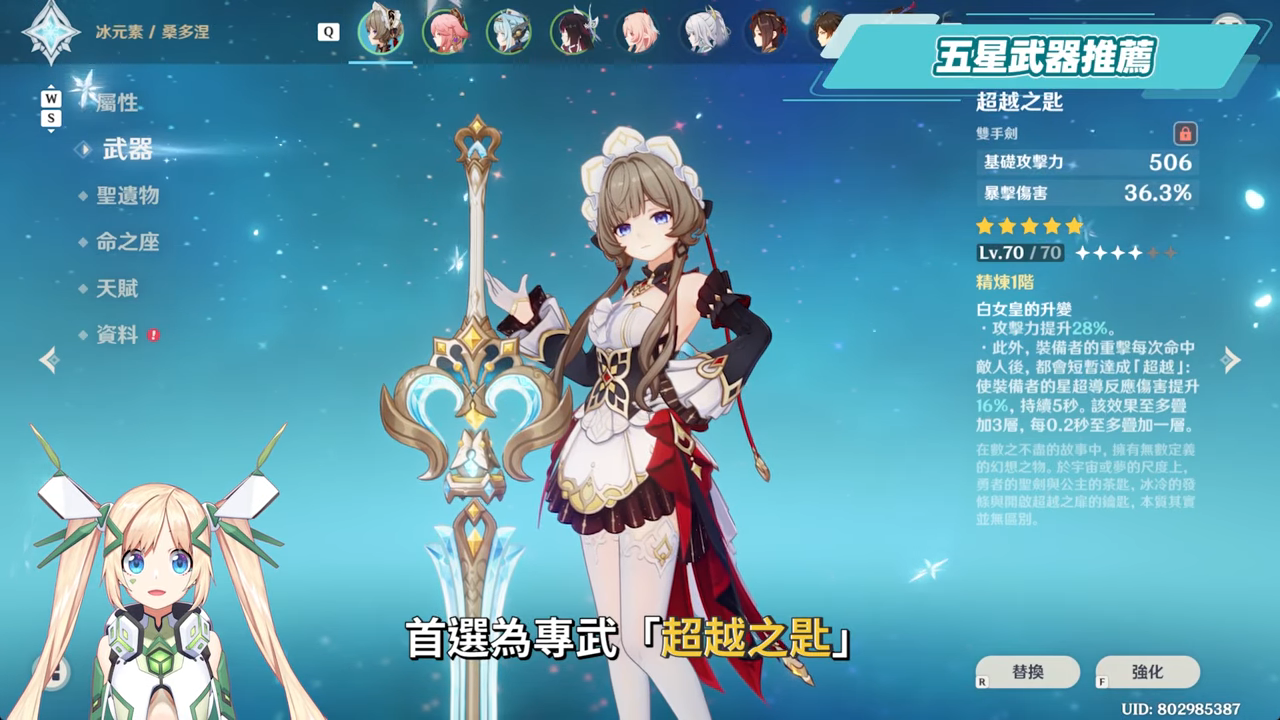
Four-star weapon
For 4-star weapons, you can similarly follow the same approach mentioned earlier of prioritizing crit stats and ATK, such as choosingOrnamental Iron Flower、「Wave Shadow BroadbladeChoosing the “Shadow Ripper Blade” will require the team to have77orDionaThese types of healer characters, or the pure Crit Rate Battle Pass selector claymore, mainly rely on the base attack provided by their weapon.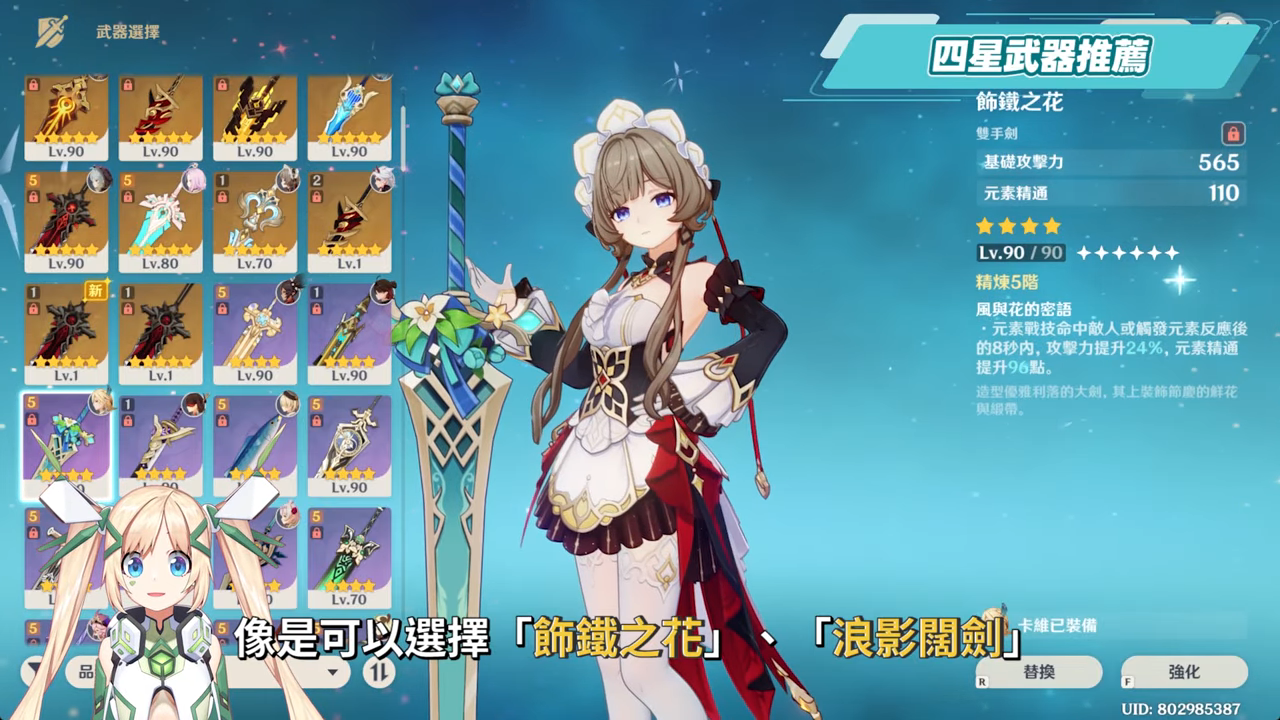
Artifact Recommendations
Regarding Sandrone’s artifact selection, specifically pairing with the newly released Star Superconductor exclusive setDisillusionment settling in the shadowsIt can increase Superconduct reaction damage80%Superconduct damage increase40%and when attacking enemies affected by Superconduct or Electro-Charged reactions, this attack’sCritical rate +16%。If you haven’t grinded out the new set yet, you can use [something] for now.4-piece gold jewelry setorAttack 2+2Transition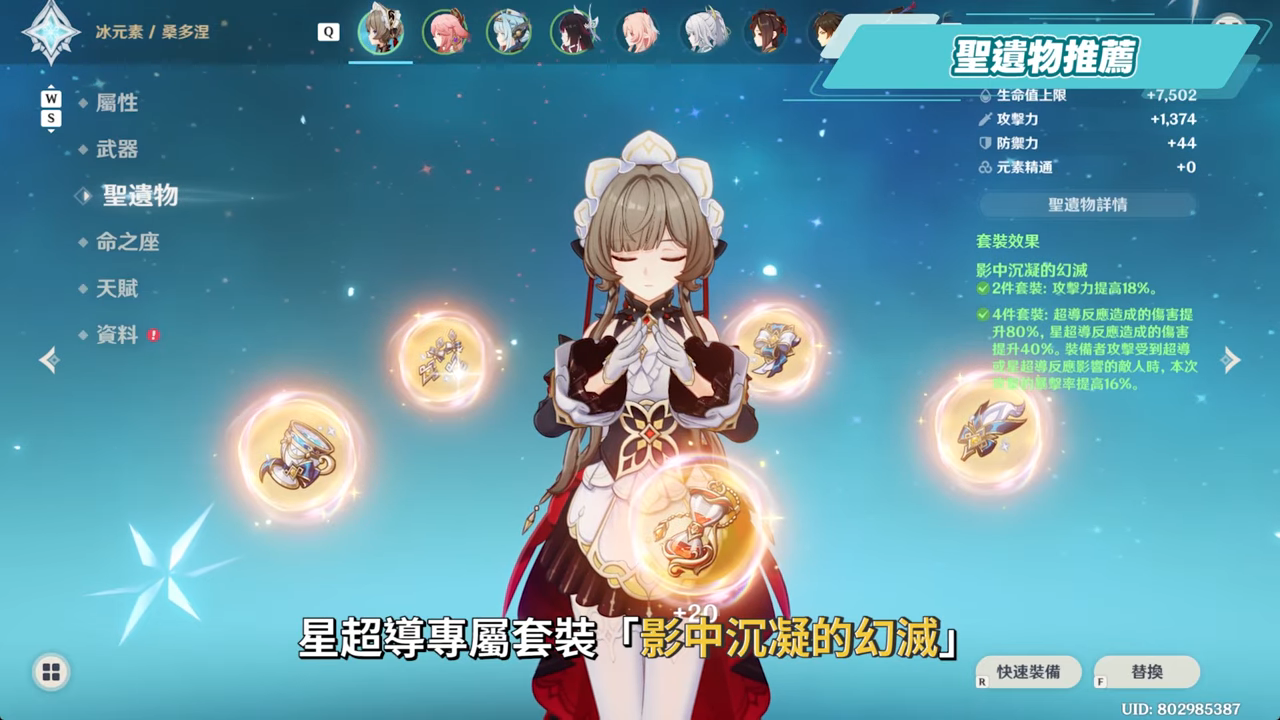
Primary/Secondary Attribute Selection
For artifact main and sub stat selection, since Superconduct doesn’t scale with traditional damage bonuses like Cryo damage, the main stat choices are quite straightforward: Circlet.Double critSand of TimeattackCup of the VoidAttack。Prioritize adverbial sub-entriesDouble crit stats > ATK% > a bit of Elemental MasteryIf you have extra room, you can also aim for around 20% Energy Recharge to ensure smooth Burst rotation. Elemental Mastery is heavily diluted, so there’s no need to stack it intentionally.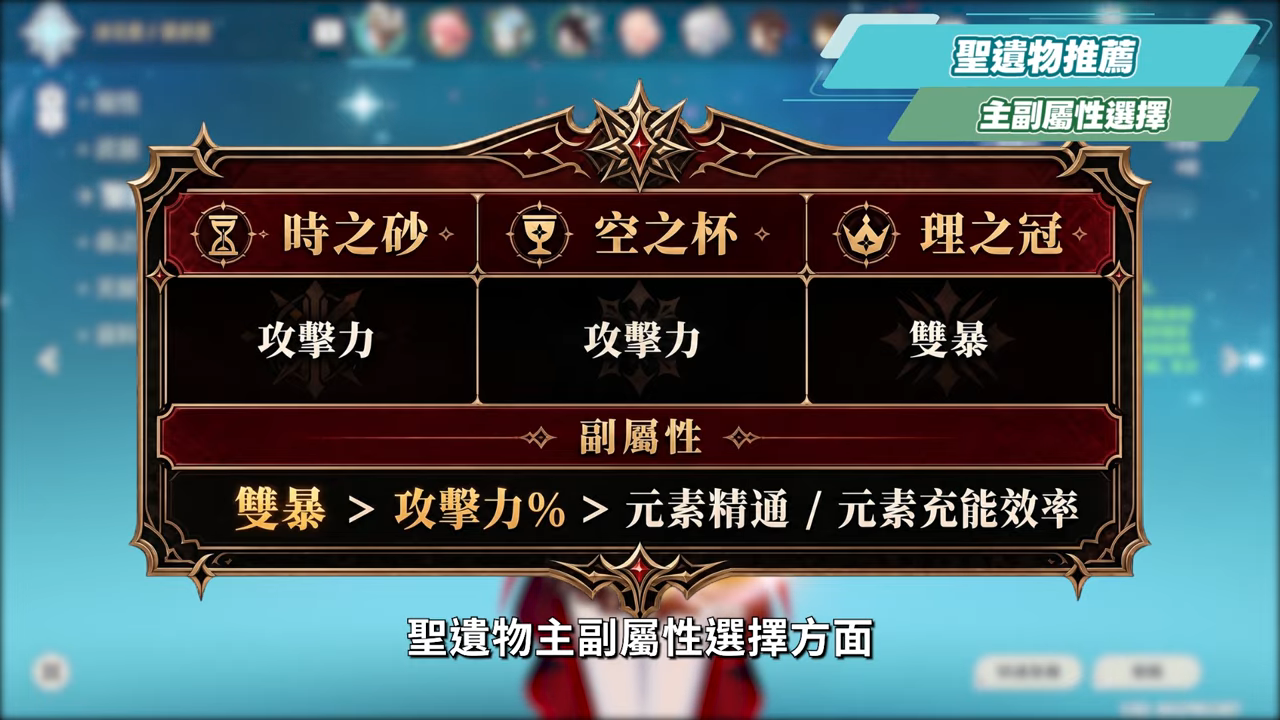
Graduation Panel Reference
Build reference, assuming your Sandrone is wearing the Shattering set, and the team isDouble ice resonancethen, as long as the enemy is affected by Cryo,The 16% crit rate from the Disillusionment set, plus the 15% crit rate from double Cryo resonance,The crit rate panel outside of combat only needs to be stacked up to69%you can achieve 100% crit rate. However, you need to note that if there is in the teamDouble Thunder,So you can’t expect to trigger the Cryo resonance effect, which is why crit rate would be recommended to stack up to84%At least attack powerover 2000With all talent bonuses applied, critical damage can then be at…140%~200%left and rightThe energy recharge requirements vary depending on your team composition, so you should aim for an average value that’s sufficient, something like130%about, but if the team only has one Cryo but has two Electro characters, then it can stack up to140%; only one Lei, even getting double ice won’t help eitherAbout 140%, so what if it’s double ice + double thunder?the configuration ofthat 120%That’s enough.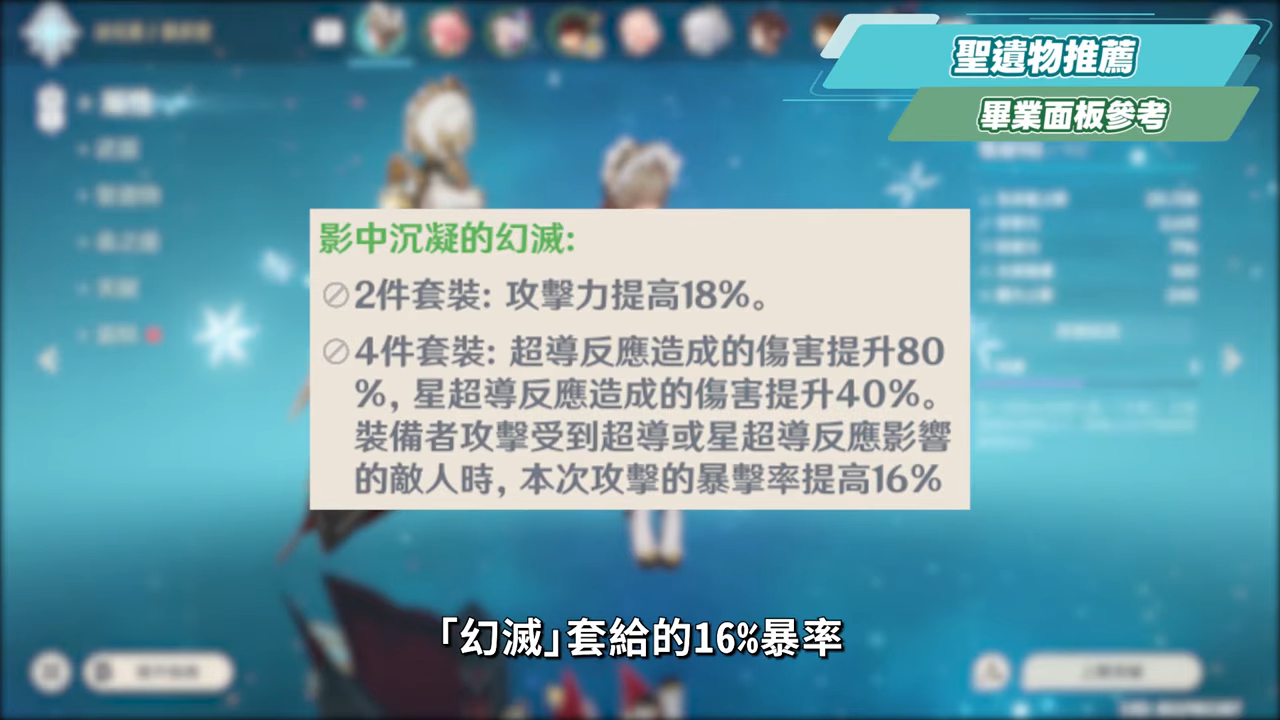
Team composition
Team Building Strategy
The key to Snezhnaya’s team composition lies in three main points. First, to trigger the Superconduct reaction, your team must include a character who can continuously apply Electro, which is essential for maintaining the “Starlight Radiance Zone.”Second, for the remaining positions, try to find those who canPersistent freezing, persistent thunderstormsteammate, if possibleHigh-frequency adhesionIt would be even better, mainly to stack the layers of the Stellar Resonance domain; third, besides applying Cryo and Electro, these teammates should also preferablyBuilt-in backstage damageorsupport boost, the most ideal in terms of assistance would beResistance reduction supportBecause in the whole star superconductor reaction’s multiplier region, resistance reduction yields the highest benefit. Finally, as mentioned earlier, it’s best if the team has a member that canput on a shieldorImprove resistance to interruptiona role that helps Sandrone maintain stable on-field feel during jetting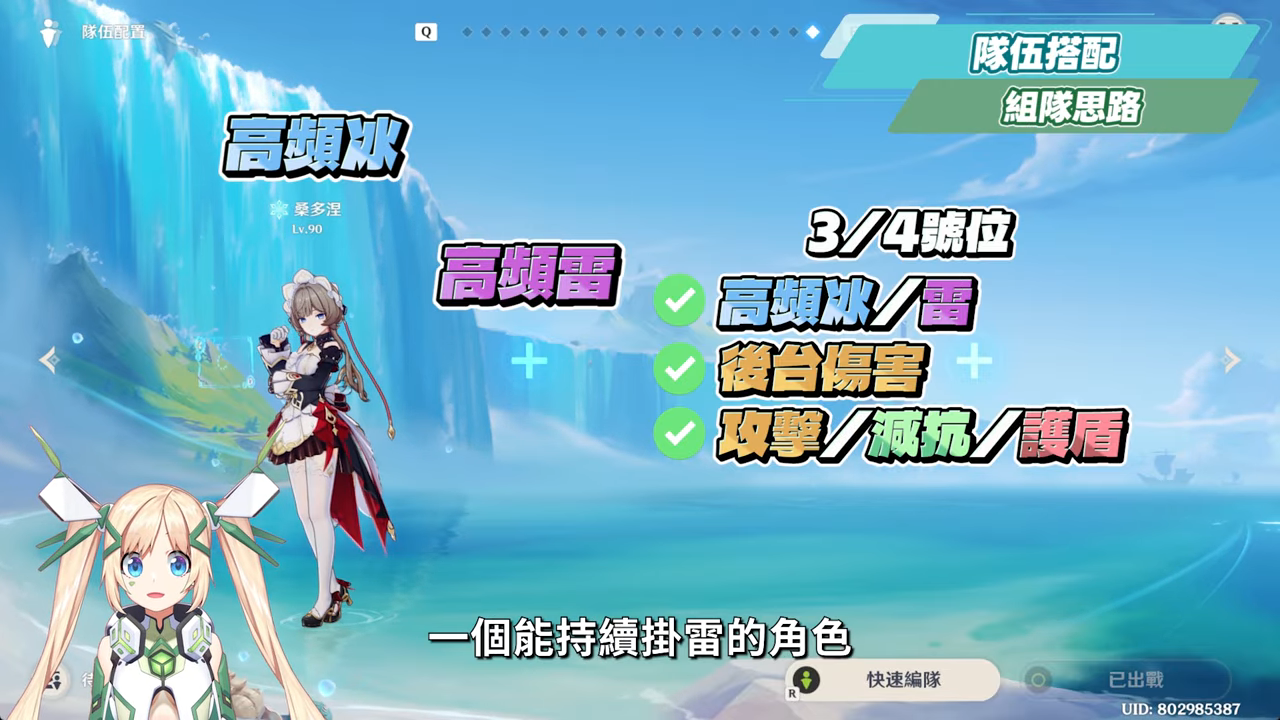
Lightning strike location
For the mine-laying role, the top pick is the one that received a major buff this time.Yae MikoHer advantage is that she stays fully off-field without competing for on-field time. Plus, her Shachihoko can continuously apply Electro, and combined with the Superconduct damage she can currently deal, her damage output has also increased significantly, making her a great match for Sandrone.Next isIneve + ColumbiyaThe “Less Machine” combo features Inevu who not only has a shield but also applies thunder, and paired with the Lass, they can deal massive Moon-type Superconduct back damage. Therefore, in terms of total team damage, this is currently Sandone’s highest damage team. However, it should be noted that this combo and Sandone’s inherent Star Superconduct reaction are actually “each doing their own thing” with no synergy relationship. So the main purpose is to boost damage, not to enhance Sandone.If you don’t have Yae Miko, you could also useBig DipperAfter her buff, Diona can now help with energy regeneration and provide shields to resist interruption. At C6, she can also reduce Cryo resistance and grant the active character 200 Elemental Mastery, making her an excellent cost-effective choice for F2P players.Others can use it tooRaiden Shogun, Fischl, Kuki ShinobuWaiting for character swaps, but they mainly tend to be Electro applicator supports with relatively low personal damage output.
Freezing level
If there’s still an empty slot on the team for a freeze support, after the buff77Also highly recommended. After the buff, Qiqi’s skill cooldown is now reduced to15 seconds、No longer need to rely on Sacrificial Sword, you can choose to boost the team’s energy recharge insteadWest Wind SwordIn addition, the E skill also applies ice debuff and restores HP, while boosting the entire team’s Superconduct damage by 50%, making it a highly sought-after damage-boosting healer for the Superconduct team.Relics can be selectedThousand Rock Setmain entryFull attack。Next isC6 DionaDue to the relatively limited area of the ultimate, the overall effect is slightly inferior to Qiqi’s, but it’s still a decent budget support, and it also conveniently provides a shield.You can also choose the ones with iciclesAcofi。or those with frost and shieldsCitlali。
Other auxiliary positions
So when your team already has a guaranteed debuff applier, you can also pick teammates that can further increase damage output, like ones that provide shields while boosting attack power.Nicoor can provide substantial resistance reduction希諾寧If you need to group enemies, you can also pair it with the Viridescent Venerer set to provide resistance reduction.Venti, SucroseorC2 Kazuhaeven some with a slight attack boostLynetteor those that can provide an attack boostYi AnshanWait a moment.
Team Battle
People’s Star Superconductivity
For the practical portion, let me first present a more budget-friendly Star Superconduct team that you can put together.Soutine + Yae Miko + Qiqi + SucroseAmong them, Yae Miko can also be swapped for the new “Disillusion” set, opening with Yae Miko3EFor applying Electro off-field, pairing Qiqi with Favonius Sword works.EASugarE、Use Q when it’s upAfter that, Sandrone stays on-field using E + charged attacks for about 1-2 rotations, then uses burst whenever it’s available. After about 3 rotations, Yae Miko uses burst whenever it’s ready, then the cycle repeats. If you don’t have the “Yae-Sara” combo, you can also form the “Yae-Bennett” team instead, replacing Yae Miko with…Big DipperAlthough the C6 Beidou buff provides Superconduct elemental mastery and resistance reduction, the main issue is still that she’s very energy hungry, so in this team with only single Electro, the energy recharge requirement would need to be at leastmore than 250%Otherwise, you could swap Sucrose with another Electro character, or use Fischl, who applies Electro more frequently. If you don’t have Qiqi, you can also use Diona instead, forming the “Cat Sand” combo with Sucrose, which essentially achieves similar results, though Diona’s field has more limitations.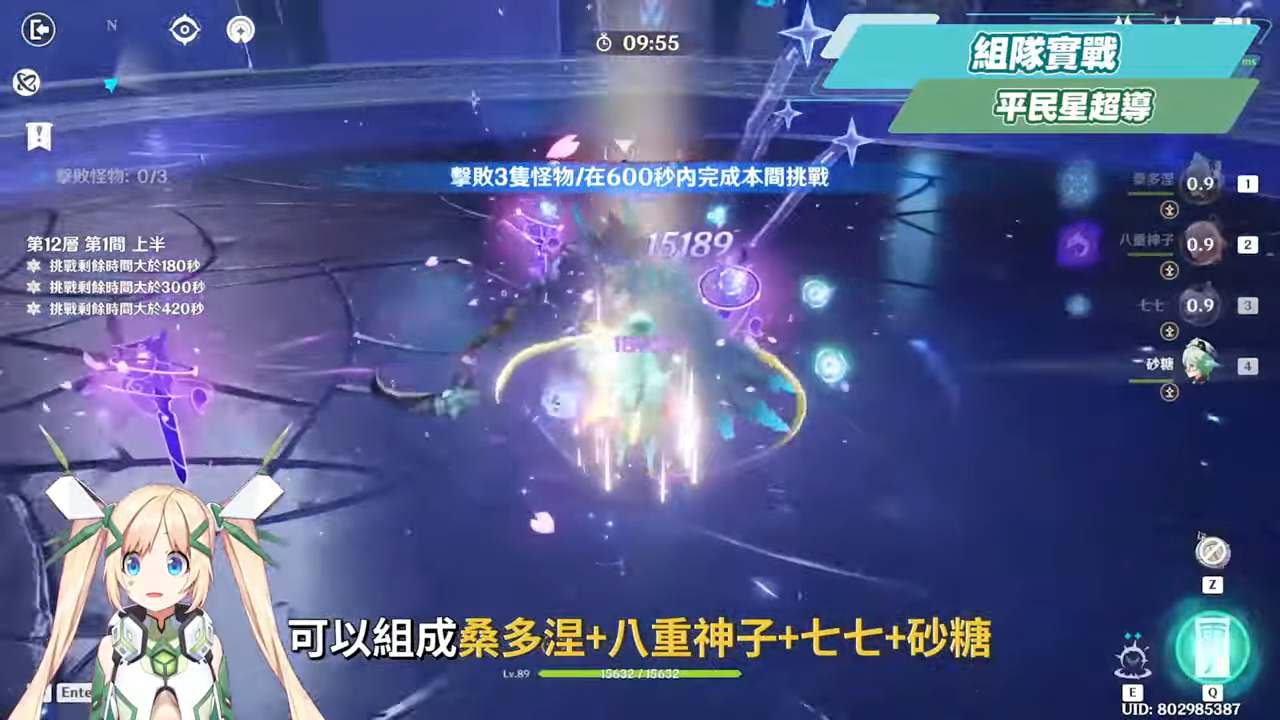
Stars and moon together
Next, for those who prefer the puppet + girl CP pairing, they can form…Soudanier + Yinefu + ColumbiaThe 4th slot can be filled by picking one character from the ones mentioned earlier. Although this team has a pretty high total damage ceiling, it mainly leans toward each character doing their own thing, since Moon reaction and Star reaction essentially have no synergy with each other. This is mainly because of the Inieth and Girl combo, which allows many characters that don’t interfere with reactions to serve as drivers.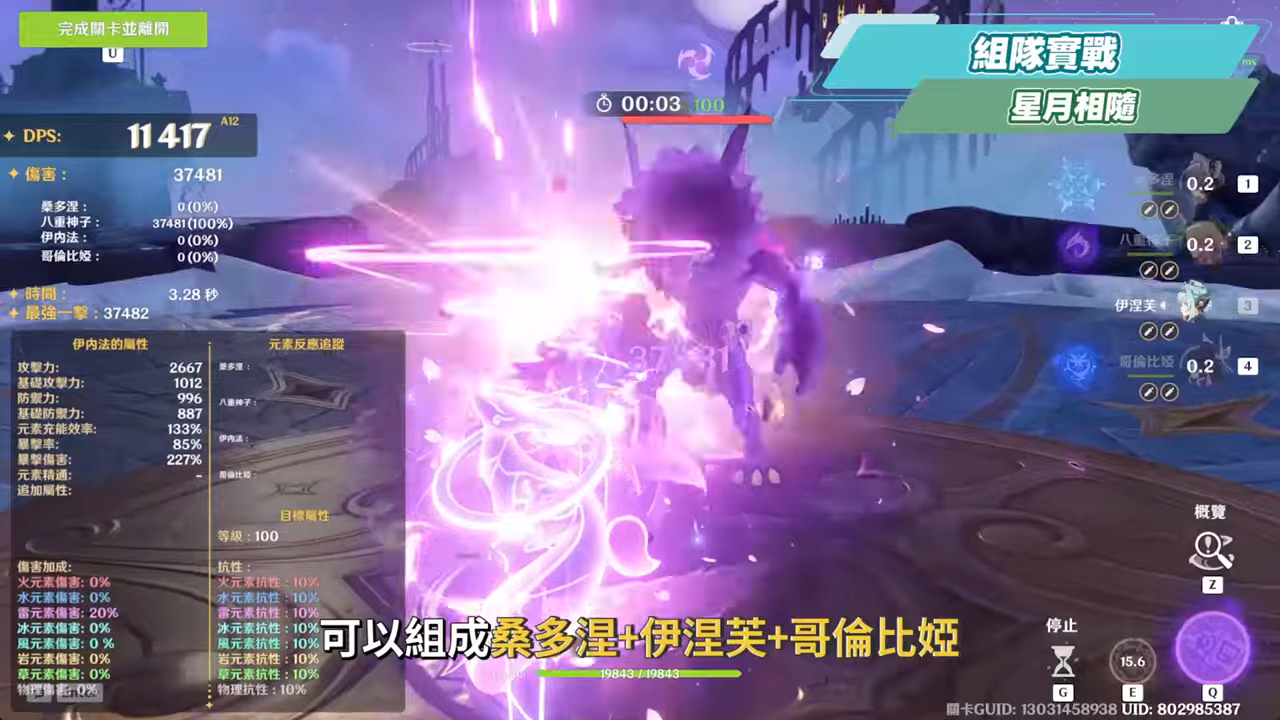
Is Sandoff Nye worth pulling for?
In conclusion, whether to pull for Sandrone.First, the positives. Sandrone’s mechanics are really excellent. She doesn’t rely on her burst to trigger her damage, her charged attacks don’t cost stamina, she has super long-range attacks with anti-air capability, and she can clear enemies while moving. The手感 is incredibly smooth. She’s basically a mechanical version of the Dragon King, and she even has seamless wheelchair traversal. Plus, Stellar Superconduct as a brand-new reaction system means we can expect more Stellar Superconduct content in the Snezhnaya patch later on. Since Sandrone is the core main DPS, she’ll be able to enjoy the meta from start to finish in the future. So whether you like her gameplay and feel, or just care about strength, Luo Luo thinks she’s definitely worth pulling for. And at C0, she can work as a main DPS. Even with a budget team costing only one 5-star, you can already clear Difficulty 5 of the new Spiral Abyss. Now from another angle, the Stellar Superconduct reaction has just gotten started.、The team lineup isn’t complete yet. While some older characters have received Superconduct enhancements, referencing the previous elemental reaction system, there’s a high chance they’ll add another Superconduct-exclusive support in the future. So this isn’t Sardonia’s full potential yet. However, to handle current permanent content and grab all the rewards, the enhanced older characters are more than enough. So if you plan to expand the Superconduct team later, you can prioritize getting at least one.C0 SandroneIf you have extra budget, you can prioritize constellation upgrades.
Constellation and Signature Weapon Pull Order
Finally, the classic question of whether to prioritize the signature weapon or C1. Since there are so many viable weapon options, and C1 not only extends Sandrone’s shooting duration but also simplifies her rotation while providing team-wide Superconduct damage bonus, it has even greater potential as more Superconduct teammates become available in the future. Therefore, Luo Luo personally recommends C1, or even going straight for C2, as it provides a more noticeable improvement to her personal damage.After reaching 2nd constellation, if you don’t plan to go for 6th constellation later, then 3rd constellation is the maximum. Stopping at 4th or 5th constellation is not recommended, so the only remaining option is the complete 6th constellation form.
Above is the complete character review and analysis of Sundowner. We hope everyone can quickly master Sundowner’s builds and pull recommendations. As long as the content gives you one useful perspective, then this article was worth it! IfThanks for watching until the end! I’m virtual YouTuber Lulu Luo, and I’ll see you next time!
Source: KOCPC Chinese