



While everyone else is depicted in “standing illustrations,” Genshin Impact’s first character to appear in a “seated illustration” has arrived!Hey, hey! I’m virtual YouTuber Lu Luo Luo. In this video, I’m going to introduce the 5-star Hydro character from the first half of Genshin Impact’s “Moon IV” update—also known as the Moon Maiden—ColumbiaA Complete Guide to Character Development. Columbia isn’t just the core of Lunar Reaction teams—she can also be paired with other veteran Water, Grass, and Geo characters to directly unleash all three types of Lunar Reaction damage. Even at 0 Ascension, she offers impressive support capabilities and backline damage. so whether or not you have the Nodecale character, you can learn about this young girl’s skill mechanics and unique traits. If you’re considering how to pull for her, Lolo will also cover her ascension tiers and how she pairs with her signature weapon.Extraction and Analysis,Class Roles, Talents and Skills, WeaponsandChoosing Relics、Competitive Teamdemonstrations and other content. If you’d like to see the draw recommendations for all four versions throughout the month, you can also check out the previousA Quick Guide to What’s AheadOh!
[Genshin Impact] Girl 🌙 Colombia 💫 Build Guide ▸ 0 Ascensions = Full Potential! Moon Reaction Core + Essential Support Cards! She Can Wreak Havoc Even While Taking a Stroll! Role/Weapon/Artifacts/Ascensions/Team Composition ▹Lu Luo Luo◃
00:00 Chapters
00:53 Introduction to LD SHOP Third-Party Top-Up Services
02:35 Character Analysis and Positioning
03:27 Moon Crystallization Reaction
04:15 Normal Attack – Moon Dew Shower
04:38 Elemental Combat Skill—Eternal Tides
06:55 Innate Talent—Moon-Induced Madness
07:09 Elemental Burst—Her Nostalgia
07:48 Innate Talent—The Crescent Moon’s Own Rules
08:47 A Moon Omen of Blessings · Borrowing Your Moonlight
08:57 Innate Talent—Moon’s Watch
09:12 Skill Upgrade Priority
09:24 1 Life
11:29 2 Lives
12:31 3 Lives & 5 Lives
12:38 4 Lives
13:12 6 Lives
13:46 Recommended Zodiac Signs
14:12 5-Star Weapons
14:55 4-Star Weapons
15:21 Recommended Relics
16:22 Selecting Primary and Secondary Attributes
17:02 Graduation Panel Reference
17:45 Team-Building Strategies
18:19 Moon Sensing Team
19:22 No Film
19:56 Monthly Electric Heater (Set-and-Forget)
20:42 Moon Blossom Team
21:26 No Neufer
22:22 No role for Nordkale
23:03 Should the girl take a drag?
24:15 Destiny Constellation + Special Weapon Draw Order
24:57 END
Character Analysis and Positioning
Columbia forFive StarsThe Element of WaterRitual Object Characters…and is also at the heart of the Lunar Reaction, as a Seven Gods-levelMoon Goddess…If just one person joins the team, the entire team can trigger all three Moon Reactions at once, and it also provides threeMonthly Response Exclusive Buff, and it can also improve all7% of Monday’s base damage, as well as the effects provided by the ultimate abilityMoon Reaction: +40% Damage(Level 10), it still has general-purpose capabilitiesPortable Water DispenserMechanisms andBackline Damage-Boosting Sub-C…and her damage output is also quite impressive. If you have any Norcala characters, I highly recommend pulling for Colombia. Even if you don’t have any Norcala characters, older Water, Lightning, or Geo characters can all be paired with Colombia to tackle certain stages that require the Lunar reaction. As such, she can be considered a must-have character of the new generation. Since she can trigger all three Lunar Reactions on her own, we can experience the brand-new “Lunar Crystal” reaction right away—even before the next generation of Lunar Crystal main DPS characters are released. Her walking animation also gives off a very light and airy feel—it’s like moonwalking under lunar gravity—and she runs faster than most characters. Plus, once you pull her, the Empty Moon Blessing icon will change to her likeness—so cute!
Moon Crystallization Reaction
Although we briefly touched on some of the mechanics of “Lunar Crystals” during the preview livestream, some of you may not have watched it or may not be familiar with them, so Lolo will go over the mechanics of “Lunar Crystals” again here.As long as the girl is in the party, attacks dealt by characters in the partyWater+RockWater Crystals will all upgrade to Moon Crystals, and when a Moon Crystal reaction is triggered for the first time, three Moon Shrouds will appear around the enemy. For every three subsequent Moon Crystal reactions triggered, each Moon Shroud will fire a missile at the nearest enemy—somewhat similar to the Divine Child’s “Killing Cherry Blossom.”In addition, unlike the reaction of old crystals, the reaction of moon crystals isCannot generate a Crystal Shield, but what they have in common is that they can both be regarded asRock Formations. Therefore, even a Chiori with 0 Lives can summon two Sode directly when paired with Tsukikago.It can also be combined with other Rock-type creatures to deal Resonance damage, and once the second half of Zibai is released, there should be even more new playstyles to explore.Since the main Moon Crystal “Big C” and its dedicated support unit are both in the second half of the gacha pool, I’ll just briefly explain the mechanics of Moon Crystals for now.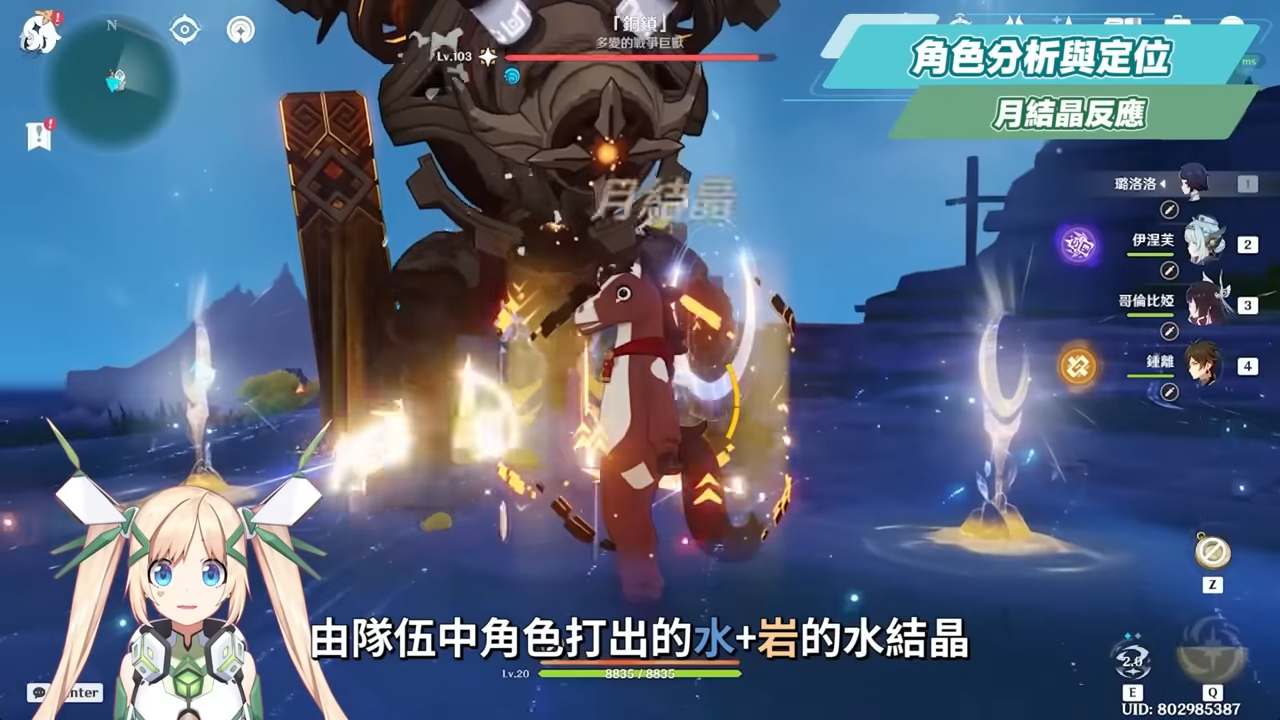
Talent Skill Explanation
Normal Attack – Moon Dew Shower
The girl’s basic attack consists of three hits, all of which deal Water-elemental area-of-effect damage, and each hit is accompanied by a singing-like animation.Additionally, when the girl is in a Moonblossom team and uses a Heavy Attack while holding a Grass Dew, she consumes one Grass Dew and deals 3 instances of Grass Element area-of-effect damage to enemies in front of her. This effectively allows her to function as a Moonblossom main DPS, even in teams without Nefrit. However, she absolutely must be paired with Rauma.
Elemental Combat Skill—Eternal Tides
The girl’s core abilities are also primarily activated via her E skill. After casting her Elemental Skill, she summons a lunar ring behind her, known as “Gravitational Ripples“, with a duration of 25 seconds and a cooldown of 17 seconds, it can generally be looped seamlessly. Similar to the rings from Vulcan and Thor’s E abilities, it follows the character on the field and won’t disappear even if they’re switched to the backline.This “Gravitational Ripple” ability deals Hydro damage to surrounding enemies once every 2 seconds, and each hit applies a separate Hydro status effect. It then generates 1–2 Hydro particles approximately every 4 seconds. Since the character spends almost all her time in the backline regenerating energy, this aspect is very similar to Funina.
If a team reaches “Full Radiance,” the damage dealt by Water Ring will causeA wider rangeWater-element area-of-effect damage—you can also see the visual comparison here. The difference in Full Radiance is the only distinction when the character is at 0 Ascendancy levels, so even without Full Radiance, it doesn’t significantly affect her performance. In other words, she isn’t heavily reliant on her Nodecale teammates,However, the girl can also increase the Lunar Omen level of the party, so you can pair her with some 4-star Nord-Cale characters to easily max out the Lunar Omen.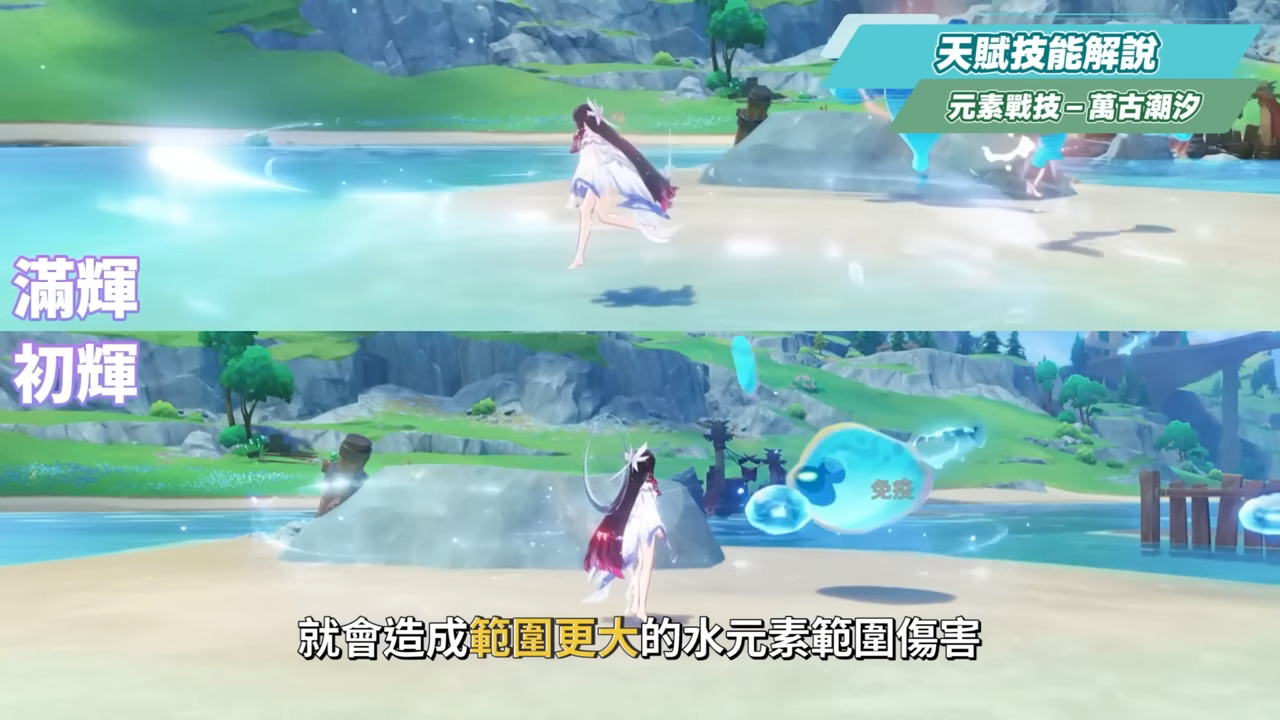
In addition, every Monday Reaction triggered by the party—or any damage dealt by a Monday Reaction—will accumulate “Gravity Points” for this ring, which functions similarly to a charge system. The maximum Gravity Points is60, accumulating 20 gravity points approximately every 2 seconds; when the ring’s energy is fully charged, that is,6 secondsUpon arrival, it deals damage to enemies based on the Monday Reaction type that has accumulated the most Gravity value within a certain time frame. It’s somewhat similar to Chaska’s Moon Reaction: whatever elemental team composition you put together for the girl, that’s the type of Monday Reaction damage you’ll deal.The accumulation of this Gravity value is primarily related to the number and frequency of Lunar Reactions triggered, and is unrelated to the amount of damage dealt. For example, if you include a Lightning Element character with a high trigger frequency but low damage in your party, alongside a Grass Element character with a lower trigger frequency but high damage, you’ll see that the damage dealt by the final Gravity Ring will be Moon Electrocution. But if the team includes Water, Dendro, and Geo elements simultaneously, whose damage will be applied in the final calculation?All we can do is look at the three instances where the gravity ring absorbed someone and see who was absorbed the most times.The damage dealt every 2 seconds is fairly standard, so the damage from “Maiden’s Battle Technique” primarily comes from this damage dealt every 6 seconds.At the 0+1 level, it easily deals over 200,000 damage; even at 0+0, it deals around 150,000.The Lunar Ring will also display different colors based on the Lunar Reactions it collects—such as the pale purple of “Lunar Electrification,” the pale green of “Lunar Blossom,” and the pale orange of “Lunar Crystallization”—so you can use the ring’s color to determine the type of Lunar Reaction damage the Gravity Ring will deal next.Meanwhile, the gravitational ring damage dealt by Lunar Shock and Lunar Crystal is bothSingle-Target Area Damage,The damage dealt by the Lunar Bloom Gravity Ring is5 instances of single-target damage, although if enemies are close enough, it can also trigger a small-scale AOE.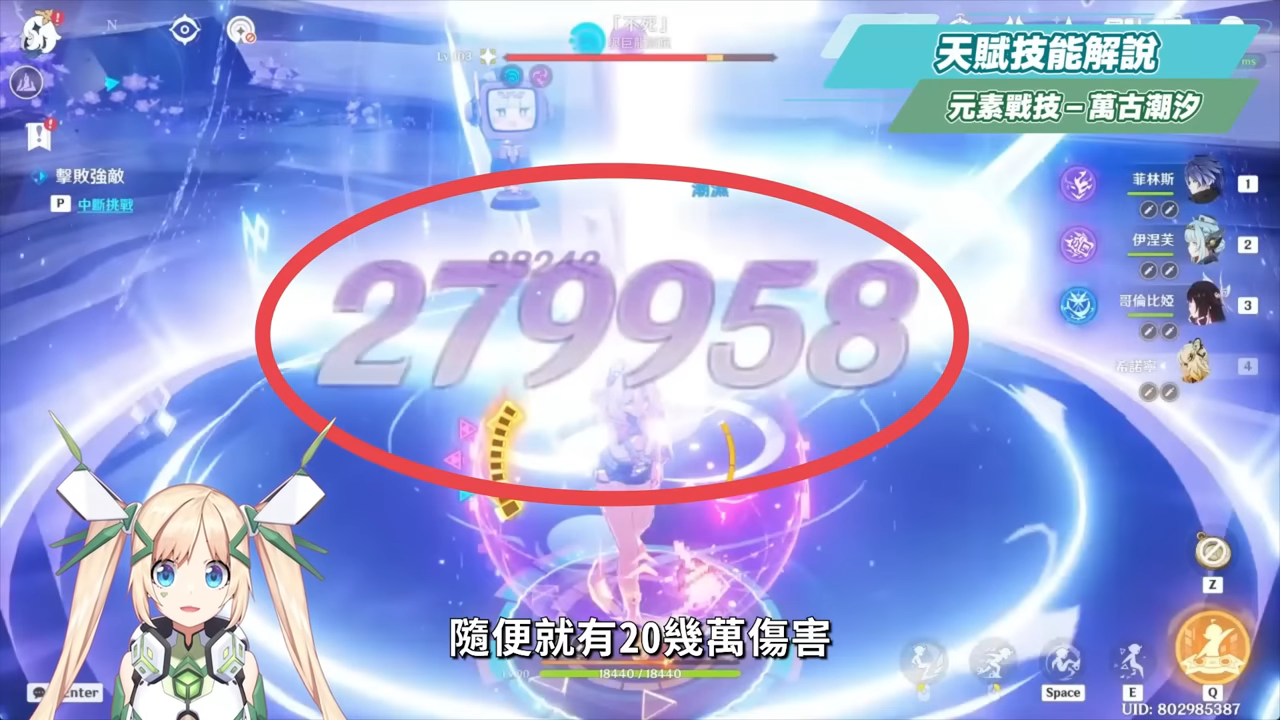
Innate Talent—Moon-Induced Madness
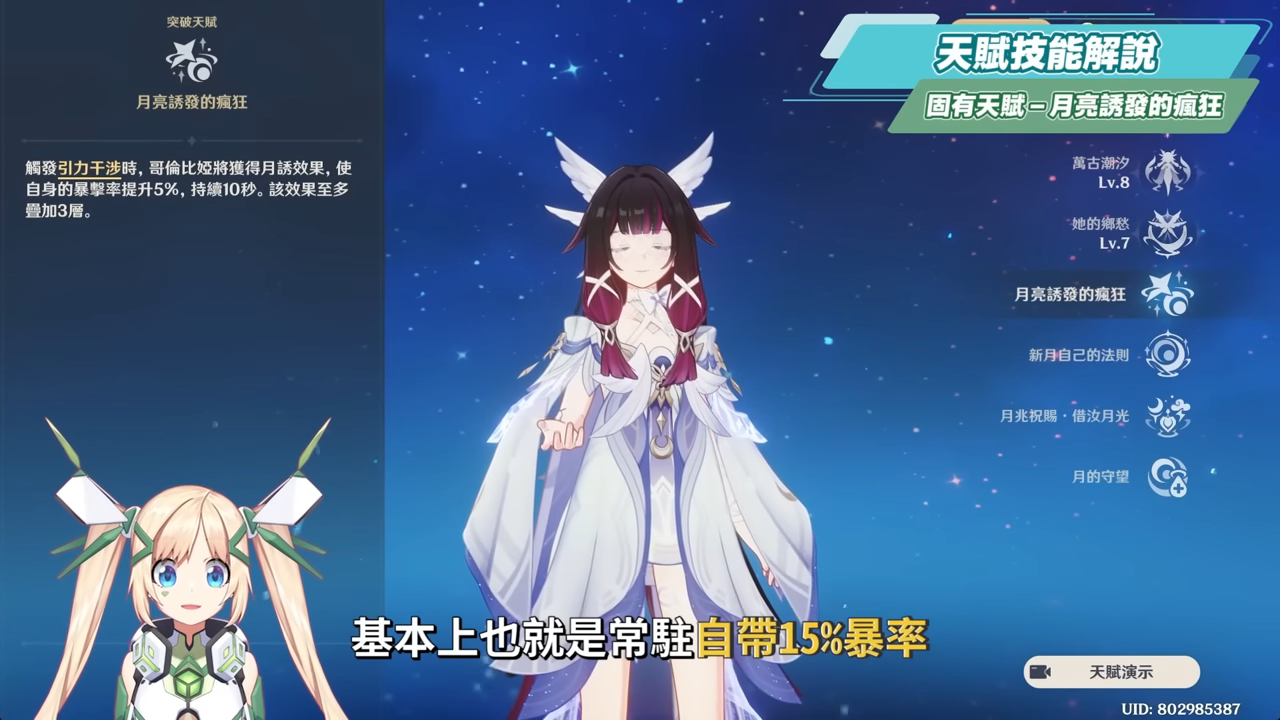
Combined with the innate talent “Moon-Induced Madness“, as long as the Gravity value reaches 60 and Lunar Reaction damage is dealt, the girl’s critical hit rate will increase by 5% for 10 seconds, stacking up to 3 times. Combined with the mechanic that deals Ring damage every 6 seconds, this is essentially a permanent effect.Comes with a 15% drop rate。
Elemental Burst—Her Nostalgia
When the Elemental Burst is activated, the girl’s eyes open, and a continuous effect begins…20 seconds“Moon’s Realm,” which deals area-of-effect Hydro damage. The range of this ultimate is roughly the same as that of Naxida’s ultimate, covering most of the Abyss. At this time, all characters within Moon’s Realm will deal increased Moon reaction damage,It can be upgraded once the ultimate reaches Level 10.40%Monthly Damage Boost. This damage boost falls under the “Damage Boost Reaction Zone,” which differs from traditional damage boost zones and is unrelated to the Mastery bonus.AddCalculation,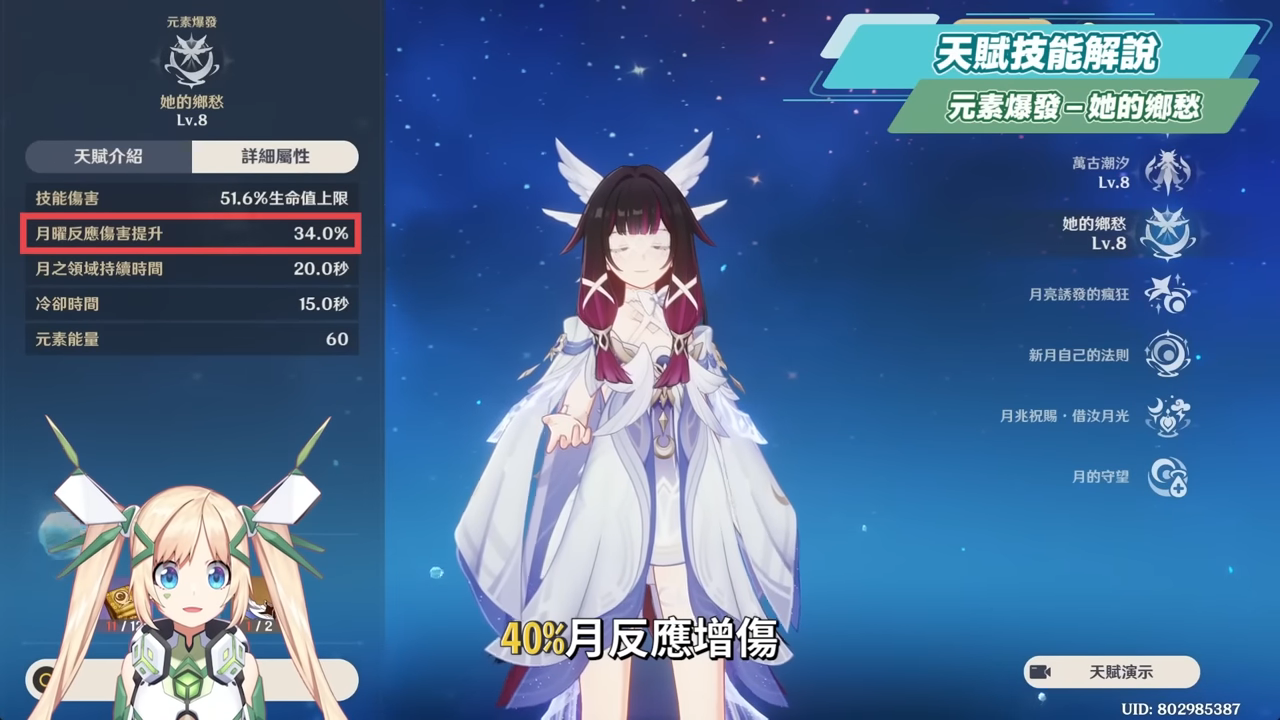
Although this 40% damage increase will be somewhat diluted when combined with other damage-boosting effects, the actual results will vary depending on the amount of Mastery stacked by the team,But mainly, this damage boost isThe entire teamYes, so it can also be added to the girl’s own damage,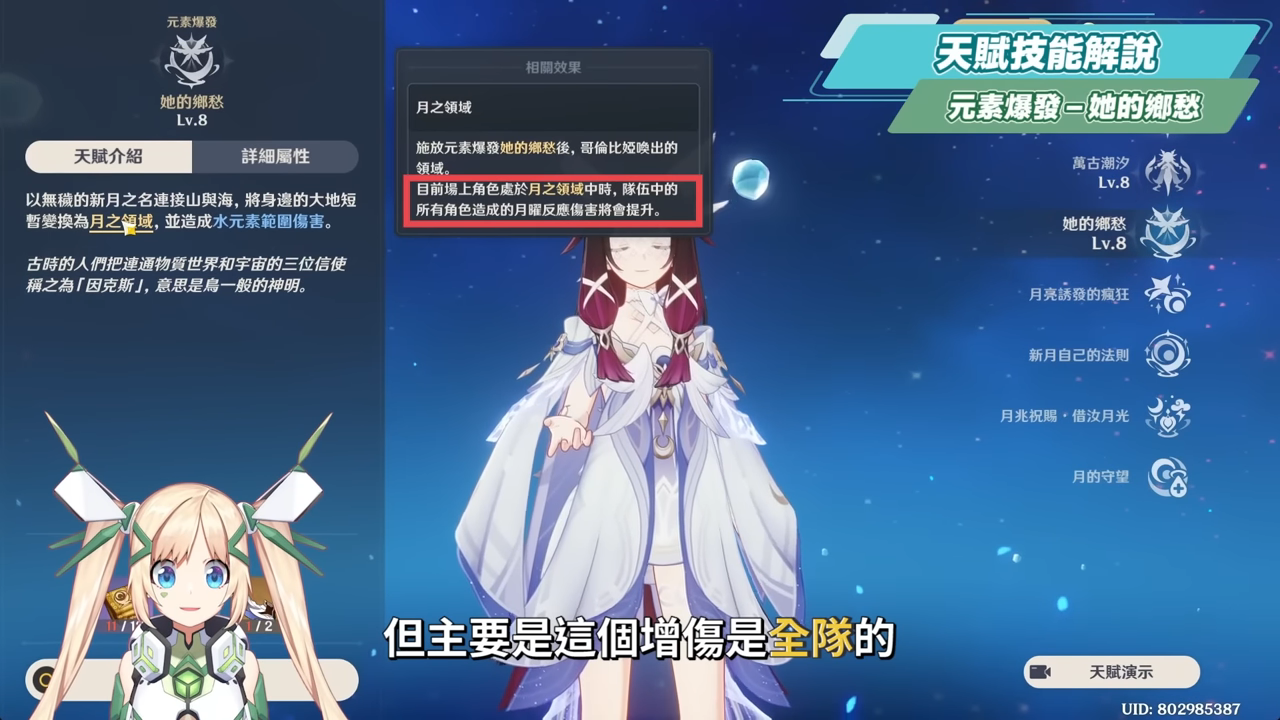
It can also stack with other teammates’ effects, such as Inneve’s1 LifeOr perhaps it isSpecial Weapon Effects。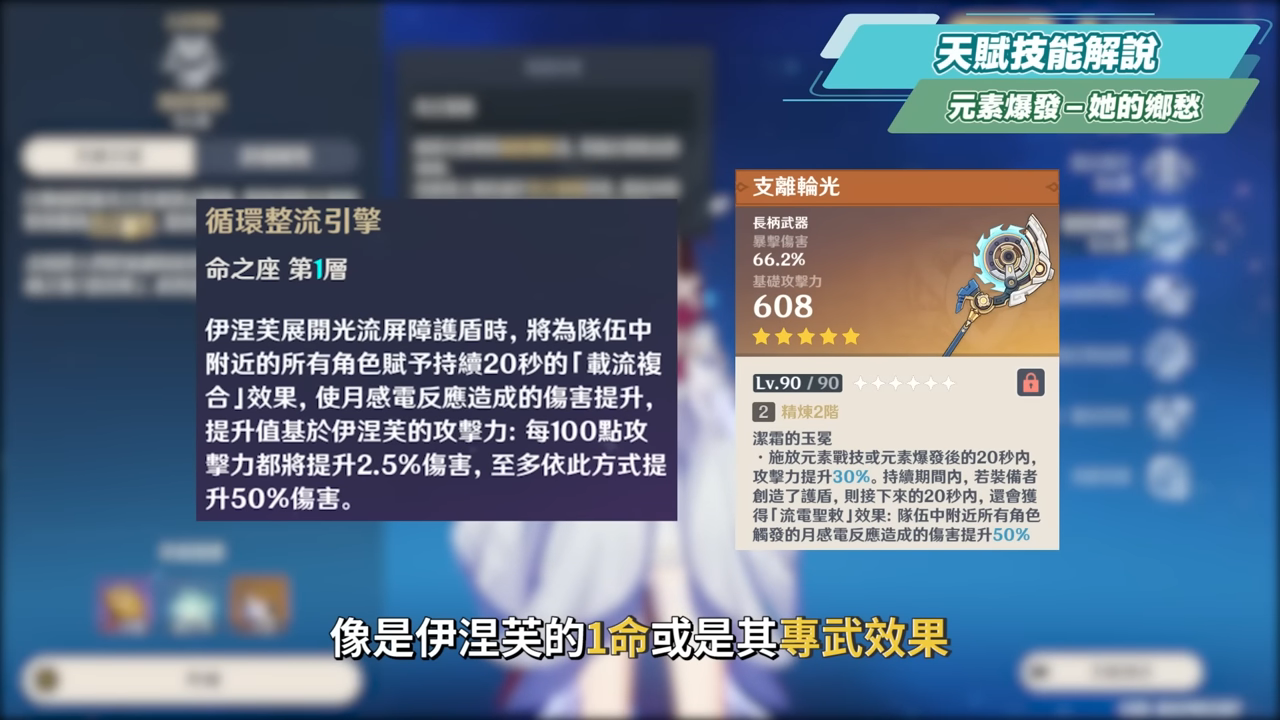
Innate Talent—Crescent’s Own Rules
Combined with the innate talent “The New Moon’s Own Rules“, while under the effect of the Maiden’s Ultimate, you can also gain different buffs based on the specific lunar phase.First, regarding the “Monthly Electrostatic Reaction” mechanic: when a thundercloud strikes, there is a 33% chance that it will trigger an additional lightning strike. In short, this means thatIncreases damage from thunderstorm clouds by 33%。In the case of the Lunar Crystal reaction, there is a 33% chance of landing an additional attack when Lunar Crystal triggers the Lunar Shroud Concerto attack; therefore, like Lunar Shock, it can be consideredIncreases Moon Cage’s damage by 33%。The “Moon Blossom” reaction is a bit special: when triggered, it grants 1 “Mountain Moon and Dew“, which is a kind of grass dewAlternative Resources,It will appear below the grass-droplet icon, displaying aDiamondthe icon,Accumulates up to a maximum every 18 seconds3…Later, when the Grass Dew runs out, it will switch to consuming Mountain Moon Grass Dew, which will help alleviate the shortage of Grass Dew that occurs when Nefer uses Heavy Attacks repeatedly.Also, since there are plenty of Grass Dew resources, Lau’ma no longer has to conserve Grass Dew by tapping “E”—as she did before the girl appeared—but can now simplyUlt + Long EPress the button to get all 36 layers of “Prayer Songs” at once. This way, while Nefer uses up 18 layers, there will still be enough “Prayer Songs” left for the girl, thus achieving freedom from Kusatsuyu.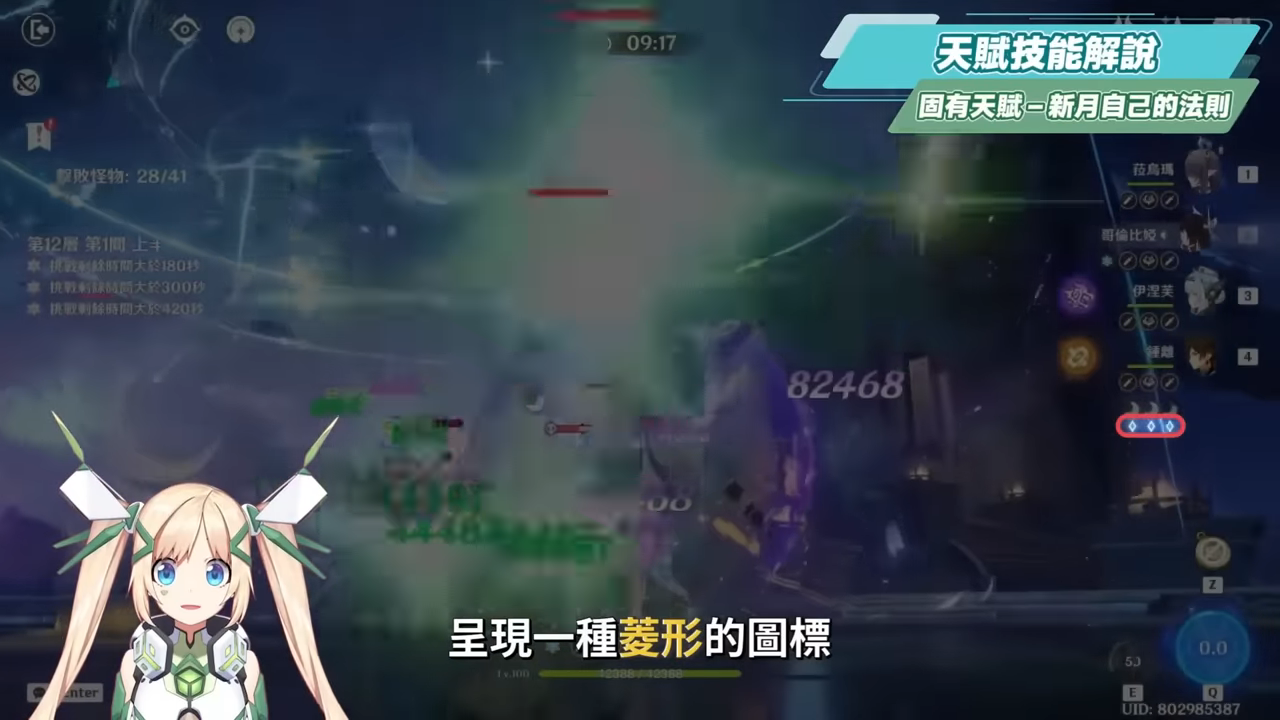
A Blessing from the Moon · Borrowing Your Moonlight
Combined with the effect of Columbia’s “Lunar Omen” blessing, the maiden can increase the entire party’s HP by up to a certain amount based on her own maximum HP.7% of the Moon’s base damage, as long as the health points reach35000That’s all you need to eat.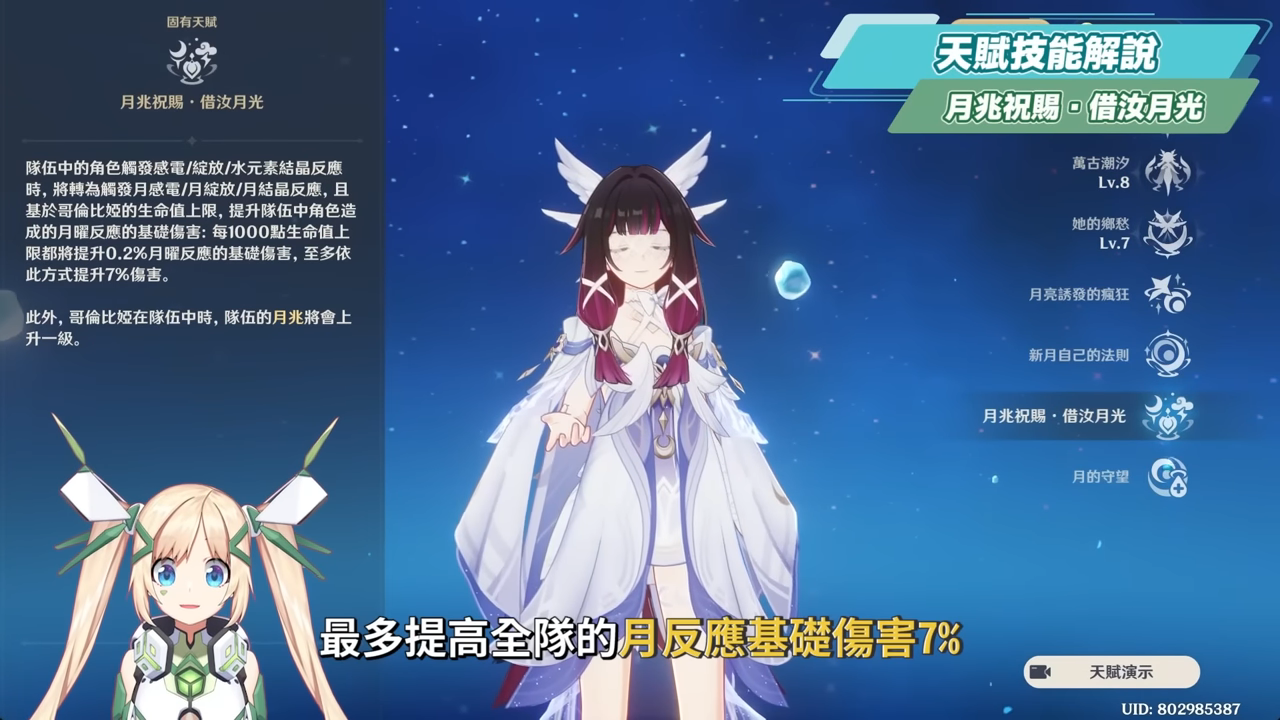
Innate Talent—Moon’s Watch
The effect of the “Maiden’s Exploration” talent is that when a character falls in the Nordkale region, the maiden will immediately revive that character and restore varying amounts of health based on your affinity level with them. This effect can be triggered once every 100 seconds.Furthermore, just like Rauma, the young girl has a natural ability to bond easily with the small animals of the Nordkale region.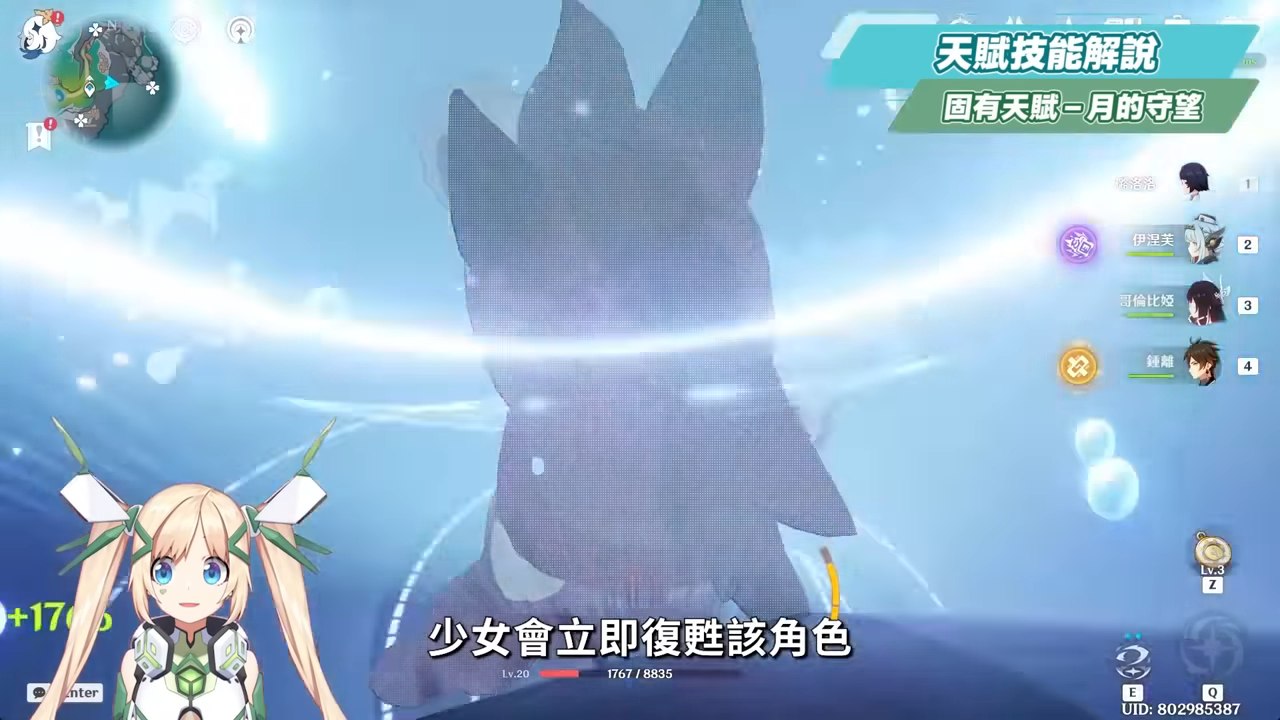
Skill Upgrade Priority
In terms of skill priority, the E ability is the core skill and has simple casting requirements, so it should be leveled up first. Next, prioritize the Q ultimate. Finally, if resources are abundant, you can fully max out both E and Q. If you don’t plan to play a tanky, sustained-damage style, you don’t need to level up your basic attacks.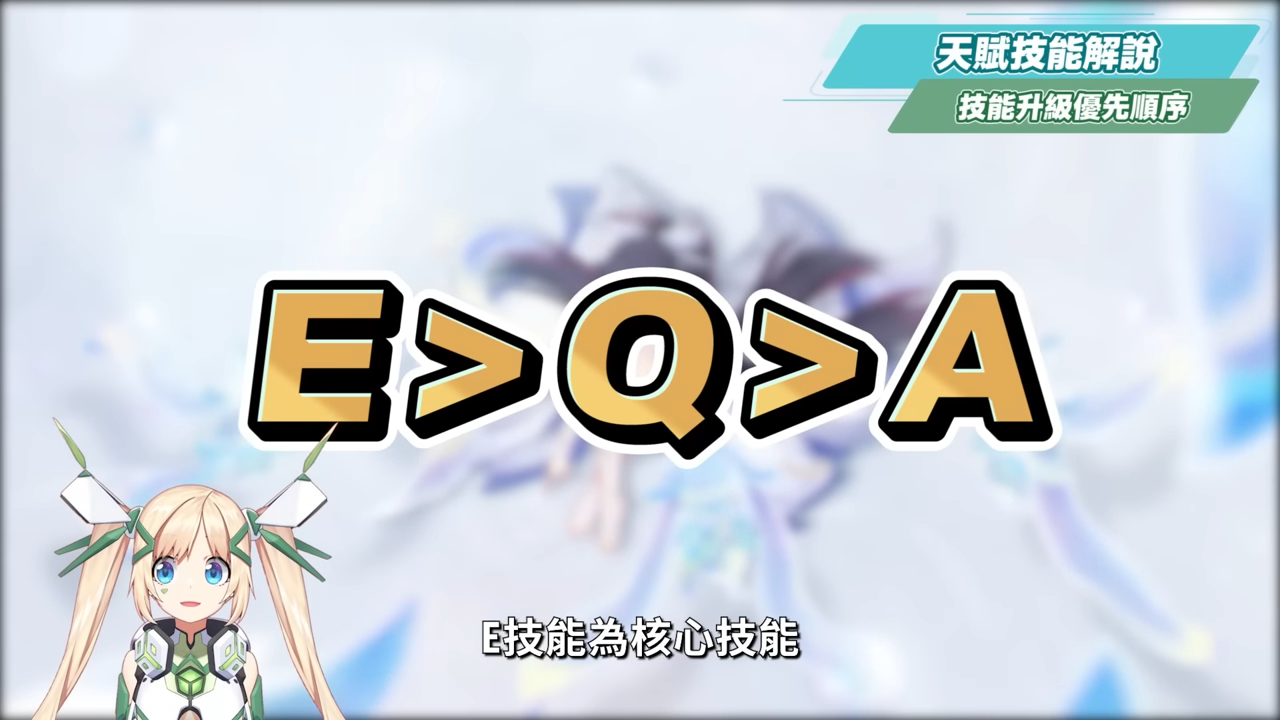
The Influence of the House of Destiny
1 Life
After unlocking 1 Life, when the girl casts her Battle Skill, she immediately triggers a single instance of Gravity Ring damage—which would normally take 6 seconds to trigger—with a 15-second cooldown.Also, because this initial Gravity Ring damage does not require a Gravity charge to be triggered, it will prioritize triggering the Moon Reaction corresponding to the attribute with the most team members—Water, Grass, or Rock—based on the number of teammates in the party. The priority mechanism will beElectrified by the Moon>Blooming in the Moonlight>Moon Crystal. For example, when the girl is alone, the Gravity Ring will by default prioritize dealing Lunar Electrocution damage; when she has one Lightning, one Grass, and one Rock type, she will also prioritize Lunar Electrocution,When “Grass 1” and “Rock 1” are combined, the young girl casts “Moon Blossom,”In the end, the team consists of two Geo characters and one Dendro character. The girl uses her E ability directly, and the Gravity Ring deals Moon Crystal damage.In addition, within the team, achievingMan HuiDepending on the effect, the boost provided by the Gravity Ring to the Moon’s reaction will also vary.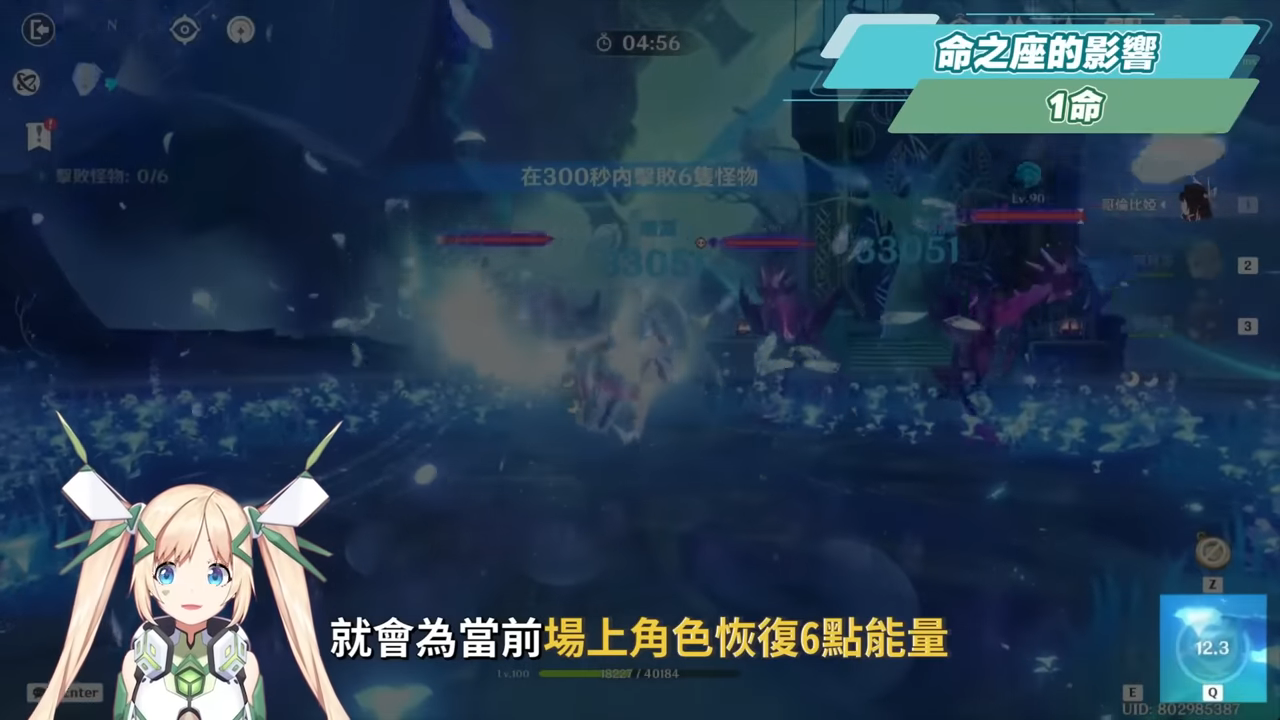
In the Lunar Shock team, each time Gravity Ring damage is triggered, it will deal damage to the currentThe character on the field regains 6 energy points, so if you want the young girl to be able to eat this as well—which will speed up her ultimate cooldown—you can also have the young girlQ first, then E…this way, you can immediately gain 6 Energy, and then save the Energy-regeneration effect for other characters on the field. And if your Felins is at 0-star, pairing her with the 1-star effect of the Maiden will also improve your damage output on the field,So the “1 Life” effect of the young girl is somewhat similar to that of Filins.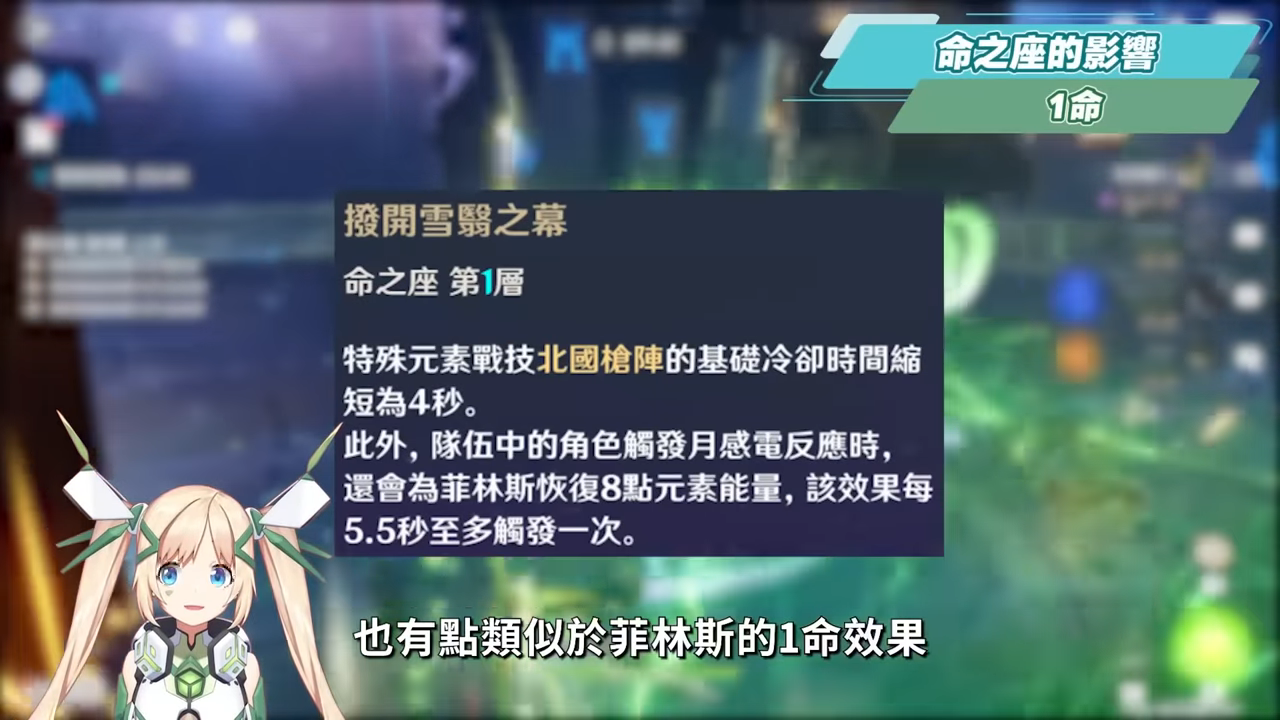
In the Moon Blossom team, it will increaseCurrent Character’s Interruption Resistance…It lasts for 8 seconds, but when used with standard characters, this buff tends to focus more on increasing resilience; you can still be knocked back by a heavy hit, so you’ll still need to activate a shield. As such, it feels more like a mechanic designed for Nefer. However, when Nefer has Grass Dew active, she’s basically impossible to interrupt, so this buff doesn’t feel particularly impactful.Meanwhile, the Moon Crystal team will summon a blueRain Sea Shield…This effectively makes up for the Crystal Shield mechanic that was missing after the monthly Crystal Reaction transformation. The shield amount is based on 12% of the girl’s maximum HP and provides a 250% absorption effect against Water elements, lasting 8 seconds.Finally, it can still deal damage to all party members even when you have only 1 health point left.Monday’s reaction damage is increased by 1.5%。To gauge the increase in damage dealt by the Maiden, you can roughly compare the difference between 0-star and 1-star versions of the Lunar Electrocution team. Compared to characters like Funina or Naxida, who also provide both support and damage, the Water Goddess and Grass Goddess prioritize support over damage, whereas the Maiden’s damage output clearly outweighs her support capabilities.Overall, while the new mechanics and effects at Level 1 are numerous, they are primarily focused on optimizing the damage output of the three Moon Reaction teams. In terms of damage increases, the specialized weapons provide a greater boost. Unless you’re using a Level 0 Filins and experiencing issues with energy circulation, the Level 1 upgrade for the Maiden can effectively alleviate this problem.
2 Lives
Like the other seven God-tier characters, this girl’s two constellations also feature a mechanism that triggers a qualitative transformation and provides a satisfying mid-tier pay-to-win experience. These are also her core constellations.First, the accumulation speed of the Gravity Ring has increased by 34%. This means that while it originally took 6 seconds to fully accumulate the Gravity value, after reaching 2-star, this time will be reduced to4.5 secondsOnce activated, it increases the frequency of the young girl’s core damage, and when the Gravity Ring triggers damage, it alsoIncreases maximum health by 40%, lasting 8 seconds. It can also significantly increase the girl’s damage.Next is onMan HuiWhile in this state, the three types of Moon Reactions receive additional numerical bonuses. These bonuses are all calculated based on a portion of the girl’s HP.In the Lunar Electrification team, characters on the field gain a boost every 4.5 secondsAttack Power, approximately 450 points; the “Monthly Bloom” team increases the stats of characters on the field every 4.5 secondsProficiency, approximately 150 points; the Lunar Crystal team increases the stats of characters on the field every 4.5 secondsDefense…We’ll have to wait for the second half of this season to see exactly how much it improves.With just two lives left, he gave the whole team another oneMonday’s counterattack damage is increased by 7%. Therefore, Level 2 not only significantly increases the damage contribution of the Girl within the party but also boosts the damage of the main DPS in the Moon Reaction formation—typically by around 20%. Additionally, depending on the type of Moon Reaction, the Girl’s own damage is increased by approximately 30% to 40%, making this a well-rounded and comprehensive buff.
3 Lives & 5 Lives
Constellation 3 and Constellation 5 each increase the level cap for Combat Skills and Ultimate Skills by +3. In addition, each Constellation also grants the entire partyMonday’s reaction damage is increased by 1.5%。
4 Lives
The effect of Level 4 primarily further enhances the girl’s energy regeneration; every time the Gravity Ring attacks, it restores energy to the girl.4 Sources of Energy, After one cycle, this effectively reduces the young girl’s energy requirements to just40 pointsSo, at this point, even if the young girl is part of the Shanshui lineup, she can wear it without worry.Sand of Life, similar to Funina’s 4-Star synergy, which in turn boosts the benefits of 1- and 2-Star synergies and her own damage.Additionally, having 4 Health points further increases the damage dealt when the Lunar Reaction is triggered; Lunar Shock and Lunar Blossom will be based on the Girl’s Health12.5%, while “Moon Crystal” is based on the life of a young girl2.5%, and finally, yet again, for the whole team’sMonday’s reaction damage is increased by 1.5%。Therefore, equipping the “4-Life” set to the Moon Reaction team also boosts damage by approximately 10%.
6 Lives
The final 6-Star Perfect Form grants participating characters a boost for 8 seconds while the “Moon’s Domain” ultimate ability triggers the “Monday Reaction.”80% Critical Damage, as well as further improving the entire teamMonday’s counterattack damage is increased by 7%。This is a massive damage-boosting stat; at 2 Ascensions, it provides a boost of around 20–25%. However, the benefit is slightly less significant for Nefiel, whose critical damage is already off the charts.Finally, each girl has her own unique Destiny Seat visual effect. For every Destiny Seat unlocked, a new moon phase appears in the gravitational ring behind her; once all 6 Destiny Seats are unlocked, there will be 6 in total,Plus, every month when the portrait moves, there are extra star effects, and it even has a trail effect as it moves—it’s seriously so tempting for those who haven’t maxed out their lives yet, aaaah~
Recommended Zodiac Signs
Recommended Ascension Effects: Even at 0 Ascensions, the Maiden’s mechanics are quite complete, and the fact that she has the “Full Radiance” effect has little impact at 0 Ascensions; it’s only at Ascensions 1 and 2 that she gains additional Lunar Reaction buffs specifically for Full Radiance. As such, Ascension Level 1 is recommended primarily when 0-Ascension Filins needs energy recharge effects; otherwise, it’s generally advised to skip directly to 2-Ascension Filins. Additionally, each of Filins’ Ascension levels provides a modest boost to the entire party’s Lunar Reaction damage—a benefit that, for previous characters like Nordkale, wasn’t available until Ascension Level 6! By the time she reaches her final 6-star ascension, the Girl can provide a total of20% increase. And it’s shared by the entire team.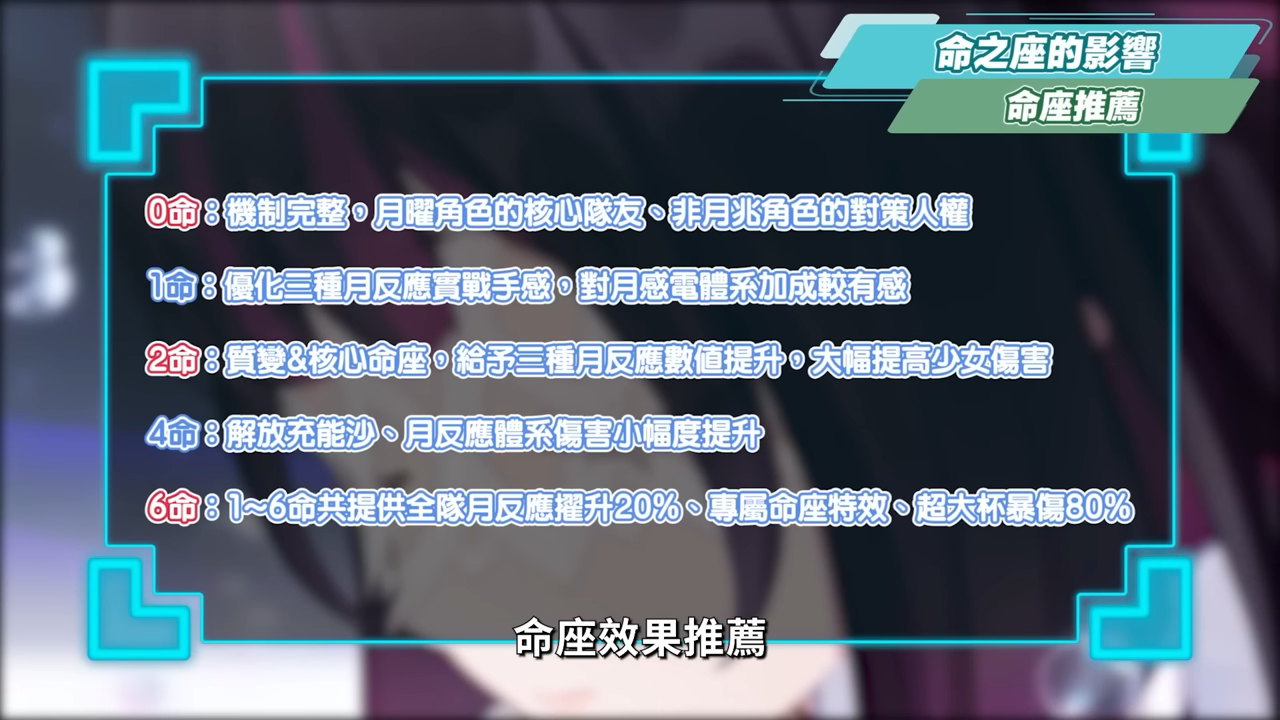
Weapon Recommendations
5-Star Weapons
The top choice for a young girl’s five-star weapon is her own class-specific weapon, “Nocturne Behind the Curtain“, secondary attributes and passive effects provideLifeandCritical Damage, and it also deals Monday Reaction damageCritical Damage Bonus, which can significantly increase the young girl’s damage, and when triggering a Monday reaction or dealing Monday reaction damage, it canRestore Elemental Energy, which lowers the energy recharge panel requirements. However, without her signature weapon, the main impact is really limited to the Girl’s damage output, followed by energy regeneration. However, there are currently many weapons with substitute effects, and as long as the main DPS in the party is strong enough, the Girl’s support abilities alone are sufficient. Additionally, you can use a rotation of two rounds of normal attacks followed by one ultimate, so the Girl isn’t heavily reliant on her signature weapon.Other five-star alternatives are worth consideringHealth + Critical DamageWeapons, such as the Vilette-exclusive weapon “The Grand Ceremony of Eternal Flow“, Malani’s exclusive weapon “Surfing Moments“, If you have Nefer’s signature weapon, you can equip it to the girl, but if Nefer is going to be in the party, you should give it to her first.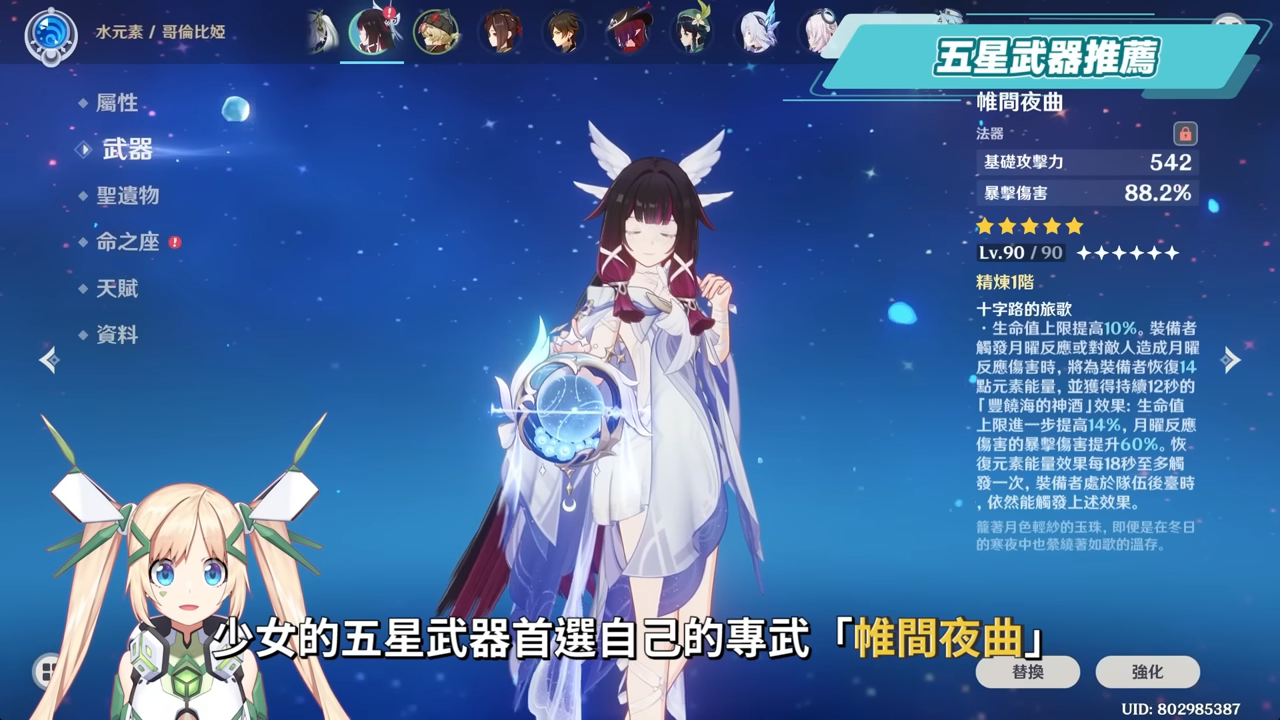
4-Star Weapons
For 4-star weapons, you can choose the “Yu Long, Posthumously Honored“, which has a critical hit rate as a secondary stat, though it may easily overflow; its passive also increases Health and Mastery. Casual players can also choose the “Test Run: Golden Amber“, with the secondary attribute providing health, the passive ability offering energy regeneration, and even a slight healing effect, giving the girl a bit of healing capability.Finally, if you’re really short on energy, you might also consider bringing weapons that generate energy, such as “The Secret Scroll of the West Wind“. When used in conjunction with the “Secret典 of the West Wind,” the technique could beUse E first, then Q…giving the young girl a chance to consume the energy particles triggered by her E ability.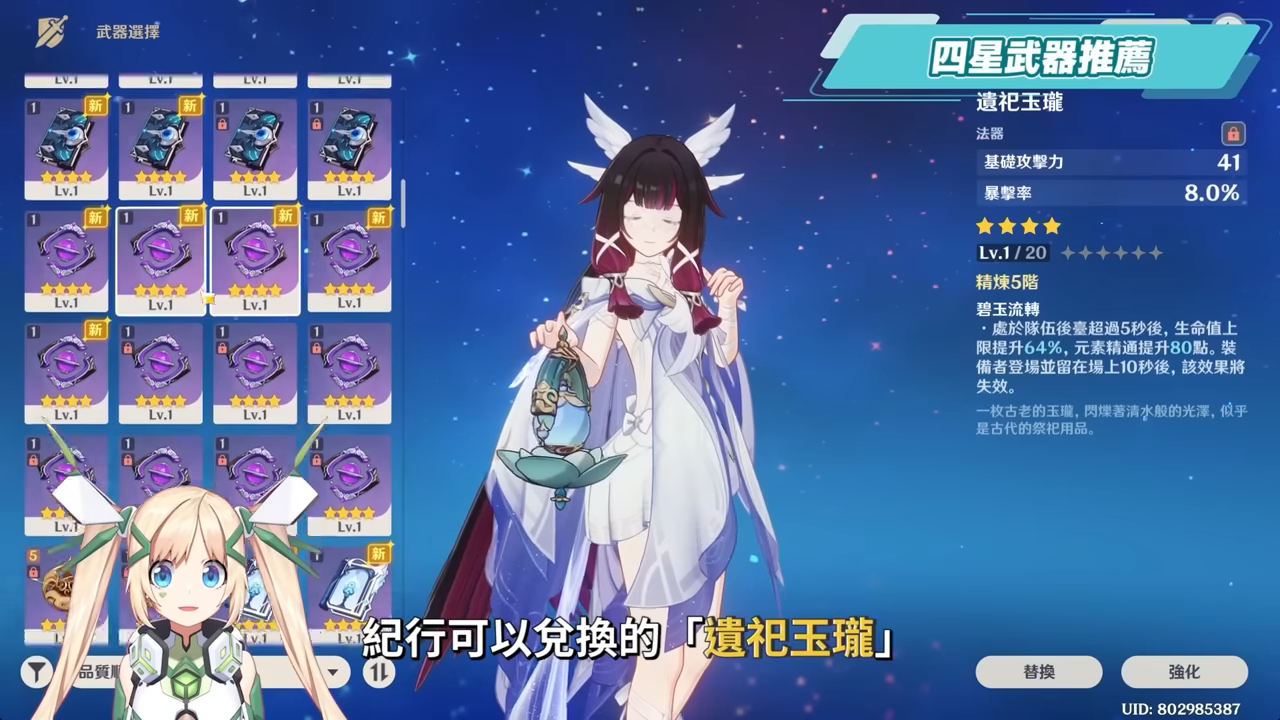
Recommended Relics
The top choice for a young girl’s relics is the exclusive set released in the “Moon IV” version, “Morning Star and Moon: A Dawn Song“, 2-piece set upgrade80 Elemental Mastery, while the 4-piece set is caused when in the background,Increases lunar reaction damage by 20%…and the Full Radiance effect can be further enhanced. However, it’s important to note that when wearing this set of artifacts, the girl cannot remain on the field for more than 3 seconds.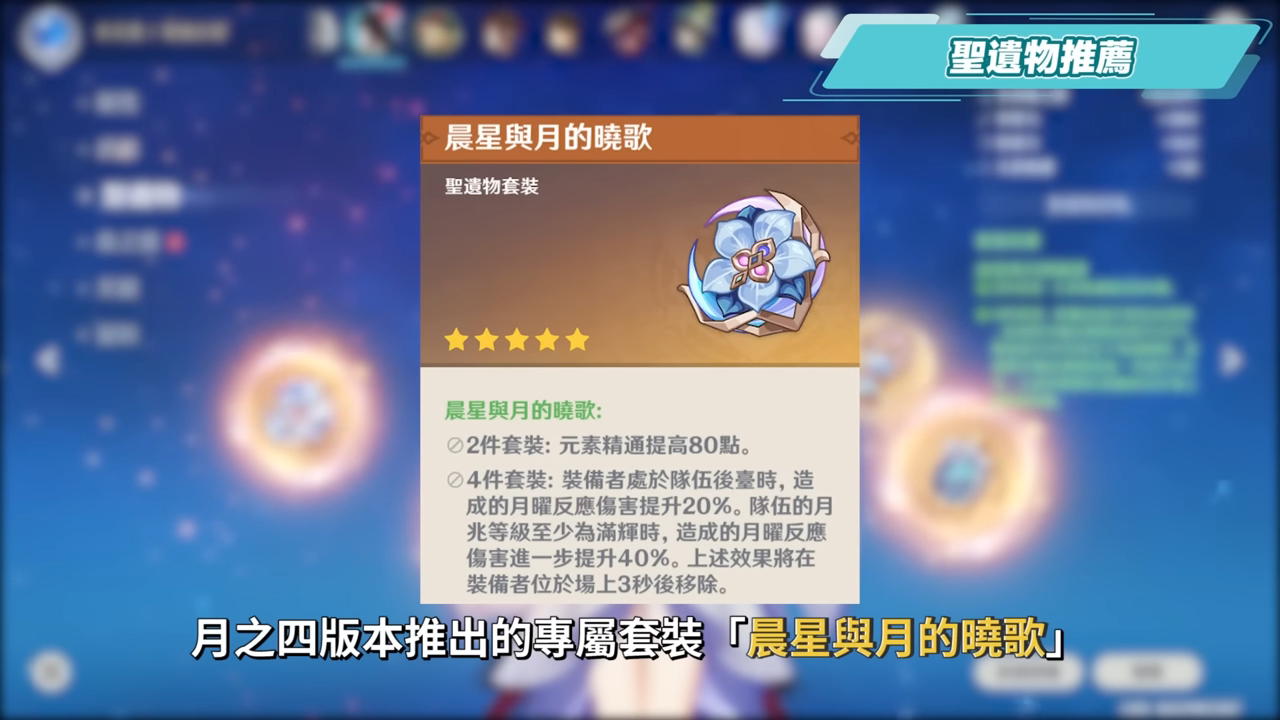
By the way, this new artifact dungeon drops 4-star artifacts.“Instructor” Set…It’s also currently the only dungeon that drops the “Instructor” set, so if you’re missing pieces of the “Instructor” set, you won’t have to rely on farming wild bosses to slowly collect them.And this set is alsoIneveSince this is a wearable artifact set, you should equip it on whichever character—either the Maiden or Inenef—has the higher cultivation level and damage output.Xiaoge“, while those who need more energy regeneration or play a support role should wear “Spinning the Moon」。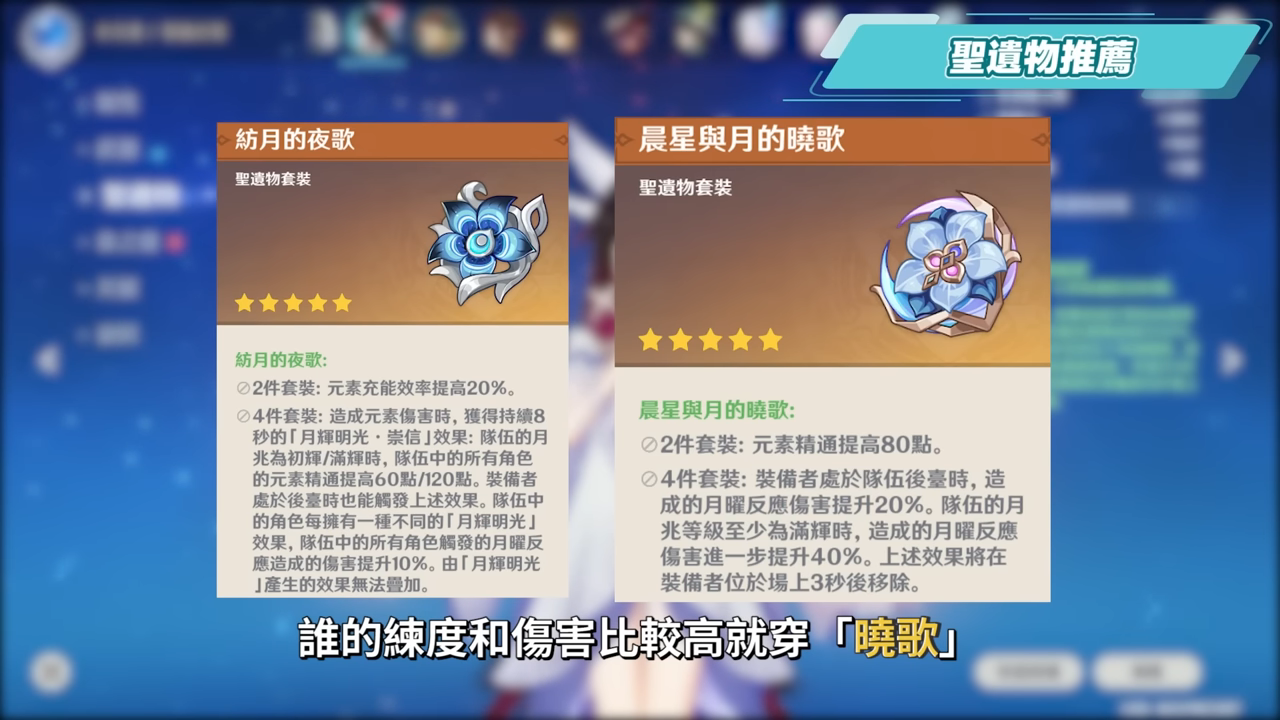
If the main DPS in the team relies on attack power, you can also choose“Qianyan” 4-Piece SetThis transition.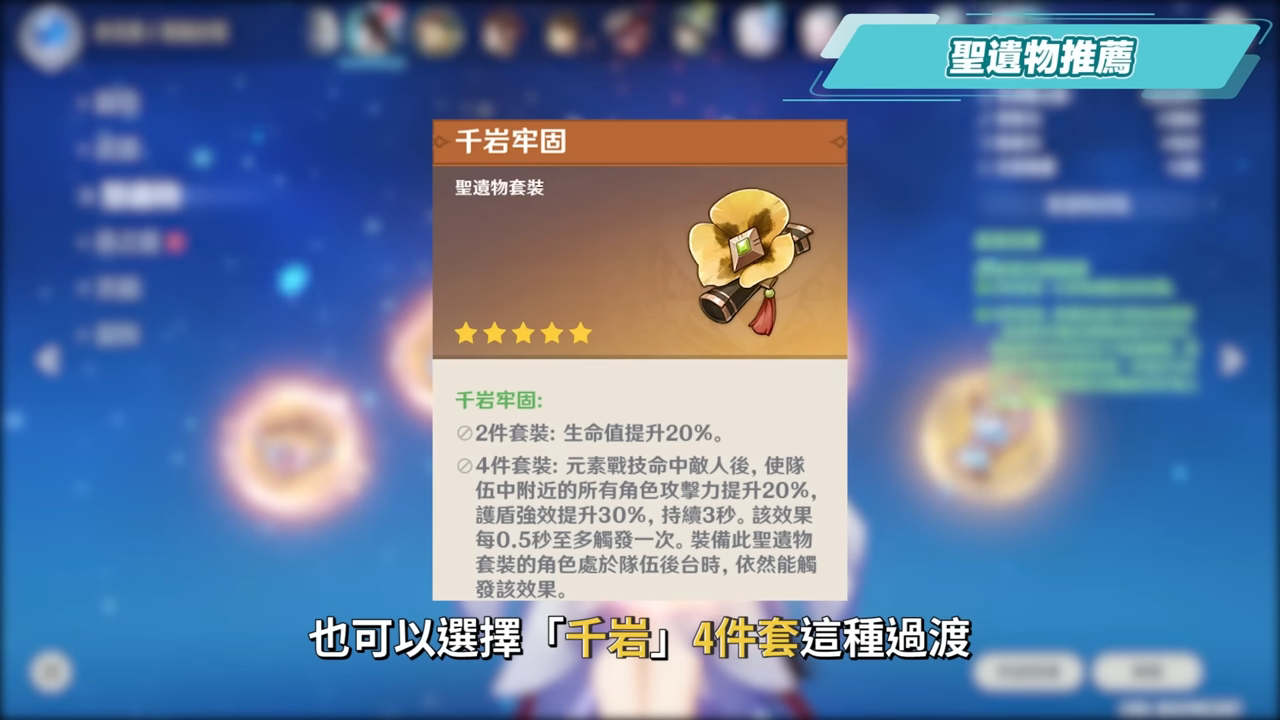
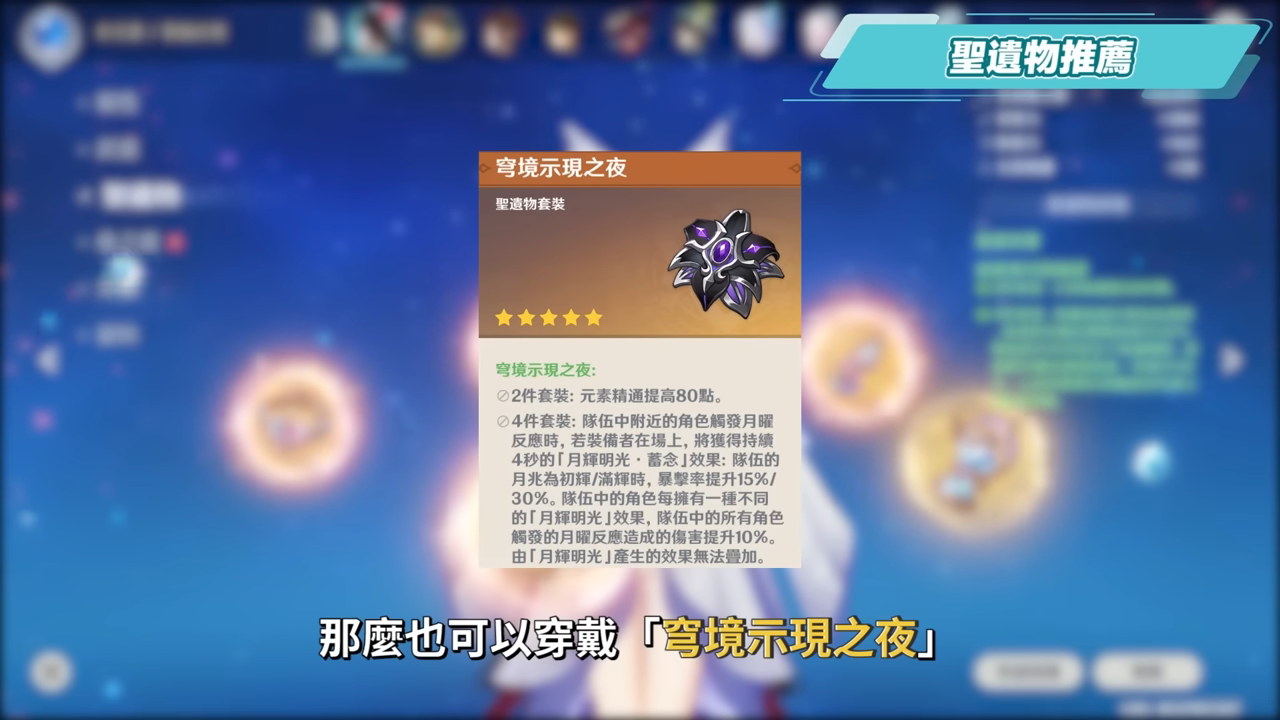
However, if a young girl is working at a club, she can also wear “The Night of the Celestial Realm’s Manifestation“, such as characters that interact with certain background elements,For example, skills like “Moon Blossom” against Luma or Inneve’s combat skills are fully automated attacks, so the girl can build a “brainless AFK” team that relies on E-class characters.
Selecting Primary and Secondary Attributes
When choosing the primary and secondary stats for artifacts, for the Sand of Time, chooseChargingorLifeIf you want to ensure that the main DPS character can cast her ultimate every round, prioritize stats that meet the energy recharge requirements first. Next, focus on the character’s damage output, or if her HP is below 35,000, you can equip the HP Sand. However, if your Energy Recharge is insufficient, you’ll need to use your ultimate every two turns. The actual difference in total damage between using the ultimate every turn and every two turns isn’t that significant—it mainly depends on the main DPS.Choosing the Empty CupLife, The Crown of Etiquette: The Top ChoiceCritical DamageSince the girl has a built-in 15% critical hit rate, make sure your total critical hit rate does not exceed 85%.Although Lunar Reaction damage benefits from Mastery, the character already has plenty of Lunar Reaction damage-boosting zones, so she can deal sufficient damage without needing to stack additional Mastery. Therefore, you can focus on secondary stats instead.Double Critical > Energy = % Health > Mastery, For this level of priority, simply add or subtract from the stack.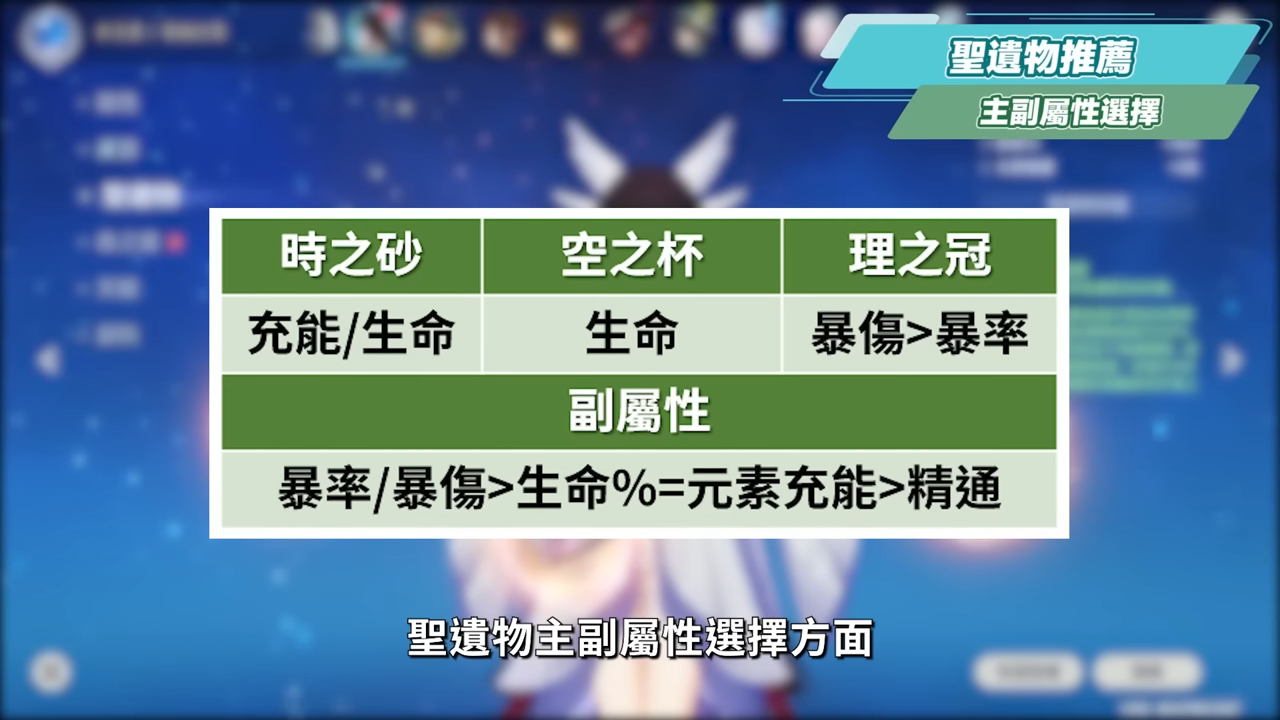
Graduation Panel Reference
Graduation Stats Reference for the Girl: Since the Girl must prioritize ensuring her Ultimate is charged and ready to cast in every cycle during actual combat, she—like Funina—should prioritize her charge stats. If the Girl is the only Water-element character on the team, her charge stats will need to be stacked to200%~230%Around,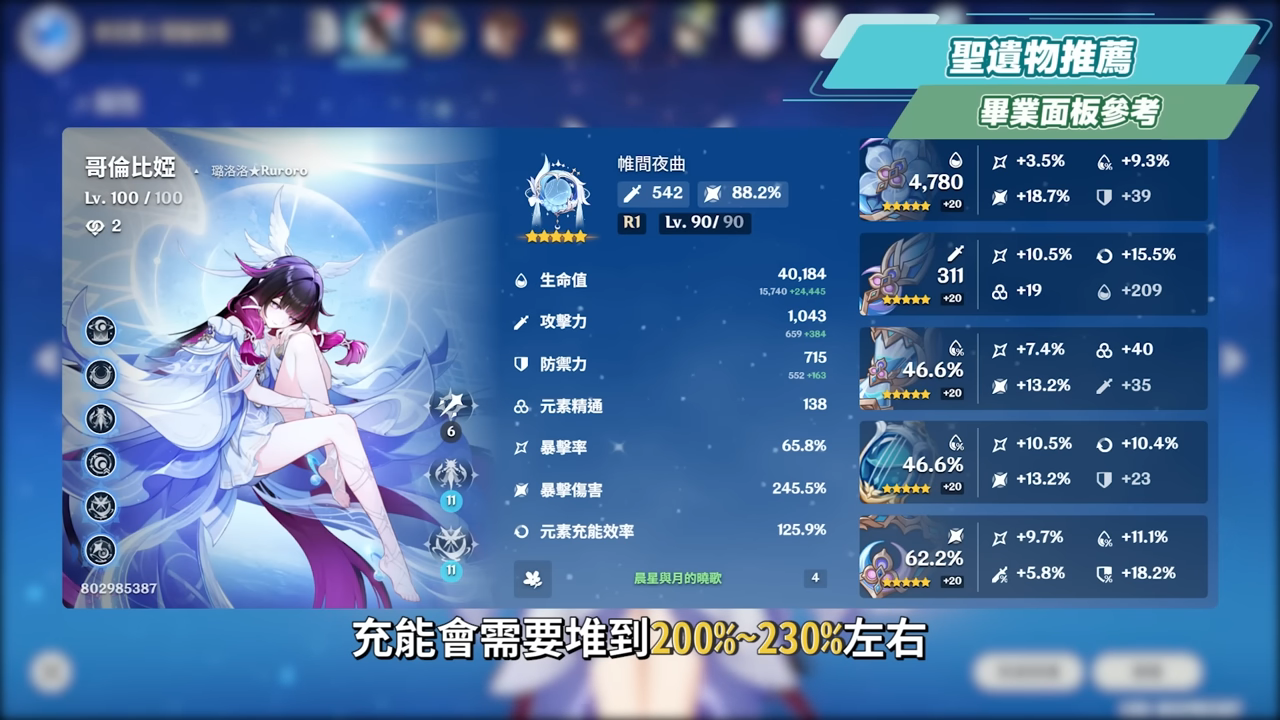
For levels like “Dangerous Battle in the Shadow Realm” where you start with no energy, you might need to stack more resources depending on how the battle goes. If you’re carrying the specialized weapon “Nocturne Behind the Curtain“, and if teammates are carrying additional Westwind-series weapons, the charge requirement can be further reduced by approximately 10% to 20%.”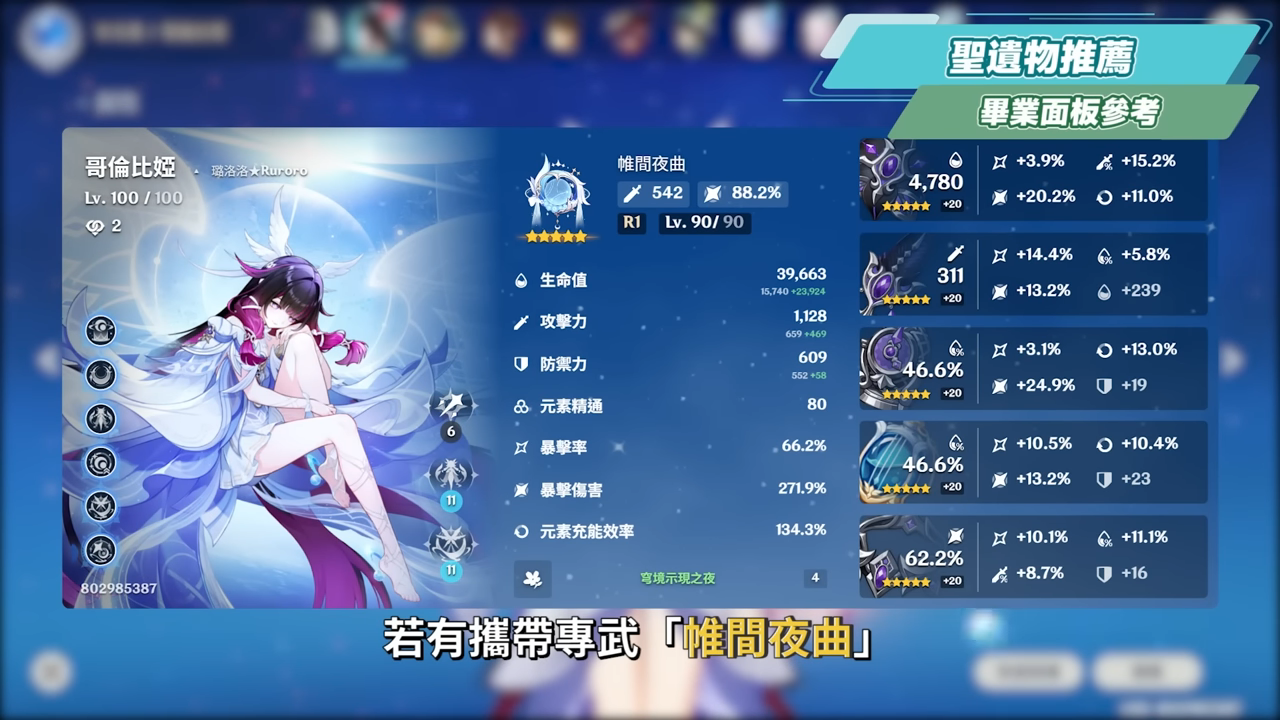
Second, the damage dealt by the girl’s skills mainly depends onHealth PointsTo convert this, and for the innate talent to receive the full 7% base monthly reaction damage bonus, you need to35000With the stats listed above, her total HP is at least 35,000, and the girl also has a built-in 15% critical hit rate, so her maximum stats outside of combat areNo more than 85%Just focus on the critical hit rate for now; once you have enough energy later on and there are leftover stats, you can continue to stack them.LifeandDouble Explosion。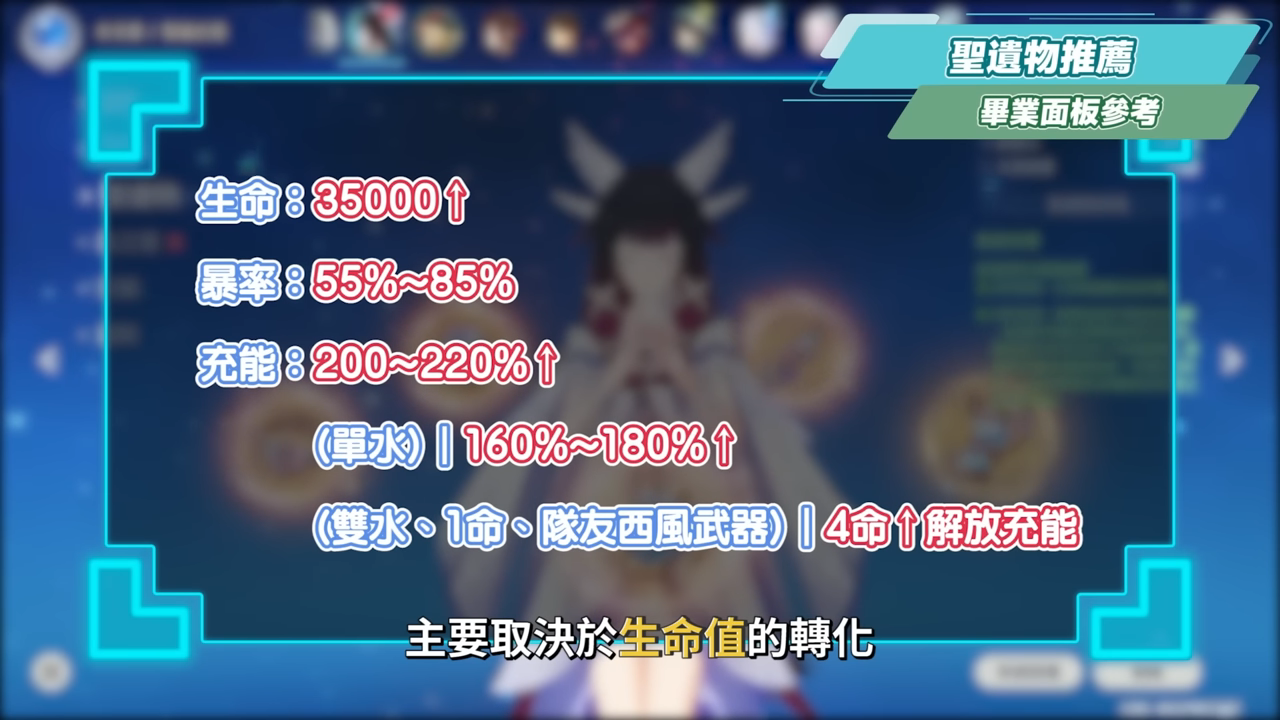
Team FormationPair
Team-Building Strategies
When it comes to team-building strategies for the young girl, the first step is to replace the original Moon Reaction team withAinoThe difference between having Aino and not having Aino is significant. The boost the Maiden provides to the main DPS in the “Moon Reaction” setup is noticeably greater at the 0+0 level. In addition, the Maiden herself provides a constant area-of-effect Water status effect, and her buffs are alsoShare with the entire team…unlike Aino’s buff, which requires the target to remain in place and is only granted toFront-End Roles…and the girl’s own damage output is also quite impressive. Ever since she joined the team, Yue has found her performance to be incredibly satisfying, so to Luo Luo, the girl feels somewhat similar to Funina in Yue’s team.However, even though the young girl is central to the “Reaction of the Moon” mechanic, she isn’t required to team up with the Nordkale characters, so we’ll also provide some ideas for team compositions featuring older characters later on.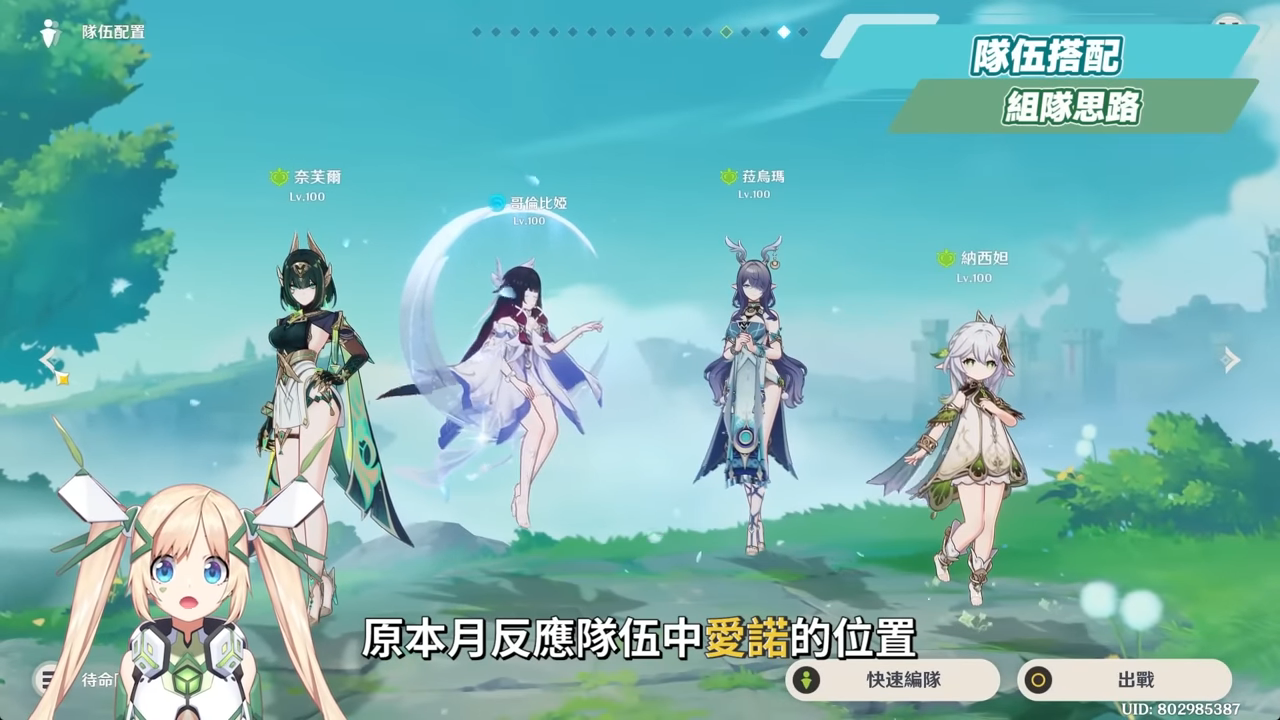
Moon Sensing Team
When the girl joined…Filins + InèveAfter joining the Moon-Affected Electric Team, this has become a multi-core lineup capable of providing team-wide buffs and dealing damage with all three members. Currently, a recommended lineup configuration could be:Filins + Inève + Girl + Sugar。For a 0-star Filins, you might consider building a strategy where the Girl uses her ultimate once every two rounds. The practical approach would be: use the Girl’s EQ with “West Wind,” QE for 1-star or higher versions, and Inene’s E, “Ritual” Sandu’s E to trigger resistance reduction, then have Filins stay on the field to deal damage with EEQ + auto-attack combos, followed by a dodge to cancel the post-cast animation—repeat this cycle. After the enchantment ends, switch back to Sandu’s E to trigger resistance reduction again, then use the Maiden’s E, Inene’s Q, Sandy’s E, then have Felins stay on the field to deal damage; switch back to Sandy’s E, and then return to the Maiden to cast her ultimate.However, if Filings has 1 life, or if the girl has 1 or more lives, and the energy cycle isn’t too stagnant, you can also followYoung Girl → Inenef → Sand → FelinsThe order of the wheelchairs.Ineve can be replaced with other backline Lightning sub-DPS or Lightning support characters, such asFischer, Yae Kono, Ian Shan…and you can replace the sugar with other resistance-reducing slots, such asSinonine, and even if you’re short on survival resources, there are still things likeZhongli, Lan Yan, YakodaThere are many other roles to choose from. For the last slot, it’s best to select a character that provides both resistance reduction and other buffs. You can also refer to the previous section.Filings FilmsExplanation of the team-building strategy in the game.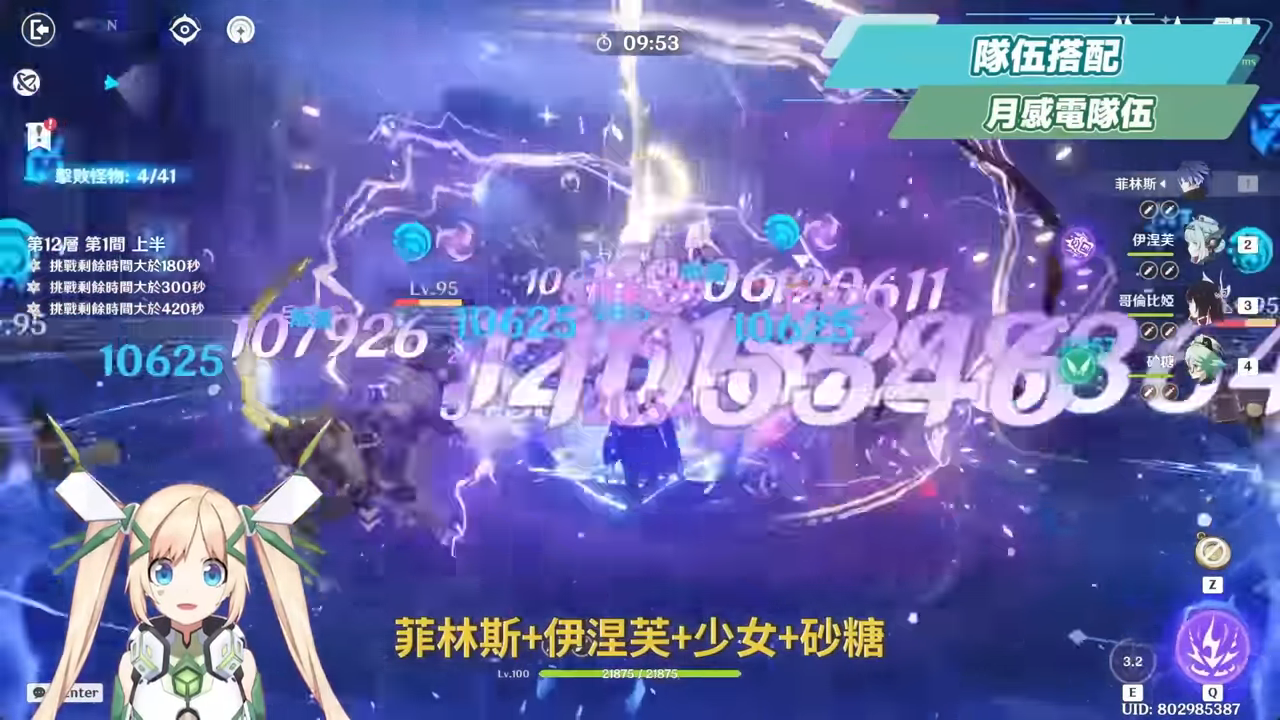
No Film
Alternatively, Filins’s spot could be filled by another Water/Thunder C, such asNavelette, Clorinde, General Thunder, Varessaand other roles, but it’s also best to max out Hui here. Here’s a quick tip: if Shinon is the resistance-reduction character, her EAA—when enemies are under the Water/Thunder coexistence debuff—will be unable to trigger the Hero’s Set’s Hydro damage bonus due to the 1-second cooldown of the Crystal Reaction. While this damage bonus isn’t a major issue for characters dealing direct damage via the Moon Reaction, when paired with Water/ Thunder direct damage characters, you’ll often miss out on the Hydro damage bonus. However, when paired with the Maiden now—since she triggers the Lunar Crystal—Xinoning’s EAA can simultaneously trigger both Hydro and Thunder damage bonuses, resulting in a much better experience when used with older characters.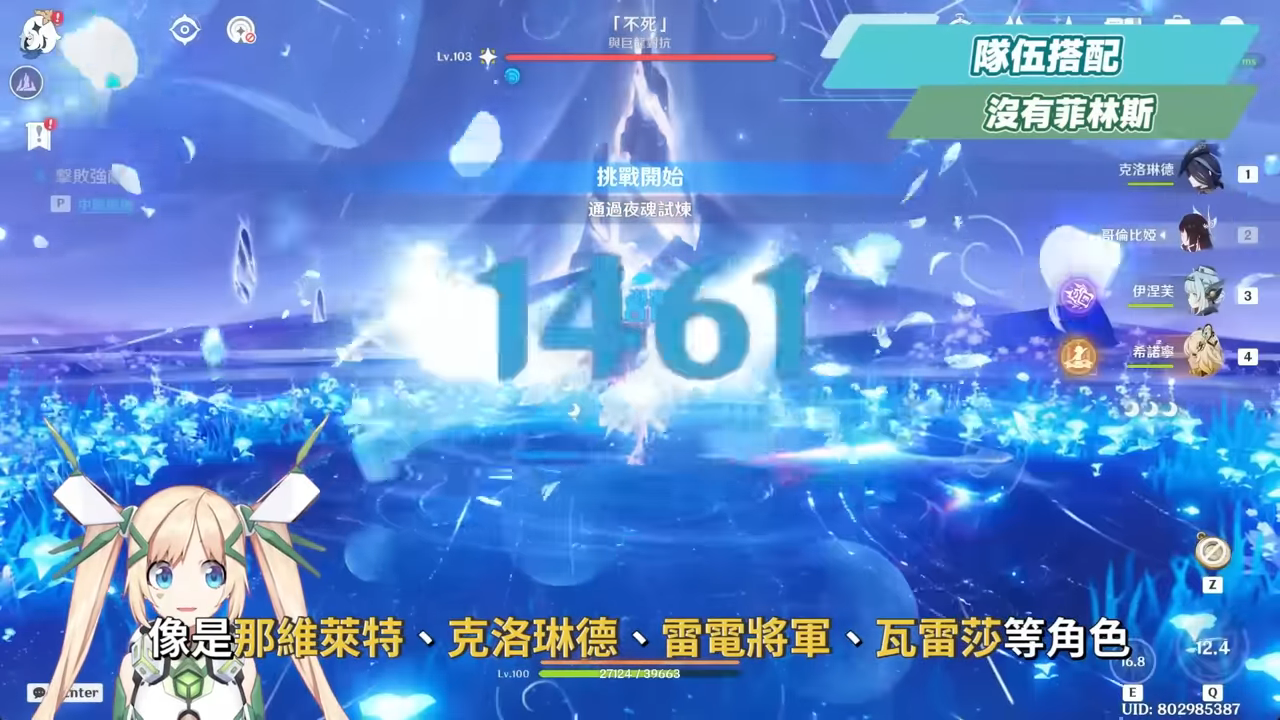
Monthly Electric Hanging DecorationMachine
In addition,Ineve + The GirlThis combo is also an extremely low-effort Moon Shock AFK team. You can use any main DPS for this team, such asThe Wanderer, Dreaming of Yue Ruixi, but you’ll definitely love pairing it withIneve…or if the young girl takes the field on her own, in the open world and dungeons, she can basically just stand there and do nothing, and the enemies will be killed on their own. However, if paired withChaskaWhen using this type of character to convert Moon’s electric damage, you need to be a little careful: Since the Girl’s Ring has a lower attack range than Fennina’s, if Chaska uses her E ability and reaches maximum height, the Gravity Ring won’t be able to hit enemies directly below her. Therefore, it’s best to press the Heavy Attack button to fire immediately after activating Chaska’s E ability to ensure the Gravity Ring hits the enemies.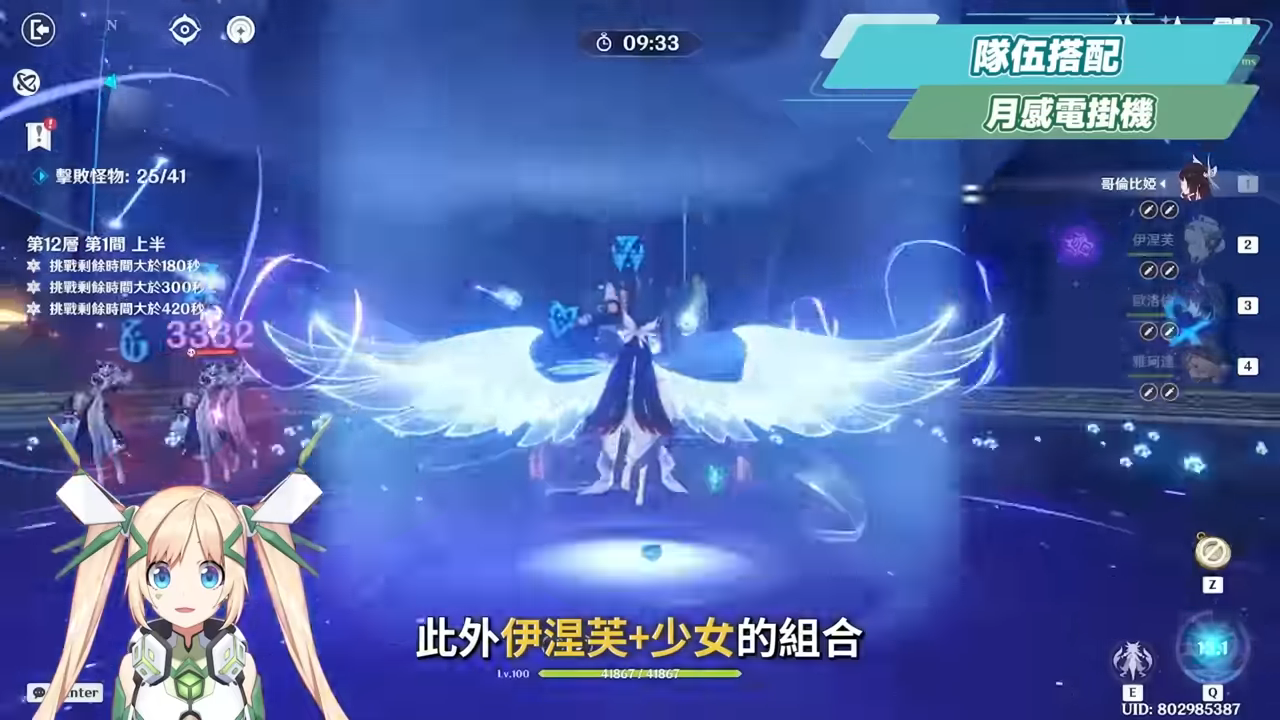
Moon Blossom Team
Meanwhile, in the Moon Blossom team, you can form a team centered aroundNafur + Rauma + GirlWith this combination, the remaining slot can also be filled with a survival-focused or resistance-reduction option, such asXin Hai, Zhongli, 6-Star Diona, YakodaWait a minute,For a team with an average of 0 constellations, one strategy could be: Zhongli uses his E to cast a shield, Lauma uses her normal attack, or Nefiel uses her E to place grass. Then, depending on her gear or constellations, the Girl uses EQ or QE. followed by a loop where Luma uses Q + Zhongli’s E, then Neuville enters the field with E + 3 Heavy Attacks. The final Heavy Attack can be dodged to cancel the recovery animation, allowing you to quickly chain into the next round of 3 Heavy Attacks for faster damage output.There are also plenty of other candidates for the No. 4 position; you can refer to the previous…Nével FilmsExcerpts on team-building strategies.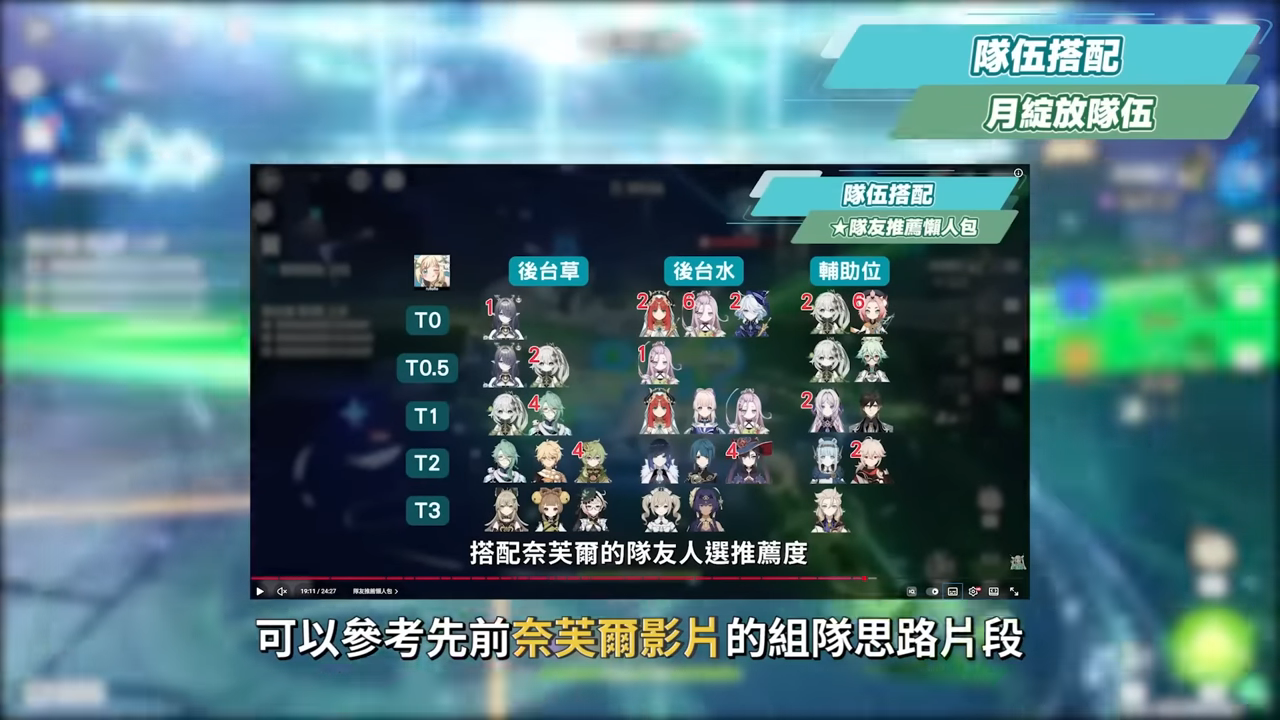
However, if your Lauma has1 Life…then they can also serve as the healer, which frees up an additional slot in the party,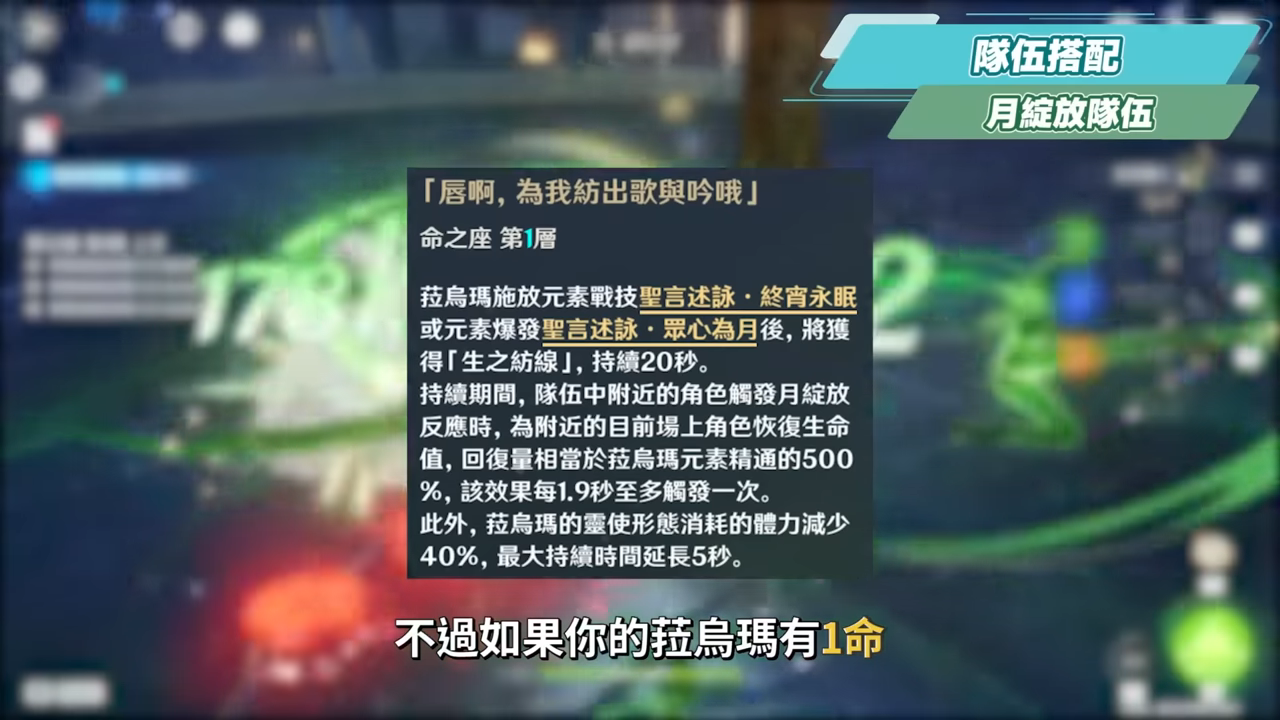
This allows you to use a booster with higher gain, such as2 Lives of Naxidaor2. Ming Ni Lu, and increase the damage cap as much as possible.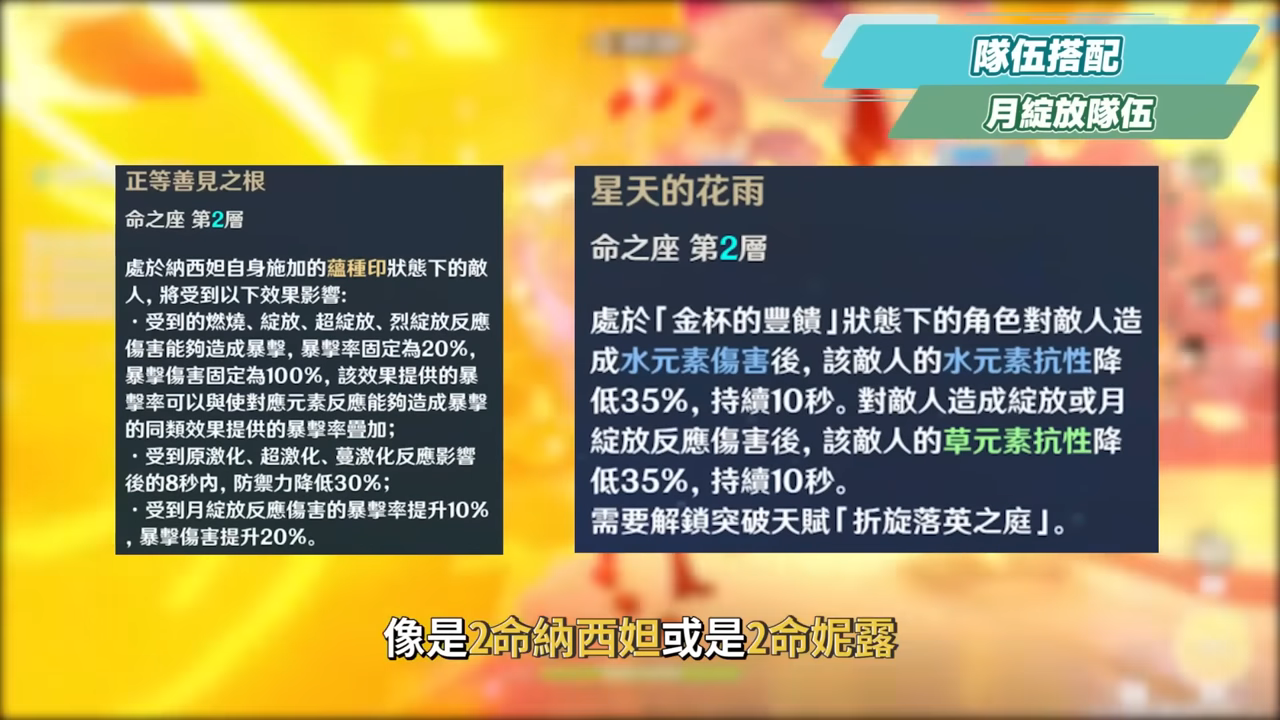
No Neufer
Another option is that if you don’t have a main DPS like Nefiel for the “Moon Blossom” skill, you can have the girl serve as the main DPS for “Moon Blossom” herself—but you’ll definitely want to pair her with…LaumaWithout the “Prayer Song” effect from Rauma’s long E and ultimate, the Maiden’s Moon Blossom damage becomes quite underwhelming. You can also switch her artifacts to the “Celestial Realm” set for sustained presence on the field; by using heavy attacks to consume Dendro Dew, her damage output remains solid. Furthermore, her Heavy Attack can be chained by holding down her normal attack—she’ll automatically perform a Heavy Attack combo. Since this doesn’t consume Stamina while draining Dendro Dew, the gameplay feels very smooth. Plus, she’s absolutely gorgeous. This way, you won’t have to bring her out just to activate her Eye and then send her back to the bench right away. The downside is that, as an Artifact character, she has low resistance to interruptions, so it’s best to pair her with a shield-providing character like Zhongli. This setup also allows for a “no-brainer” AFK team that benefits from both “Moon Blossom” and “Moon Crystal”—it’s a lot of fun.Strategies can include Zhongli’s Long E to build a shield, Naxida’s EQ, Lauma’s Q + Long E, the Maiden’s EQ or QE, holding down the heavy attack to auto-combo, or simply standing still.
No role for Nordkale
What if you haven’t pulled any of the Nordkale-exclusive characters and have only pulled the girls? Actually, you can still build your team around them.Aino, Yakoda, or even those in the second half of the card poolYe LuoyaOnce you’ve gathered enough characters with the “Hikari” trait, you can pair them with a main DPS that suits your needs based on the Lunar Reaction you require. With this setup, you’ll generally be able to handle any stage that requires the Lunar Reaction mechanic. For example, you can form a team with the Thunder General…General Raiden + Young Girl + Dulin + InenefIn this team composition, the Thunder General’s ultimate ensures that all characters in the party can complete their charge cycles. As a result, the backline sub-DPS can directly equip the Sand of Time for damage output, while Full Radiance ensures that the Maiden and Inenef deal maximum damage. while Inéve’s shield ensures the Thunder General’s survival on the field. After Dulin’s backline Fire and the Thunder General trigger the Overload reaction, they can further reduce Lightning and Fire resistance. This effectively creates a brand-new burst damage playstyle for the Thunder General, following in the footsteps of the “Thunder God National Team.”
Should the girl take a drag?
This time, the young girl happens to be in the same gacha pool as Inneve. For Travelers who are building a Yue-based Electro-Charged team, this might raise the question: if you only have enough resources for one Golden Summon, which character should you prioritize?If you’re the type who wants all three Moon Reaction types, or if you also use older Water/Grass/Rock-type characters to tackle stages that require Moon Reaction, then I highly recommend prioritizing the draw for this girl. Not only does the Maiden provide a significant boost to Moon Reaction teams, but she’s also a must-have card; in other stages that require Moon Reaction, she’s an absolutely recommended T0 countercard.On the other hand, if you’re not particularly interested in the Lunar Reaction team, or if you only plan to play Lunar Electrocution, then Inene—who specializes in the Lunar Electrocution system—will naturally be a better choice than the Maiden. One is more versatile, while the other focuses on power-ups; it depends on which playstyle you prefer. Of course, being able to get both would be ideal. After all, this auto-E-skill AFK farming team is incredibly brainless to use. It’s so powerful—it’s truly astonishing.The same applies to Travelers who plan to focus exclusively on the Moonblossom team. While Rauma is the core, there aren’t many Grass-type DPS characters capable of running Moonblossom, so this is a better choice for those who like Nefiel or are considering using the Maiden as their Moonblossom main.Also, since the Moon Reaction team composition is already pretty well-rounded, it feels like if they’re going to release more characters from the same system in the future, the only roles left might be the resistance-reduction or survival roles within the Moon Reaction team.Therefore, regarding the current monthly gacha characters, if you’re on a limited budget, Lolo has put together a summary of recommended gold amounts and pull tiers, which you can also refer to for future reruns.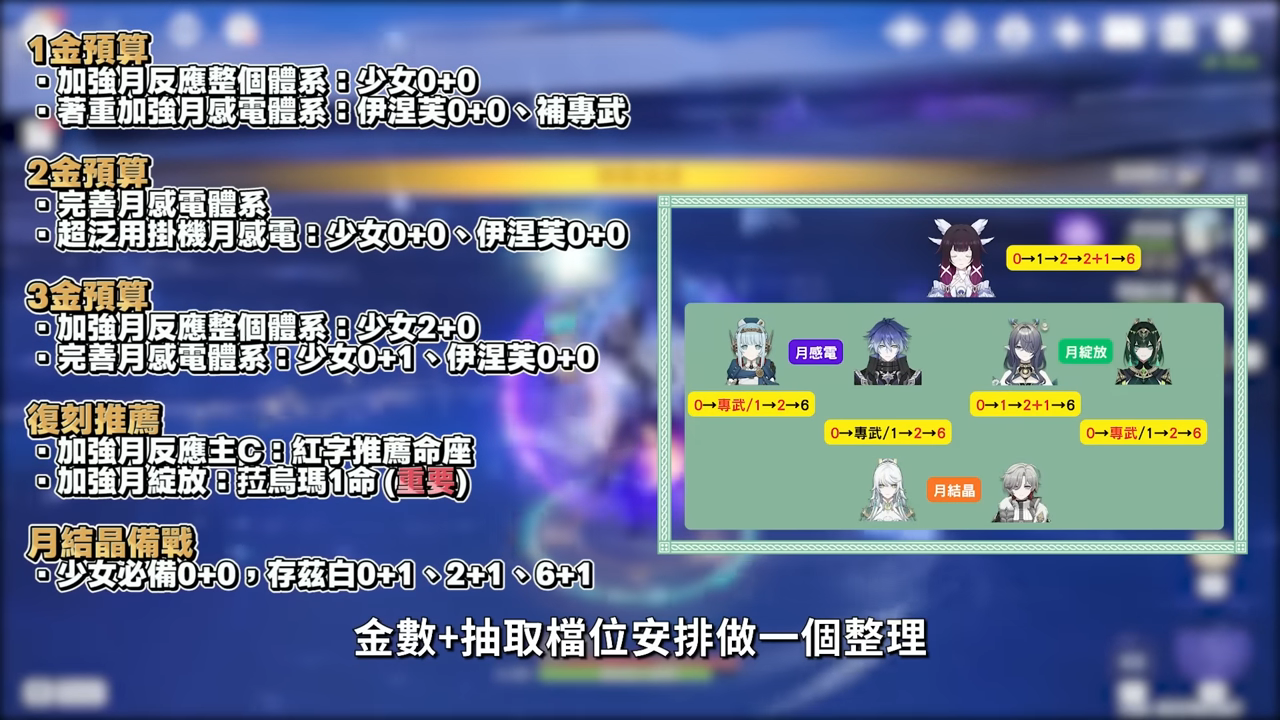
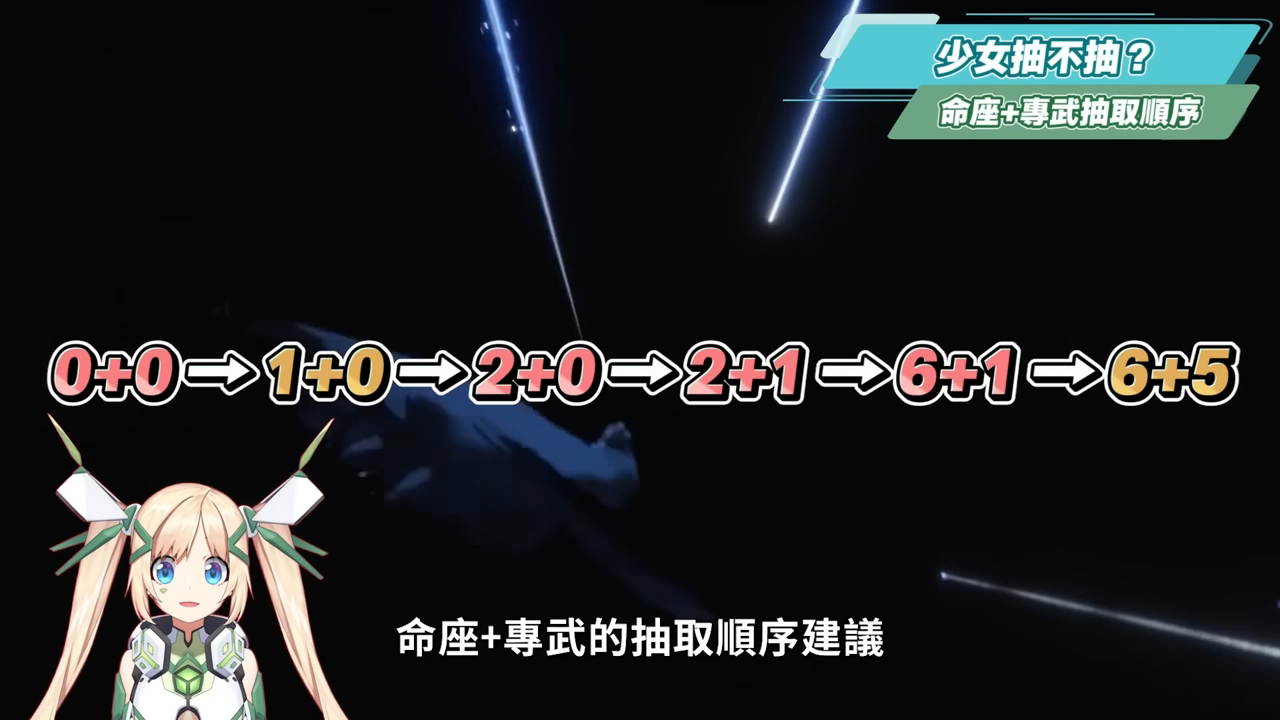
Destiny Constellation + Special Weapon Draw Order
Finally, here are some recommendations for the gacha order for the girl’s Constellation and signature weapon. The gacha order for the girl is similar to that of Funina; while the signature weapon provides bonuses, it isn’t strictly necessary. if your budget allows, it’s recommended to go straight for 2-Star Ascension before pulling for her signature weapon. 1-Star Ascension is better suited for players using a 0-Star Filins “Lunar Electrocution” team; otherwise, the 0-Star build already has a very complete set of mechanics, so it’s better to use the resources to add a 0+0 Inenef to the “Lunar Electrocution” team, or stockpile Primogems to wait for the Rauma rerun to add a 0+0 or unlock a slot for 1-Constellation, or to pull a 1-Gold for a 0+1 Girl, or even wait until the second half of the event to pull a 0+0–0+1 Zibai and pair her with Yeloa as a support to experience the new Lunar Crystal reaction, etc., Finally, just go straight for 6-star ascension and become *that* woman who can bring about the end of the world just by taking a stroll.The weapon pool this time is actually pretty good. As long as you have Inneve, even if you roll a weapon meant for her by mistake, it’s still worth it—they all provide party-wide buffs that stack with the Maiden’s effects.
That concludes our comprehensive analysis of the character Colombia. We hope everyone can quickly get the hang of how to level her up and which gacha pulls to prioritize., I’m Lu Luo Luo, a virtual YouTuber. See you next time!
Source: KOCPC Chinese