


Many ASUS phones have a built-in free call recording feature that lets you record important calls, which has made many Android phone users envious. Now you no longer have to be jealous! There is already a free open-source tool called CallVault on GitHub that gives every Android phone automatic call recording capability, without requiring Root. And it supports not only regular calls but also calls through apps—I tested it with LINE myself and it worked fine.
However, note that this requires manually installing an APK file (it is not available on Google Play) and also requires relatively high system permissions, so those concerned about security should probably skip it. Since it is an open-source project, you can also review the code yourself, or hand the APK to an AI agent to check.

CallVault lets your Android phone automatically record calls too, with no Root required and AI transcription support.
CallVault is a free, open-source Android call recording app that aims to let Android phones without call recording support achieve a two-way call recording experience similar to Asus phones, without root or a computer. This tool is based on and improved from the ShizuCallRecorder project and includes an ADB pairing feature. You only need to enable Developer Options and wireless debugging on your phone. After completing the initial pairing, you can set up automatic recording or have it ask before each call whether to record; it also supports running via Shizuku.
In addition to traditional phone call recording, CallVault also supports recording voice calls in messaging apps such as WhatsApp, Signal, Telegram, and Line, and offers features such as pause, resume recording, and mark highlights. More notably, it also integrates on-device AI capabilities: it can use Whisper to transcribe recordings into text, then use the Google Gemma model to automatically organize call summaries, key decisions, and to-dos—all completed on the phone without uploading to the cloud.
Before installing, remember to first enable Developer Options on your phone. The way to enable it differs slightly by brand, so I recommend looking it up online. On my Pixel 6 Pro, tapping the build number in About phone seven times enables Developer Options, and this option will appear in the system menu. Next, turn on both “USB debugging” and “Wireless debugging” in Developer Options:
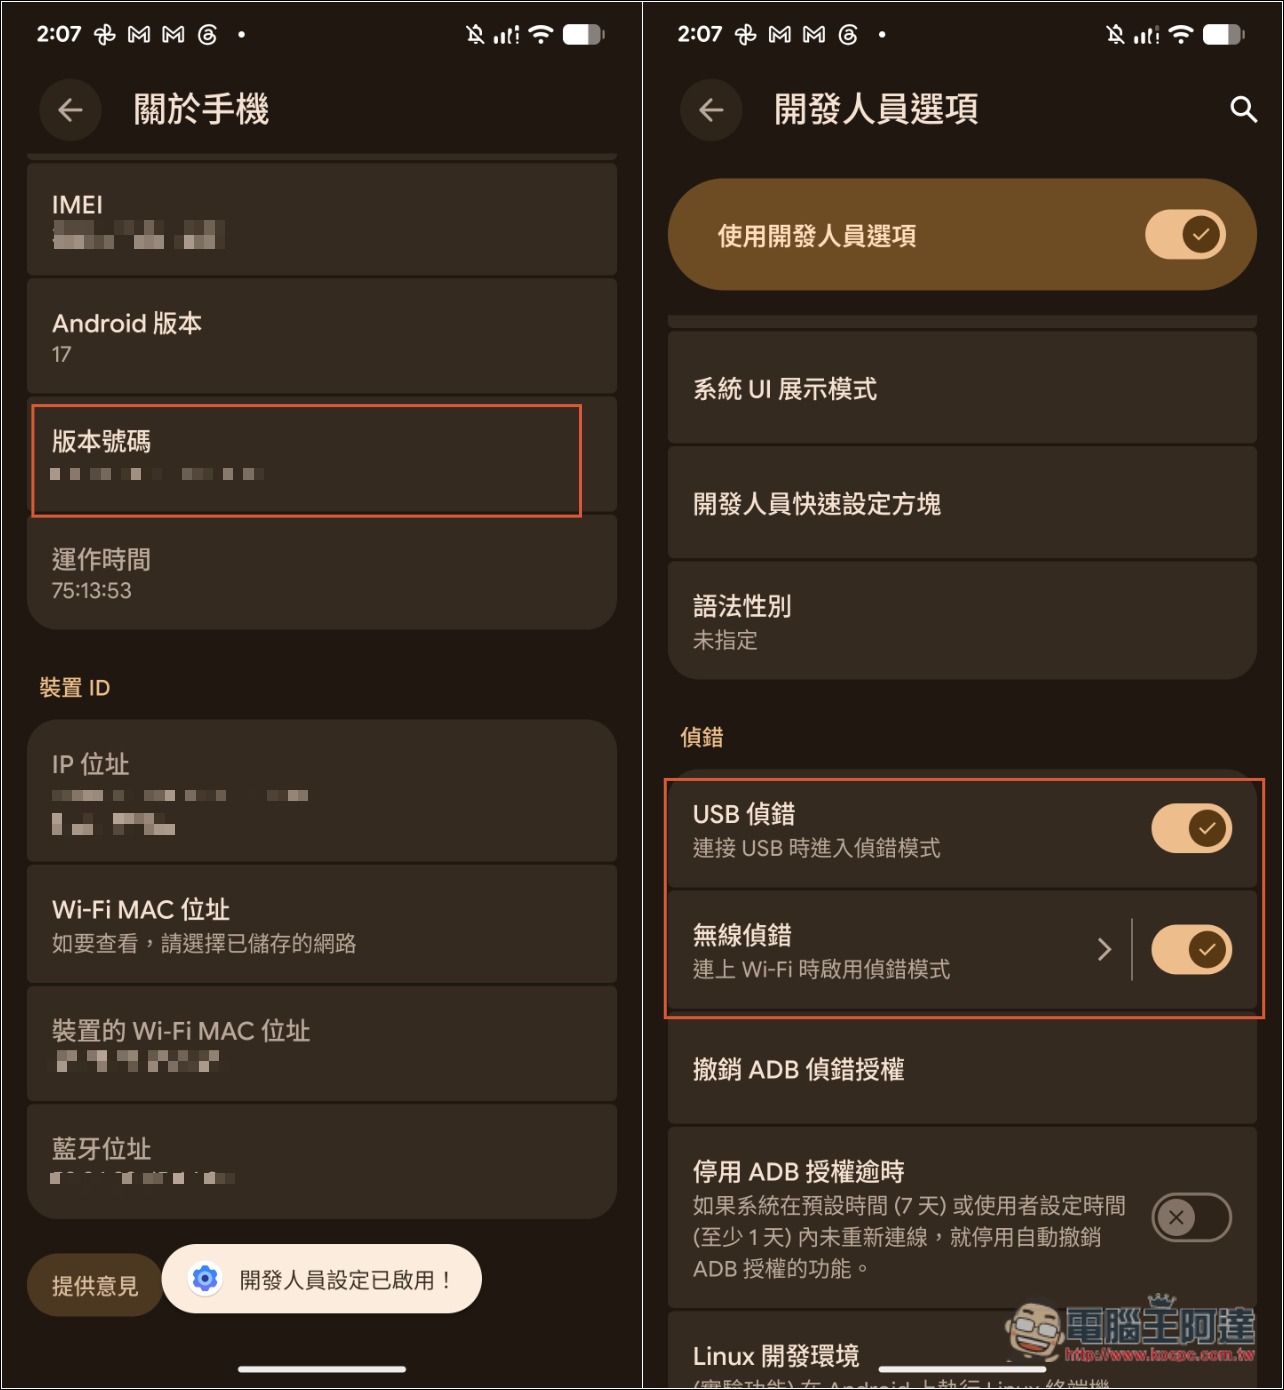
Once enabled, you can go to the CallVault open-source project to download the APK file and install it:
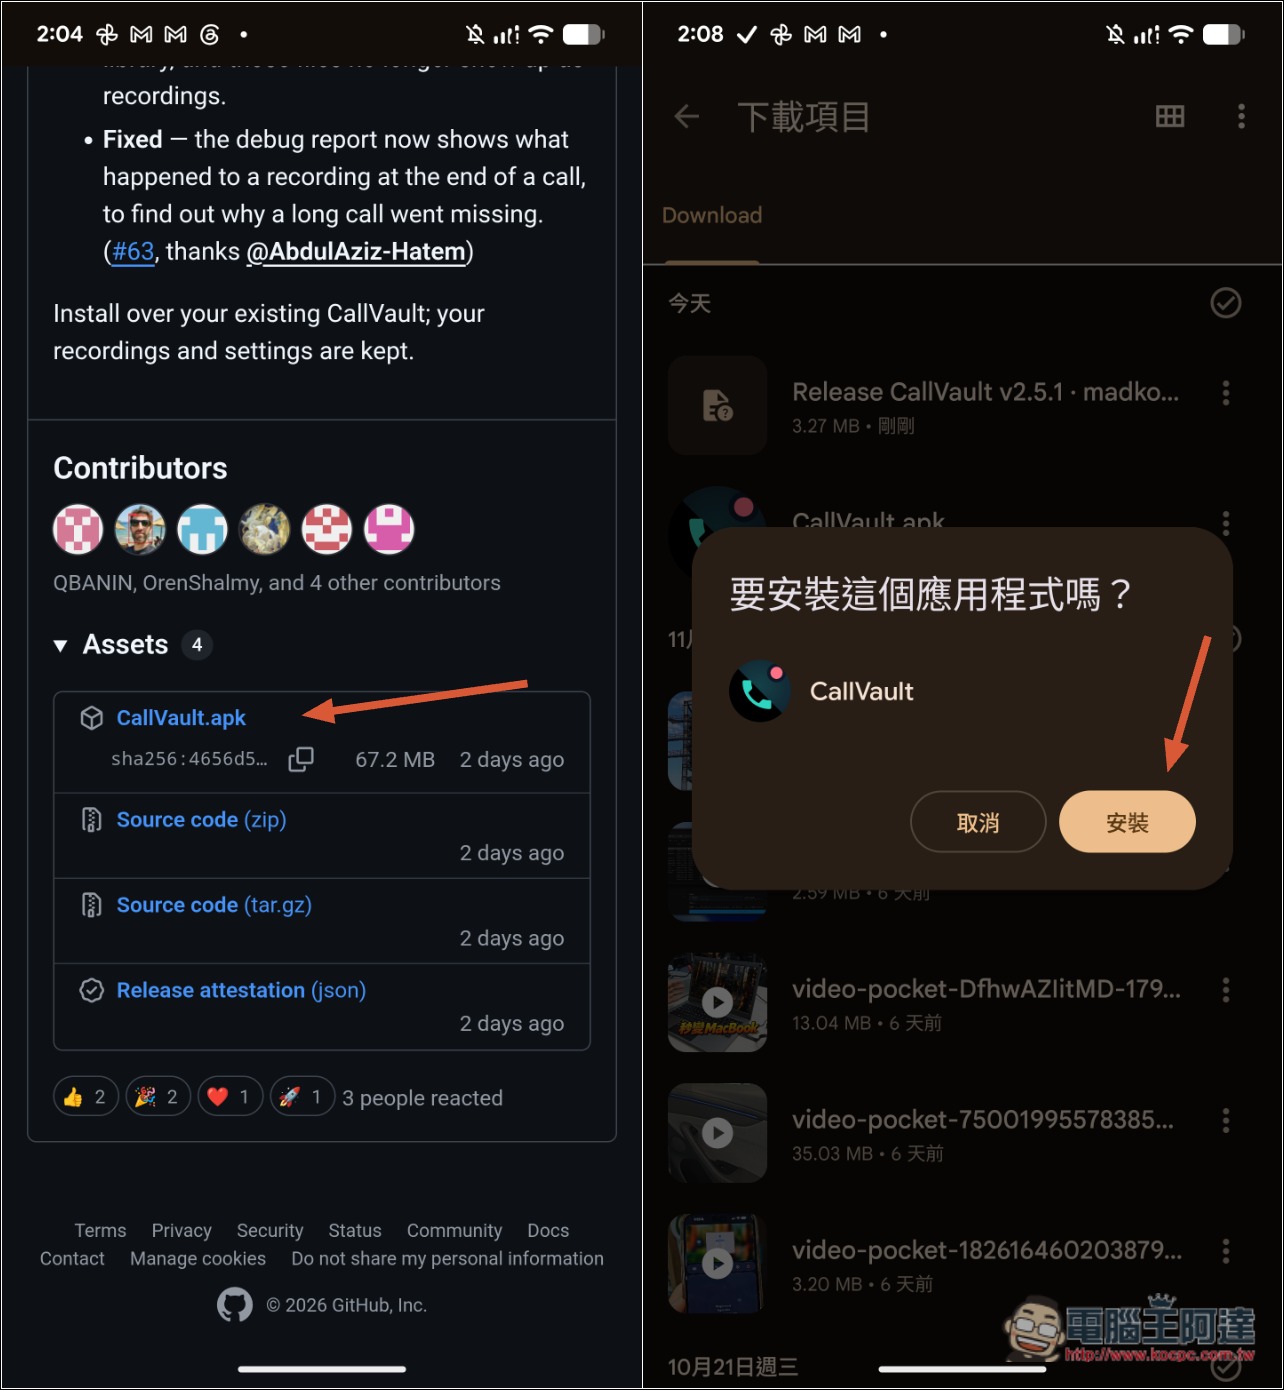
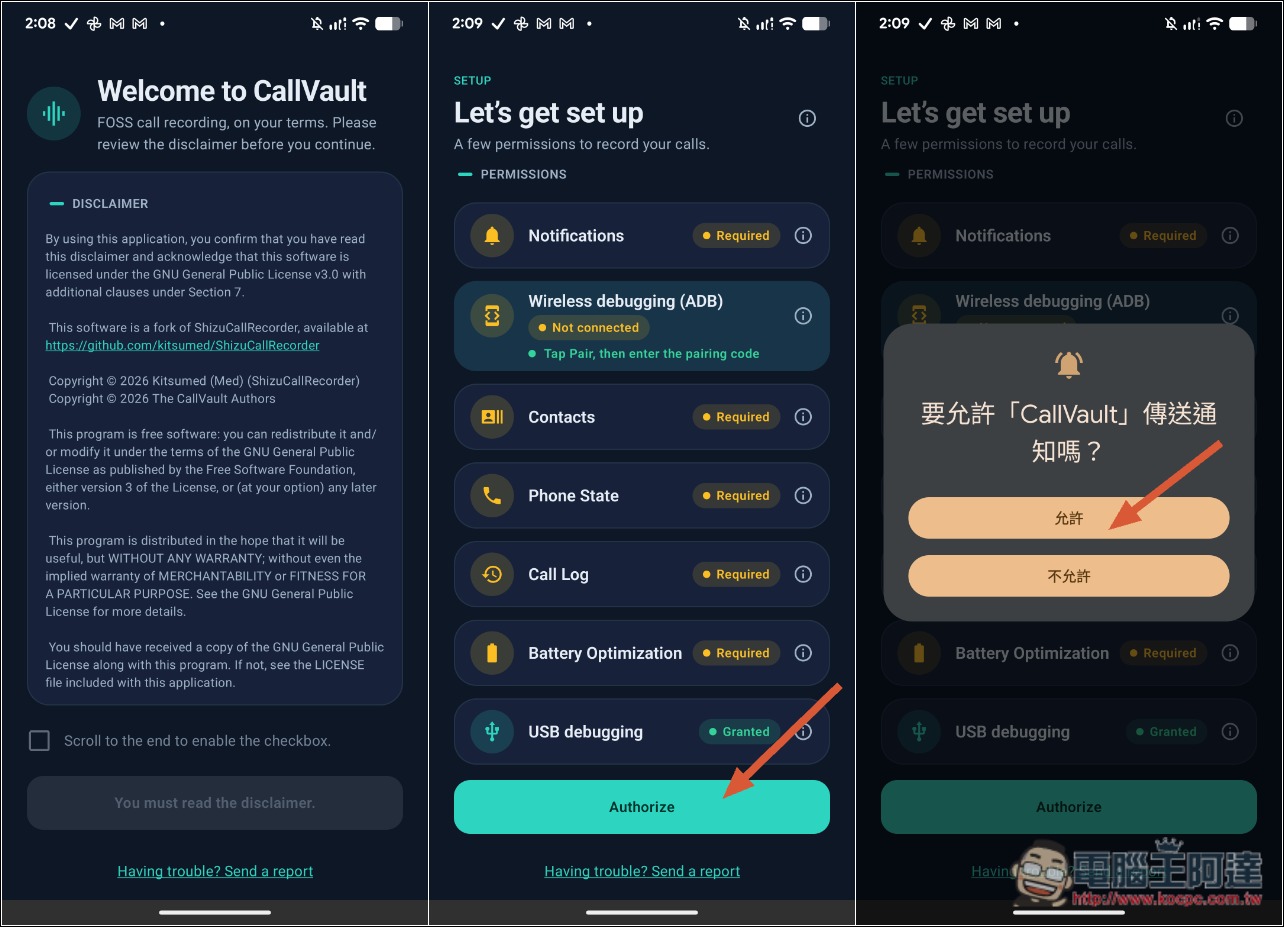
The interface will be in English during installation. Don’t worry if you don’t understand it—just follow the on-screen steps. Once you get to the main screen later, you can change it to Chinese. It starts with agreeing to the terms, then it will ask you to set various permissions—just keep tapping the button at the bottom, then tap Allow:
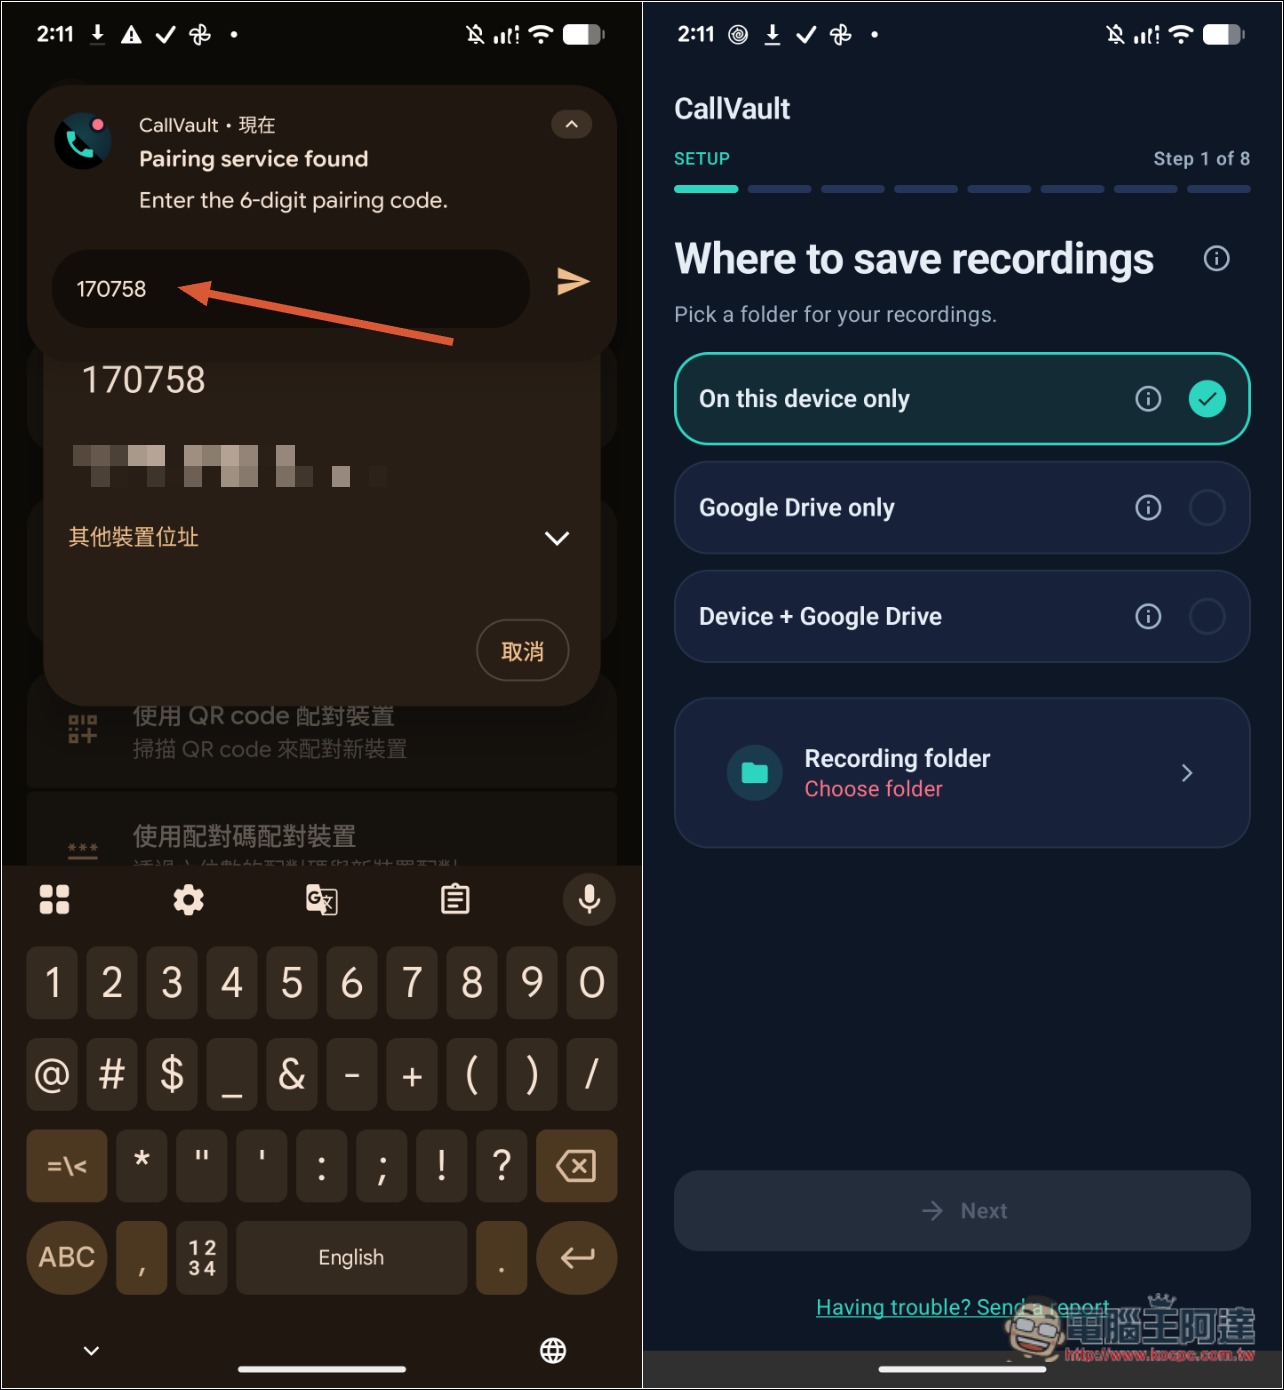
The second one, Wireless debugging, is a bit different: after you enable Wireless debugging in Developer options, tap “Pair device with pairing code,” and you’ll get a string of numbers. Wait a few seconds, and a notification from CallVault will pop up at the top asking you to enter the pairing code. Tap “Enter pairing code”:
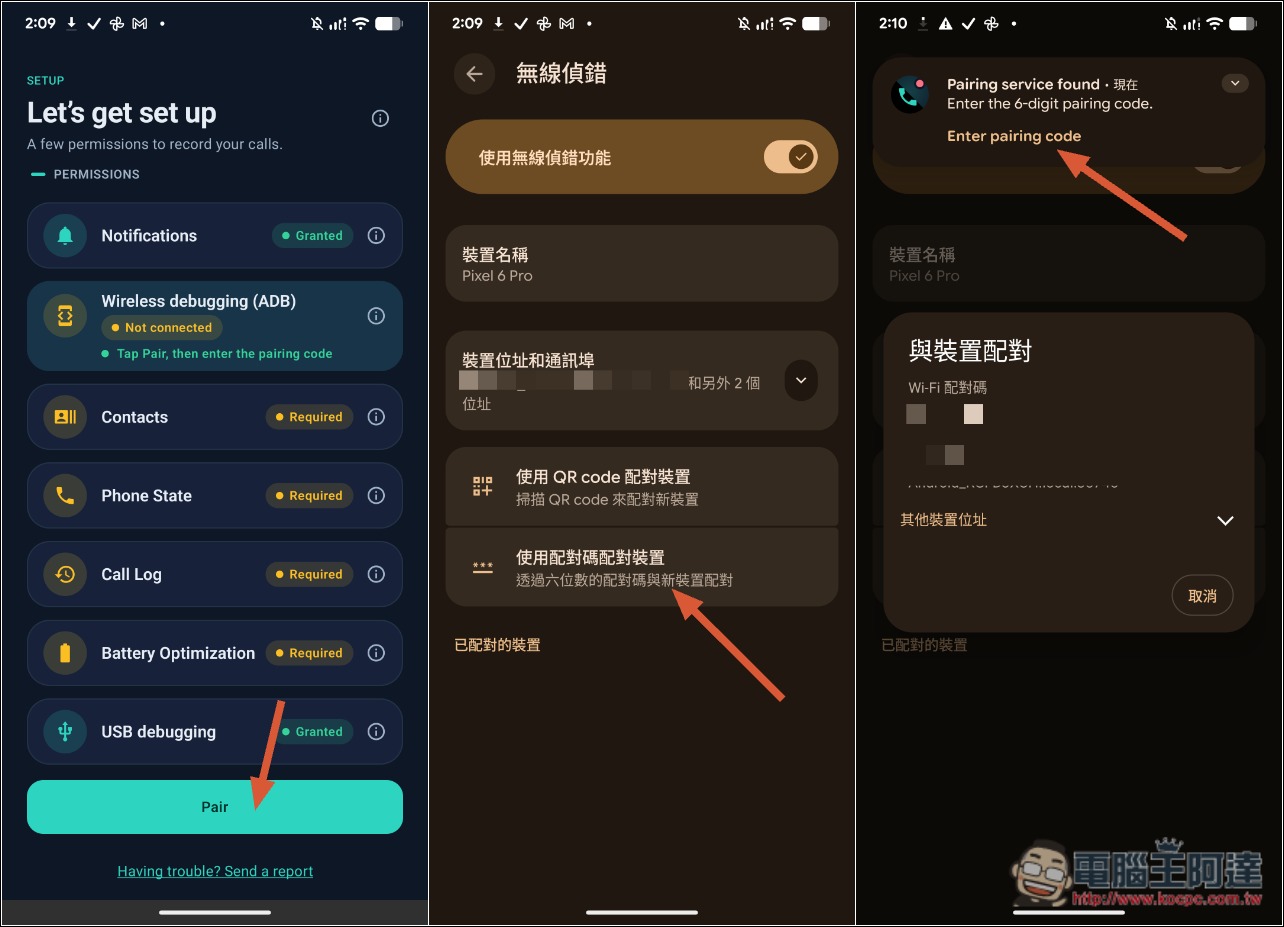
Enter the number shown on the screen, and this step is complete. After all authorizations are done, you’ll enter the setup flow. It first asks where you want to save recordings; you can choose local, Google Cloud, or local + Google Cloud:
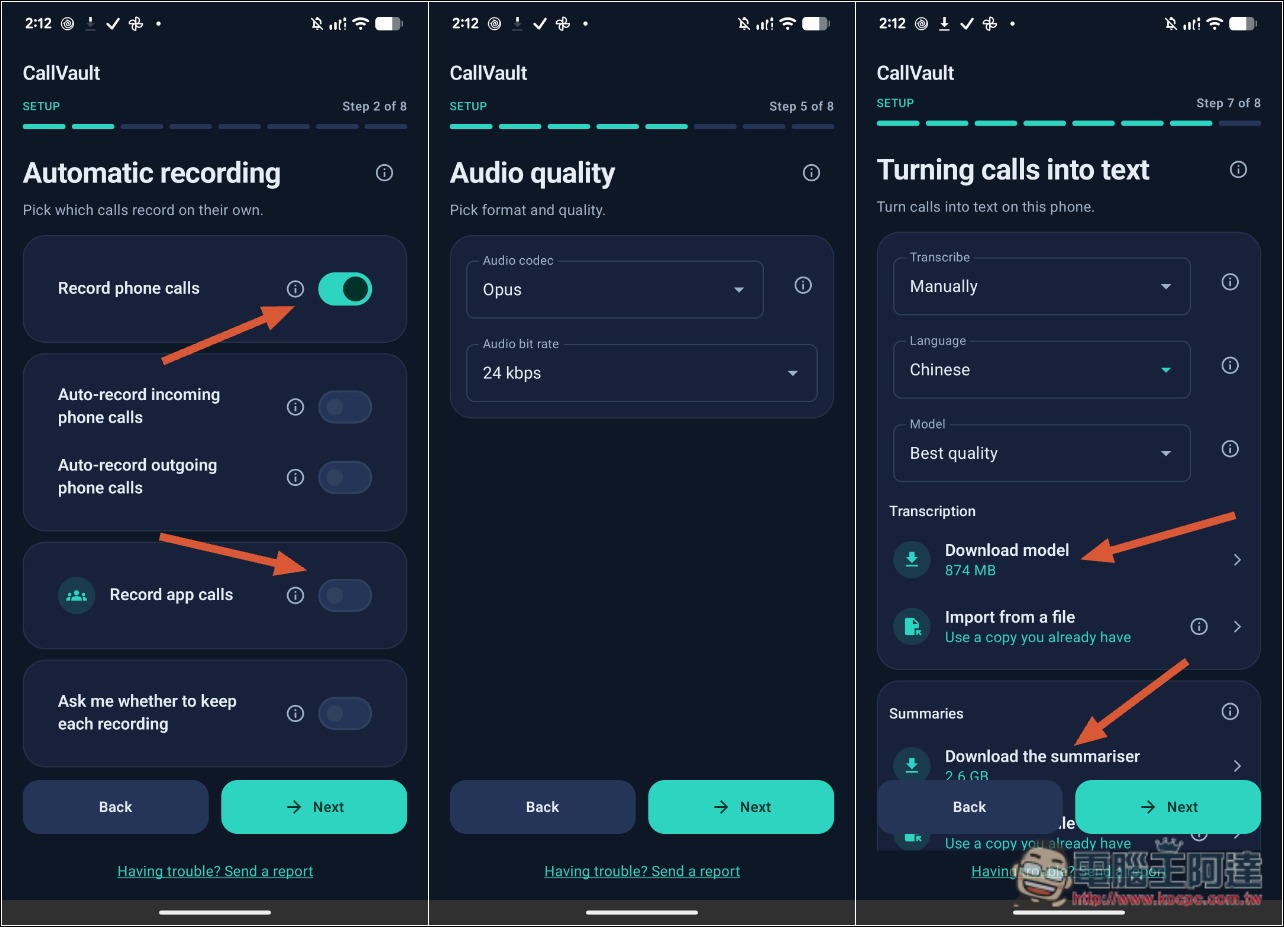
On the automatic recording screen, incoming calls are enabled by default. If you also want to automatically record app calls (e.g., Line calls), remember to enable Record app calls as well. Turning calls inteo text is the setting for AI transcription and summaries; if needed, remember to download the model:
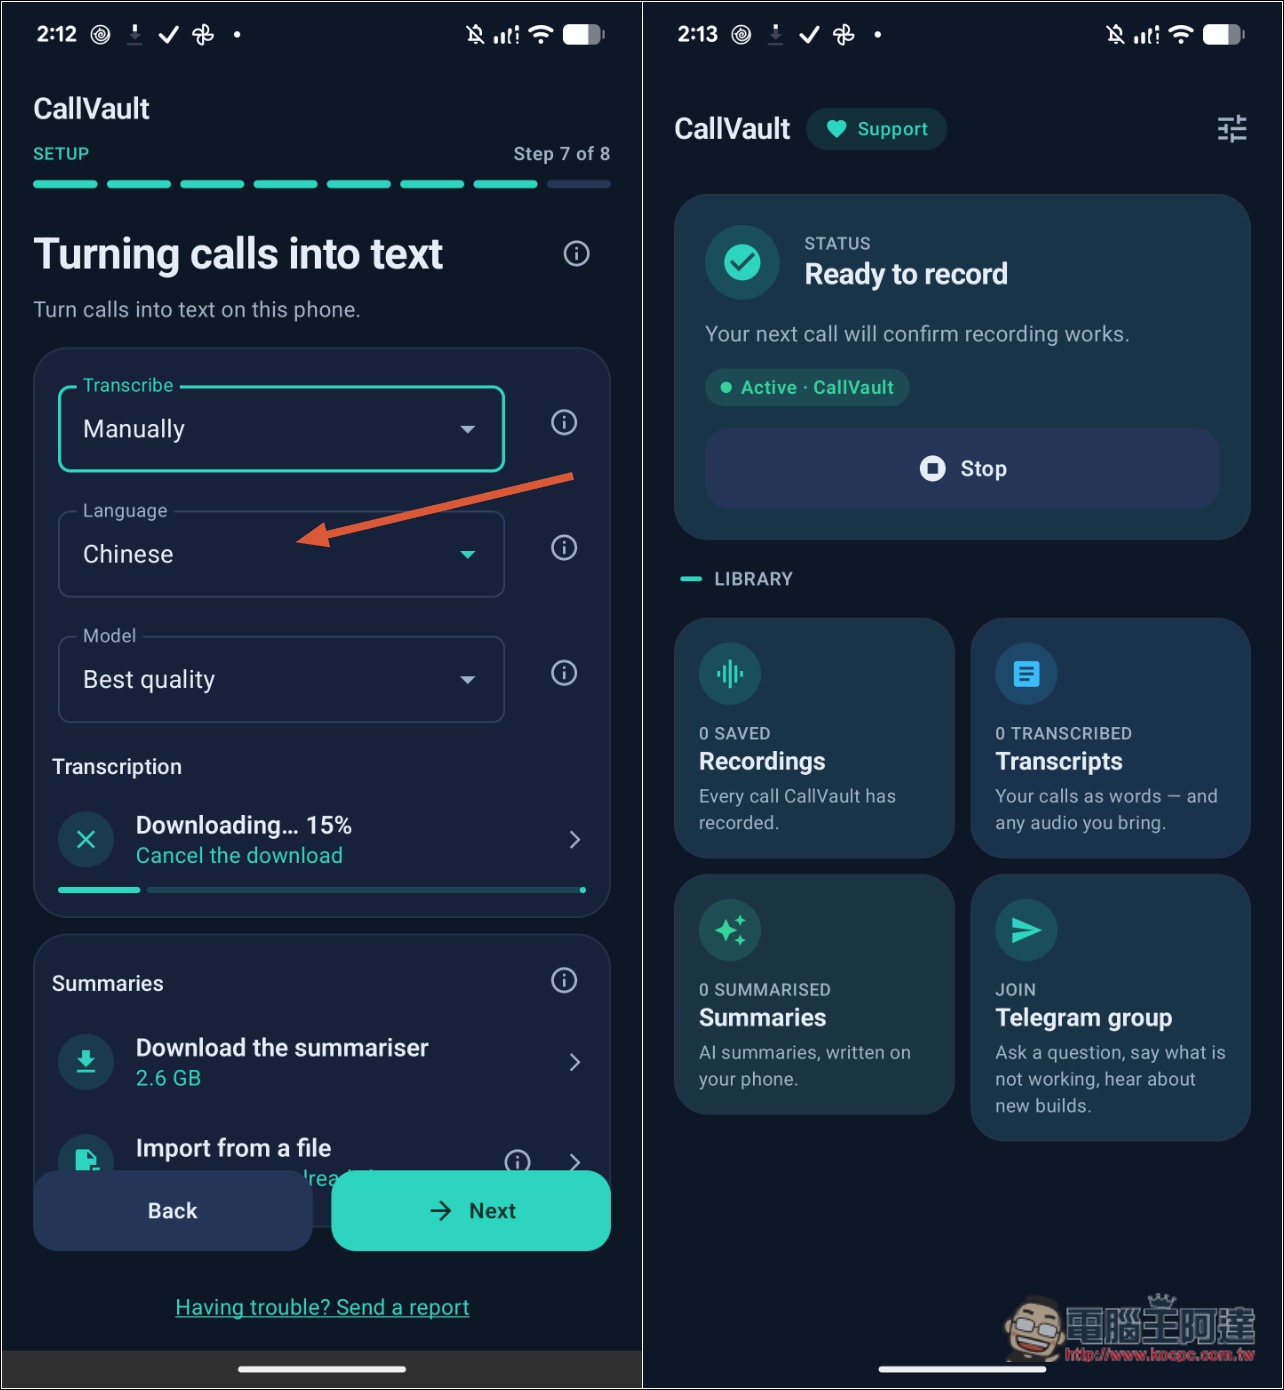
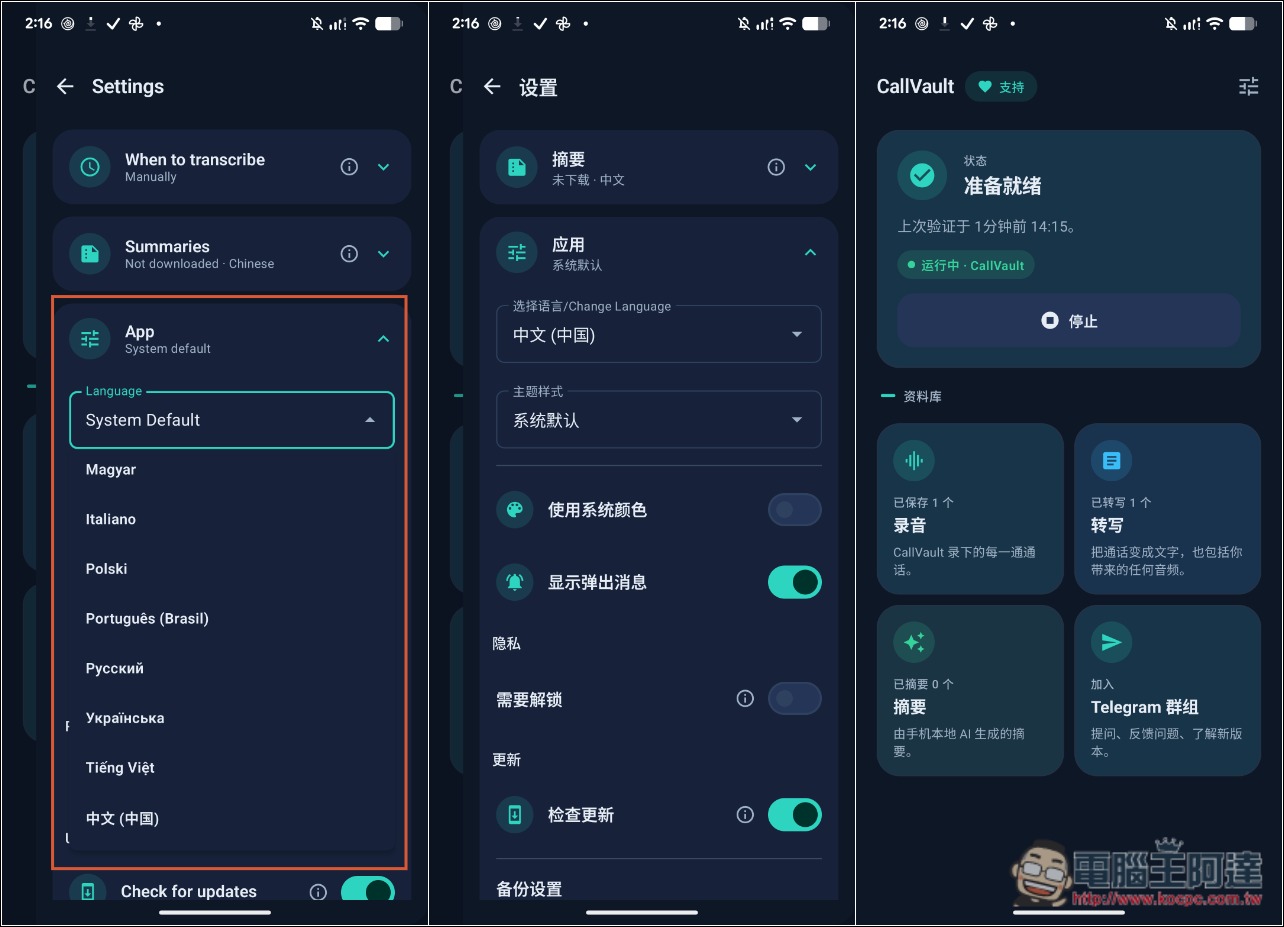
After setup is complete, you’ll go to the main screen. At this point, automatic recording is already enabled, and any call will be recorded automatically. If you want to stop it, press Stop on the main screen:
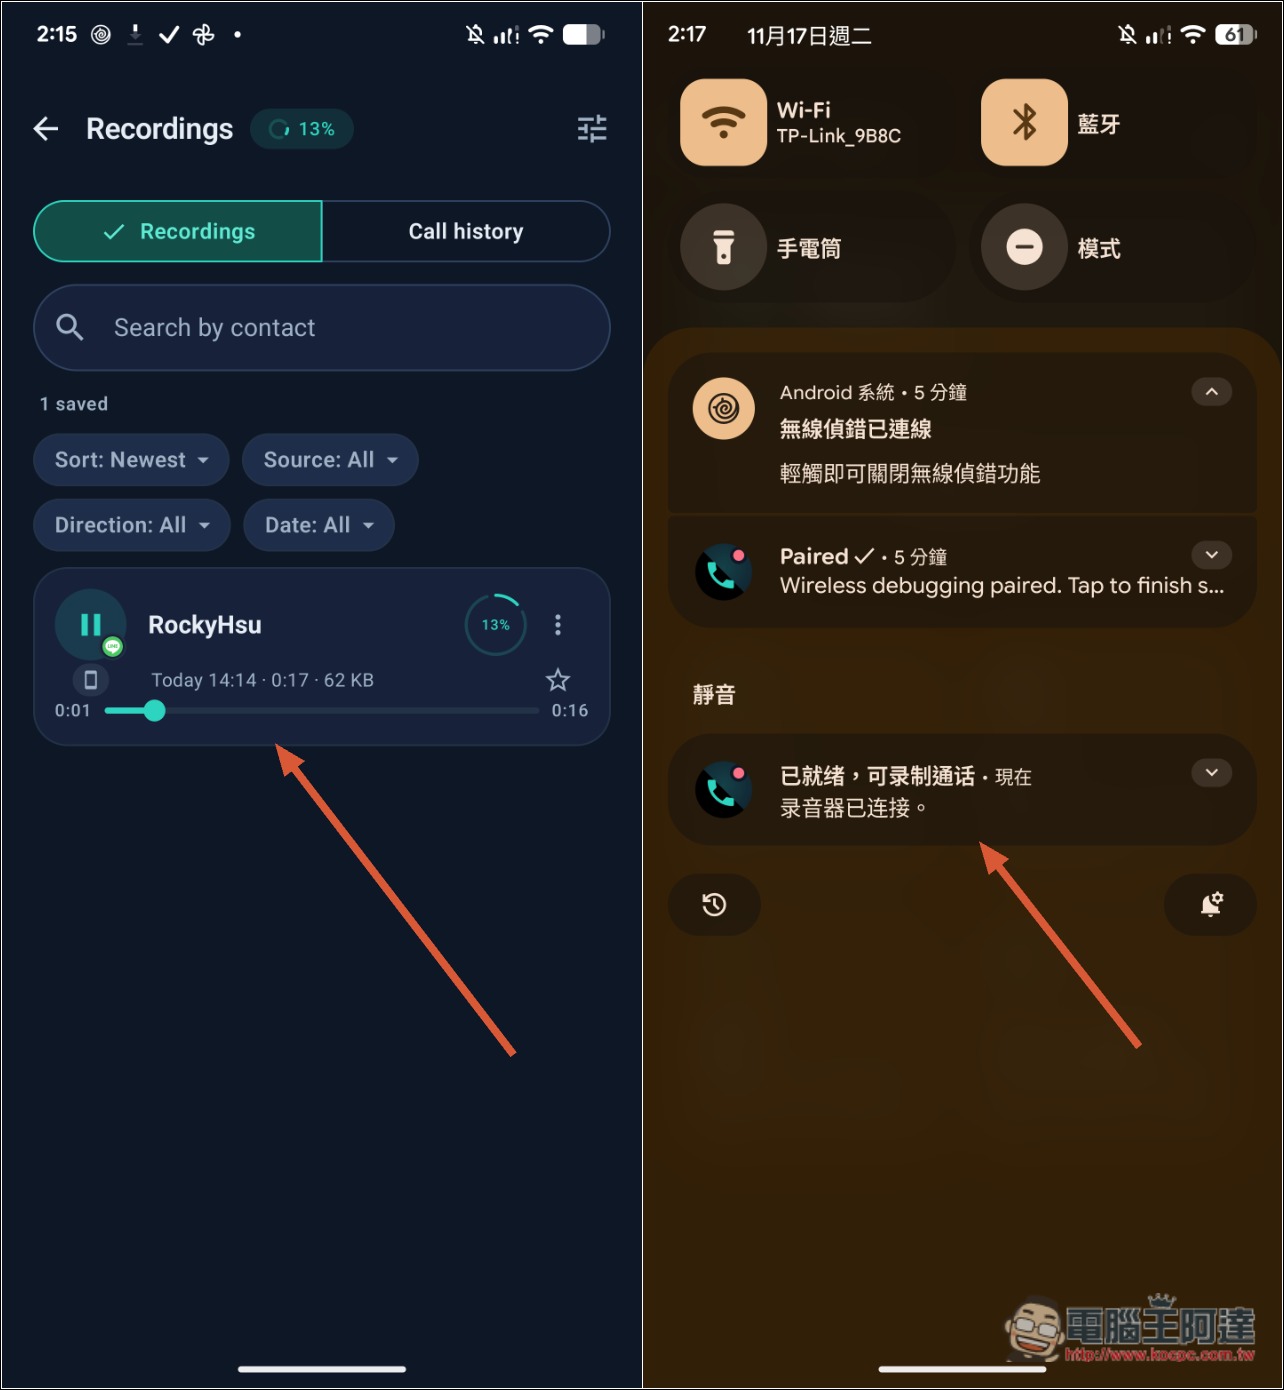
I tested Line and it worked—the call was automatically recorded. In Notification Center, you’ll also see a prompt from Paired saying it’s standing by to auto-record at any time:
Open App Settings from the menu in the top right corner. There you’ll find Language Settings, which offers Simplified Chinese:
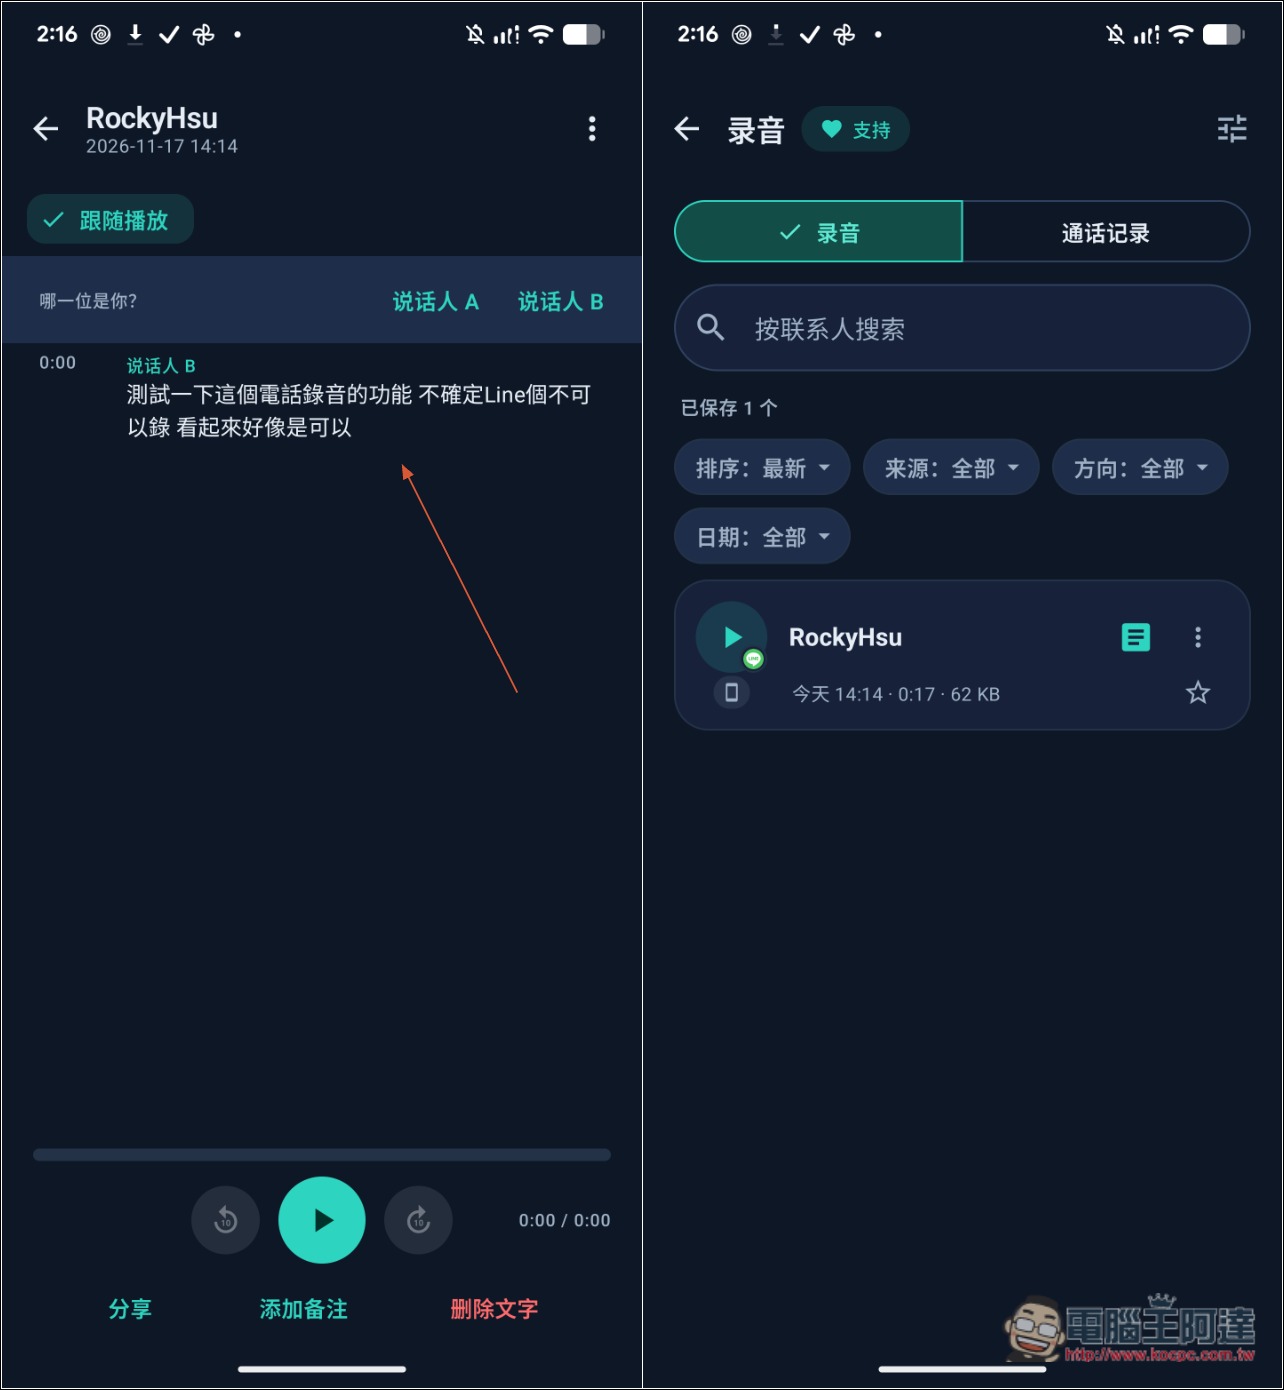
In real-world testing, the transcription quality is also good, and it transcribes Traditional Chinese:
Source: KOCPC Chinese