


Recently, stability.ai has launched a new generation of AI image generation model, Stable Diffusion 3.5, which is also open source and free for everyone to use. Compared with SD3.0, the performance is not only stronger, but the generation quality is also better. It can generate good AI images without a large number of prompts and supports a variety of styles. If you want to give it a try, this article will teach you how to use it online for free and install it locally.
Stable Diffusion 3.5 model version differences
There are three versions of Stable Diffusion 3.5, Large, Large Turbo and Medium. Medium is not expected to be released until October 29, and the others are available now:
- Stable Diffusion 3.5 Large: With 8 billion parameters, the best generation quality, and extremely accurate response to prompt instructions, it is the most powerful basic model in the Stable Diffusion series. Suitable for professional use, supports 1 megapixel resolution image generation. It is recommended to use a VRAM graphics card above 16GB.
- Stable Diffusion 3.5 Large Turbo: Stable Diffusion 3.5 Large is a streamlined version that can generate high-quality images in just 4 steps, much faster. It is recommended to use a VRAM graphics card above 8GB.
- Stable Diffusion 3.5 Medium (launched October 29): Has 2.5 billion parameters, uses improved MMDiT-X architecture and training technology, is designed for most consumer hardware, and generates images in the 0.25 to 2 megapixel resolution range. If your hardware is relatively poor, then it is recommended to wait for this one.
How to use Stable Diffusion 3.5 image generation online
If you want to play with it first before deciding whether to install it locally, or your computer graphics card does not have 8GB, Stability.ai has been installed on Hugging Face Stable Diffusion 3.5 Large、Stable Diffusion 3.5 Large Turbo online version.
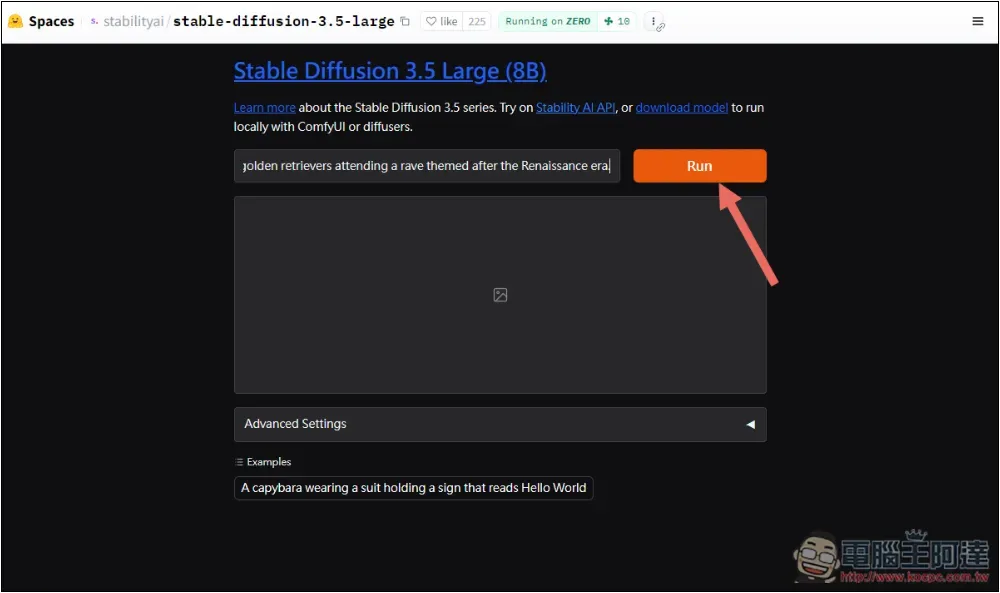
The user interfaces of both models are the same. After clicking the link above to enter the Hugging Face page, fill in the AI graph description Prompt you want to generate in the input box, and then press Run:
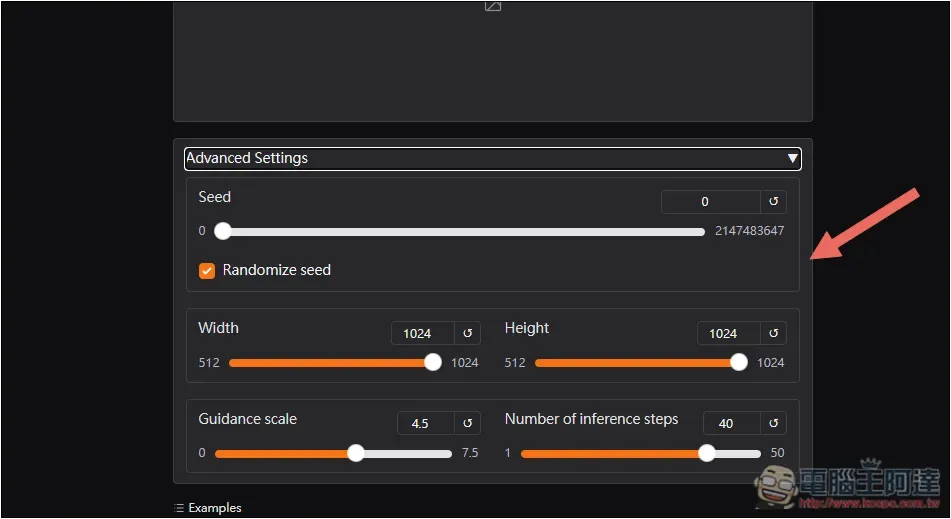
In the advanced settings below, you can adjust the Seed value, image width and height, etc.:
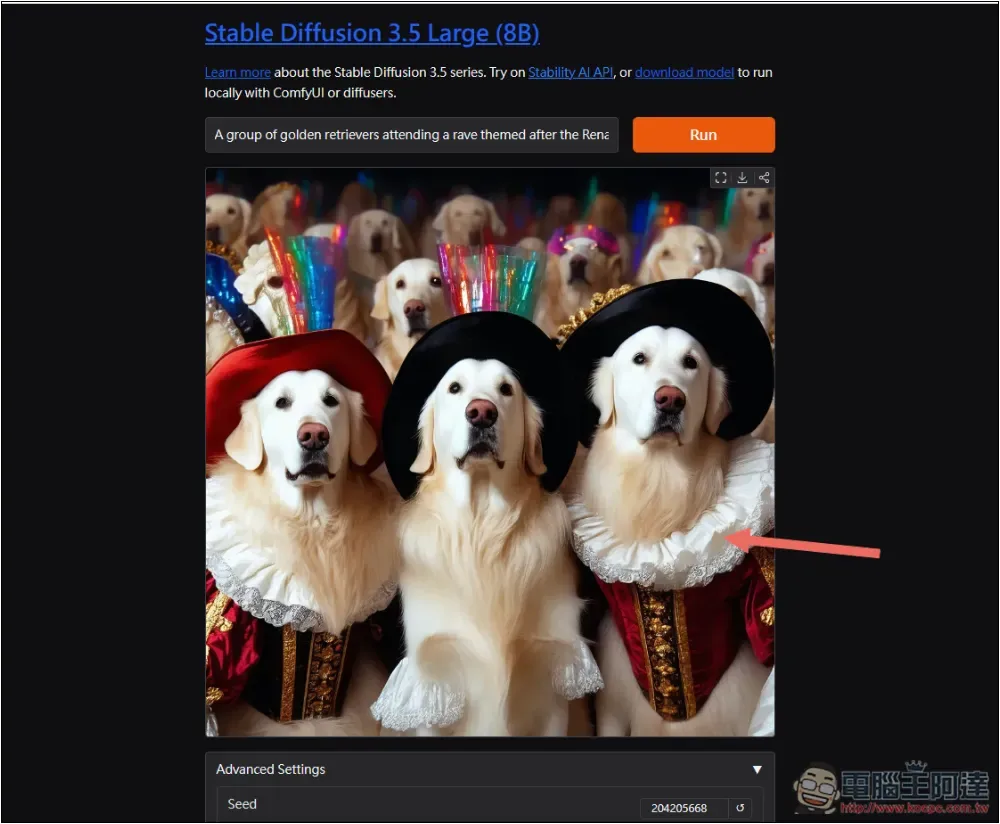
Wait a few seconds and you will get the result:
How to install and use Stable Diffusion 3.5 locally
There are many ways to use Stable Diffusion 3.5 locally. Here I will demonstrate the implementation with ComfyUI software.
First you need to download these files:
- Model file:Stable Diffusion 3.5 Large、Stable Diffusion 3.5 Large Turbo
- Workspace official sample:SD3.5L_example_workflow.json
- ComfyUI software
- CLIP archive:clip_l.safetensors、clip_g.safetensors、(t5xxl_fp16.safetensors / t5xxl_fp8_e4m3fn.safetensors)
Just choose one for t5xxl. If you download the Large model, download fp16. For Large Turbo, fp8 is recommended. Detailed steps are as follows.
After clicking the link above to enter the model file download page, you should be asked to enter some information for the first time to use this model. You also need to have a Hugging Face account. If you don’t have one, register for free:
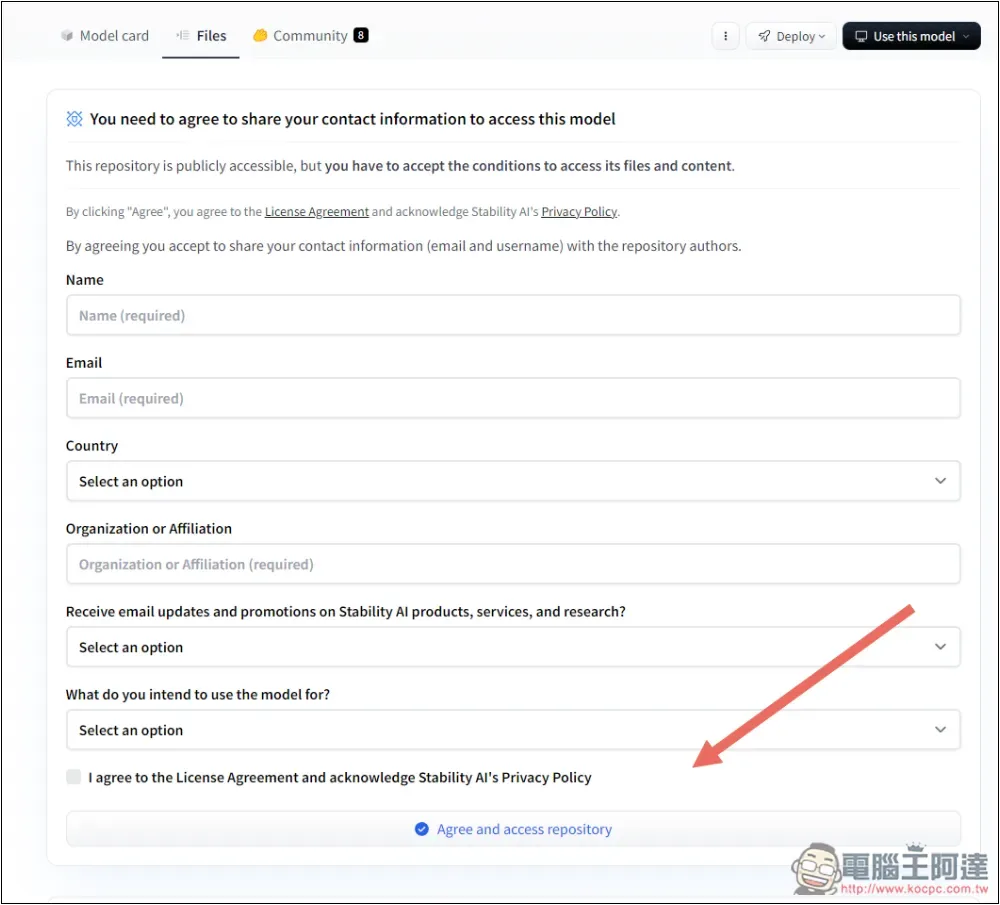
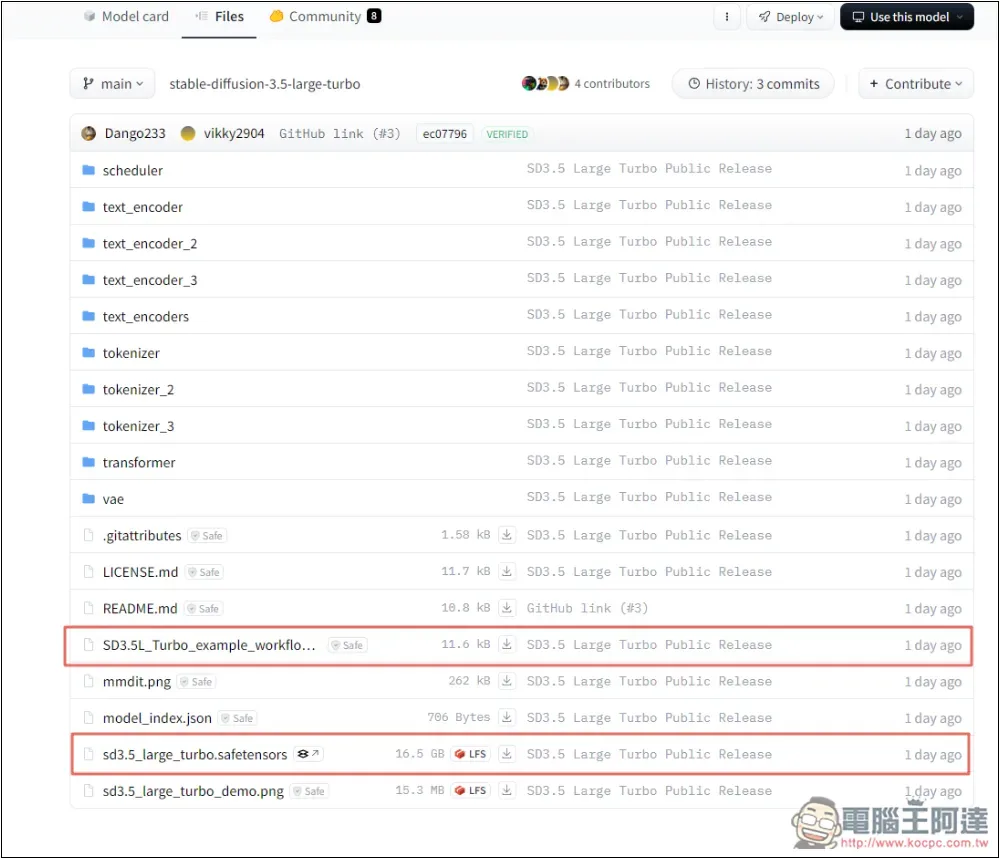
After inputting, download the model file you need. I used Large Turbo. SD3.5L_example_workflow.json is the officially provided workspace sample. Click the download icon on the right to download. In addition, the link I attached above is to the download page of the model file. You can click Download in the upper left corner to download:
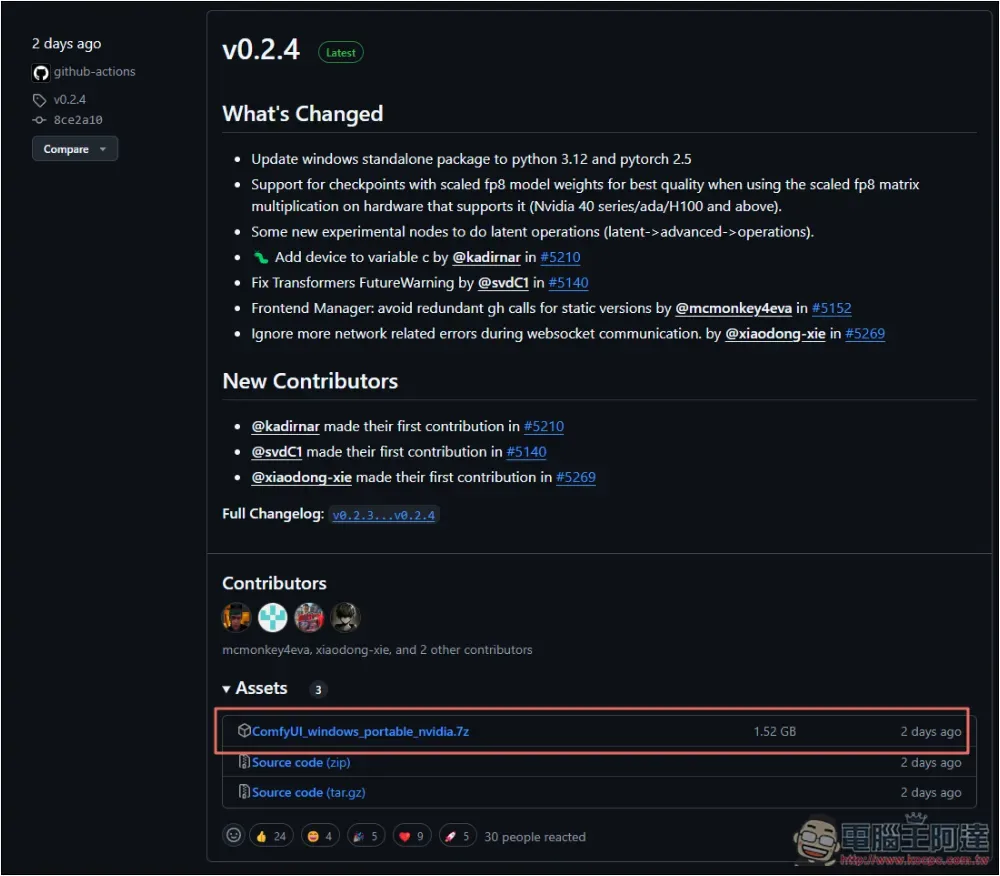
Next is the ComfyUI software. The latest version is v0.2.4. Download the .7z compressed file:
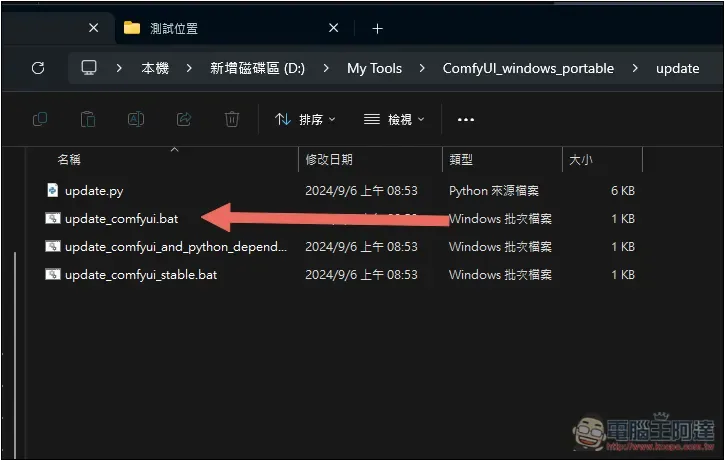
If you already have ComfyUI, remember to upgrade to the latest version, go to update in the folder, and press update_comfyui.bat to start the update:
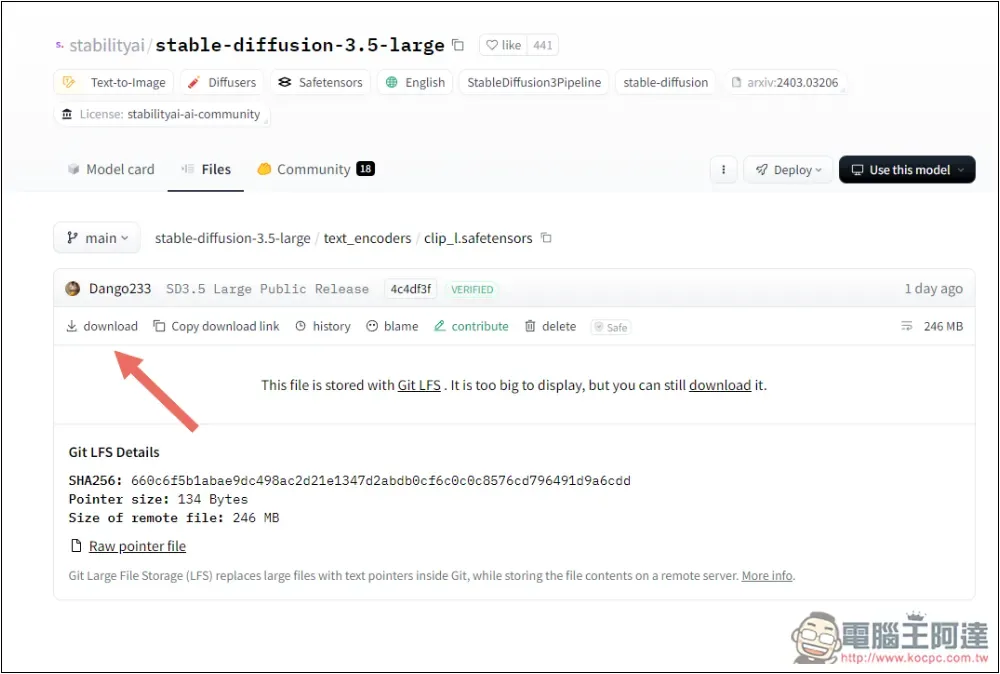
A total of 3 Clip files are required. After clicking the link above to enter the download page, click download on the upper left to download:
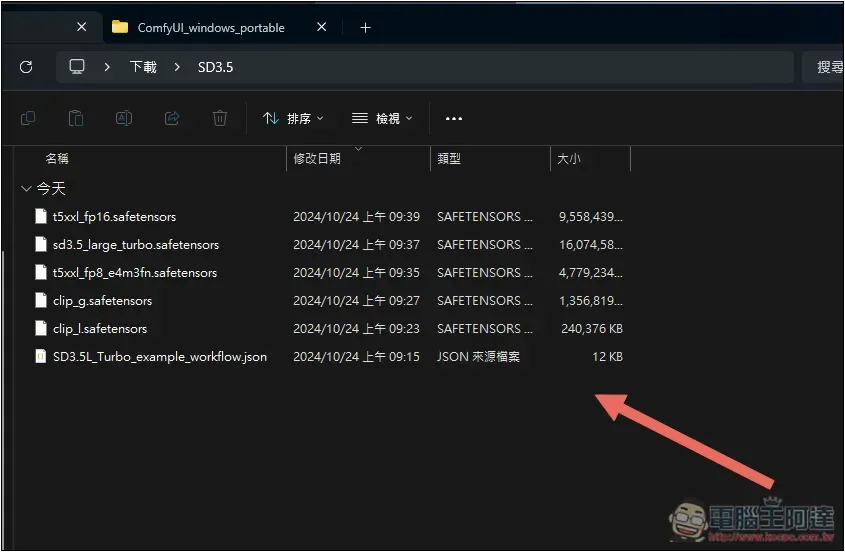
It is recommended that the downloaded files be placed in the same folder, so that it will be easier to move them later. I downloaded both t5xxl, so there is one more. Normally, there are 5 in total (excluding ComfyUI):
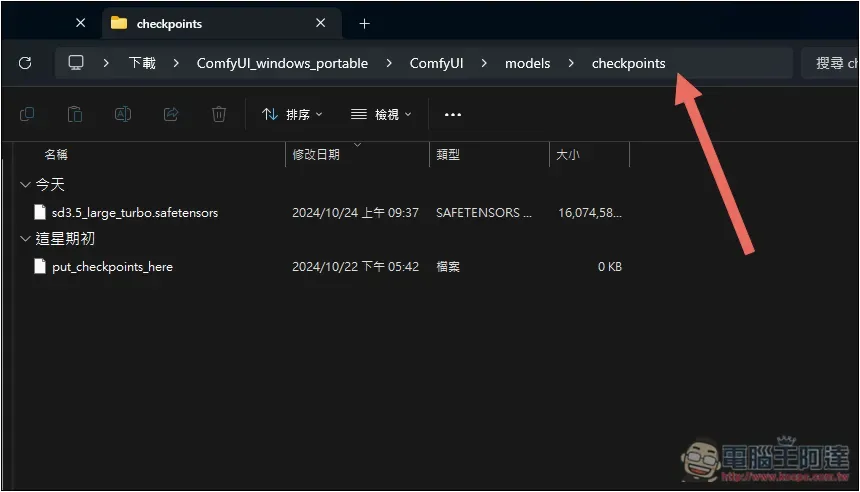
After downloading ComfyUI, unzip and open it, go to the ComfyUI > models > checkponts folder, and put the model file here. Mine is sd3.5_large_turbo.safetensors:
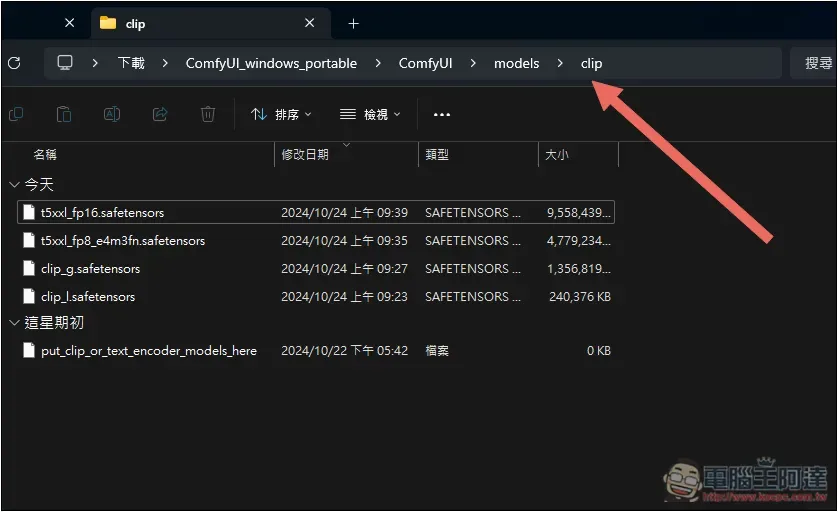
Then go to ComfyUI > models > clip folder and put the 3 downloaded clip files here:
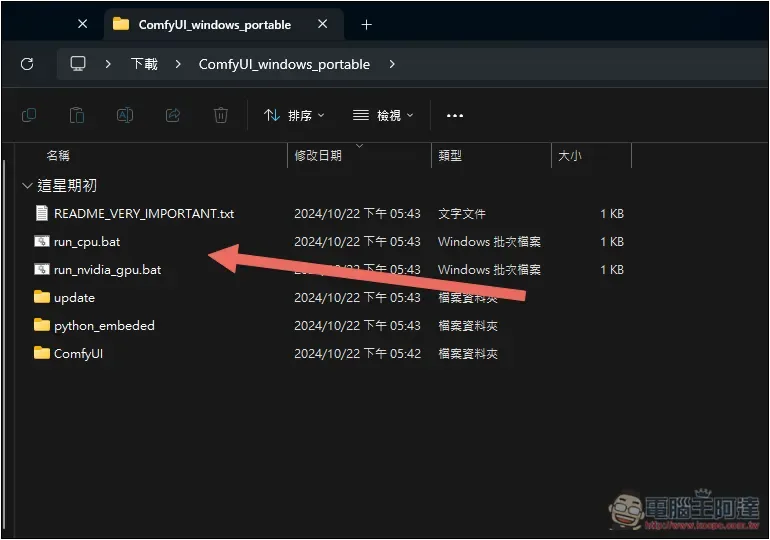
Finally, go back to the ComfyUI_windows_portable folder and enable it. If you have an NVIDIA graphics card, please run run_nvida_gpu.bat, so that the graphics card will be used for calculations when generating images. If you don’t have one, run_cpu.bat, and the CPU calculation speed will be slower:
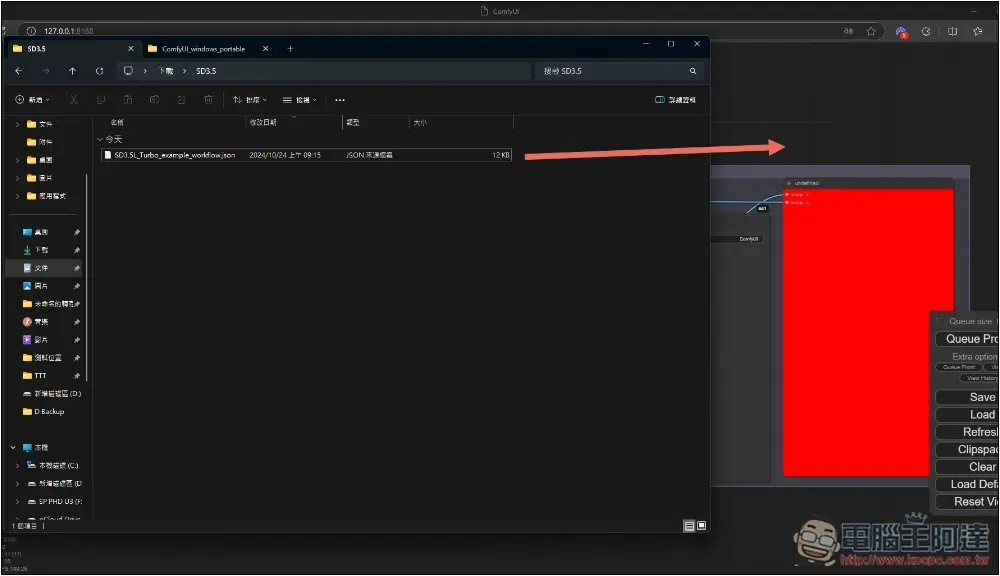
After ComfyUI is opened, drag and drop the workspace template SD3.5L_example_workflow.json just downloaded on the top of the ComfyUI screen, so that it will be imported:
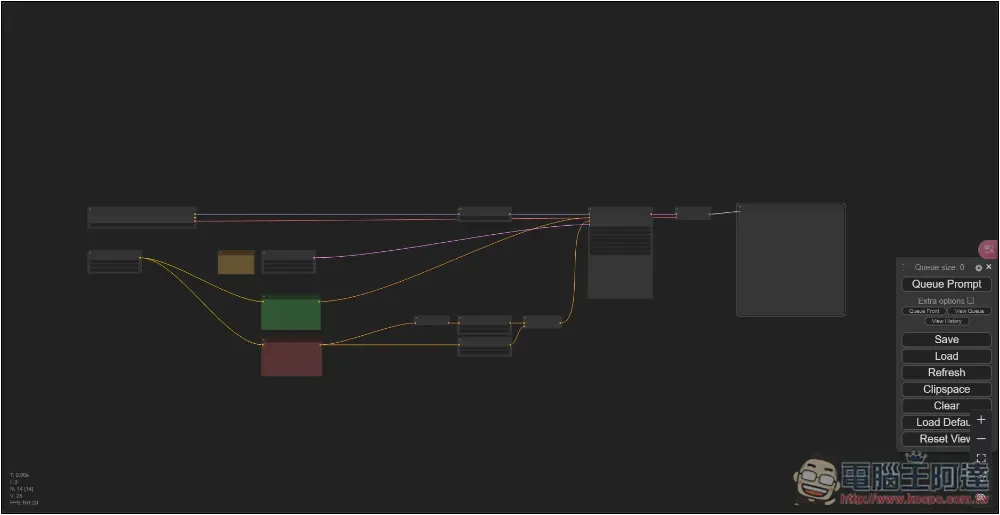
As shown in the picture below, currently, because the screen is zoomed far away, no words are displayed. You can see it by sliding in with the scroll wheel:
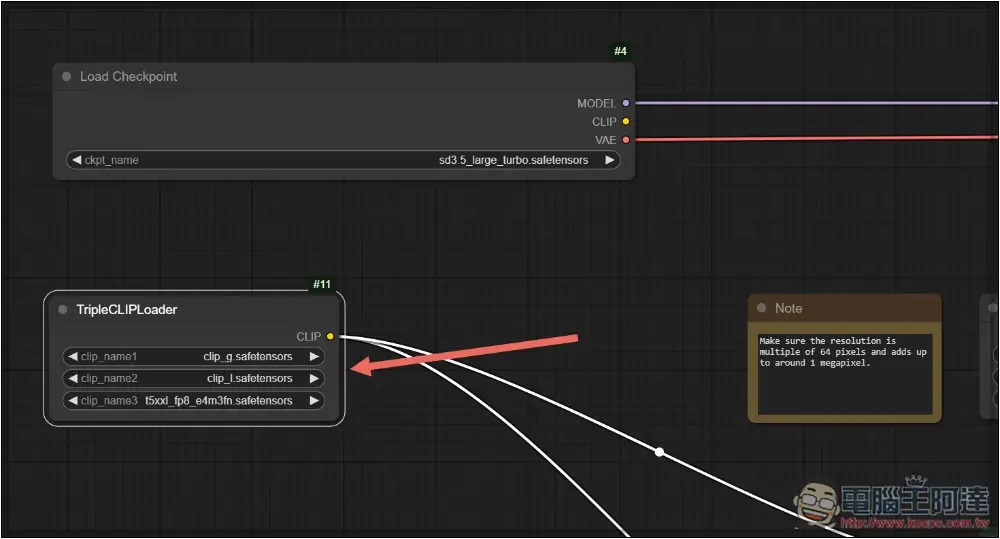
First, zoom in to the far left, set Load Checkpoint for the model, and confirm whether it is the one you just downloaded. After no problem, the three options of TripleCLIPLoader need to be changed to the clip file you just downloaded:
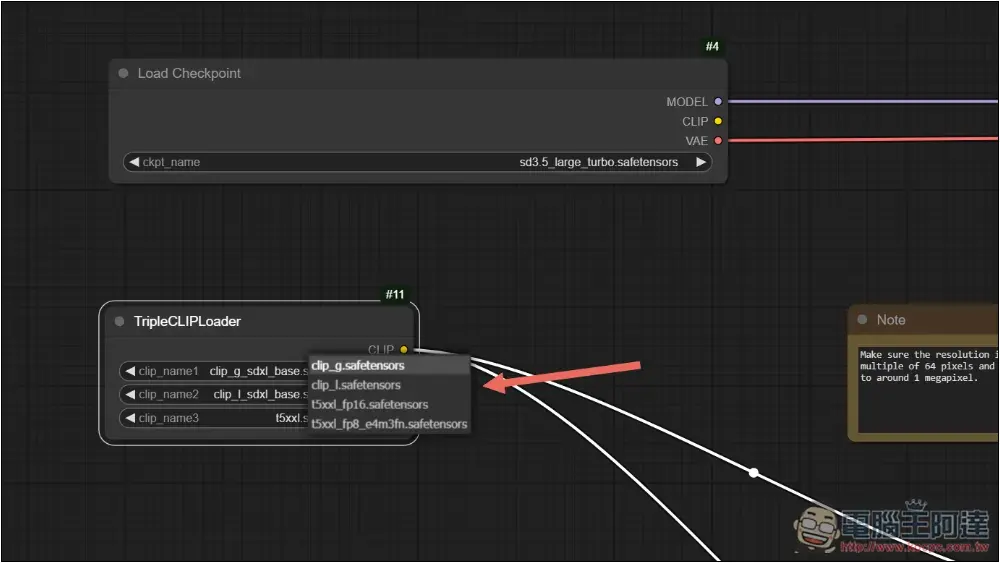
Like this:
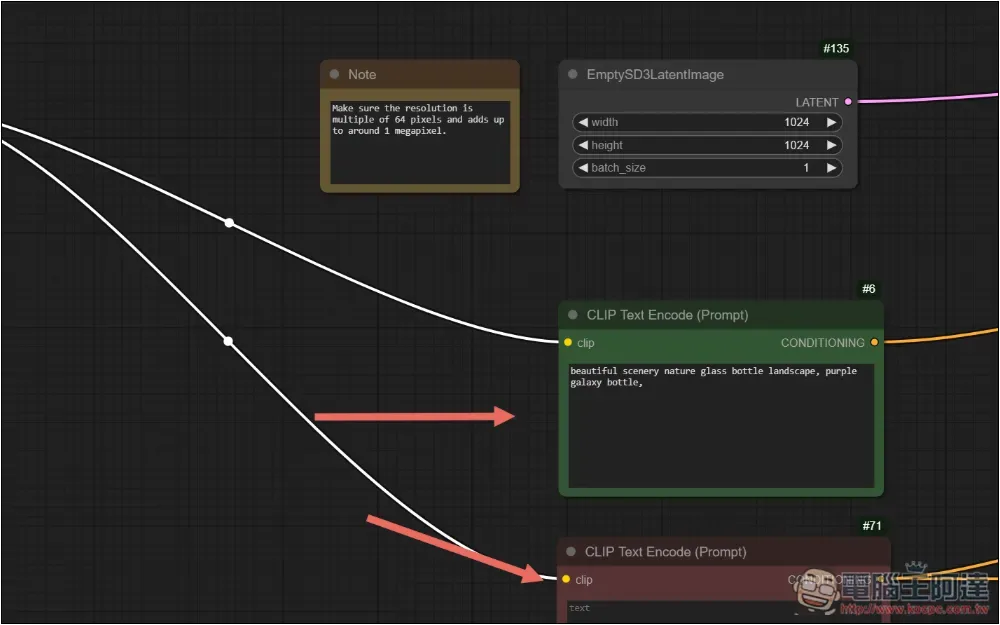
The green CLIP Text Encode on the right is where the image prompt is input. It has been preset. You can try it first to see if it can be generated normally. The red CLIP below is the reverse prompt. You can enter content you don’t want to appear on the picture:
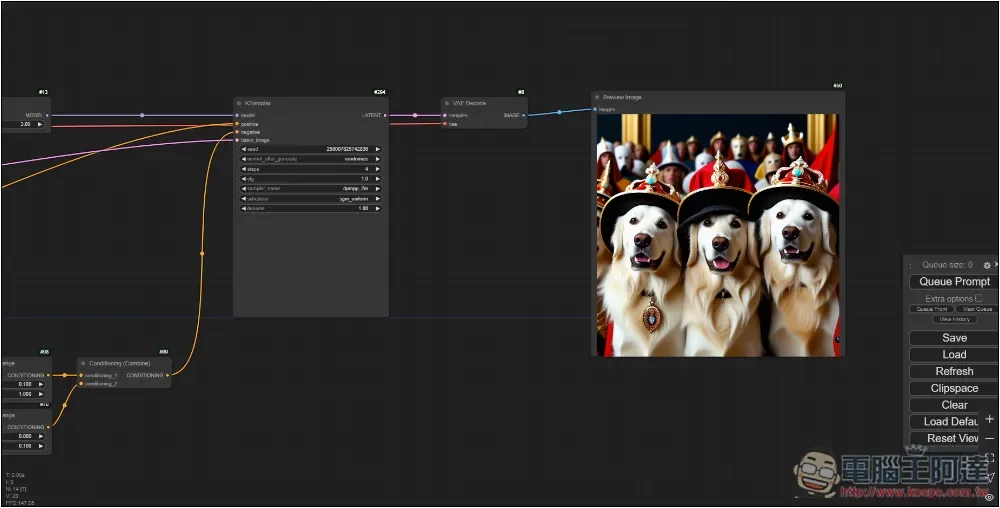
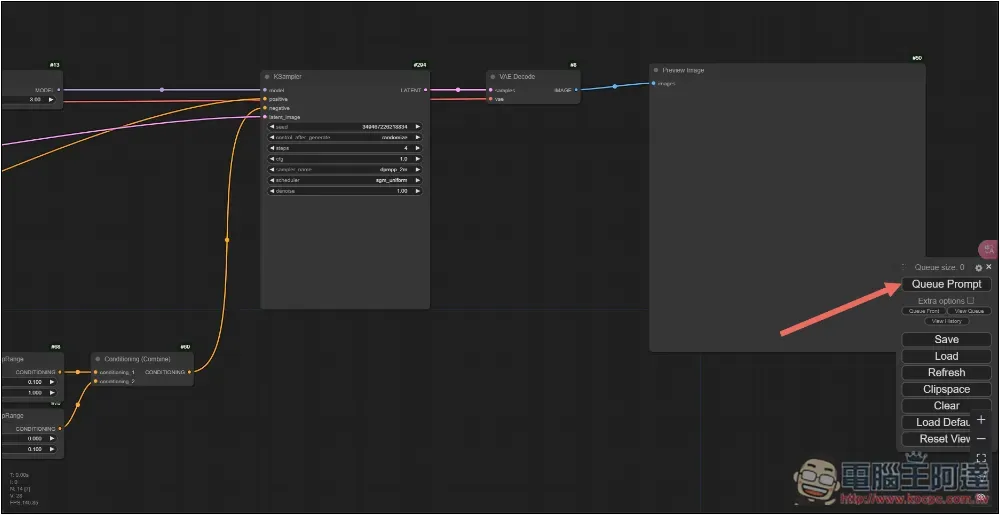
Press the Queue Prompt on the right to start generating:
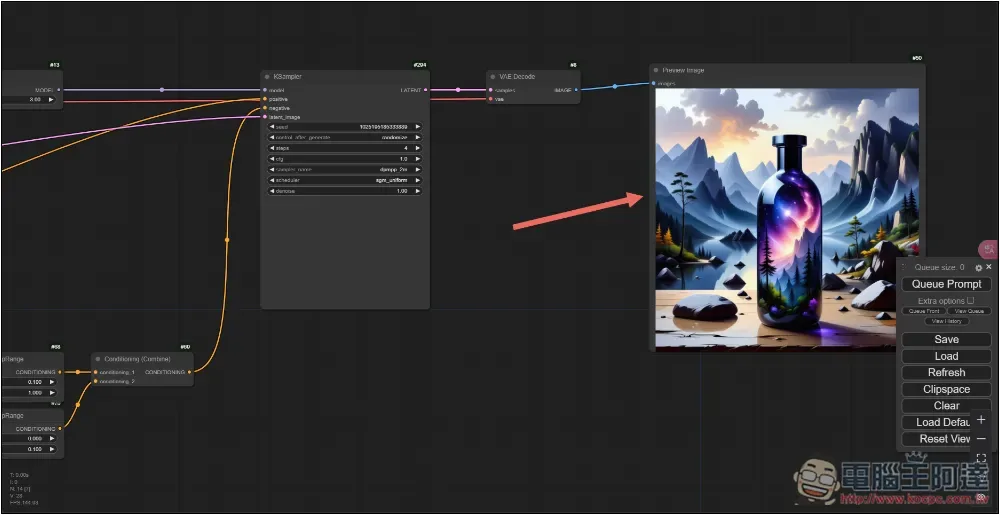
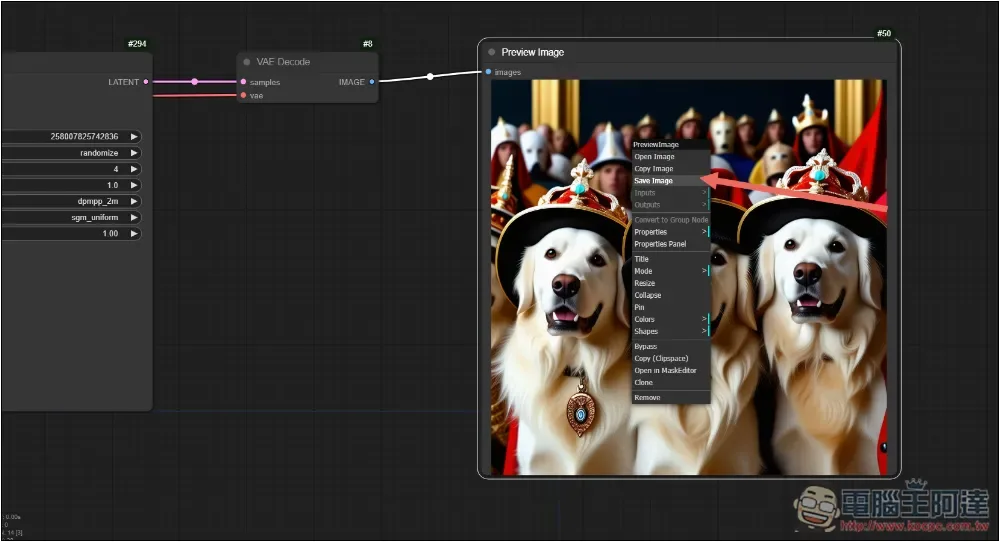
After it is generated, the Preview Image on the far right will display the result. The generation speed depends on your computer hardware:
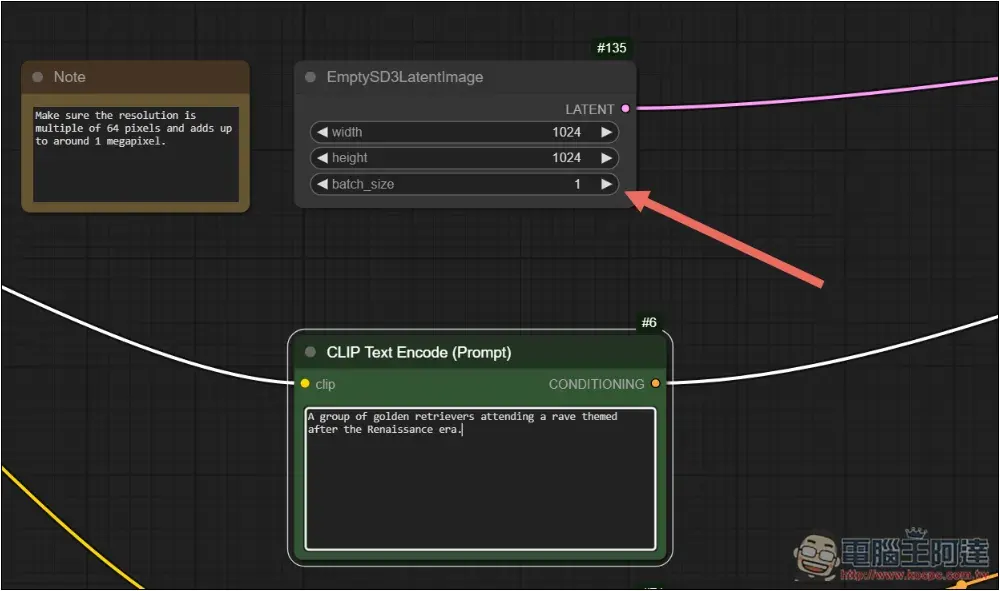
EmptySD3LatentImage can set the height, width, and number of images you want to generate:
If you are satisfied with the image, click the right mouse button above and click Save Image to save the image:
Source: KOCPC Chinese