


While the Microsoft Photos app was very basic when it was first released, it has received numerous UI enhancements and new features, and now it beats all other third-party photo viewing apps on Windows. In the current version, it is no longer limited to viewing media files on your laptop, but is more powerful in terms of cloud integration, AI editing tools and sharing options, and can work seamlessly with other applications such as Clipchamp and Designer.
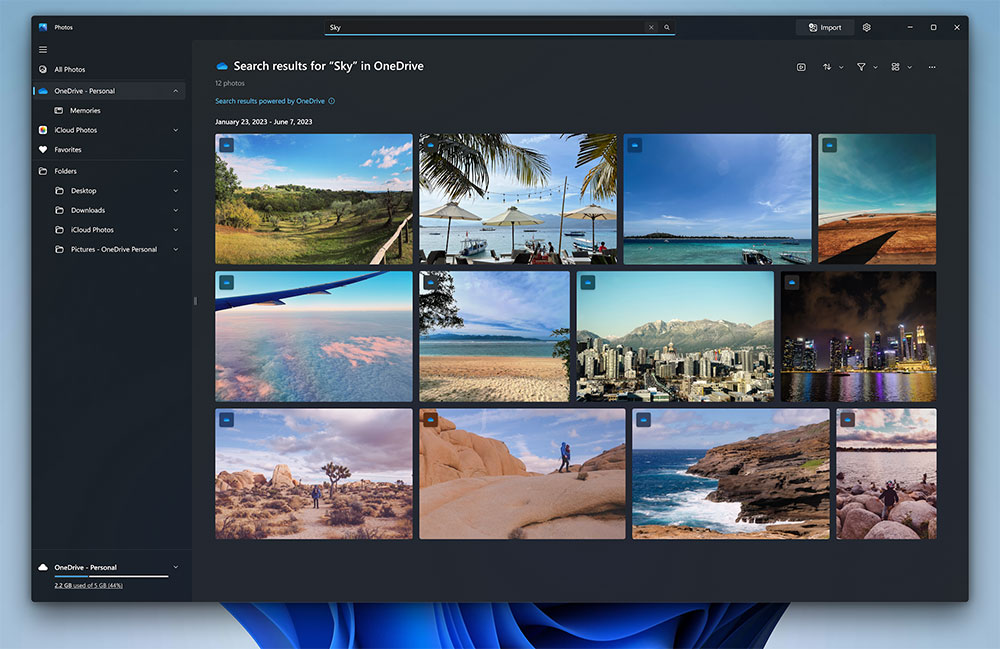
Windows 11’s built-in “Photos” easily overwhelms 6 major functions of third-party applications
1. Check your OneDrive photos
If you are a Microsoft 365 subscriber and use OneDrive to back up your media library, enable OneDrive integration in the app, which will enable your OneDrive photo folders and memories directly in the Photos app.
- Open the Photos app in Windows and click Settings (the gear icon) in the upper right corner.
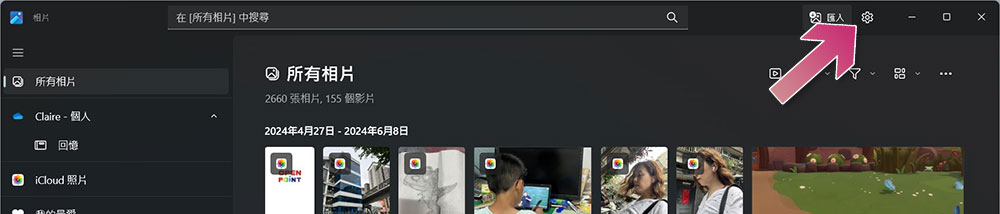
- Enable personal OneDrive.
Once set up, you no longer need to search for multimedia files uploaded through OneDrive in the file manager app every time. You can access, edit and manage all content directly from the folder menu in the Photos app.
2. Import photos from other sources
In addition to OneDrive cloud space, you can also import photos and videos from other sources, such as external drives, memory cards, and local folders.
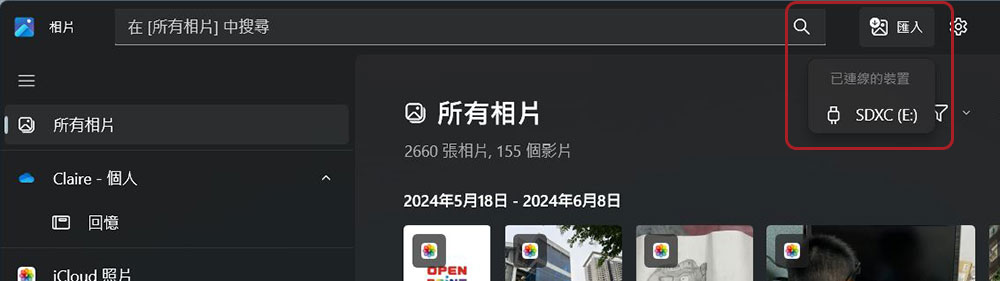
- Open the Photos app, click “Import” above, and select the storage device you connected.
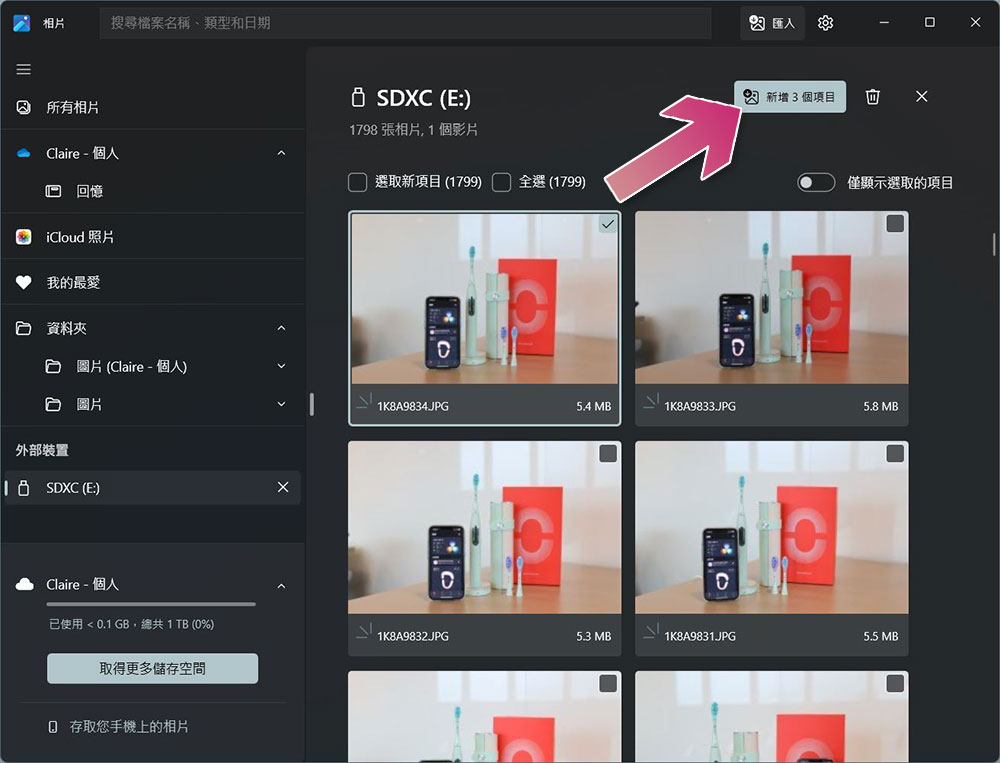
- The Photos app will then load existing photos and videos on the storage device. After selecting the content you want to import, click the “Add XX items” button above.
- Next you can choose where to import the photos. In order to facilitate organization, you can choose to “add a folder” on the local computer or in the cloud to accommodate the files to be imported. After selecting the location, click “Import”.
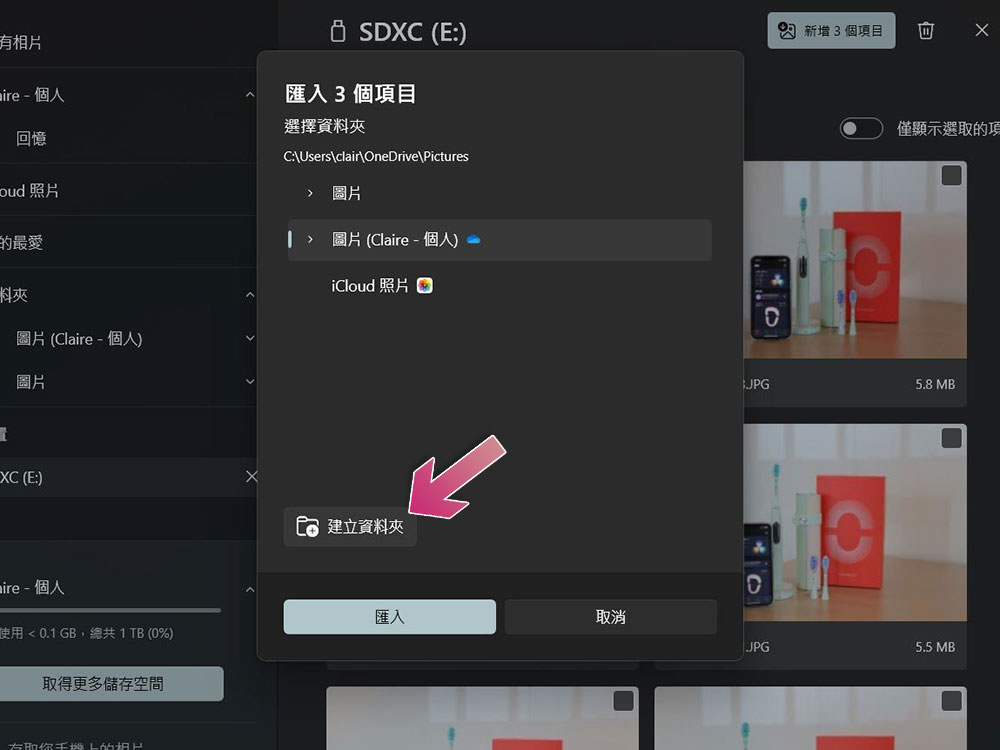
- You can now find and select your folder in File Explorer, and the photos will be available in the Photos app. You can select imported photos, back them up to OneDrive, start a slideshow presentation, or create a video using Clipchamp.
3. Blur or remove background
Like the AI editing tools in Google Photos, Microsoft has now begun adding its own AI research and development to all services that include the Photos app in Windows. Two of the best and most useful tools are the ability to add background blur to portrait photos and remove the background from the photo.
- Open the Photos app and double-click on the photo you want to edit.
- Click “Edit Image” in the top function button

- Next, click on the background processing icon on the far right (as shown by the arrow below). After AI detection, the part considered to be the background will be represented in blue. Then you can select the options to be processed later from the right sidebar. The degree of blur can also be adjusted using the pull lever.
- Blur: Create a depth of field effect and blur the background behind it.
- Removal: that is, the removal of the portrait.
- Replace: Replaceable background, you can use a solid color or another image as the background.
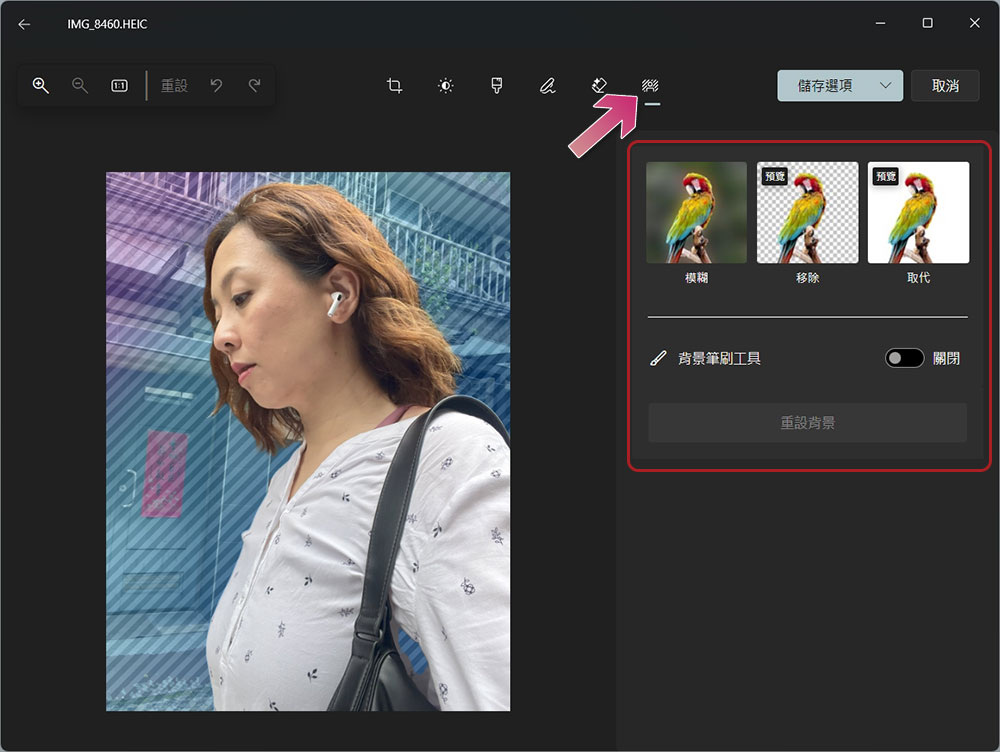
- After setting, click Save.
4. Create compelling videos
Thanks to clever integration with Clipchamp, ordinary users can create eye-catching short films without relying on third-party video editors.
- Open the Photos app and select the desired image file.
- Click the Clipchamp icon at the top.
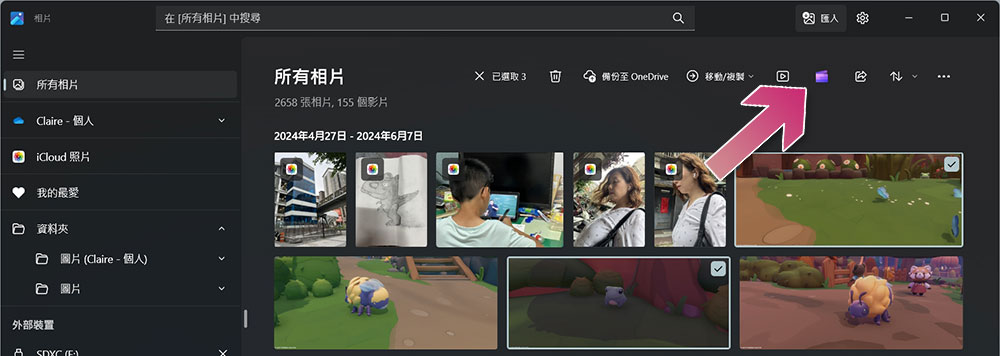
- Next, the Photos app will import the photos and videos you selected into Clipchamp. You can drag media files to the timeline and use the editing tools to create beautiful videos to share with social software in just a few minutes.

5. Edit images instantly
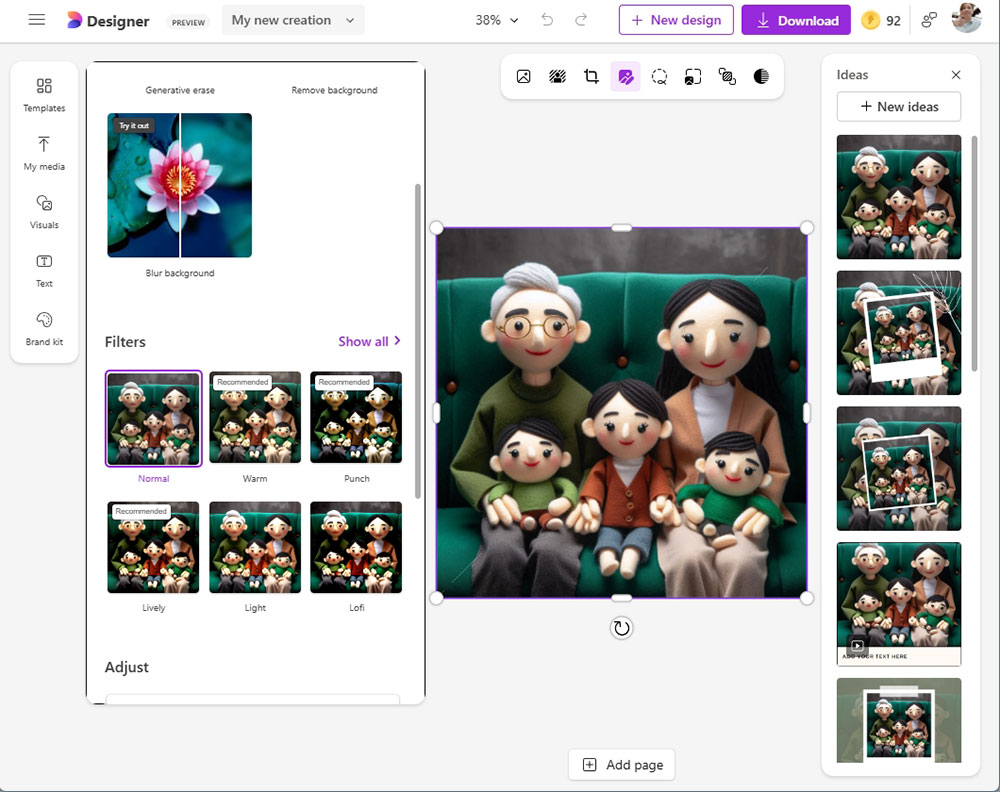
In addition to AI tools, the photo application also provides many filters and other editing tools. You can even import images into Microsoft Design (it is still in Beta, so it is not yet available in the Chinese version of Photos) to make other adjustments.
- Open the Photos app, click on the selected photo and click Edit Image at the top to directly crop, resize, change lighting and apply filters. If your device supports a stylus, you can also annotate.
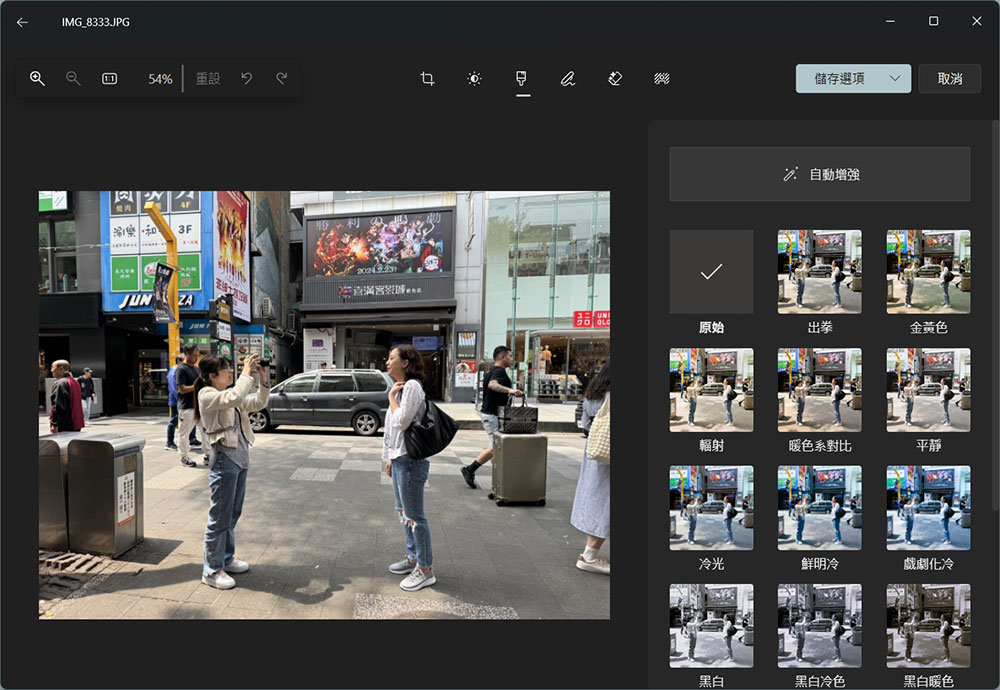
- If you want to make other adjustments, you can further process it from Microsoft Designer in the same way you imported it into Clipchamp above.
6. Integration with iCloud
The Photos application is also perfectly integrated with iCloud. If you use an iPhone and are accustomed to using iCloud to store multimedia data, you can directly read, delete and other functions from the Photos application.
- Download iCloud from the Microsoft Store, log in to your Apple ID after opening it.
- Check your account details and set which content to sync with Windows 11 services to make sure everything is correct.

- Open the Photos app settings, click the gear icon in the upper right corner to enter the settings, and turn on the “Show iCloud Photos” item.
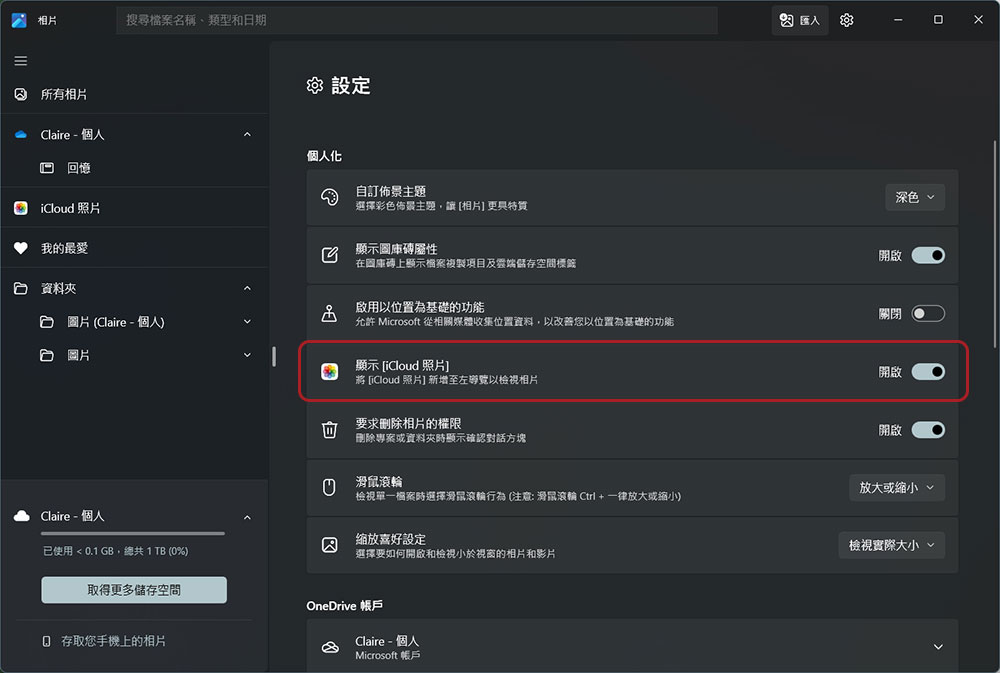
- Next, you can click to switch to iCloud media library from the left side, and you can also open any image and use the various editing functions we talked about above.
While Microsoft’s Photos app for Windows has a solid track record, and the iCloud integration is the right feature addition, we’d also like to see support for other major cloud storage services. Still, it’s a highly recommended go-to app for viewing, editing, and managing photos and videos with absolutely no additional installation required.
Source: KOCPC Chinese