


Buying a new laptop can be overwhelming at first, especially if you are new to the Windows ecosystem, and it may take some time to get familiar with the Windows 11 system. In order to speed up your adaptation, whether you are a professional, a gamer or an ordinary consumer, we have compiled the top 10 things to do after unboxing a Windows 11 computer, so that you can quickly enter the door of Windows 11.
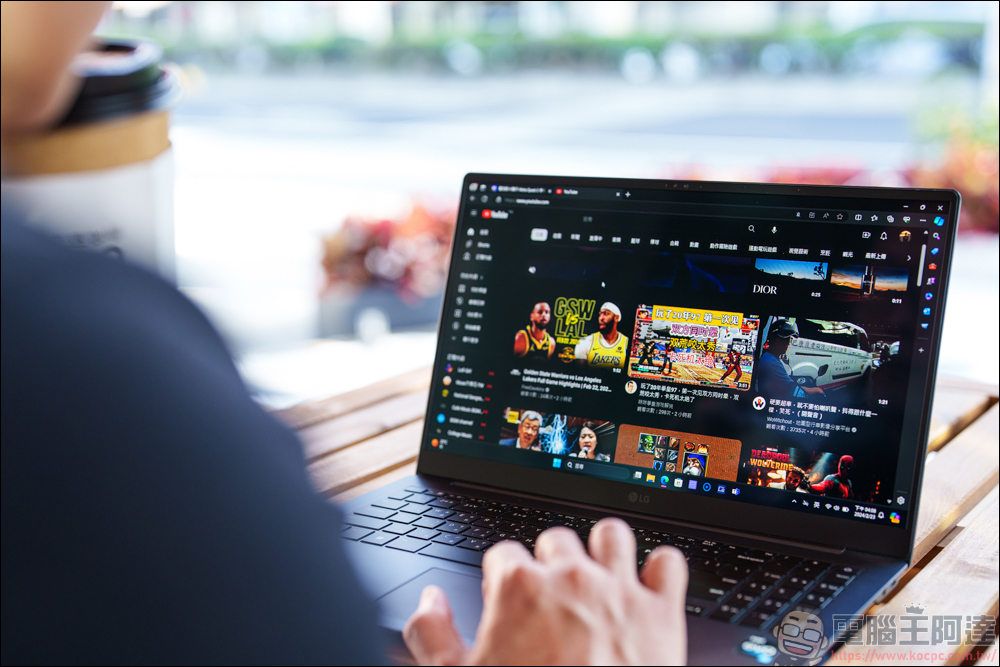
Getting a new computer with Windows 11? 10 things to do first after unboxing
There are many steps in this guide that depend on your own usage methods and habits, so you don’t have to follow them all and just pick the steps that suit you best. However, there are a few that are really worth recommending because they can help you get the most out of those shiny new computers that smell like cartons.
1. Check for updates
This one is the highest priority necessary program, it can be annoying, but it is important to keep your computer up to date, especially for security reasons, but it can also add new features to the computer. Although your computer comes with Windows 11 preloaded, the version may be out of date, so be sure to update.
- Open the Settings app.
- Enter “Windows Update”.
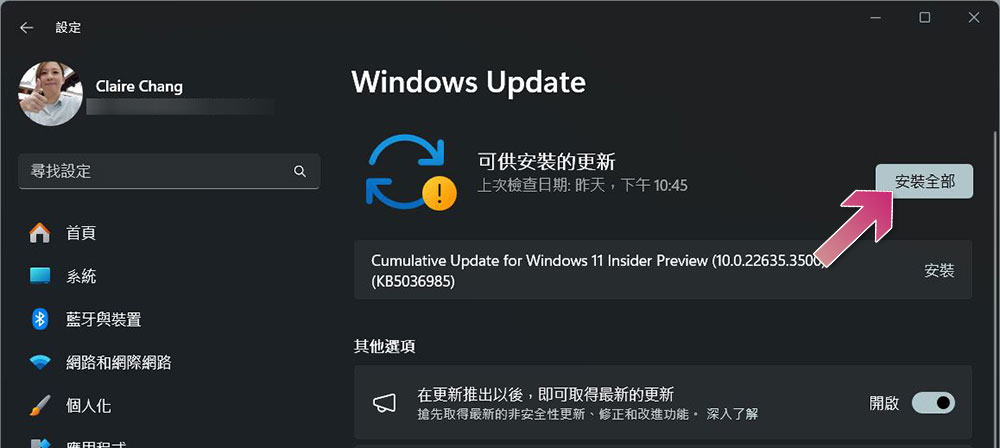
- Click “Check for Updates” and if there are any, click “Install All”. Any available updates will begin downloading and installing. Some of these may require a computer restart, and it is also recommended to check back after installing updates as more updates may be available.
You may also want to update Windows preloaded apps, which can be updated independently using the Microsoft Store:
- Open the Microsoft Store.
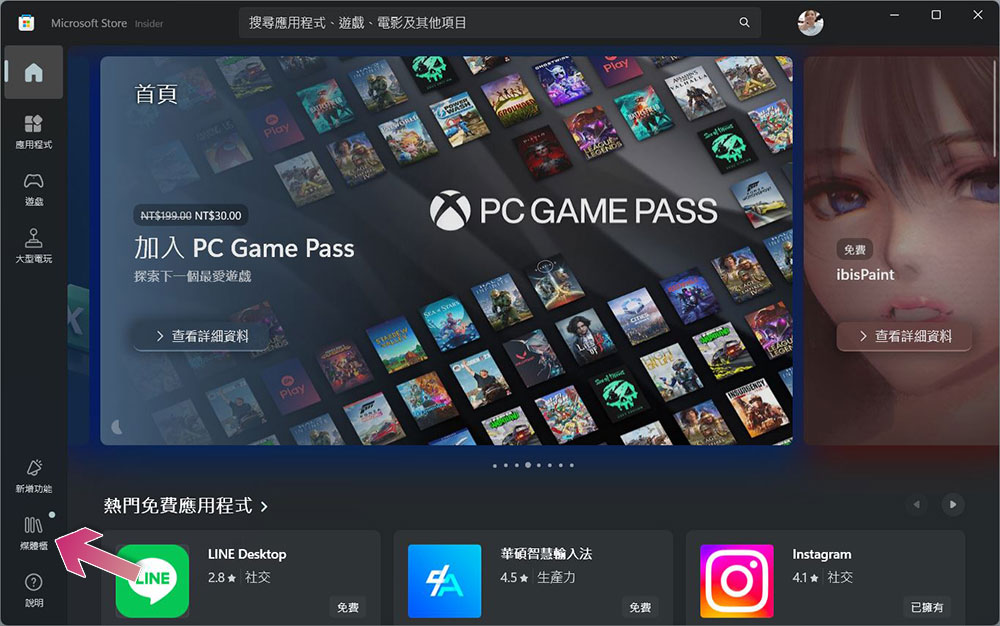
- Click “Media Library” in the lower left corner.
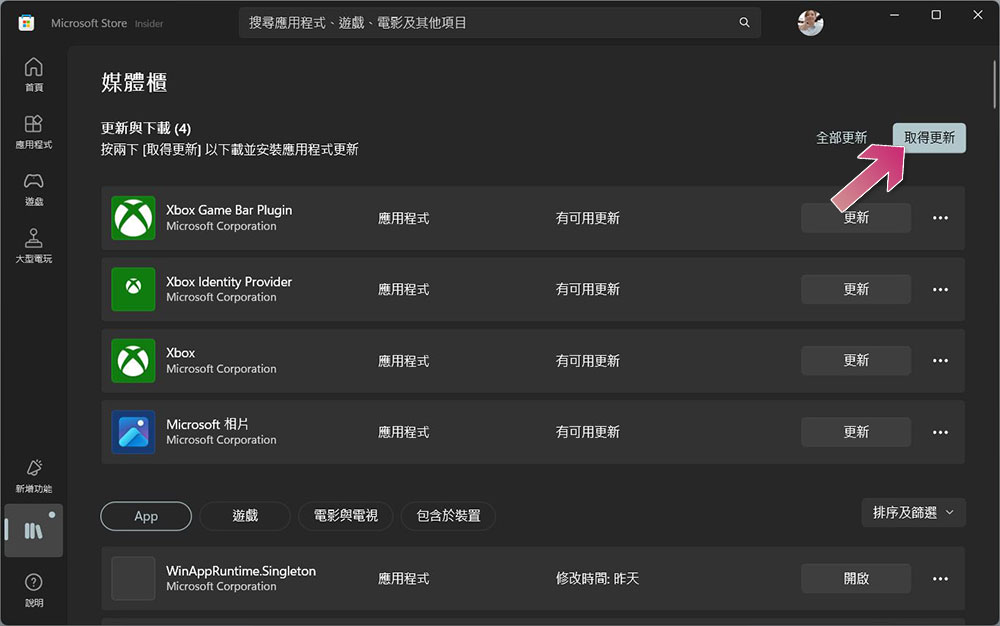
- From this page, you can see the applications that need to be updated. You can click “Get Update” and wait a moment. Almost all preloaded apps are subject to updates, so this process will take a while, but once you’re done, you’ll have all the latest security updates and features available.
2. Organize the taskbar and start menu
When you first set up Windows 11, you may see a number of icons pinned to your taskbar and Start menu. While some of these are useful, others are not, so it’s a good idea to clean up and get rid of anything you don’t need. Let’s start with the work column:
- Right-click on an empty area of the taskbar and select “Taskbar Settings”.
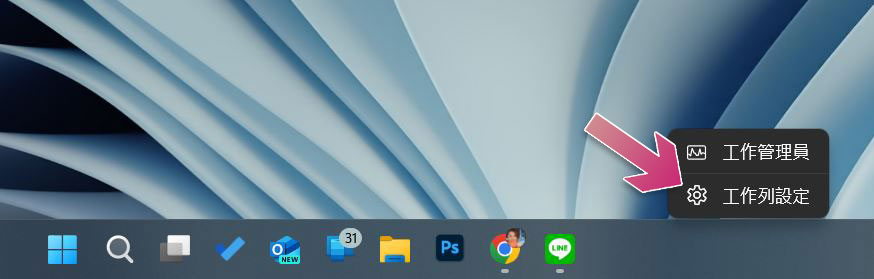
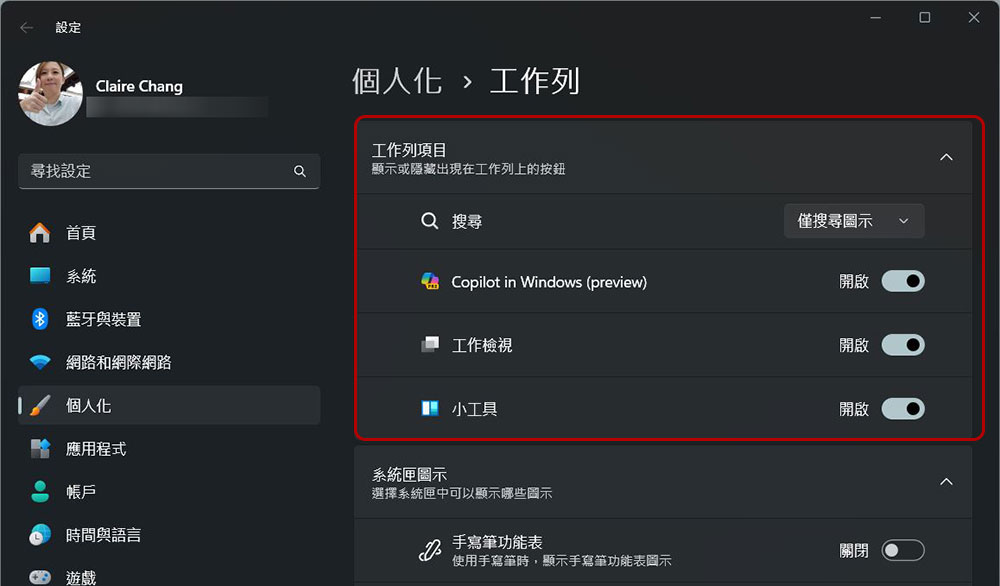
- Check the settings page for Windows feature icons that allow you to disable or enable them, and just click the switch to make them disappear from the taskbar.
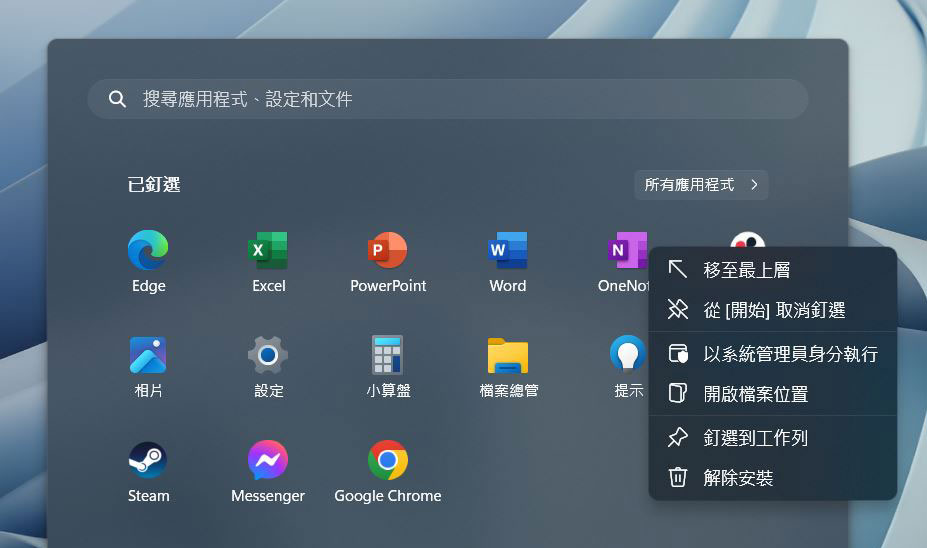
As for the Start Menu, when you open it you can see some apps pinned to the homepage, many of which you may not want. Just right-click on the unwanted app’s icon and select “Unpin from Start.” If you don’t need this application at all, just click “Uninstall”.
If your computer is running Windows 11 22H2 or later, you can even create folders in the Start Menu to better organize your apps by grouping them according to your preferences. Simply drag an app icon onto another app icon in the pinned area and a folder containing both apps will automatically be created.
3. Uninstall unnecessary pre-installed software
Following Microsoft’s tradition of pre-installing a lot of software on Windows devices, Windows 11 itself includes many apps out of the box, but if you get a new computer, the manufacturer has probably installed a lot of stuff that you don’t actually care about.
- Open the “Settings” application and click “Applications” in the left sidebar.
- Select “Installed Applications”.
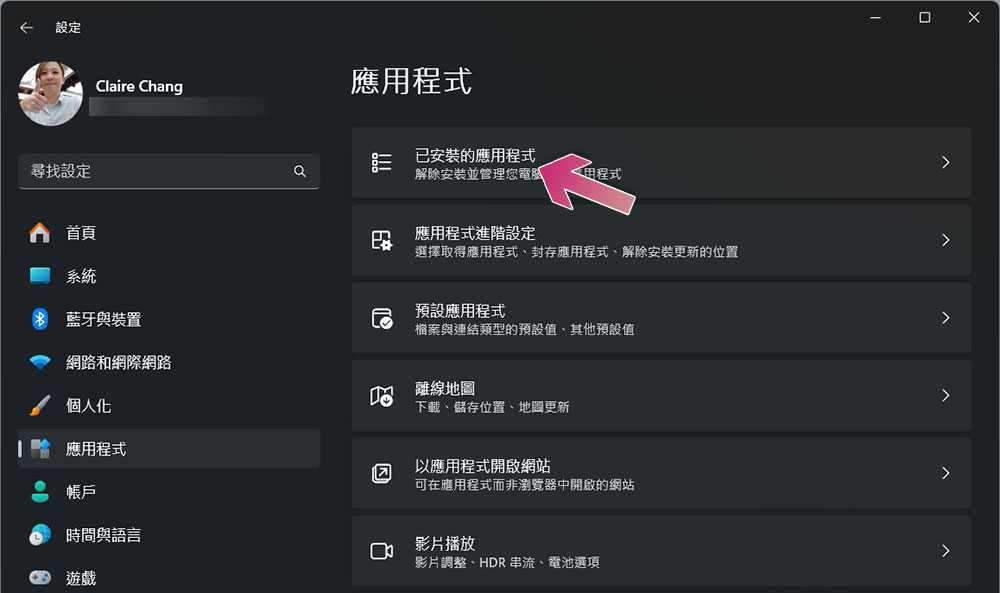
- Wait for a moment to read, click the three-dot icon behind the specific application, and then select “Uninstall” to uninstall it.
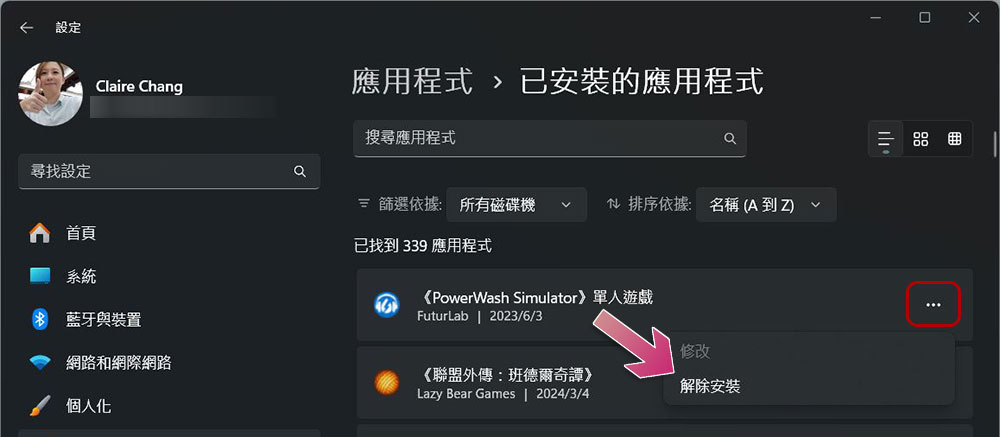
We recommend that you keep an eye out for applications that may help your computer run as expected. Be cautious about deleting something when you’re not sure, as some manufacturers include their own driver update tools that you may not want to uninstall.
4. Disable unnecessary startup applications
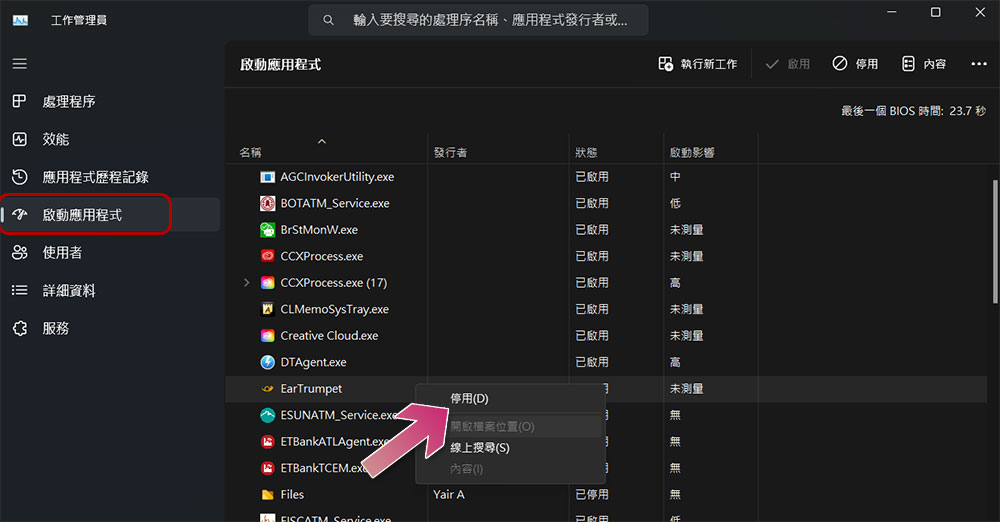
In addition to the apps that come pre-installed on the device, computers often come with apps that are set to launch at boot. This can slow down your computer without doing much good, so it’s a good idea to browse the list and see which apps you really need to run at startup. You can disable certain features so they only open when you need them:
- Right-click an empty area of the taskbar and select “Job Manager”.
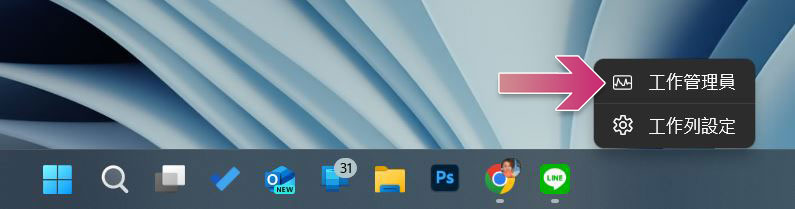
- Click “Start Application” in the left sidebar, right-click the application you want to deactivate, and then select “Deactivate.”
5. Change the look of Windows 11
Windows 11 gives you several ways to customize the look and feel of your computer to match your unique style.
- Open the Settings app and select the “Personalization” page from the menu. You’ll see all the options you can change.
- You can choose from several preset themes at the top of the page, which can change your background image and theme colors, and you’ll also see more individual options.
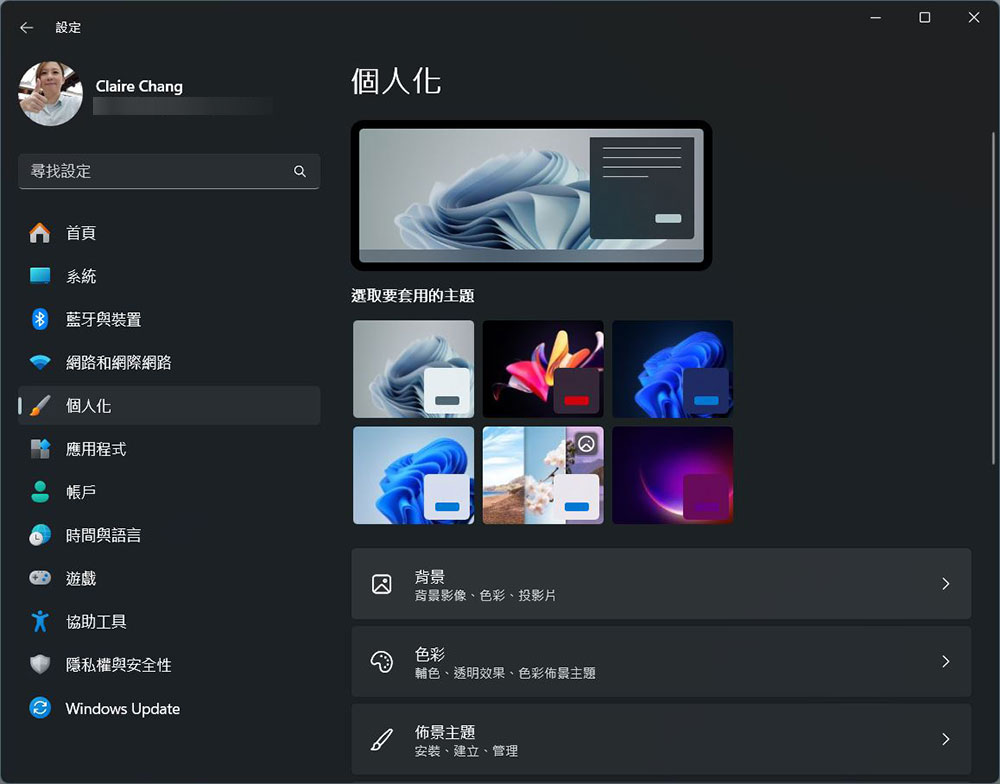
- background
You can change the tablecloth and set up a slideshow. - color
Lets you switch between light or dark mode, or choose an accent color, which can be almost any hue you want - set theme
The page contains theme packs that can change these two settings, as well as sounds and mouse cursor styles.
- background
Work column personalization is another interesting option. You can adjust the orientation of the taskbar icon (centered by default) back to the left, just like in previous versions of Windows.
6. Enable clipboard history recording
Copying and pasting are things that computer users are used to doing, but being limited to one cut and paste and only one project can become cumbersome at work. This is fixed in Windows 10 and Windows 11. If you turn on clipboard history recording (in Settings >> System >> Clipbook), you may find that this feature is disabled by default and can be enabled by turning it on.
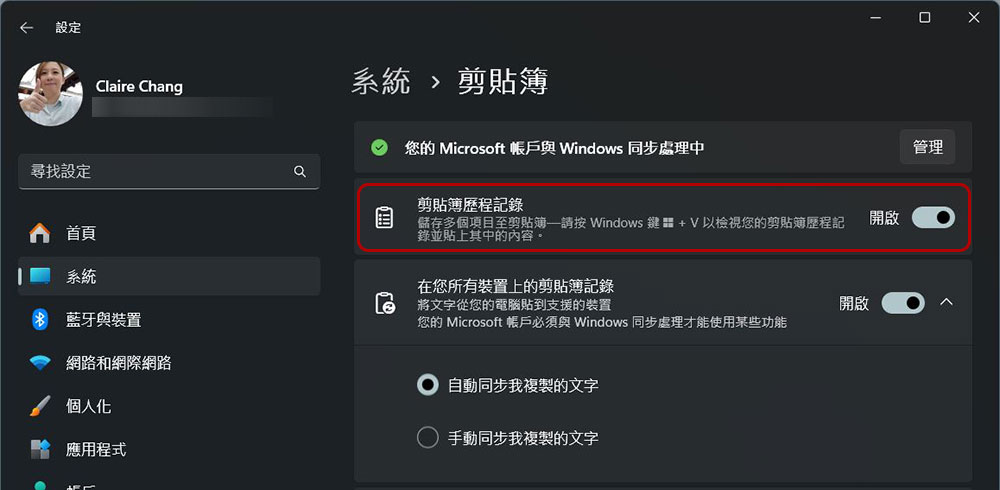
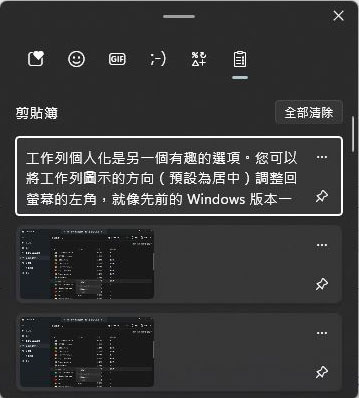
Whenever you want to view an item in your clipboard history, press Windows +V to open the list, then click to copy the specified item, and then Ctrl+V at the destination until you select a different item from the list or copy additional new items. This feature is helpful if you want to post something multiple times. Keep in mind that your clipboard history will reset when you restart or shut down your computer, but you can also click on the Pin icon to pin specific items so they’re always available.
7. Manage your notifications
Being available right out of the box also means that almost any application installed on your computer can send you notifications. This can be a little overwhelming. If you want to control which apps can send notifications and how those notifications work:
- Open the Settings app and click “System” on the left sidebar.
- Select “Notifications”.
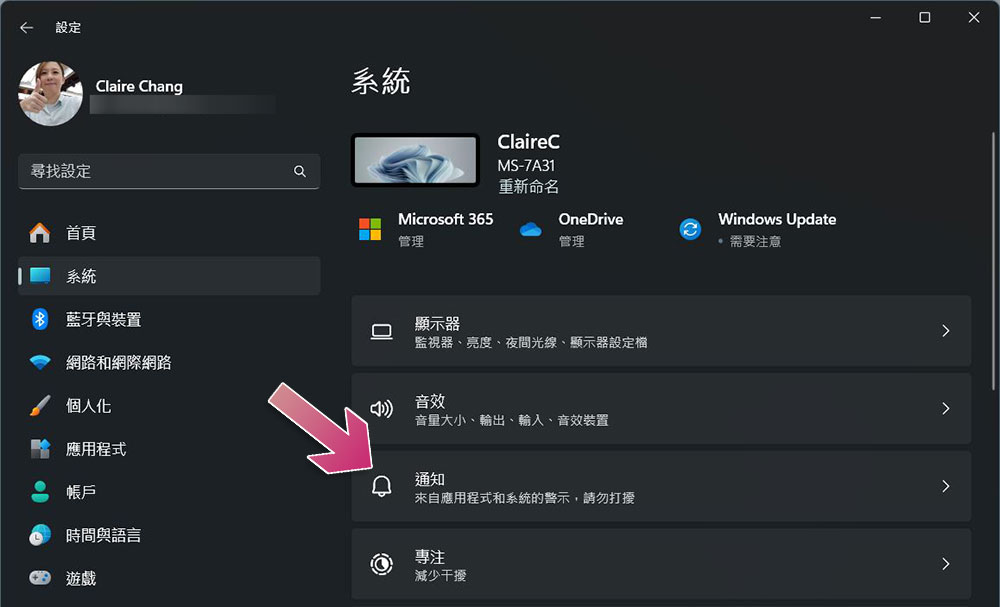
- Here you can see your general notification settings as well as all the apps on your computer that can send you notifications, and change any or all of them to suit your preferences.
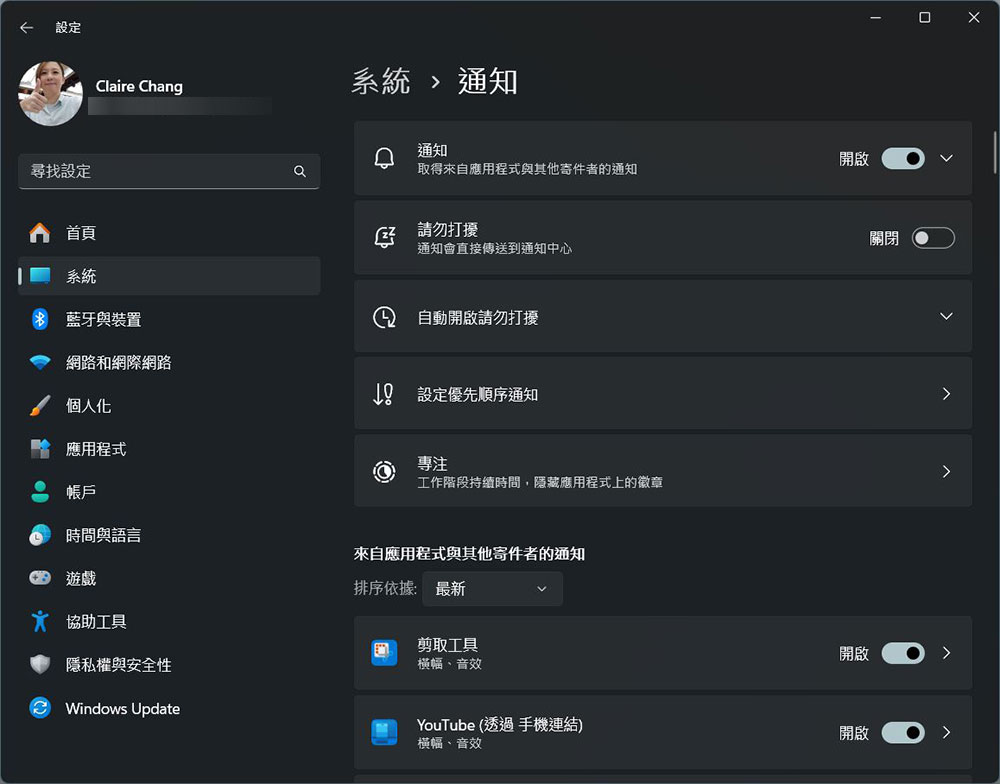
If you scroll to the bottom of this page you’ll also find other settings related to Windows notifications and prompts that should help you use your computer. If you don’t find these useful, you can disable them here.
8. Disable OneDrive backup
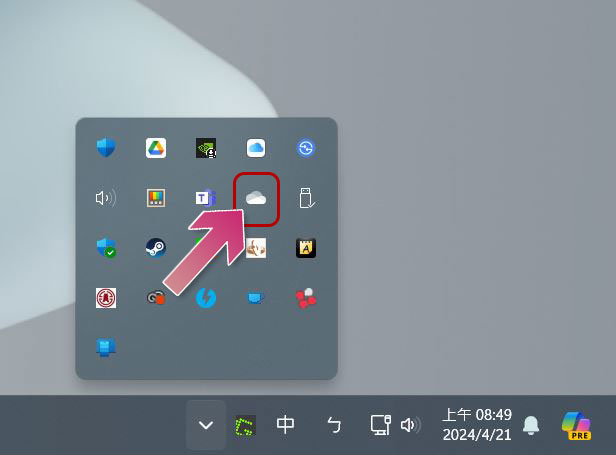
OneDrive is Microsoft’s cloud storage service that integrates with Windows 10 and 11 out of the box. By default, OneDrive is set to automatically back up your desktop, pictures, and files folders, and while that can be a good thing, you probably don’t want to use cloud storage all the time. Not to mention, you might end up backing up a lot of duplicate data in the cloud, since OneDrive doesn’t do a great job of simplifying backups from multiple devices.
- Click the OneDrive icon on the taskbar.
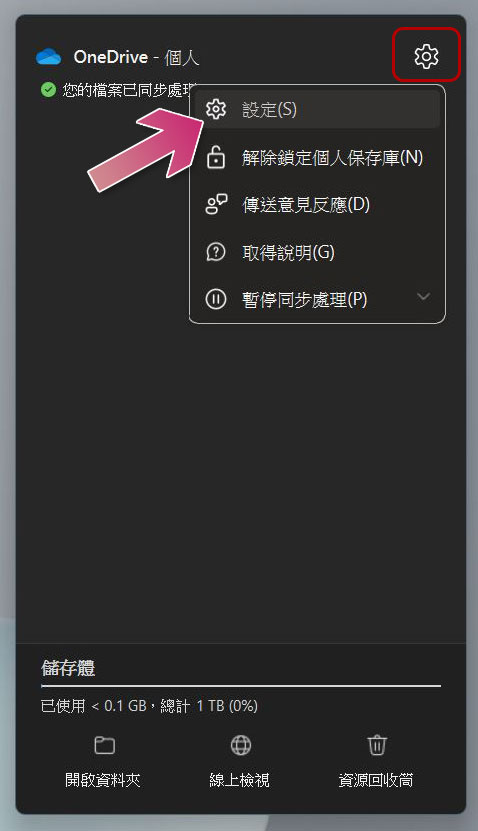
- Click the gear icon at the top of the pop-up window and select Settings.
- After switching to the “Sync & Backup” tab, click Manage Backup, then close the folders you don’t want to back up to OneDrive.
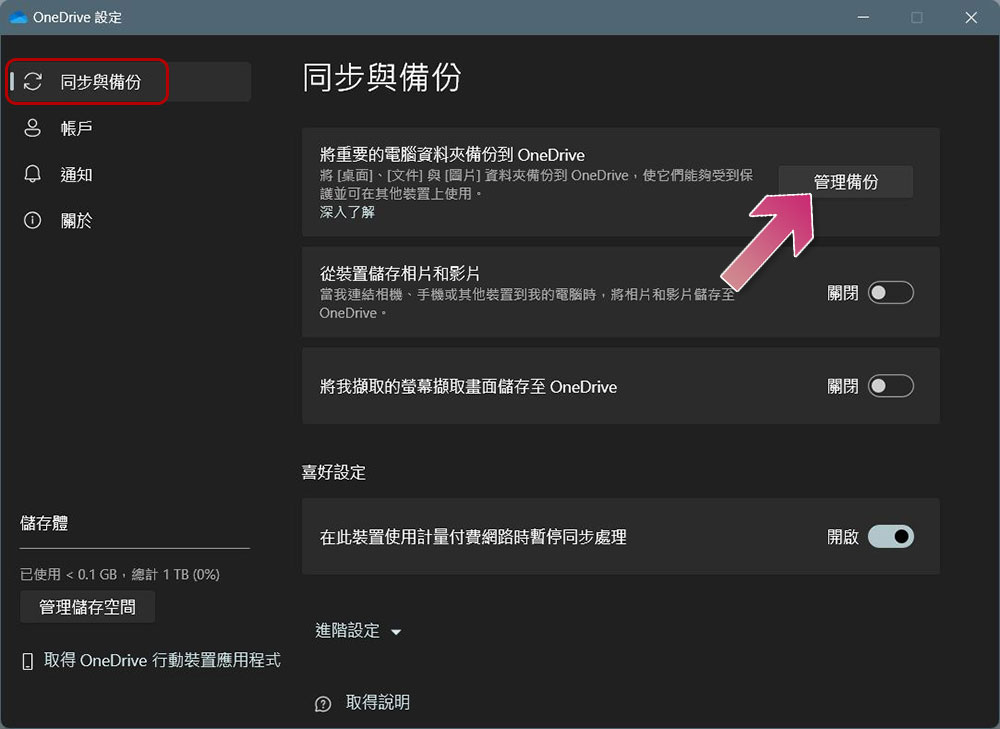
If you scroll further down, you’ll also find Advanced Settings options, where you can choose how to access OneDrive files on your PC, download your entire OneDrive library so you can access it offline, or use the file-clicking feature to free up disk space.
9. Install the application
This should go without saying, but one of the things you need to do is install your favorite apps, either from the Microsoft Store or from the web. If you can’t install apps from the web, your computer might have Windows 11 in S mode. If this is the case, go to the Settings app and scroll down to the Startup page, then select the option that says Switch to Windows 11 Home or Switch to Windows 11 Pro (note, this is not the place to upgrade your version of Windows, for Windows 11 Home users who want to upgrade to Pro). You’ll be taken to the Microsoft Store to exit S mode so you can install apps from everywhere.
10. Change the default browser on Windows
A web browser is arguably the most important application you use on your computer. Almost everything we do now is based on the web, so it’s probably the application you care about most. By default, Windows 11 comes with Microsoft Edge, which is already a great browser, but if you’re more comfortable using Google Chrome or another browser, you may want to turn it off. You can download your favorite browser through the following link:
Once you’ve installed your favorite browser, you’ll need to set it as your default browser, and you’ll be prompted to do this when you launch it. If you click the button to change your default browser, you may see a list of installed applications, so you’ll have to search for the browser and click it, then click the “Set as Default” button at the top of the page. This will change all relevant files and protocol associations to the browser you just installed.
Source: KOCPC Chinese