


Windows 11 is a very user-friendly international computer operating system that can switch to a variety of different languages. If you move to a new country/region and are not satisfied with the language, you can easily change the language on your computer to match the language you are most familiar with. But you can also change the language and layout of your keyboard, which affects spell check and how you type certain special characters.
How to change or adjust keyboard layout in Windows 11?
If you are using a new laptop or keyboard in Traditional Chinese, but you often use foreign languages such as Japanese, changing the keyboard layout can help you make full use of the keyboard, even if it is not a Japanese keyboard.
Add a keyboard layout in Windows 11
Adding a keyboard layout in Windows 11 is easy, as long as you know exactly which keyboard layout you want to use.
- Open the Settings app.
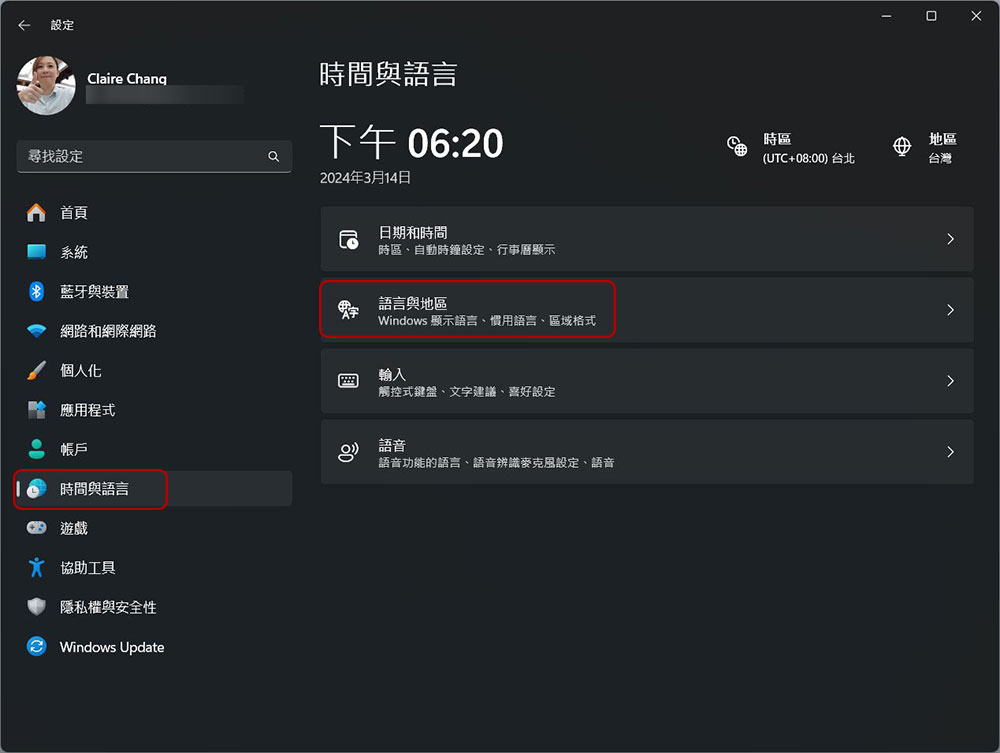
- Click “Time & Language” on the left, then click “Language & Region.”
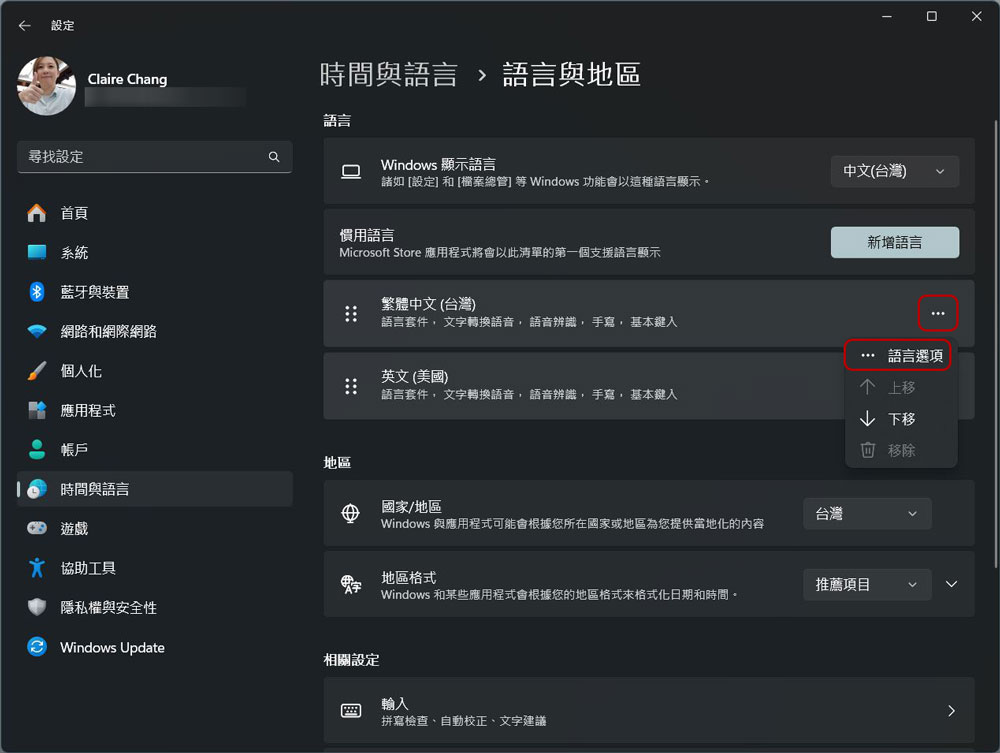
- Next to the language you want to manage (for example, “Traditional English” in this example), click the “…” icon next to it, and then click “Language Options.”
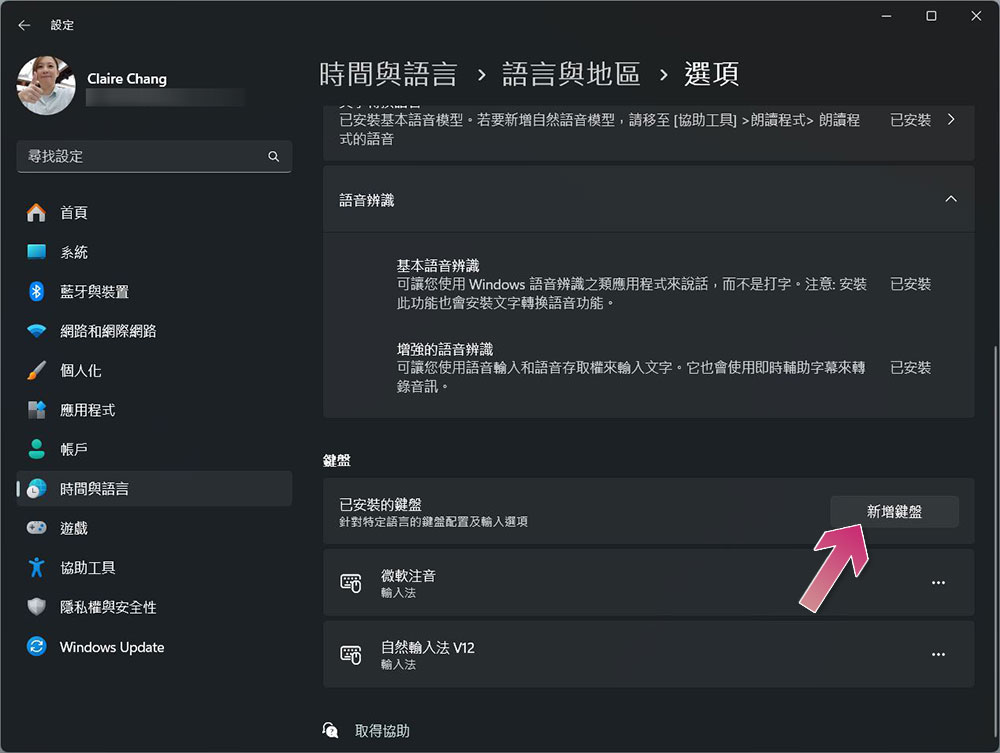
- Scroll down to “Keyboards” and click “Add New Keyboard.”
- Select the keyboard layout you want to use. For example, if you want to add Cangjie in addition to Zhuyin, you can add it from here.
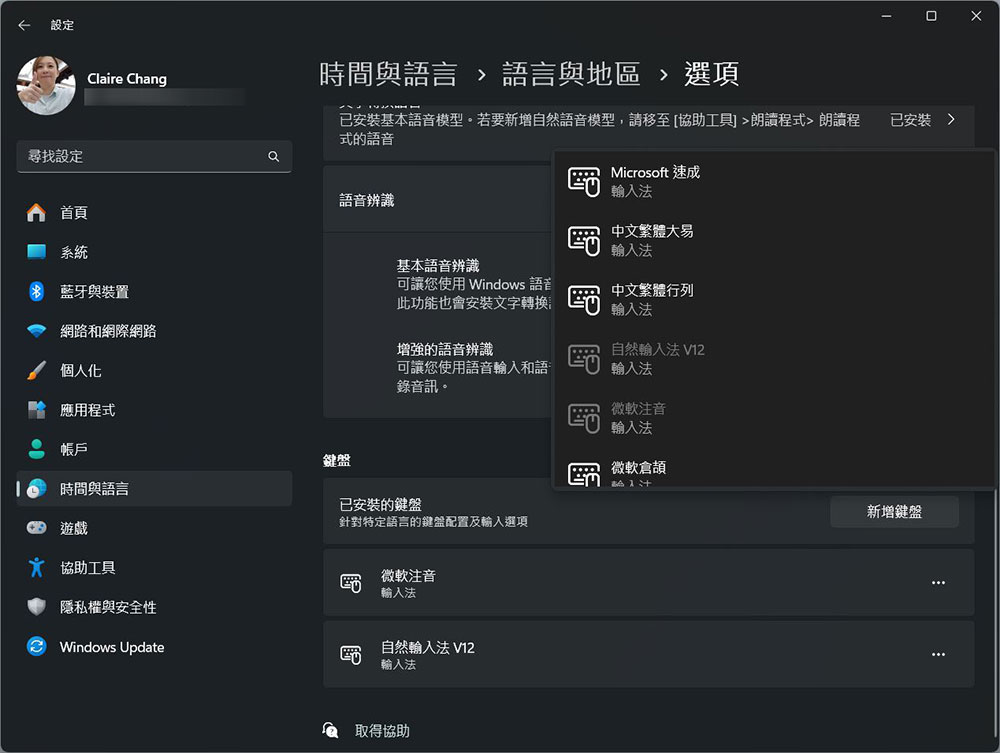
- Now, your new keyboard layout will be ready for use. To switch between the available keyboard layouts and languages, you can press “Windows + Spacebar” on your keyboard to see a display of the language and layout in use in the lower right corner of the taskbar.
Remove keyboard layout from Windows 11
If you don’t want the old keyboard layout to be confused with the new keyboard layout, you only need to delete the old layout after adding the new layout. The process is also very simple:
- Open the Settings app.
- Click “Time & Language” on the left, then click “Language & Region.”
- Next to the language you want to manage (for example, “Traditional English” in this example), click the “…” icon next to it, and then click “Language Options.”
- Scroll to the bottom keyboard area, click the “…” behind the unwanted layout, and then click “Remove”.
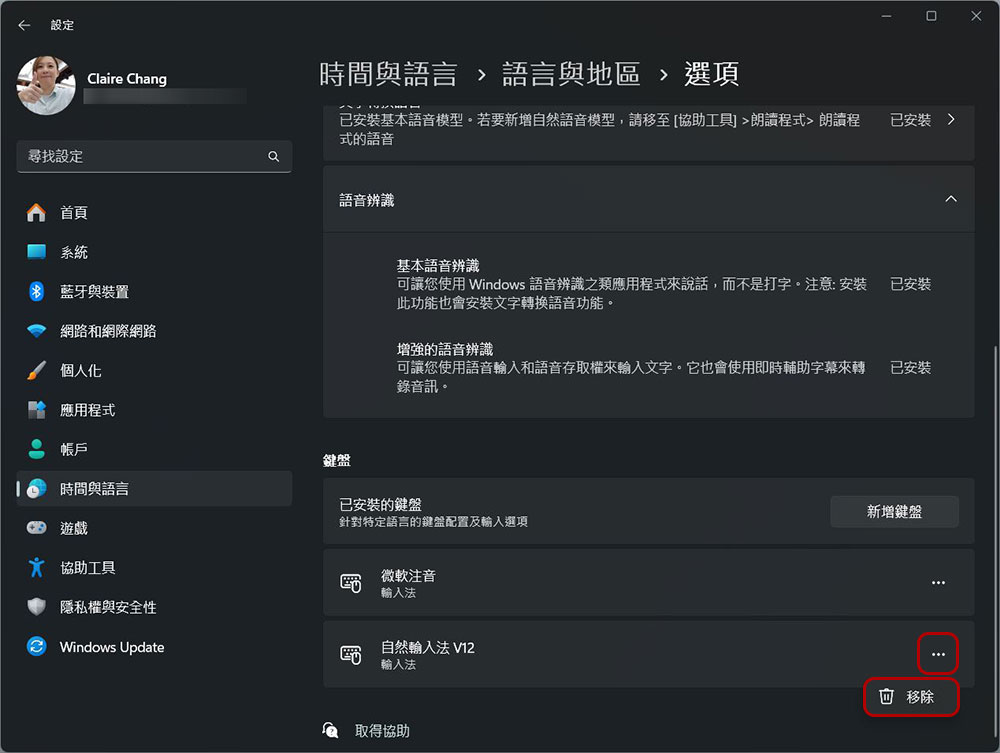
- This will remove the keyboard layout from the input switching menu (Windows + Spacebar), so you don’t have to spend time switching layouts while using it.
Add or remove languages
You can use almost any keyboard layout in any language, but using a different language may change the built-in spell check and autocorrect tools in Windows 11, so you may want to include the language you type in frequently to avoid Windows interfering with what you’re using. It’s also fairly easy to do:
- Open the Settings app.
- Click “Time & Language” on the left, then click “Language & Region.”
- Click “Add Language” at the top.
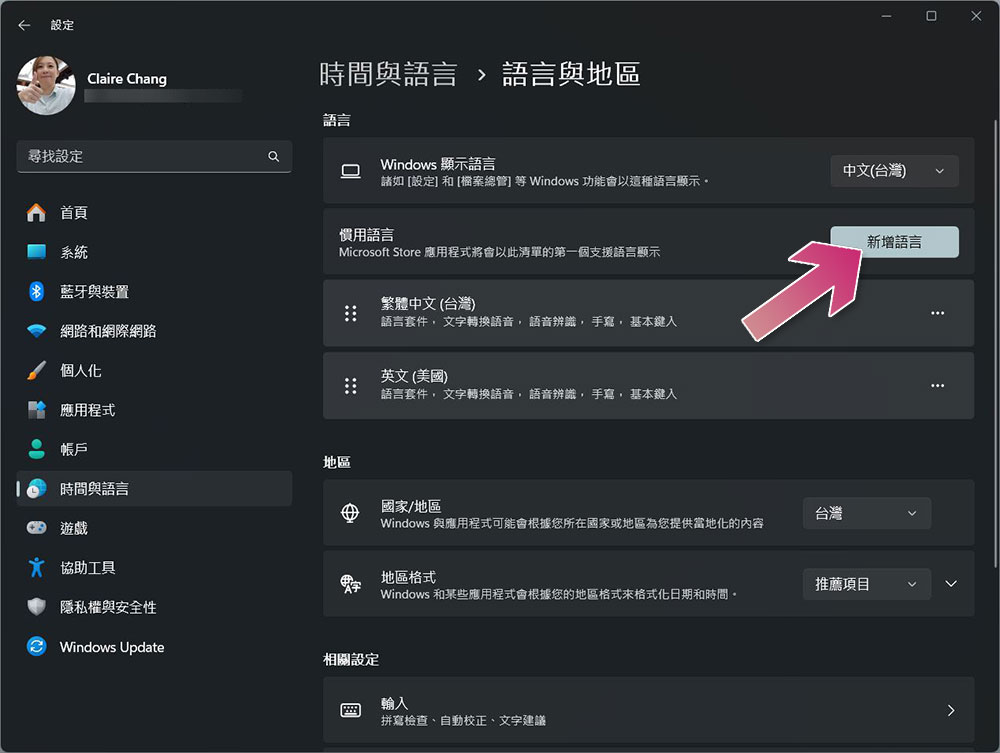
- Next search and select the language you want to add, then click Next.
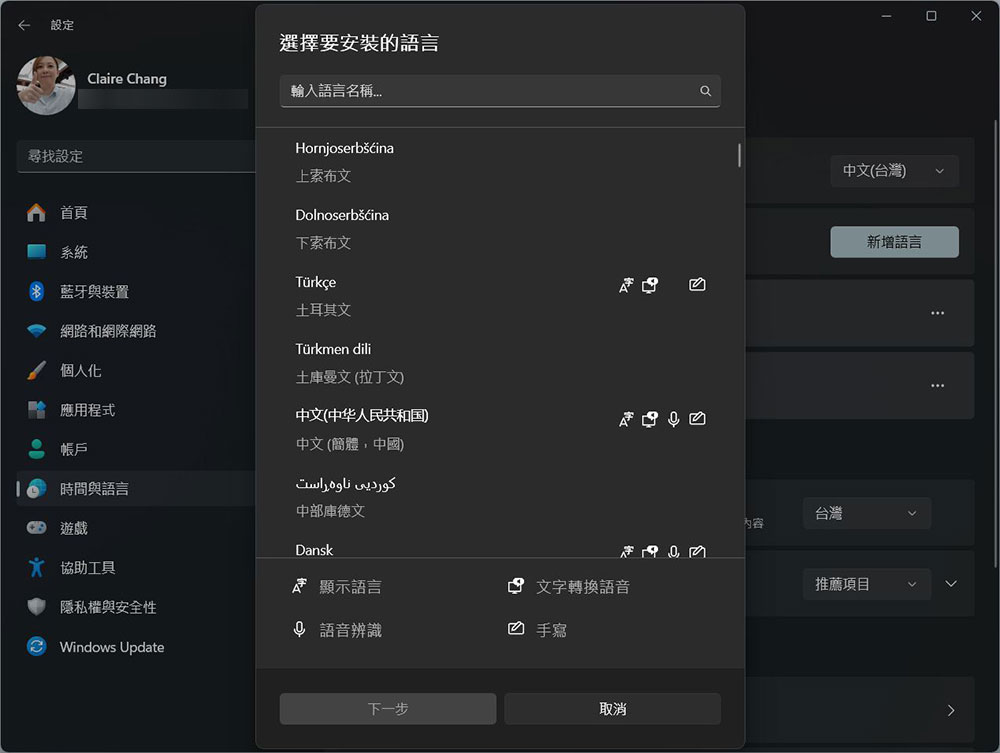
- Select the features you want to enable. If you only want to be able to use spell check in a certain language, you can uncheck all the boxes as basic input is included by default.
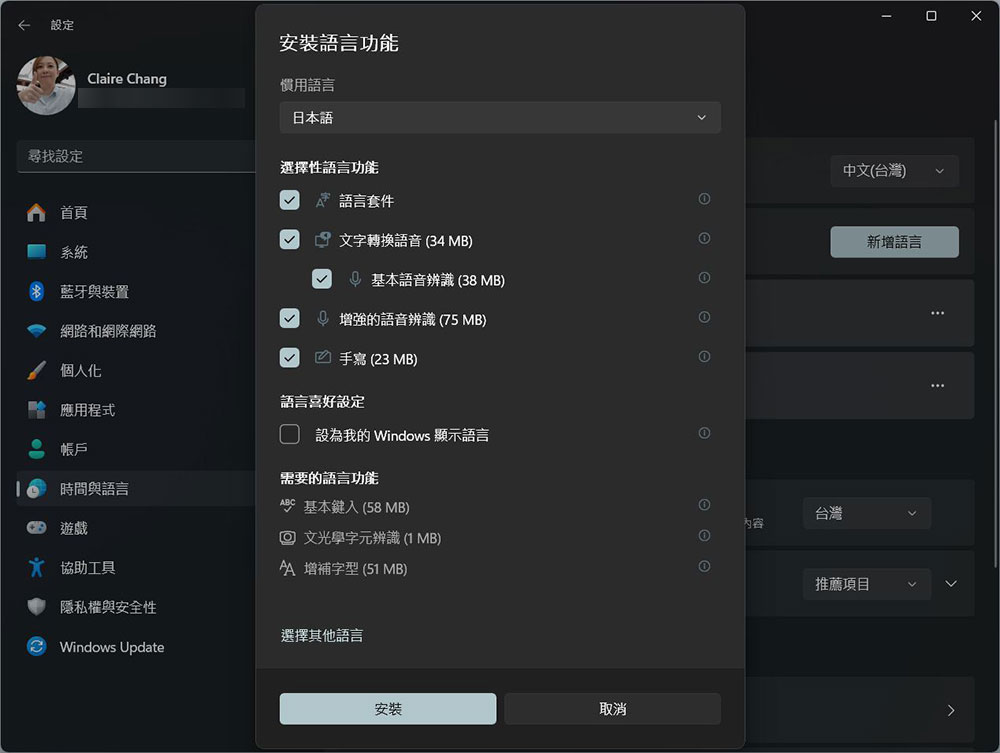
- Click “Install” to add a new language. In addition, you may also need to add a new keyboard layout as mentioned above, because the default input method may not be suitable for you.
Adding and removing keyboard layouts and languages isn’t something most people will need to do, but if you just got a new laptop or keyboard, or you’ve moved to a new country and want to keep using your old keyboard layout, this feature can make it easier to adapt Windows 11 to your needs.
Source: KOCPC Chinese