


If you bought a new Windows 11 computer, you didn’t set the desired administrator name when you first started it, and now you want to add a more personalized style, it’s not a troublesome thing, and you don’t need to cut it off and try again. The 3 easiest methods for you to quickly change the administrator’s name in Windows 11, give it a try!
The 3 easiest ways to change the administrator name in Windows 11
Change from settings
If you are logging in with a Microsoft account instead of a local account, you can change this from the Settings app:
- Open the Settings app.
- Click “Account” on the sidebar.
- Scroll down and click “Your Information”.
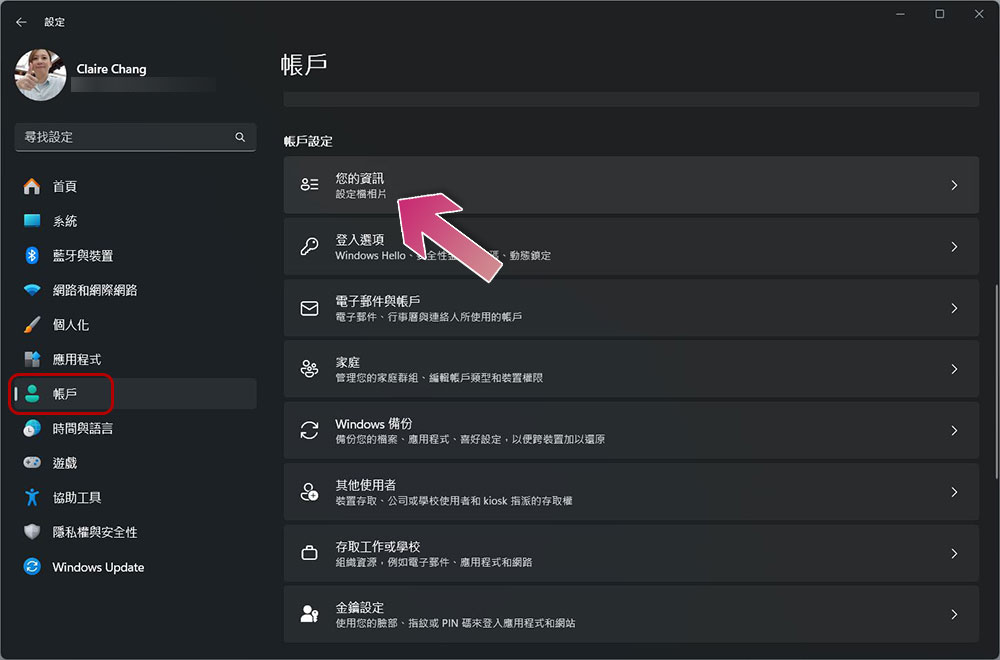
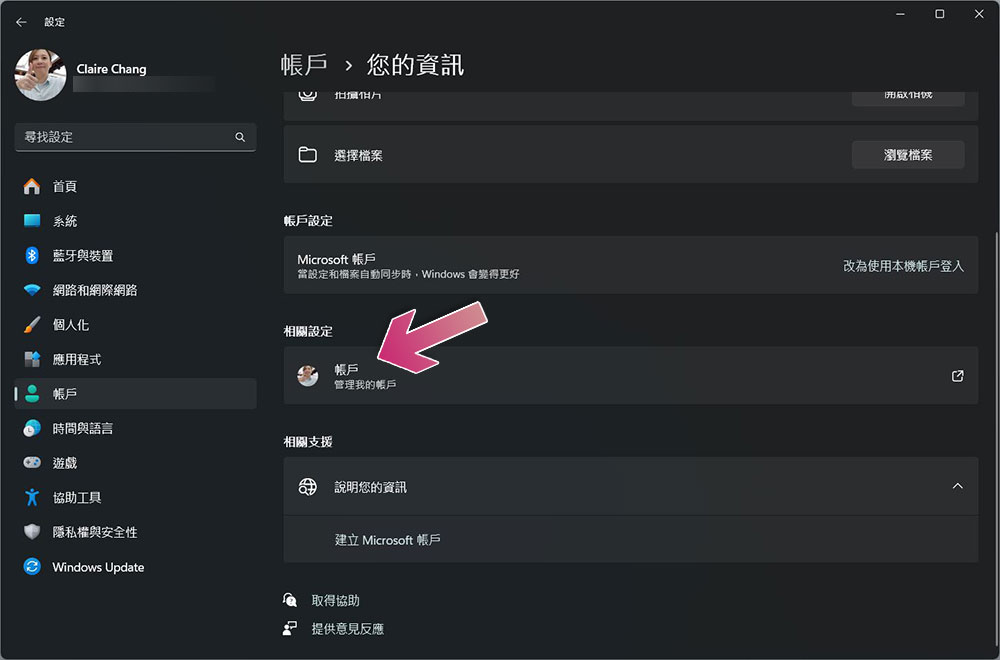
- Click “Account” under the relevant settings and you will be directed to your Microsoft account page.
- Then on the Microsoft Account page, click your profile picture in the upper left corner.
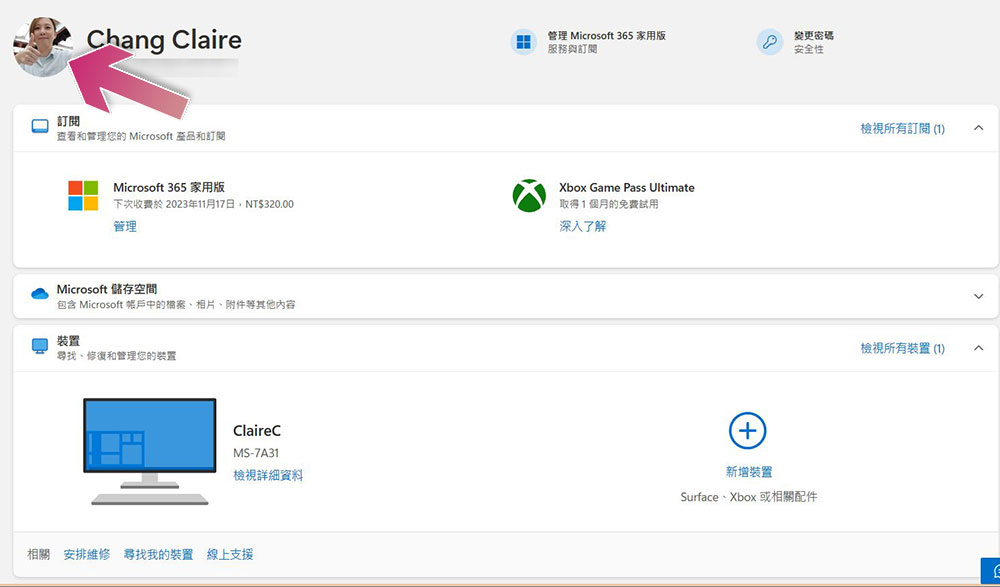
- Click “Edit Name” after the full name to enter the modification interface to make changes.
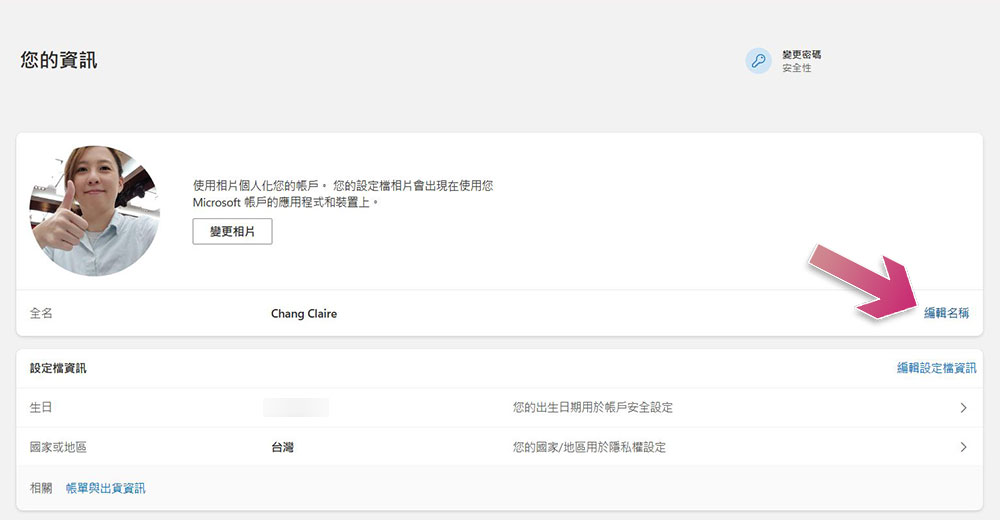
Change administrator name from console
The former method only works if you are logged in with a Microsoft account, if you are logged in with a local account, you have to use another method, like changing from the console is the solution.
- Open the Start menu and type “Control Panel” in the search field.
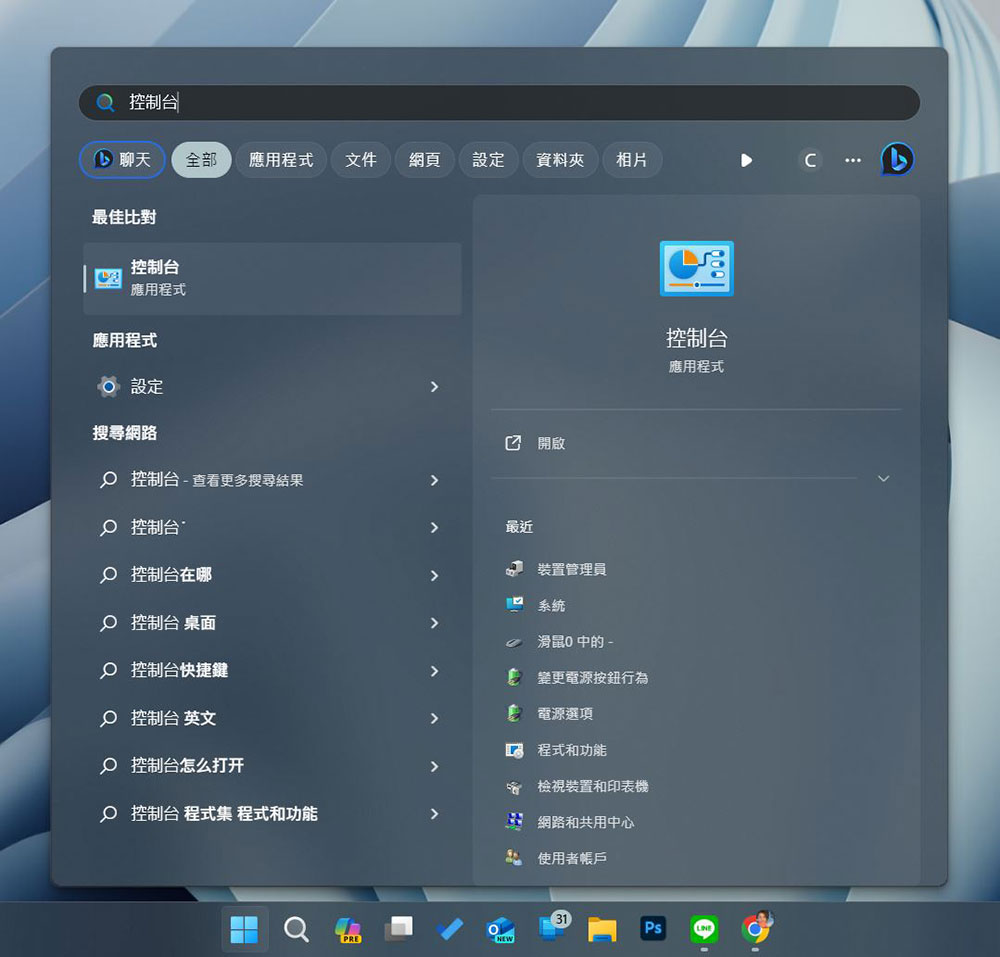
- After opening the control panel, click to enter “User Accounts”, then click Change Account Name and follow the instructions to make changes.
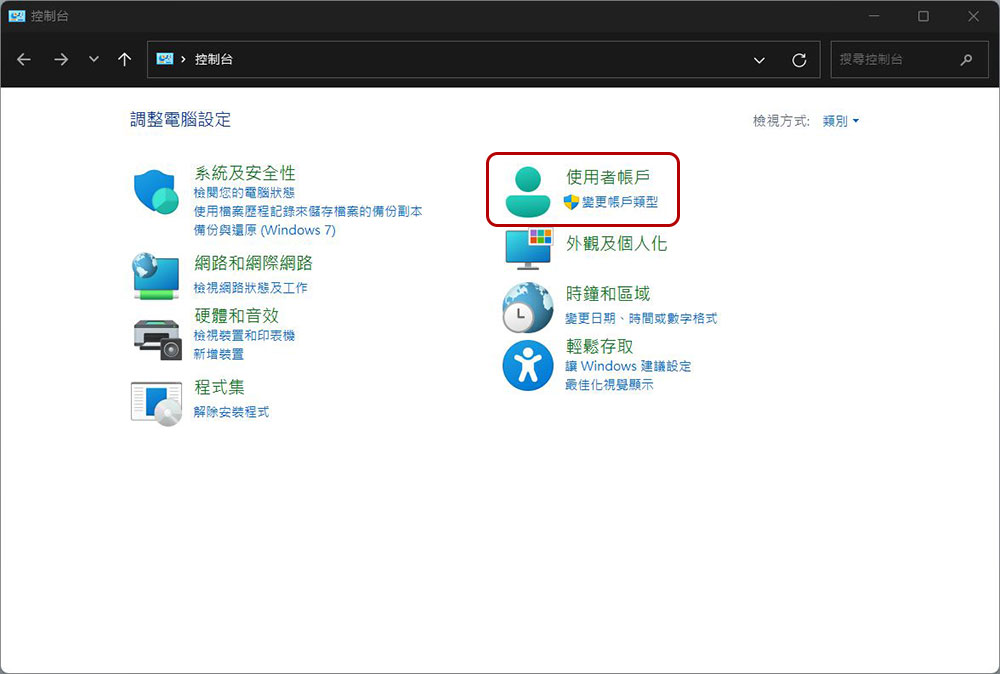
Change administrator name using netplwiz command
netplwiz is a Windows command that can be used to manage user accounts on your computer. It allows you to add, delete or modify your user accounts, and of course you can manage administrator names with it.
- Press Windows + R to open the execution tool, then type “netplwiz” in the search field and press Enter.
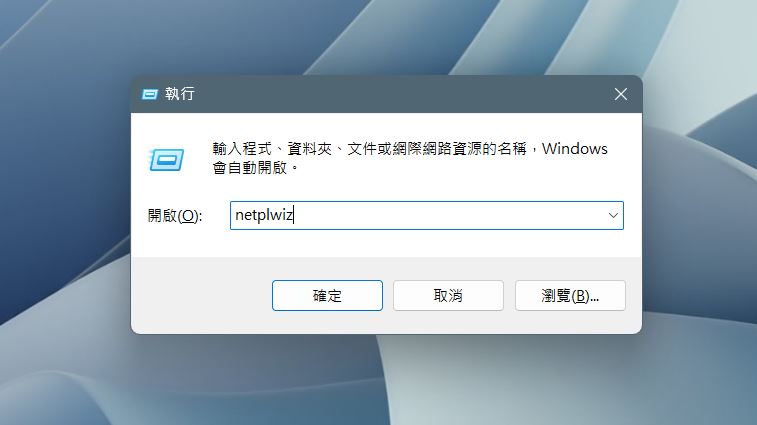
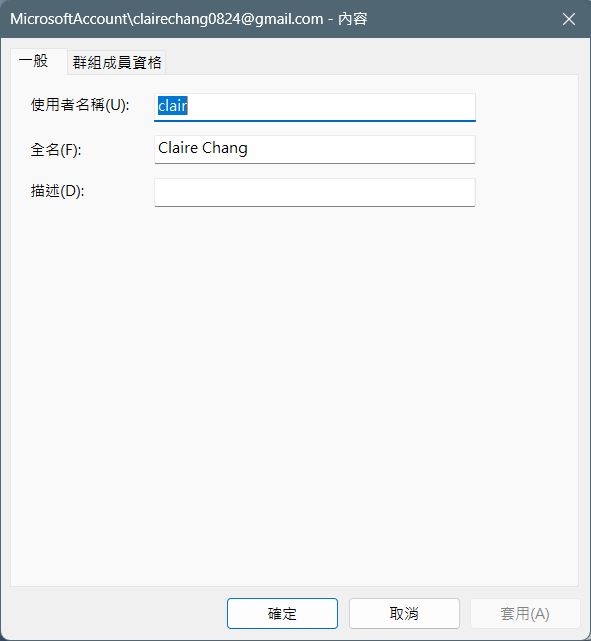
- In the next user accounts window, select your account and click “Content.”
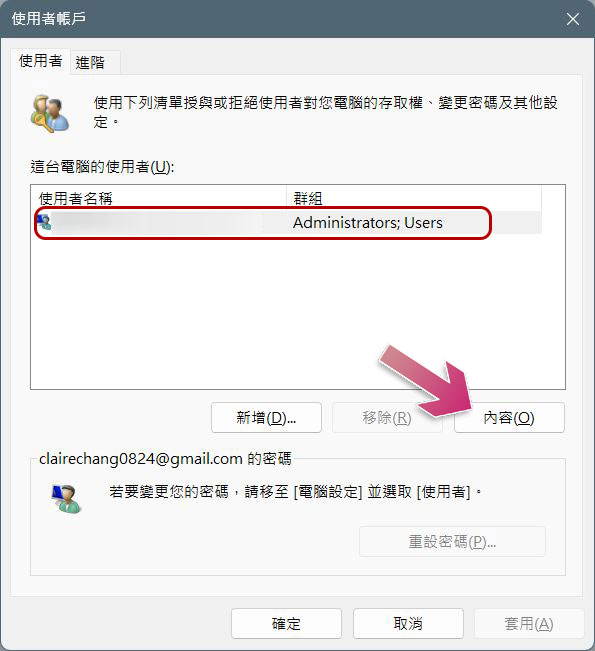
- Then you can modify the name.
Source: KOCPC Chinese