


In daily life, if you want to convert paper documents or certificates at hand into electronic files, the most convenient tool is your smartphone. However, although we have introduced in the past that apps such as Microsoft’s Office Lens can help machines scan documents and IDs, many people may not know that their iPhones already have a built-in document scanning function. Today I will share with you the built-in scanning document function of iPhone, which can be used without downloading an additional app. It is simple, easy and fast.

iOS application tips: iPhone has built-in tutorials on scanning document functions, so you can use it easily without downloading an additional app!
The “Files” app since iOS 13/iPadOS 13 has made it easier to manage, download and share file files on iPhone and iPad, but many people don’t know that the “scan file” function is actually hidden in the Files App (it is too secretive after all!). Today I will briefly share how to use Apple’s built-in scan file function to easily store documents and certificates that you want to convert to electronic files on your iPhone/iPad.
First, open the “File” App and click “…” in the upper right corner of the browsing tab to expand the function bar, then click the “Scan File” button to proceed to the next step: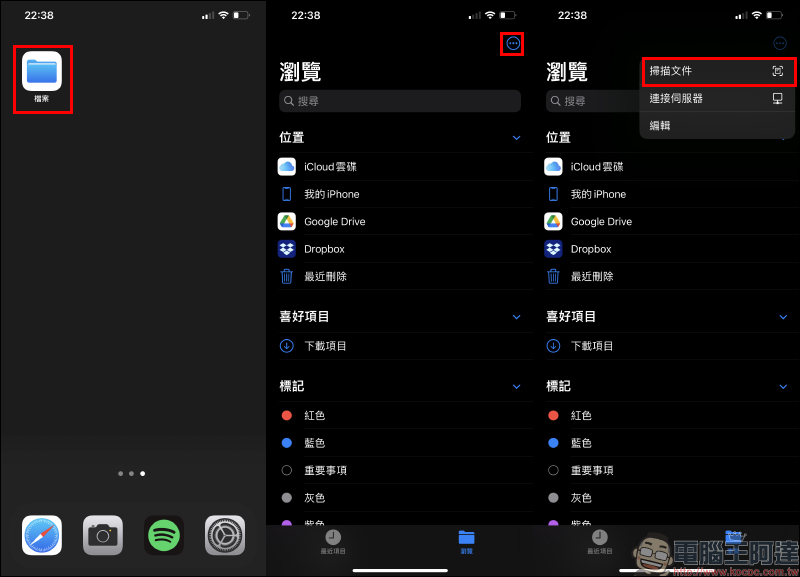
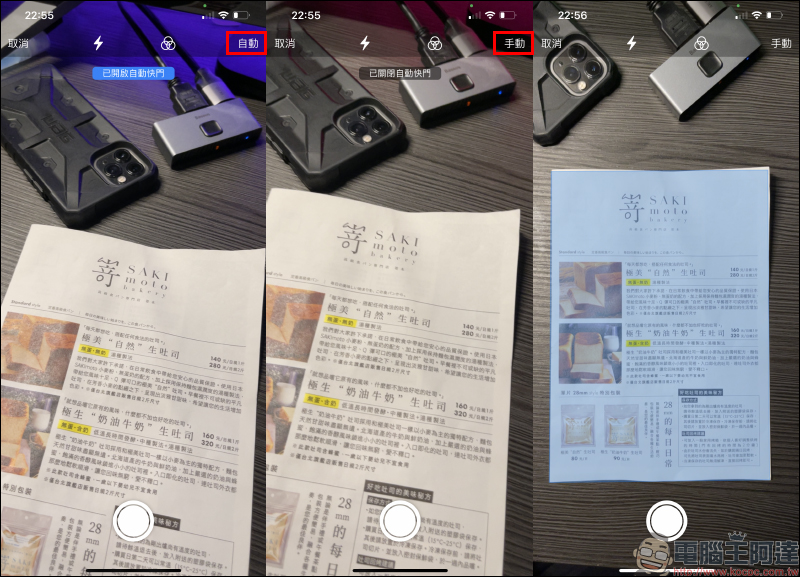
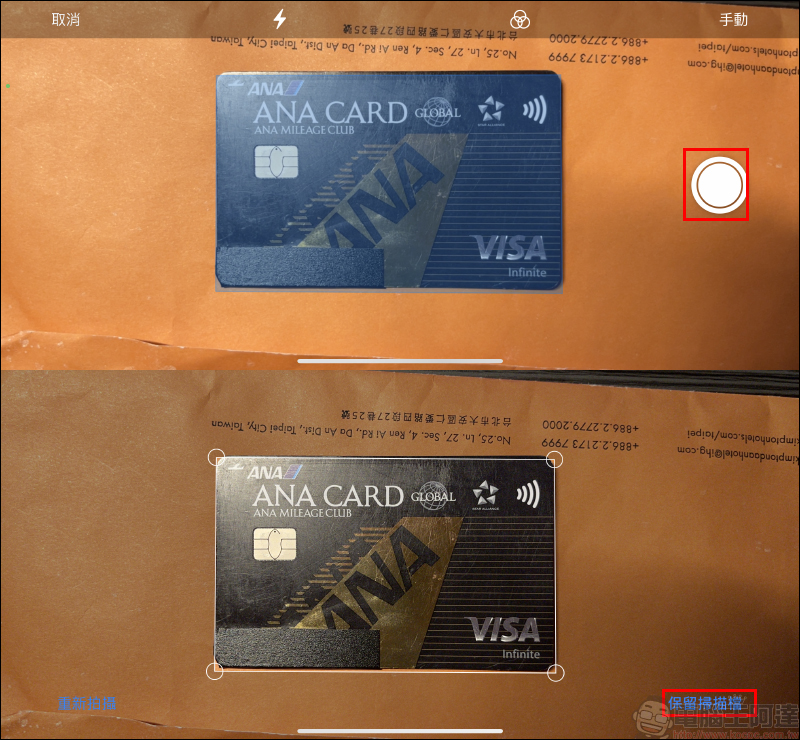
At this time, the screen will open the camera and directly start the file scanning function. You can see the shutter button, flash, filter and automatic/manual shutter setting options. Apple’s built-in document scanning function defaults to “automatic shutter” for detection and direct shooting. However, in actual use, you will find that the system will often automatically shoot when the document is not aligned. Therefore, the author personally recommends that you switch to “manual shutter” for smoother operation. When the blue selection area on the screen is filled with the files to be scanned, you can press the shutter button to scan!
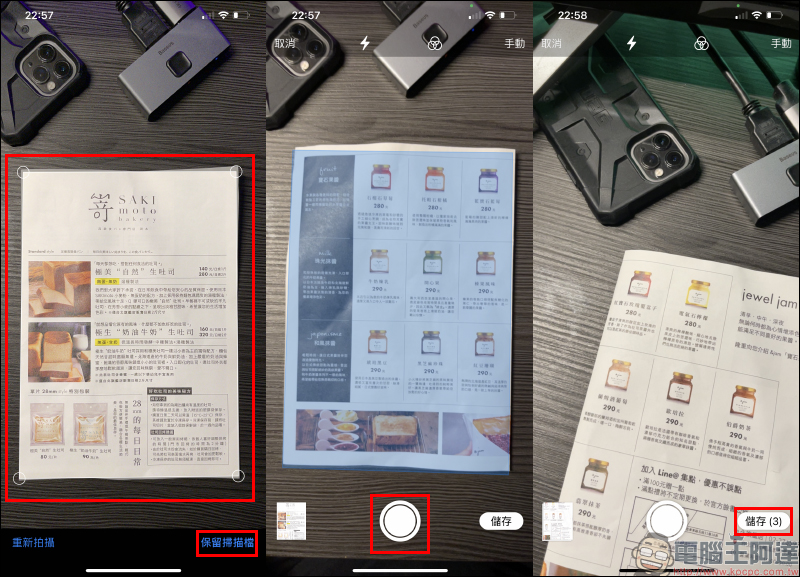
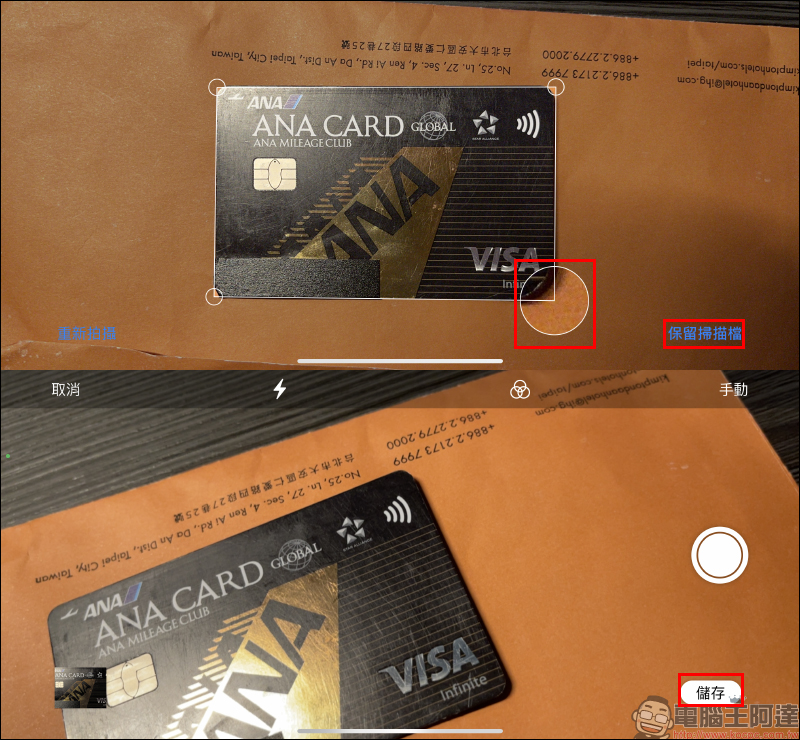
After shooting, the user can drag the four sides of the selection range to adjust the selection range. After the adjustment is completed, click “Keep Scanned File” to complete the first page of document scanning. The screen will then return to the capture screen of the scanned documents. You only need to follow the same steps to capture page by page. After all the documents to be scanned are captured, click “Save” in the lower right corner of the screen to save the batch of documents as the same PDF file:
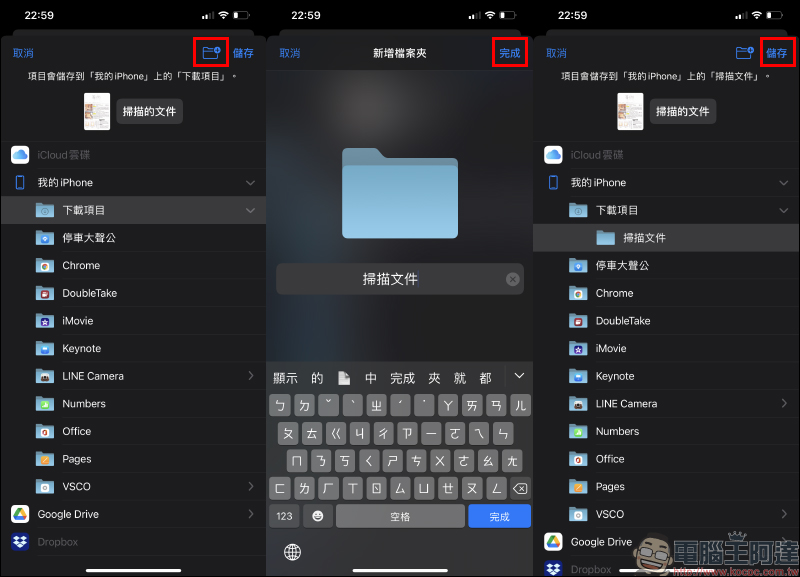
Users can choose the location where they want this document to be stored, and can also add a new folder to store the scanned document in:
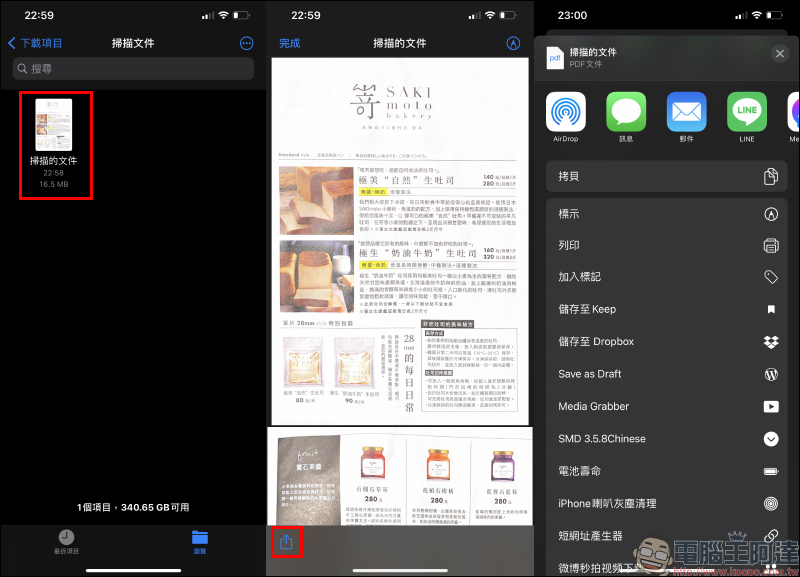
At this point the file is successfully scanned and stored in the iPhone! View the scanned document with clear text and images, then click the “Share” button to send it to an application such as LINE or as an attachment to an email:
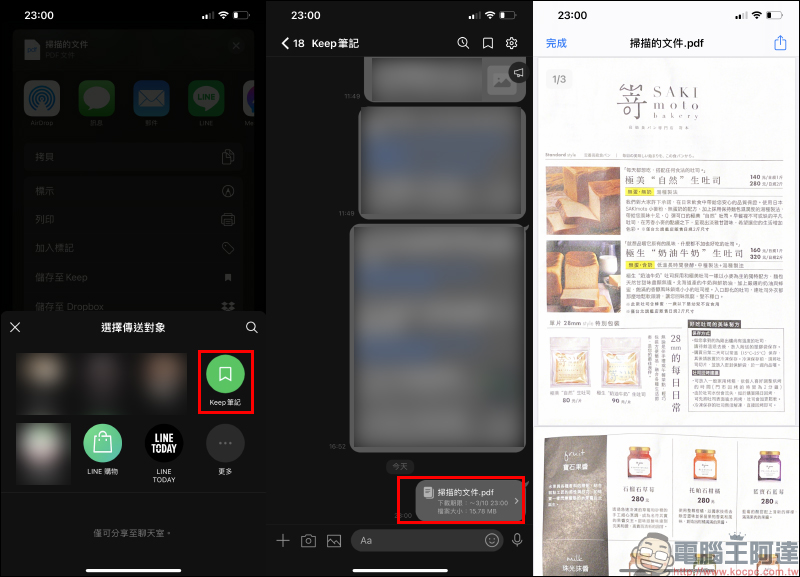
Here, the author uses LINE’s Keep notes as a demonstration. You can see that there is no problem in previewing PDF files in LINE:
In addition to documents, more people often have the need to scan documents, business cards and other cards. Apple’s built-in document scanning function is also easy to use to scan documents. Just follow the same steps to shoot and scan. Here is a credit card as an example:
Here are some tips for scanning. Whether you are scanning documents or documents, it is recommended to choose a background with a large color difference, which can save a lot of time in adjusting the selection range afterwards.
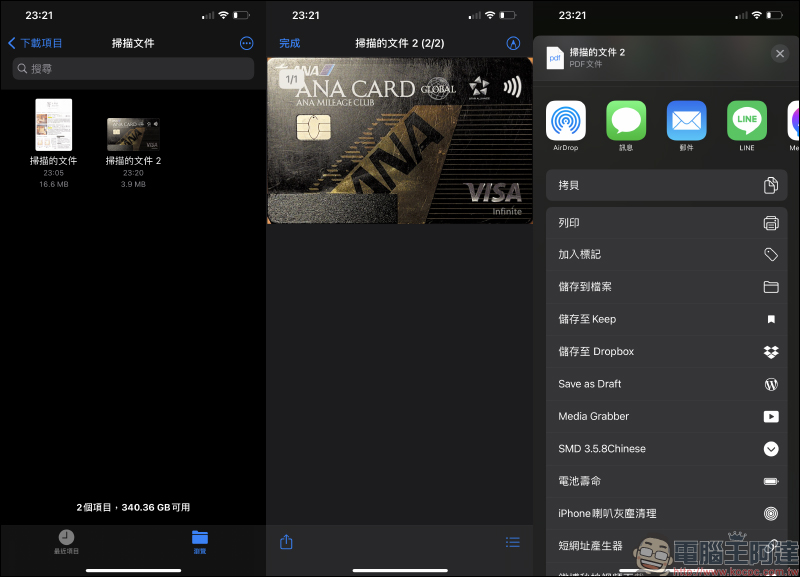
The scanning results are as follows:

Further reading:
ZMI ZMI GaN gallium nitride charger 33W quietly launched: can charge Apple, Android, and Switch, priced at only about 340 yuan


Source: KOCPC Chinese