


When you need to print a document, encountering technical problems can interrupt your work and become frustrating. There are many reasons why a printer may not work properly, and most of them can be easily fixed by excluding hardware failures on the printer itself. This time, we will talk about how to easily troubleshoot the most common printer errors and problems in Windows systems.
How to fix common printer problems and errors on Windows?
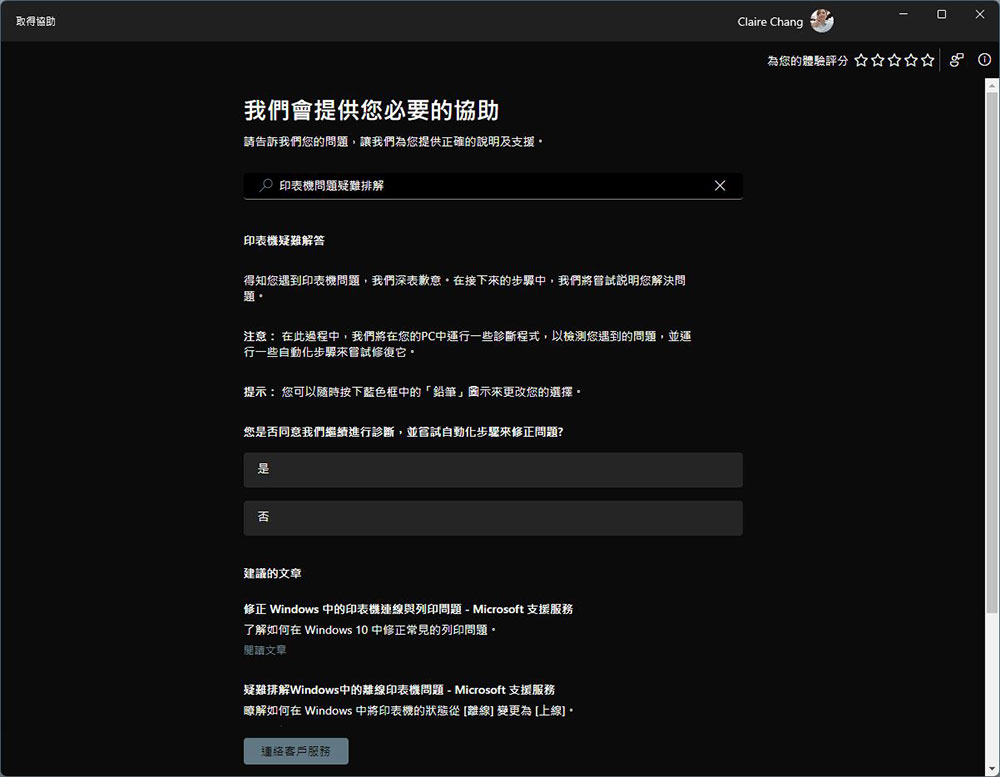
If you have installed a newer version of Windows, you can open the built-in “Get Help” application. This application is a word-hole troubleshooting system that can diagnose common printer problems and provide easy-to-operate solutions. Visit on a Windows computer Microsoft support pageYou can also learn about printing issues, click the “Turn on Get Help” button on the page, and give your web browser permission to quickly find help.
Often, the simplest, crude, yet effective way to troubleshoot an unstable Windows device is to shut down and restart your computer. Temporarily disconnecting the printer from the power cord to allow it to wake up is also an easy way to troubleshoot basic printer errors. However, if the above two options don’t work, you can try the other methods we’ve listed below.
Check printer connections
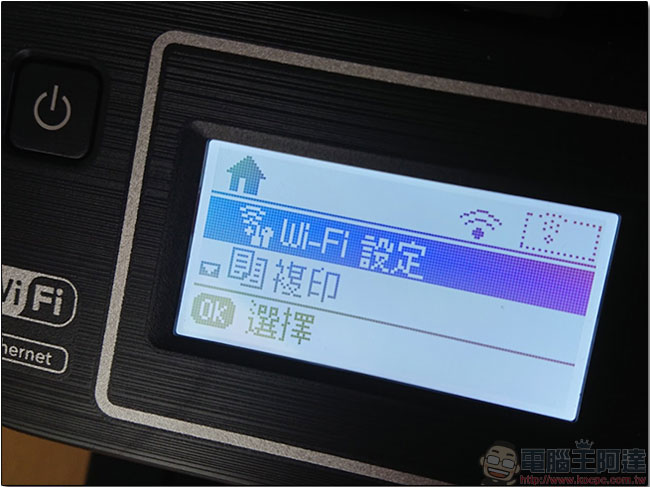
Some newer printers can connect wirelessly via WiFi or Bluetooth. These printers usually have a dedicated button to activate the pairing and wireless connection functions. If you still have the printer manual on hand, you can look for the text on how to turn on the wireless option of the device, or download the manual or troubleshooting from the official website to learn how to connect. Some wireless printers already have this function as a built-in option in the menu, you can check it out.
If your Bluetooth printer fails, please first make sure that the Bluetooth switch is turned on on the Windows device and that you are not far away from the Bluetooth coverage area when troubleshooting. If it is a WiFi connection, make sure that the computer and printer are in the same wireless network environment. If it is an older model of printer that requires direct cable connection to the computer, make sure that all cables are correctly connected to the corresponding ports.
Remove and reinstall the printer
The next thing you can try to resolve printer-related issues is to uninstall and reinstall. Here’s how to remove it from the Windows device inventory:
- Click the “Start” button and open the “Settings” app, then go to the “Bluetooth & Devices” tab.
- Select “Printers and Scanners” in the main options area on the left.
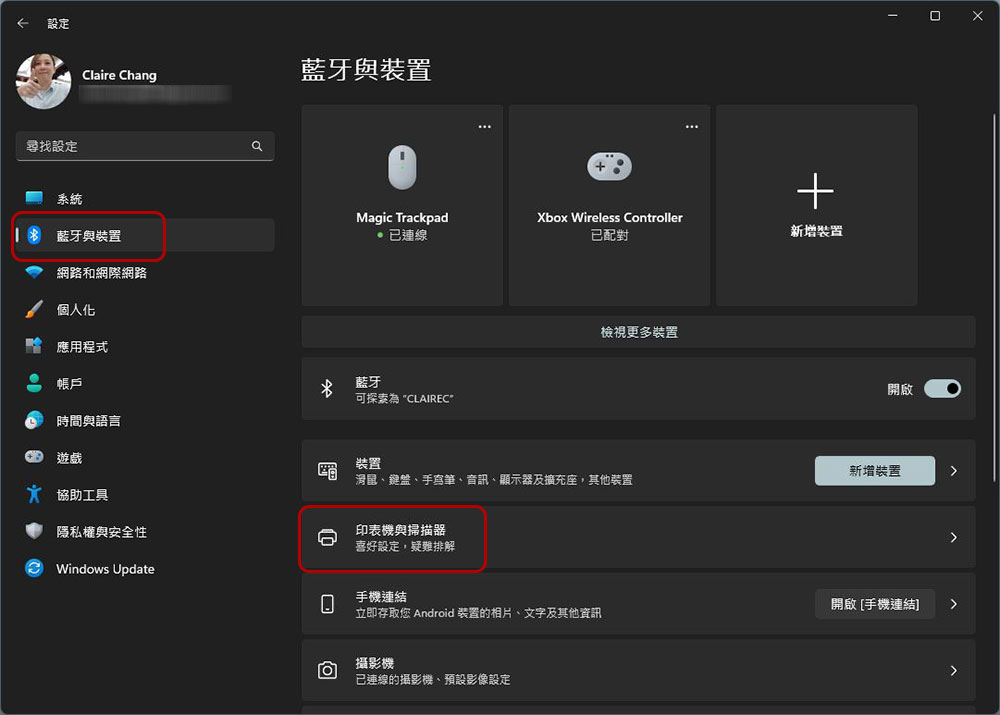
- Select the printer you want to uninstall, then click “Remove” and click OK to uninstall.
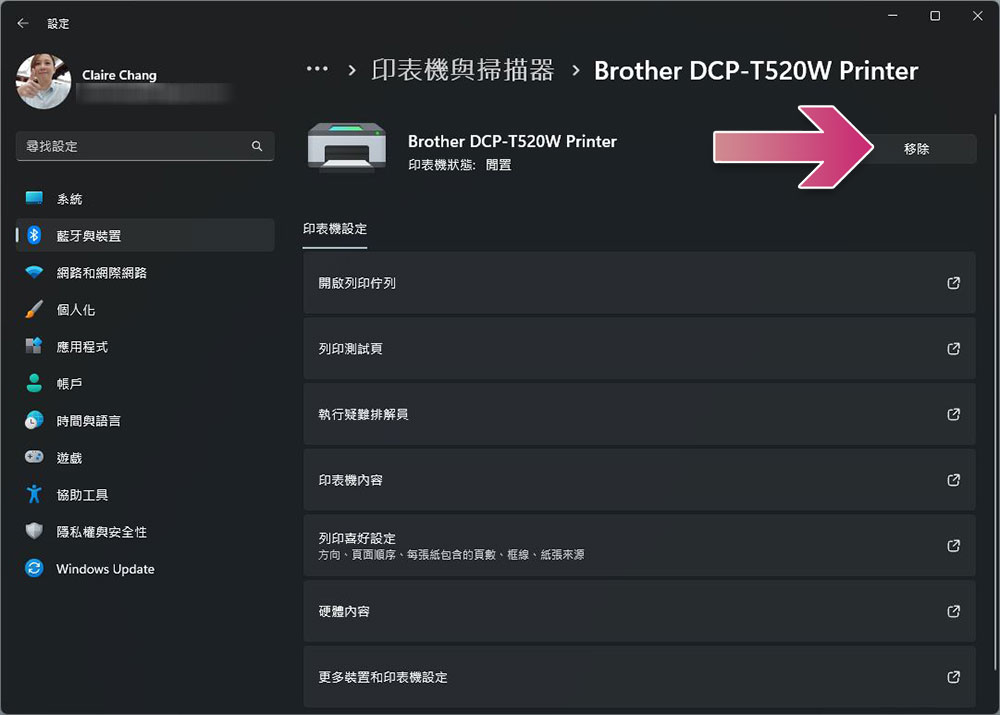
Next, as long as your printer is powered on and connected to the same wireless network environment as your Windows computer, reinstallation is also a very simple step:
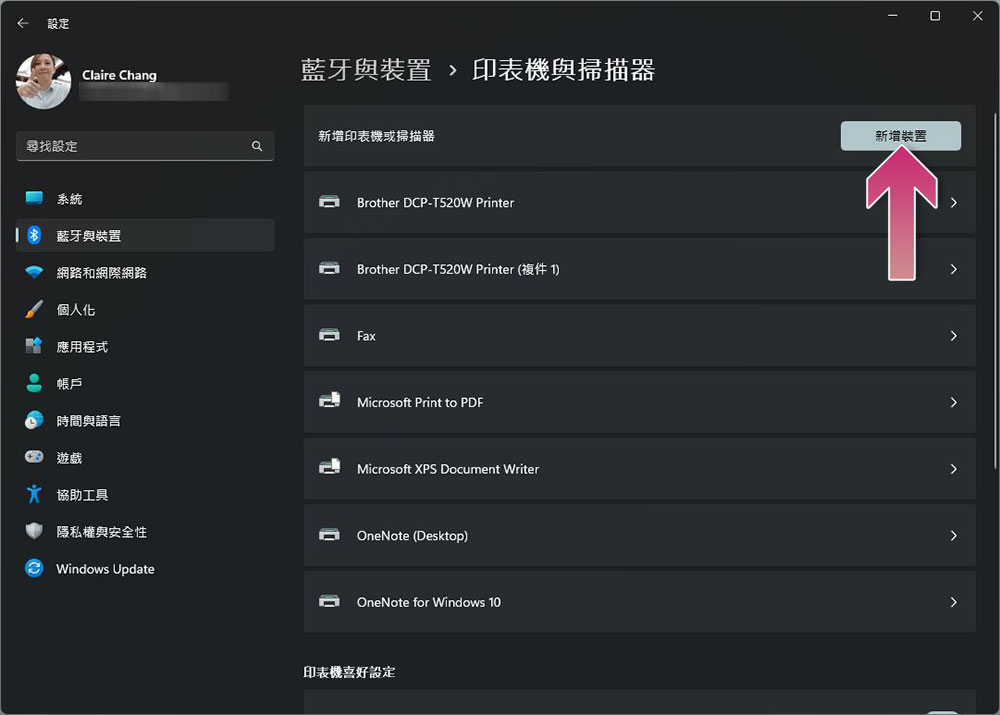
- In the “Bluetooth & Devices” tab in the “Settings” app, select “Printers & Scanners” in the main options area on the left.
- Click “Add Device” at the top. Next, the system will detect the list of devices near the computer. Click Add and wait for the process to complete.
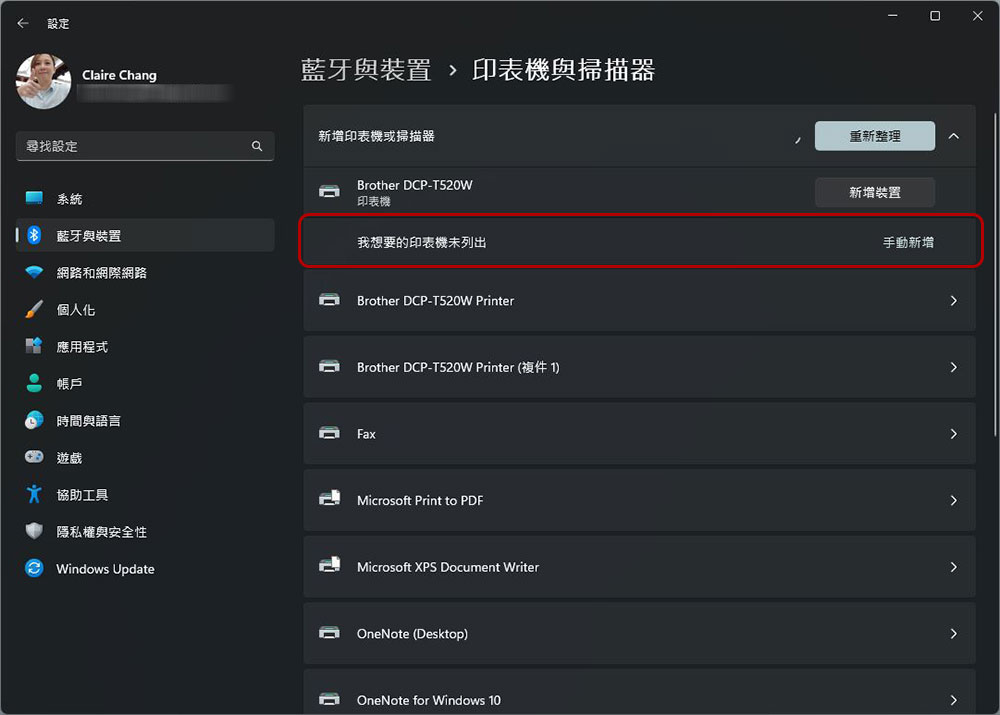
If your printer does not appear in the list of nearby devices, click “Add manually” next to “The printer I want is not listed,” select the option that applies to your situation and follow the on-screen instructions. Regardless, print a test page after connecting to make sure the printer is back to normal operation.
Update printer driver
Like any other device, a printer requires the latest available drivers to function properly on Windows. For almost all current models, driver updates can be downloaded from the official websites of various brands. Additionally, you can find new drivers through Windows Update:
- Enter the Settings application and go to “Windows Update”.
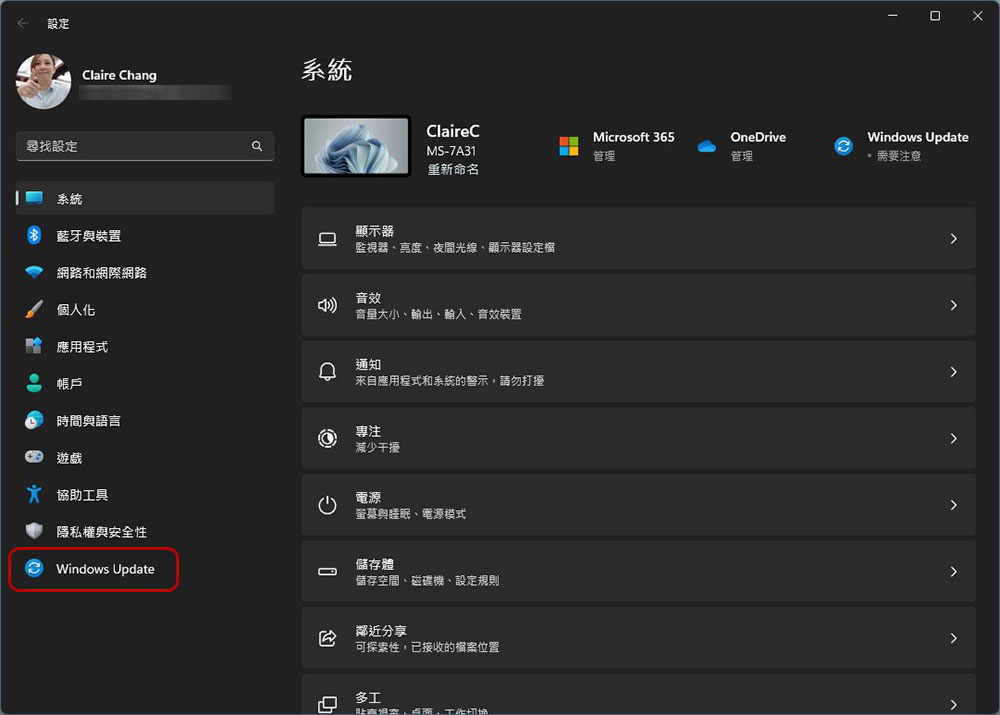
- Click “Check for Updates”. If a new driver is found, you can install it directly here.
If the previous step did not detect updates, you can manually perform the following operations:
- Click the “Start” button and open the “Settings” app, then go to the “Bluetooth & Devices” tab.
- Select “Printers and Scanners” in the main options area on the left.
- Click “Print Server Content” in the relevant settings category.
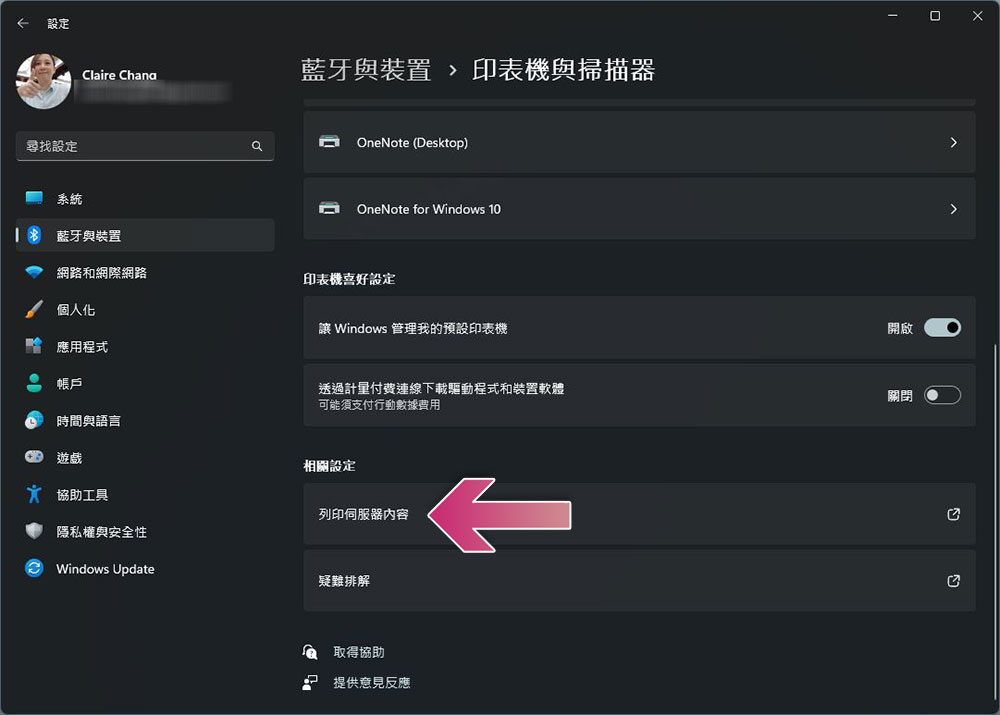
- In the small window that appears, switch to the “Driver” tab and check whether your printer is already in the list. If so, the latest version of the driver has been installed.
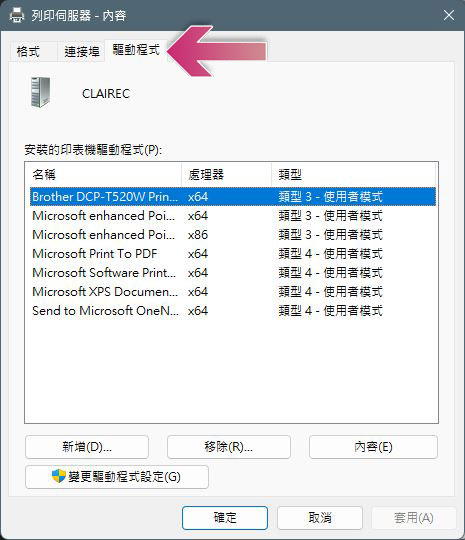
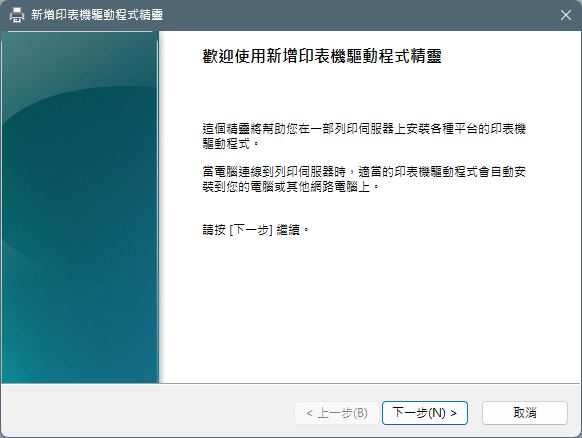
- If you do not see the hardware in the list, please click “Add” to open the “Add Printer Driver Wizard” and then follow the instructions step by step to set the device architecture, printer manufacturer, model, etc. to complete the driver installation.
Run the troubleshooter and update the printer spooler
Some printer errors can be automatically fixed using Windows’ built-in troubleshooter. The author will tell you how to find it below:
- Click the “Start” button and open the “Settings” app, then go to the “Bluetooth & Devices” tab.
- Select “Printers and Scanners” in the main options area on the left
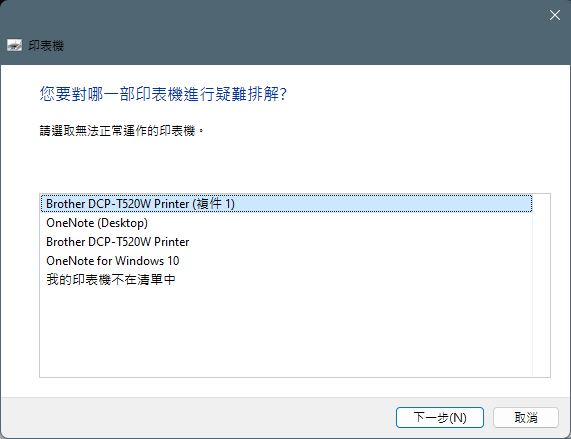
- Scroll to the bottom of the page and click “Troubleshooting”. Next, after detection, select the inoperable printer from the list and click Next. By performing this sequence of operations, Windows should automatically detect any problems related to the printer connected to the computer. If there are many detected problems that require multiple fixes, select the problem to be fixed and follow the on-screen instructions to generate a suitable solution.
But if the troubleshooter clearly detects the problem but fails to fix it, you can also choose to perform the following steps manually. The printer itself has a background processing program that manages the entire work process. Sometimes it may be due to a blockage of printing tasks. A clear and reset may be required to get the printer working again:
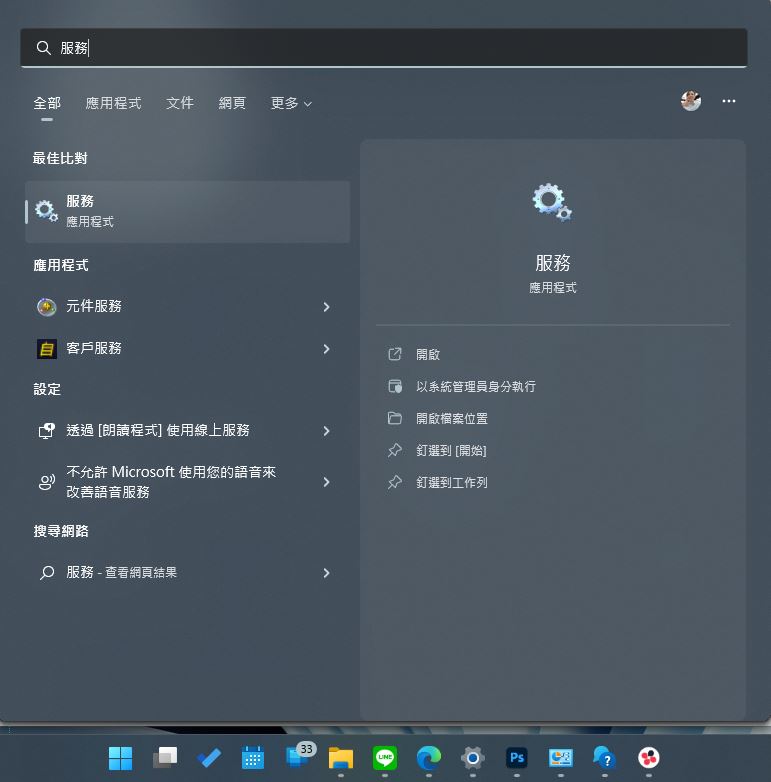
- Search for “services” on your computer and click to launch the service application. The search method can be performed from the start menu or directly from the search on the toolbar.
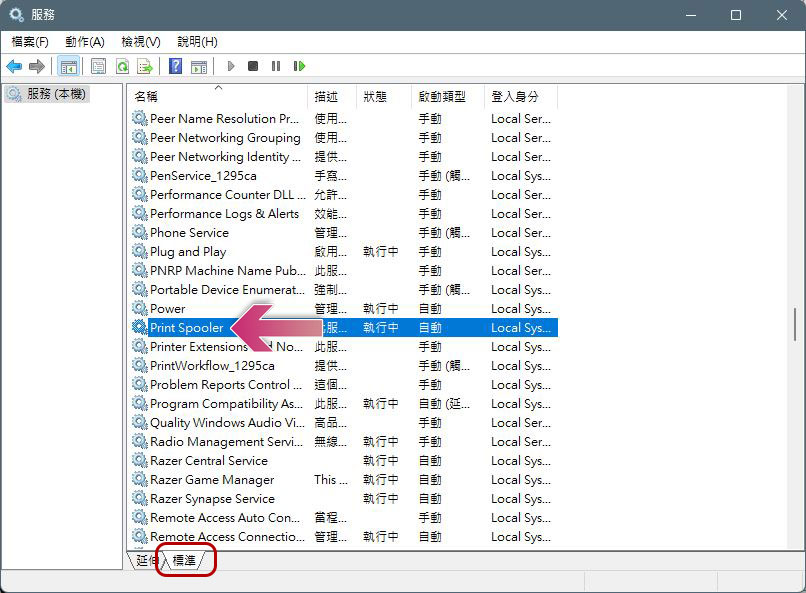
- Switch to the “Standard” tab, scroll down to find “Print Spooler”, right-click and select “Stop”.
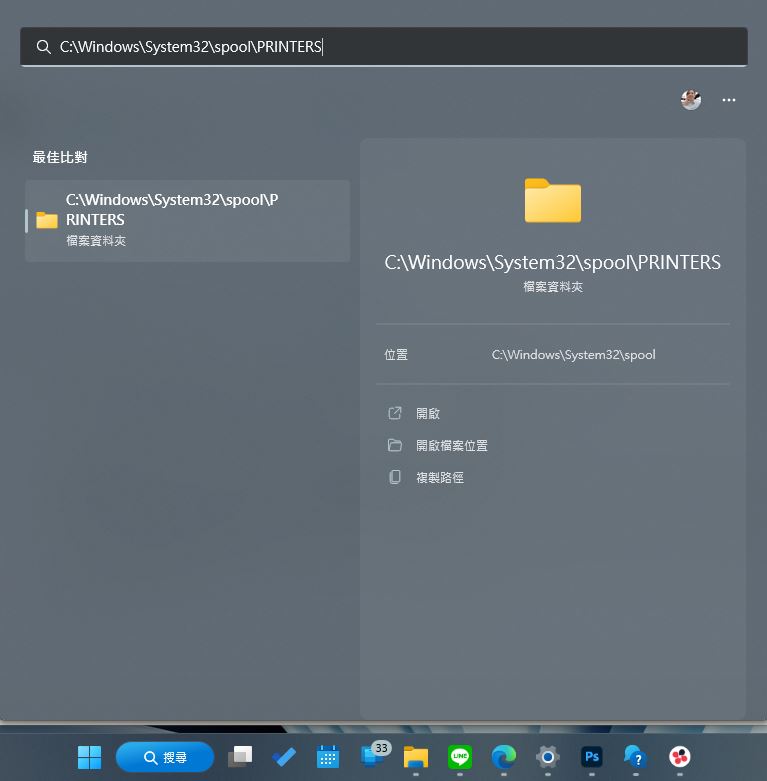
- Next, search for “C:\Windows\System32\spool\PRINTERS” in the search bar, click to enter the folder, and then delete all files in it.
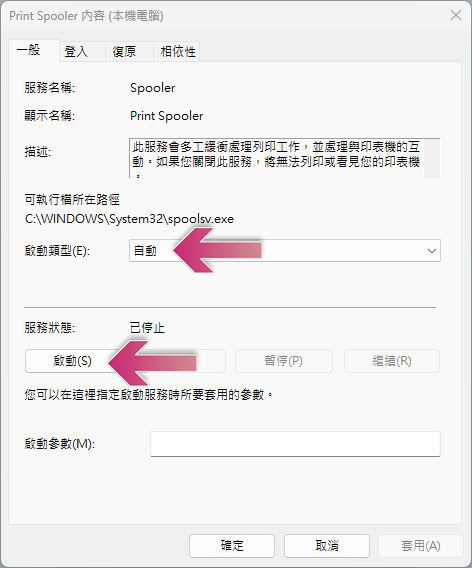
- Next, go back to the service application, switch to the “Standard” tab, scroll down to find “Print Spooler”, right-click the mouse, select “Content”, then select the startup type as “Automatic”, then click “Start” in the service status below, and finally click OK.
Test to see if the printer is working properly. If not, the only option left is to check for the issue that is causing the printer to go offline before seeking help from customer service.
How to repair an offline printer
There are several solutions mentioned above that can fix an offline printer, such as unplugging and plugging it back in, removing and reinstalling the printer, or making sure the printer is connected to the same wireless network as the PC or laptop. If the troubleshooter you ran previously failed to help you set the current printer as the default printer, please follow the steps below:
- Open the Settings app, click “Bluetooth & Devices” in the left sidebar, then select “Printers & Scanners” on the right.
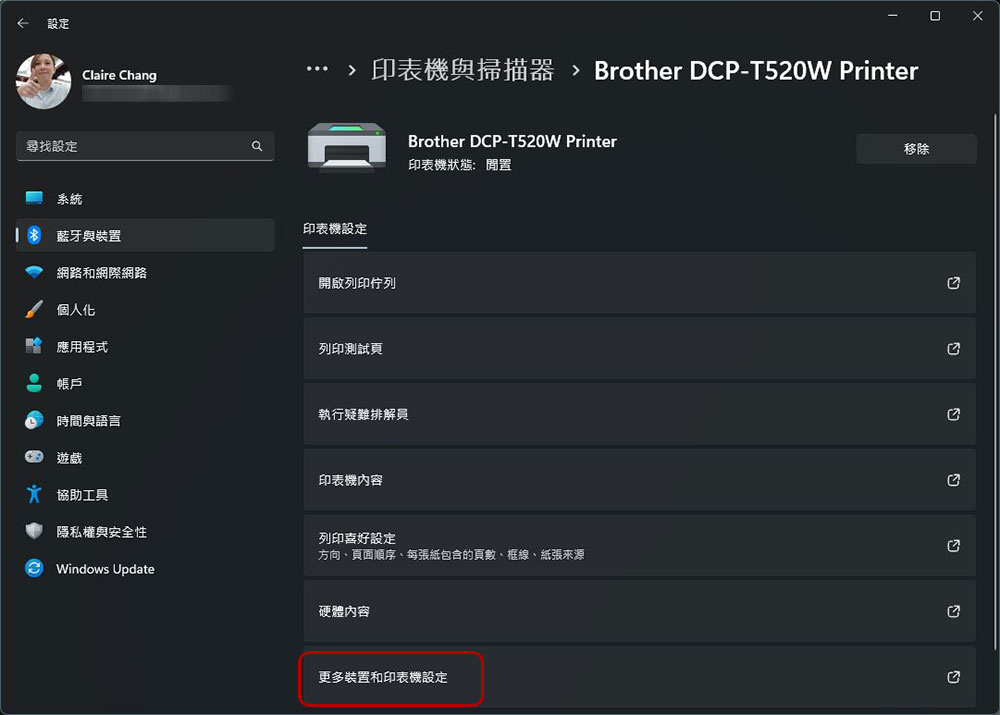
- Select your printer and click “More devices and printer settings.”
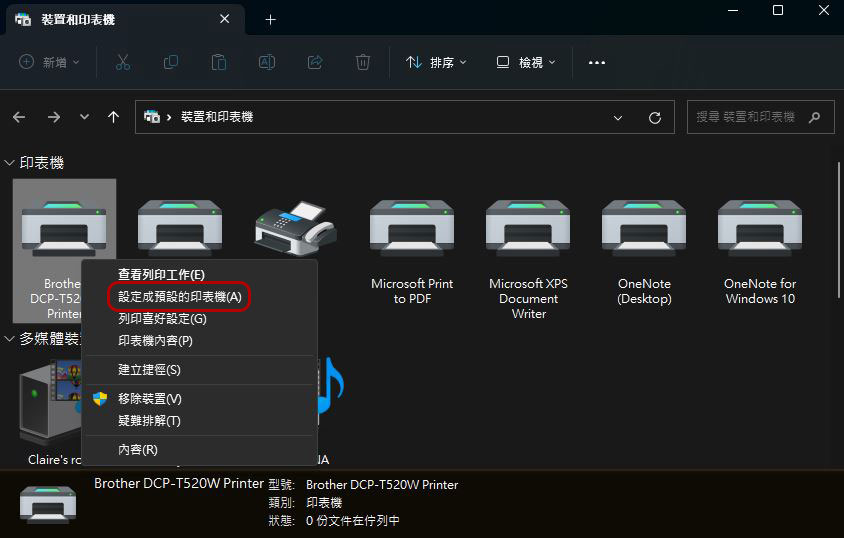
- Right-click on your printer and select “Set as Default Printer.”
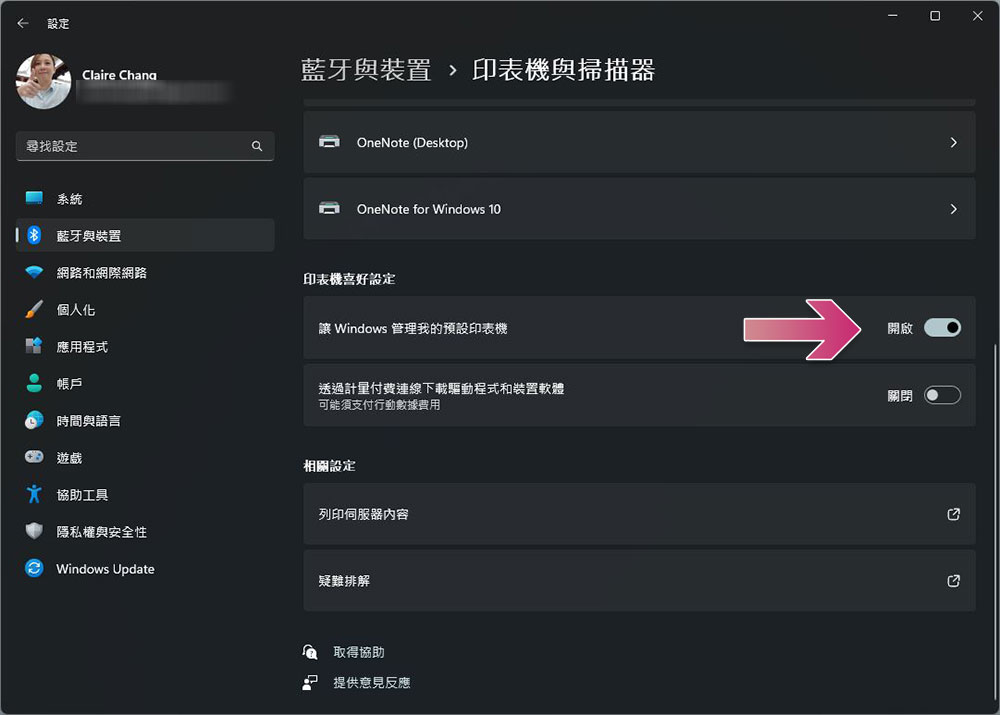
- If the prompt “Windows will stop managing your default printer” appears, click OK to prevent Windows from automatically setting the last printer you used as the default. At the same time, you can also turn this feature back on by turning on the “Let Windows manage my default printer” switch from “Settings >> Bluetooth & Devices >> Printers & Scanners”.
Finally, open the printer’s queue page and check if any print jobs are on hold. Clearing the queue may help resolve printer errors. Simply click on the document listed under Document Name, select Document, and then select Cancel Print to remove it from the queue.
If none of these work, the last thing you can try is to restart the print spooler and your Windows PC or laptop. Follow the previously mentioned instructions to enter the Print Spooler service, right-click it twice, select Restart, and then restart your computer. If your printer still isn’t working properly, you may need to contact Microsoft Support through the Get Help app.
Source: KOCPC Chinese