


Not long ago, we helped you compile 10 macOS Monterey tips that you may not have noticed or know. This time we will continue our efforts and compile another 10 special features and tips for you. Some of them are really highly practical, allowing you to easily advance and get a thorough understanding of macOS Monterey!

10 macOS Monterey tips you may not know (Part 2)
Translate the content in the file
Don’t think that the new translation function can only be used in Safari, it is applicable to the entire macOS Monterey system, and even the content in the file can be easily translated. Just highlight the content you want to translate, right-click, and select the “Translate” function from the menu to bring up the translation window. In the translation window, you can select the language you want to translate. Not only can you read and copy the translated content, but you can also press the play button next to it to give you a clearer understanding of how to pronounce words and sentences.

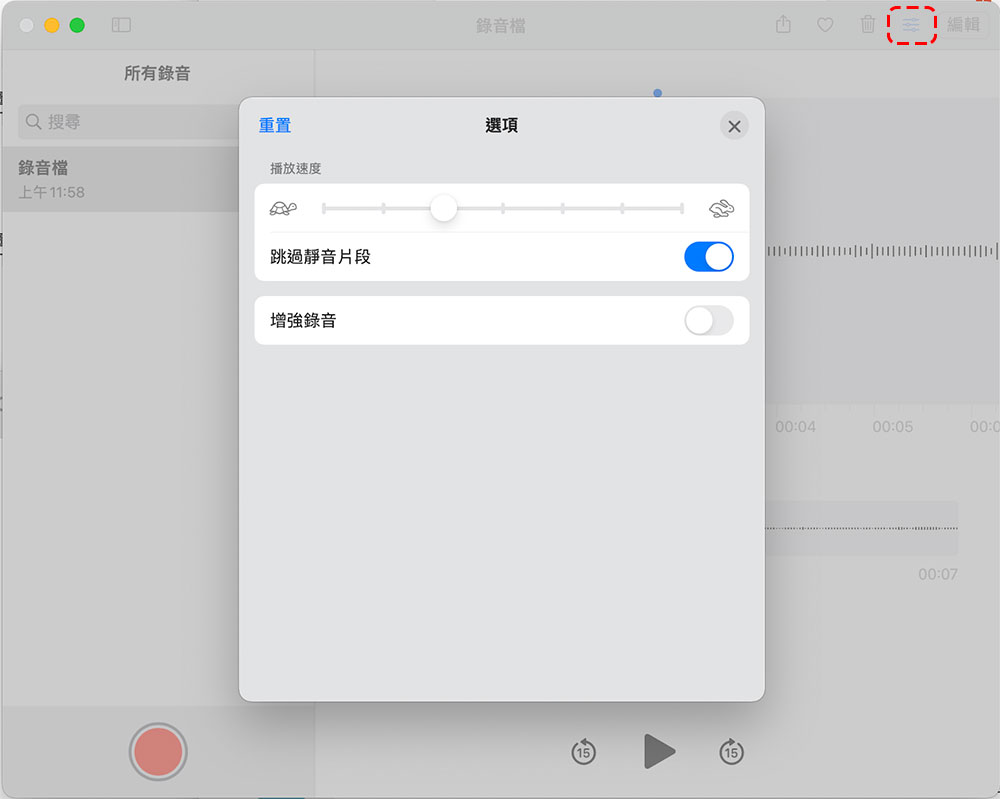
Change voice memo playback speed and skip silent passages
Many people use the Voice Memos app to take notes during interviews or meetings, and Apple has added some welcome and useful features to the Voice Memos app. Now you can automatically skip the silent parts of the recording file when playing back, and you can also adjust the playback speed to make your work more efficient. Just click on the recording file and then click on the control item in the upper right corner of the window to set it in the pop-up window.
Automatically adjust window size
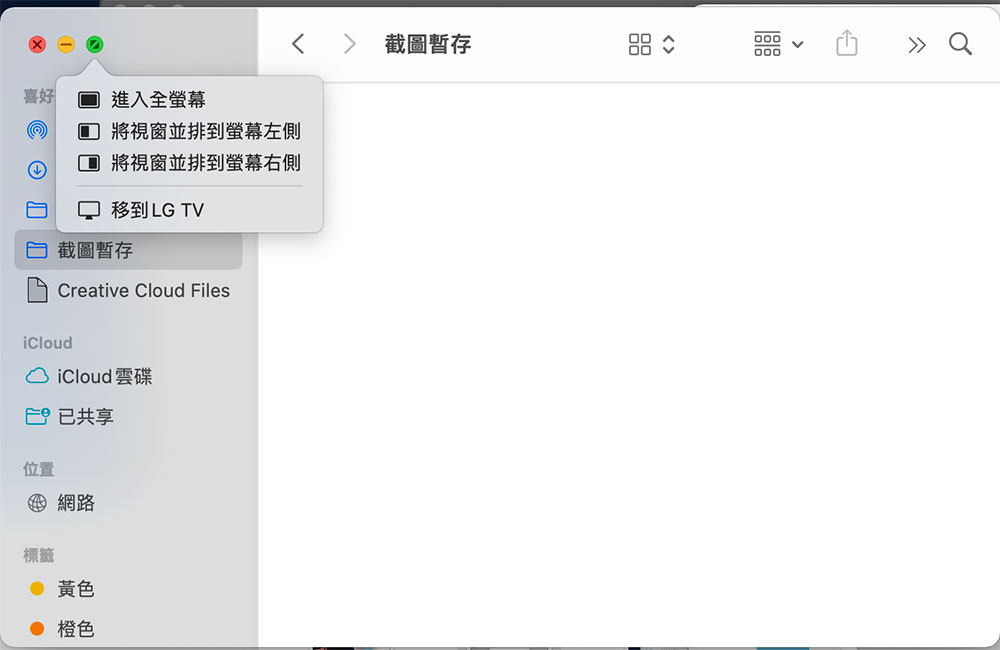
macOS Monterey is more display-aware than previous versions of macOS and automatically resizes the window to fit the external screen, meaning you don’t have to manually resize the window to match the size of the external screen. When you connect an external monitor, just move your mouse cursor to the green light in the upper left corner of the window to display the options.
Always show full screen menu bar
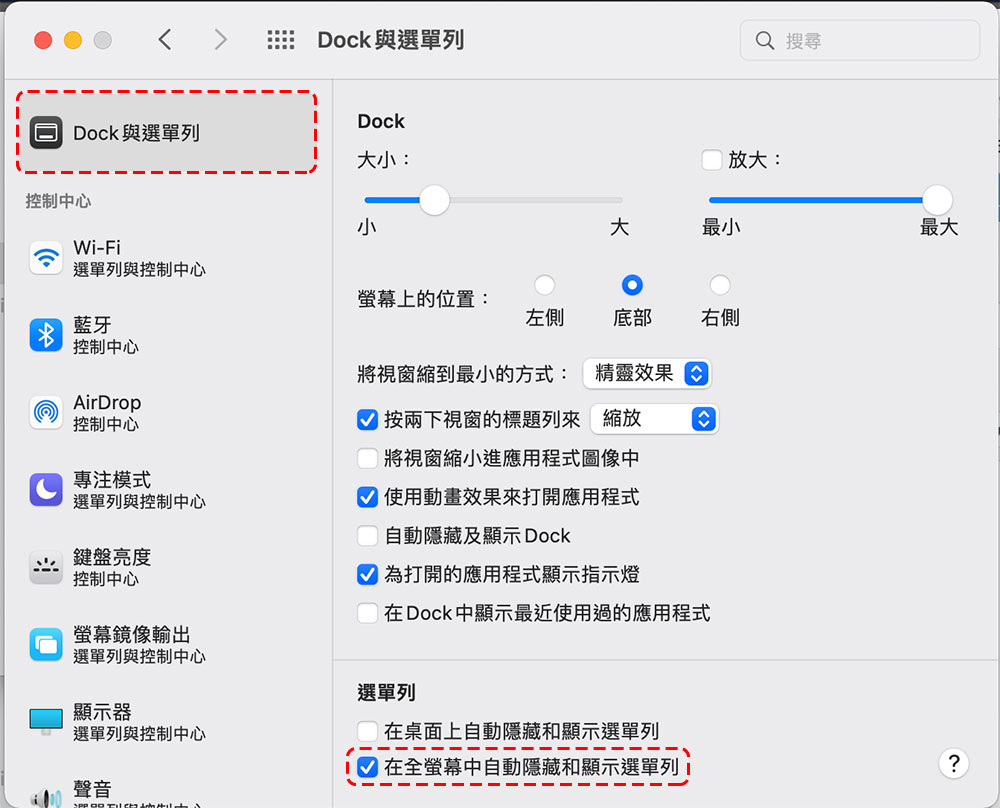
In previous versions of macOS, launching an app in full-screen mode would automatically hide the menu bar, meaning you had to hover your mouse cursor over the top of the screen to display it. In macOS Monterey, you can force the menu bar and all its menus and items to remain visible in full-screen display.
1. Open “System Preferences” and select.
2. Click “Dock and Menu Bar”
3. Click “Dock and Menu Bar” on the side and check “Automatically hide and show menu bar in full screen” at the bottom.
Import photo library
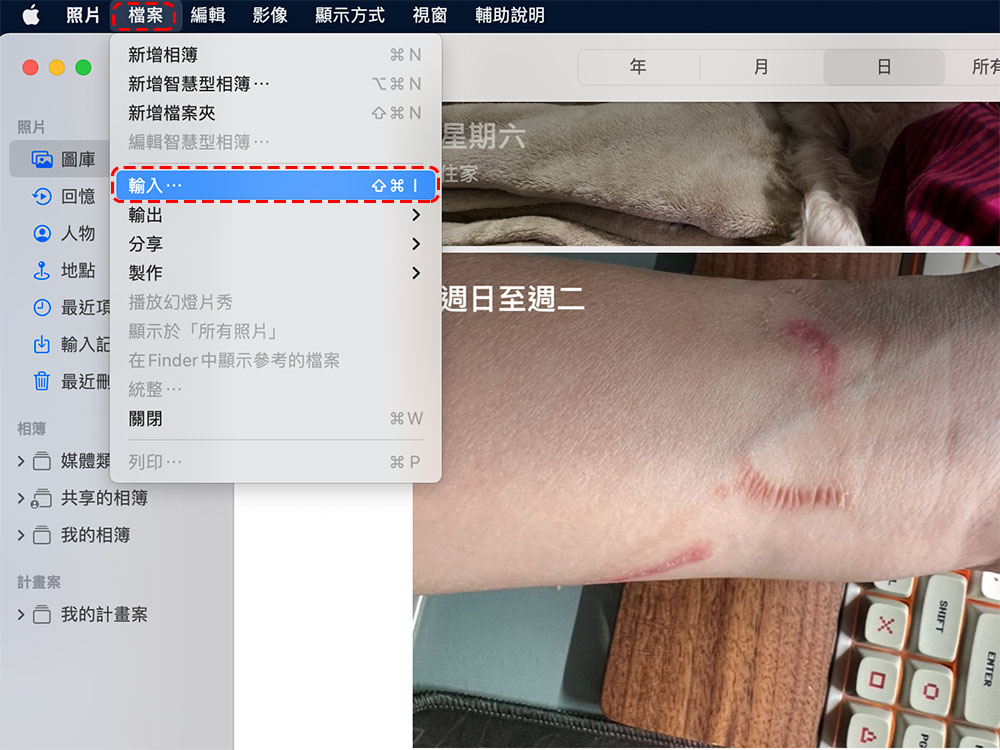
The Photos app also has a new feature in macOS Monterey, which now allows you to import images from another photo library.
1. Open the “Photos” application
2. Click “File” in the function bar and select “Import” to select the images to be imported.
Change the screen refresh rate on your MacBook Pro
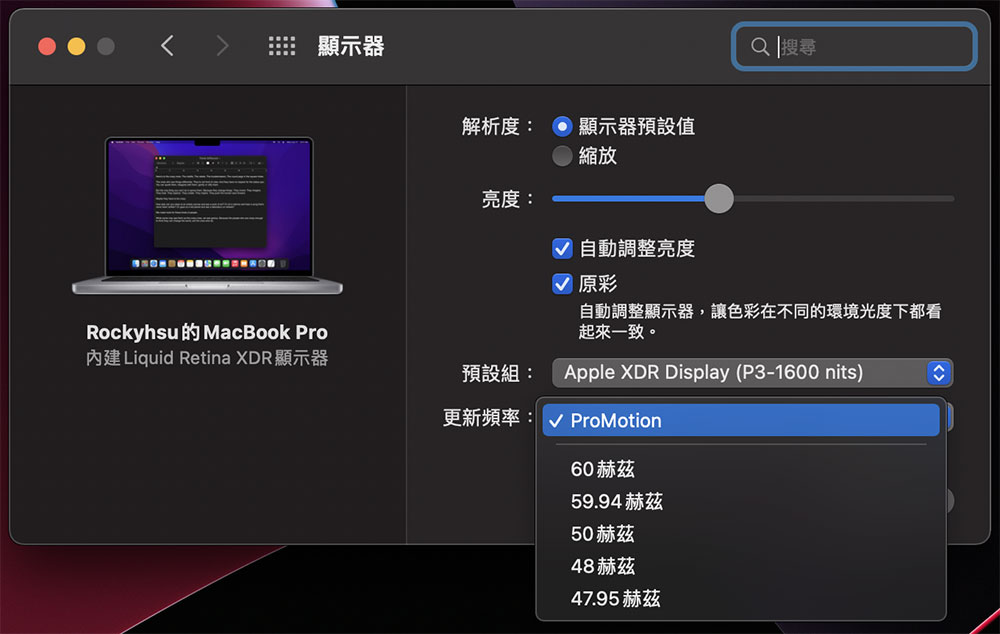
If you are using a 14-inch or 16-inch MacBook Pro, you can now adjust the screen refresh rate of the Liquid Retina XDR display yourself, especially to make it match the video content you are editing and editing, which is especially helpful when working.
1. Open System Preferences.
2. Select the “Monitor” item to make adjustments.
Use labels in notes and reminders
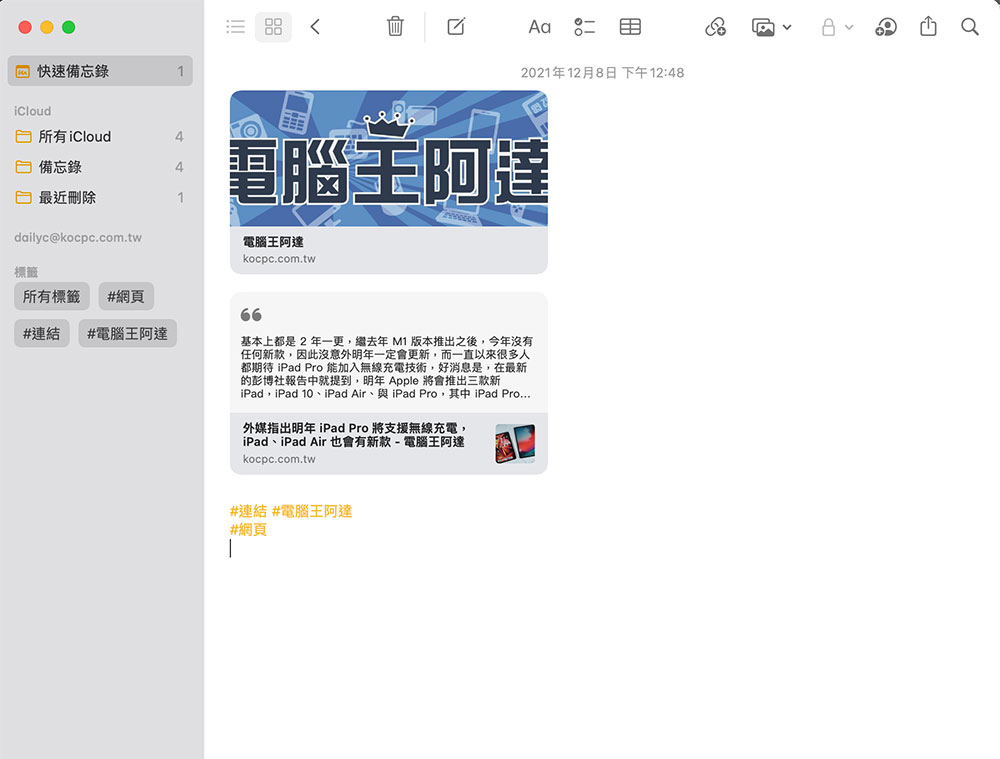
The built-in Notes and Reminders applications on Mac can support tags. This feature can help you summarize and classify various content, making it easier for you to find and save various notes and to-dos. If you want to add a tag, you can directly enter “#” followed by the tag string in the text, and the app will also suggest existing tags for you to choose directly.
Jump to Finder window
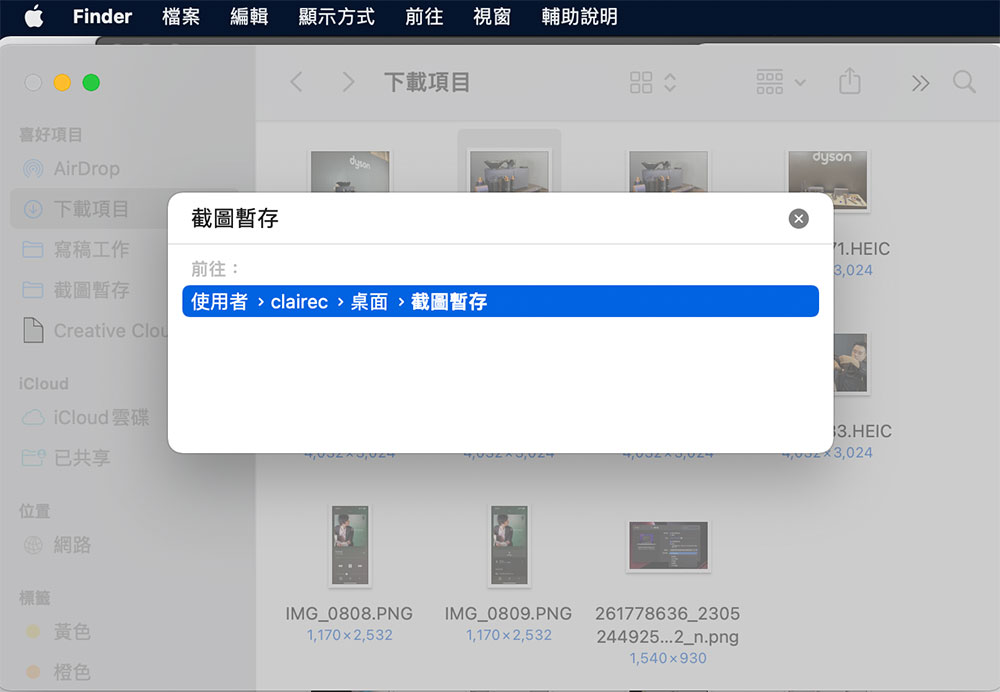
This little new feature is easy to miss, but it works really well. macOS Monterey has added an enhanced version of the jump folder to the Finder. This function will not be displayed directly on the window, but will be a floating window similar to Spotlight style.
1. Open Finder
2. Click “Go” on the function bar and select “Go to Folder…”
3. Directly enter the folder name
Comprehensive keyboard control
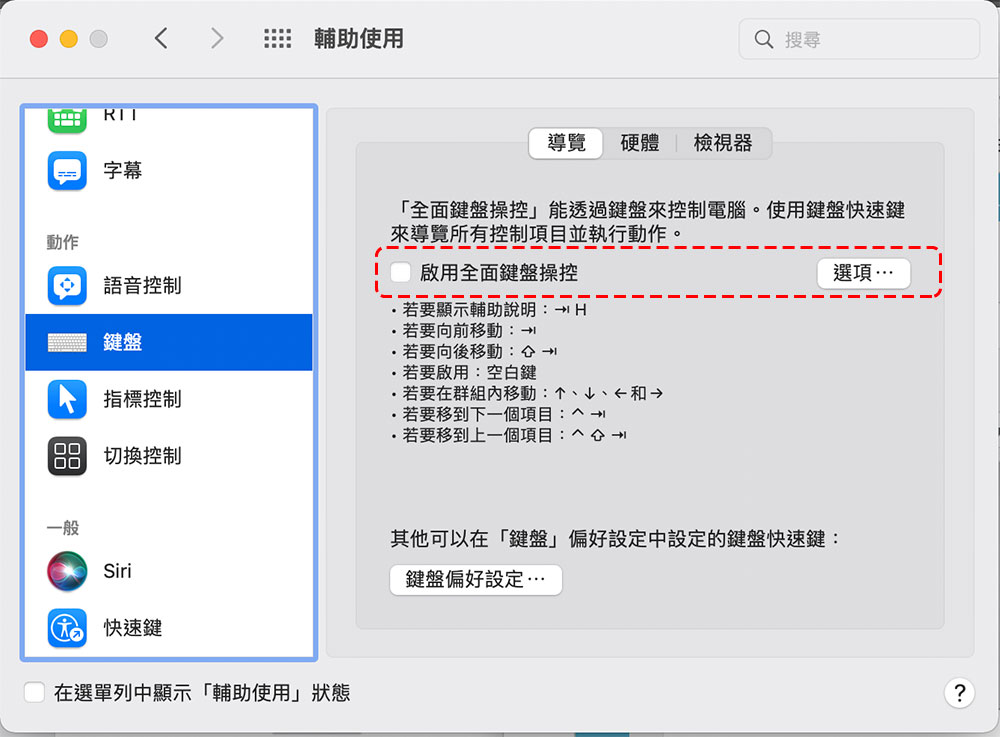
Apple has expanded the “Comprehensive Keyboard Control” option in macOS Monterey. If you don’t need to use a mouse and trackpad, just turn on this option to completely control the computer through the keyboard. After turning on this option, the focused project will be highlighted on the screen. You can customize the color, contrast, and size of the highlight in the navigation options. In this mode, if you want to view the shortcut keys, press Tab + H and use the arrow keys to select it from the list.
1. Open “System Preferences”
2. Select “Accessibility” and find “Keyboard” in the sidebar
3. Check “Enable full keyboard control”
Create a FaceTime link
In the past, to FaceTime someone, you had to have the contact information of the other party. However, in macOS Monterey, even if the other party is not an Apple device user, they can join the FaceTime conversation anytime and anywhere from the link you created. Even friends and family members who do not have an Apple ID can click on the link you shared from Windows computers, Android devices, etc., to join the conversation in the web version.
1. Open the FaceTime app
2. Click “Create Link” in the upper right corner
3. Select how you want to share the link

These two sharing of tips have basically covered the most commonly used, widely used and practical new features of macOS Monterey. As for some small features that are limited to specific models and launch years, I have not listed them one by one. You can explore and play around. It is recommended that if you are not familiar with the macOS system, you can record the option path before making settings that you are not sure about. When you want to restore everything, you can also click on the picture to find it, saving a lot of trouble of searching. However, if you are not sure about the important settings of restoring, overcoming or controlling, I still do not recommend that you adjust it yourself, lest you don’t know how to solve the problem later and I am helpless.
Source: KOCPC Chinese