


Apple launched macOS Monterey this fall. The new desktop operating system brings a series of useful new features and changes to applications such as Safari, Maps, FaceTime, Notes, Photos and Messages, mainly to make Mac more efficient and more enjoyable to use. Today we have compiled 10 small features of macOS Monterey that you may not know about. Come and update your database in your mind!

10 macOS Monterey tips you may not know (Part 1)
Change mouse cursor color
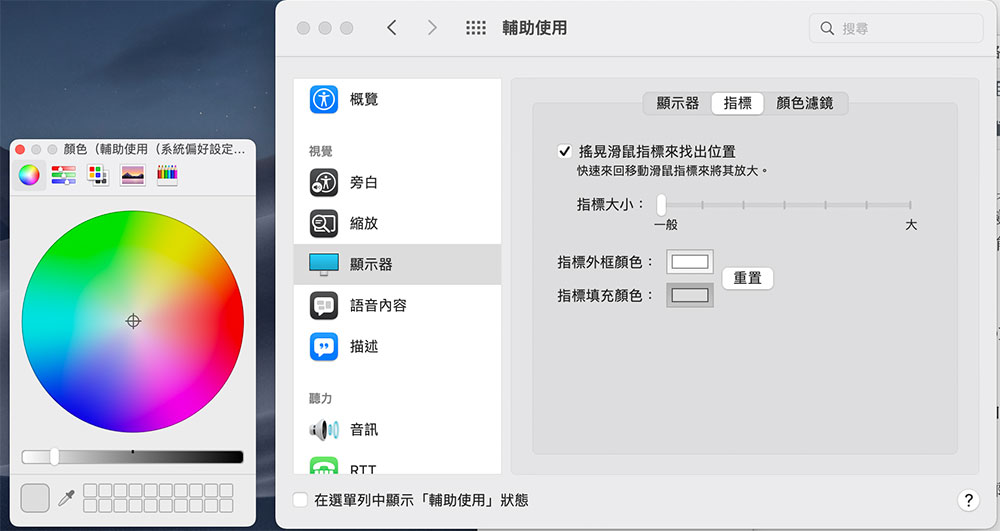
You can change the default black outline with your mouse cursor to almost any color you want with a few small settings.
1. Open “System Preferences” and click “Accessibility”.
2. Click “Display” in the “Visual” category in the left column.
3. Click “Indicators” in the right window to change the outline color and fill color of the indicator.
Test network quality
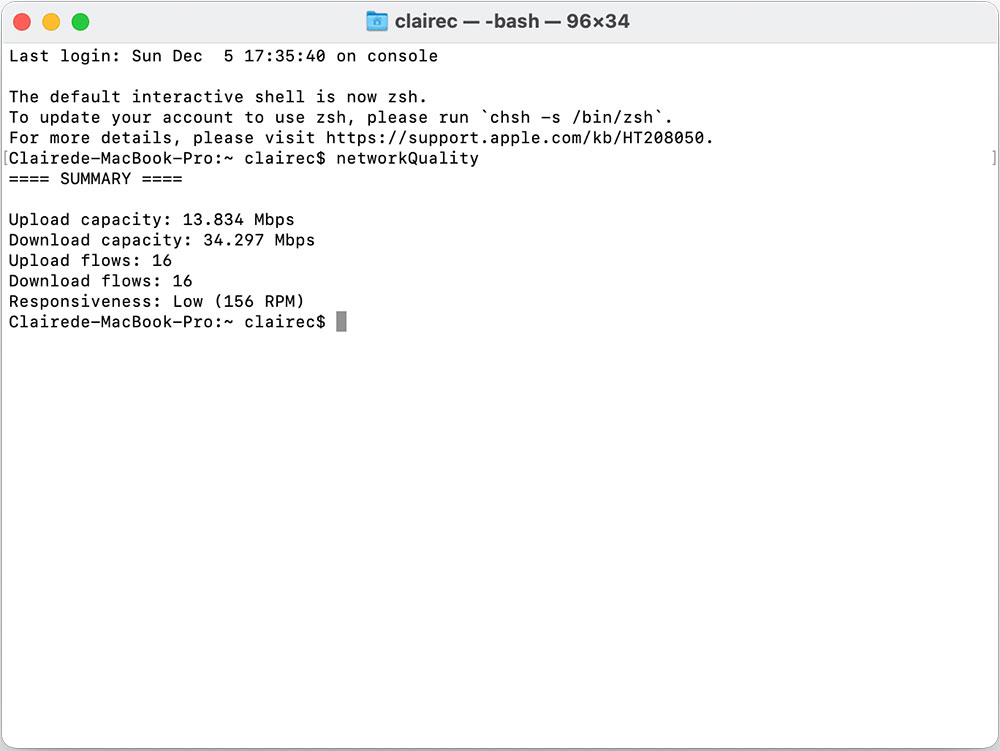
Now you can measure your Mac’s network connection quality directly from macOS without having to download special software.
1. Open “Terminal”.
2. Enter “networkQuality” in the window.
3. Wait a moment to get an upload/download data, which is basically the same as the results of online Internet speed testing tools (such as Speedtest).
Cast iPhone/iPad Music to Mac
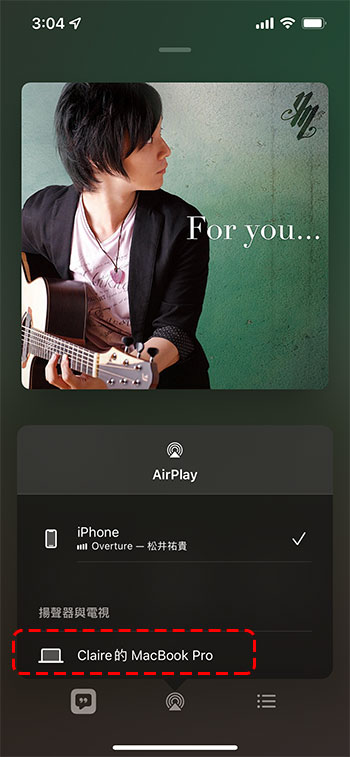
In the new system, you can cast iPhone and iPad music or podcasts directly to your Mac, or even from your Mac to another Mac.

Quick image conversion
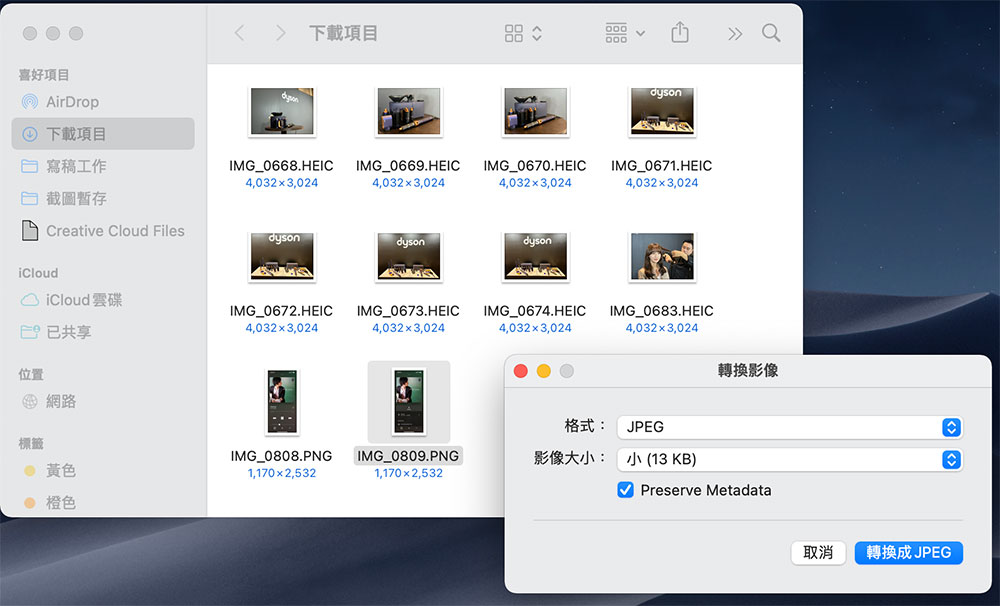
Image Converter is a new quick action item in Finder that can quickly convert image files to other formats, including JPG, HEIC, and PNG. It also allows you to change the file settings to small, medium, large, and actual size, and allows you to choose to save as a new file or directly overwrite the original file.
1. Right-click the image you want to convert.
2. Select “Convert Image” in the “Quick Action” item.
3. Set the image format and file size to be converted in the pop-up window.
Clear content and settings from your Mac (use with caution!)
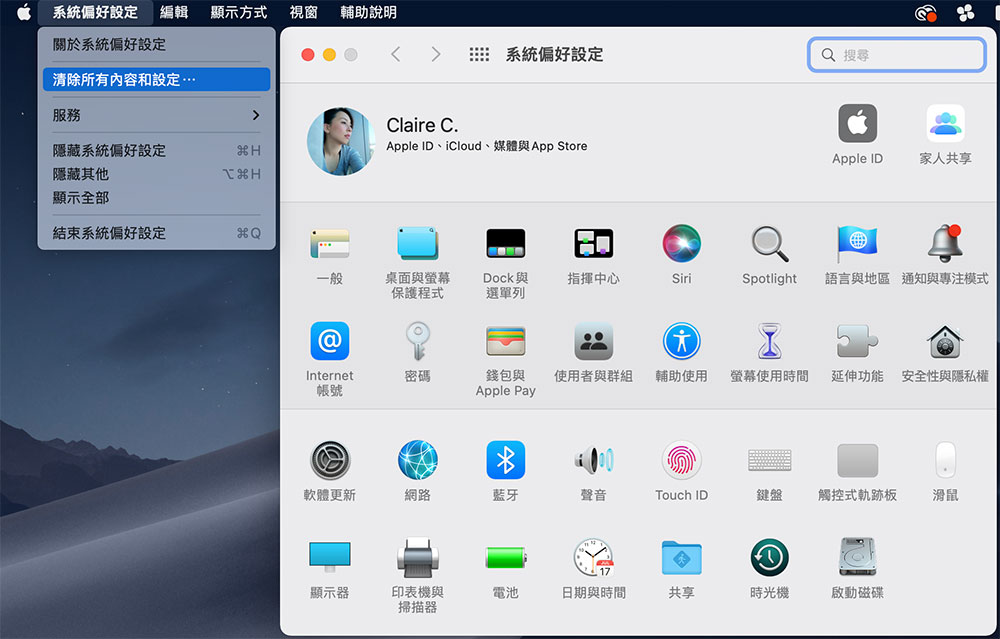
Following iPhones, iPads, and Macs equipped with T2 security chips, macOS Monterey now provides the option to wipe all content and settings from the laptop. This new feature allows you to effectively erase all user data and user-installed applications on your Mac without reinstalling the system, log out of your Apple ID, Touch ID, purchase data, and all Apple Wallet data, and turn off features such as discovery and startup lock, making it easier to reset your computer to its original factory settings.
1. Click the Apple icon in the upper left corner of the screen and select “System Preferences”.
2. When the System Preferences window pops up, click “System Preferences” in the upper left corner of the entire screen to see the “Clear all content and settings…” option. Then follow the prompts step by step.
Add links and text to quick notes
A productivity feature called Quick Notes has been added to macOS Monterey, which provides users with a faster way to record content without having to open the Notes app first every time.
1. Click the share symbol next to the Safari address bar.
2. Select “Add to quick memo” to add the link directly to the memo.

In the Notes application, you can also automatically detect the application you are currently using or have just been using, and provide an item to add a link in the menu above the editor, allowing you to directly click to add the target URL to the note. When you want to go back and view it in the future, you only need to click to go to the web page.
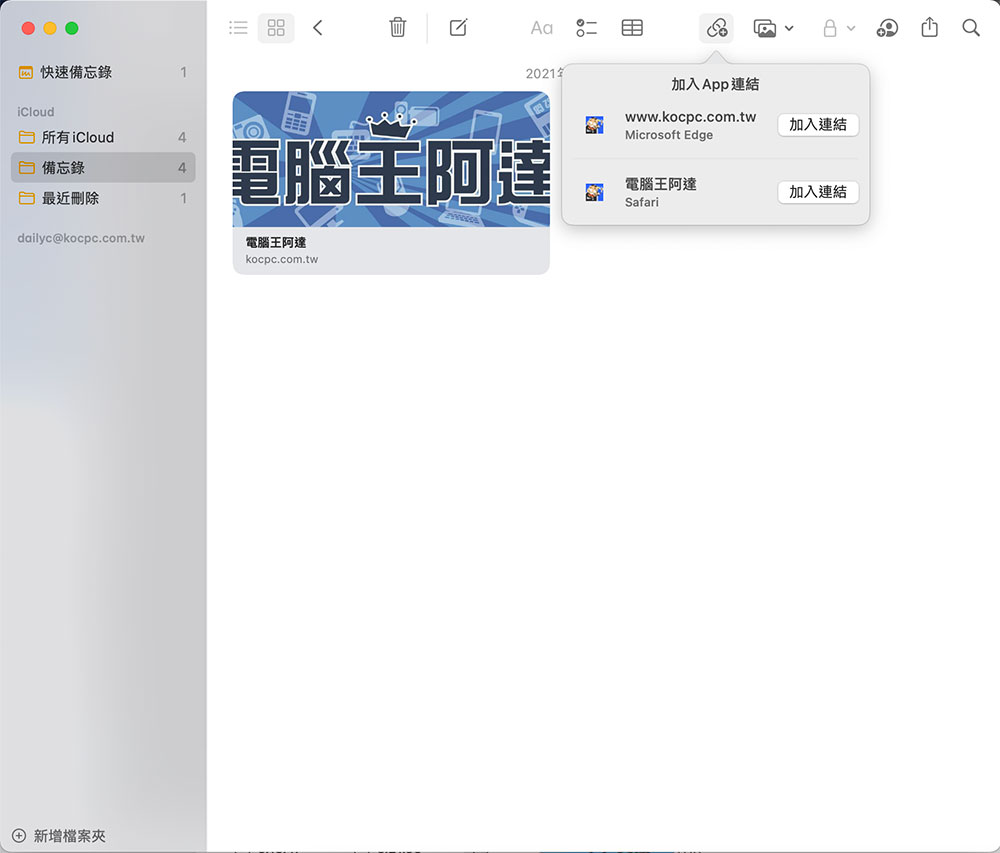
If used with Safari, if you want to add the selected content (text, pictures) to the quick memo, you can also right-click the mouse, or hold down Ctrl and double-click on the target to select add to quick memo.

Add shortcuts to Finder quick actions
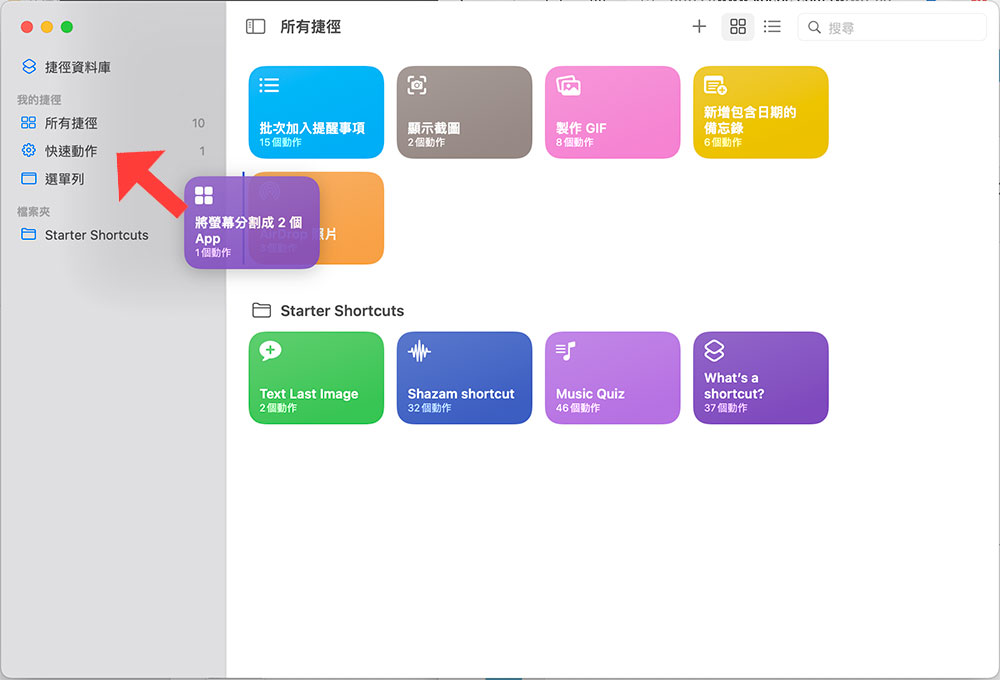
The shortcut function has been introduced in macOS. You can now add shortcuts to the Finder right-click menu for quick selection.
1. Open the “Shortcuts” application.
2. Drag the “shortcut” you want to add to “Quick Actions”.
View file path
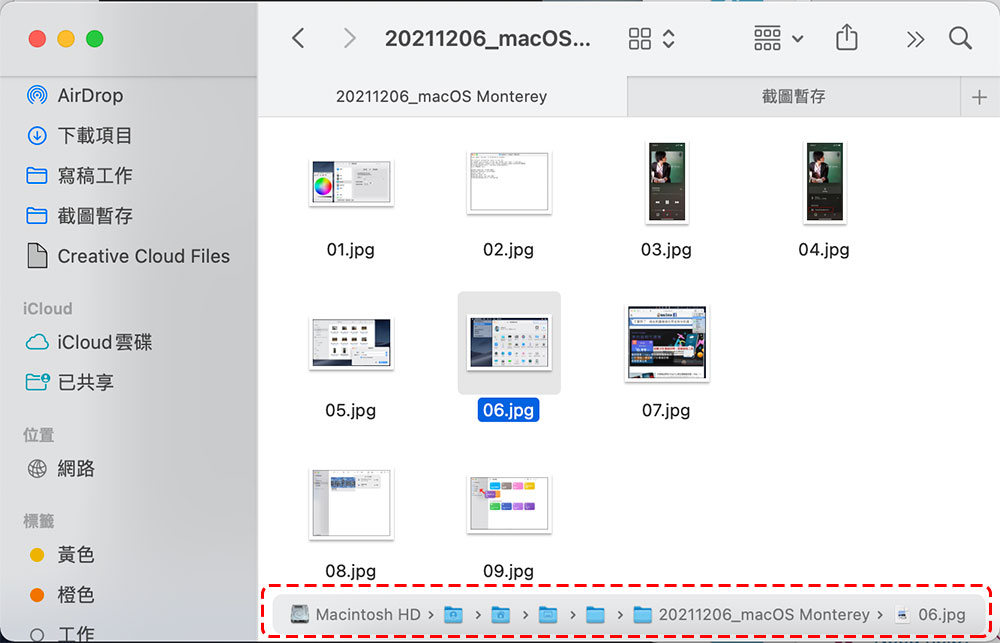
Generally speaking, you will open the file directly from the folder, but it seems not so simple if you want to view the path where the file is located, but in macOS you can view it faster. As long as you click on the file and press the “Option” button, you can see the full path of the file at the bottom.
View iCloud archives in Finder
A Shared collaboration folder has been added to the Finder sidebar, where you can easily find files shared with you through iCloud or through collaboration features in Apple productivity apps. It can further display the invitation status, the person who last modified the file and other sharing-related raw data for easy management.
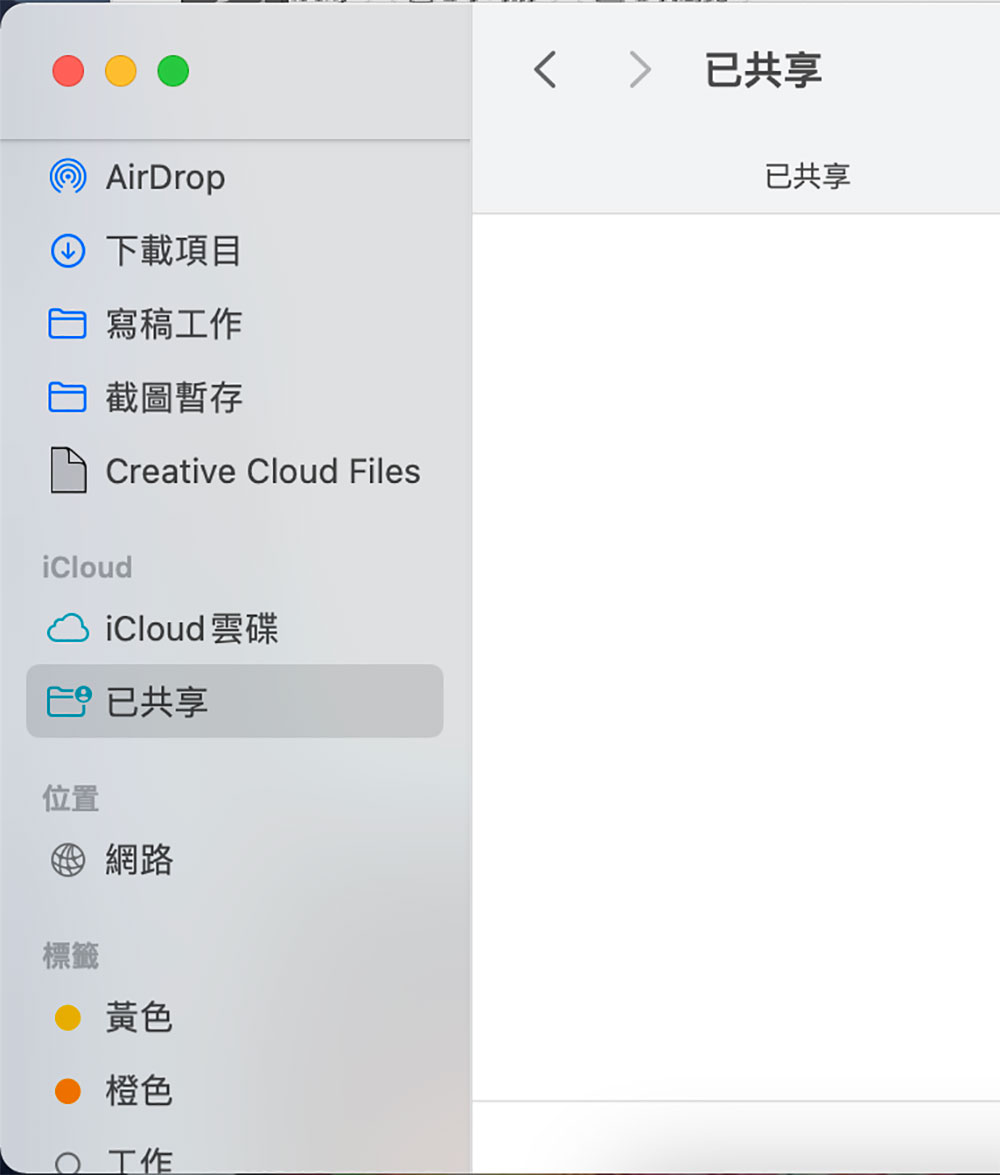
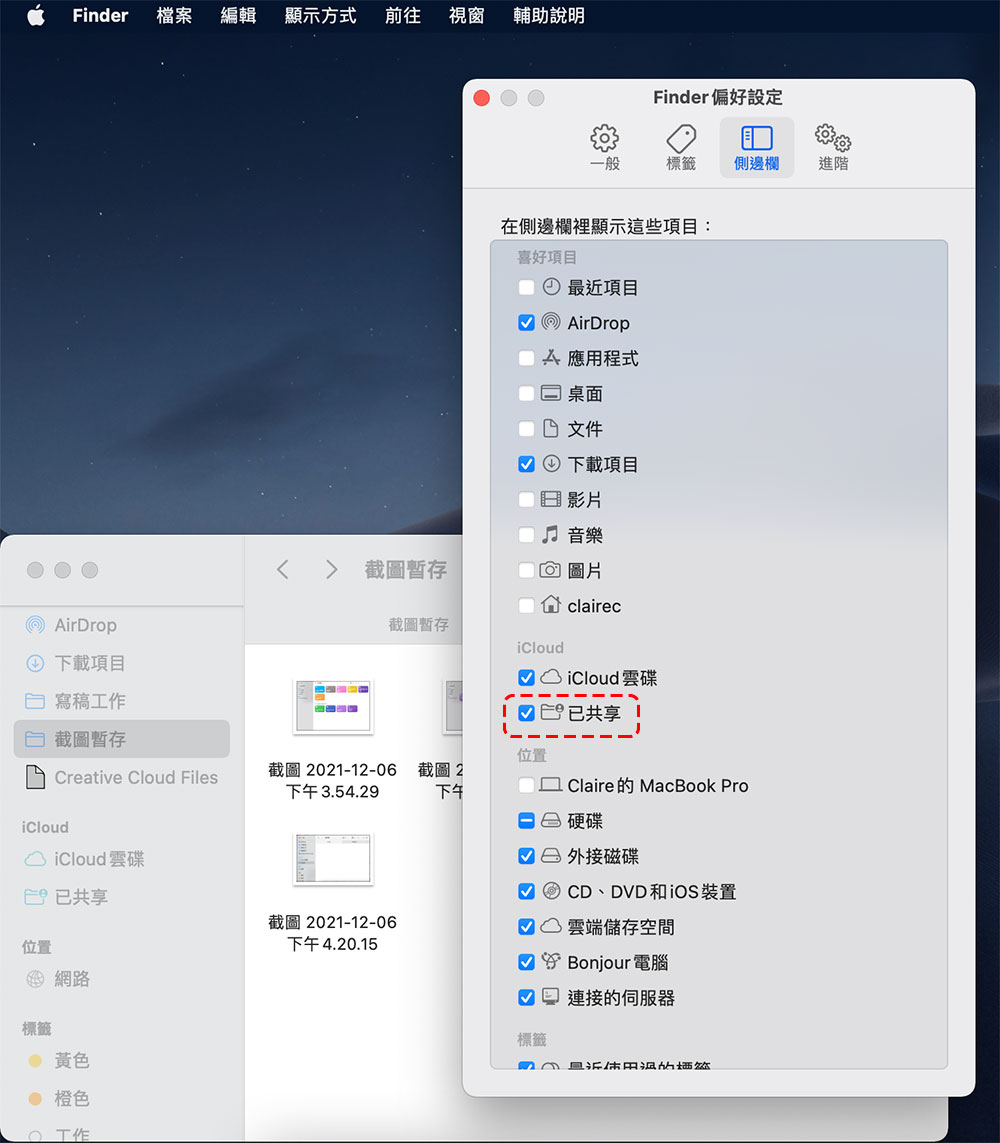
To add or remove iCloud shared folders from the Finder:
1. After opening the Finder window, click Finder in the upper left corner and select “Preferences…”.
2. In the “Sidebar” item, check or uncheck “Shared” in the iCloud item.
Set focus mode for specific applications
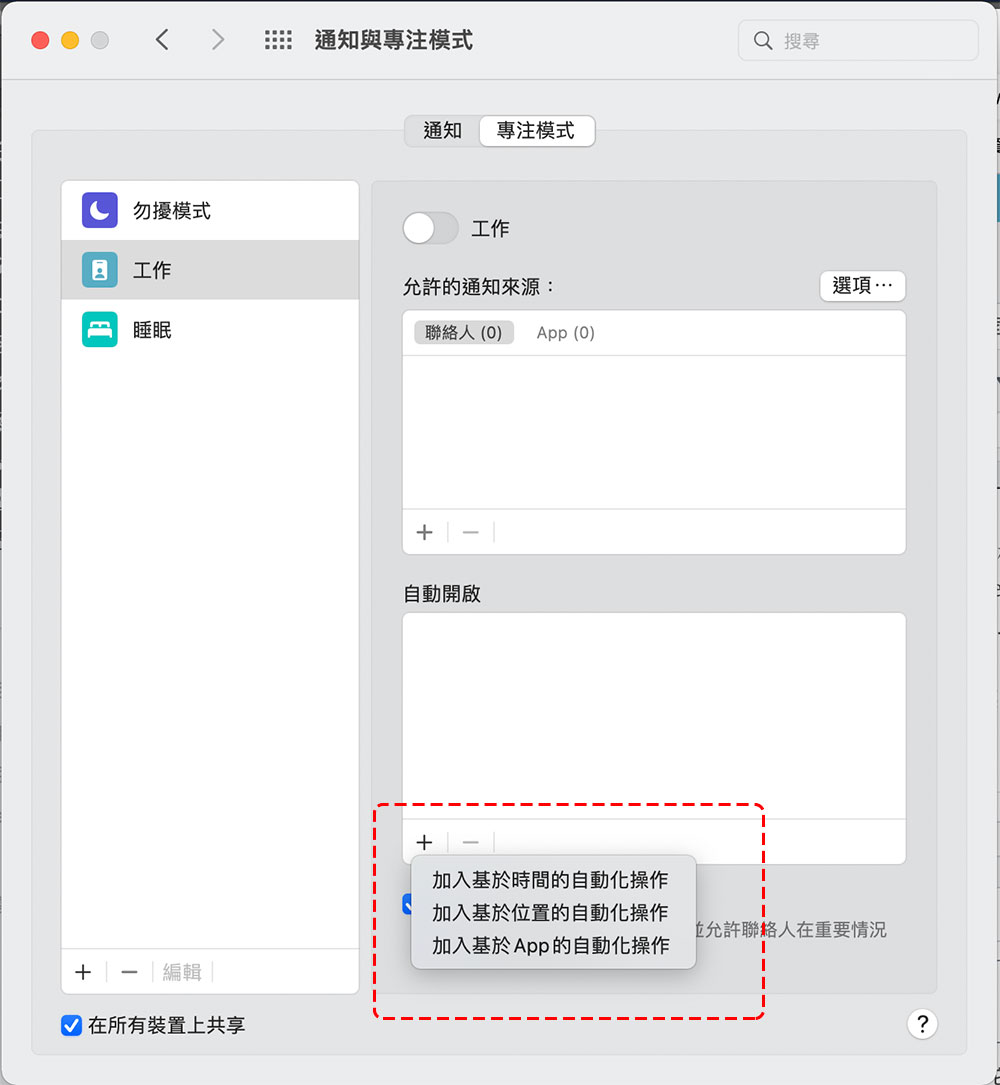
Apple’s new Focus Mode feature in macOS Monterey allows you to stay focused when you need to, without being distracted by external affairs. It implements this function based on the operation you are performing. In addition to the comprehensive focus mode, you can also set it to automatically enter the focus mode under specific circumstances.
1. Open System Preferences.
2. Select “Notifications & Focus Mode” and switch to the “Focus Mode” tab.
3. New status can be added to the left column, and on the right you can choose to automatically turn on focus mode based on time, location or application. For example, you can set it to turn on focus mode when you go to work, or turn on focus mode when opening an e-book reading application.
These small functions are hidden in macOS Monterey, but you may not know it or have not discovered it. The ones selected by the author are simple and practical functions, and I hope they will make you use them more smoothly!
Source: KOCPC Chinese