


Low photo resolution and blurriness when zoomed in are common frustrations many people face. Especially now with smartphone photography, AI AI-generated images are becoming increasingly common, but once you need to enlarge them for use, the quality issues become directly visible.
Recently, there’s an AI that emphasizes being free and requiring no installation Enlarge imageTools are quietly gaining attention, allowing users to noticeably enhance image details in no time simply through a browser, with even previously blurry areas being restored.
What’s even better is that it supports batch processing and multiple AI model options, offering an easy-to-use interface with solid results. In this article, we’ll take a comprehensive look at what makes this tool stand out and share some practical tips you can use.
Free AI Image Upscaling Tool – One-Click to Enhance Images Up to 4x Without Distortion
In today’s digital landscape where content quality matters more than ever, social media posts, website assets, and even e-commerce product images all demand higher resolution. But the reality is, most image sources aren’t actually perfect—old photos, screenshots, or AI-generated images often reveal their flaws the moment you zoom in.
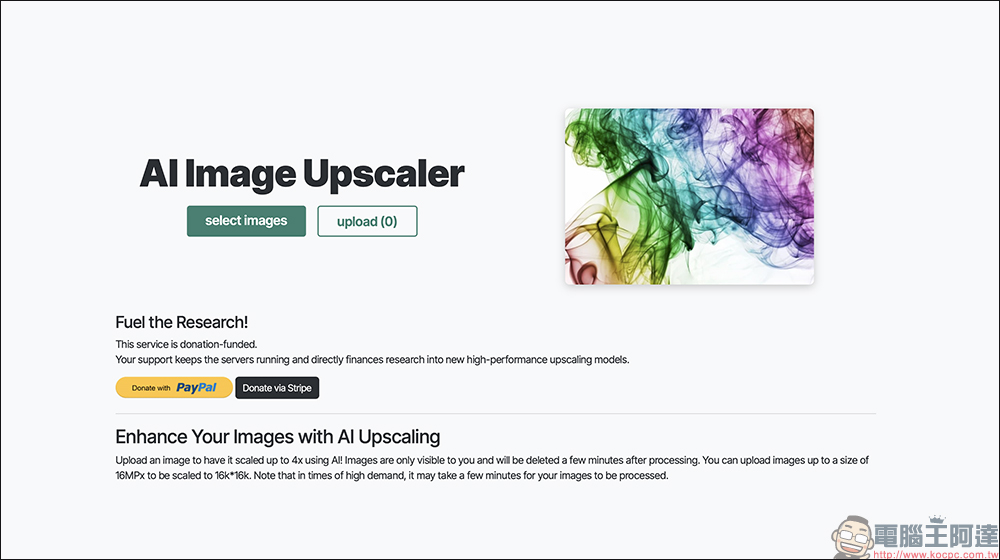
This is where AI image upscaling tools come in as a lifesaver for many creators and casual users alike. The tool we’re featuring today, “Image Upscaling,” is a free, no-download-required online AI image enlarger, best known for its simple operation and surprisingly impressive results.
Users only need to upload images through a browser, and the AI will automatically redraw and enhance details, supporting upscaling up to 4x while maintaining image clarity.
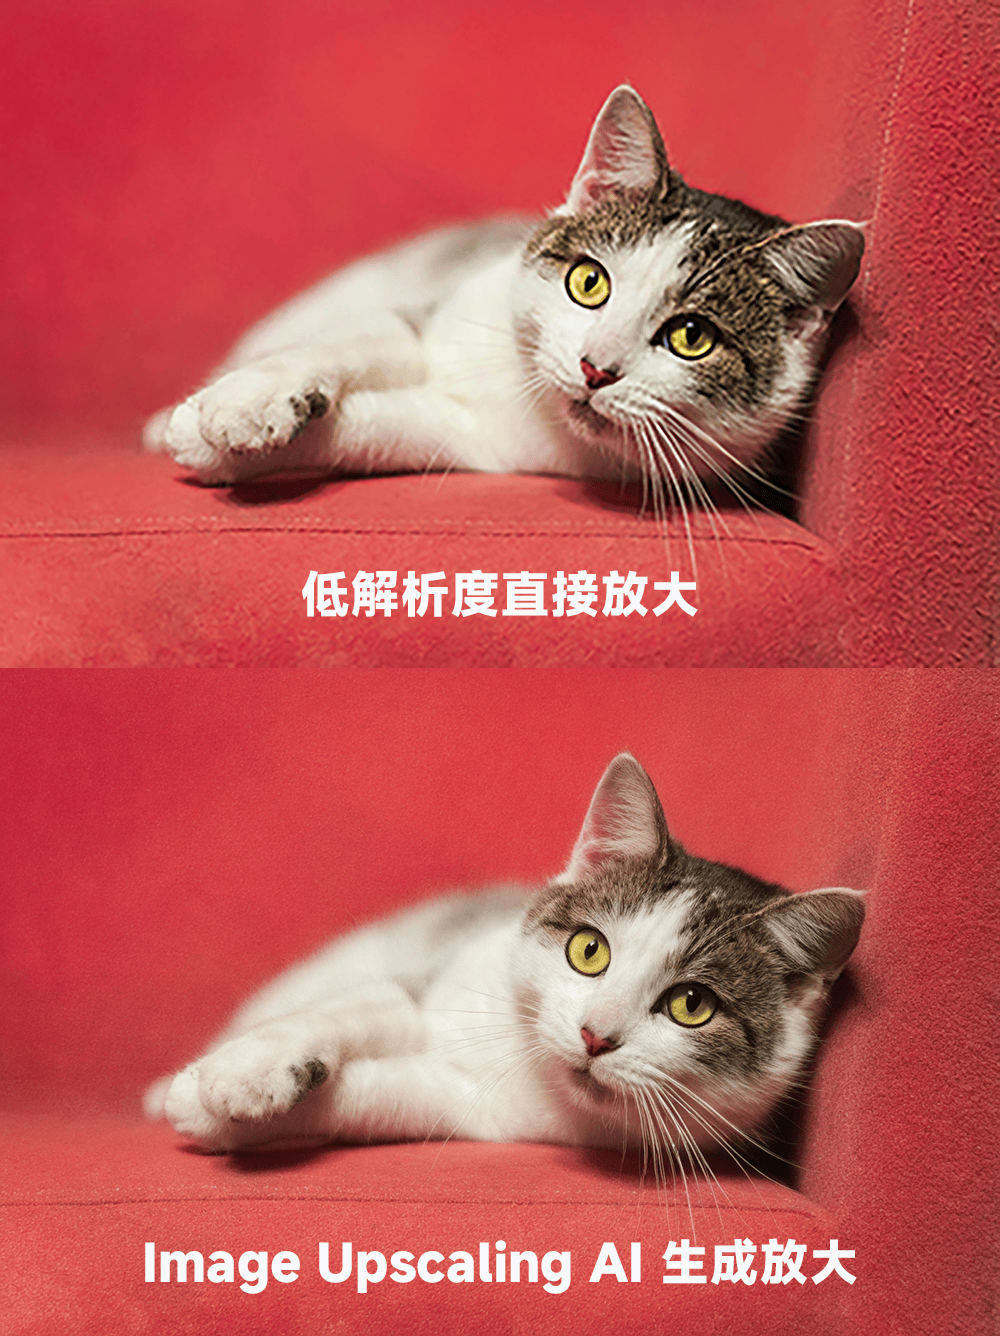
AI upscaling doesn’t just enlarge—it regenerates details.
Traditional image upscaling simply enlarges pixels, which easily results in blurriness and jagged edges. However, Image Upscaling uses AI model computation to analyze the image content and then regenerates details. In other words, it’s not simply enlarging, but rather “reconstructing the image.”
When you process a low-resolution photo, you’ll notice that not only does the size increase, but the details also become sharper—facial features and edge lines get optimized as well. This is incredibly helpful for restoring old photos or enhancing social media content.
Supports multiple formats and batch processing to save time
In terms of format support, Image Upscaling handles common formats like PNG, JPG, and WebP, which is more than sufficient for most users. Regarding resolution, it can output up to 4096 × 4096, which is more than adequate for web or social media use.
Another practical feature is its batch upscaling support. If you need to process multiple images at once, you can upload several files directly, and the system will process them all together, then package them into a compressed file for download. For content creators who need large amounts of assets, this is a major plus.
Free to use, but with usage limits
This service is currently free to use. Small-scale needs are essentially free, and no account registration is required to use it directly. However, note that there is a daily usage limit, so if you need to process large amounts, you may need to batch your requests or consider a paid plan.
Additionally, images are temporarily stored on the server after processing and automatically deleted after approximately one hour, which is a plus for privacy and security.
Quick Start Guide
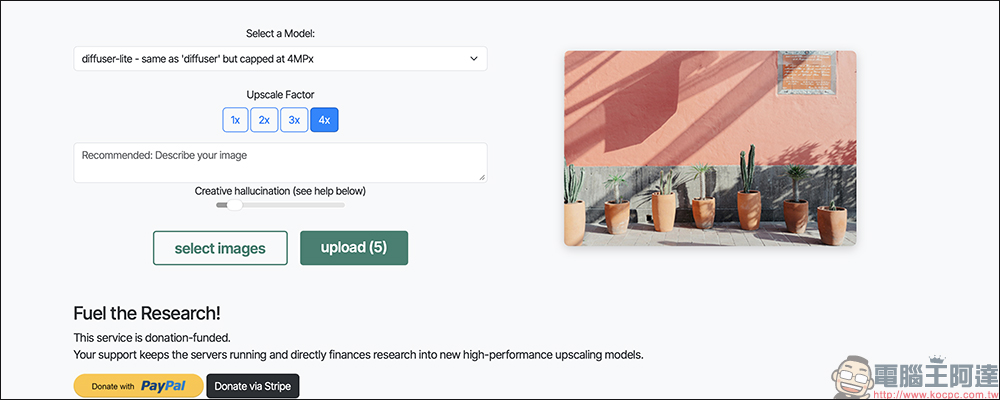
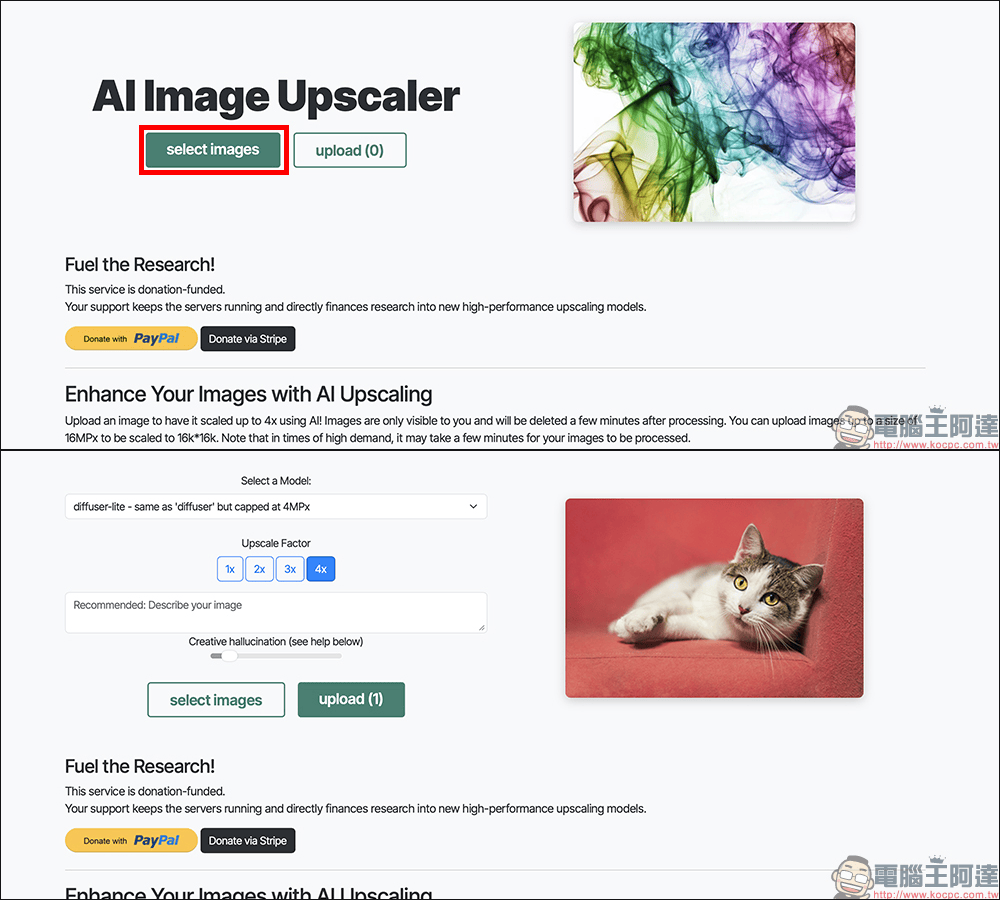
The actual workflow is actually quite simple and can be roughly divided into a few steps. First, after entering the website, simply click “Select Images” to upload images, and you will see the preview screen.
How to Choose the Right AI Model? Results Vary Wildly Depending on the Use Case
Image Upscaling offers multiple AI models. While the interface looks simple, selecting the right model actually has a direct impact on the final image quality and processing speed. Below is a breakdown of the usage scenarios and differences for the three main models.
- Diffuser model:
This delivers the strongest overall image quality. It’s especially suited for low-resolution, blurry, or poor-quality photos—old pictures and compressed images alike. This model can reconstruct details to make the result look more natural.
Diffuser excels particularly well at restoring portraits and real-world images, and can even be combined with text prompts to further refine details. However, its drawbacks are also quite obvious—processing is relatively slow, with a resolution ceiling of approximately 6MP, and it doesn’t support transparent background images. For regular image upscaling, the wait time may feel a bit long. - Plus Model:
- This is a relatively balanced choice. It’s best suited for images that already have decent quality, such as illustrations, design assets, or AI-generated images. The Plus model supports up to 32MP output, faster processing speed, lower cost, and transparent background.
The overall output tends to be sharp with well-defined lines. However, when it comes to detail processing—such as hair or fine textures—there’s occasionally a slightly unnatural appearance, so it’s better suited for illustrations or graphic design materials. For portraits, pairing it with the built-in face enhancement feature will produce more stable results. - General model:
The biggest advantage of this model is its support for ultra-high resolution output, reaching up to 256MP, which is equivalent to 16K level. If you have large format output needs, such as posters or large-scale materials, General would be a more suitable choice. It also supports transparent backgrounds, with fast processing speed and low cost.
However, the image quality and details are typically not as refined as Plus or Diffuser, and may have a somewhat plastic-like appearance in some cases, making them better suited for illustrations or graphic materials.
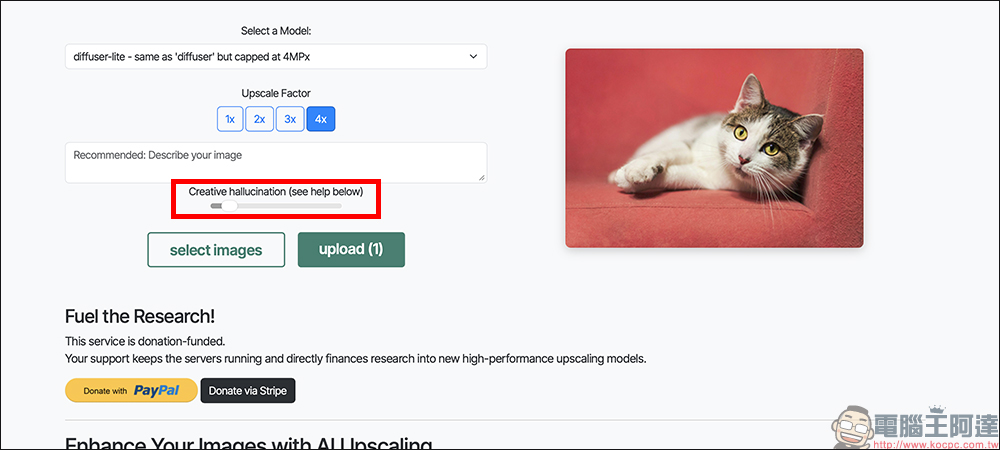
Another key setting is “Creative hallucination,” which controls the AI’s creativity intensity. Higher values make the AI fill in details more aggressively, resulting in sharper and richer images, but also increase the likelihood of deviating from the original or producing overly dreamy or unnatural effects.
If the image itself is very blurry or noisy, increasing this value moderately can help, but avoid setting it too high to prevent image distortion.
If you’re unsure which model to use, it’s recommended to start with Plus or General in practice, as this usually provides a good balance between speed and results. When you need to repair more severely damaged images, switching to Diffuser will be more effective.
If the image itself is very blurry, you can slightly increase the value to let AI enhance detail generation. However, if the value is too high, it may make the image look unnatural, so it’s recommended to adjust it moderately.
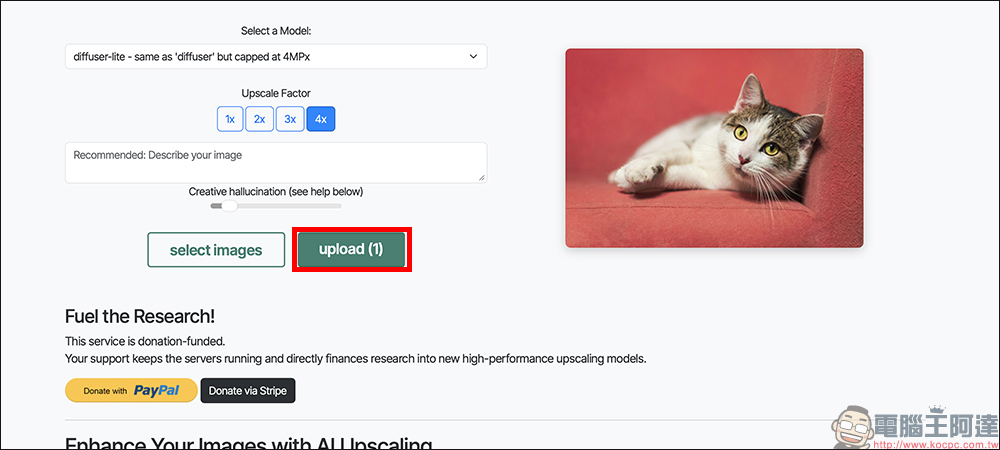
Then click Upload to start processing:
After the system finishes, simply use Download All to download all the images.
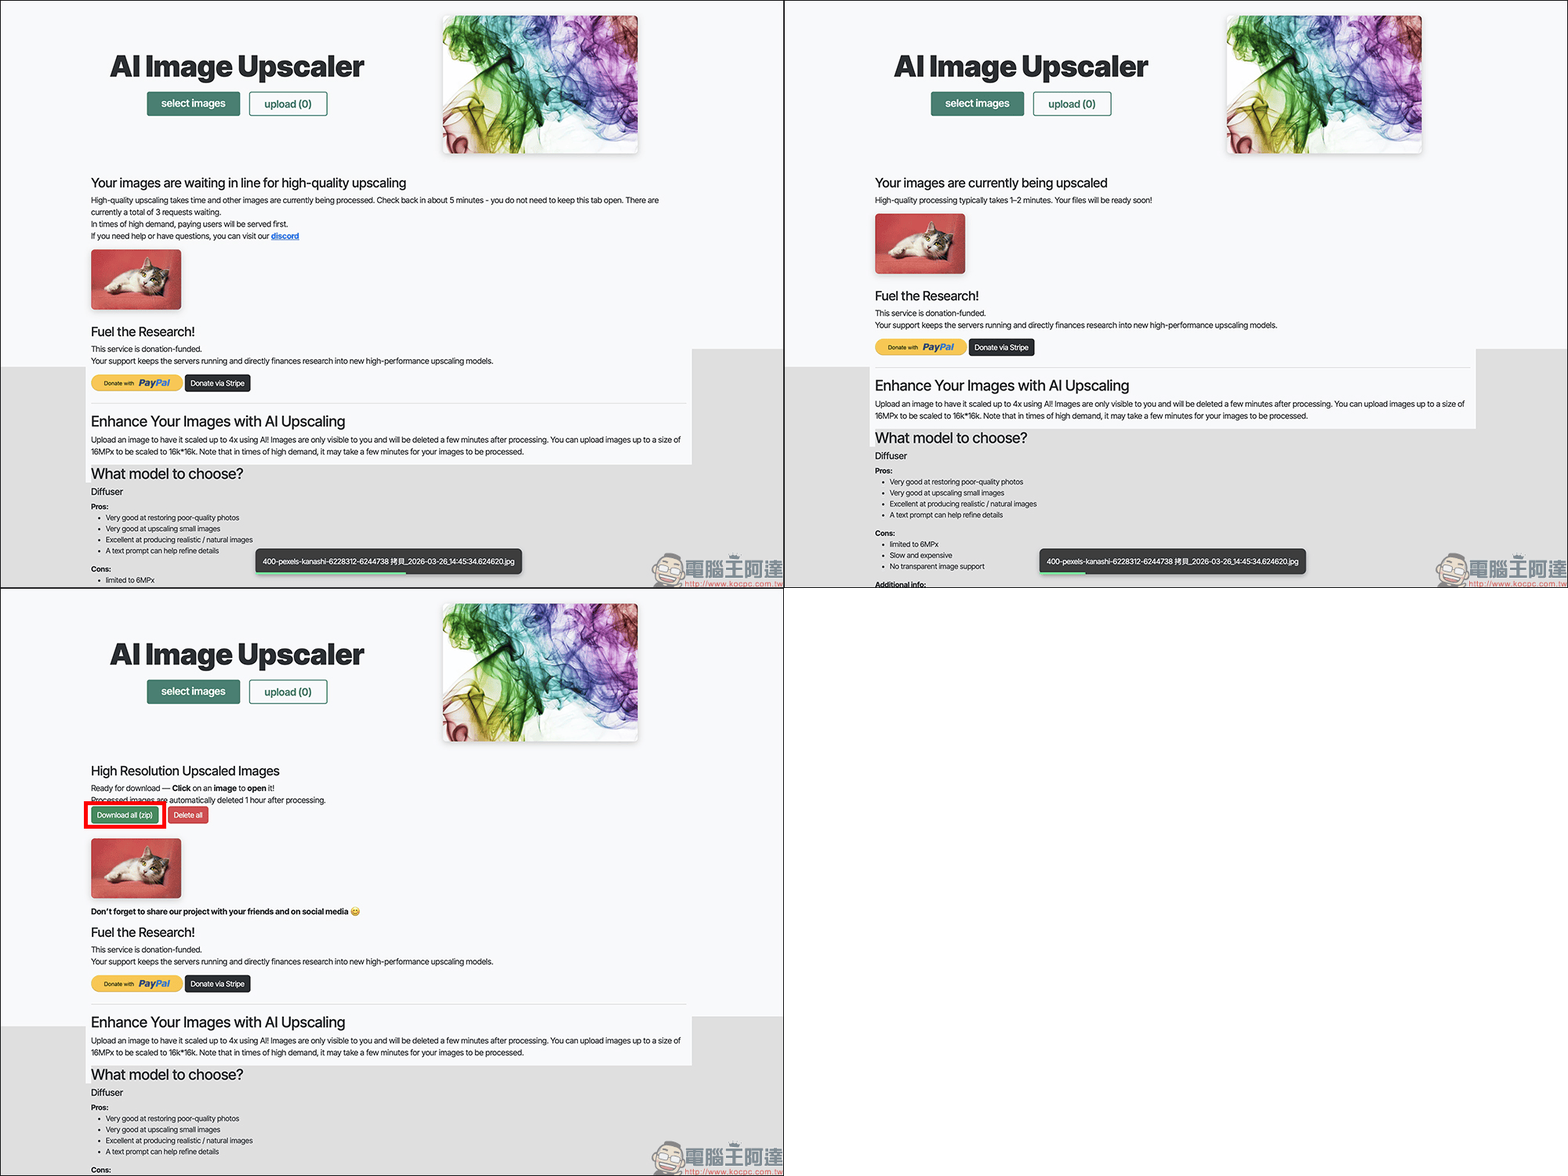
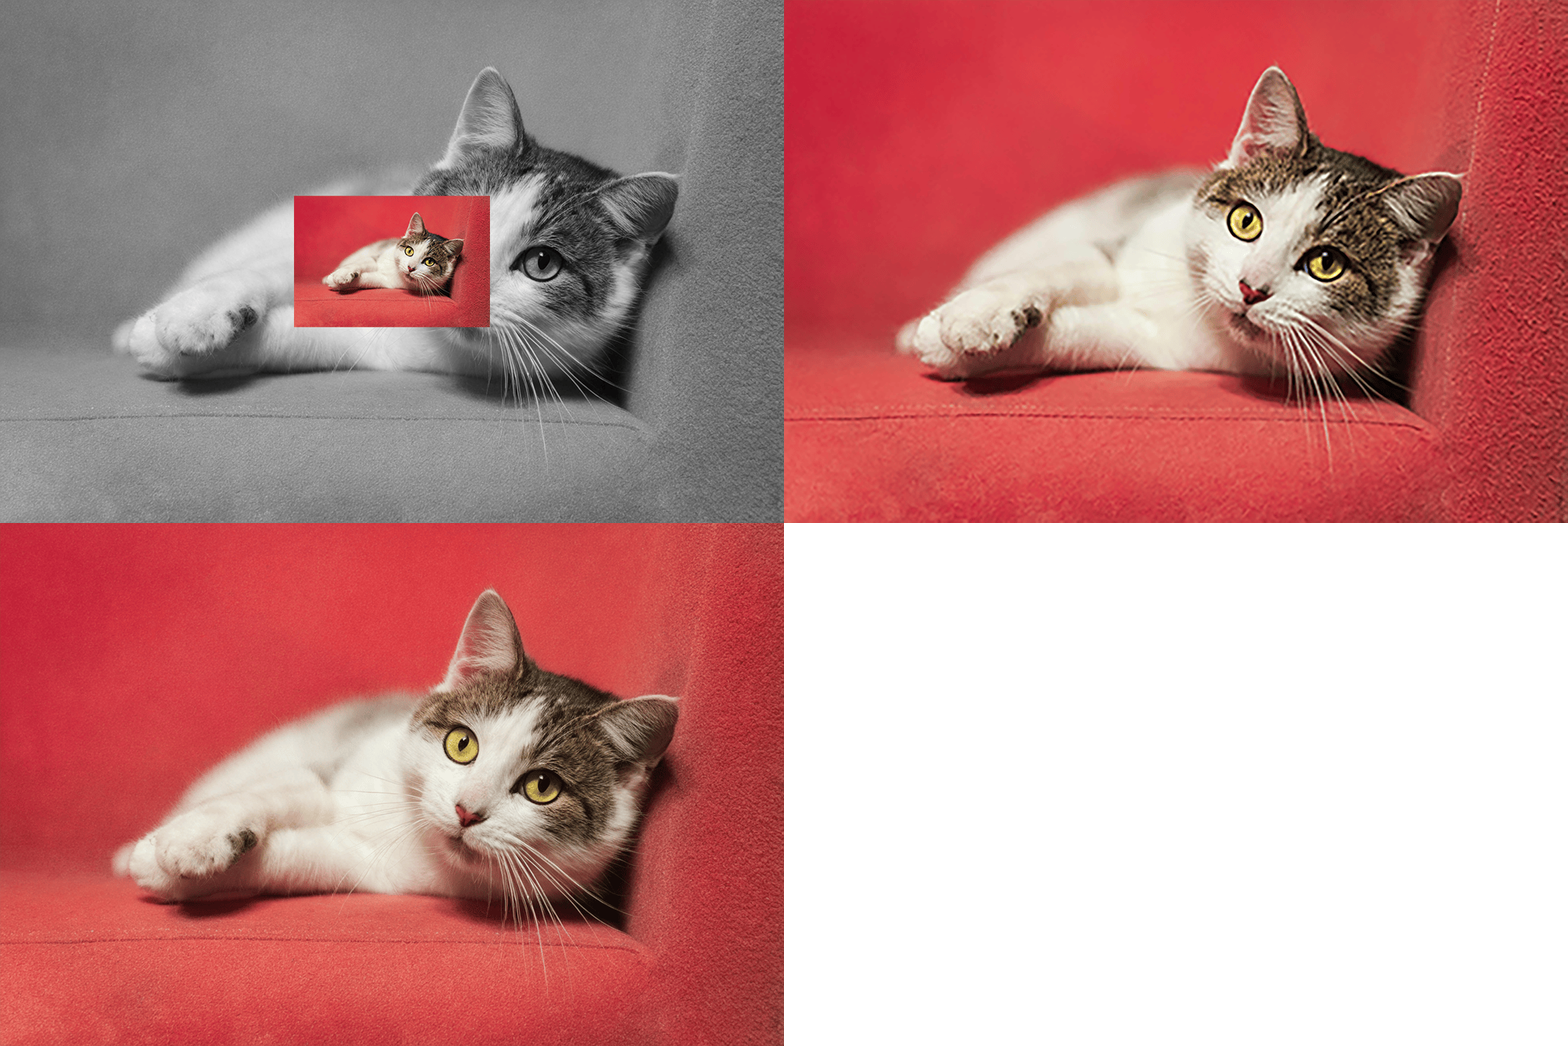
Finally, comparing the original low-resolution images, direct upscaling, and AI image upscaling through Image Upscaling in sequence, the effectiveness of this tool becomes readily apparent. The overall workflow requires minimal learning curve, allowing even first-time users to get up to speed quickly.
Conclusion
If you’ve ever been troubled by low-resolution images, or need to quickly enhance your material quality, Image Upscaling is definitely a tool worth bookmarking. Its advantage isn’t about having complex features, but rather making AI upscaling simple and efficient, with virtually no learning curve. While the free version has usage limits, it’s more than sufficient for everyday needs.
With no downloads or sign-ins required, it’s also incredibly convenient for quick image processing needs. Whether you’re a content creator, social media manager, or just someone looking to restore old photos, everyone can find it practically useful.
Image Upscaling – Free AI Image Enlargement Tool
Further Reading:
Source: KOCPC Chinese