


Whether you’re watching videos or working on a high-end 4K monitor, or you’re hoping to use a higher refresh rate to capture headshots on a gaming monitor, even small changes in color settings can cause your images to look abnormal, so you need to perform color calibration accurately. Professional users know the importance of ensuring that the colors on their monitor reflect real-life colors as accurately as possible, but even for casual users, calibrating your monitor color can help you see everything more clearly. Luckily the process for calibrating monitor color is the same in Windows 10 and Windows 11, and we’ll teach you how to do it this time.
How to use built-in functions to calibrate monitor color on Windows?
Calibrate using Windows built-in tools
Even if you don’t have a professional color calibrator, the Windows Color Calibration Tool can help you adjust your monitor’s gamma, brightness, and even contrast. While these settings have an impact on color, setting them too low or too high can make colors appear washed out or overexposed. At every step, the tool provides you with instructions for each setting and some example effects for reference. Here’s how to open and use it:
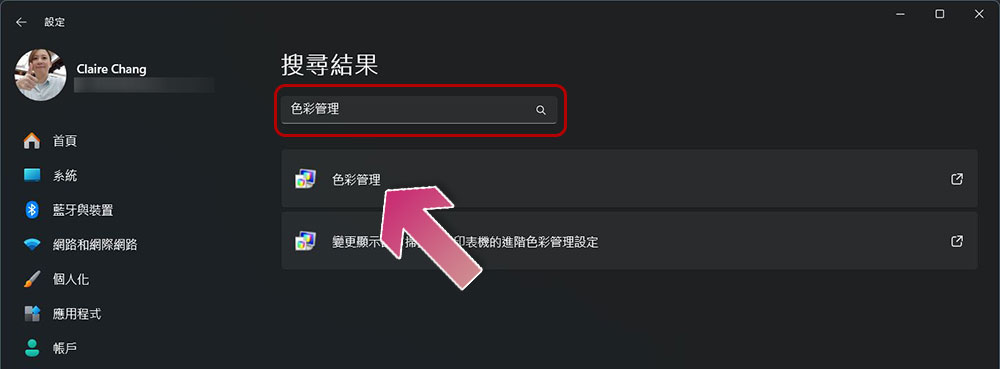
- Open the Settings app and enter “color management” in the search field.
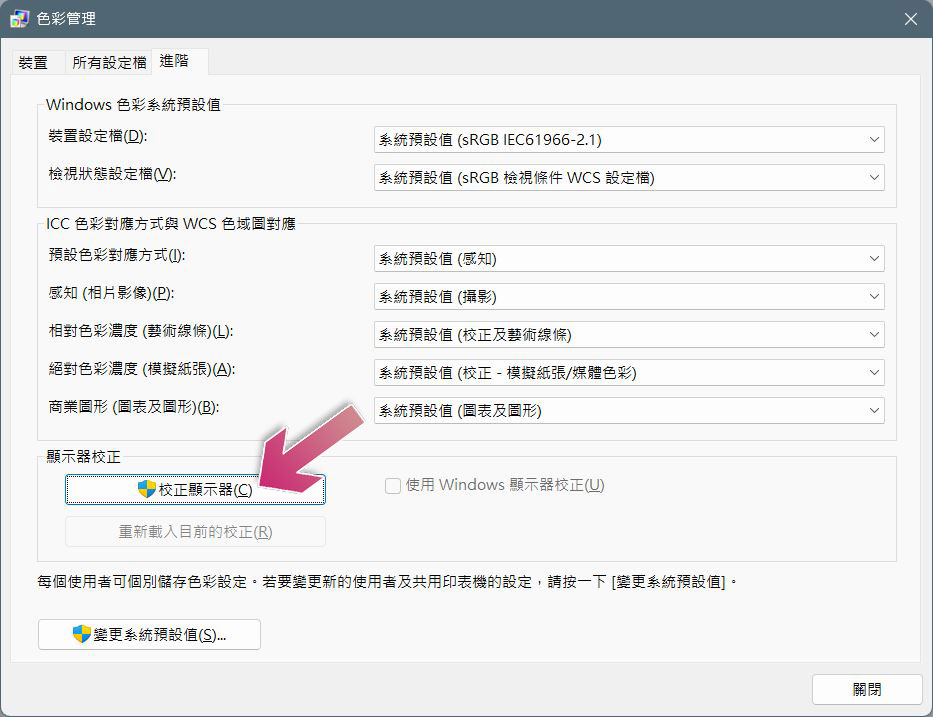
- After clicking, a pop-up window will open. After switching to the “Advanced” tab, click “Calibrate Monitor” below.
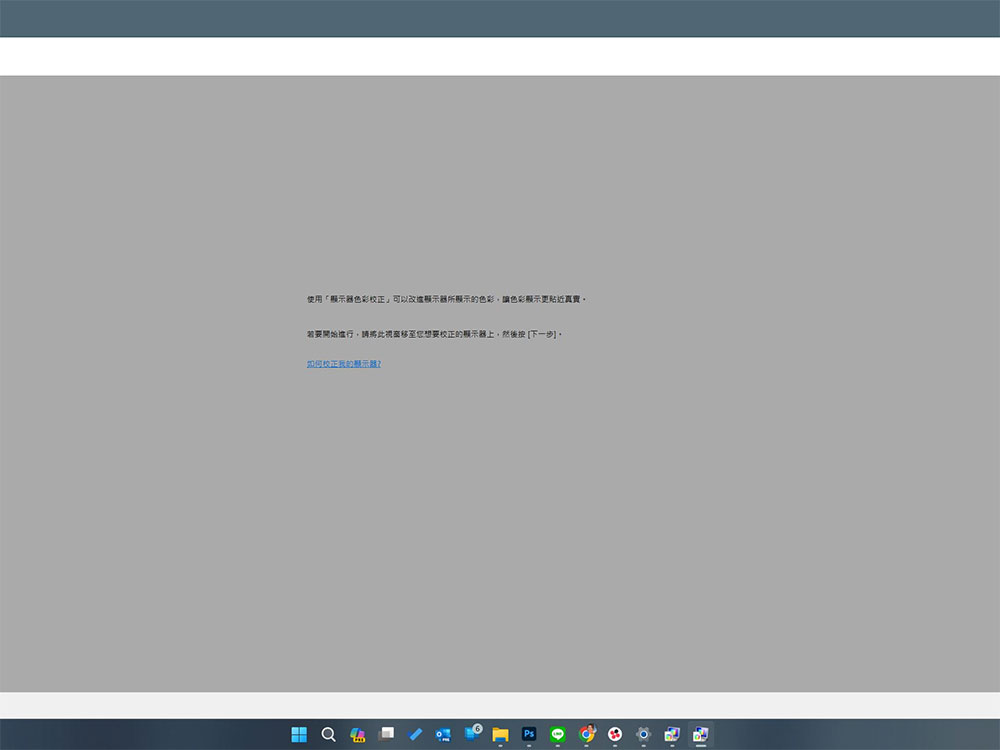
- Click the help link in the middle of the screen to learn how to correct it, then click Next in the lower right corner.
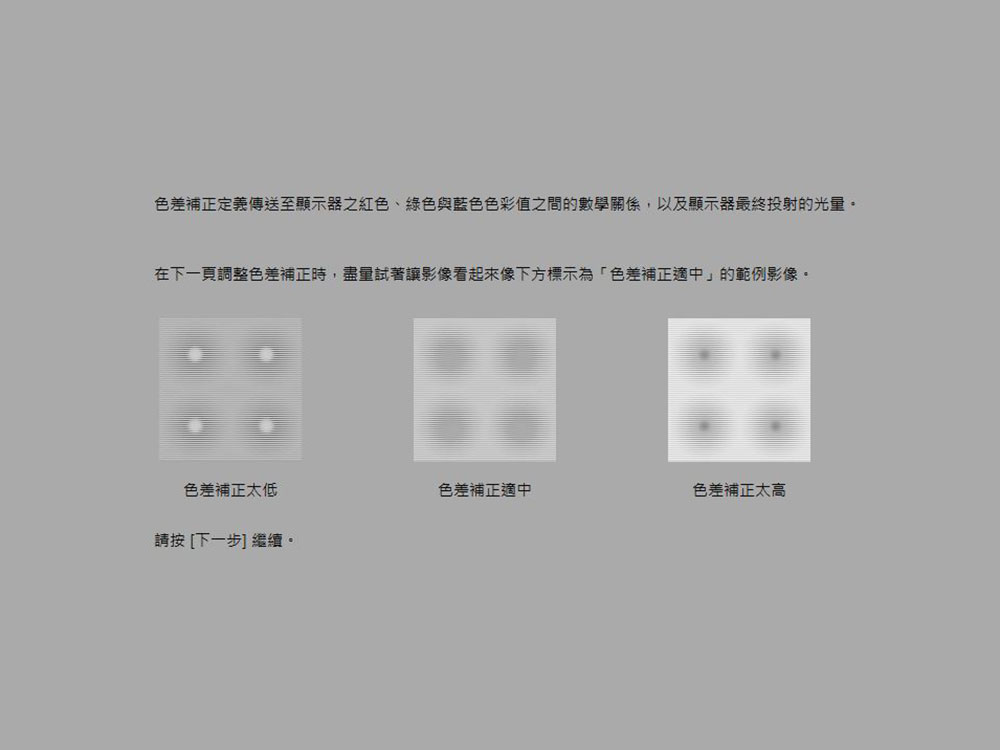
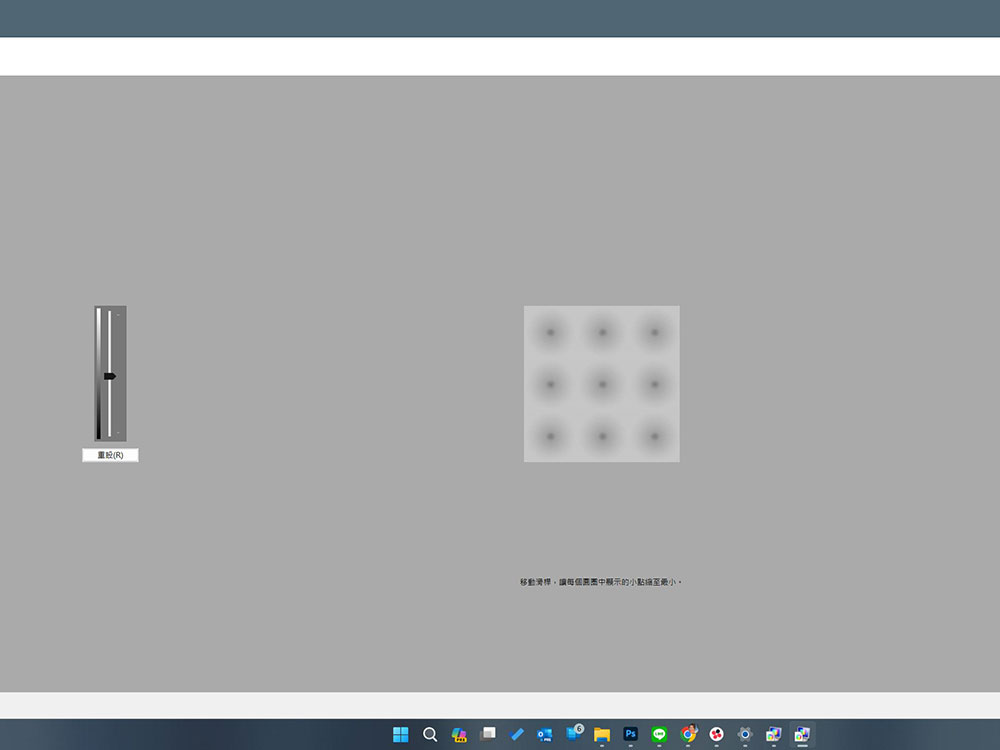
- The first step is about gamma value calibration. View the sample image, and proceed to the next step. Use the slider on the left side of the screen to increase or decrease the gamma level of the monitor. The goal is to make the display on the screen the same as the picture with moderate color correction in the middle of the sample image, and then click Next.
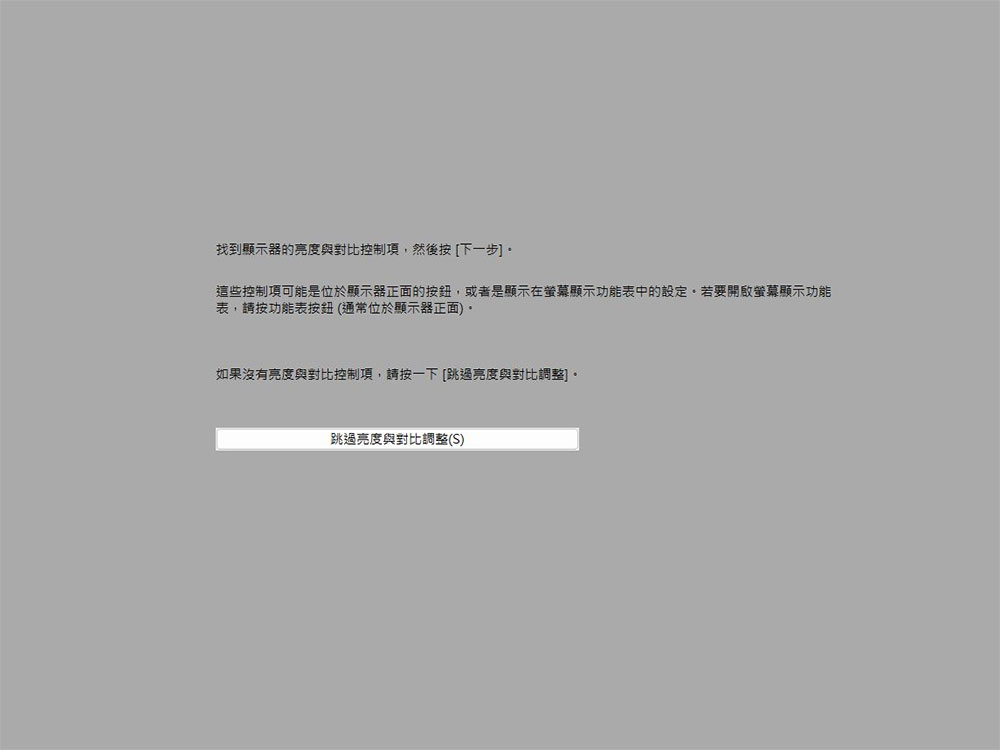
- If your screen does not have settings controls for brightness and contrast, you can click “Skip brightness and contrast adjustments” next. If your monitor itself has these adjustment buttons, you will use these physical buttons to adjust the brightness and contrast, then click Next in the lower right corner.
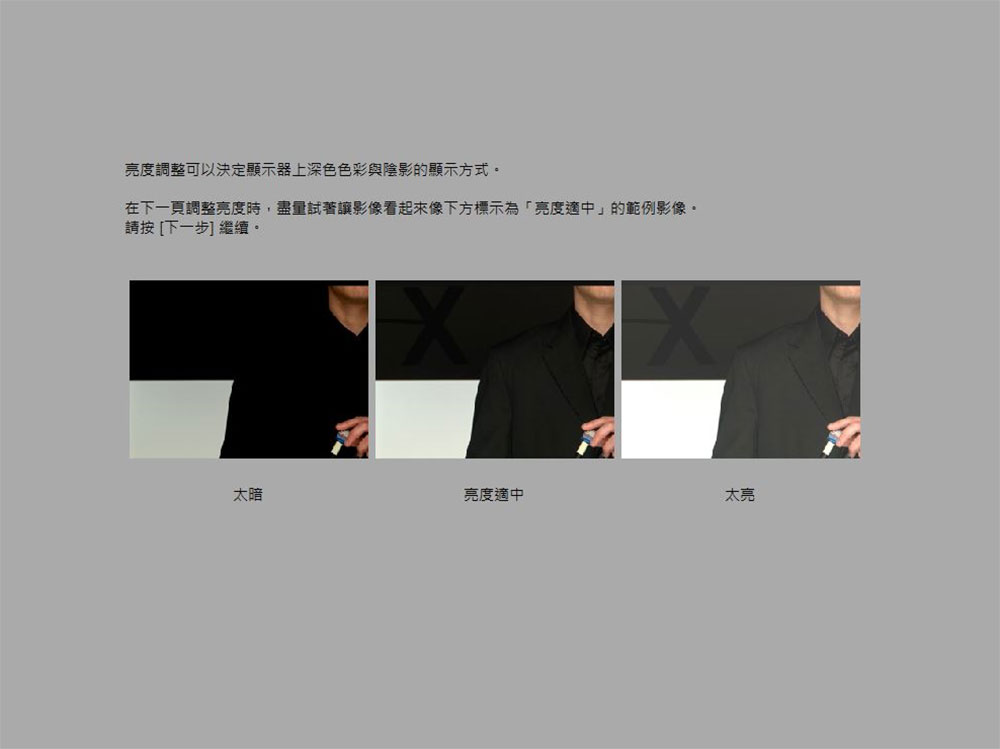
- As before, the brightness and contrast adjustment part of the system will give you a set of comparison pictures respectively, so that you can more intuitively understand the optimal adjustment. Use the physical buttons on the screen to adjust as closely as possible and click Next.
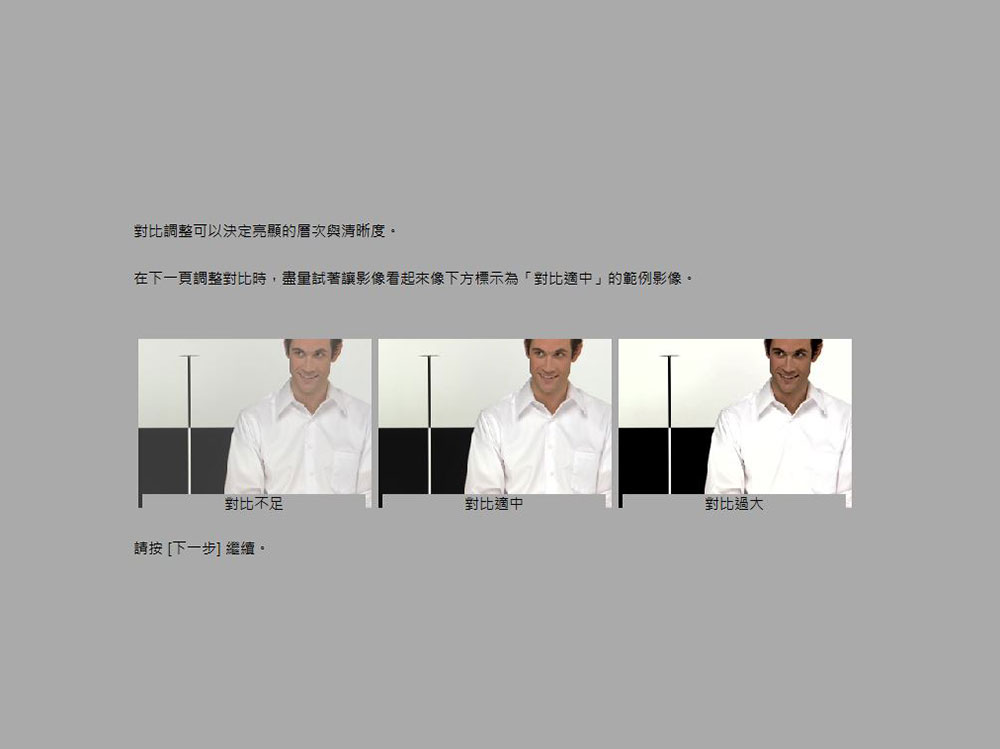
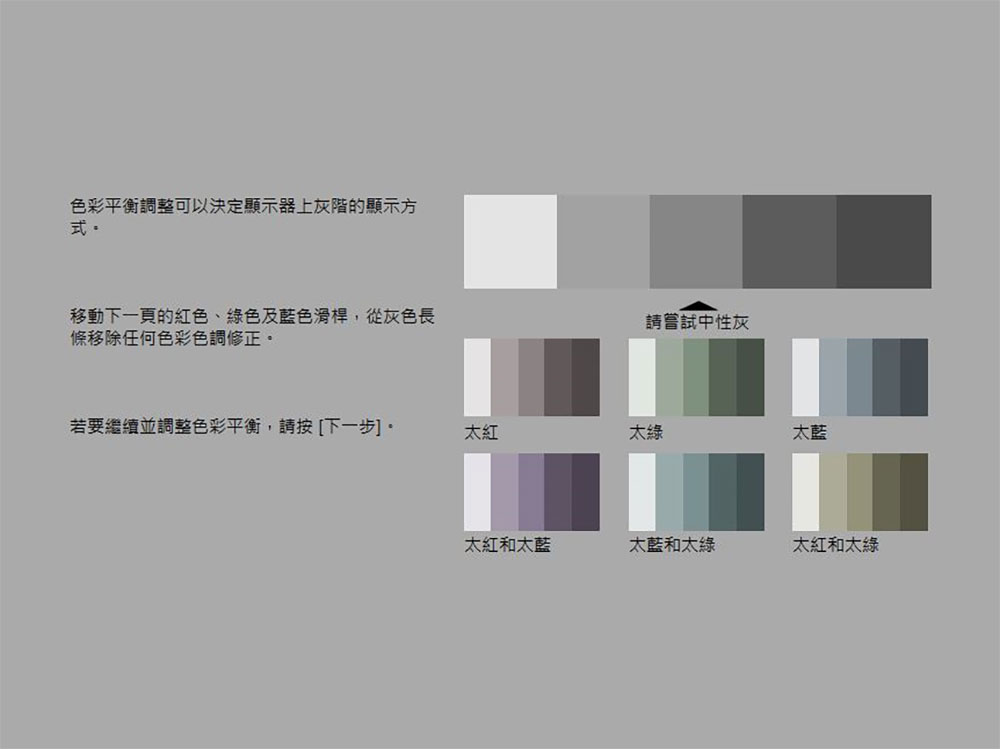
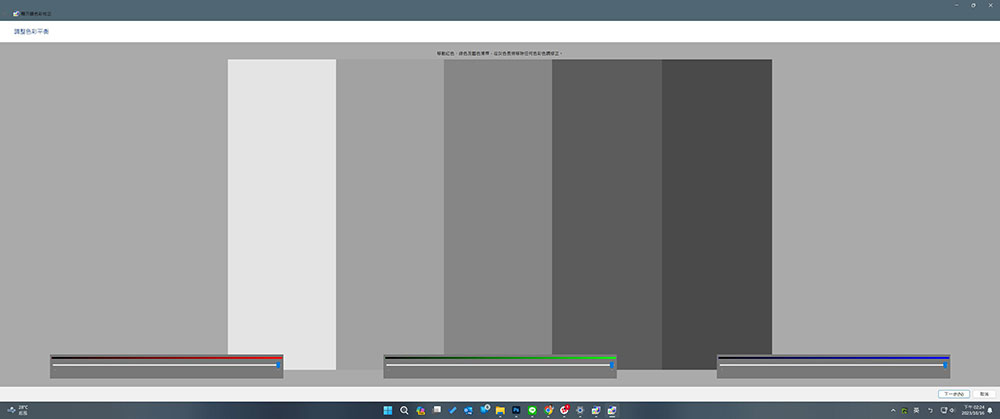
- For the final color balance adjustment, you can use the red, green, and blue sliders displayed on the screen to increase or decrease the proportion of each color so that the straight bars on the screen appear to be a neutral gray.
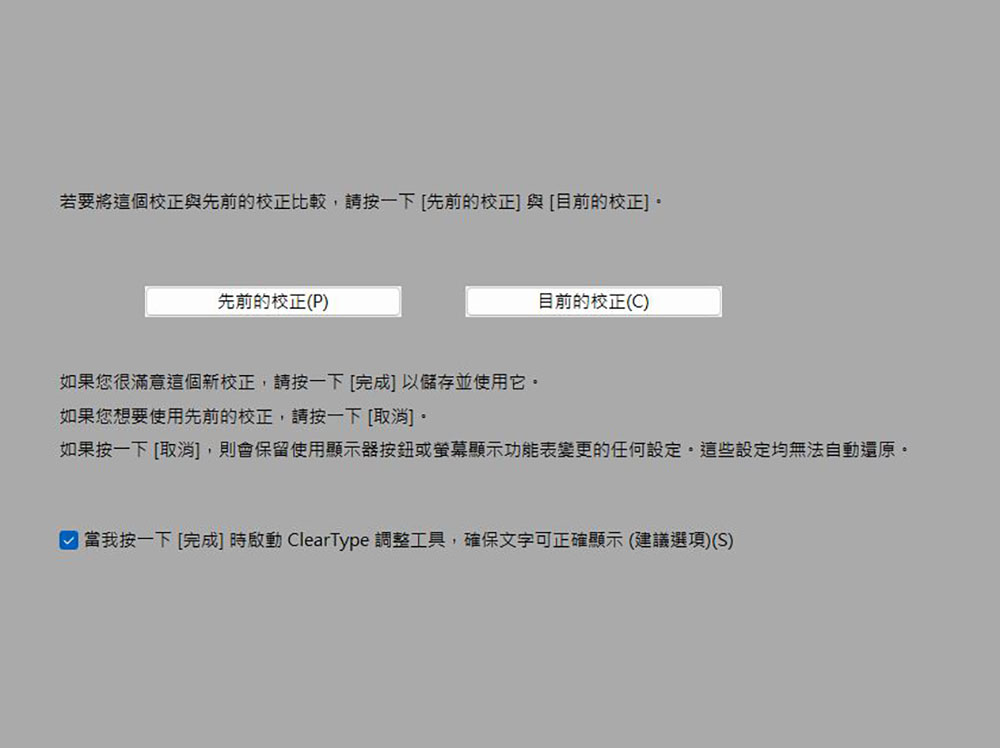
- Finally, you can click the “Previous Calibration” and “Current Calibration” buttons on the screen to view the differences before and after. If there are no problems, click “Finish” in the lower right corner. If you want to readjust, you can click “Cancel” in the lower right corner at any time to exit the process.
Improve text display on screen
After calibrating the colors on your screen, you will automatically enter the ClearType text adjustment tool unless you deselect this option on the last page of the color calibration application. The author strongly recommends that you use this tool, especially if you do a lot of reading and working on the computer. By adding a layer of anti-aliasing, you can make on-screen text look clearer and easier to read, reducing eye strain.
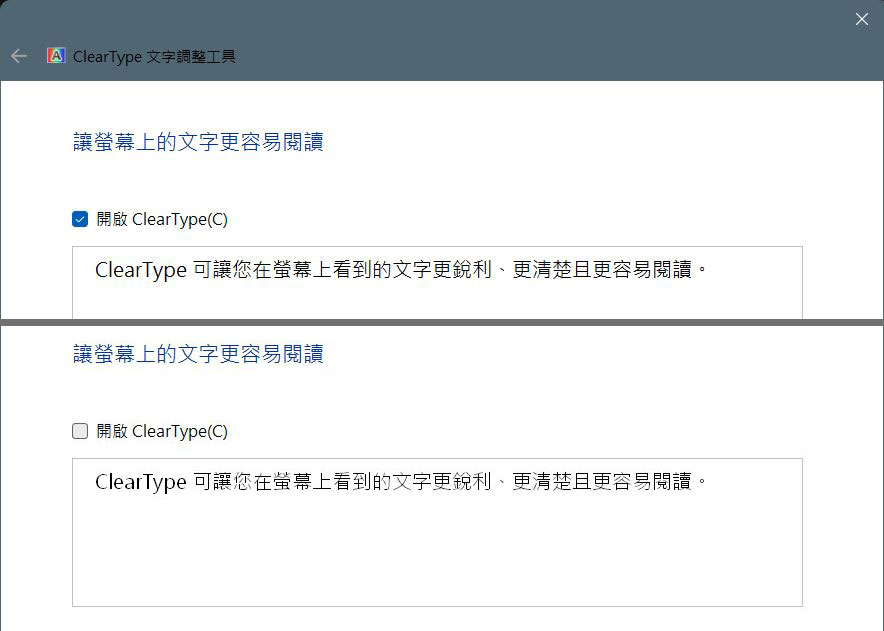
- In the “ClearType Text Adjustment Tool” window, you can check or uncheck the checkbox to check the difference in the appearance of the text when the ClearType setting is turned on and off, and then click Next.
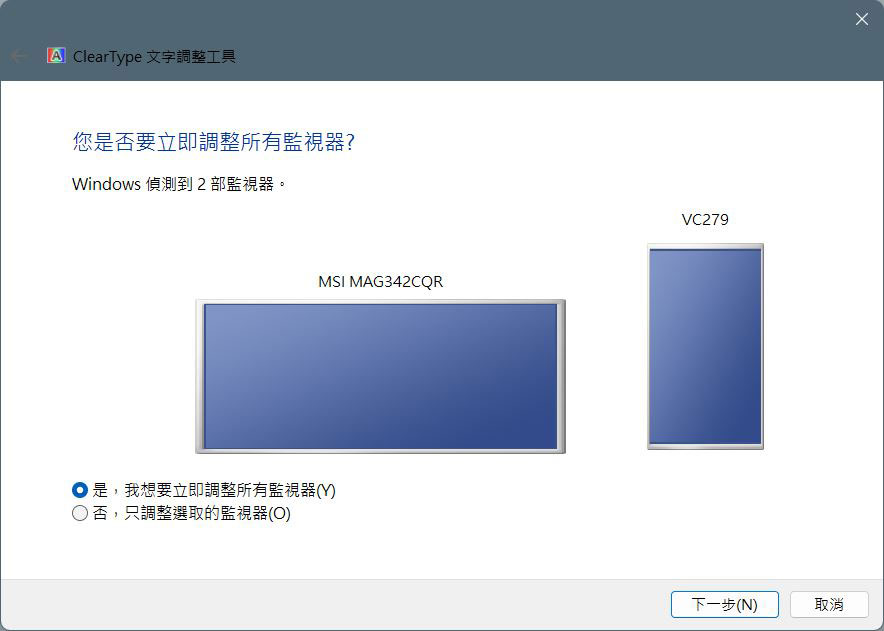
- The system will then ask you whether you want to adjust all monitors at once (multi-screen users) or only the selected monitor. After selecting, click Next.
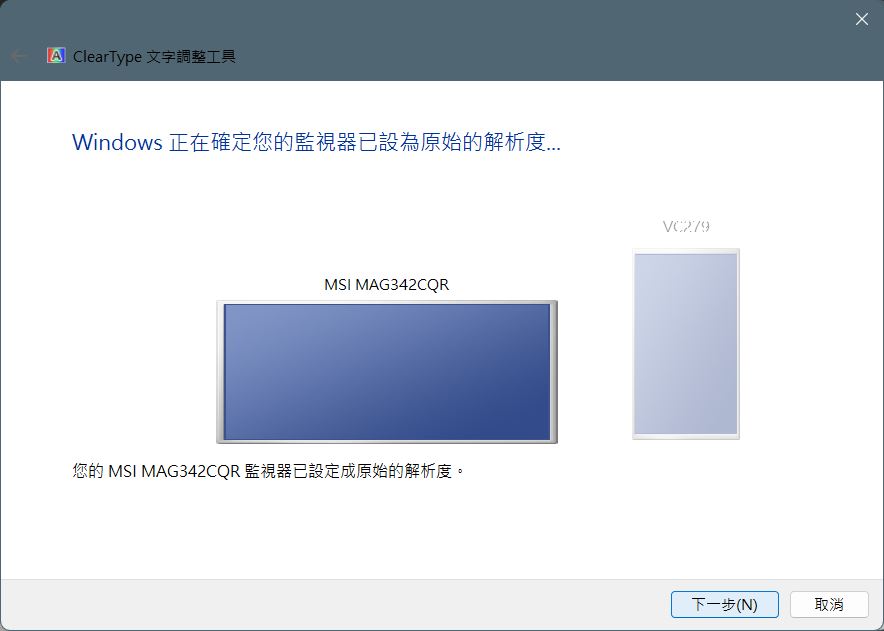
- Windows will then confirm that your monitor has been set to remote resolution, click Next when complete. If you are a multi-screen user, each monitor will be selected and calibrated one by one starting from this step.
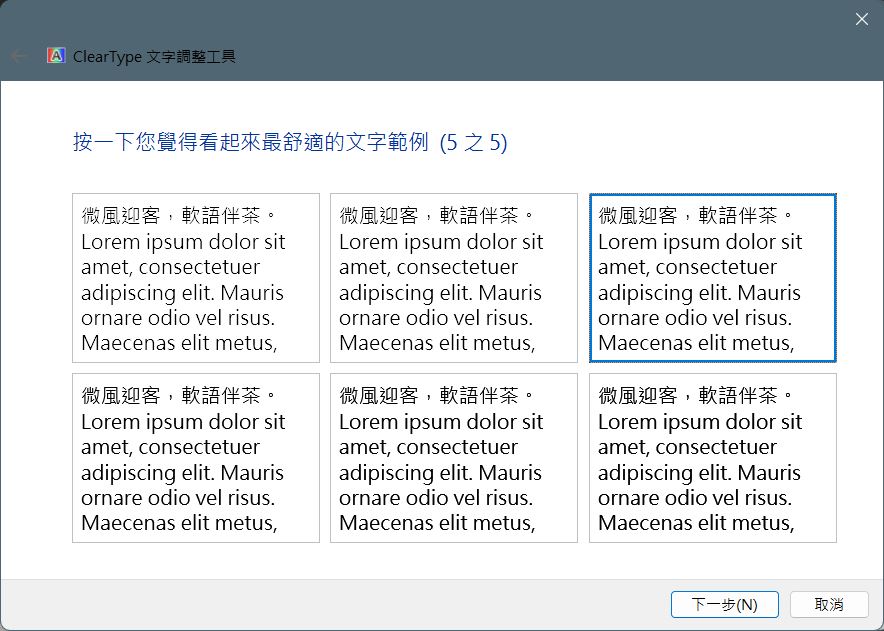
- Next, the system will give you 5 personalization steps, each of which will allow you to choose the one that looks most visually comfortable to you among multiple examples.
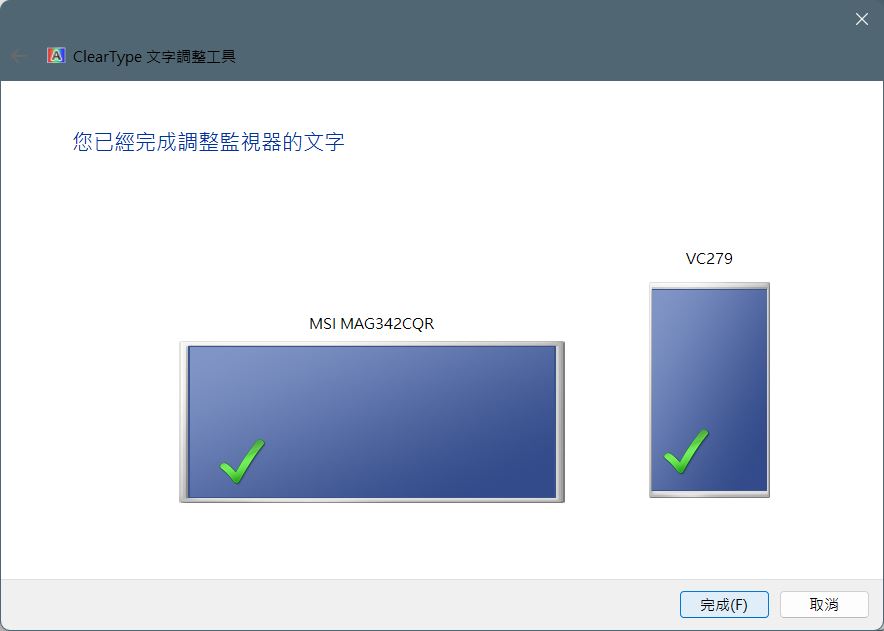
- When you have finished adjusting all screens, you can see a tick appear on the screen, and finally click Finish.
How to calibrate HDR in Windows 11
If you have a newer monitor model with advanced features such as HDR and high refresh rates, you can download Microsoft’s Windows HDR Calibration Tool to take full advantage of these features through calibration. Calibrating an HDR display in Windows 11 requires several steps:
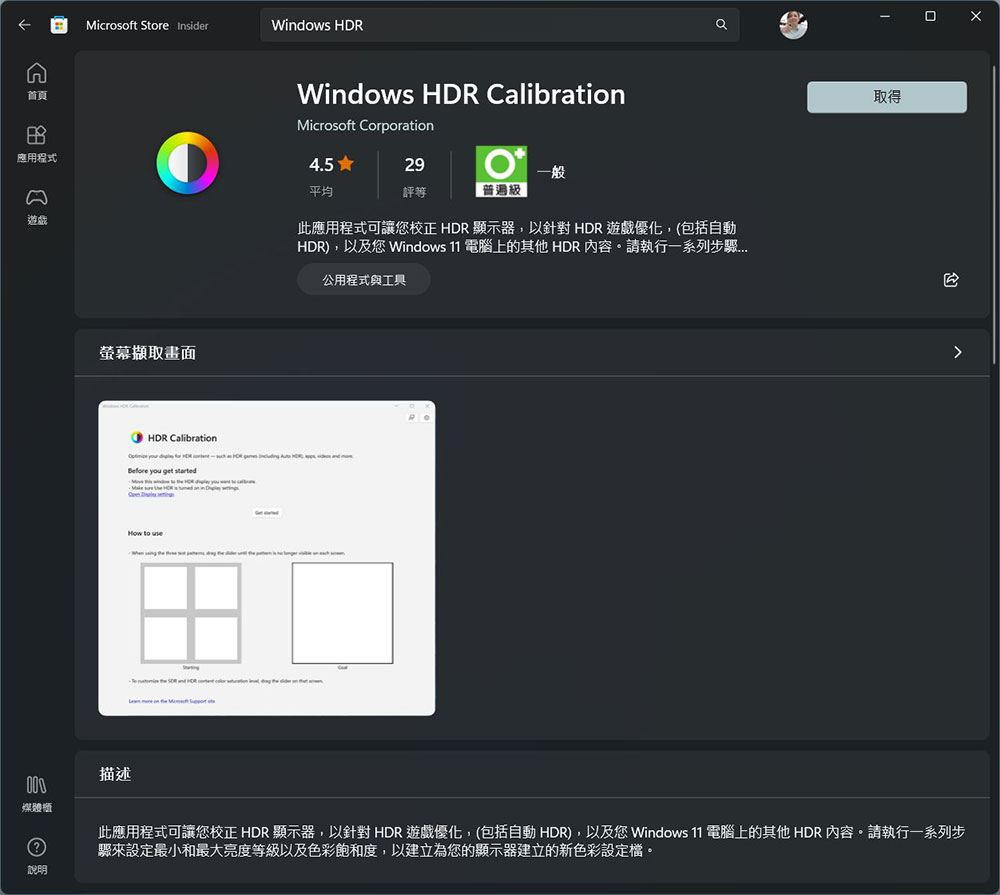
- first,Go to the Microsoft Store and download the app called “Windows HDR Calibration”, which is a tool developed by Microsoft itself. Press Get and install it.
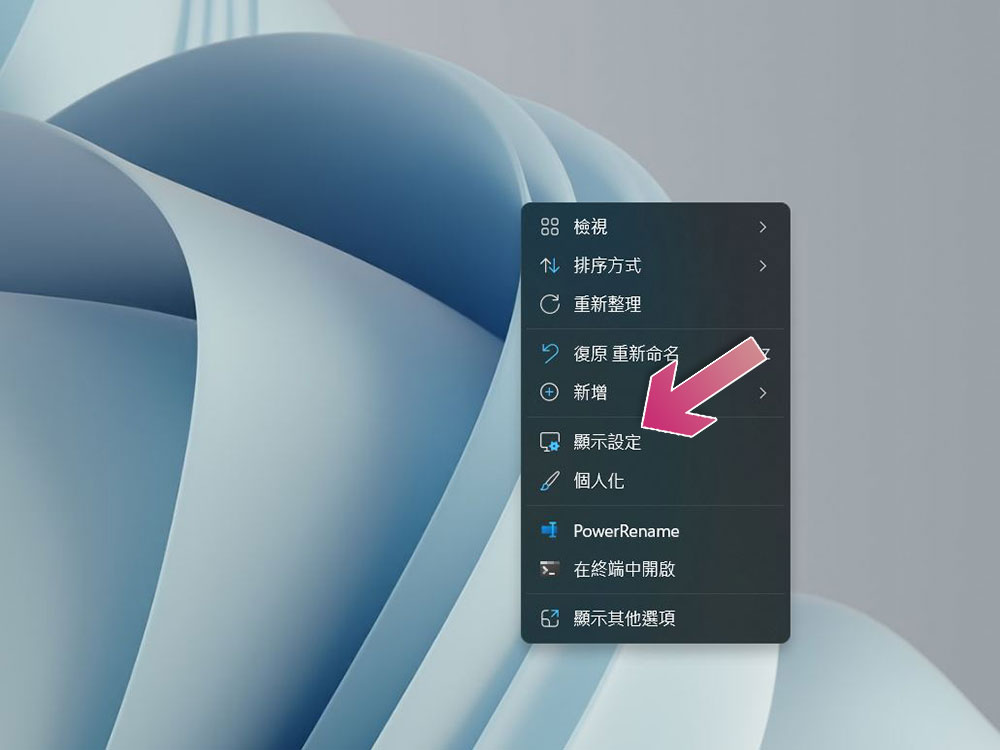
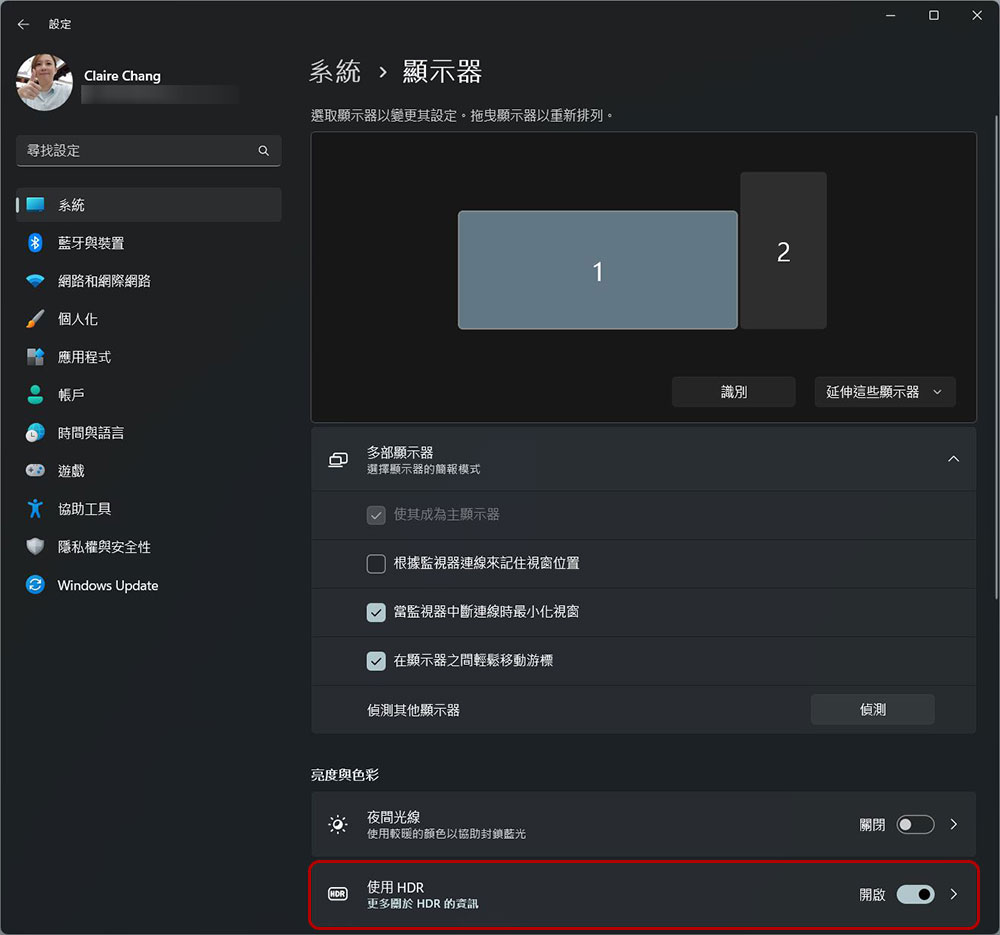
- Next, if you have a monitor that supports HDR, right-click anywhere on the desktop, select “Display Settings” from the menu, then select the monitor and turn on the HDR function below. Although you can click the small arrow behind HDR to make more settings, we won’t care about it since we are going to calibrate.
- Now, we’re going to start the calibration. Open the “Windows HDR Correction” application installed in the first step and click the “Get Started” button.
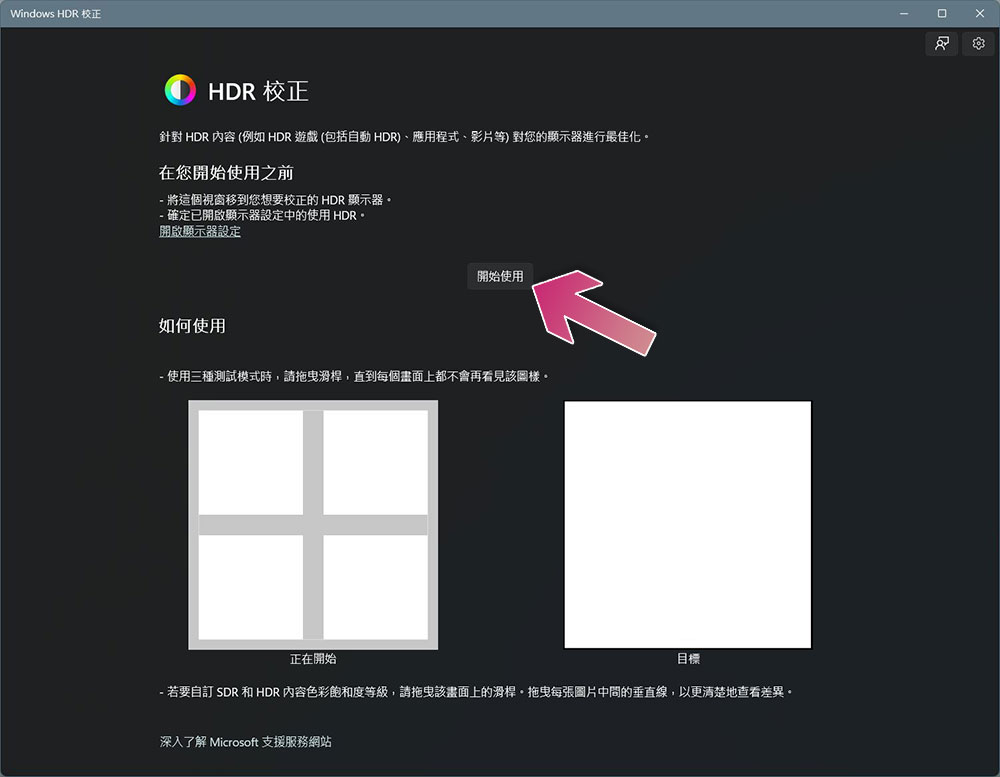
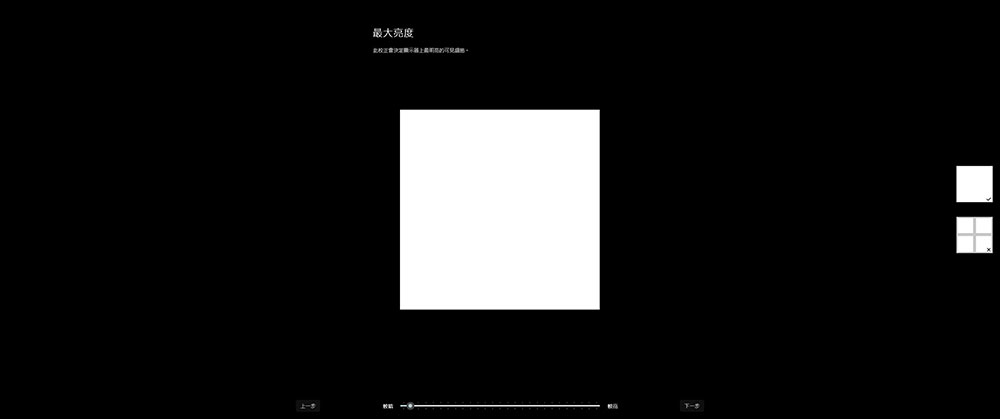
- Next, the system will prompt you to make three settings related to brightness and darkness. For each setting, drag the lower lever left or right until it is bright or dark enough so that the pattern is no longer visible to calibrate the screen, then press Next.
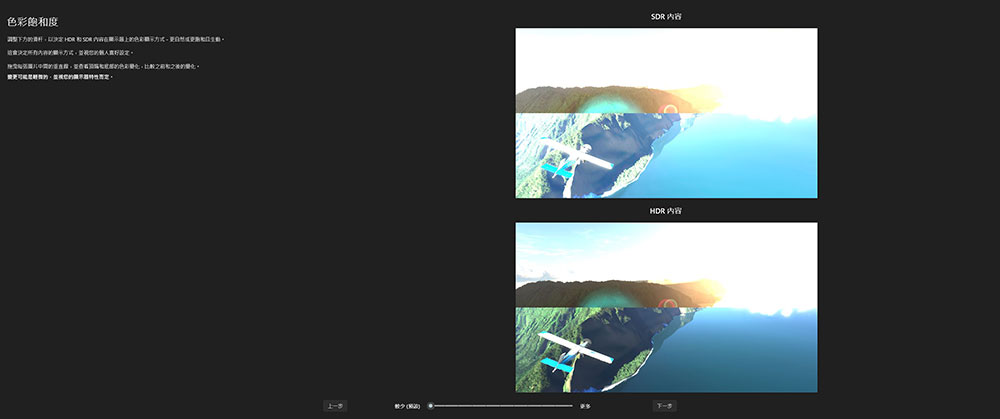
- Then there is the color saturation test. You can compare the SDR and HDR image displays with each other, and drag the slider below to adjust it to the way you want.
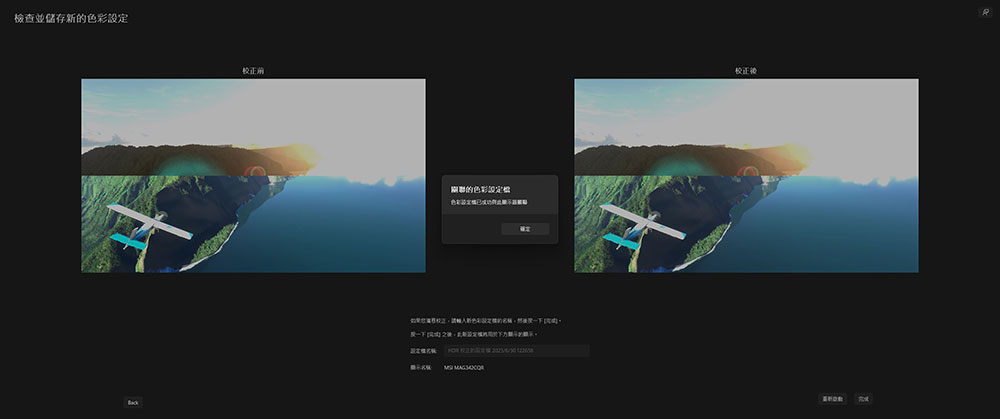
- Then make final confirmation and save the calibration file.
Buy the right monitor
While color correction is helpful, it doesn’t do much to improve color accuracy if your monitor itself is old or outdated. If your goal is to play PC games and look visually good, then any decent quality IPS panel will suffice. For advanced gamers who want a higher refresh rate and smoother visuals, a TN panel would be a better choice, but the colors on these panels tend to look bland, which isn’t ideal for non-gaming scenarios unless you choose an expensive high refresh rate IPS monitor to do both. Professional photographers or video editors prefer monitors with high-end color accuracy. For this type of monitor, if you have a lower budget, you can choose a high-end IPS panel. If you have a larger budget, you can choose an OLED model or a Mini LED monitor.
Source: KOCPC Chinese