


Everyone has more or less encountered a situation. When you want to open a file or folder in Windows, the system pops up a notification telling you that you do not have access permission and cannot perform any operations on it. Although this situation may rarely happen, what do you do when you really need it? This tutorial will tell you how to solve this occasionally troublesome problem.
How to take ownership of a file or folder in Windows?
Why take ownership of a folder or file?
In Windows, a user who owns a file or folder has implicit permission to change the permissions for that object, always allowing that user to access the file or folder even if other permissions appear to conflict with that access permission. When you create a file or folder, the user account you log in with automatically takes ownership of the file or folder.
When you need unrestricted access to a file or folder in some way (most likely to modify or delete the file or folder), you usually need to take ownership of the file. Maybe you have files or folders created by a user account that have been deleted. Maybe you’re working on another computer equipped with a hard drive. Or maybe you just need access to a specific system archive, such as Notepad.exe, so you can apply some tricks. Whatever the reason, here are the official solutions for taking ownership of an archive or folder.
How to take ownership on Windows 10 and Windows 11?
First, make sure you’re logged into your computer with an account that has administrator privileges. By default, any administrator privilege can take ownership of a file or folder in Windows.
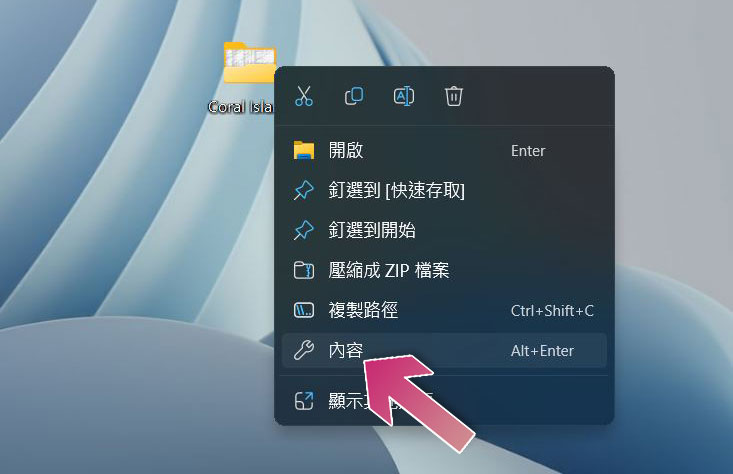
- Right-click the file and select Content.
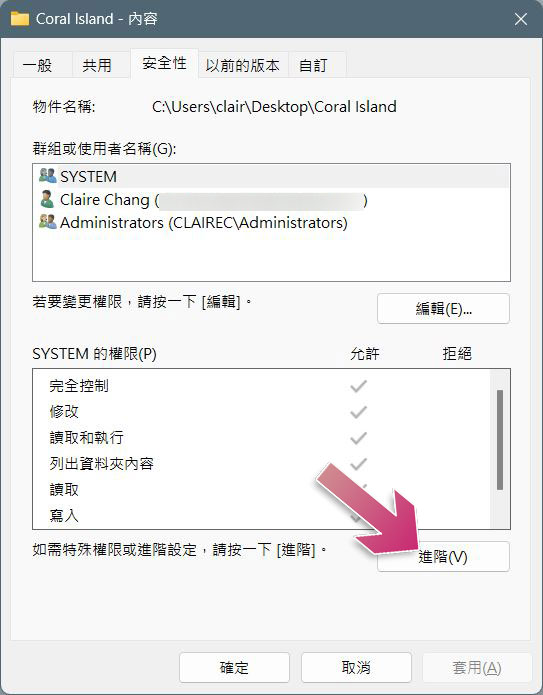
- In the content window, switch to the “Security” tab and click “Advanced.”
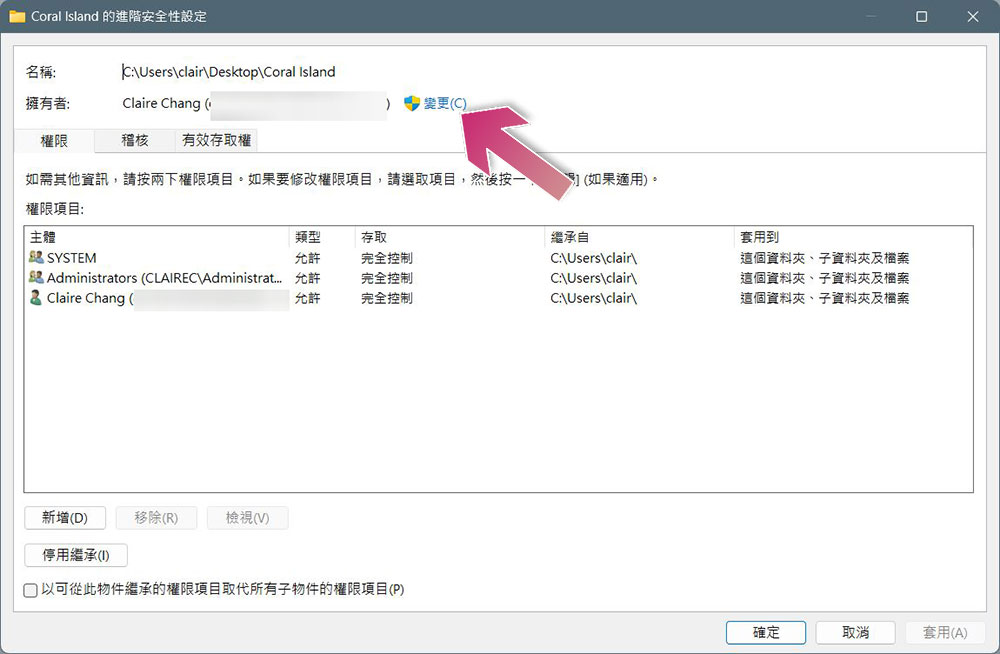
- Click “Change” next to the owner’s name in the Advanced Security Settings window.
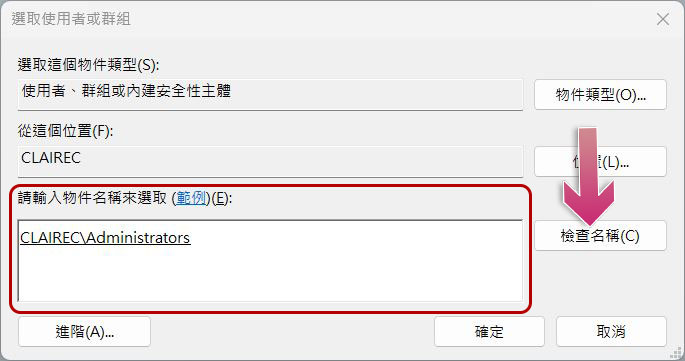
- In the “Select Users or Groups” window, enter your user account name in the “Please enter the name of the object to select” box, and then click the “Check Names” button. If a valid name is entered, the name should change to show the full username path, preceded by the PC name. Then, you can press the “OK” button. If you’re using a Microsoft account (rather than a local account), your official username is just the first five letters of the full email address you used to set up your account. You may also notice that these five letters are also used to name your user folders.
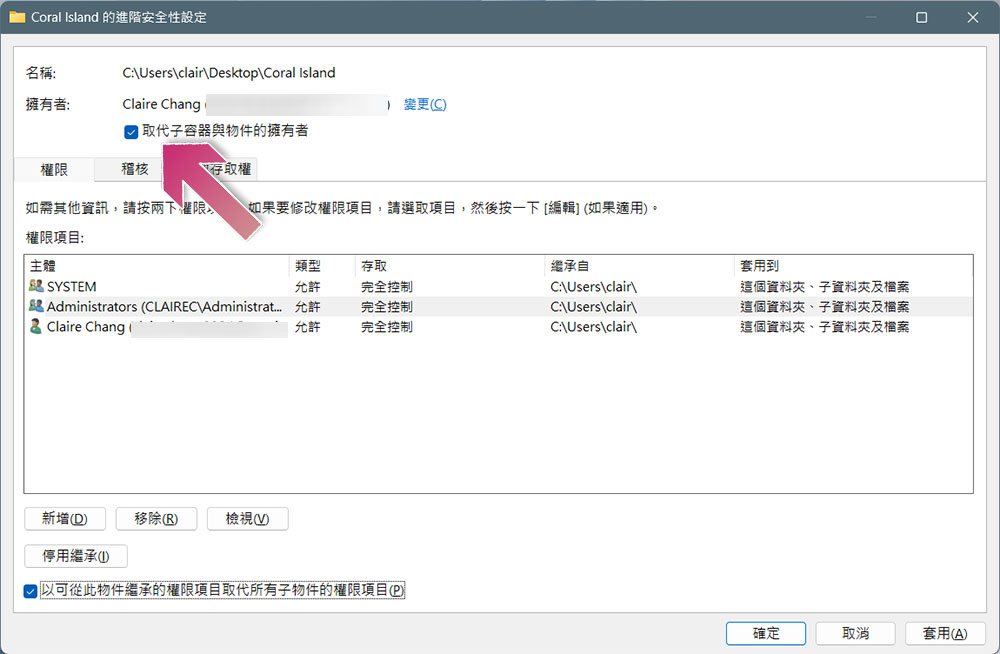
- Next, return to the “Advanced Security Settings” window. You can see that there is an “Replace the owner of subcontainers and objects” under the owner. Check it. Then click Apply and OK.
- Then go back to the content window and click OK. You now have full ownership and access permissions for the file or folder.
Source: KOCPC Chinese