


Recently in the App Store, there’s a very handy app called Perfect Pic that’s super powerful. AI Photo Enhancement App,is rolling out a lifetime editionLimited-time free(The limited-time free offer has ended.)Once obtained, you can use it without restrictions. It comes with a huge number of built-in AI photo editing features, from face retouching, object removal, photo enhancement, low-light enhancement, background removal, coloring, 4x resolution upscaling, and 3D space, all the way to face blurring and artistic styles. The results are quite impressive, and I highly recommend getting it.
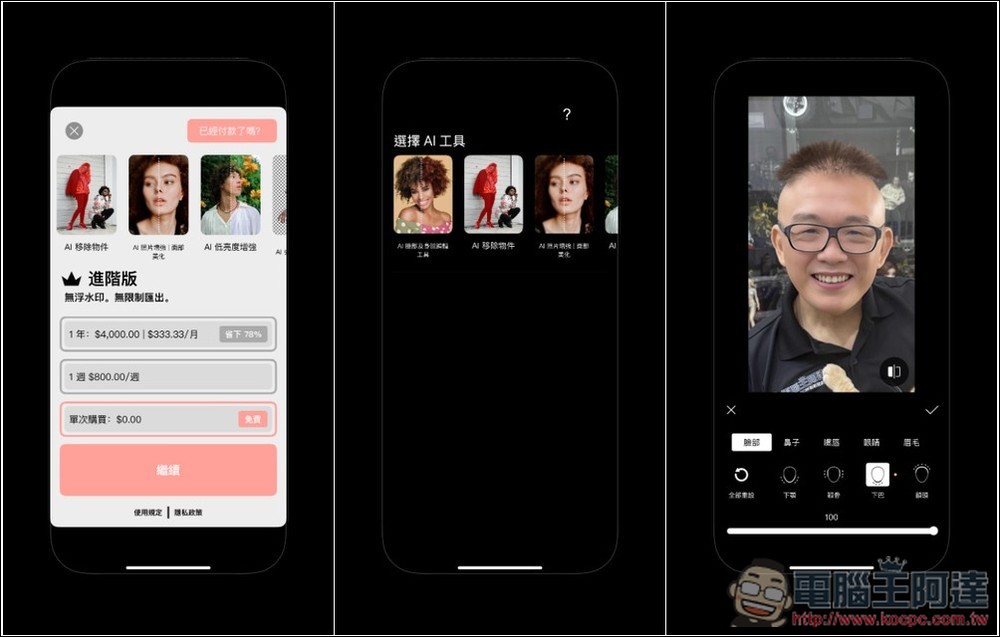
Perfect Pic: Super AI Photo Enhancement App – Lifetime Version Free for a Limited Time
Perfect Pic is a nearly all-in-one AI photo editing tool that has every feature you need, and it also boasts high privacy—all processing is done on-device, with no collection or storage of any user data.
The developer hasn’t specified an end date for this lifetime free promotion, so if you see it, grab it quickly. When making the payment, make sure to check carefully that there’s no amount charged before confirming.
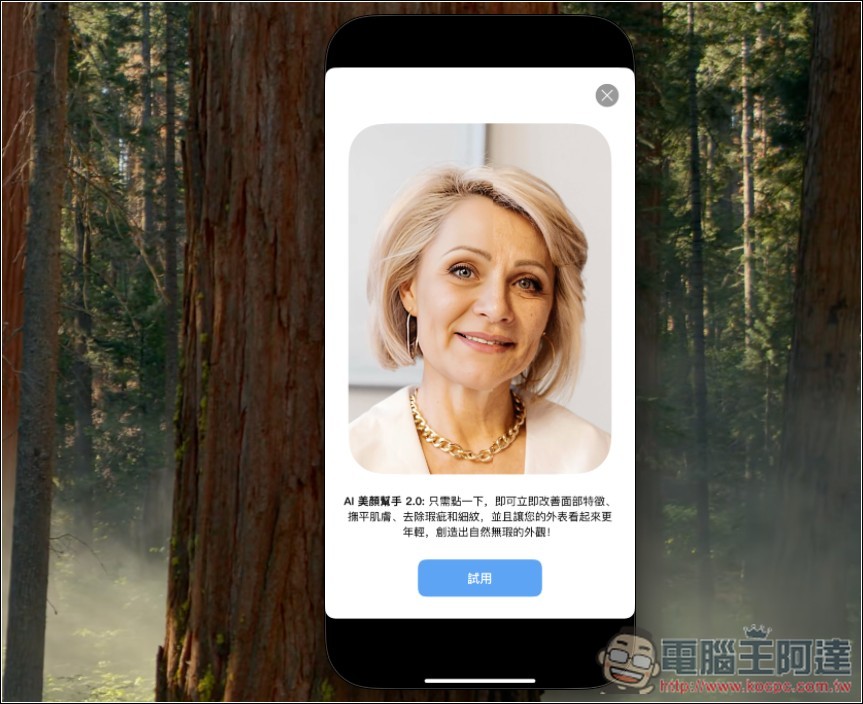
When you open the Perfect Pic App, this screen will pop up—just tap the X in the top right corner to close it:
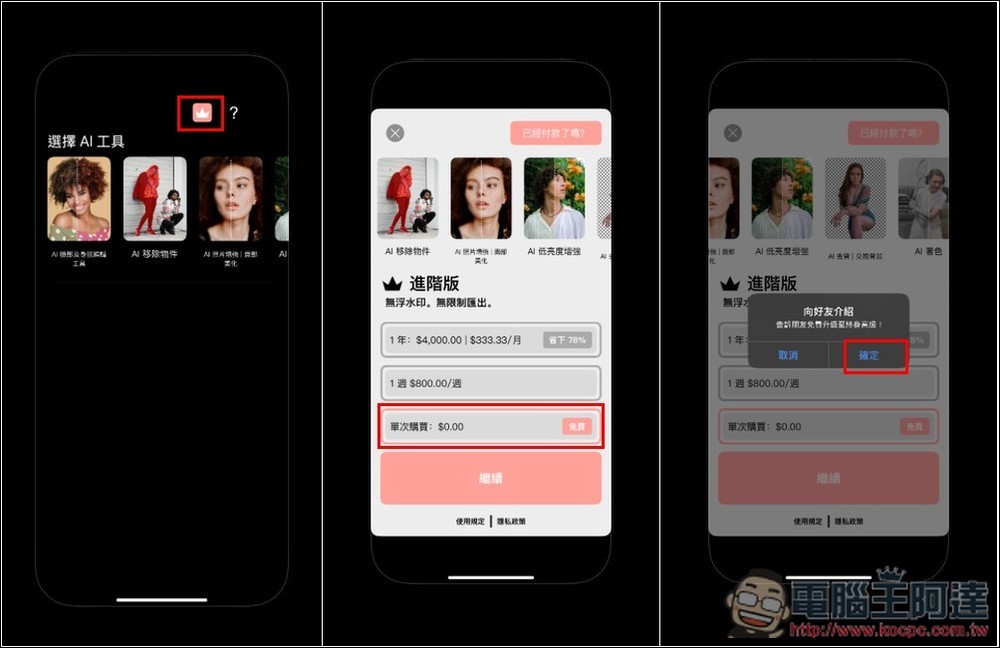
Next, you’ll go to the main screen. At the top there’s a crown icon. After tapping it, you’ll see a one-time purchase option for $0. That’s the lifetime version. Select it and press “Continue”. A message prompting you to introduce it to friends will pop up. Please press “OK”.
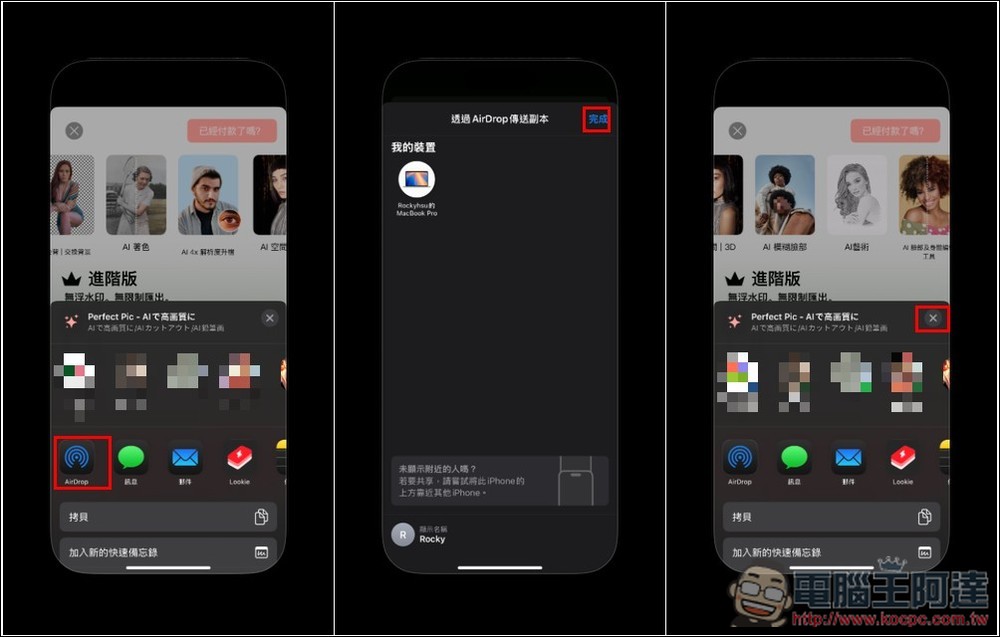
Then you can share it with others. If you don’t want to share, you can use an AirDrop trick to skip this step. Tap AirDrop, and once the window pops up, just finish without sharing to any device, then tap the X in the top right corner.
Wait a moment, and the payment screen will appear. Check whether there is no amount (I’m using a Japanese Apple ID, so it shows Japanese; in Taiwan it would be Chinese). If there’s no amount, you can safely get it. If there’s an amount, definitely don’t. When it shows “purchase complete,” that means you’ve obtained it, and the crown icon above will also disappear:
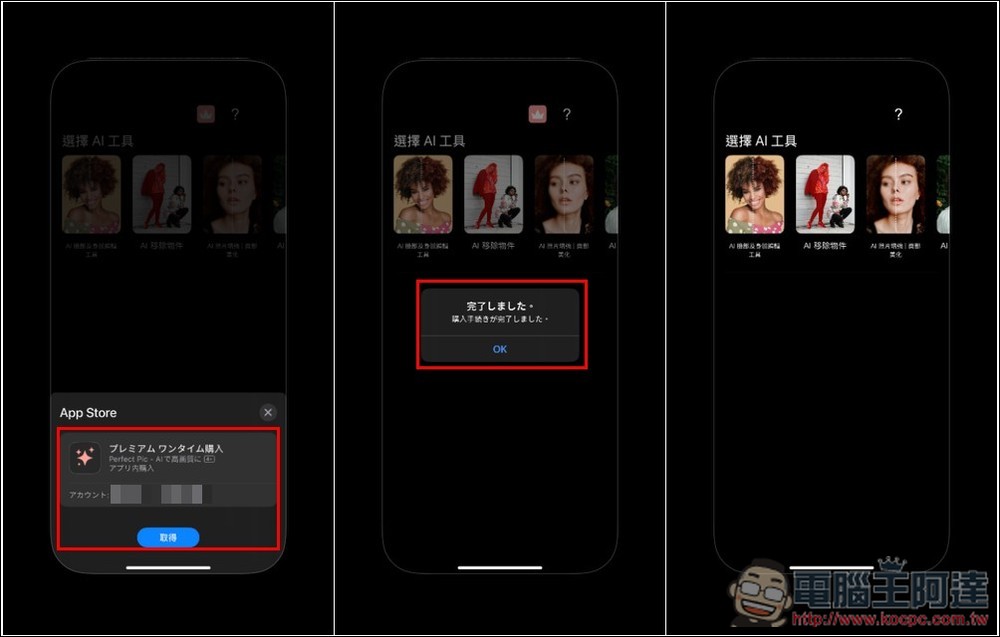
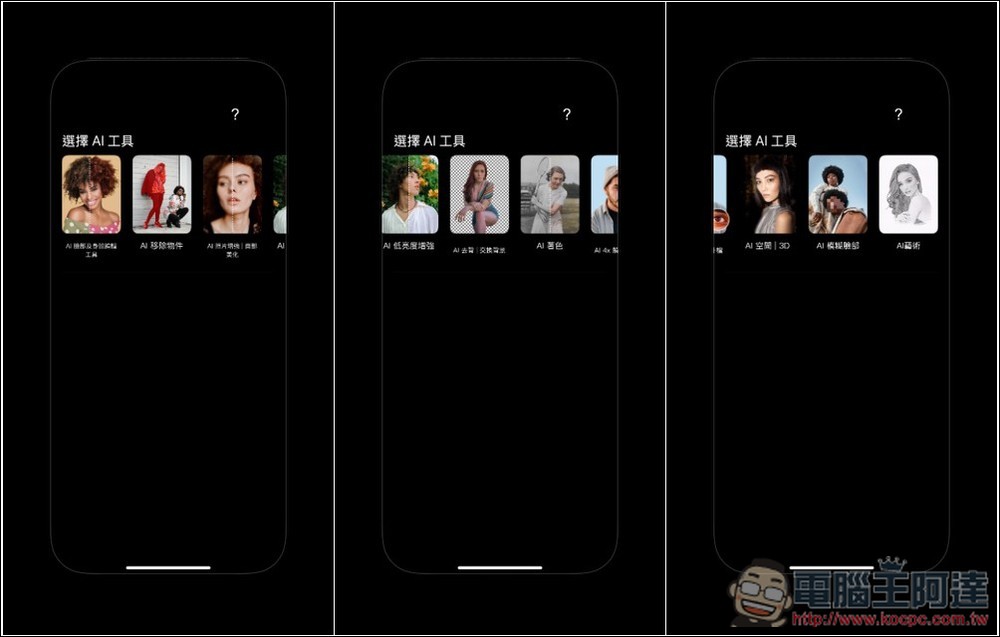
At this point, you can start using all the AI features. Swipe left or right to view all of them.
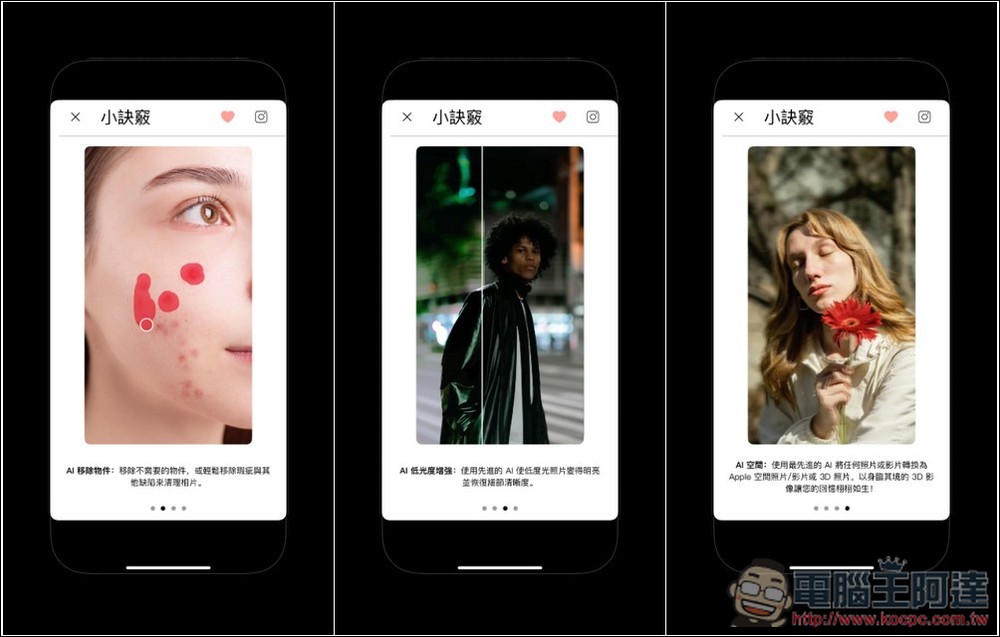
Every AI feature will pop up a quick tips tutorial, so it’s recommended to take a look first—it’ll help you understand how to use it better.
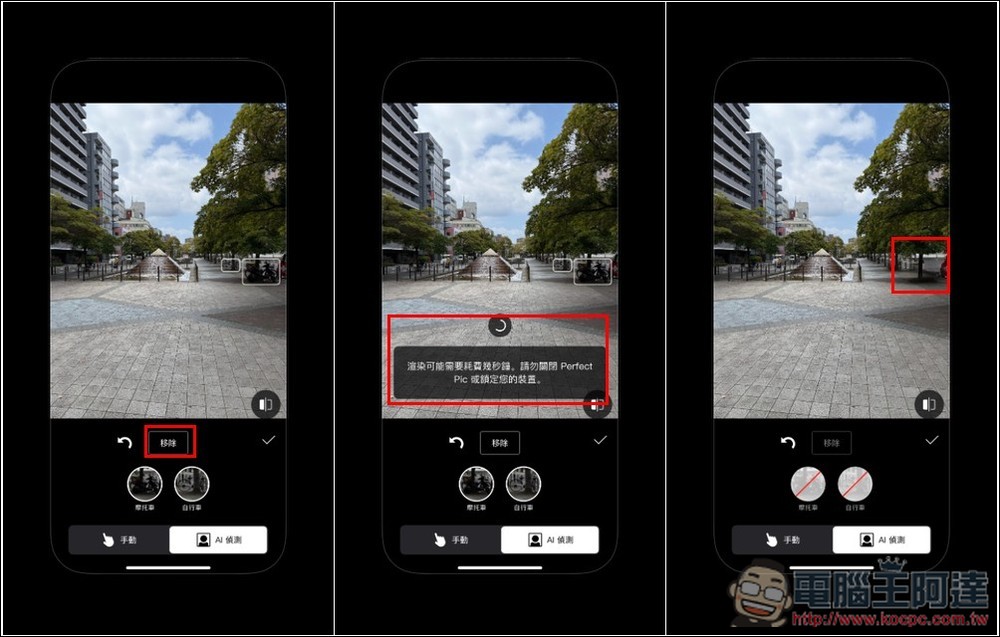
For removing objects, once you enter that feature, first select the input source, which offers “Photos” and “Files”. There are also two removal methods: manual and AI detection. Manual means you draw the object you want to remove yourself, while AI detection lets AI check what objects are in the scene, then you choose which ones to remove. For example, in this image of mine, AI detected a bicycle and a motorcycle, located on the right side of the photo:
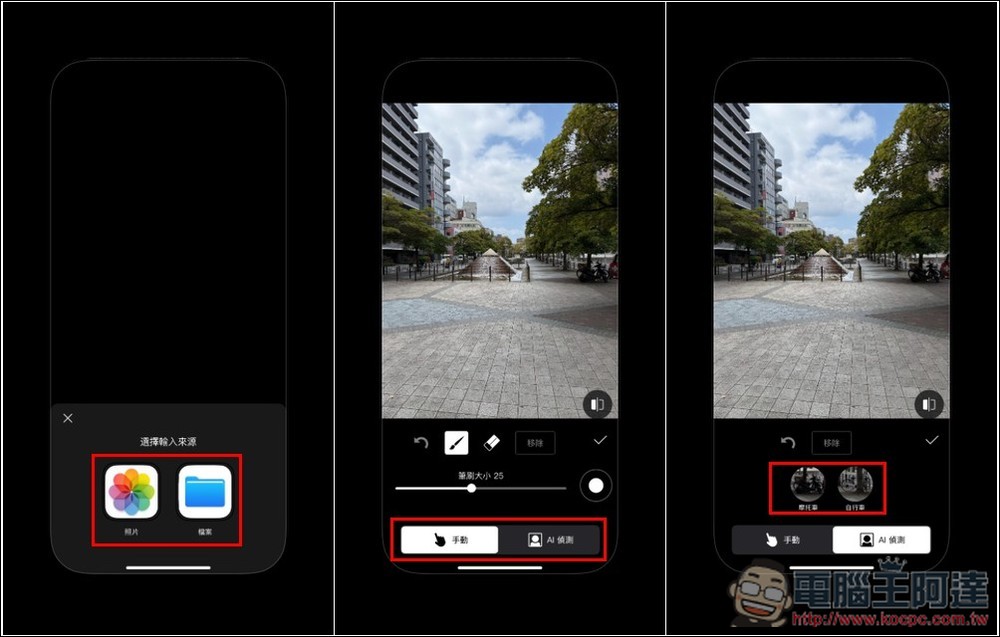
After selecting the object to remove, press the remove function, and the AI will start processing. Wait a few seconds, and you’ll see the object disappear from the frame. It looks pretty good from a distance:
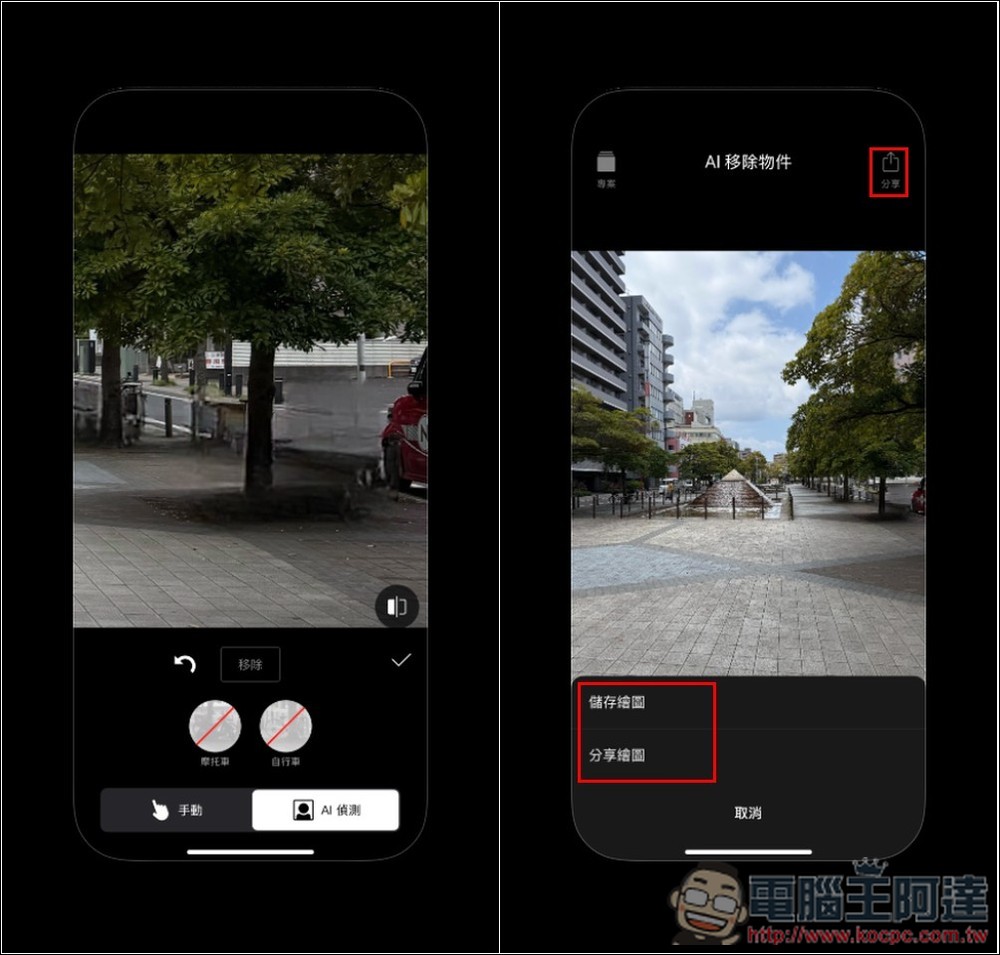
However, after zooming in, you can still see the filled-in areas. It might be that the objects in this particular image are harder to remove. If you’re satisfied, tap the share icon at the top right, and you’ll find the save drawing and share drawing options:
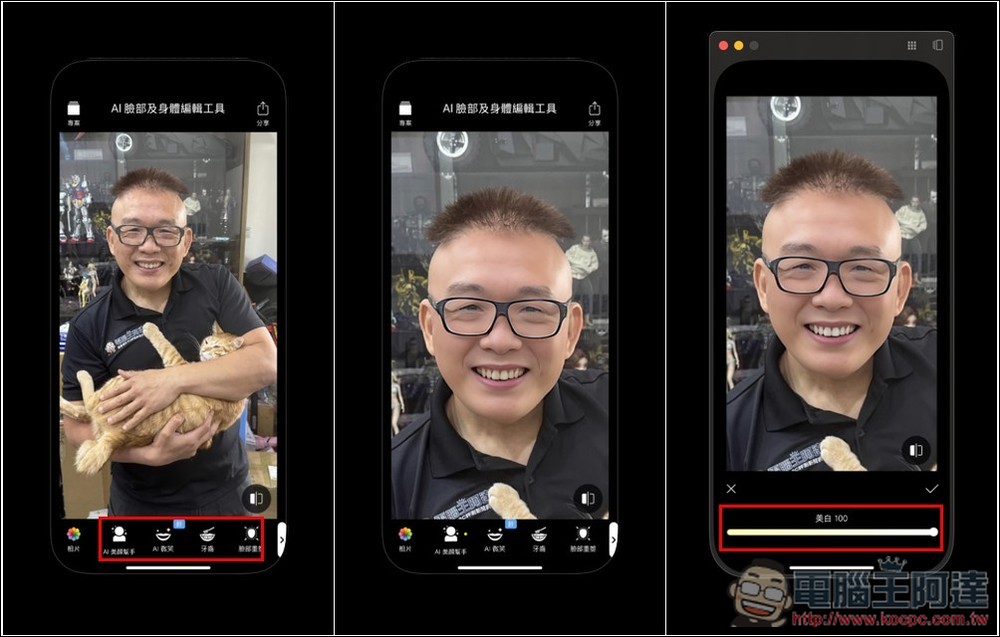
AI face and body editing tools offer a ton of features. Besides basic skin beautification, they also support teeth whitening, face shape adjustment, body reshaping, removal, hair color, skin tone, lip color, eyes, eyebrows, and more.
One last reminder: the limited-time free offer can end at any time, so be sure to double-check before making a payment.
Source: KOCPC Chinese