


“Scheduling” is a new feature for window organization in macOS Ventura. If your work requires the use of multiple applications at once, Scheduling can be used to easily switch between applications and files, eliminating the trouble of finding the required windows. Want to learn more about behind-the-scenes scheduling? Want to learn how to use it? The author will tell you how to enable and disable the current schedule, and how to customize it according to your preferences. It is quick and easy to set up.
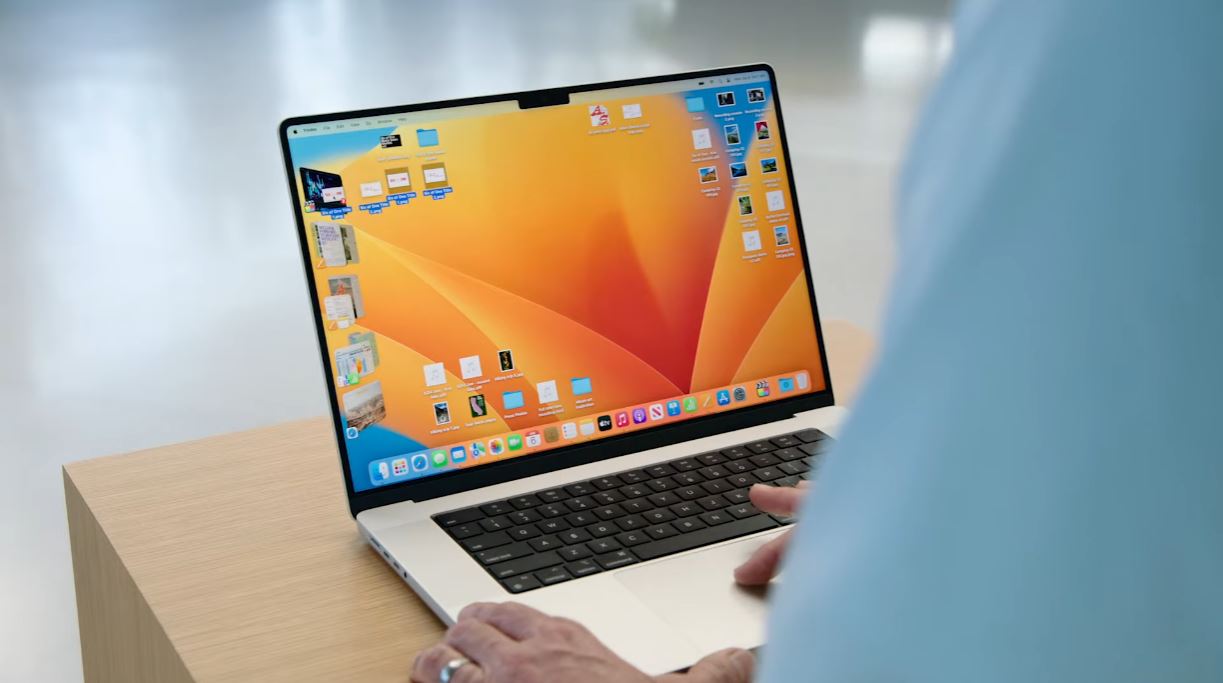
This is how you use macOS Ventura’s “Pre-screen Scheduling”. Learn the principles and usage of new features at once!
In the display at Apple’s press conference, we saw the behind-the-scenes scheduling function for the first time. Of course, everyone is eager to try this function. The new macOS Ventura has finally been officially released, and everyone finally has the opportunity to try out the new feature that Apple has highlighted as a major focus.
Settings of “Prescene Scheduling”
Don’t think that after installing macOS Ventura, behind-the-scenes scheduling will come out by itself. You must manually turn on this function to see what it looks like when displayed. In this unit, you will be told where to enable and customize the on-screen schedule.
Turn on/off pre-screening
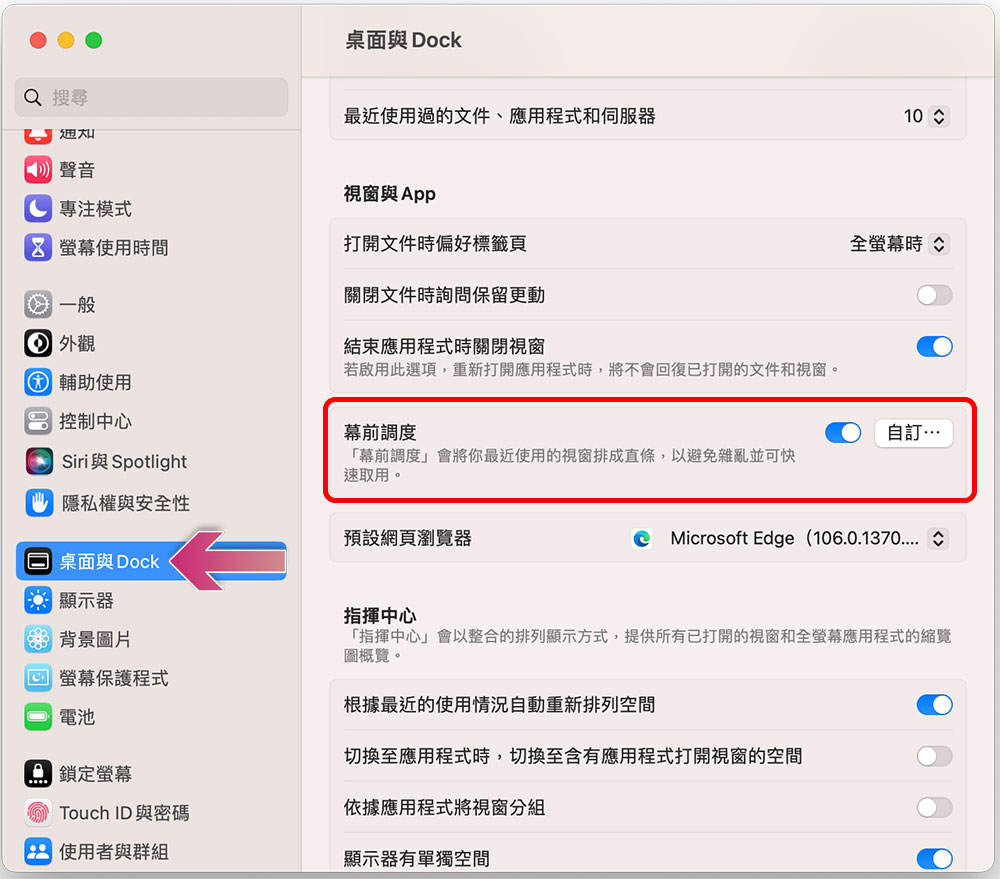
Open the “System Settings” application on your Mac, click “Desktop and Dock” on the left sidebar, and scroll down the main settings block on the right to see the “Pre-screen Scheduling” option. Just turn on the switch of behind-the-scenes scheduling. When you turn it on for the first time, a pop-up window will appear telling you the function of behind-the-scenes scheduling.
Customize the on-screen scheduling display method
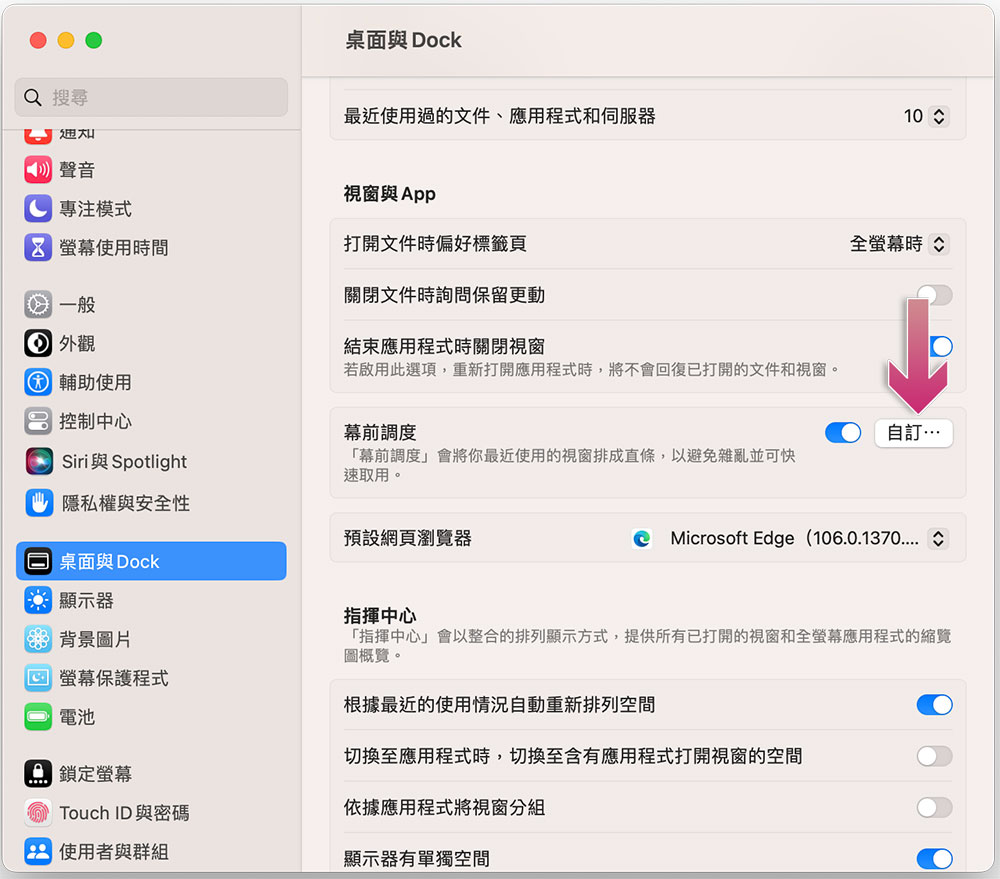
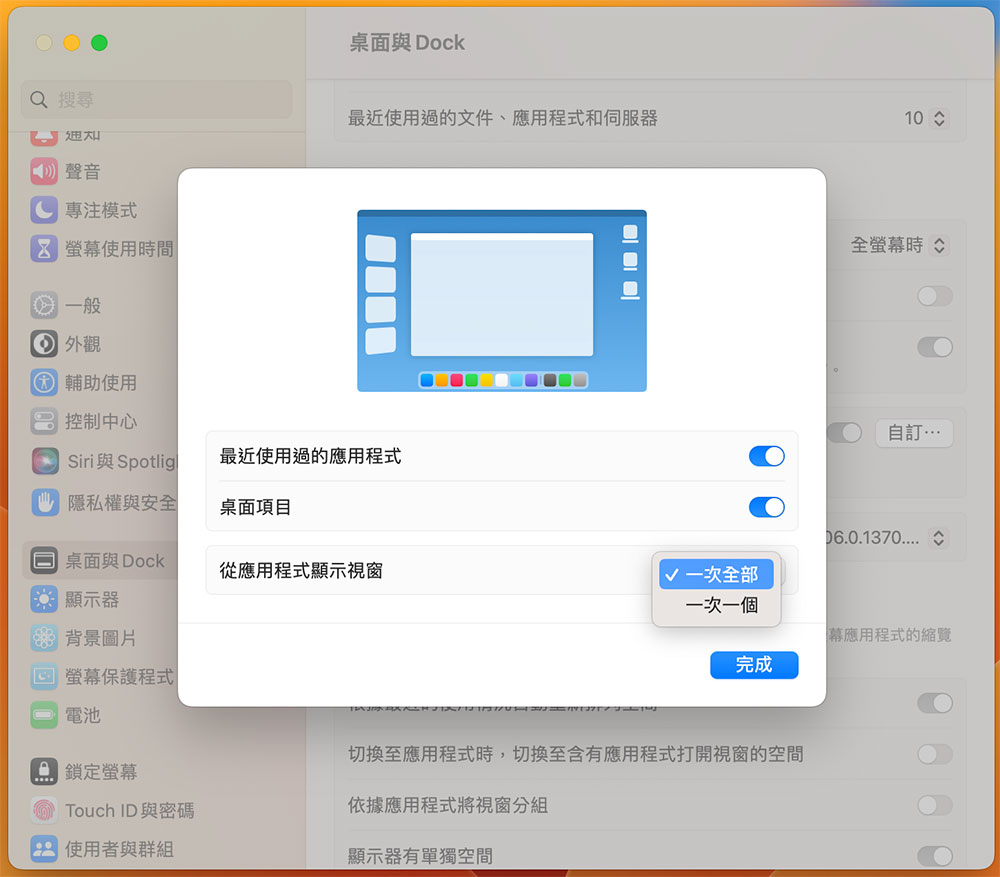
Apple retains the power to let users choose the display mode in the on-screen scheduling function. If you want to customize it, you can click the “Customize…” button behind the switch in the previous step. The author will explain three of the settings below, and Apple has also added icons to the settings window for you to understand intuitively:
- Recently used apps
If you want to keep recently used application windows on the left side of the screen as shown in the presentation, you can turn on the switch behind this setting. If you don’t want it to appear when you don’t need it, you can choose to turn it off. You have to move your mouse cursor to the left side of the screen to make the thumbnail appear. - desktop project
If you want to be able to display desktop icons (such as files, shortcuts, etc. that are temporarily on the desktop for easy access), turn this switch on. - Show window from application
This setting applies to a single application that opens multiple windows, and includes two options:
1. All at once: Display all stacked windows of a single application at the same time
2. One at a time: Show only one window in the application. When you double-click the thumbnail of another application window on the left, the currently displayed window will swap with the thumbnail you clicked.
Create a behind-the-scenes scheduling group
If the work you are working on requires the use of multiple different applications at the same time, and one point at a time is obviously not convenient, then you can create a window group for the work, and just click to call out all the windows in the group. For example, if you are writing a special report and may need to open multiple applications such as Pages, Safari, Notes, etc., you can create a group by dragging the window thumbnail. You can refer to the video below for how to operate:

If you divide and arrange the grouped application windows, each time you click on the group, the application windows will be displayed according to the arrangement you set, without the need to manually adjust each time. When will the group disband? When you close all the applications in the group, the group will be automatically dismissed.
How to paste photos from Finder to other applications?
Sometimes you want to share a certain picture with others through a social application, but when the front-end scheduling is turned on, you may not be able to drag two windows side by side on the desktop like in the past. Don’t panic at this time, the solution is simple! Just drag the pictures and files you want to share, and then move the mouse cursor to the application you want to transfer. The icon will flash twice to open the social application window. Then let go of the mouse to paste it:
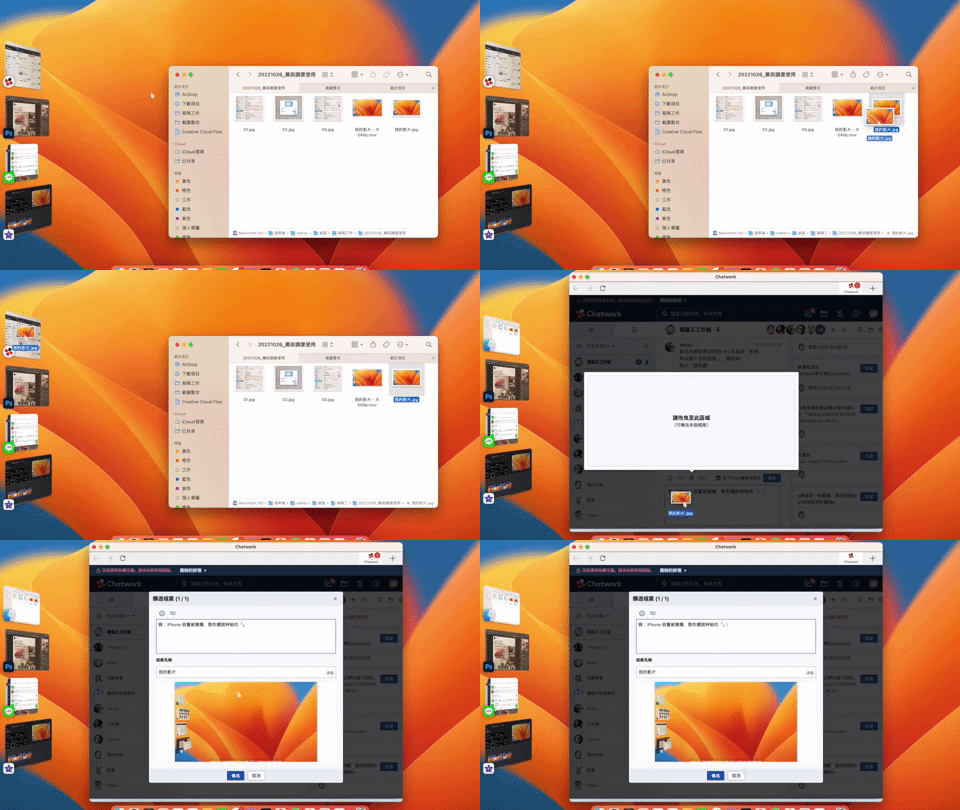
How pre-screening works
On the left side of the screen, applications are arranged as thumbnails. When you open the first app or only one app, the thumbnail will not appear if the app is active; when you open another app, the first app will become a thumbnail and appear on the left side of the screen. Up to 5 application thumbnails can be displayed at a time. When more than 5 applications are open, the top 5 most recently used ones will be displayed. Until you close one of the applications, one of the undisplayed applications will appear in the thumbnail row.
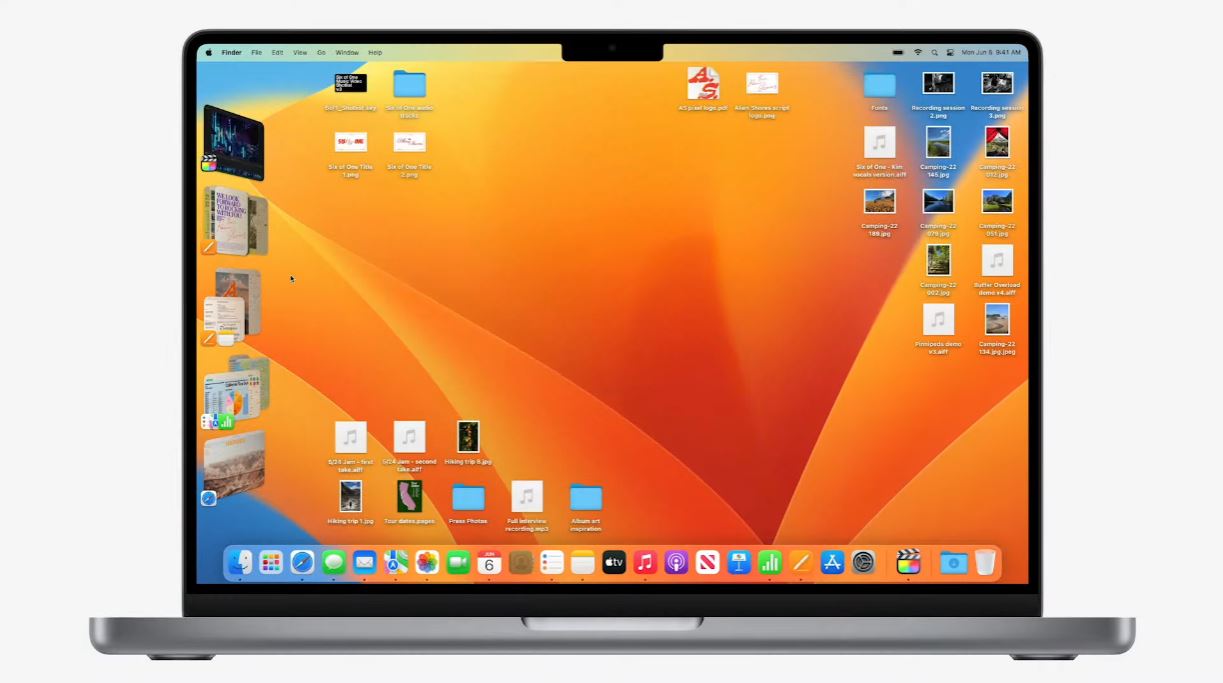
If you have multiple windows open for an application, the display method will be different according to the settings you customize in the system settings. Apple provides two options: display one at a time (displays a single window in the application, and switches to the one you clicked when you select another thumbnail) and multiple at a time (displays all windows stacked on the screen at the same time). For the setting method, please refer to the instructions in the first unit.
Source: KOCPC Chinese