


If you’ve always thought the image quality of FaceTime video on your Mac is terrible, that’s okay! Apple has used a pretty good camera on the iPhone. Through the matching of the latest macOS Ventura and iOS 16, and through the interconnection of camera functions, the capabilities of the iPhone camera can be fully utilized. If you are tired of the embarrassing video quality of Mac’s built-in lens, learn how to connect the interoperable camera today, and tomorrow you will be the most beautiful scenery in the video conference.
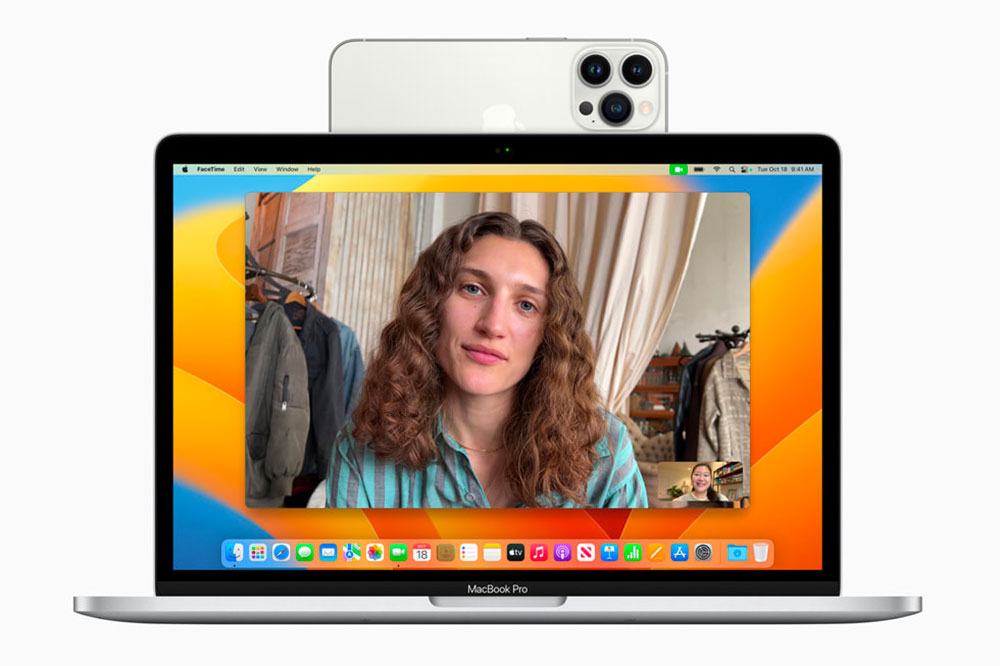
How to turn on the connected camera function in macOS Ventura and turn your iPhone into a high-end video lens
Before entering the setting tutorial, let’s first take a look at the necessary conditions for using the connected camera:
- Mac computer running macOS Ventura.
- iPhone 8, iPhone XR or newer running iOS 16.
- Log in to the same AppleI ID on the above two devices, and two-factor authentication is required when logging in.
- Both devices must have Wi-Fi and Bluetooth turned on and connected to the same Wi-Fi network.
- A stand that can be used to hold your iPhone, whether it snaps onto a laptop screen or a stand-alone stand, as long as it stays within the Bluetooth range of your Mac.
Additional features:
- If you use iPhone 11 or newer models, you can use the “Character Centering” and “Desktop View” functions.
- If you use iPhone 12 or newer models, you can use the “Studio Lights” function.
Step 1: Open “Connect Camera” on iPhone
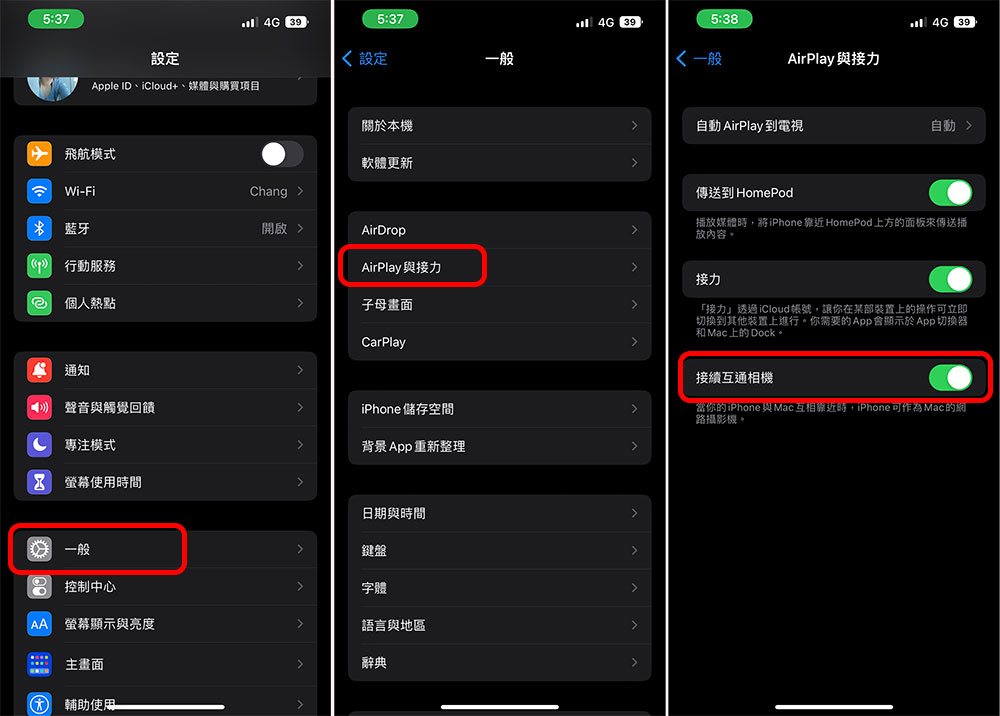
The first step is to enable the “Connect Camera” function in the iPhone. Please open “Settings” on your phone, enter “General”, click “AirPlay and Handoff”, and then turn on the switch for “Connect Camera”.
Next, use a stand or tripod to fix the iPhone in the desired position. You can even choose to hold it handheld. The key is to keep the phone within the Bluetooth range of the Mac computer.
Step 2: Open the video app on your Mac
Then you can open the video application you want to use on your Mac, such as FaceTime, Zoom, Microsoft Teams, etc., all are supported. After launching the application, enter the settings item of the video lens device selection. You can see the name of the iPhone displayed in the list of available cameras, then select your iPhone and you are done! In addition, you can also set your iPhone as an audio input device. You can also customize it by entering the microphone settings option in the video application.
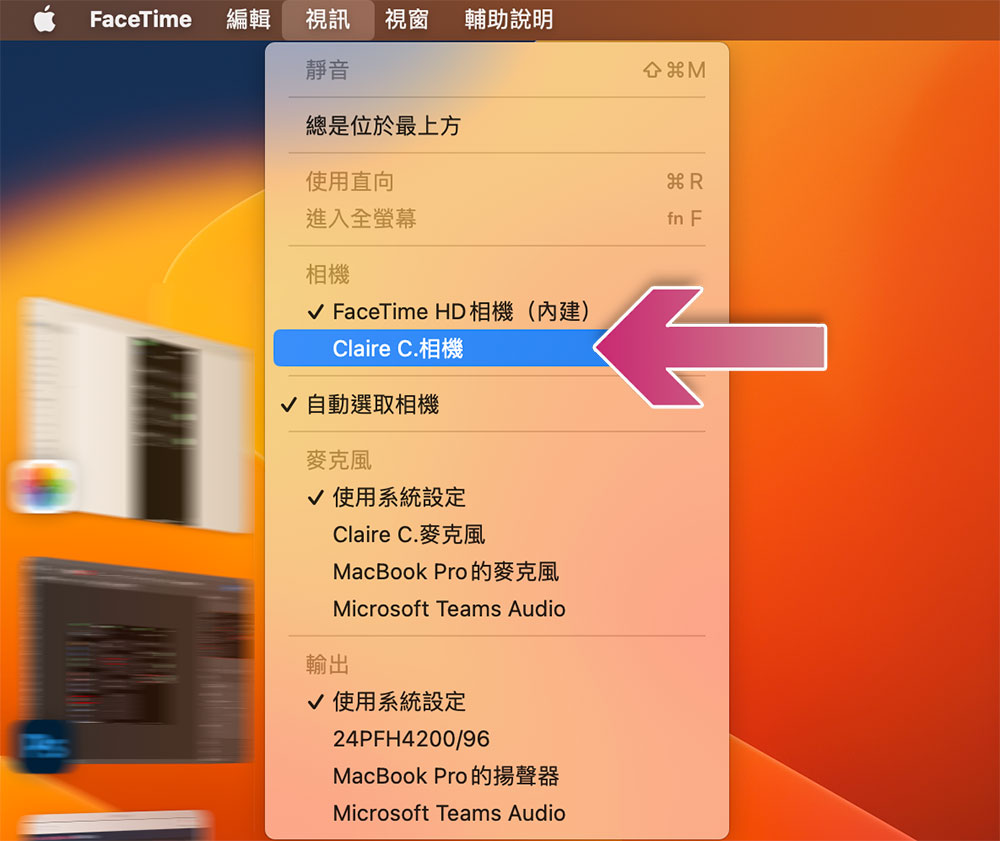
When the connection is successful, the phone remains locked and a message appears on the screen to tell you that the iPhone lens is currently in use; if you want to disconnect immediately, you can click the on-screen button.

Additional functions: Turn on desktop perspective, studio lighting, portrait mode and character centering function
The desktop perspective uses the ultra-wide-angle lens on the iPhone to capture the desktop and capture you at the same time, so you need an iPhone 11 or newer model to accomplish this; character centering is an effect that keeps the character in the center of the screen, and you also need an iPhone 11 or higher model to achieve it. Studio lighting uses the iPhone’s flash to light you, and it requires an iPhone 12 or above to operate. There is also a “portrait mode” that blurs the background! This is especially useful when the background is cluttered or there are other people around.
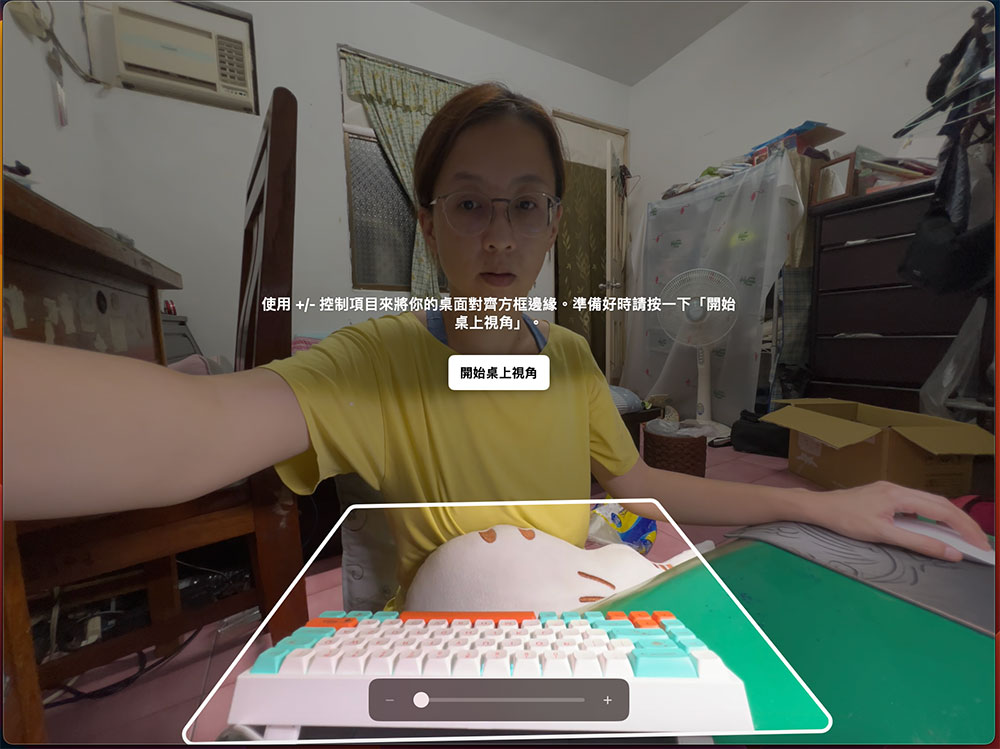
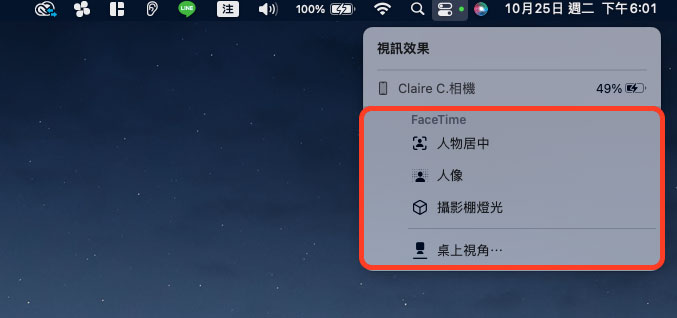
The opening and closing of these three functions are located in the same place, so I will talk about them at once. Only after you have selected your iPhone as the video lens and successfully connected and switched can you set the video effects:
- Click the Control Center icon on the control bar in the upper right corner of your Mac, then click Video Effects.
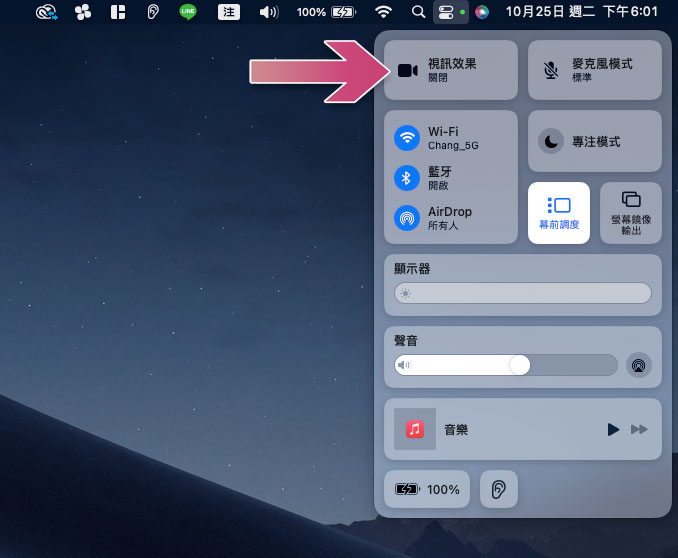
- Then there will be four effect options below: Character Centering, Portrait, Studio Lighting and Desktop Perspective. Click to open it. Only the desktop perspective requires a simple positioning action, and the others will be effective immediately.
The concept of an external video lens is not new. Since the interoperable lens is a built-in function, it lacks an image fine-tuning control system (such as color temperature, focus, hue, ISO, mirroring, and even beauty) compared to a standard external lens with a dedicated app. However, the advantage is that it is convenient and readily available. You may not carry a video lens with you, but you will definitely carry your mobile phone with you at all times.
Source: KOCPC Chinese