


Have you ever been in a situation where you had to take a segmented screenshot of the same web page on your iPhone? Although standard screenshots will capture the content currently displayed on the screen, subsequent content will not be captured when you scroll down the webpage, so many people will download third-party applications to complete the need for full-page screenshots. However, iOS screenshots are not that stupid. Just press a button and the screenshot will be completely different.
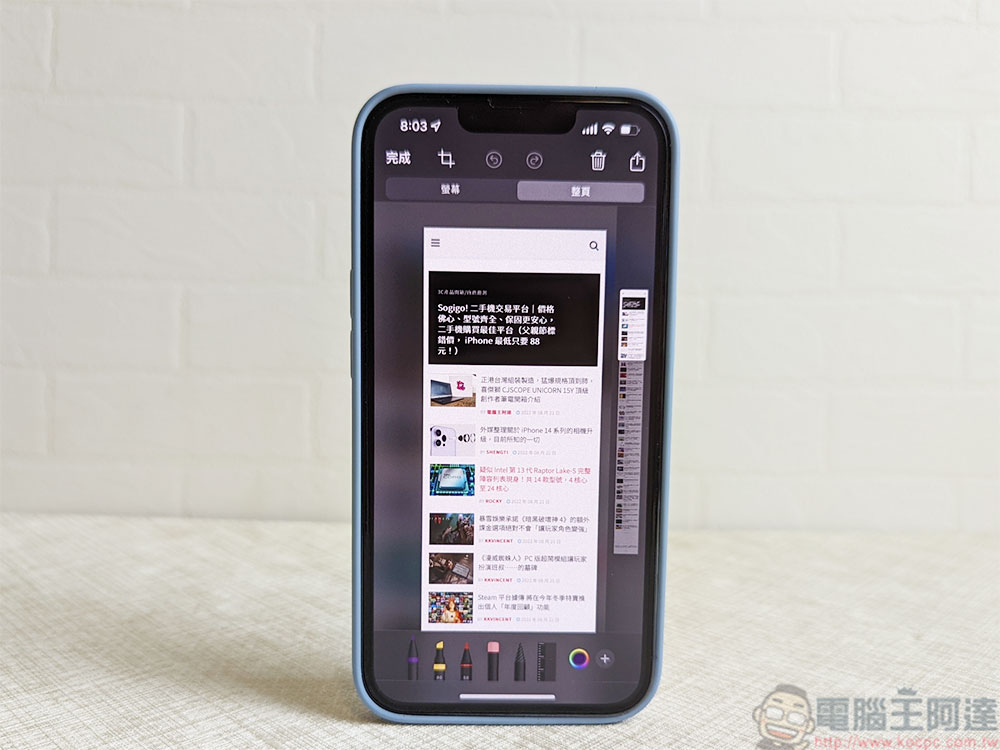
Tips for using iPhone’s native screenshot function that you need to learn most
The iPhone full-page screenshot function I’m going to introduce to you this time has actually been around for a long time, but not many people know about it, so according to common sense, you don’t need to download other applications in order to take full-page screenshots. Before talking about full-page screenshots, we also need to understand the screenshot methods of three different types of iPhones currently on the market. This article will tell you all the key points about screenshots.
Learn how to take screenshots on different iPhone types
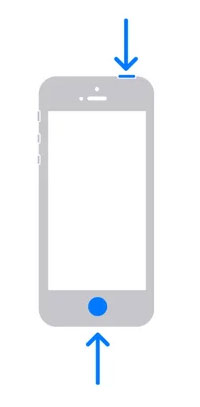
Before the advent of iPhone 6, the earliest iPhone store button was placed on the top of the phone. Therefore, if you use iPhone 5s and older iPhone models, you must press the power button on the top of the phone and the Home button at the bottom of the screen at the same time when taking a screenshot.
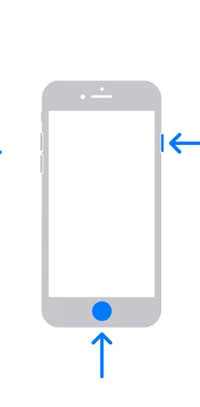
Starting with iPhone 6, Apple decided to move the power button to the right side of the fuselage. If you are using any one of the iPhone 6, iPhone 7 or iPhone 8 series, you must press the power button on the right side and the Home button under the screen. Although users were not used to the problem of the power button changing position during the initial switch, it was nothing compared to the removal of the Home button that also houses Touch ID.
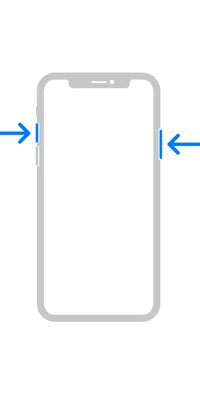
From the 2018 iPhone
What is an iPhone full-page screenshot? How do I use it?
Everyone is generally familiar with the typical screenshot function, but what is mainly discussed in this article is the iPhone’s native full-page screenshot that less people know. First of all, what is a full-page screenshot? Suppose you are reading an article on the Computer King Ada website and find that the content is very interesting. You want to share part of the specific content with your friends, but you cannot fit it into the screenshot of the same page. What would you do? A simpler way is to take multiple screenshots, highlight the key points, and then pass them on to your friends. However, the “Full Page” screenshot function can capture the entire page of content on the current web page at once without having to press the screenshot button repeatedly.
Taking native screenshots on iPhone is easy:
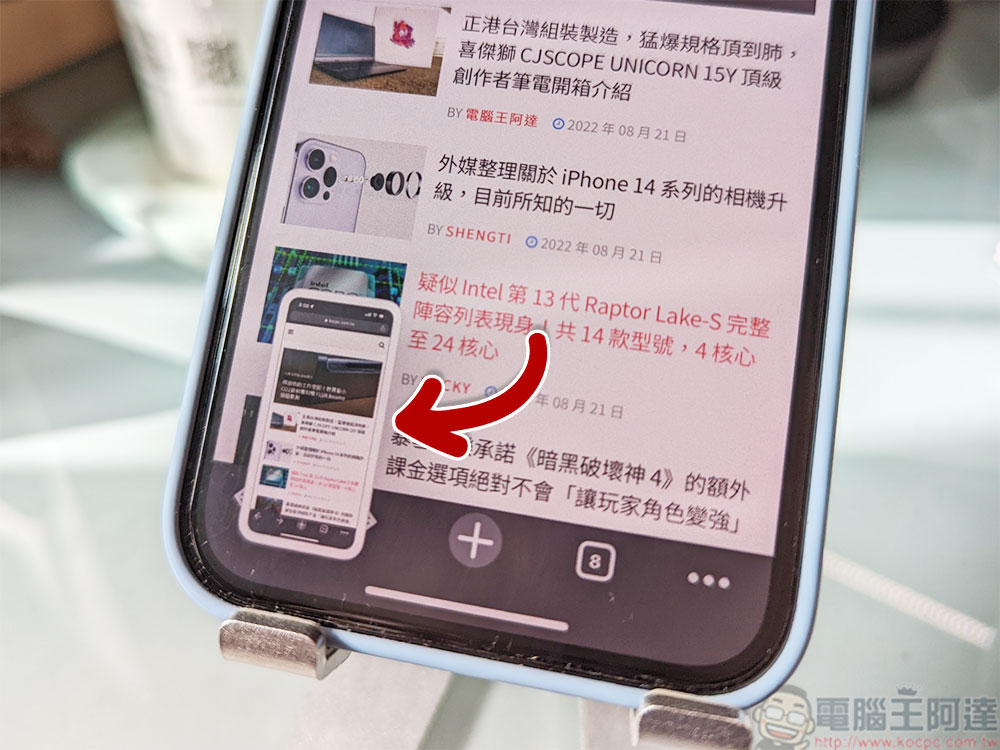
- When you press the key combination according to the normal screenshot method, a small thumbnail will appear in the lower left corner of the screen. Click it to enter the screenshot editing interface.
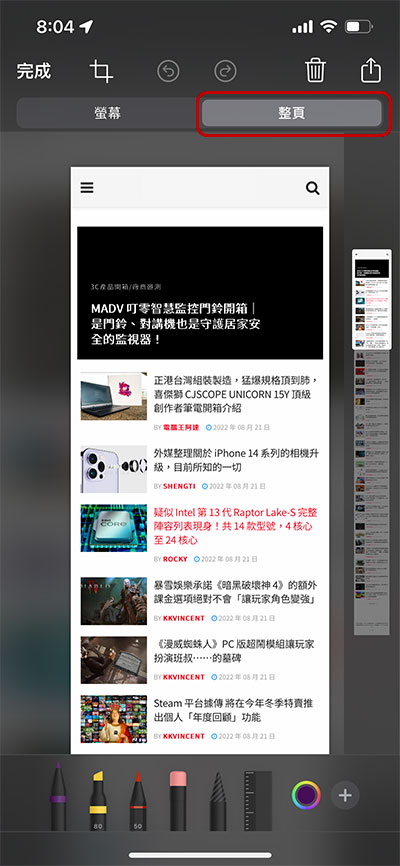
- Here comes the point! In the editing interface, click to switch to the “Full Page” tab, and you can see that the iPhone silently captures the entire web page for you, and you can also pull the side to view the part you want. You can also cut out the content you want here and add notes, etc.
Archive and share screenshots
After editing your screenshot, you have two options:
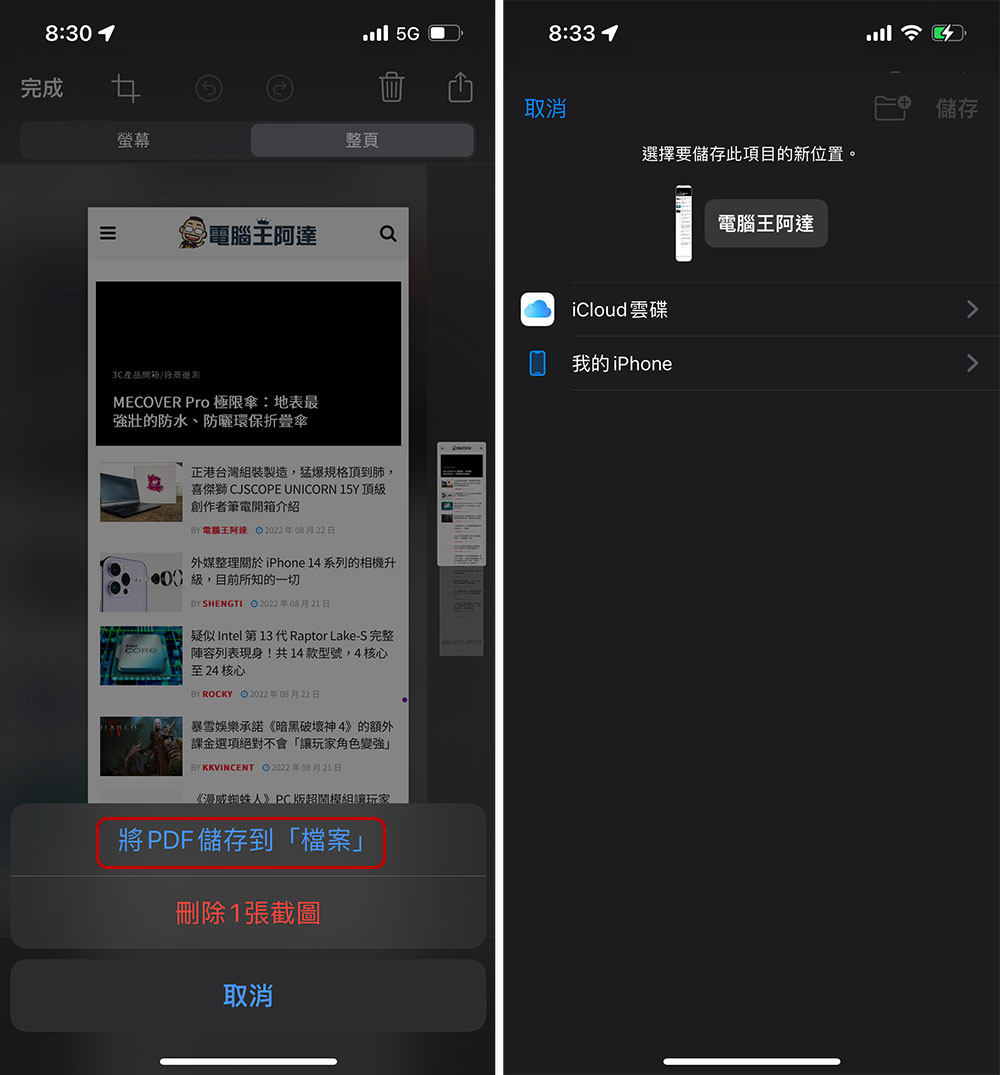
- Save full page screenshot as PDF file
Click “Done” in the upper left corner, then click “Save PDF to File”, then select the location where you want to save it and click Save.
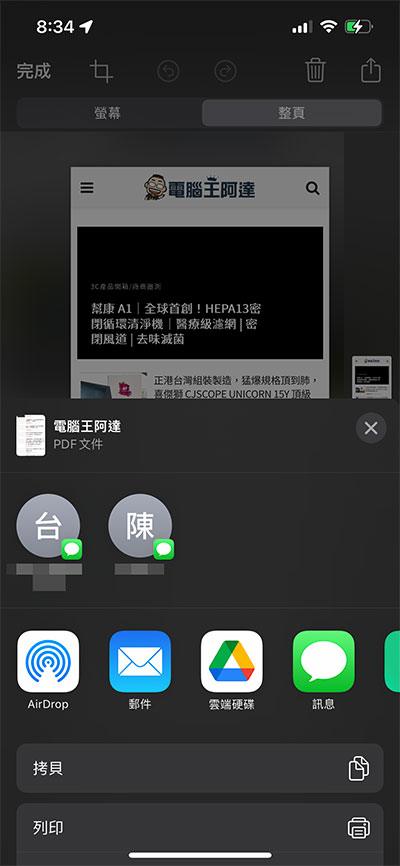
- Send screenshots as a share
After clicking the share button in the upper right corner, you can choose how to share the screenshot, or send it to other devices, cloud drives, or print it directly.
To open the saved full-page screenshot, just open it in the path where you saved it. Overall, full-page screenshots allow you to get the most information in the shortest time. It is a convenient little trick that you can use easily without downloading a third-party application or changing your original usage habits.
Source: KOCPC Chinese