


Notifications are an important tool that allow us to stay on top of important events in our lives. But often, notifications can become annoying, disrupt our concentration, or cause stress when we don’t need them. You may be used to managing notifications on your phone, but your Windows 11 PC also has some options for customizing notifications so you don’t have to be constantly distracted. Below we provide 7 ways to customize Wiondows notifications according to your preferences!

7 Ways to Manage Notifications on Windows 11
1. Use “Do Not Disturb”
Do Not Disturb is an extremely popular feature in most modern operating systems, and for good reason. As the name suggests, this feature ensures that you are not disturbed by notifications and essentially silences and hides all notifications until you turn off Do Not Disturb.
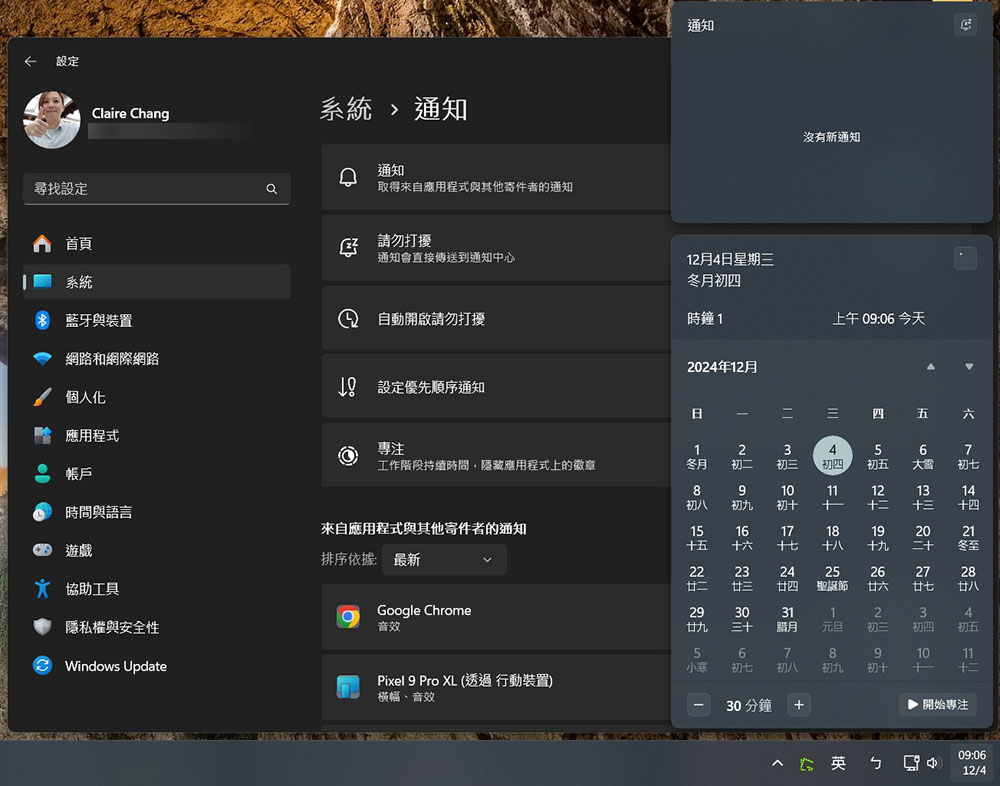
In Windows 10, “Do Not Disturb” was called “Focus Assist,” but that name was too confusing, so the name was changed to make it easier to identify. If you never want to see notifications, you can easily enable Do Not Disturb in “System >> Notifications” in the Settings app. If you don’t need notifications temporarily, you can use the notification panel in the lower right corner of the screen, which can bring you peace no matter what.
2. Turn off notifications after get off work
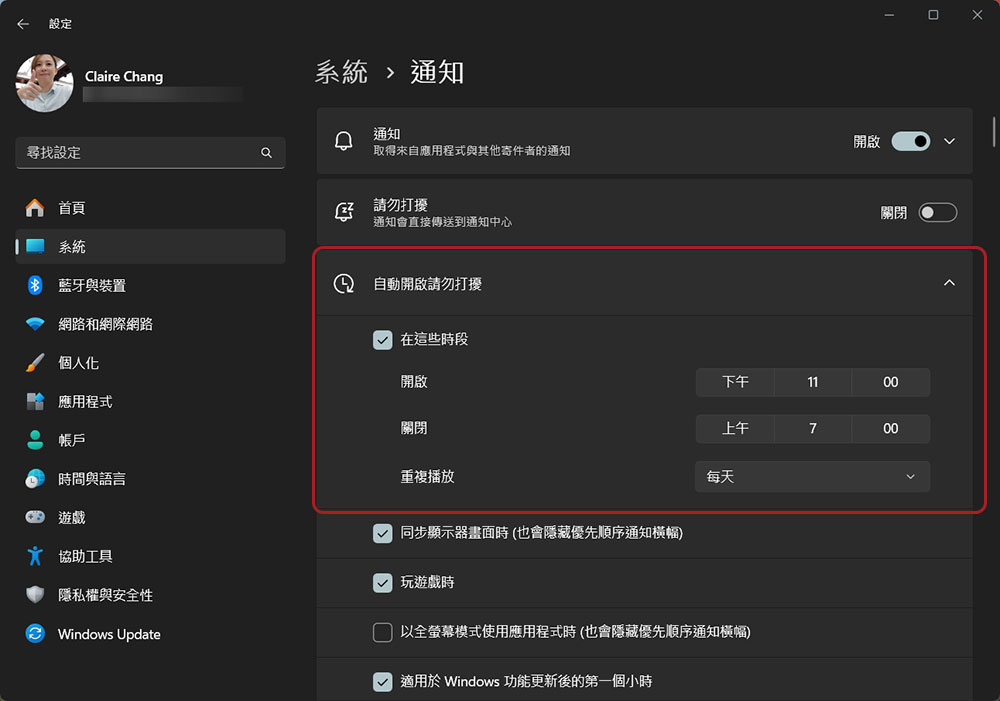
Windows 11 comes with a cool feature where you can enable Do Not Disturb with automated rules. Some of them are enabled by default. For example, if you’re playing a full-screen game, watching a movie, or sharing your screen or projecting, Do Not Disturb will activate, pausing notifications so they don’t interrupt your fun or accidentally show them to others.
However, you can also set an additional option by yourself, which is to turn on Do Not Disturb at a specific time. To enable this feature, please go to the Settings app, expand the “Automatically turn on Do Not Disturb” setting item in “System >> Notifications”, check “During these hours”, and then set the time range and repetition frequency you want.
3. Use the “focused work phase”
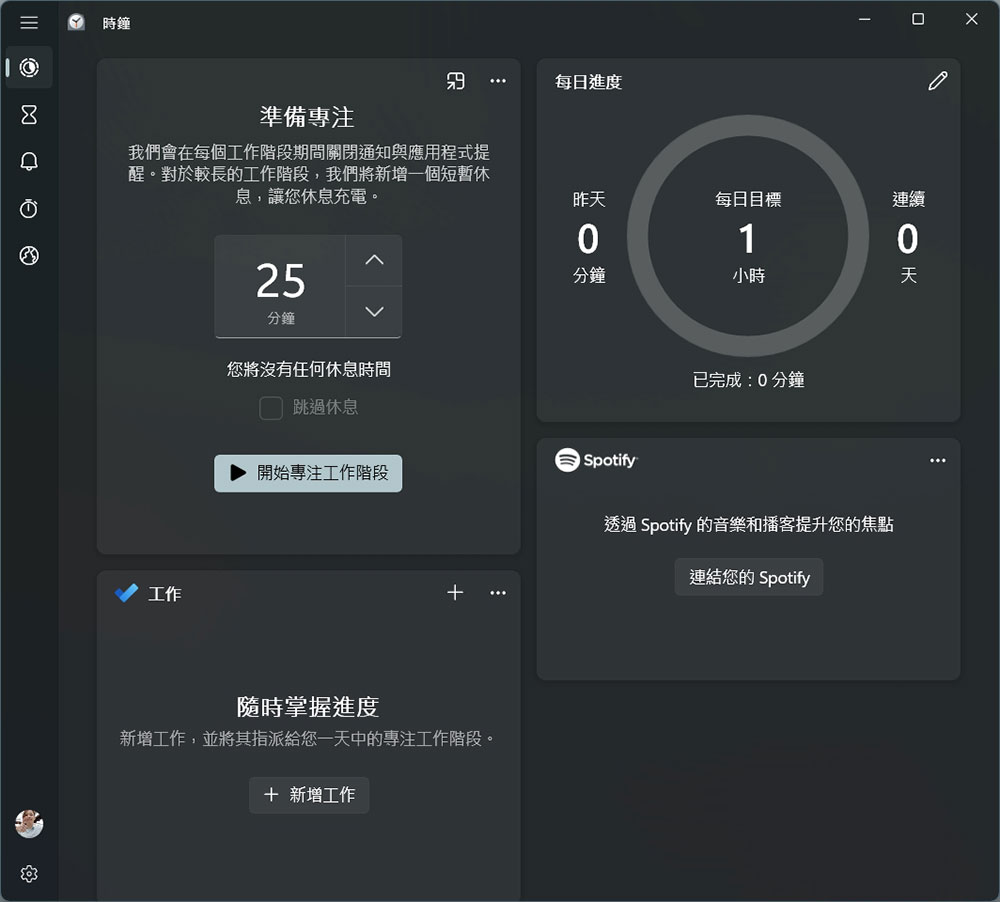
Focus sessions were introduced in Windows 11 as part of the Clock app, but they are integrated into the operating system itself. This function is based on the Do Not Disturb function and is designed to help you improve your concentration within a set time.
In addition to enabling Do Not Disturb, the Focus Phase further prevents distractions. Not only can you not see notification banners or sound effects, but if an app you open wants to grab your attention, it won’t be able to flash an orange icon on the taskbar to ensure you’re fully focused on the task at hand. Additionally, the Focus session lets you listen to Spotify music and gives you additional ways to control your work progress.
You can find the “Focus on Work Phase” in the Clock app, and you can also change some settings for the Focus on Work Phase in “System >> Notifications >> Focus” in the Settings app.
4. Set priority notifications
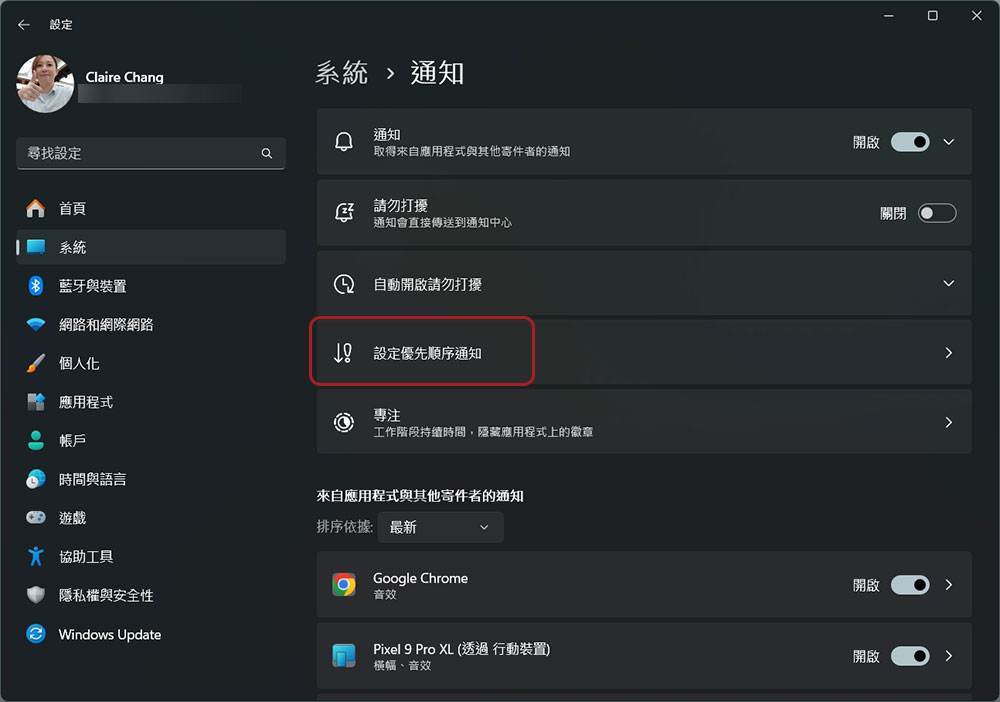
While the Do Not Disturb feature is great and you do get some quiet time from it, some notifications may be too important to miss. Some apps will still show notifications during Do Not Disturb because notifications are essential to how it works, such as the Snipping Tool that will notify you to edit the screenshot after taking it. But you can manually add your app to your priority list so that you always receive notifications from it in Do Not Disturb.
Enter the Settings application, go to “System >> Notifications >> Set Priority Notifications” and click “Add Application” to add any specified application to the priority list.
5. Hide notifications on lock screen
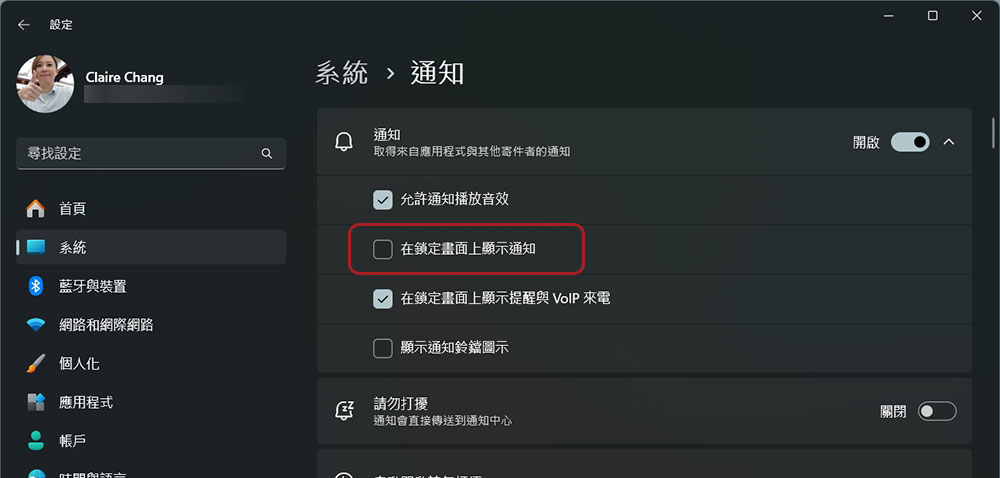
By default, Windows 11 displays notifications on your screen even when you’re viewing the Lock screen, but the content of the notification is kept private. That being said, if you don’t want to see any notifications on the lock screen at all, you can still choose to turn them off.
Just open the Settings app, expand the notifications at the top in “System >> Notifications”, and uncheck “Show notifications on lock screen”.
6. Turn off notification sounds
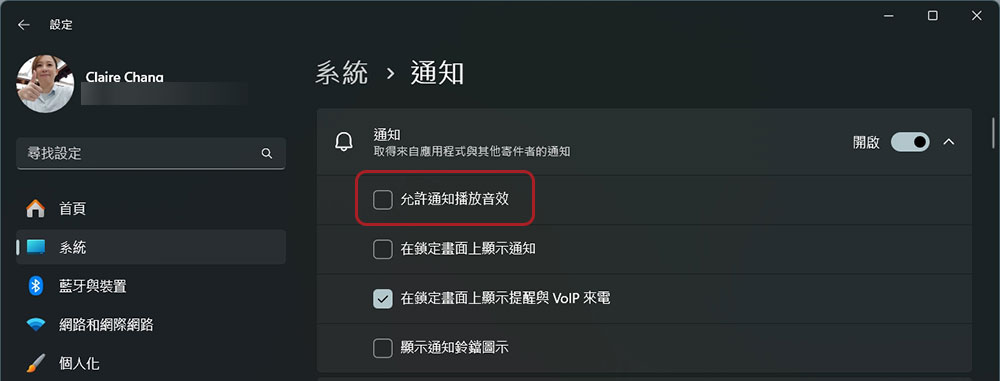
If you’re like me and don’t like to shut down your computer, the notification sounds from the app may bother you constantly. Sometimes, this can be the worst experience in the notification function. Loud, piercing sounds often interrupt what you’re doing abruptly, so even if you’re happy for notifications to appear on your screen, you can still turn off the sound that accompanies them.
To do this, all you need to do is open the Settings app, expand the notifications at the top in “System >> Notifications”, and uncheck “Allow notifications to play sound effects”. In addition, you can also disable the sound effects of a single application. Please see the next item for this.
7. Manage settings for each application
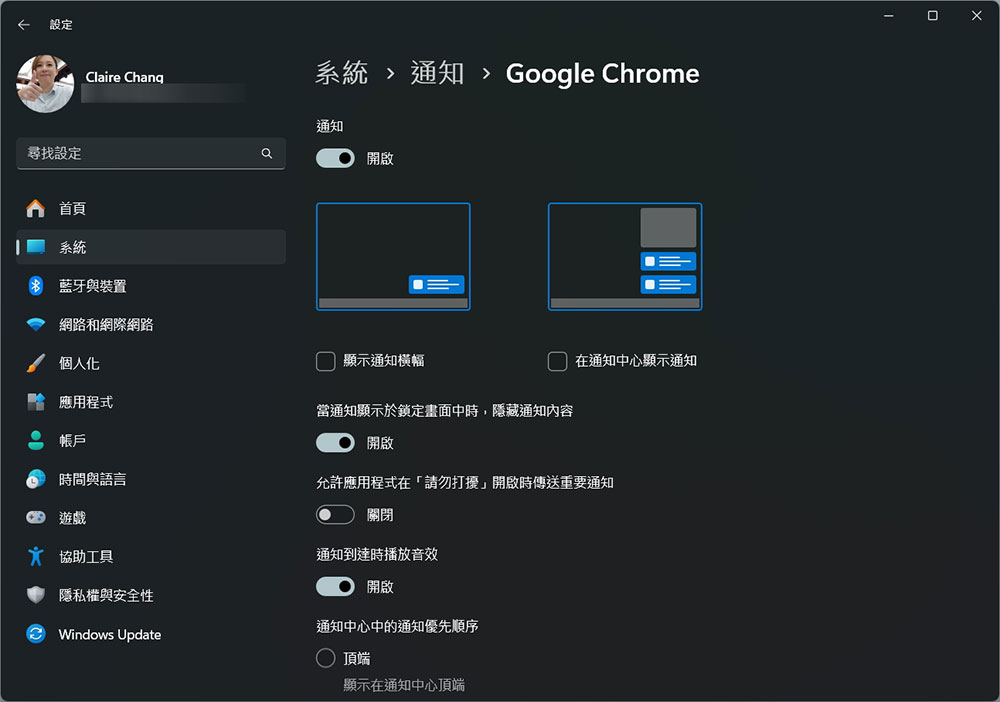
Not every app has equally important notifications, so thankfully Windows 11 also gives you the option to manage notification settings for every app on your system. The settings are also pretty in-depth, and you can turn off notifications for a given app entirely, but you can also choose to hide notification banners, turn off sound effects, or decide whether those notifications should be saved in Notification Center.
To manage these settings, enter the Settings app, then go to “System >> Notifications”. At the bottom you will see a list of apps, where you can choose to turn off notifications for each app or click on the app name to see more in-depth settings.
Notifications are important, but they can also be a problem for many people, and all of the options above make it easier to break away from system defaults and get a more personalized experience. If you want to be able to sit back, relax and concentrate while using your computer, these selections will go a long way in helping you achieve that goal.
Having said that, Windows 11 has many more perfect methods, such as the ability to create different focused work session profiles that can be entered with just one click, but this kind of thing cannot be rushed. All we can do now is wait and hope that Microsoft will add this convenient feature as soon as possible.
Source: KOCPC Chinese