


Windows 11 has been launched for several months. Overall, I think this is a free system upgrade that is definitely worth recommending. But if you have recently upgraded from Windows 10 to Windows 11, or want to install a major update to Windows 11, you may notice that your computer’s storage capacity is suddenly occupied a lot. This time we will tell you how to free up this space and make your computer cleaner.
How do you free up space on your computer after upgrading to Windows 11?
So, why is a piece of hard drive space being eaten up? This is because Windows automatically saves a copy of the system files from the old system. The advantage of this is that if you encounter any problems after upgrading, you still have leeway to revert to the previous version and straighten things out again to get everything back to normal. If you don’t encounter any problems after the update and everything goes smoothly, you can remove those backed up old system files after upgrading to Windows 11.
★ Important reminder:
Once you delete these old system files, you won’t be able to revert back to the old version of Windows, so be sure to make sure everything is working properly before doing this.
Free up space from Windows 11 Settings
- Open the “Settings” application (the shortcut key is Win + I) and find the “Storage” item on the default page (system).
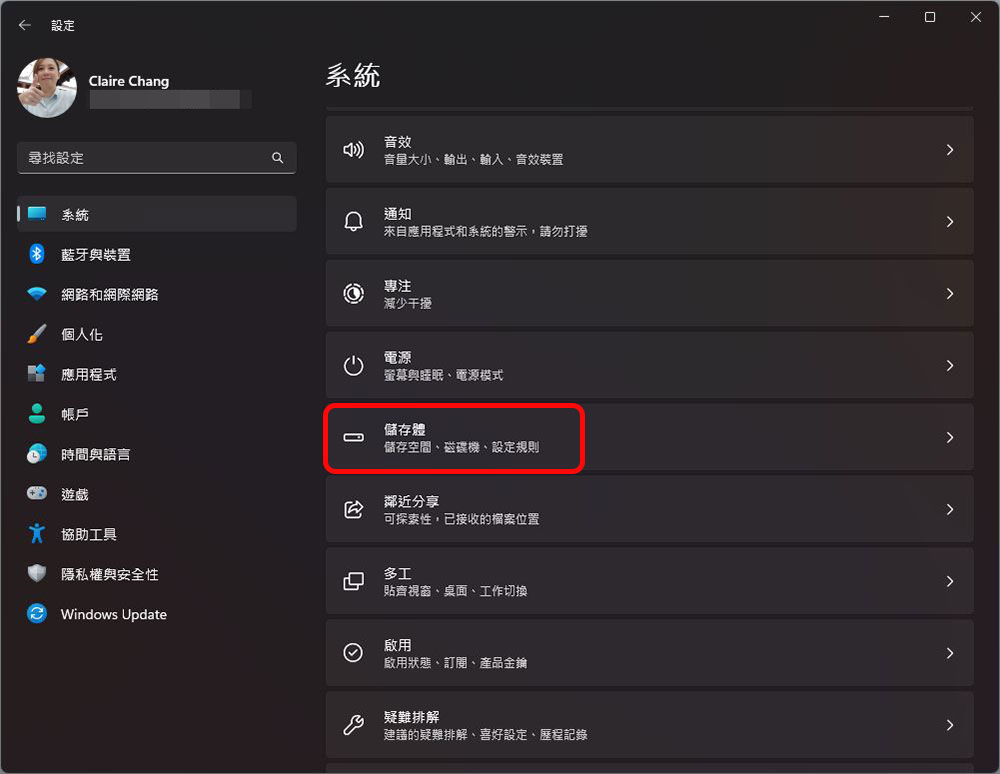
- Click the “Temporary File” field above.
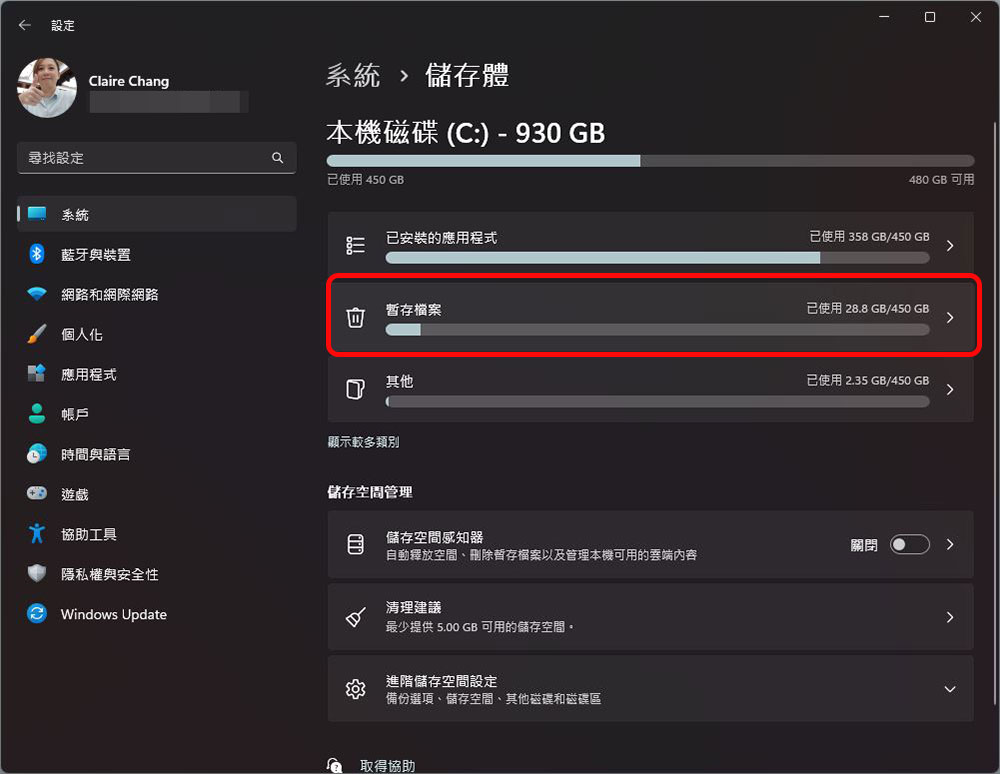
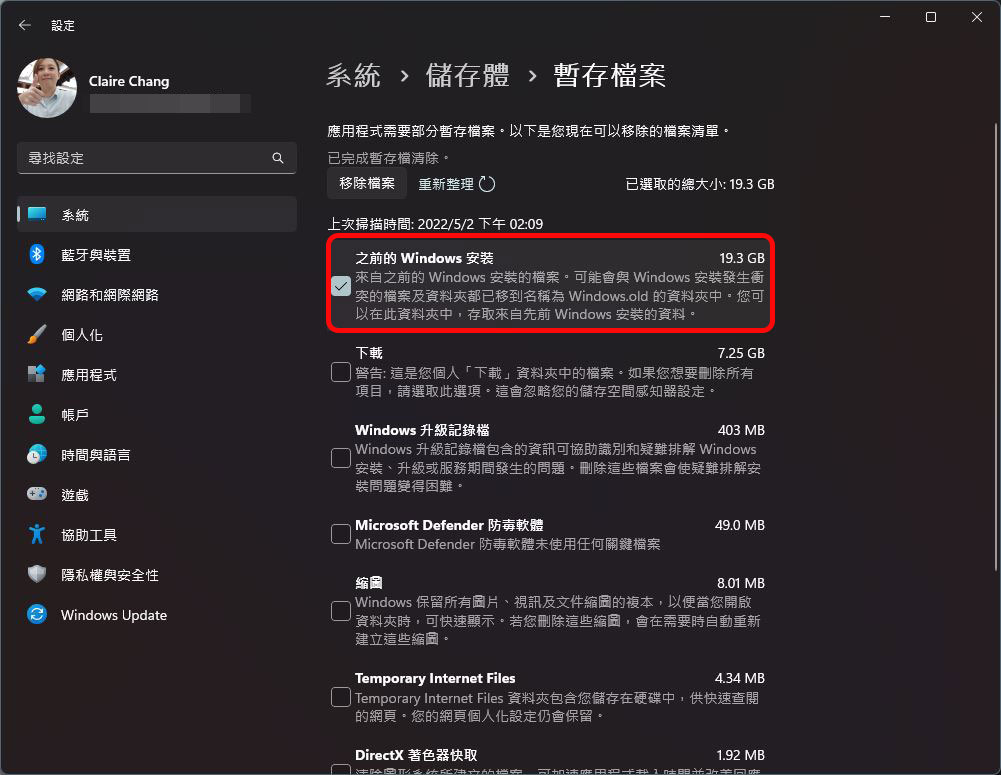
- Be especially careful in this step. The target we want to release this time is “Previous Windows Installation”. The check box in front of it must be checked. If you don’t want to remove other parts, remember to uncheck it (the Recycle Bin can also be checked), and then click the “Remove File” button at the top after selecting it. RememberCheck the tick first and then click。
Use Disk Cleanup to free up space
If you prefer to use old-school Windows tools to organize your computer, you can still use the built-in “Disk Cleanup” to free up space even after upgrading to Windows 11. The following will tell you the simplest way to perform it.
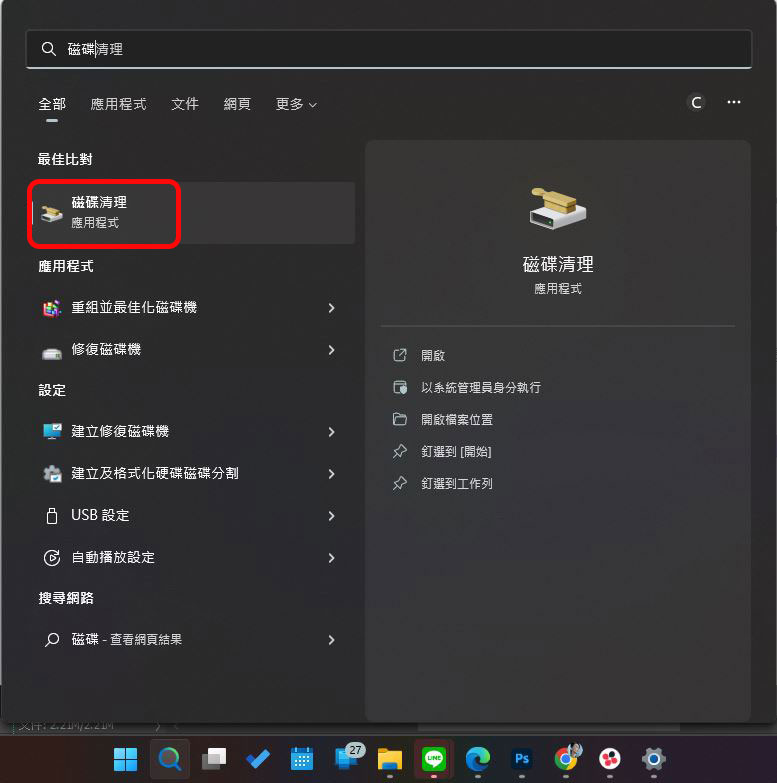
- Open the Start menu, search for “Disk Cleanup” and enable it.
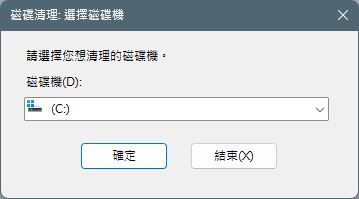
- You will see a prompt window asking you which disk you want to clean. At this time, please select the disk where Windows is installed. In theory, it will be the default value after opening.
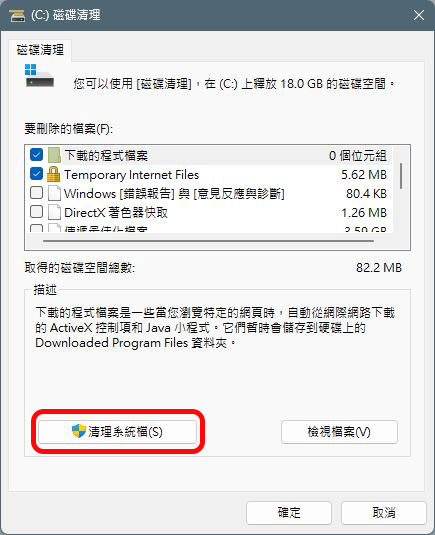
- After the scan is completed, you will be able to see the detailed window of Disk Cleanup. Here we click the “Clean System Files” button. You must have administrator rights on your computer to perform this step, and you will have to wait for the scan time after clicking.
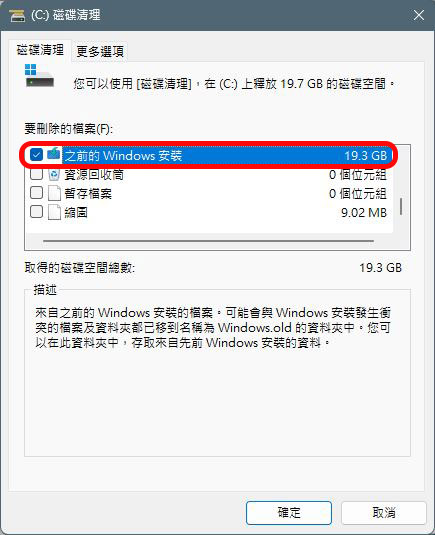
- It’s time to check the hook first! We put the target to be cleaned on “Previous Windows Installation” and tick the check box in front of it. If you do not want to delete other items, please uncheck them, otherwise once you press OK, they will be deleted!
This is how you can free up space on your computer after upgrading to Windows 11. This method is only suitable for upgrading using the normal Windows Update pipeline and is provided for your reference!
Source: KOCPC Chinese