


iPhone has now become the first choice for many Apple phone users to take photos and record videos, especially the new ultra-wide-angle lens of iPhone 11 / 11 Pro, which further upgrades the iPhone’s camera system. However, the size of photos and videos taken through iPhones is also increasing, occupying the space of mobile phones.
Image and video compression can be achieved throughOnline web compression toolThe size is reduced, but it is not very convenient to use on iPhone, and it requires a network connection. Today I will share a software “Picture and Video Compression Master” specially developed for iPhone and iPad.
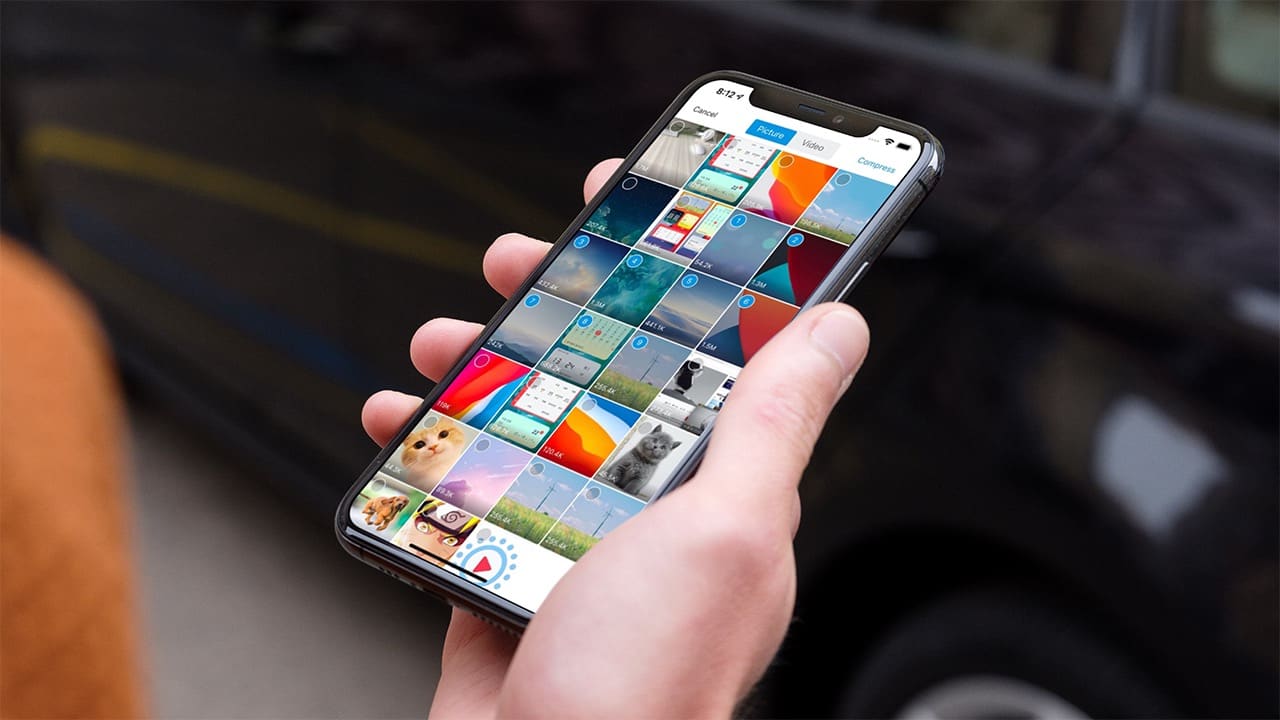
Picture and video compression master download
“Picture and Video Compressor” is a newly developed software program that supports iPhone and iPad. It can batch compress pictures and videos without an Internet connection, helping you save a lot of storage space.
“Picture and Video Compression Master” uses intelligent compression when processing pictures and videos, which can reduce the size by up to 96%. It supports iPhone and iPad photo album media file management and browsing. In addition, “Picture and Video Compression Master” also supports viewing and editing of EXIF information. It is a very practical software.
Picture and video compression master tutorial
Tutorial on reducing the size of pictures
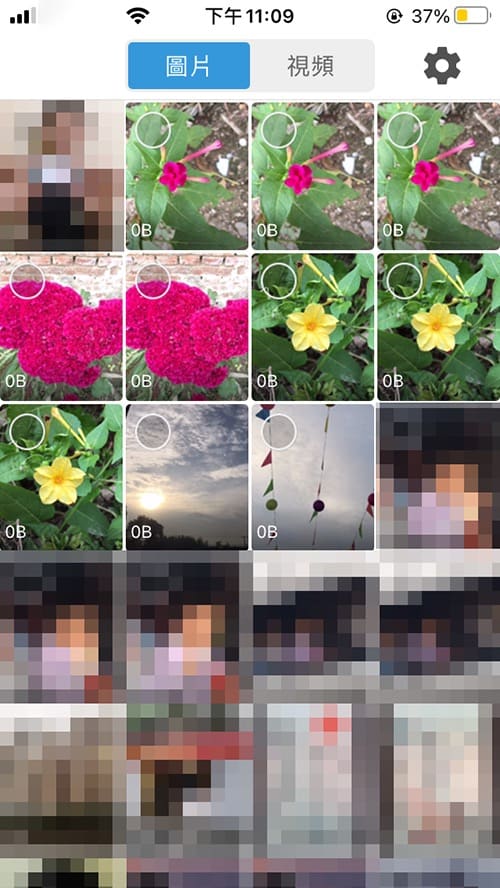
In the first step, when using “Picture and Video Compressor” for the first time, it will request access permission to the “Album”. After permission, the pictures and video files in the “Album” will be automatically displayed.
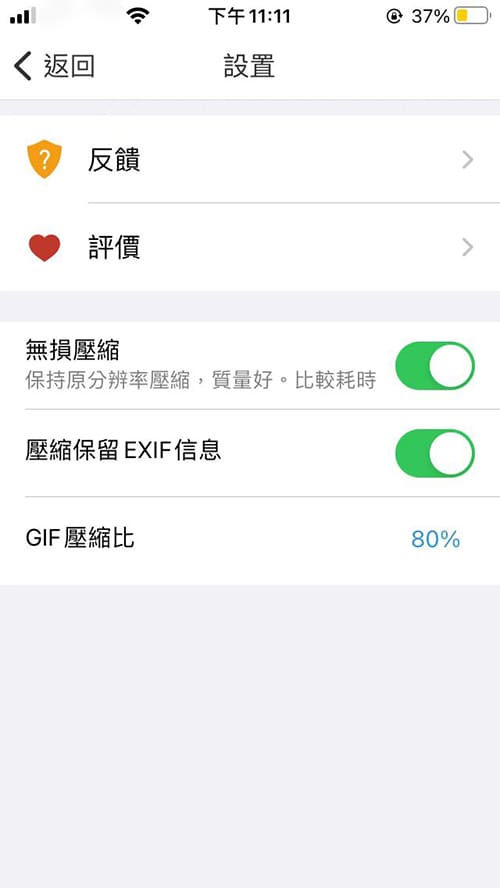
The second step is to complete the settings before starting the operation. Select the “Settings” icon in the upper right corner of the application homepage to turn on “Lossless Compression” and “Compression Preserve EXIF Information”. You can also set the GIF file compression ratio.
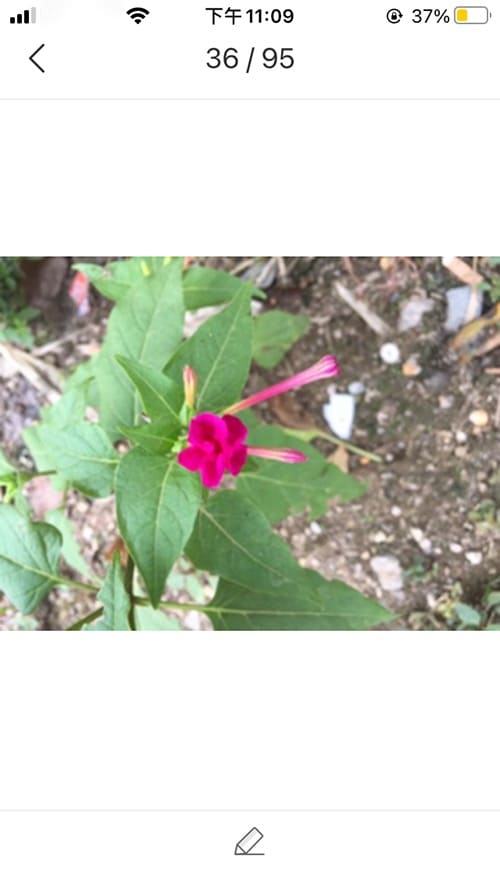
In the third step, select and press the image thumbnail to preview the image. In “Preview” mode, slide one finger left or right to switch images. Spread two fingers apart to enlarge the image, and move two fingers closer together to reduce the image.
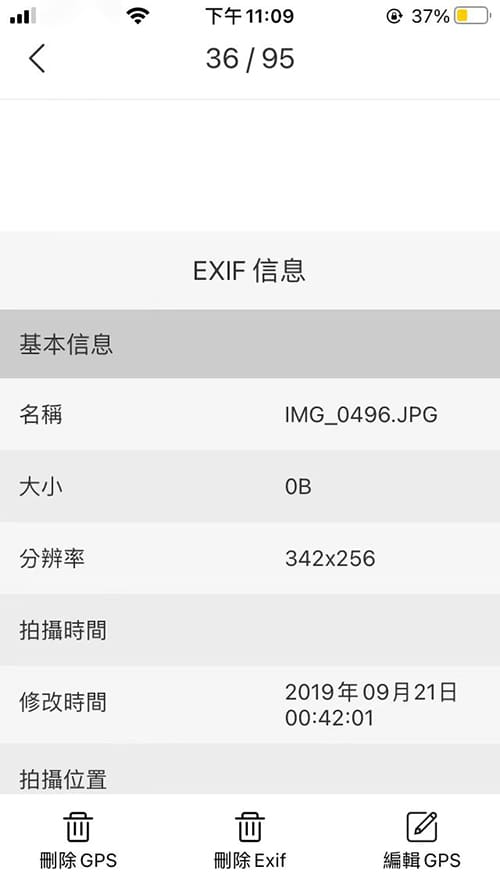
Step 4: In the “Preview” mode of the image, click the “Edit” icon at the bottom of the image to view the EXIF information of the image. The three functions of “Delete GPS”, “Delete Exif” and “Edit GPS” are displayed at the bottom.
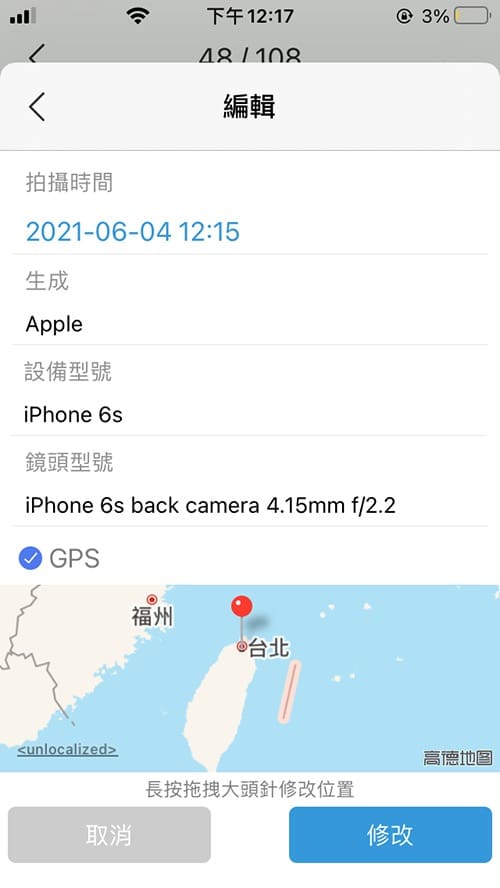
Step 5: Select “Edit GPS” to change the GPS information of the image. You can enter the image shooting time, device model, lens model and geographical location. Long press and drag the pin to modify the GPS information. After completing the changes, select “Modify” to save.
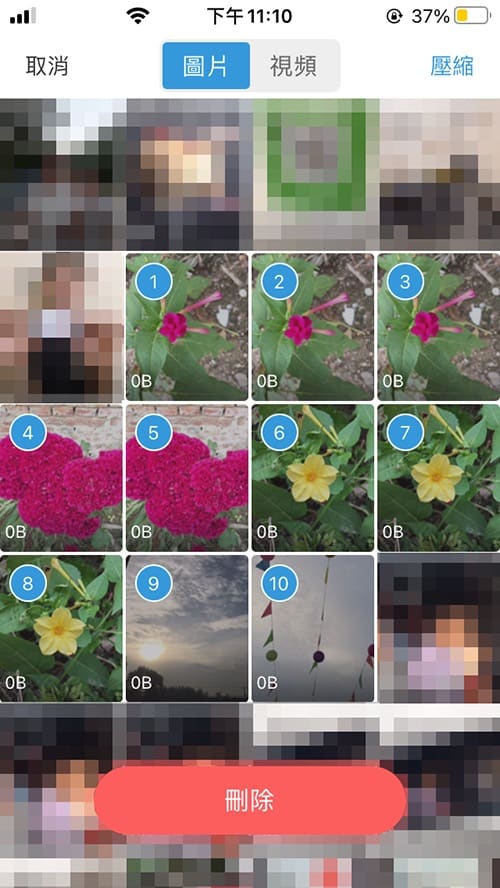
Step 6: After finishing editing the picture information, return to the application picture homepage and click the small circle in the upper left corner of the picture thumbnail to select the picture. If you want to select multiple pictures, you can use the same sliding multi-select gesture as in the “Album”. After selecting the pictures, click the “Compress” button in the upper right corner to complete the picture compression.
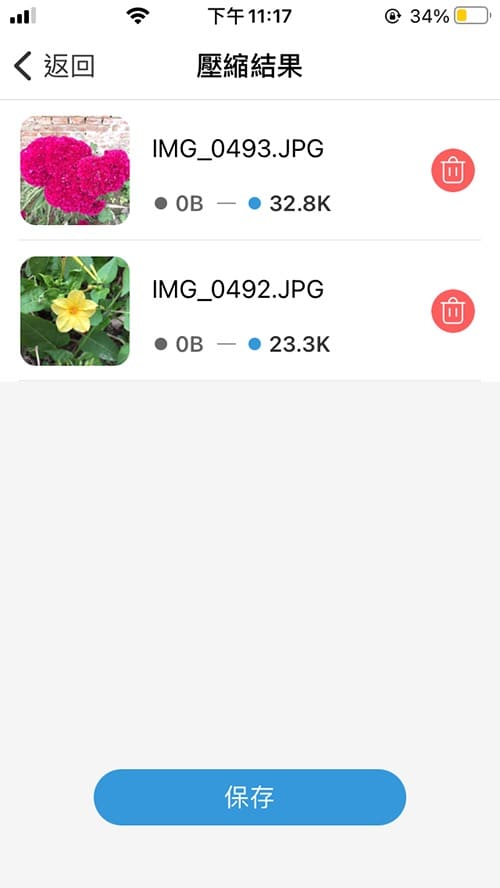
Step 7: After the image compression is completed, the compression result page will be automatically displayed. After confirmation, select the “Save” button at the bottom to save the image to the “Album”.
Video tutorial on reducing size
The first step is to switch to “Video” on the “Picture and Video Compression Master” application homepage. The video files in the “Album” will be displayed on the “Video” page.

In the second step, click on the video file thumbnail to preview the video. In preview mode, slide up or down with one finger to switch videos. Select the “Delete” button in the upper right corner to delete the video from the “Album”, and select the “Compress” button in the lower right corner to start compressing the video.
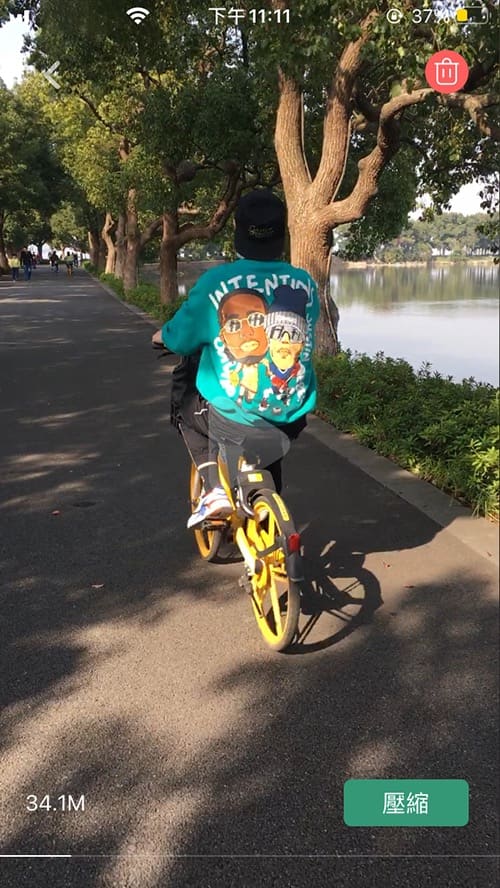
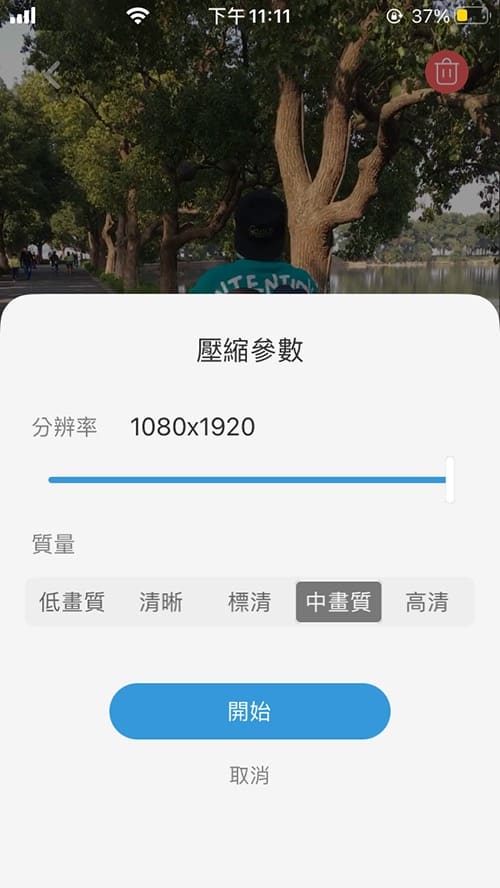
The third step is to set the compression parameters. You can drag the slider left and right to adjust the video resolution. You can also set the video compression quality (low quality, clear, standard definition, medium quality, high definition). After the settings are completed, click the “Start” button at the bottom to complete the compression.
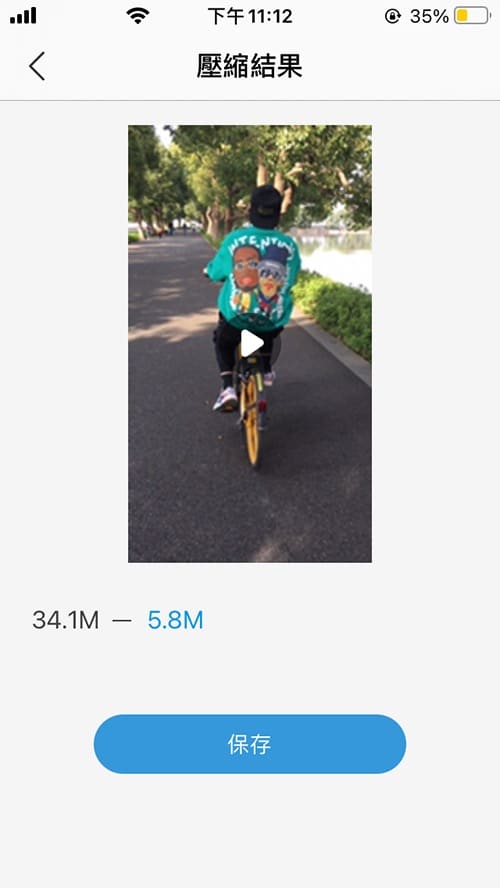
Step 4: After the video compression is completed, you can preview the compressed image quality. It will display the reduced size of the video. Test the video quality by selecting high quality. The compressed volume is reduced from 34.1MB to 5.8MB, and the compression ratio reaches 83%, but the image quality is somewhat damaged. Then click the “Save” button at the bottom to save the video to the album.
total Knot
“Picture and Video Compression Master” can effectively reduce the size of pictures and videos, helping to save money.iPhone、iPadstorage space. “Picture and Video Compressor” is not only a compression tool, it also supports album management,ExifInformation viewing and editing,Image batch compressionWait, what’s even better is that “Picture and Video Compression Master” can still work normally without an Internet connection, which is incomparable to online compression tools.
Source: KOCPC Chinese