


With this June Google Photos cancels unlimited capacityAs for the benefits of backup, many friends who love taking photos must be worried about how to back up their photos in the future. Although paying can be done once and for all, not everyone is willing. If you are getting an iPhone and don’t want to spend any money, in fact iCloud has a pretty good mechanism that can achieve nearly unlimited backup of iPhone photos. Let me tell you below.
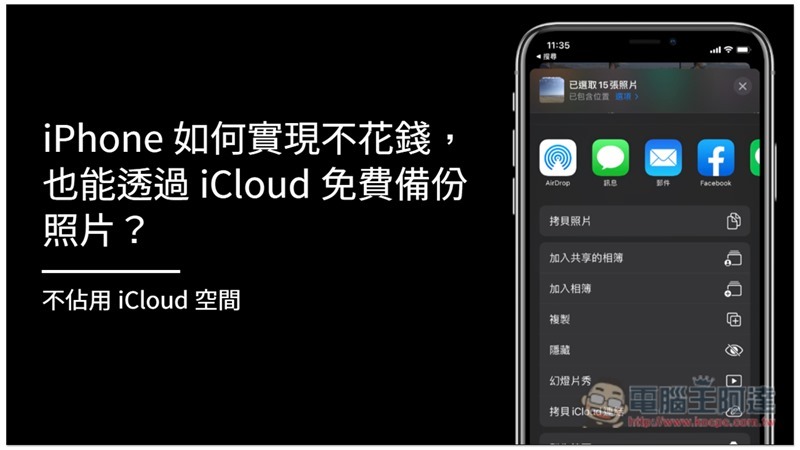
How to back up iPhone photos for free through iCloud without spending money
Although every Apple ID has free iCloud capacity, it is only a little 5GB, and the backup will be full without much content. Even people who rarely take photos will find it difficult to satisfy.
This time, the teaching method is still through iCloud backup, but it becomes a “shared album.” According to Apple’s instructions, iCloud shared albums will not be counted into the free 5GB, so you don’t need to worry about the capacity being full.
However, there are still some limitations to sharing photo albums. Here are two that you need to pay attention to:
- Each shared album can only store up to 5,000 photos and videos
- Each person can share (create) 200 shared albums
So in terms of backing up only photos, if you use them all, you can back up up to 1 million photos, which should be super enough for most users, so it can almost be said to be unlimited.
Steps to create an iCloud shared album
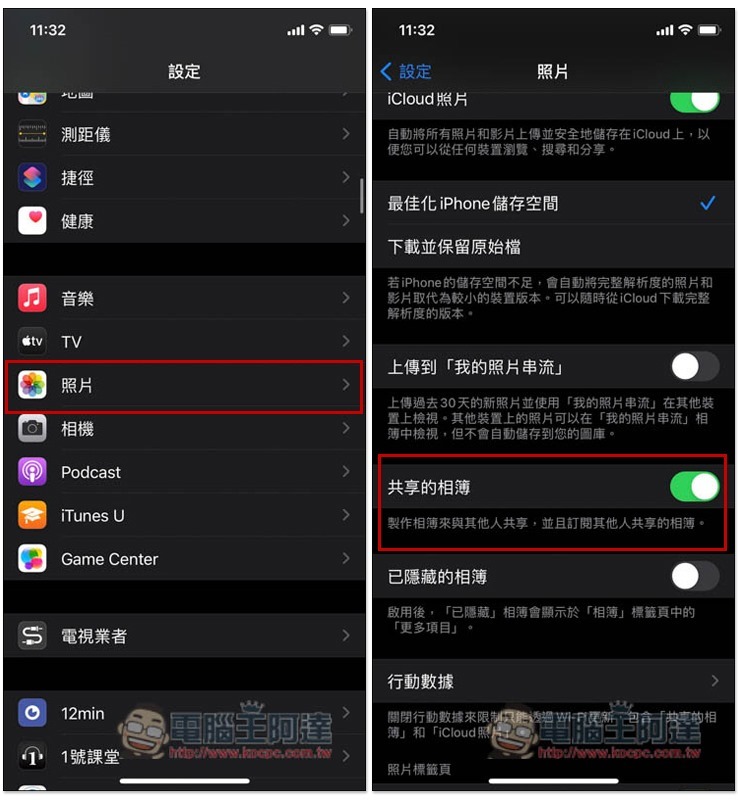
First, please open settings, enter photo options, and confirm whether “Shared Album” is turned on. As for the iCloud photos at the top, if you don’t want the photos to be automatically backed up to iCloud (which will occupy 5GB of free space), you can turn it off without opening it. This will not affect the iCloud shared album:
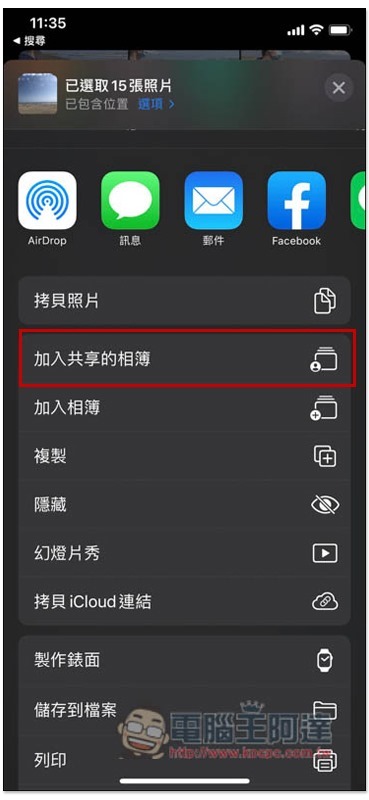
Then open the photos, select the photos you want to back up and add to the iCloud shared album, then click the share icon in the lower left corner, and you will see the “Add to Shared Album” function:
Click “Shared Albums” below:
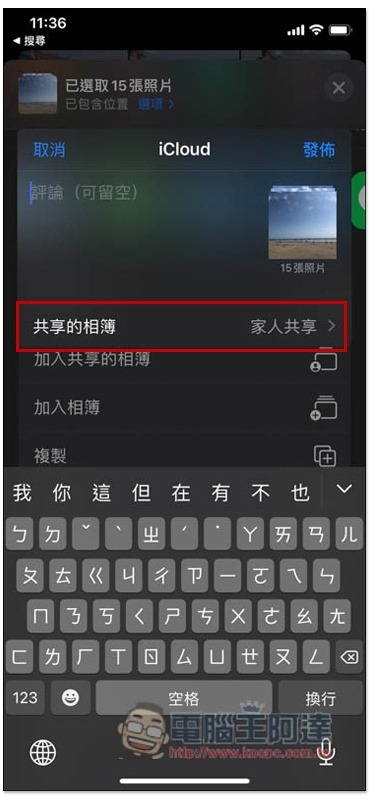
Select a new shared album:
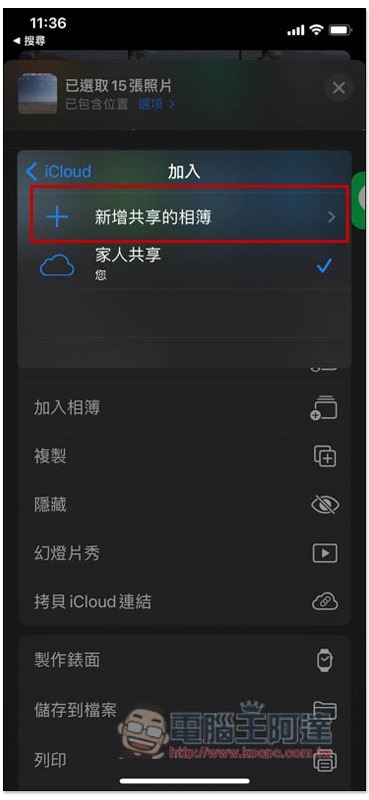
Set the name of this shared album, such as photos of where you went, photos with whom, etc.:
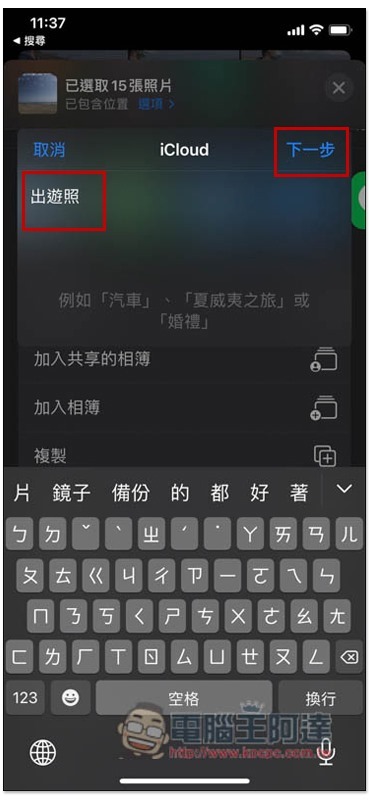
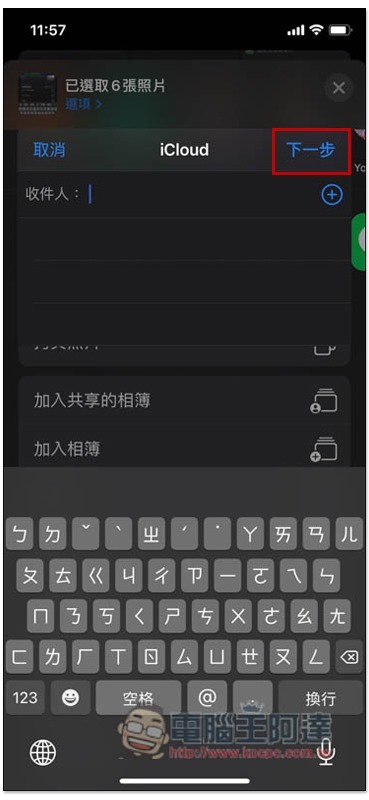
There is no need to fill in the recipient section, just press Next, but if you want to share it with other friends or family, you can add their Apple ID:
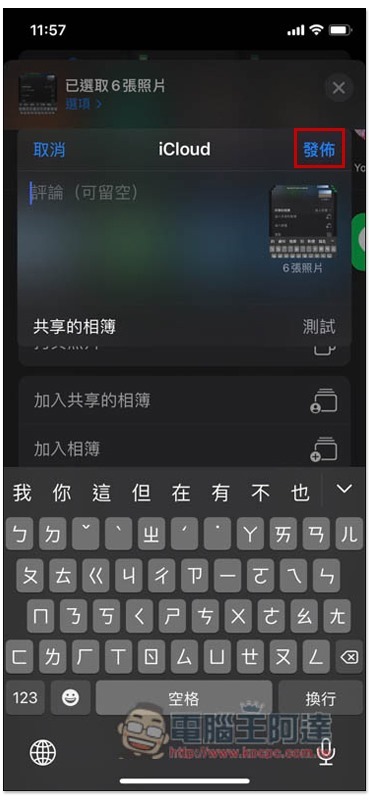
Finally press Publish and you are done:
Scroll down the album page, and in the shared album category, you will see all the shared albums you have created:
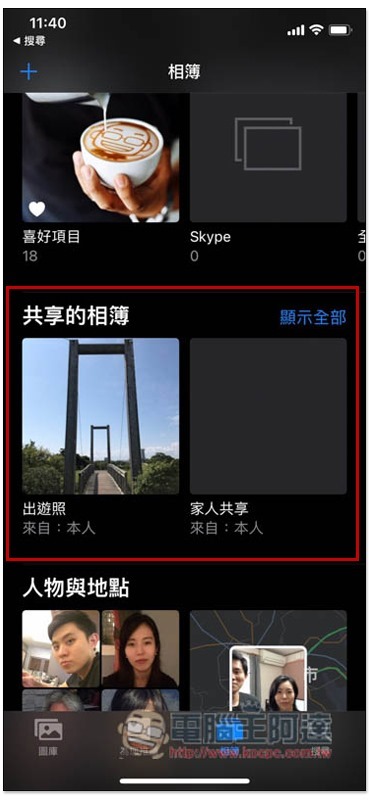
Photos added to shared albums will continue to be saved on your iPhone. If you don’t want to take up space, you need to delete them manually.
In addition, just like Google Photos’ free unlimited backup of photos, iCloud shared photo albums will also compress the image quality:
- The long side of the photo will be reduced to 2048 pixels
- Panorama width will become 5400 pixels
- Share GIFs under 100 MB
- Videos can be up to 15 minutes long and have a resolution of 720p
However, the format part supports more, the photos include:
- HEIF
- JPEG
- RAW*
- PNG
- GIF
- TIFF
Supported video formats are:
- HEVC
- MP4
- QuickTime
- H.264
- MPEG-4
For more detailed instructions on iCloud shared albums, you can refer to the two official pages below. You should have a clearer understanding:
- My Photo Streaming and Shared Albums restrictions
- How to share an album in Photos on iPhone, iPad, and Mac
Source: KOCPC Chinese