


Let me introduce you to the Dell OptiPlex 7090 Ultra unboxing. We have introduced many Dell before. There are a variety of different products, but the one I want to unbox today is really unprecedented. It can be said to be a super good partner for full-time operations, such as medical stations, hotel receptions, cashiers, etc. These all require the use of computers, but they are often inconvenient because the machines are too large, and the performance of computers like this is usually not very good. But if you want to make the operation smoother, then the hardware cannot be too bad, but computers with good hardware are often too large. When one thing is good and the other is not good, it often makes it difficult for operators to carry out routine operations smoothly. Therefore, Dell has targeted the needs of full-time operations. When small size, neat appearance, and performance must be taken into consideration, Dell OptiPlex 7090 Ultra can be said to be a great new choice.
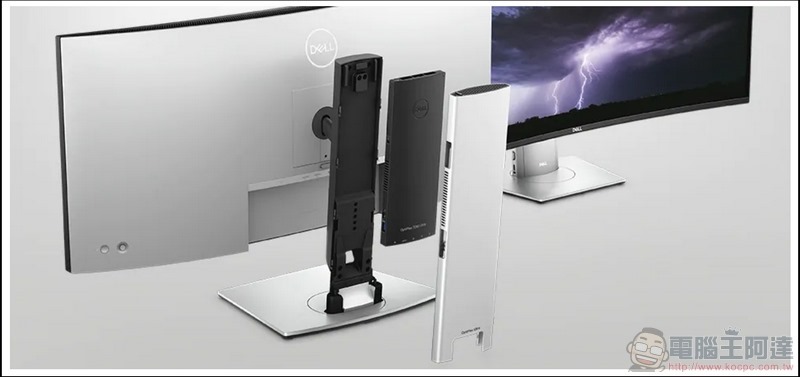
To put it simply, Dell OptiPlex 7090 Ultra is to modify the existing screen and modify the column into a module that can put OptiPlex 7090 Ultra inside, and also include the whole line planning, with the powerful performance of the 11th generation Intel® Core™ i7-1185G7 and the new Iris® Xe Whether you want to use the display chip as a high-performance computer or use it with multiple external monitors at the same time, there is no problem. Let us take a look at this new Dell OptiPlex 7090 Ultra.
Dell OptiPlex 7090 Ultra unboxing!! The magic weapon has evolved again and is a good partner for professional work
The unboxing this time is very different, because the screen is modified into a column that can be put into the Dell OptiPlex 7090 Ultra.
So let’s start with the modification part. First of all, this modification kit module has several options to choose from. You can choose and buy according to your own needs. Since it is a modification kit, you can decide the size of the screen by yourself. It can support up to 40-inch screens, which is very flexible.
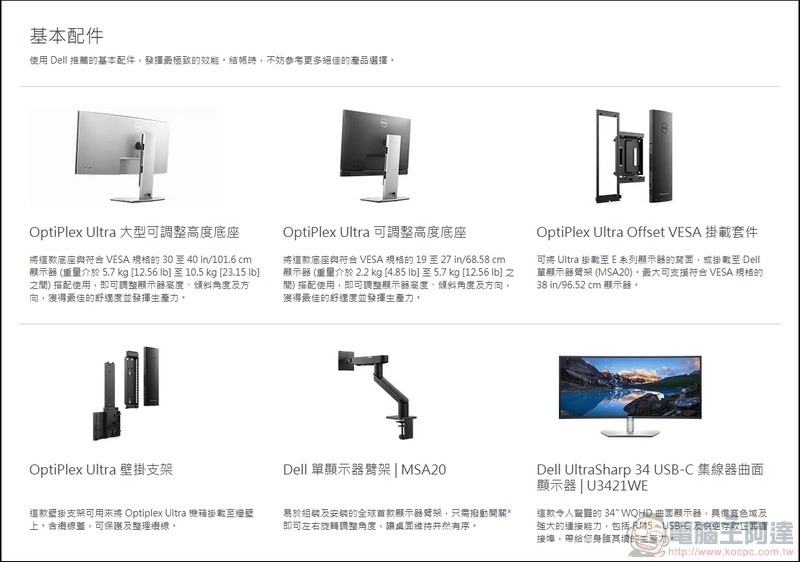
The screen we are going to modify today is a 24-inch screen, so the accompanying modification kit mainly includes a VESA mount adapter ring that needs to be matched on the screen side.
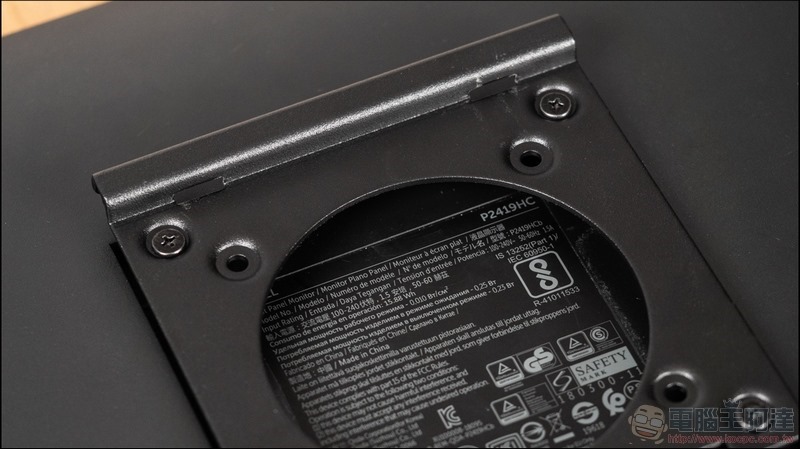
Then comes the bracket set of the kit. The first thing you see is the part connected to the screen.
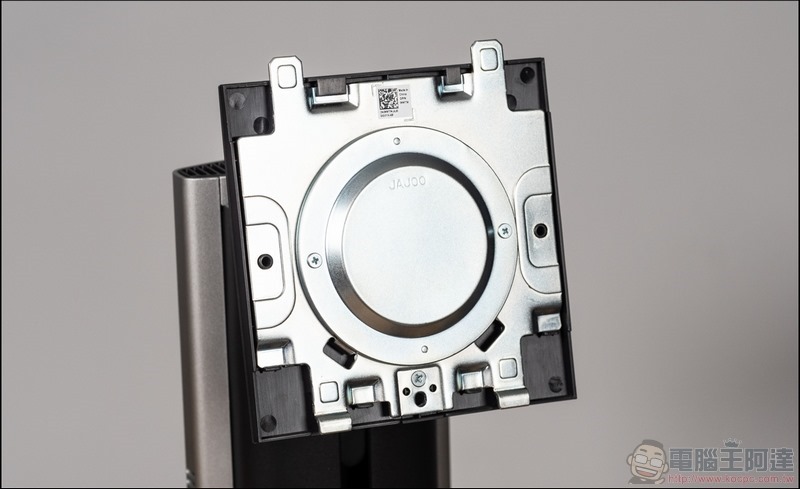
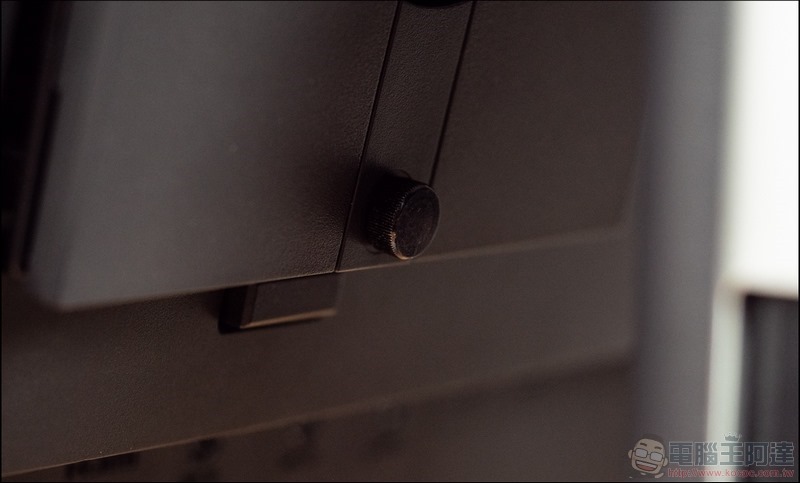
After hanging the screen, just lock the special screws with your hands to complete the fixation of the screen.
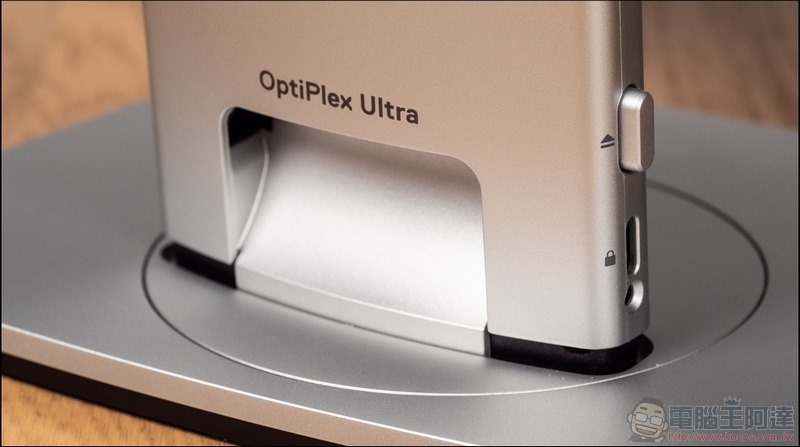
Then we saw the back of the bracket set. It is actually a detachable back cover. You can pull the back cover up by pressing and exiting.
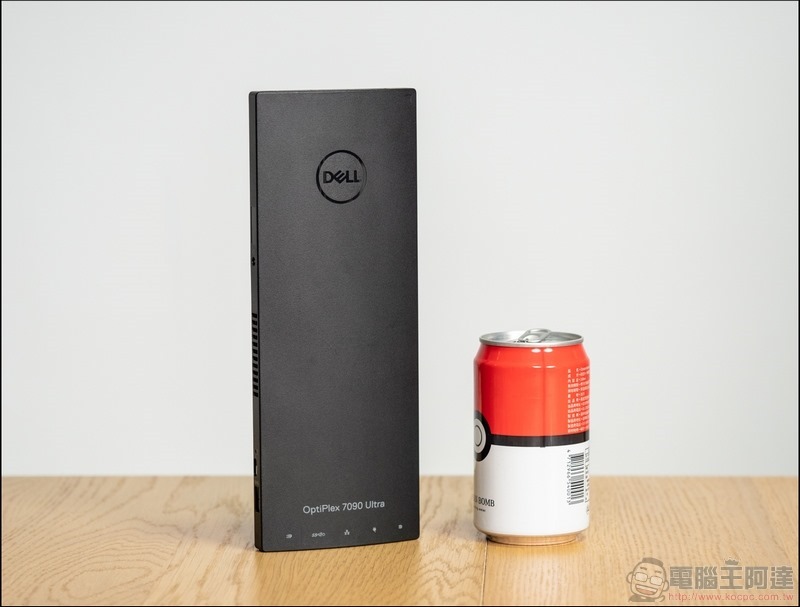
After taking it out, let’s welcome the Dell OptiPlex 7090 Ultra host! The width of the OptiPlex 7090 Ultra is only about 9.6 centimeters, the height is 25.6 centimeters, which is almost the height of two easy-open cans, and the thickness is only 1.9 centimeters. After all, it has to be placed inside the screen column, so the host should be so compact!
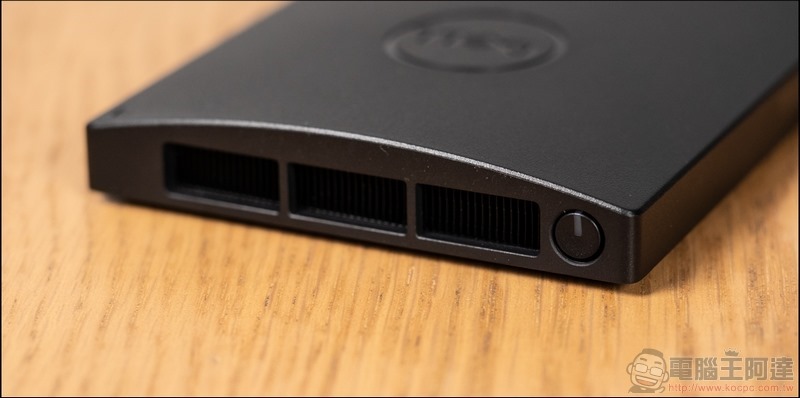
First we see the power button and heat dissipation block above the OptiPlex 7090 Ultra.
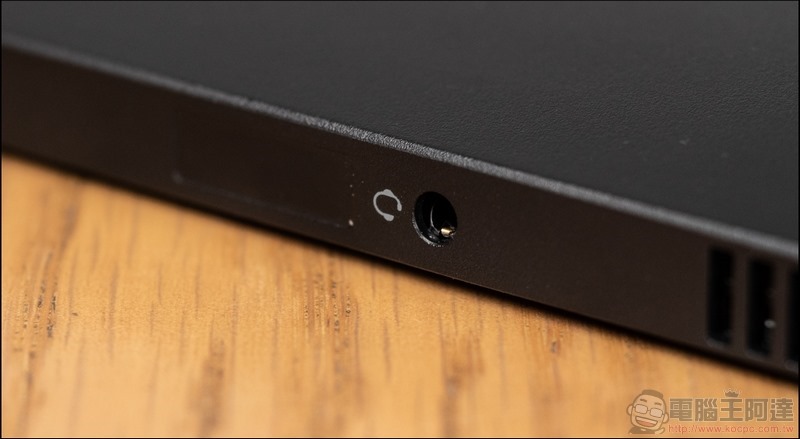
There is a composite headset hole on the upper left side of the OptiPlex 7090 Ultra.
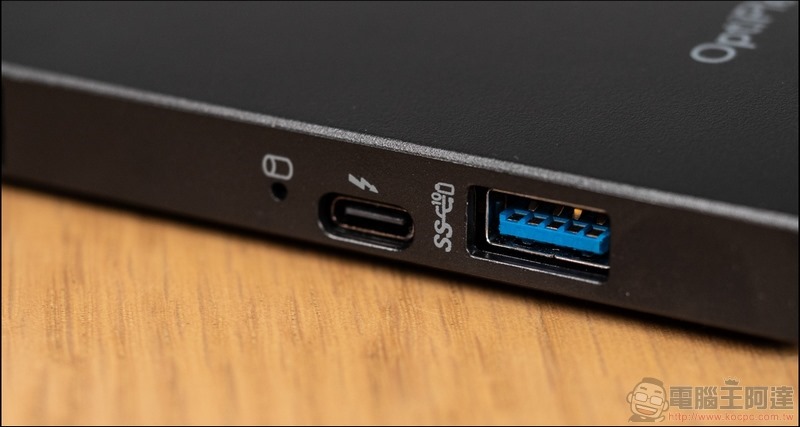
On the lower left side of the OptiPlex 7090 Ultra, there is a USB 4™ Type-C® (including DisplayPort Alt Mode/Thunderbolt™ 4.0) and a USB 3.2 Gen 2 Type-A.
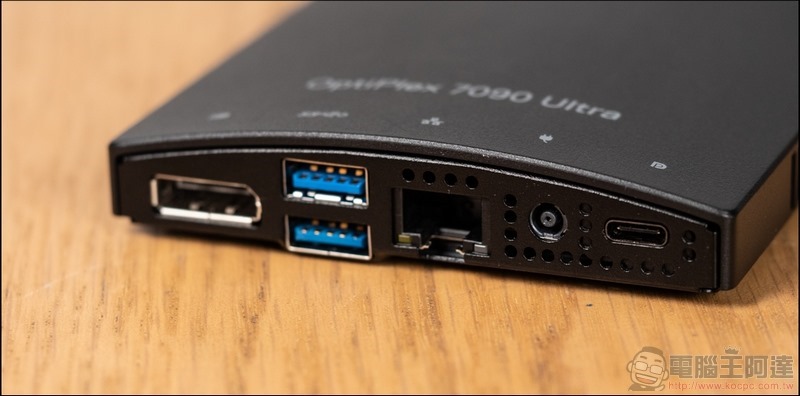
Below the OptiPlex 7090 Ultra is where the main I/O is located. From left to right: DisplayPort 1.4, two USB 3.2 Gen 2 Type-A, RJ-45 network jack, power jack and USB 3.2 Gen 2 Type-C, which can be said to be very complete.
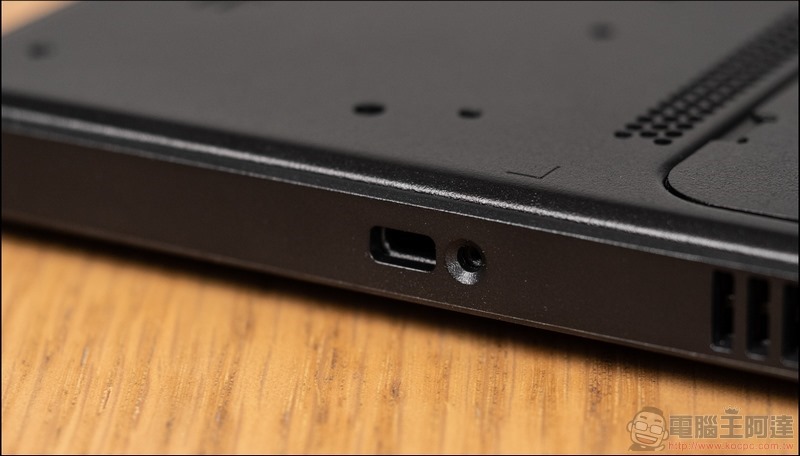
Finally, on the right side of OptiPlex 7090 Ultra, there are K anti-theft lock holes and anti-theft screw holes.
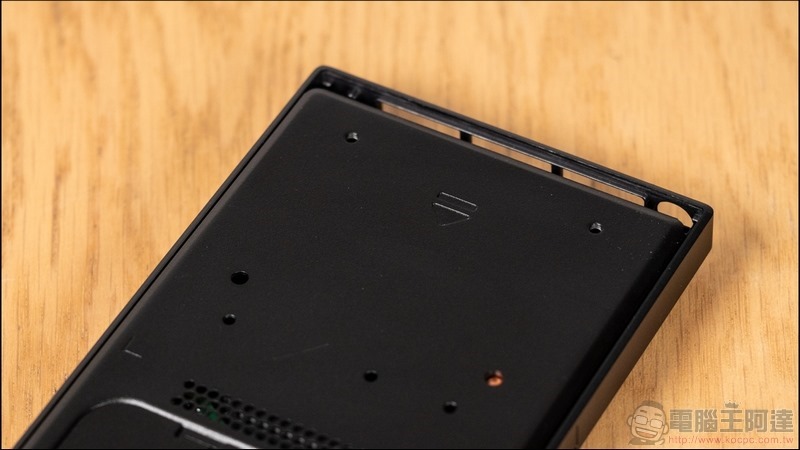
As long as all the anti-theft holes are cleared and gently pushed open, the OptiPlex 7090 Ultra can be disassembled.
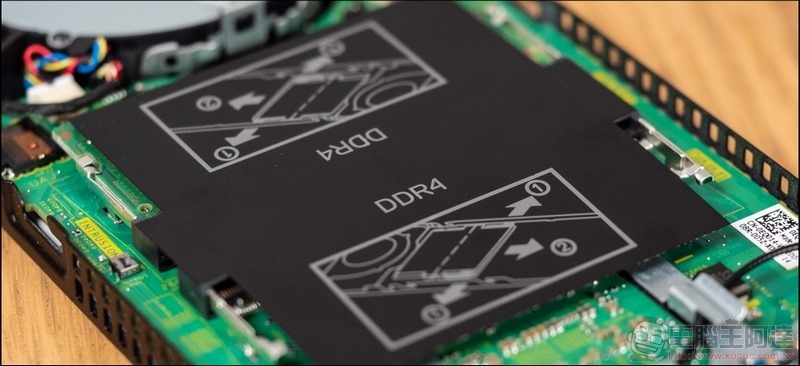
After opening the back cover, you can see the most conspicuous area is the memory area. Since the OptiPlex 7090 Ultra is designed and modified based on the motherboard of a laptop, the memory is the memory used in laptops and can be expanded up to 64GB.
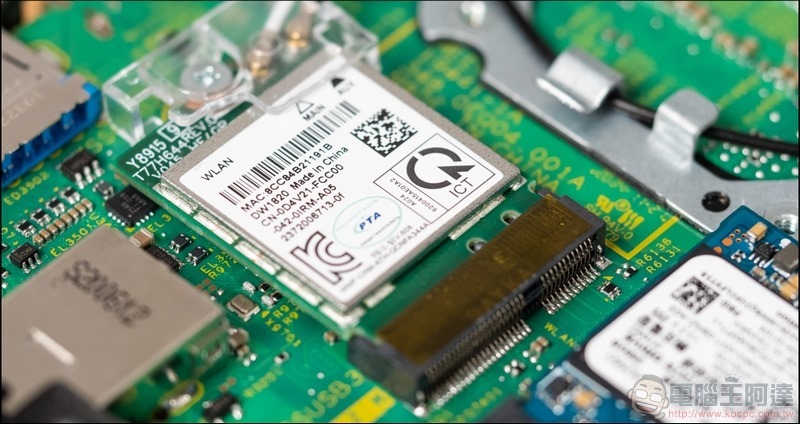
Next is the M.2 small card for the network.
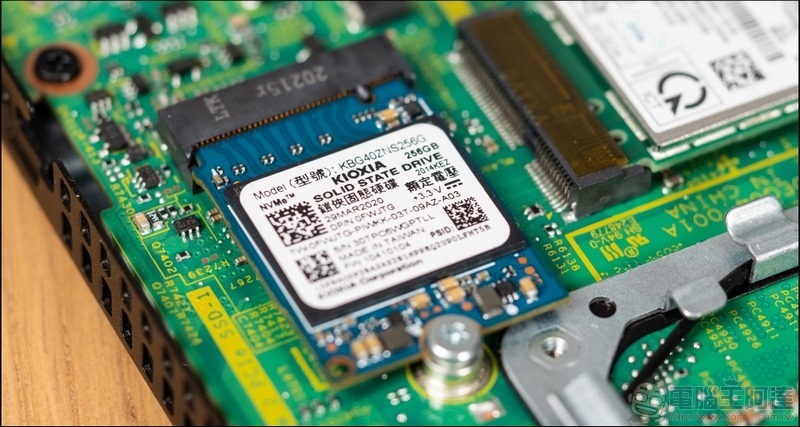
And the small card M.2 NVMe SSD used as a system disk can support SSDs up to 2TB.
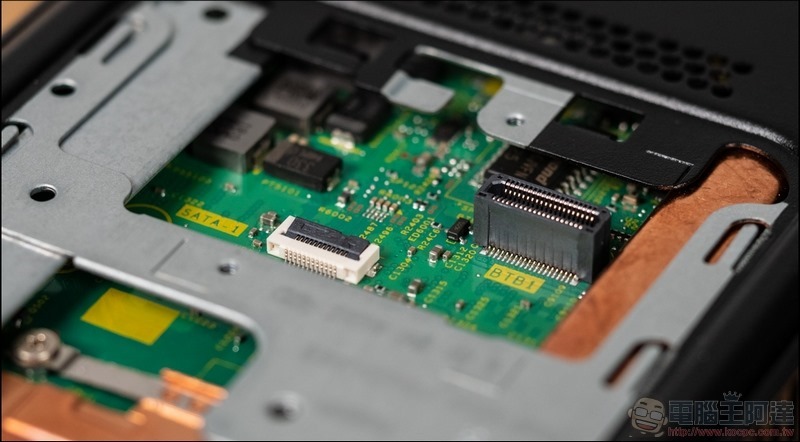
Then when we turn the OptiPlex 7090 Ultra over, we can see a piece of iron, which can be easily removed after loosening the screws. Below it is a single copper tube heat sink and a location that says SATA. This also means that another storage device can be installed through a SATA connection. However, because it is a special specification, this part may not be freely upgradeable.
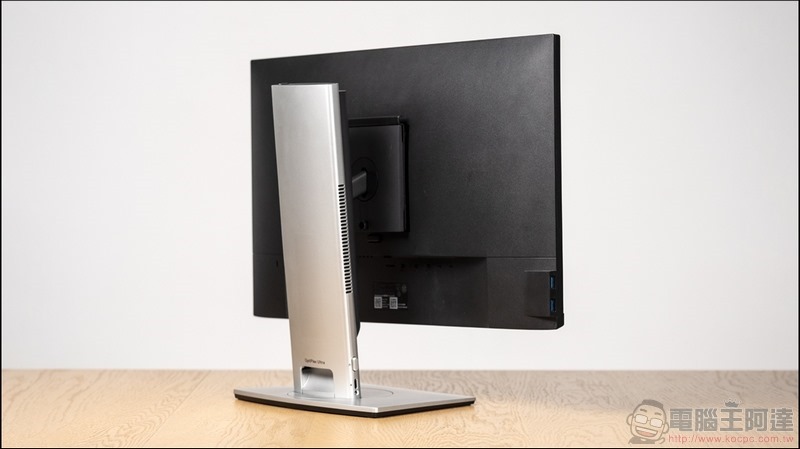
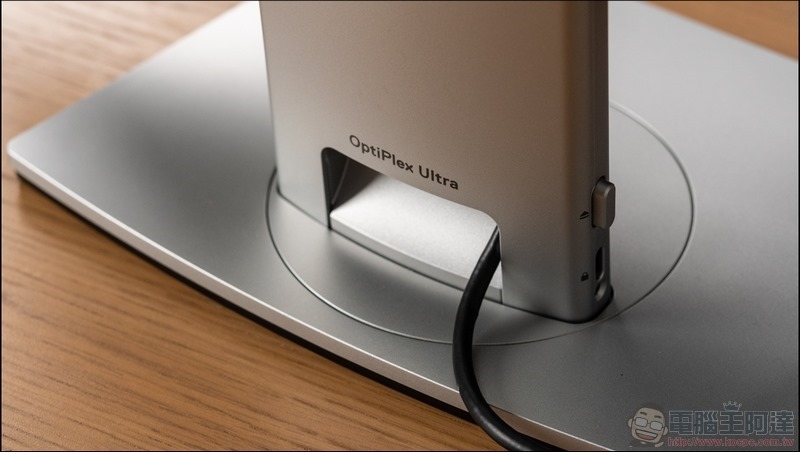
After looking at the body of the OptiPlex 7090 Ultra, let’s take a look at how to install the OptiPlex 7090 Ultra behind the screen. In fact, the appearance design of the OptiPlex 7090 Ultra is based on the matching kit style. We can see that the back cover behind the column can completely hide the OptiPlex 7090 Ultra inside.
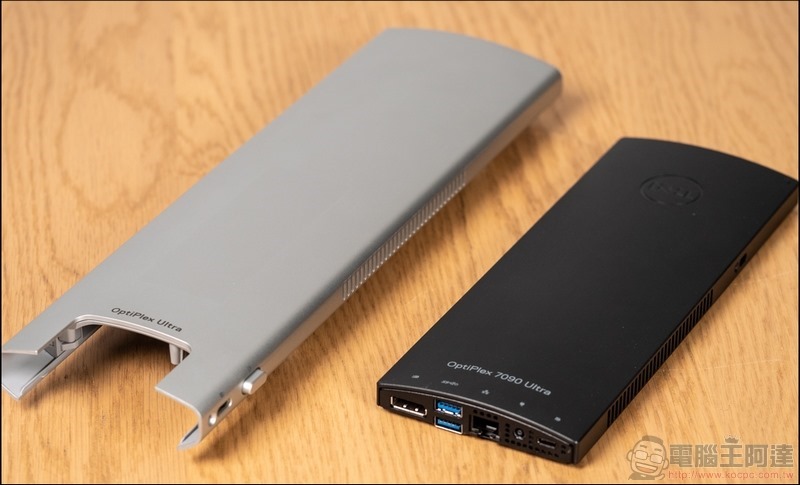
After putting it in, just cover the top quick-release plate to complete the assembly.
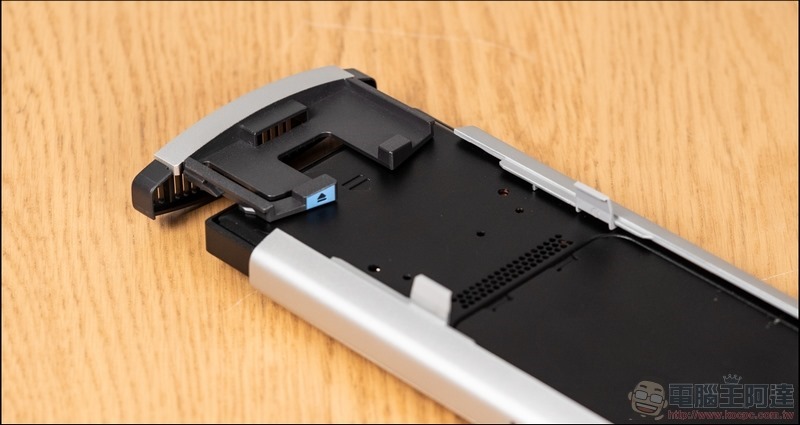
The upper part of the integrated body is the power button and heat dissipation area.
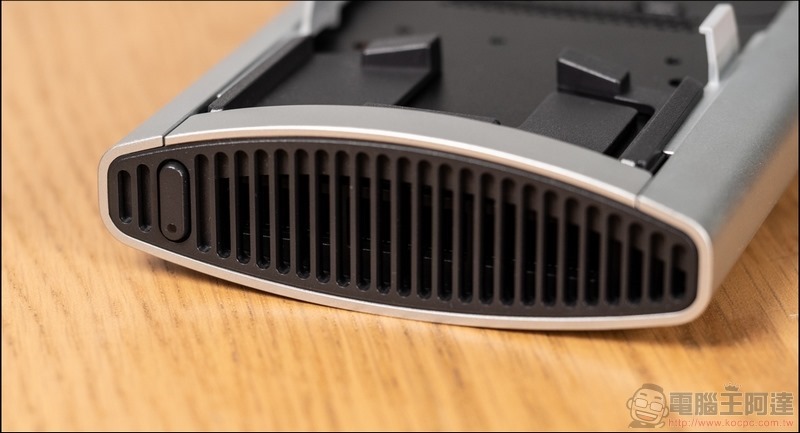
The side also has openings reserved for OptiPlex 7090 Ultra side I/O.
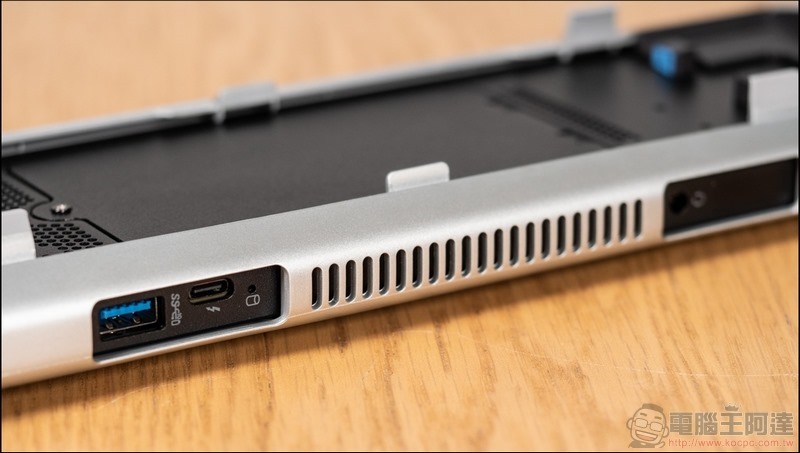
At the bottom, the latches required for the entire line are thoughtfully installed directly in the entire kit, so the OptiPlex 7090 Ultra can be installed beautifully without the need for additional tools.
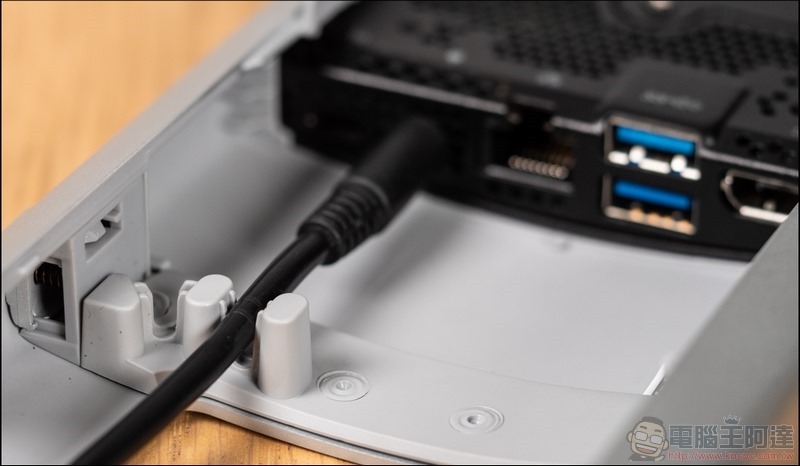
After everything is ready, the entire back cover can be fixed down on the bracket, and the installation of OptiPlex 7090 Ultra is completed.
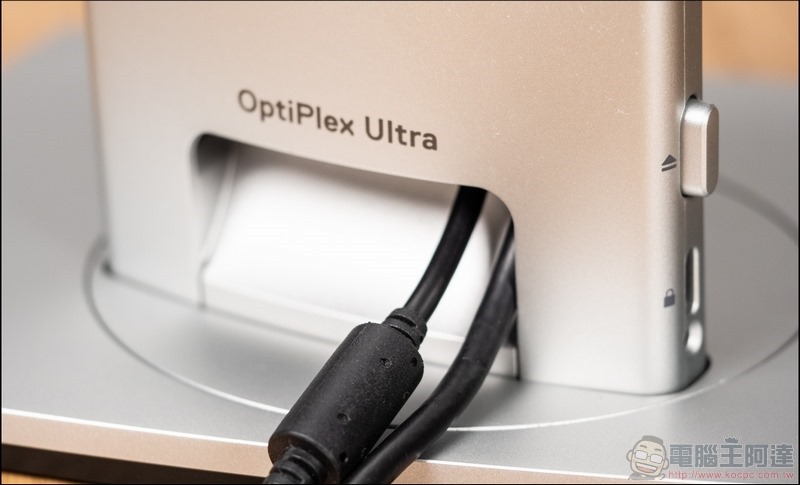
After completing the installation of OptiPlex 7090 Ultra, the last thing to see is the power supply, which uses a 90W transformer.
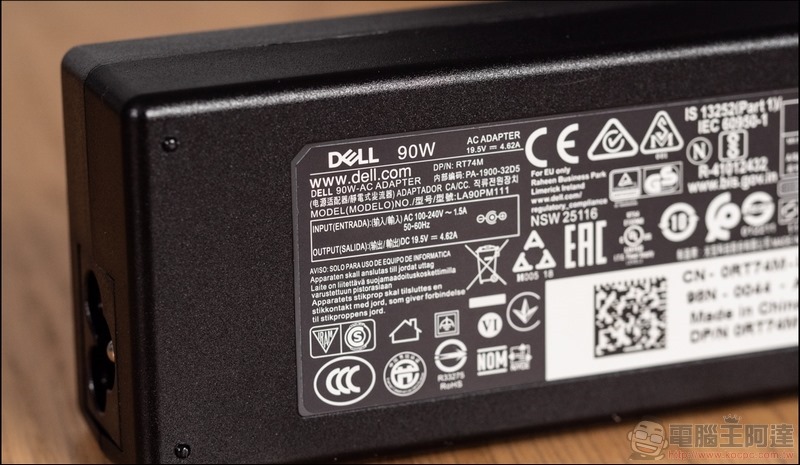
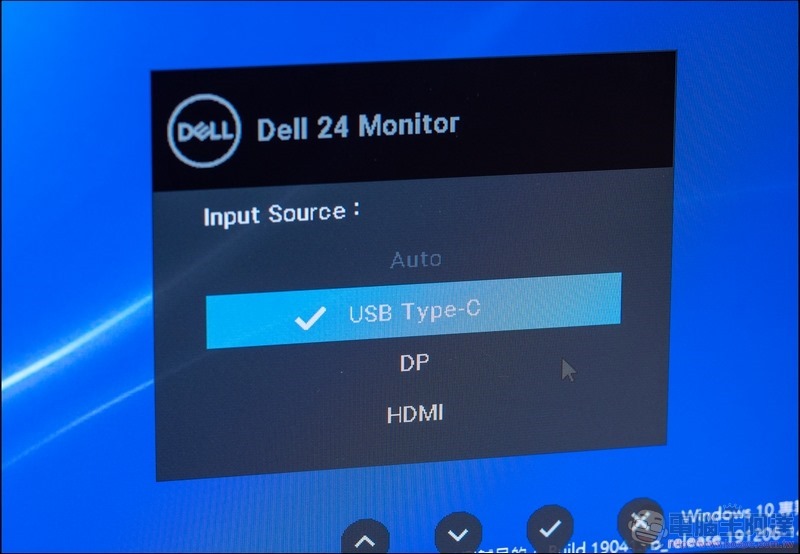
This kind of power wattage also means that it can be used through Type C external power supply. When used with Dell’s own screen for Type C image transmission, external power supply and image output can be achieved through only one Type C, making it more convenient to use.
Dell OptiPlex 7090 Ultra Performance Test
Next, let’s take a look at the actual performance test. The operating system used is Windows 10 Professional.
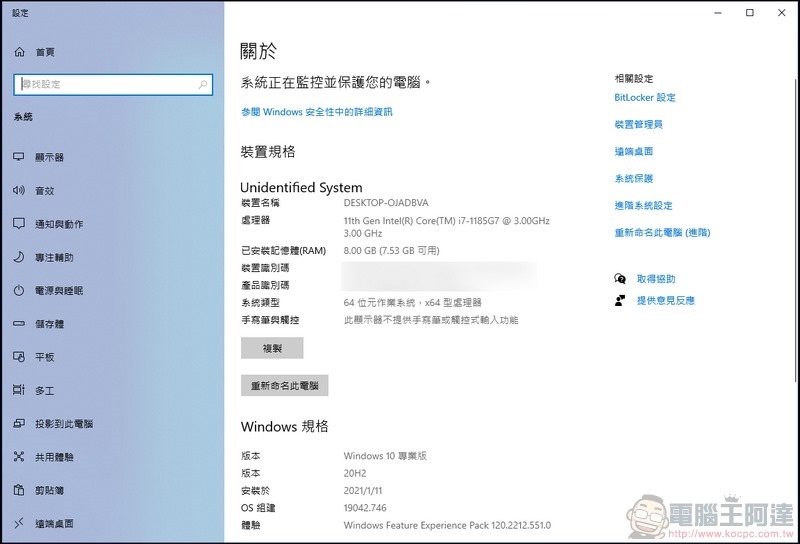
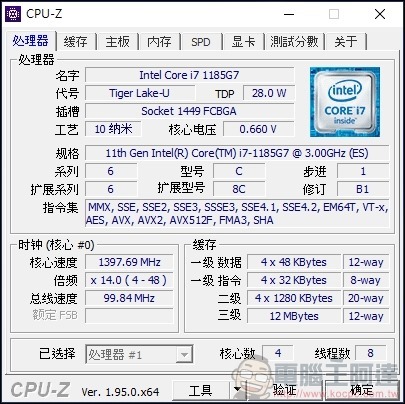
This test machine is equipped with Intel® Core™ i7-1185G7 processor.
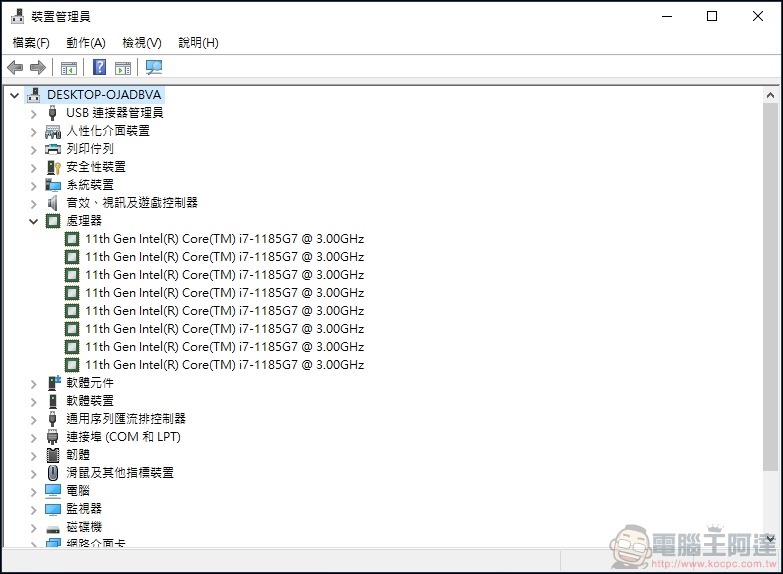
Through the device manager, you can clearly see the configuration of the Intel® Core™ i7-1185G7 4C/8T.
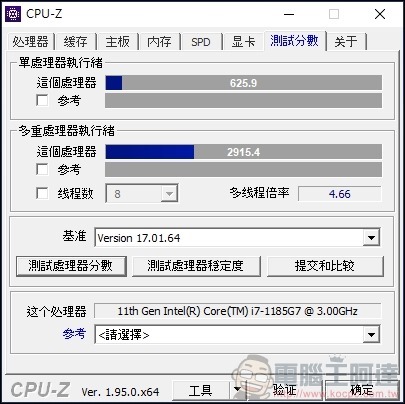
First, CPU-Z was used for the core performance test. The single-core score was 625.9, while the all-core score reached 2915.4.
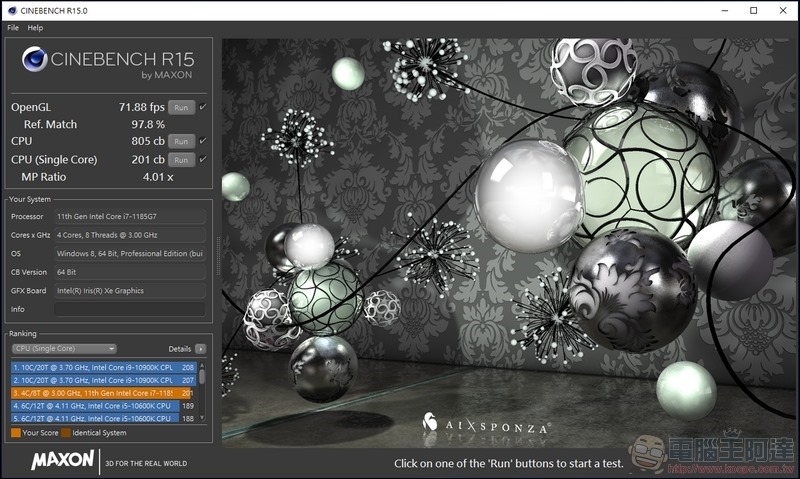
Then the same CPU test was conducted through CineBench R15. The Intel® Core™ i7-1185G7’s CPU single-core score was 201 cb, while the full-core performance was 805 cb.
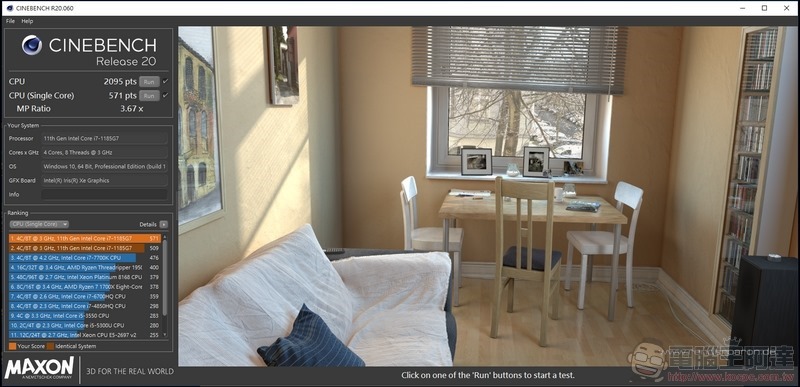
For multi-core processing, we also conducted CPU testing through CineBench R20. The Intel® Core™ i7-1185G7’s CPU single-core score was 571 cb, while the full-core performance was 2095 cb.
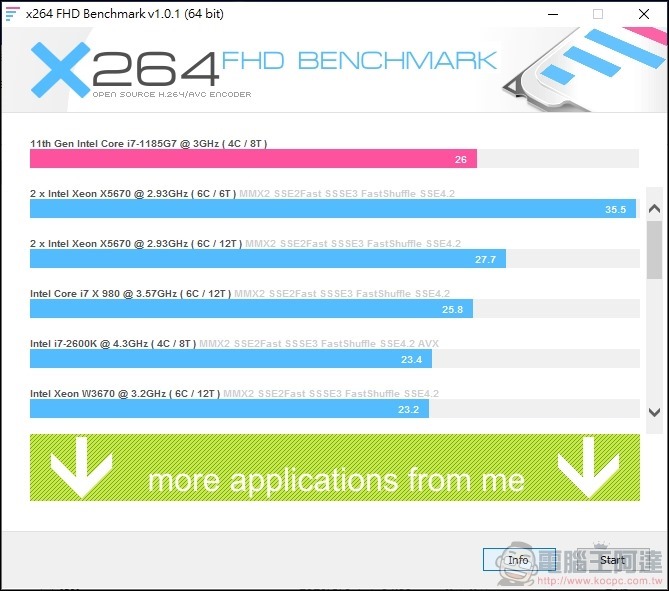
Then through the x264 FHD BENCHMARK conversion test, the performance of Intel® Core™ i7-1185G7 was 26 fps.
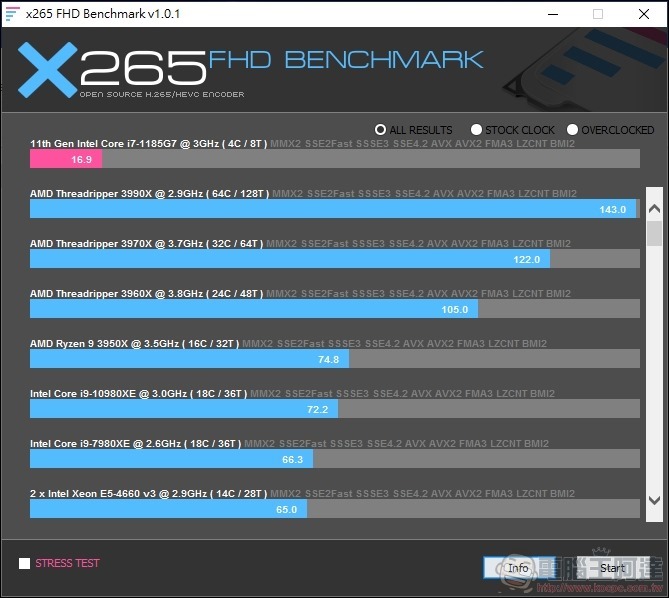
Then through the x265 FHD BENCHMARK conversion test, the performance of Intel® Core™ i7-1185G7 was 16.9 fps.
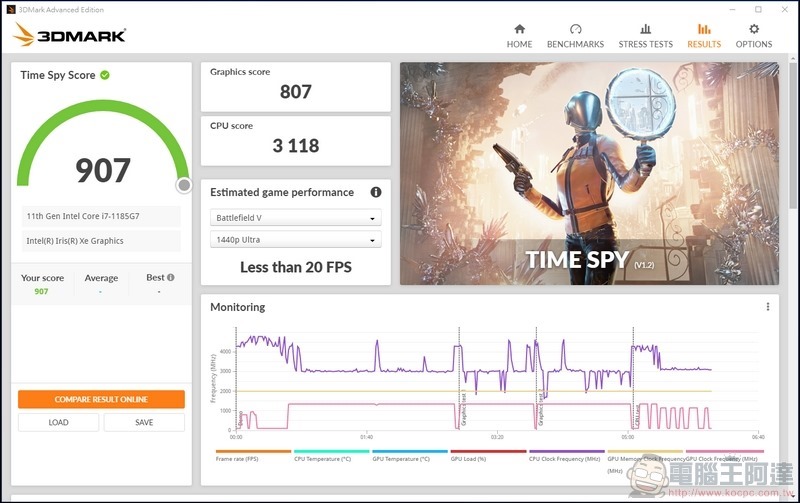
In the testing part of the display chip Intel® Iris® The first is the Time Spy test using DirectX 12 as the core architecture, with a score of 907.
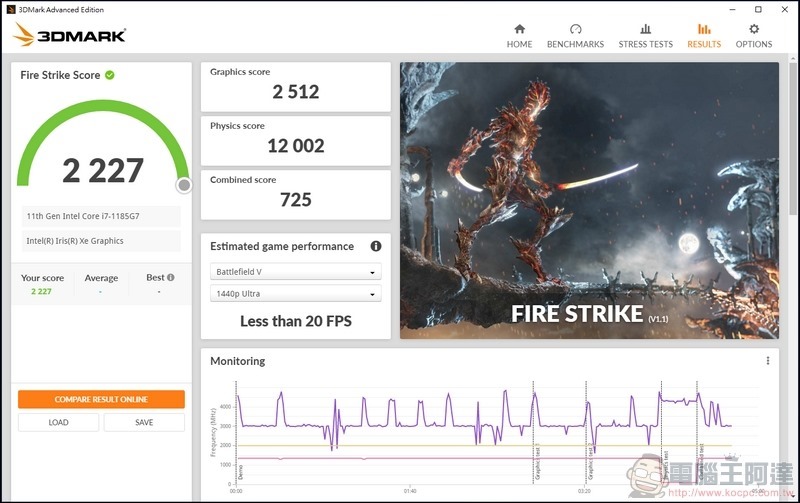
For most games, the OptiPlex 7090 Ultra scored 2227 in the Fire Strike test using DirectX 11 as the core architecture.
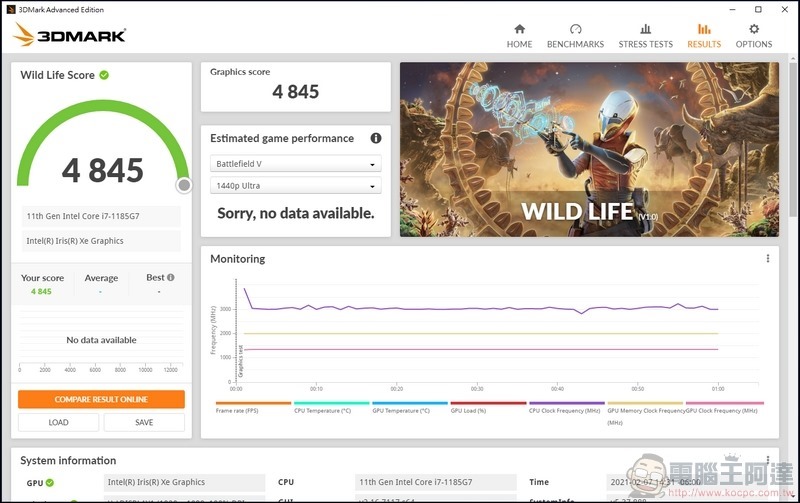
Next is the Wild Life test for general-purpose devices, where the OptiPlex 7090 Ultra scored 4845.
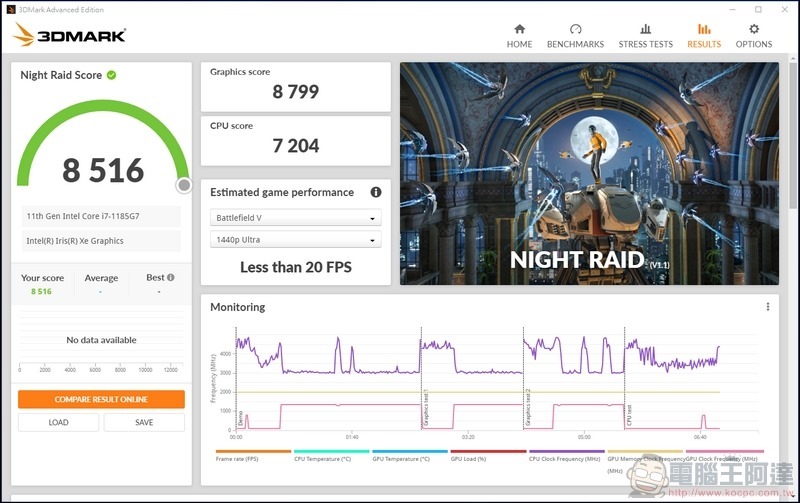
Then there is the Night Raid test using Direct X 12, and the OptiPlex 7090 Ultra scored 8516.
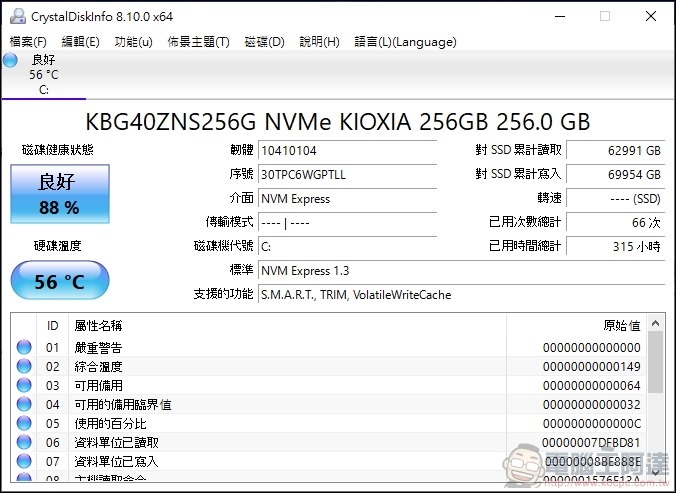
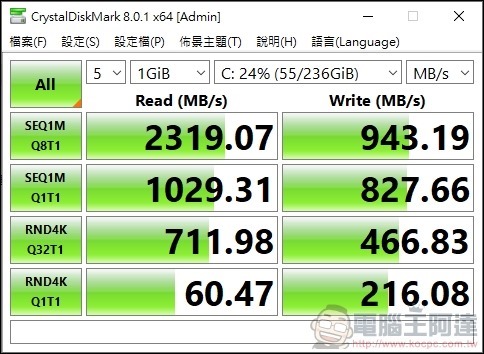
In the storage part, first check the hard drive information through CrystalDiskInfo. You can see that the OptiPlex 7090 Ultra is equipped with KIOXIA’s 256GB NVMe SSD.
Then it was tested through CrystalDiskMark, and its read and write speeds were 2319.07 MB/s and 943.19 MB/s.
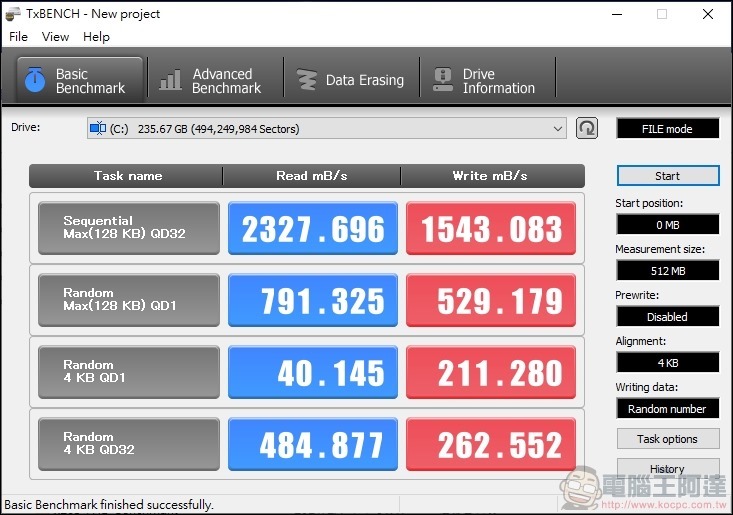
Then use TxBENCH to perform the same read and write test. The highest read and write speeds are 2327.7MB/s and 1543.1 MB/s, which also performs well.
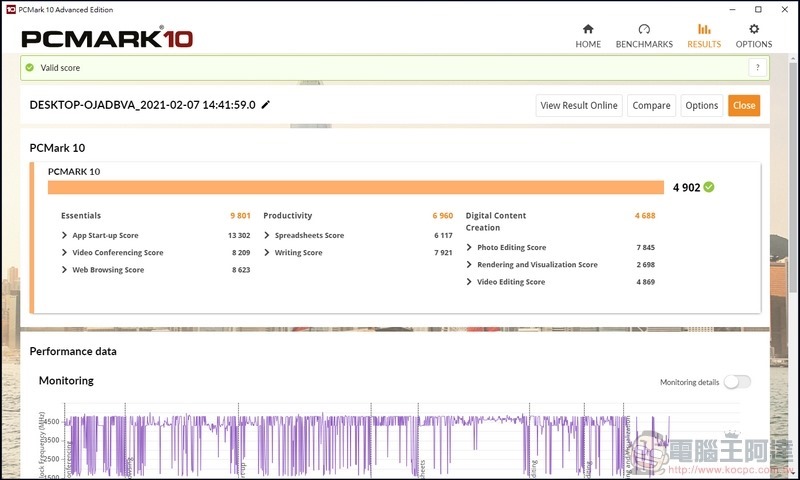
The entire machine was tested using PCMark 10. In the benchmark test for office PCs, the OptiPlex 7090 Ultra scored 4902.
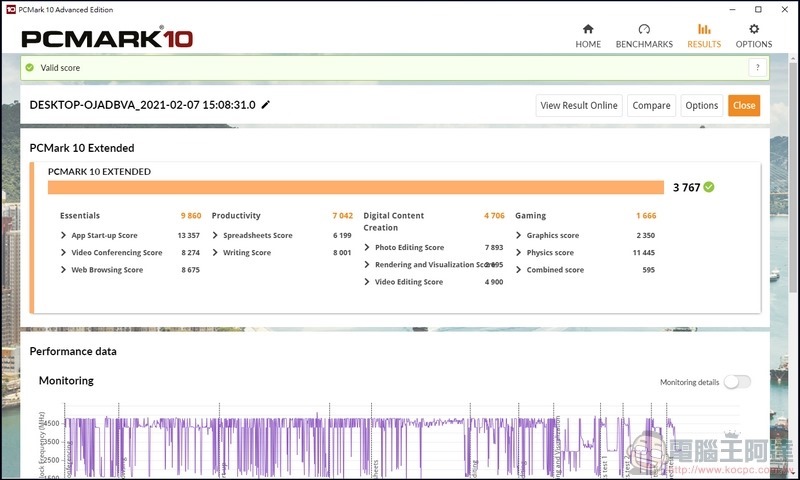
In the complete office PC benchmark PCMark 10 Express, the OptiPlex 7090 Ultra scored 3767.
Dell OptiPlex 7090 Ultra Software Introduction
In terms of software, Dell, as one of the leading computer brands, of course has a lot of exclusive software. In the OptiPlex 7090 Ultra, the first is SupportAssist for computer self-monitoring. We can optimize the computer through SupportAssist.
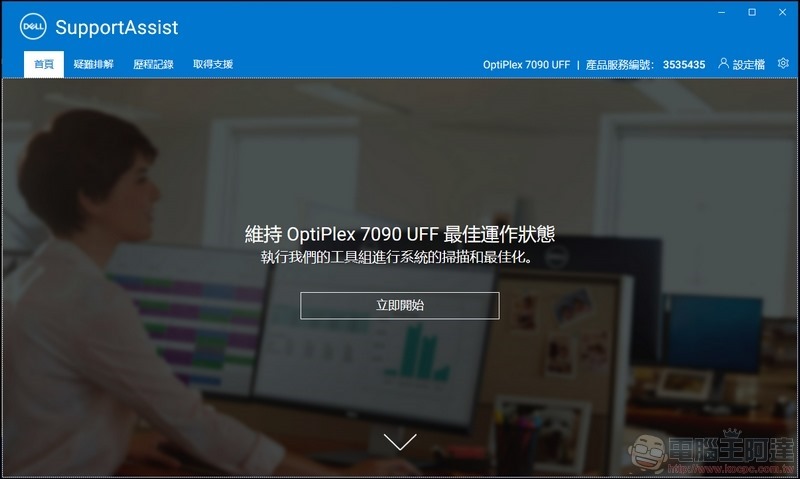
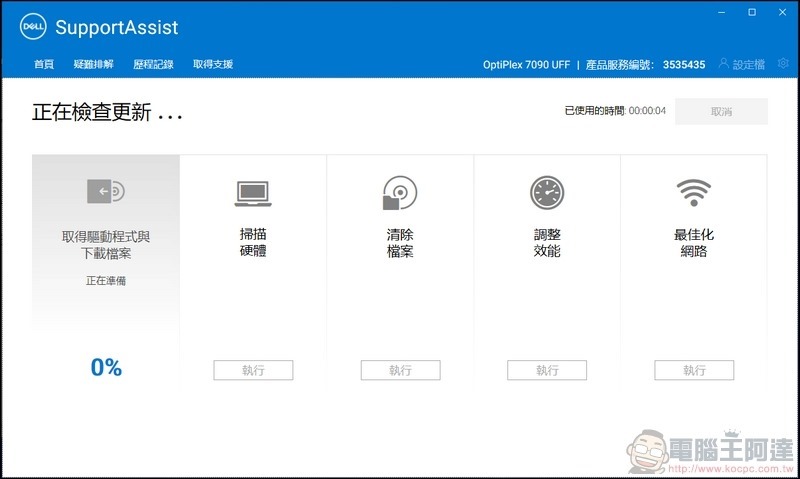
After pressing start, it will start to automatically check and adjust various functions, which is very convenient.
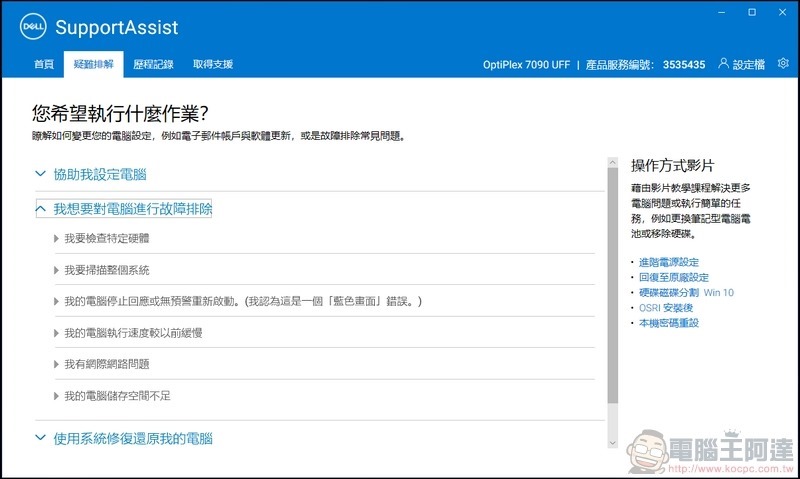
If you have any problems with your computer, you can find the solutions you need in troubleshooting.
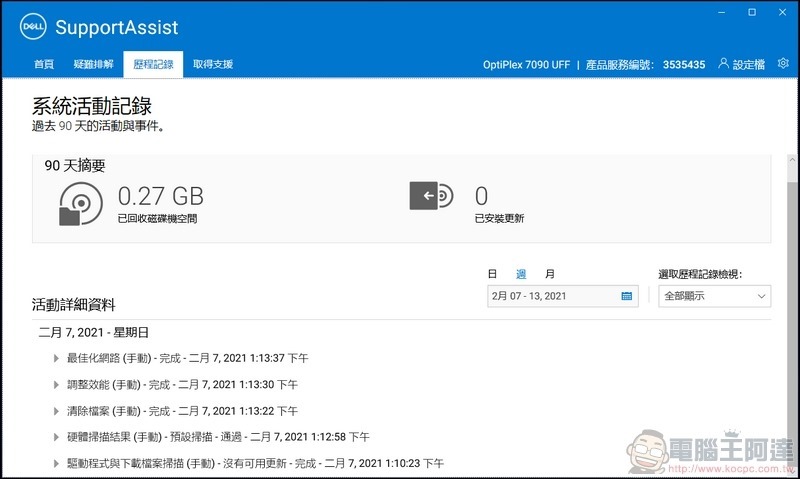
Detailed activity data of the computer can also be viewed through the history record to quickly identify computer problems.
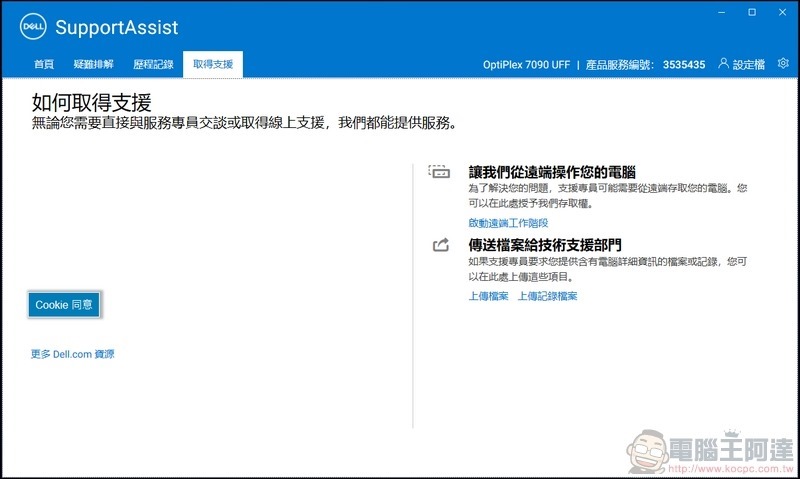
If you really can’t solve the computer problem, don’t worry. By getting support, you can contact the technical department online, and you can even operate remotely to help customers solve the problem.
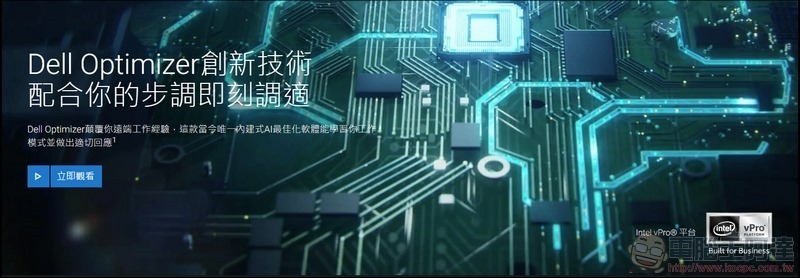
Then there is the Dell Optimizer, an AI optimization software that can directly learn your working patterns through AI and automatically adjust computer performance for different tasks.
However, since Dell Optimizer is mainly for mobile devices, the parts that can be used for OptiPlex 7090 Ultra are mainly for software optimization and sound effect enhancement.
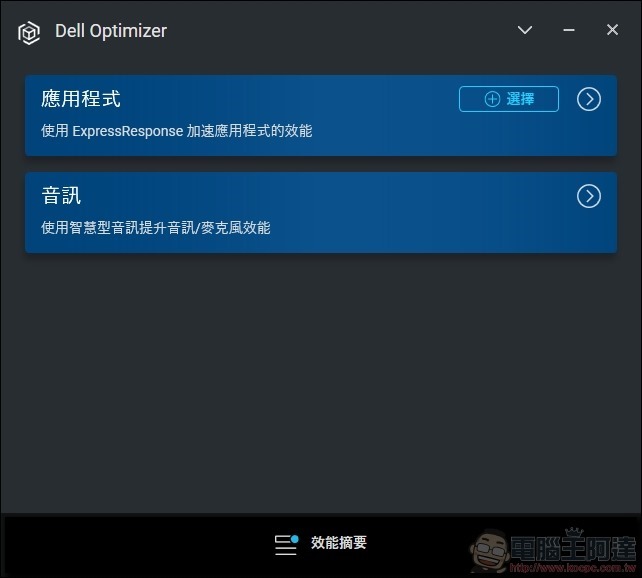
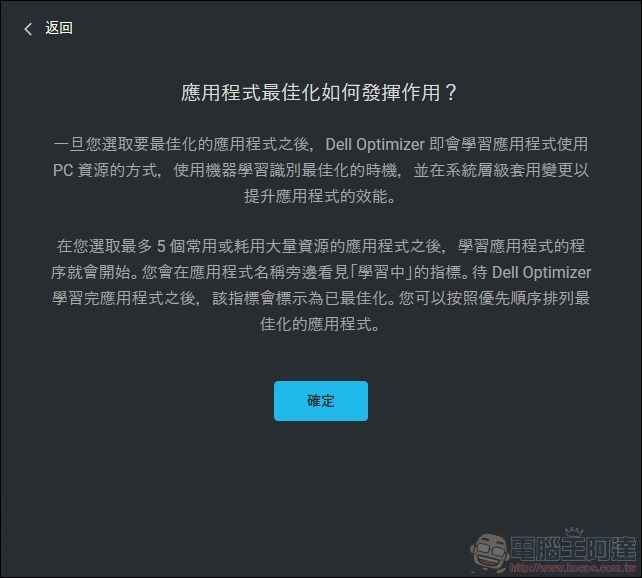
In the software optimization section, you can select the most commonly used software for automatic learning, and automatically adjust the computer’s performance according to your different usage conditions.
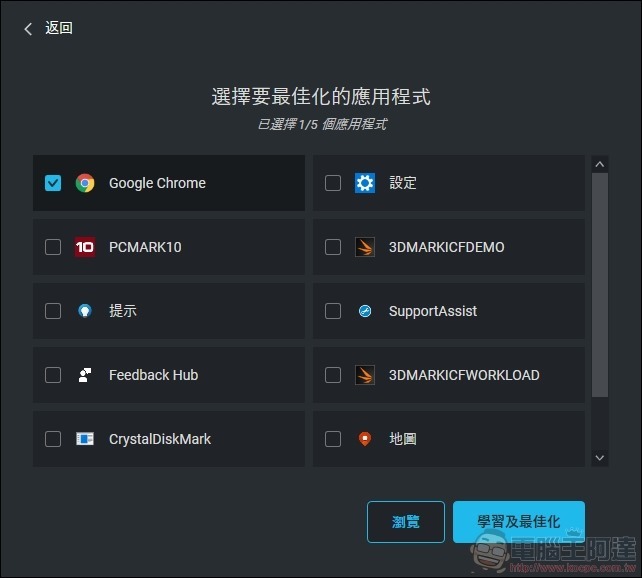
Moreover, you can select up to 5 commonly used software, and after optimization, you can automatically adjust the computer’s performance in the order you arranged it, which is very convenient.
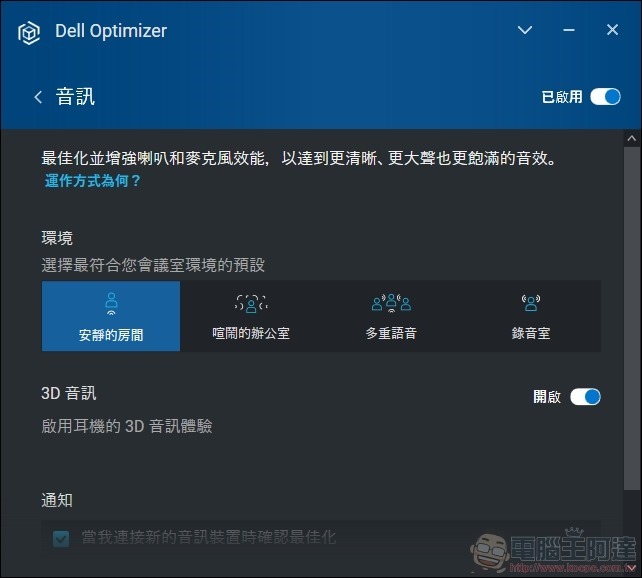
As for the audio enhancement part, AI can automatically filter external noise, stabilize the volume, etc. according to your preset environmental conditions, so that conference calls can proceed more smoothly.
Learn more about Dell OptiPlex Ultra console invisibility
Summarize
Although there are no products similar to the OptiPlex Ultra series on the market, there is really no product that can be deployed as flexibly as OptiPlex Ultra. OptiPlex 7090 Ultra is the highest-end product in the finished product line. It has shown an ultra-high level of performance in terms of space, appearance, and performance. Without affecting the movement of the screen, the stand can be directly modified into a new high-end computer, and equipped with exclusive kits for various screen needs. It is almost impossible to hide a high-performance computer host inside the stand. It saves space and is more beautiful in appearance, especially in wiring, with Type C’s external power supply and image transmission can be directly connected to the OptiPlex 7090 Ultra and the screen through a line, which can be said to be very convenient.
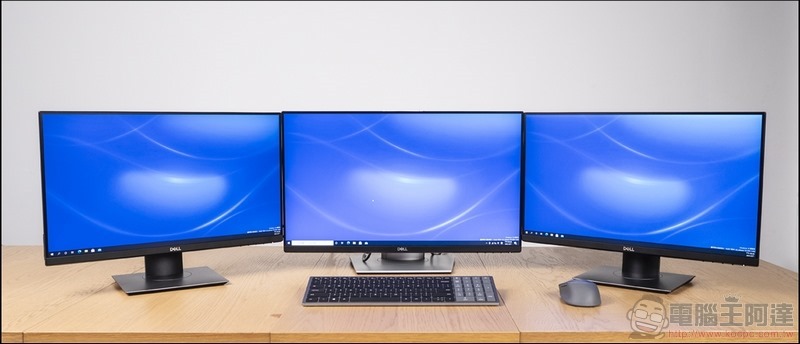
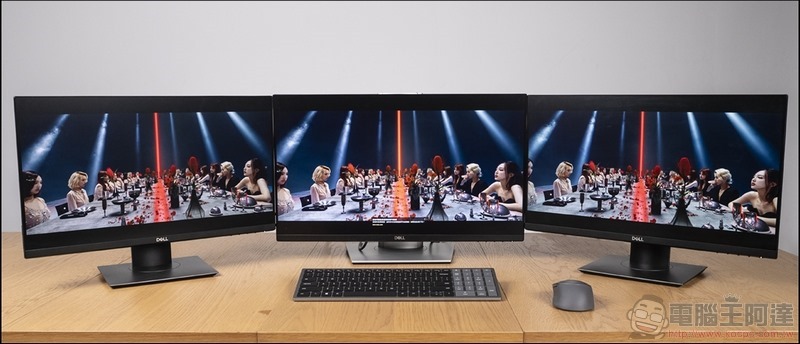
Of course, just one screen cannot satisfy more configurations. Therefore, the OptiPlex 7090 Ultra is equipped with the more powerful 11th generation Intel® Core™ i7-1185G7 and the new Iris® Extended display of the port, just like the editor added two more screens this time. Through the extensibility of the Display port, three screens can be used at the same time, which can be used more flexibly in an office environment. Therefore, whether it is for office, education, medical, service industry, etc., the Dell OptiPlex 7090 Ultra can be perfectly integrated into it. It is highly recommended to everyone.
Learn more about Dell OptiPlex Ultra console invisibility:
Source: KOCPC Chinese