


A few days ago, we reported that Google was about to launch a new “Group Pagination” feature in the Chrome browser, allowing each tab to be classified according to personally set tags. For users who are often used to opening multiple web page tabs at the same time, users can better distinguish web page tabs for different usage needs when using the browser, and no longer confuse work and entertainment tabs. Although this feature has not yet been officially launched, today I will teach you how to try out this new feature in advance if you want to experience it in advance!

Early trial tutorial for Chrome browser’s “Group Pagination” function
Although the latest “Group Pagination” function of the Chrome browser has not yet been officially released, if you also want to classify and manage the browser’s tabs in groups (labeled with names and colors), then you may wish to refer to this tutorial to try out this feature first!
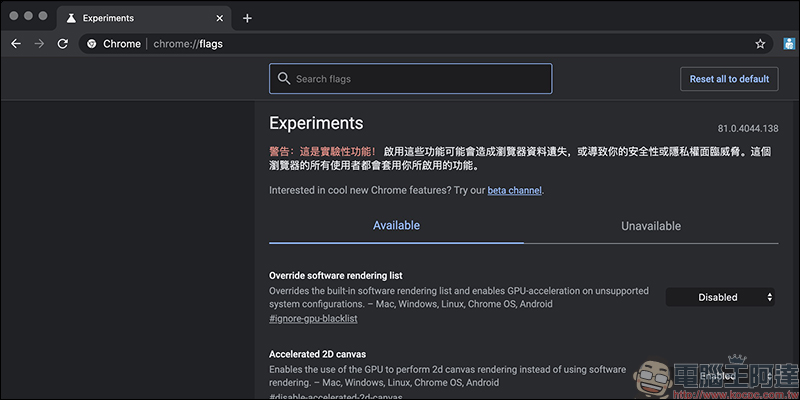
First, of course, open the Chrome browser! Then inEnter “chrome://flags” in the address barAnd send it to enter the experimental function page:

After entering the experimental function page, find the search bar above:
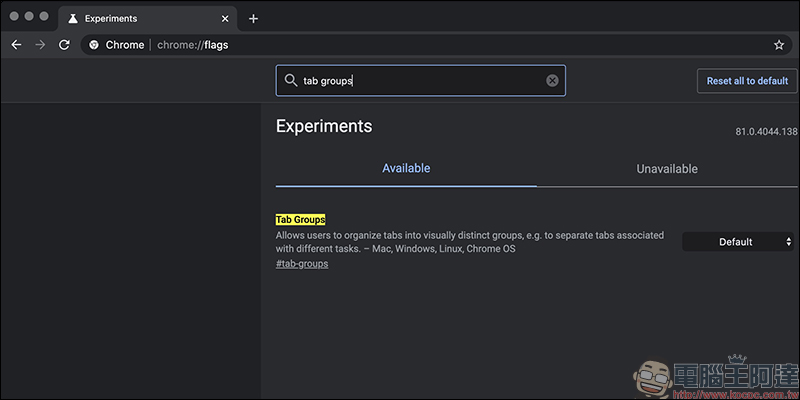
Enter “Tab groups”, you will see a “Tab Groups” below.
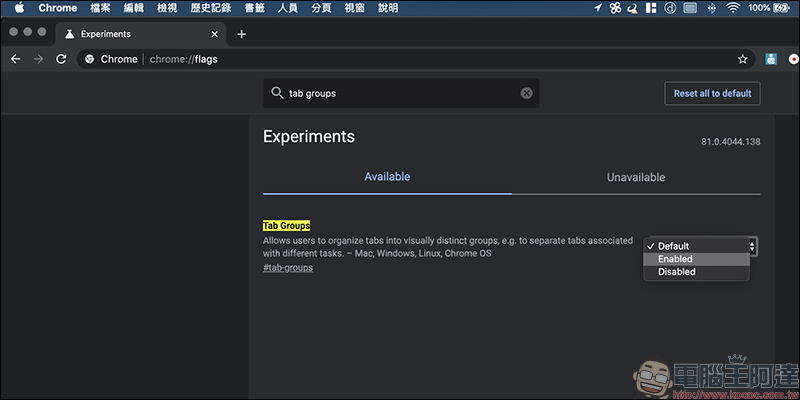
This function will be in Default state by default. Click to expand the menu and select “Enabled”. Then the group paging function will be turned on! However, if you want to start using the “Group Pagination” feature, you must first close and then reopen the Chrome browser to enable it normally.
In addition, pay special attention to the Beta version, which is still in the experimental stage and may be somewhat unstable in use. For readers who want a more stable version, it is recommended to wait until the official version is released before using it!
How to use “Group Pagination”?
When using the group paging function, just right-click on the web page paging and select “Add to new group”:

At this time, there will be an additional label on the left side of the tab, and the user can enter text to name the group. In addition, you can also set different colors for different group paginations to facilitate distinction:

After opening the first group, there are many ways to join the group in other tabs. One of them is to right-click on the tab that is not part of the group and then select “Add to existing group”. In addition, you can also directly drag the tabs that are not added to the group to the left and close to the group, and the tabs can also be automatically added to the group.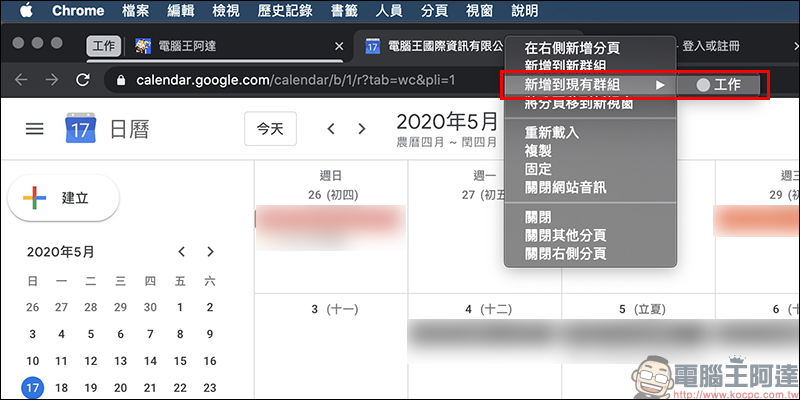
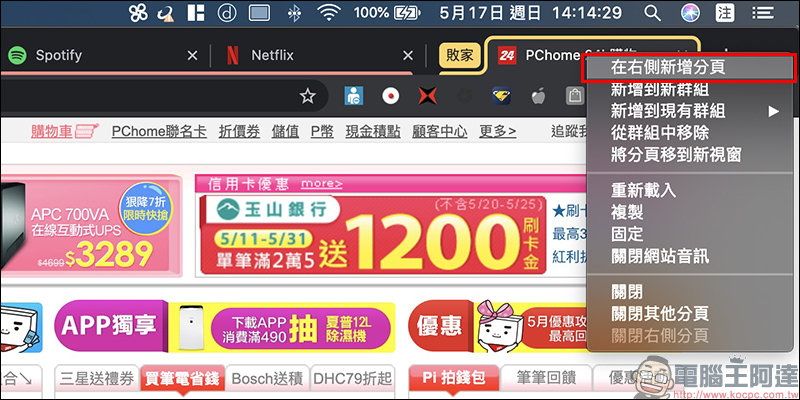
If you want to add a new tab to an existing group, just right-click on any tab in the group and select “Add new tab on the right”. The new tab that is opened will be in this group by default:
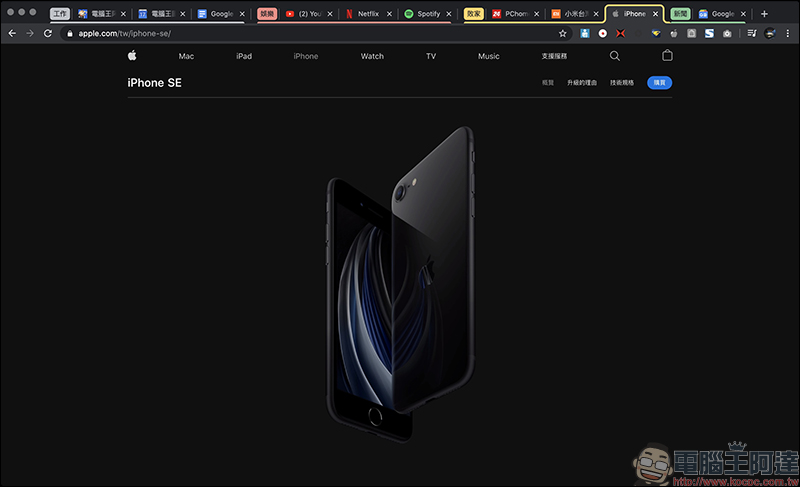
Group paging can use different label colors to classify and manage paging for different usage scenarios such as work and entertainment:
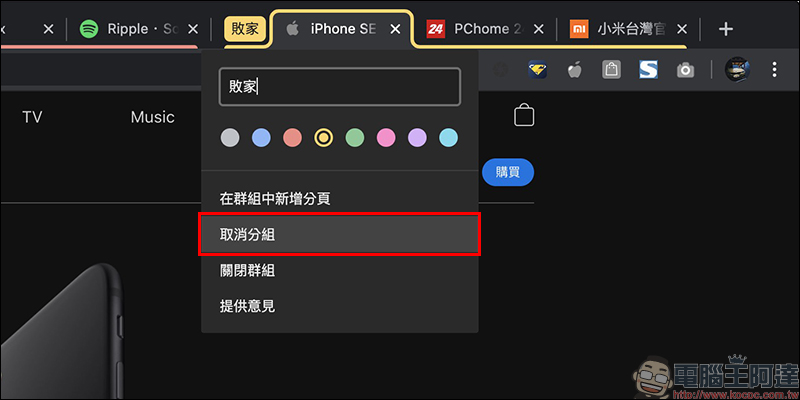
Ungroup
You can see the “Group Grouping” option in the group tab. This function is simply to dissolve the group:
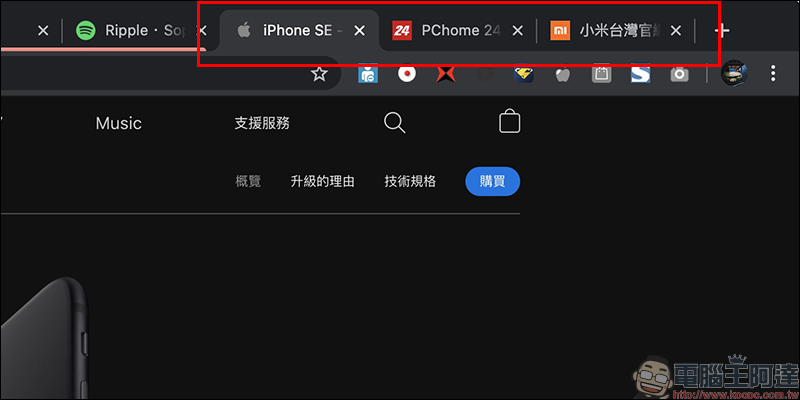
After clicking Ungroup, although the group disappears, the tabs originally in the group will be displayed independently on the web page:
Close group
Compared with “Ungroup”, if you want to close all tabs of the group at once, you can click “Close Group”. This function can also be regarded as another practical and key function of the group paging function in addition to convenient classification. For example, some people may secretly browse the Internet to take pictures while at work. If their supervisor is found out at this time, they will be embarrassed, but simply closing the entire browser will easily make people suspicious.
If you usually integrate some web pages into the same group page, then just click “Close Group” to close these web pages that are not suitable for viewing at work!
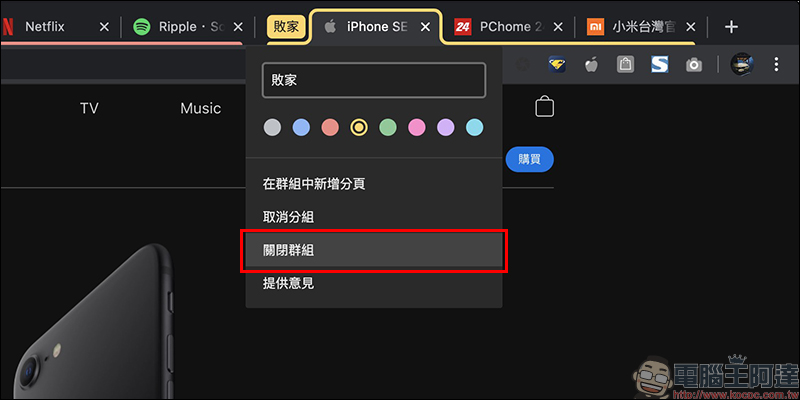
Clicking “Close Group” will not only disappear the entire group, but also close the tabs originally on the group page:

Further reading:
More organized, Chrome will support group paging and naming
Source: KOCPC Chinese