


Including laptops, mobile phones, and almost all devices connected to the Internet have a unique identification code called Media Access Control Address, or MAC address for short. It is like the ID card of the network card, uniquely bound to the hardware, and is also used to confirm the address of the connected device. Most people are relatively unfamiliar with this, but there is no guarantee that there will be times when they need to use it. This time I will teach you five methods to find MAC on Windows 10 in one go!

How to find MAC address on Windows 10? 5 methods to teach you at once
Although most companies have IT engineers to help you solve these computer and network problems, if you have a computer at home or suddenly have a need, you still have to do it yourself. Learn 5 ways to find MAC, and you will be able to show off your skills and become an office hero!
Method 1: Find it in Settings
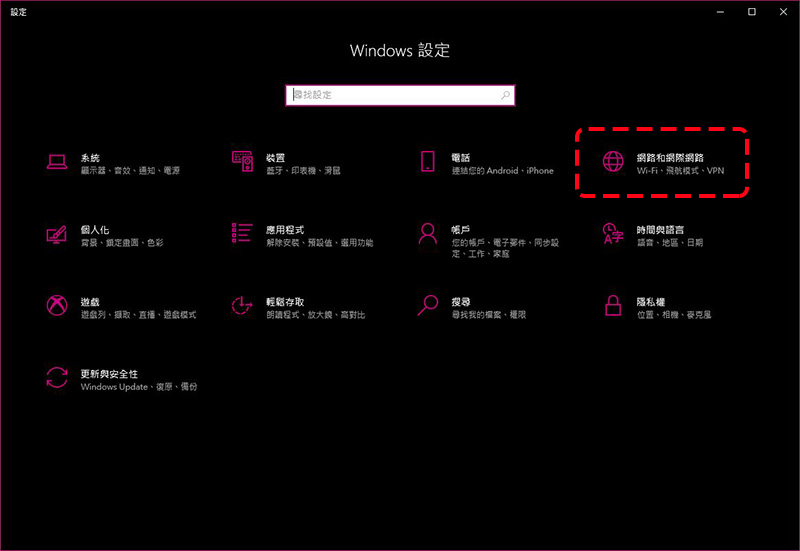
1. Open Settings and click to enter “Network & Internet”.
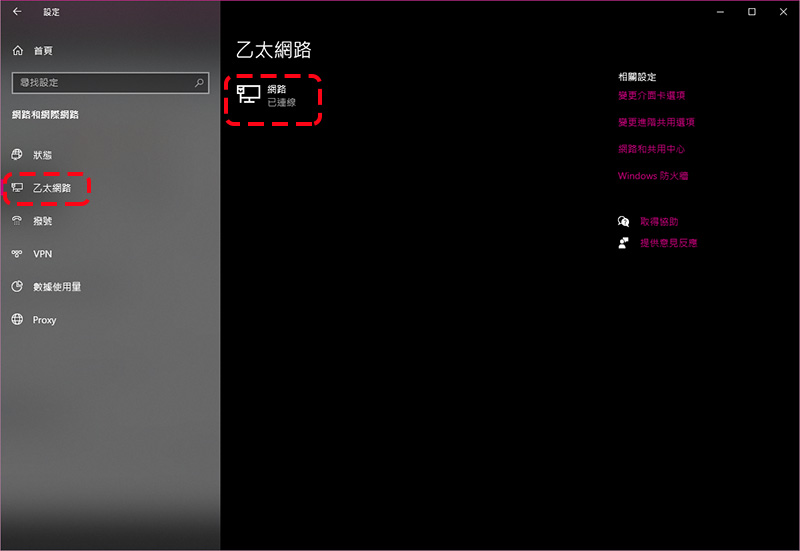
2. Click Ethernet or WiFi, mainly based on your current network connection method, and click the network you are connected to in this tab.
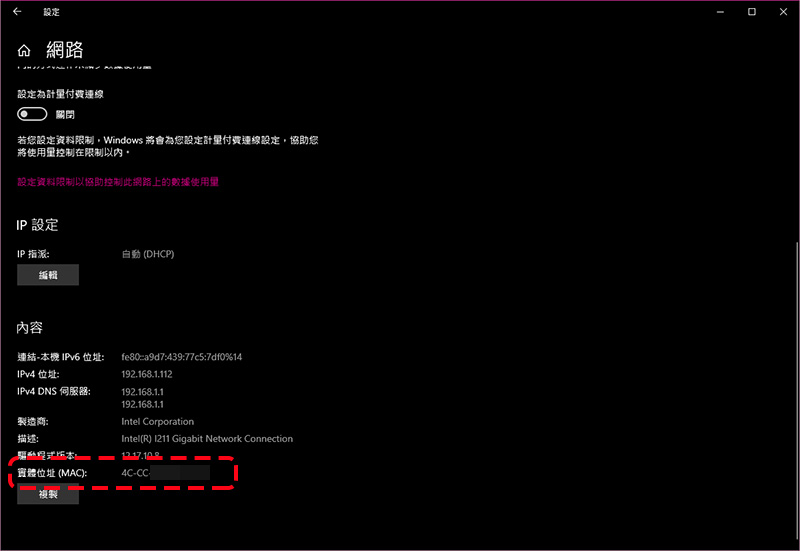
3. Scroll to the bottom to see the MAC address.
Method 2: Find from the console
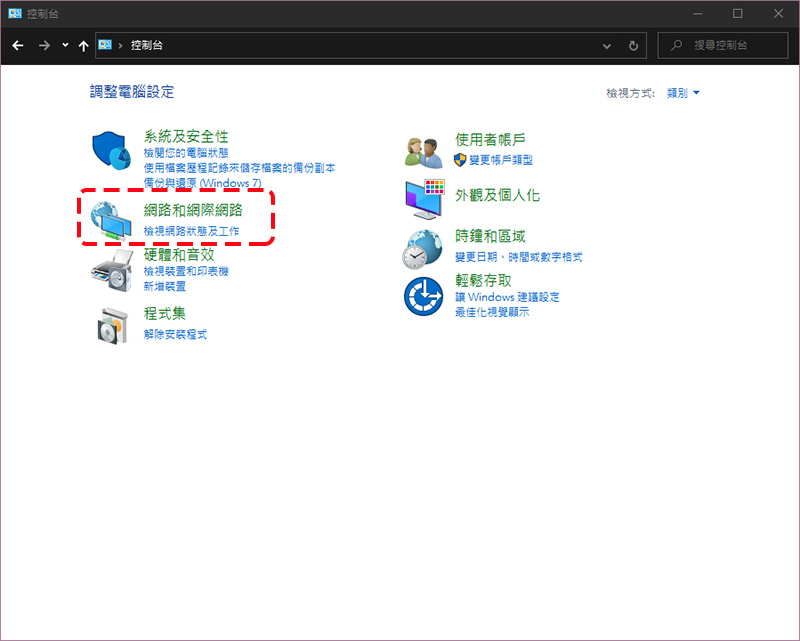
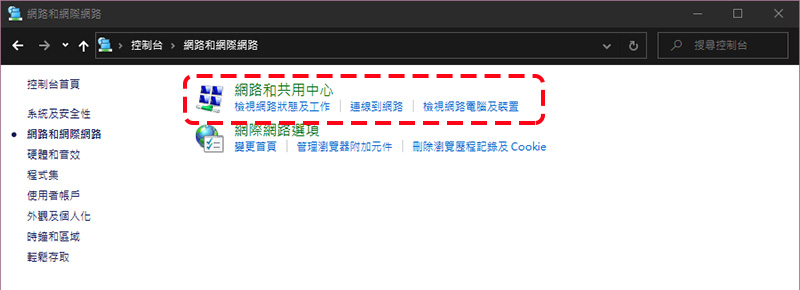
1. After opening the console, click “Network and Internet”.
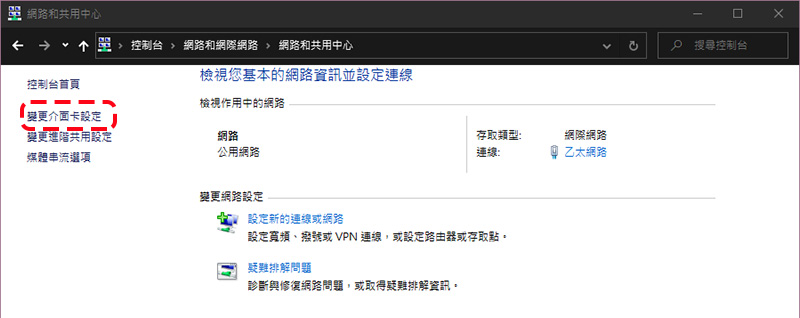
2. Enter the “Network and Sharing Center” and select “Change Interface Card Settings” next to it.
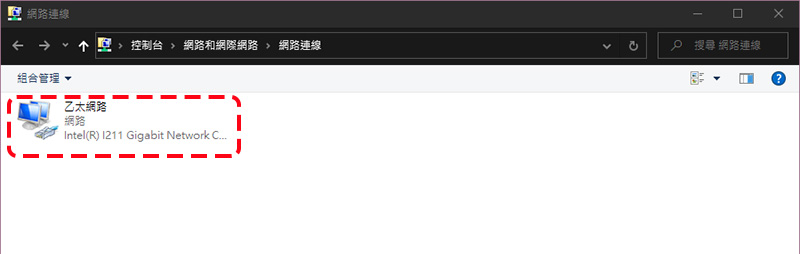
3. Double-click the network you are currently connected to (Ethernet or WiFi).
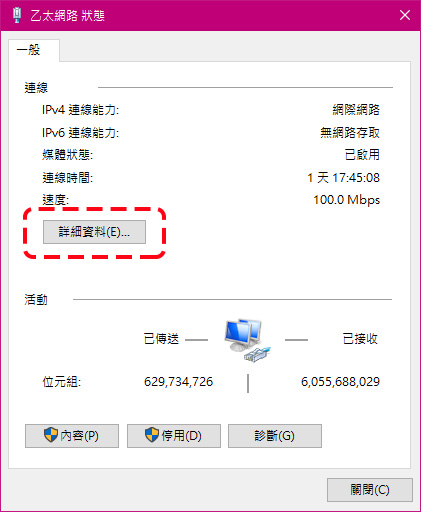
4. Click “Details” in the next window, and you can see the “Physical Address” in the next window.
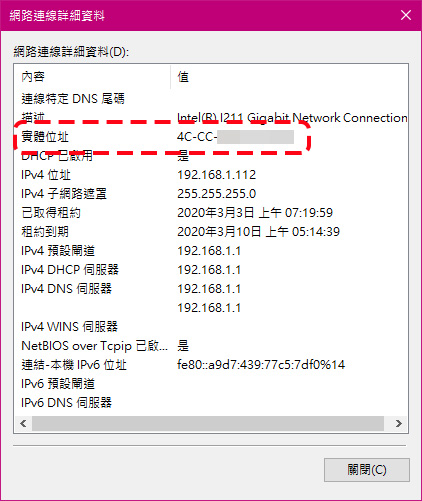
Method 3: Find from system information
1. Enter “system information” in the search and click Open.
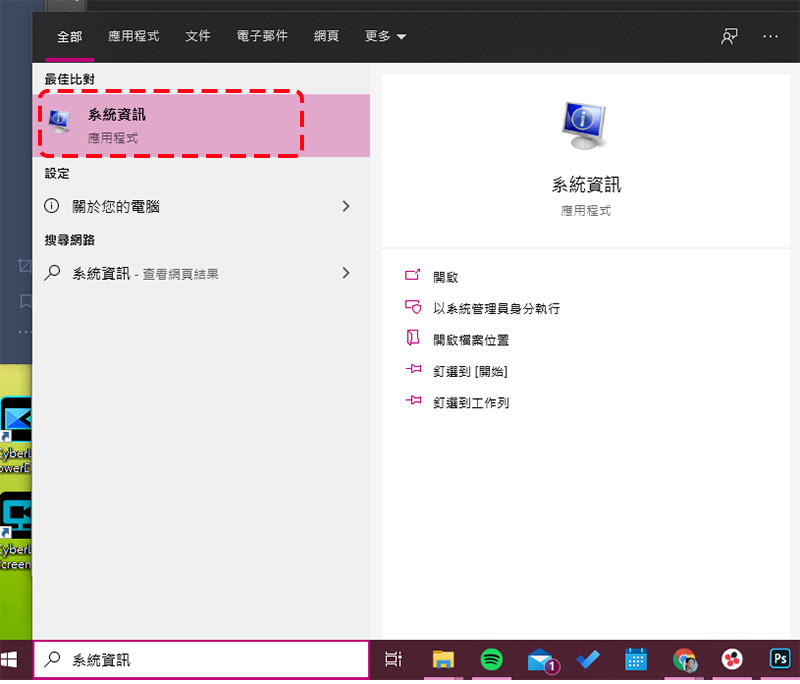
2. Expand “Components”, expand “Network” from the bottom item and select “Interface Card”. Scroll down to the name of the required network card to see the MAC of the network card.
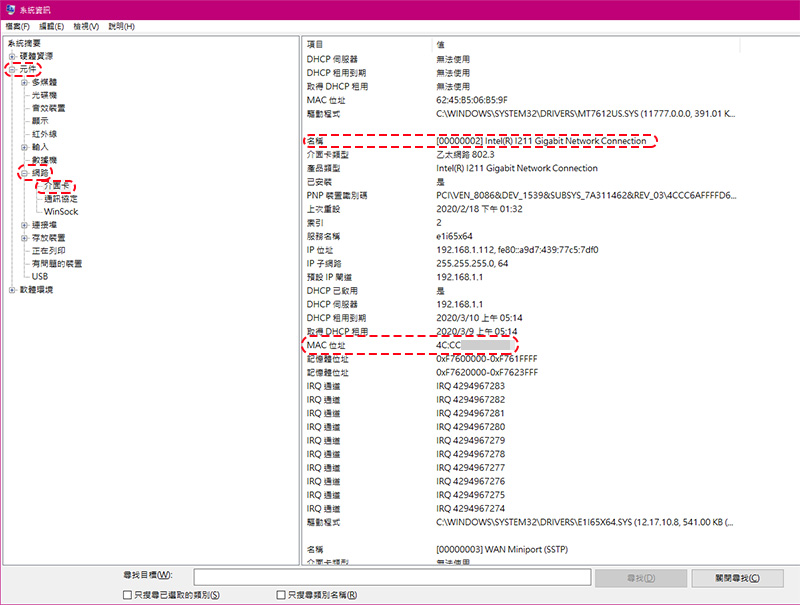
Method 4: Use command prompt character search
1. Enter “Command Prompt Characters” in the search box and click to open it.
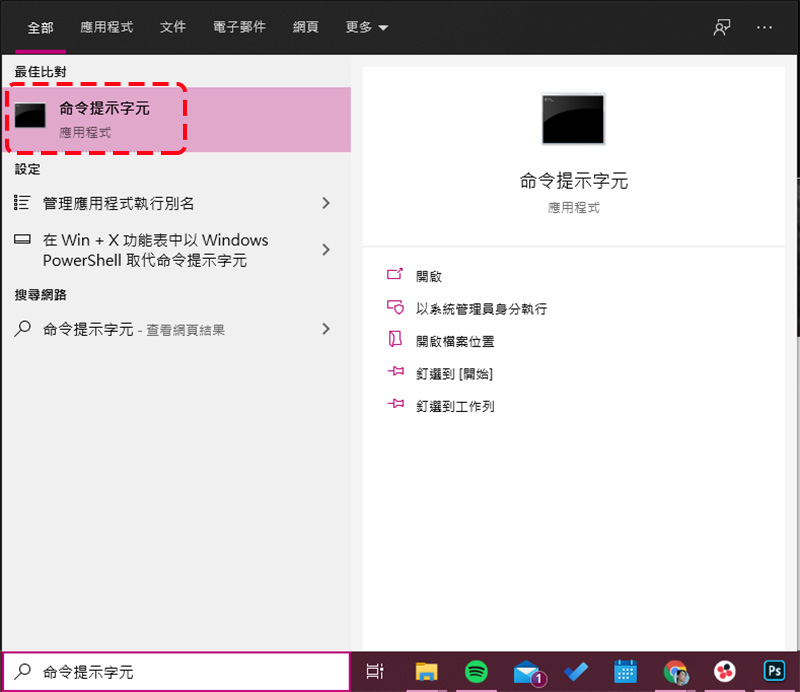
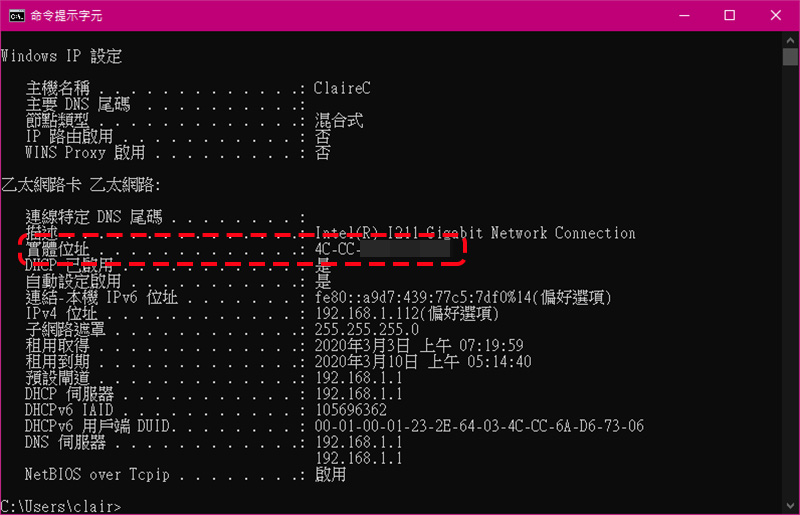
2. After entering the “ipconfig /all” command, press Enter.
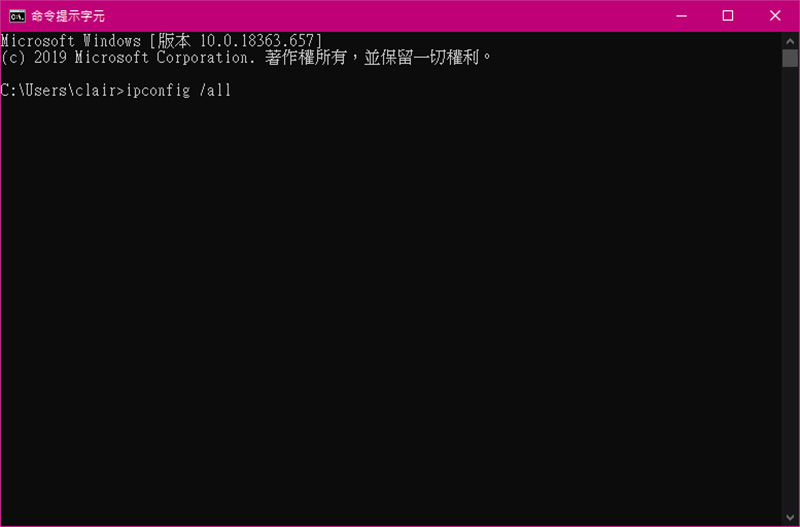
3. Next, you can see the “Physical Address” from the information that appears.
Method 5: Use PowerShell to find
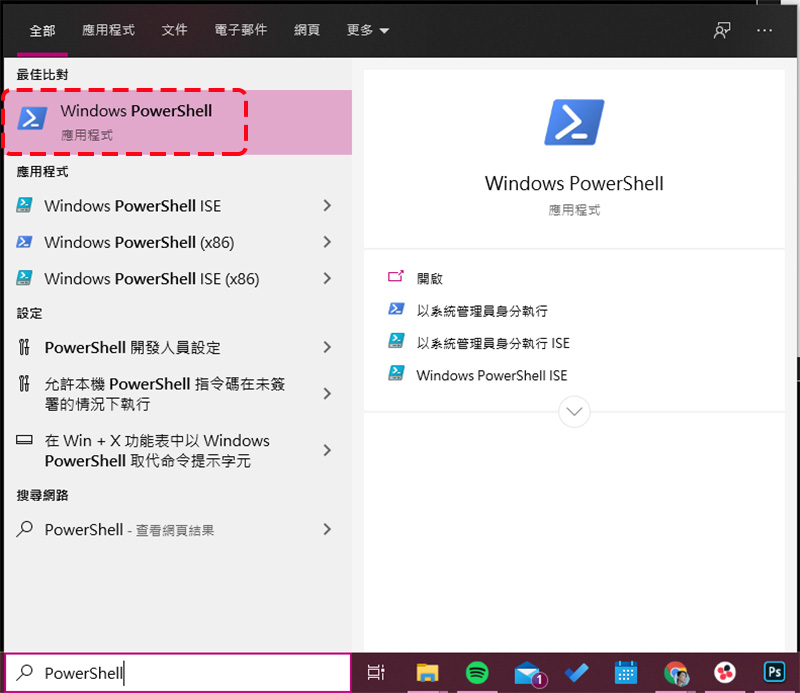
1. Search for “PowerShell” and click to open it.
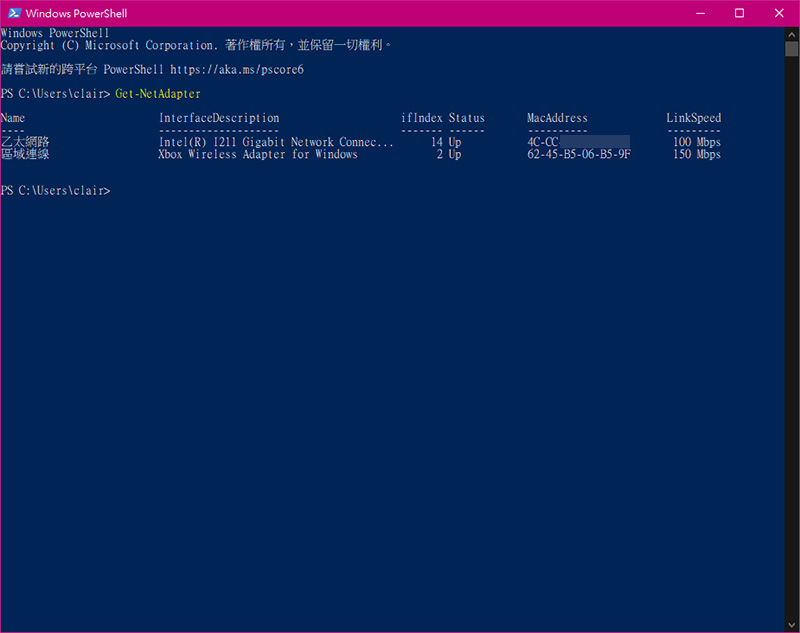
2. Enter the “Get-NetAdapter” command and press Enter.
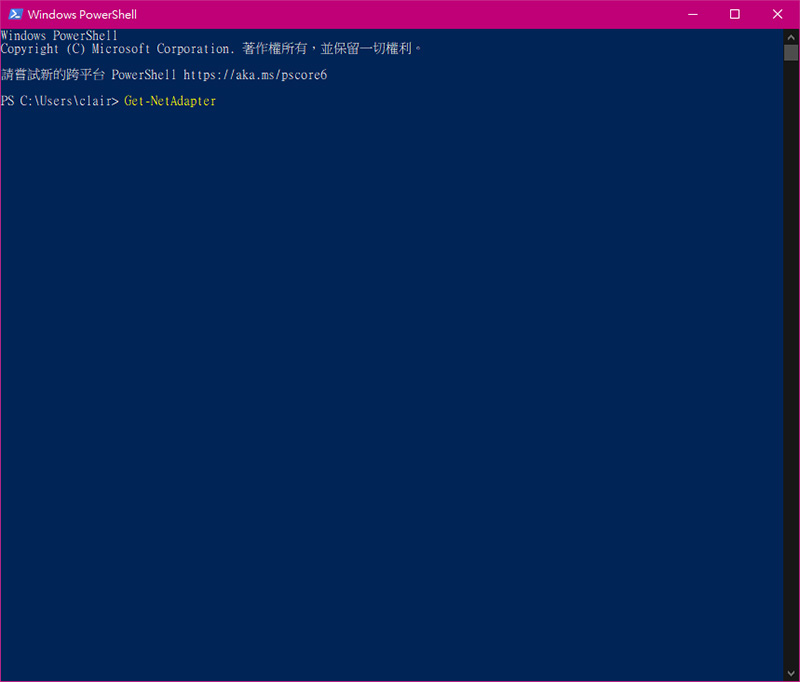
3. Next you can see the network card and its corresponding MAC address.
5 methods, different approaches to the same goal. You can choose according to your actual situation. All roads lead to MAC address. This tutorial ends here. Have you learned it?
Source: KOCPC Chinese