


For people who are not skilled in image processing, it often takes a long time of practice to complete the task of removing a picture. We have previously introduced lazy one-click memorization tools like Remove.bg, which can help all novices complete their image removal needs more easily. In addition, in addition to Microsoft Office PowerPoint can automatically remove memorization, in fact, Word can also memorize pictures! Let’s take a look at how to complete it easily with a few simple steps!
Word can also memorize pictures! With a few simple steps, you can easily memorize pictures automatically (teaching)
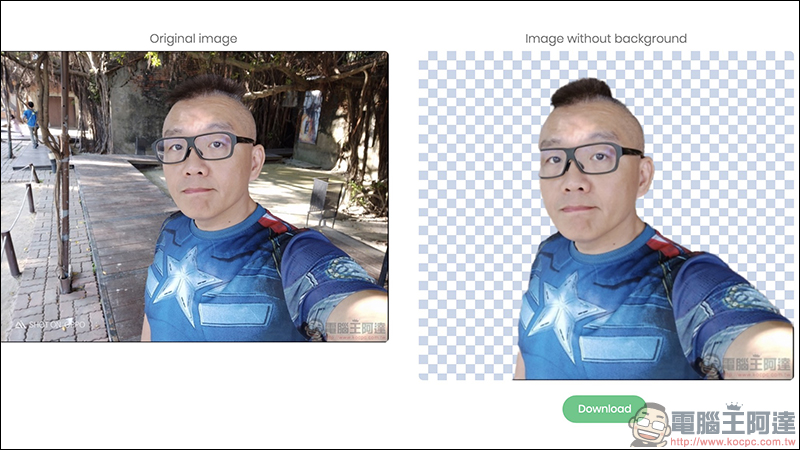
I believe that many people occasionally encounter the need to memorize pictures at work, but not everyone is good at professional image processing software such as Photoshop. At this time, it is not only recommended to use the free automatic memorization tool Remove.bg that we have introduced to achieve easy memorization work, such as Remove.bg is currently divided into online web version、Desktop versionand Free suite of extensions for Adobe PhotoshopOptional.
But what I want to teach you today is to directly use the most common word processing tool, Word, to complete the picture memorization work. As long as it isUse Word 2020 (inclusive) and above, in fact, it has built-in simple automatic back removal function. First of all, the first step is of course to insert the picture into the Word file:
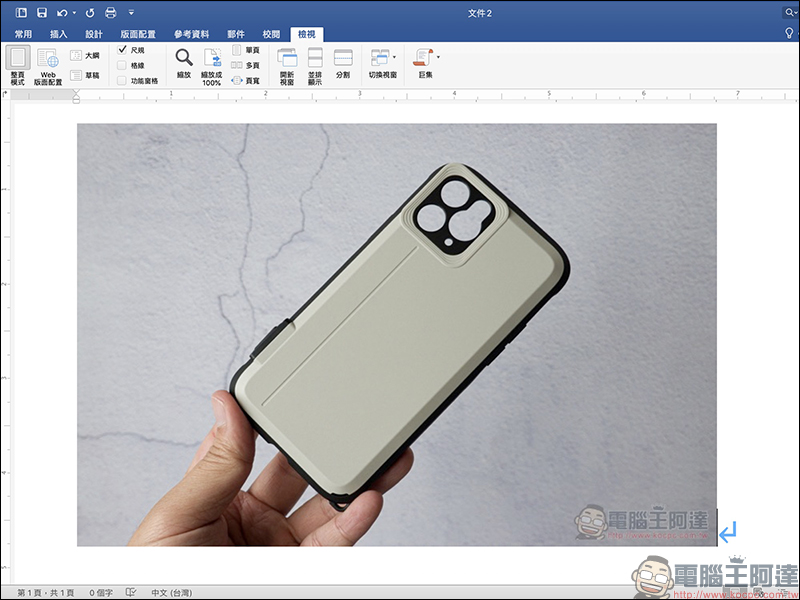
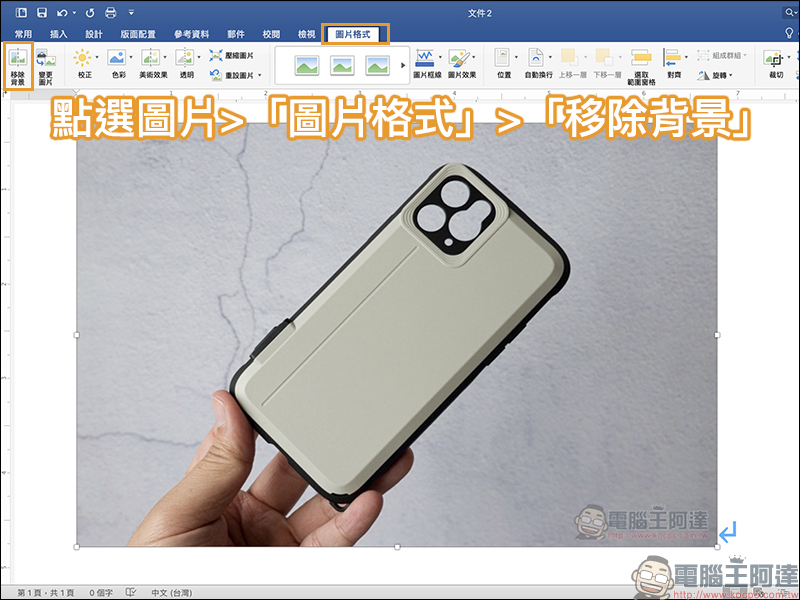
Then click on the image first, click “Image Format” on the upper toolbar, then find “Remove Background” and press:
At this time, the screen will show the preview effect of the automatic background removal of the image. The system will automatically detect the selected range and automatically remove the background. The removed area will be displayed in pink. Since you have just clicked on this function and have not yet adjusted the selection area, you may find that some parts of the screen do not cover the selection area:
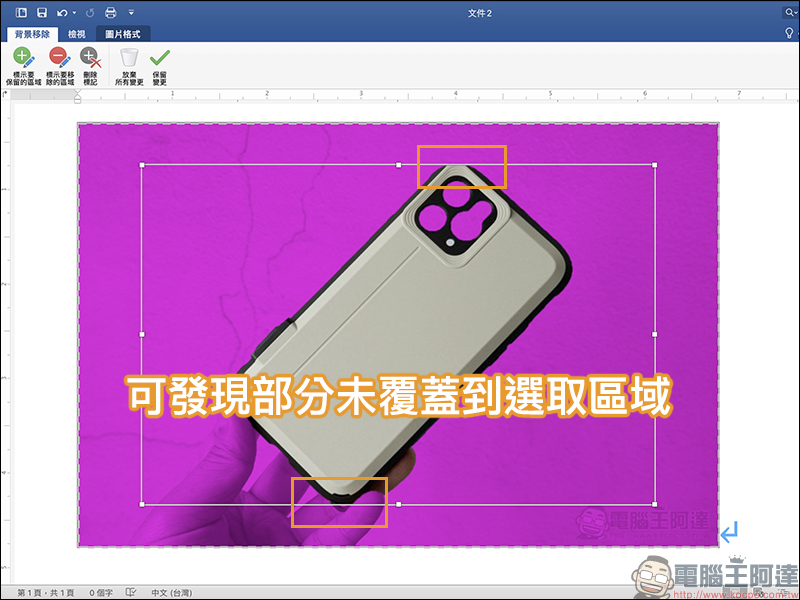
At this time, just drag the white frame to adjust the selection range, and the system will automatically detect and correct the back removal area according to the user’s selection range:
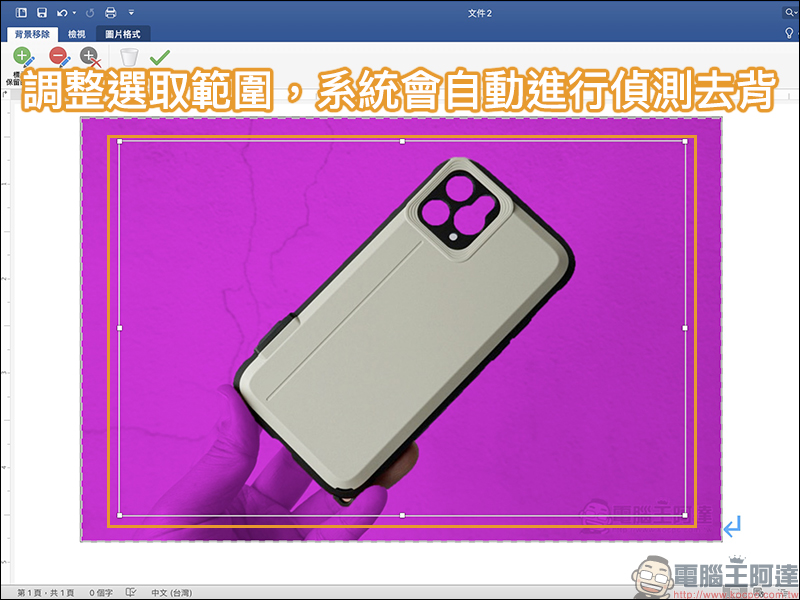
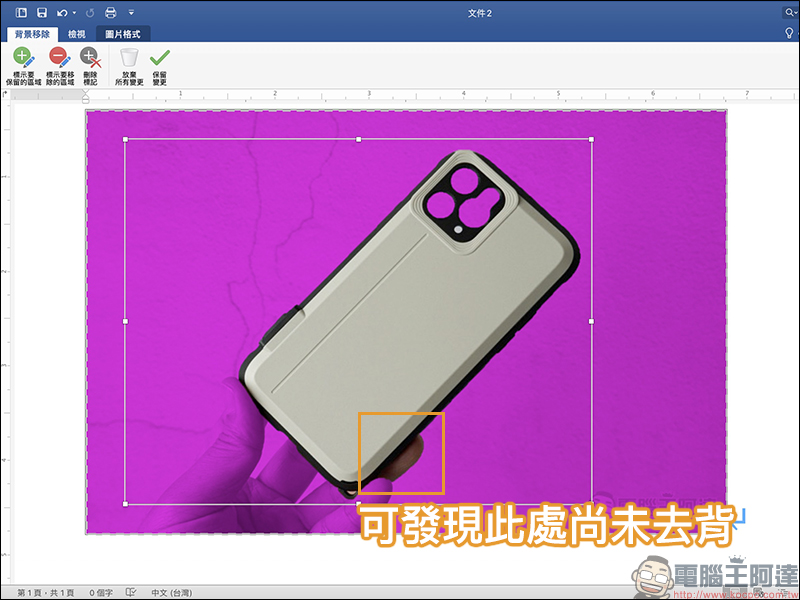
However, it is inevitable that the surrounding areas of some pictures cannot be determined by the system. For example, it may be found that the finger position is not removed at the mark:
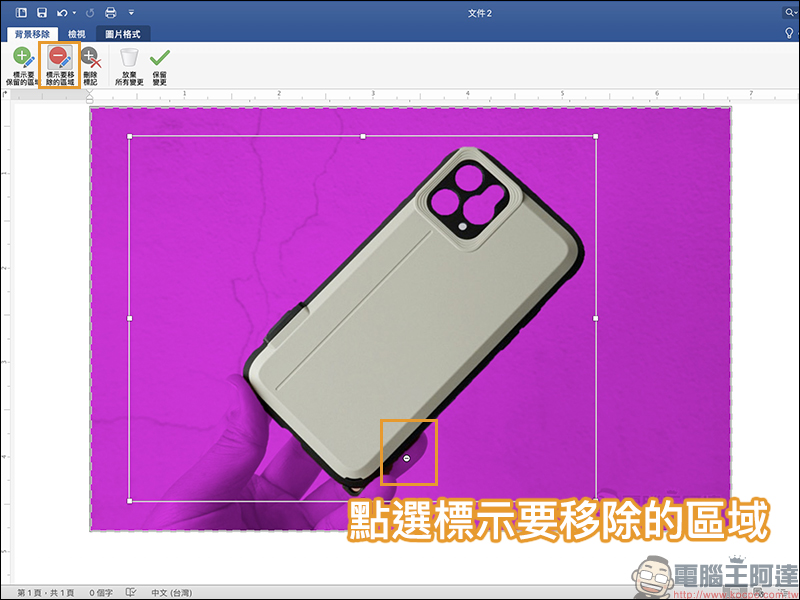
If you encounter this situation, just click “Mark the area to be removed” and click on the location you want to remove on the screen. The area to be removed will be marked with “-“. This function is somewhat different from the way the lasso tool is used in image processing software such as Photoshop. Users do not need to circle the range to be removed, but only need to mark the “position where they want to be removed.” After selecting, you can press “Save Changes” to preview the results first.
At this point we will find that some parts of the image have not been removed. At this time, just click the “Remove Background” function again to return to the original background removal interface:
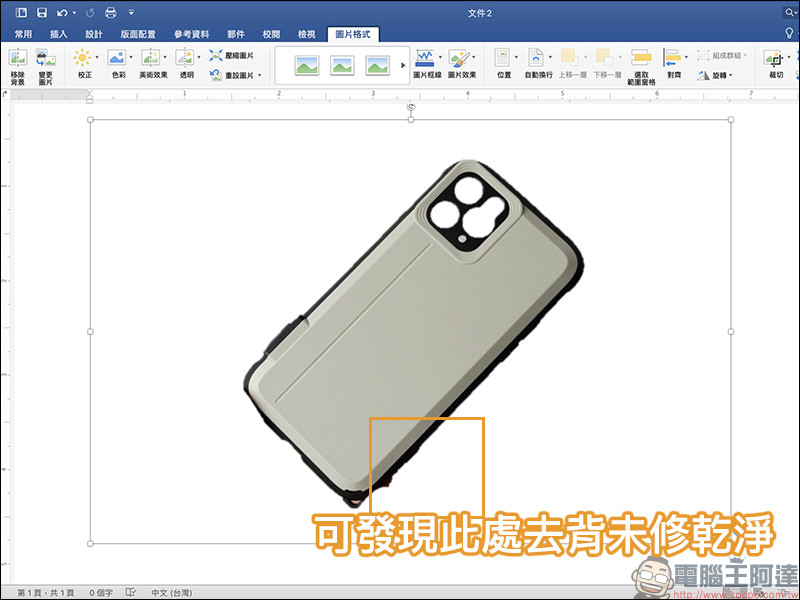
With the previous experience, we can use “Mark areas to keep” and “Mark areas to remove” again to adjust the best back removal effect. If you want to remove a marker during marking, just click “Delete Mark” first, and then click the removed marker on the screen.
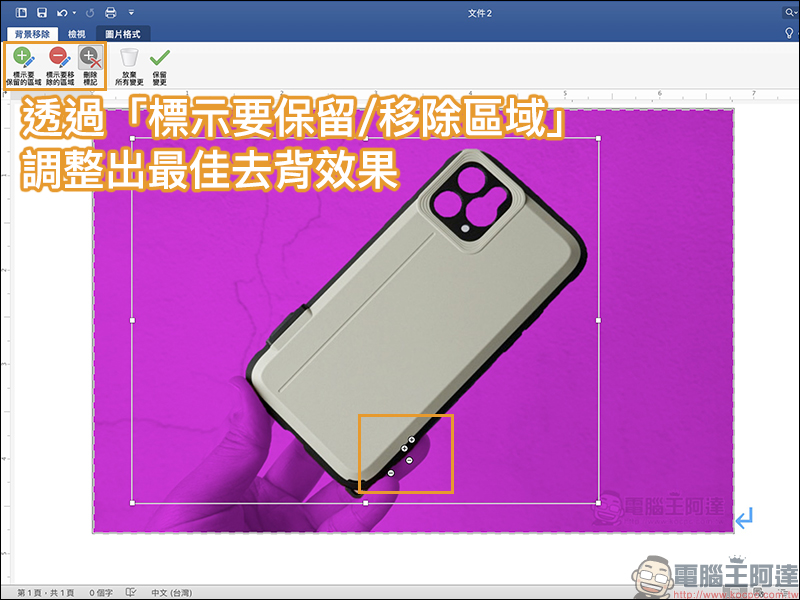
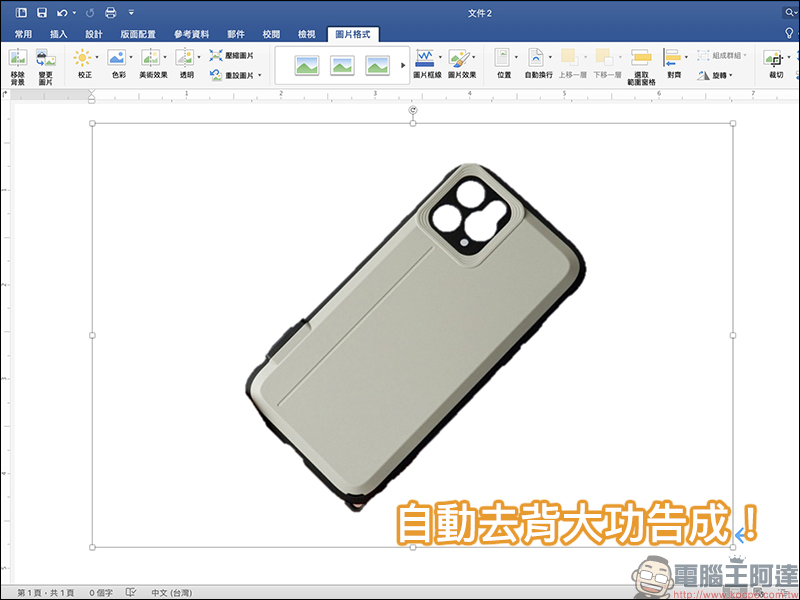
After repeated corrections and adjustments, the ideal memorizing picture is complete!
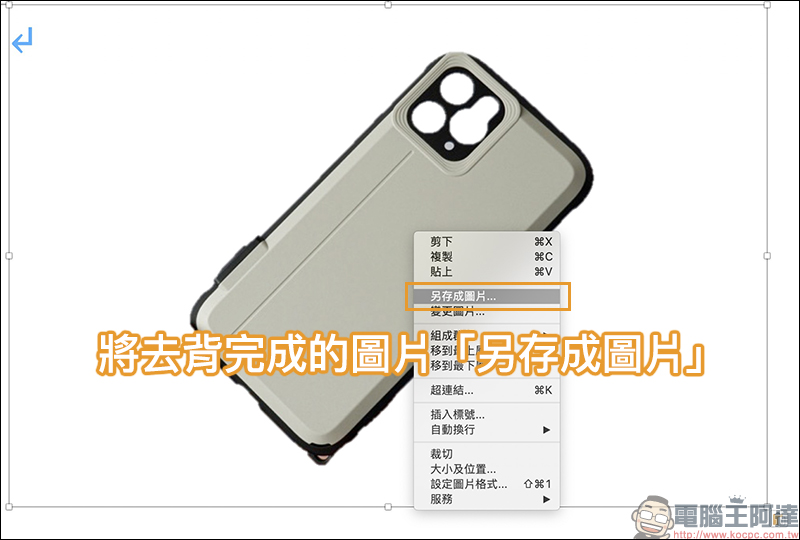
In addition to being able to use it directly in a Word document, you can right-click and select “Save as Image” to save this memorized image using Word to your computer:
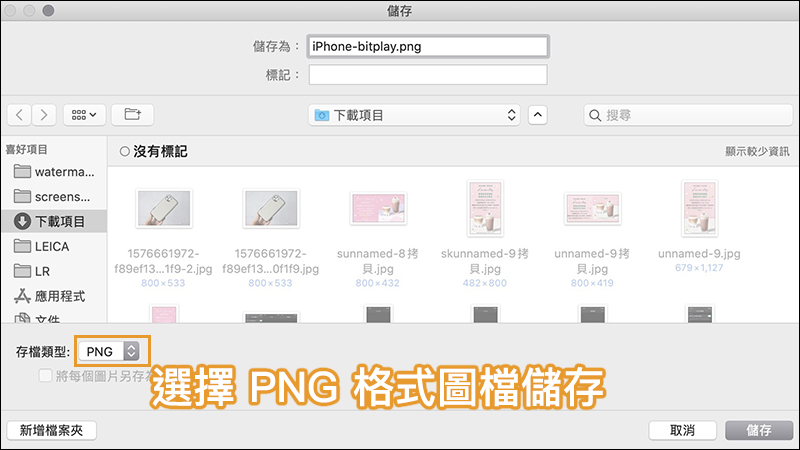
If you want to retain the background removal effect of the image, remember to select “PNG format” to save:
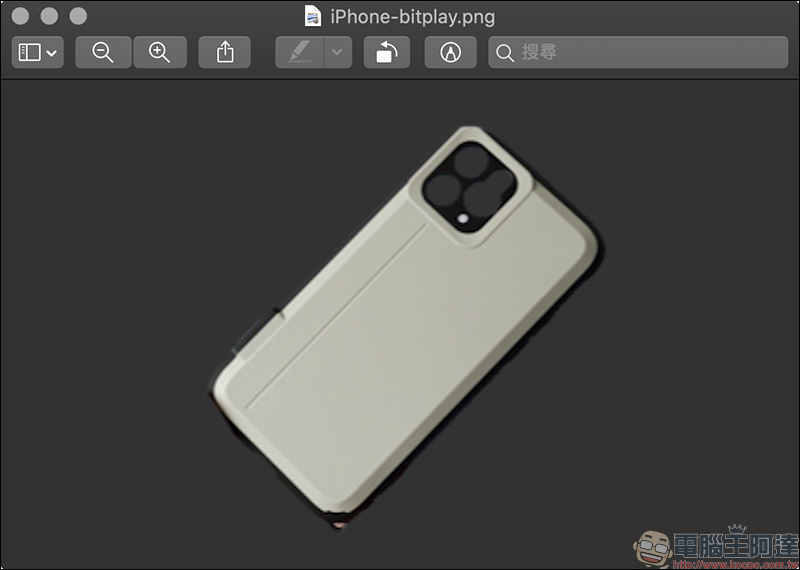
Check the saved picture and you can see that this picture has been memorized successfully!
Further reading:
PowerPoint can automatically remove memorization

Source: KOCPC Chinese