• About Us
King of Computer Media
  • Home
  • Tech News
  • AI News
  • Apps & Tutorials
  • Mobile & Telecom
  • Lifestyle
  • About Us
No Result
View All Result
  • Home
  • Tech News
  • AI News
  • Apps & Tutorials
  • Mobile & Telecom
  • Lifestyle
  • About Us
No Result
View All Result
King of Computer Media
No Result
View All Result

Home - photography teaching - Photoshop text wrapping tutorial|Quickly create a typesetting effect where text fits the outline of a character

Photoshop text wrapping tutorial|Quickly create a typesetting effect where text fits the outline of a character

Mike by Mike
July 3, 2025 - Updated on August 4, 2026
in photography teaching

When designing and typesetting, letting text naturally wrap around images can greatly improve the texture of the layout. However, Photoshop’s text wrapping effect is not as one-click-applied as text editing software. This tutorial will teach you step by step how to easily create a text wrapping effect that fits the outline of the character through the steps of “selecting the subject”, “expanding the selection” and “creating a working path”, making your design more layered and professional!
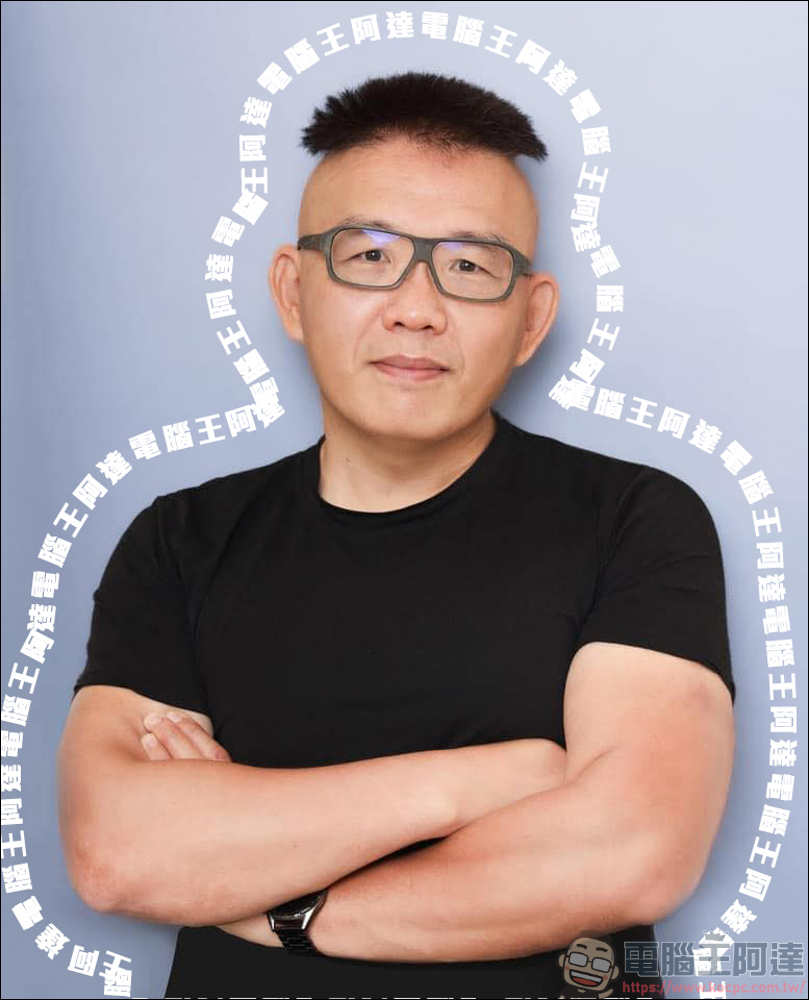
PS text wrapping effect tutorial

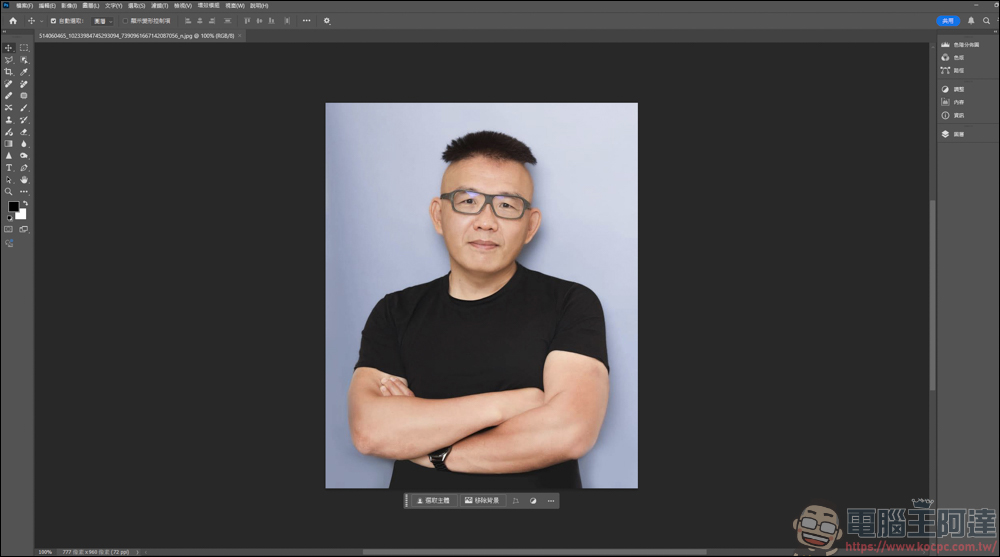
Load a picture into Photoshop that you want to wrap text around. Here we take a character as an example:
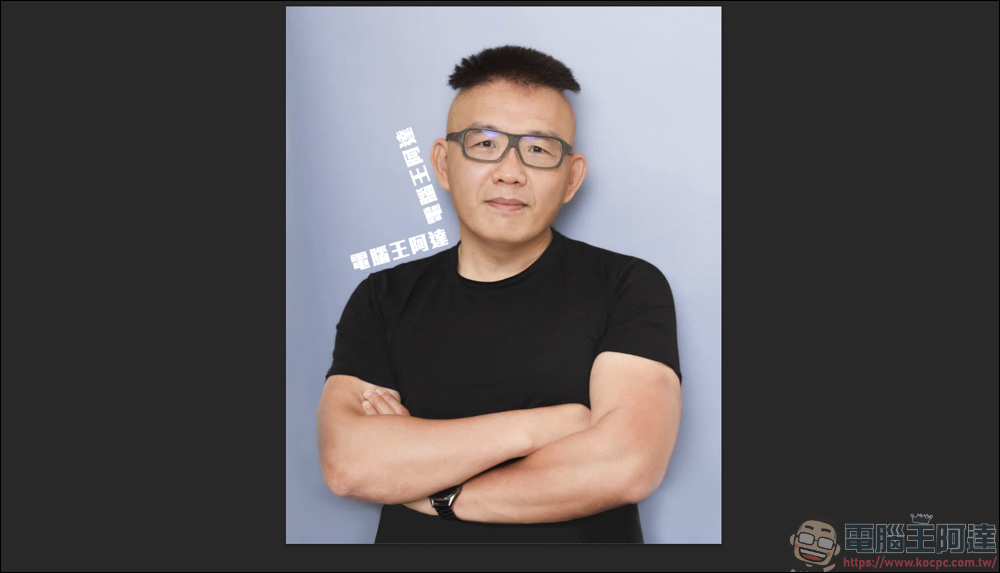
The previous method might have been to add text and then wrap it around the character’s body shape. This would not have the effect of making the text change with the character’s body shape:
Next, I’ll teach you how to wrap the text around the body, click Select→Body:
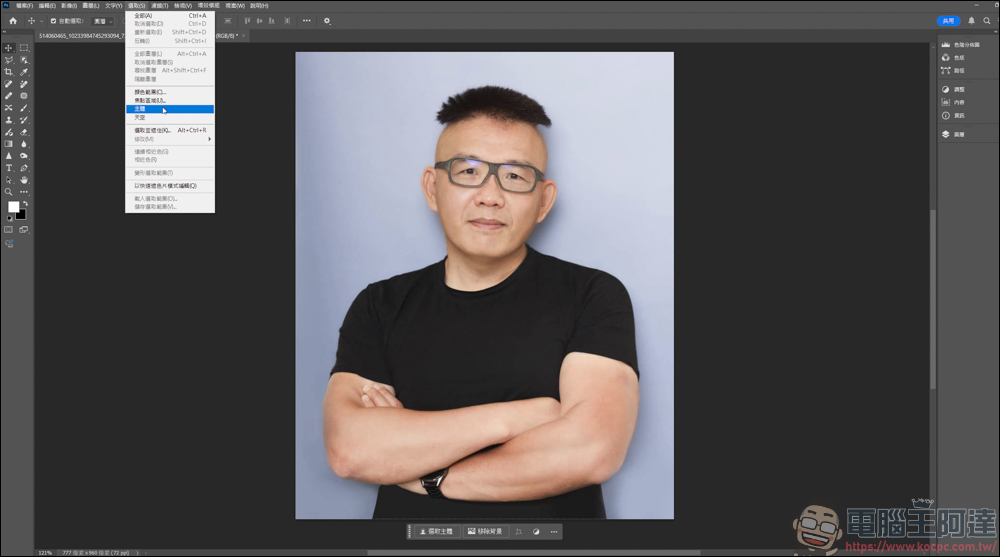
The character will be quickly selected:
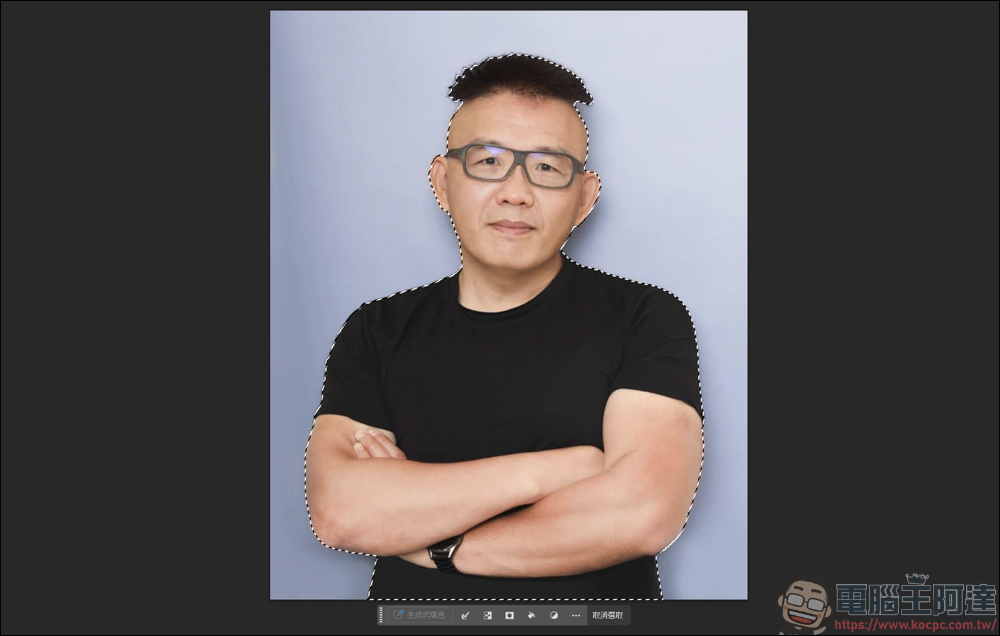
Then go to Select→Modify→Expand:
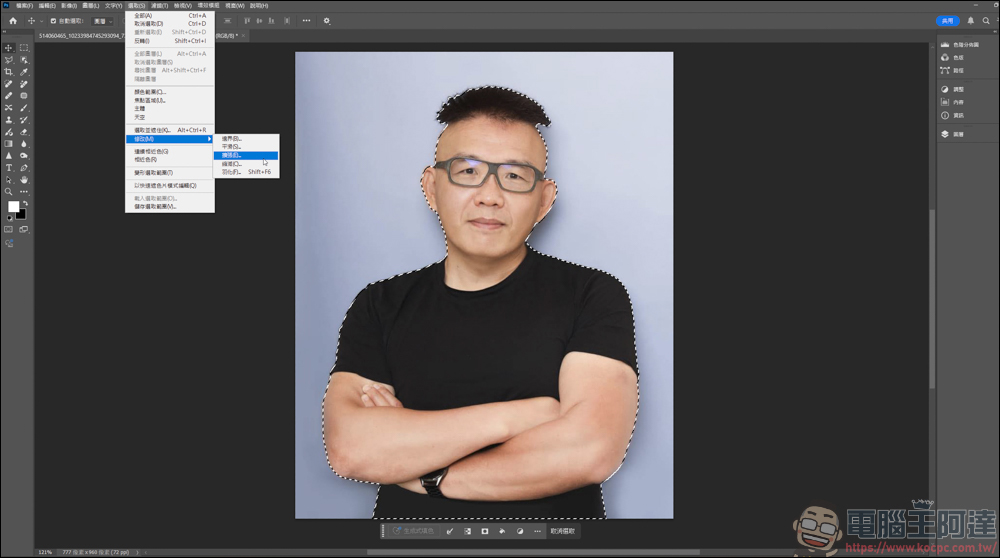
Enter a value so that the dotted line of the character’s figure will expand outward. Here we take 50 as an example:
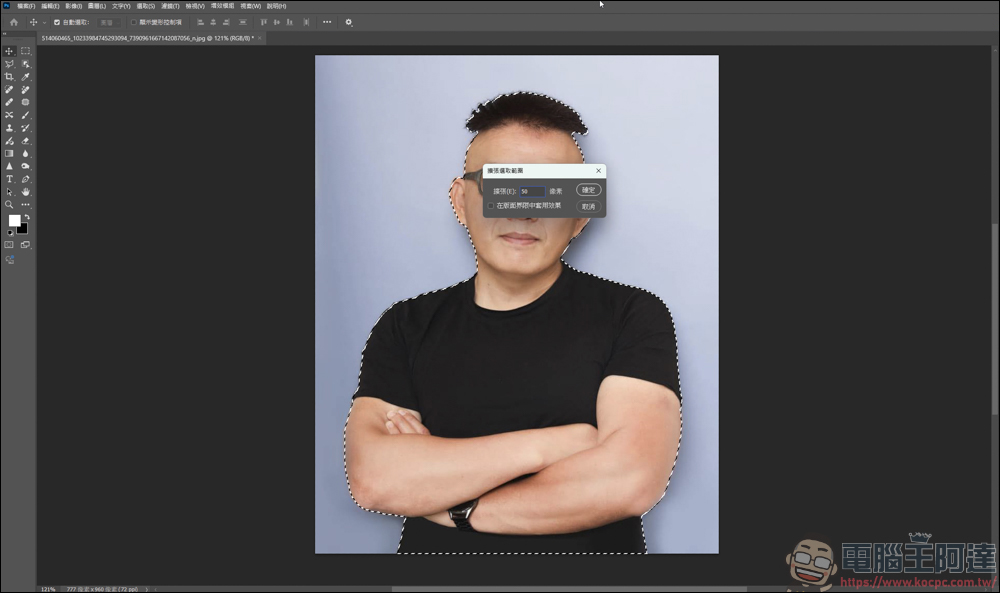
The effect of 50 is roughly like this:
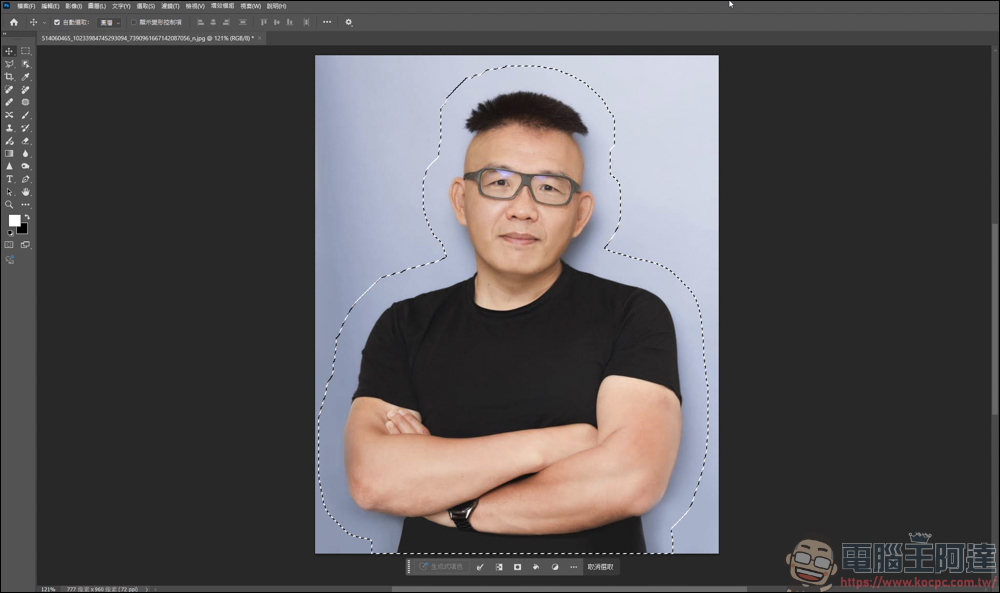
But it was too big, so I changed it to 35:
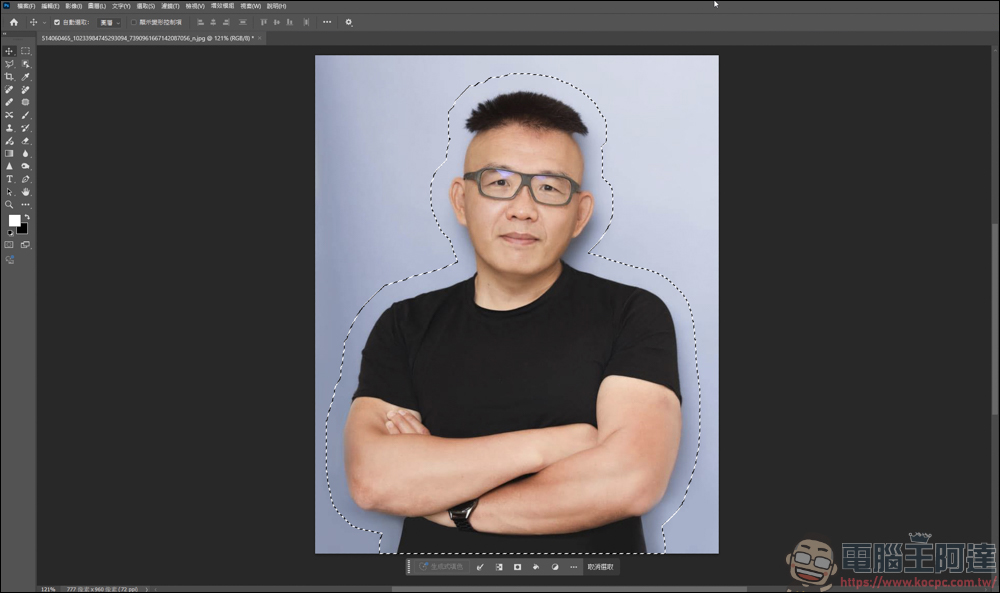
After deciding, go to Select→Modify→Smooth:
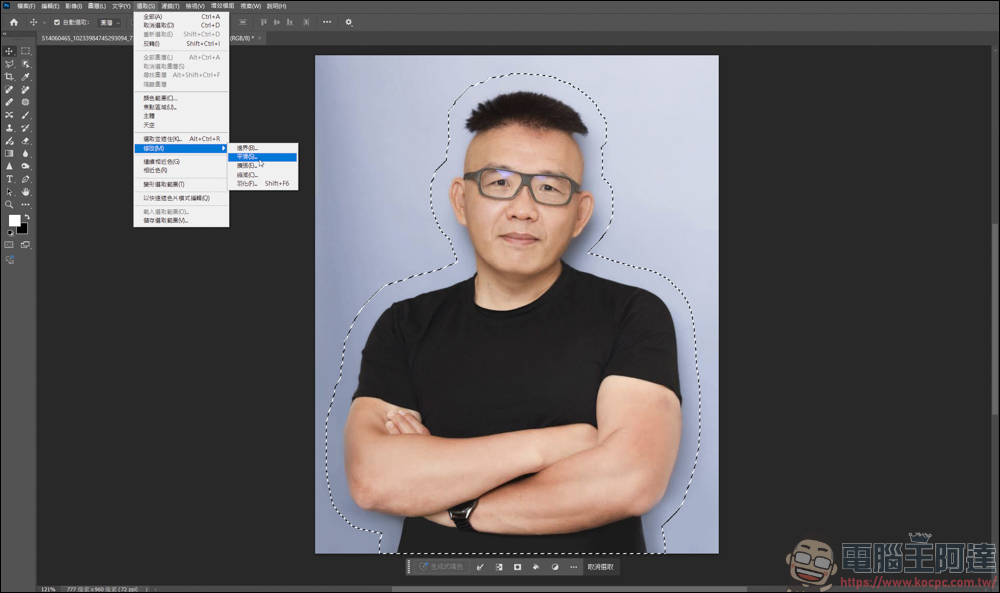
The value entered determines the smoothness of the surrounding dashed lines:
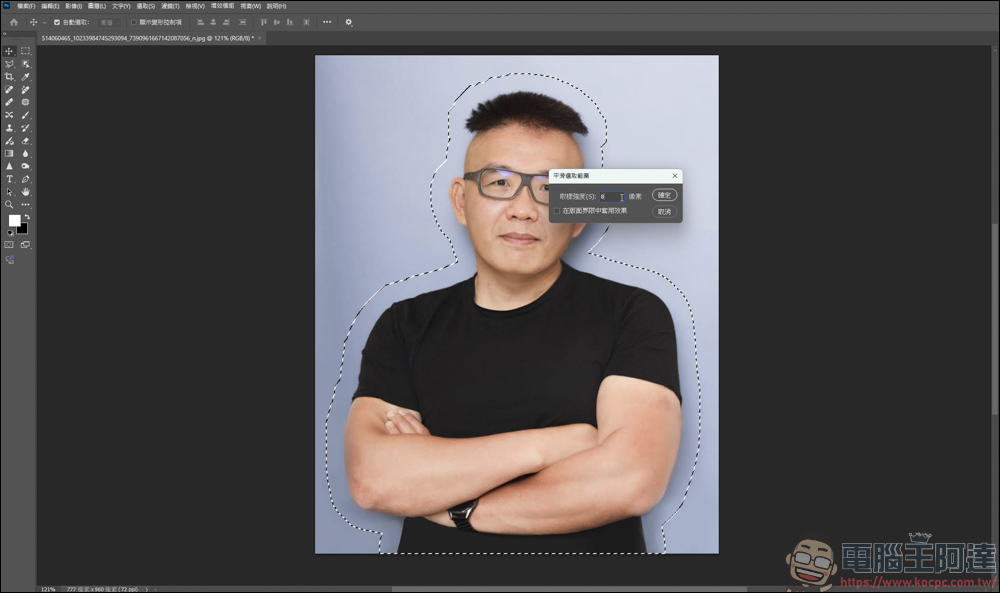
After setting, select the selection tool and right-click on the screen → Make working path:
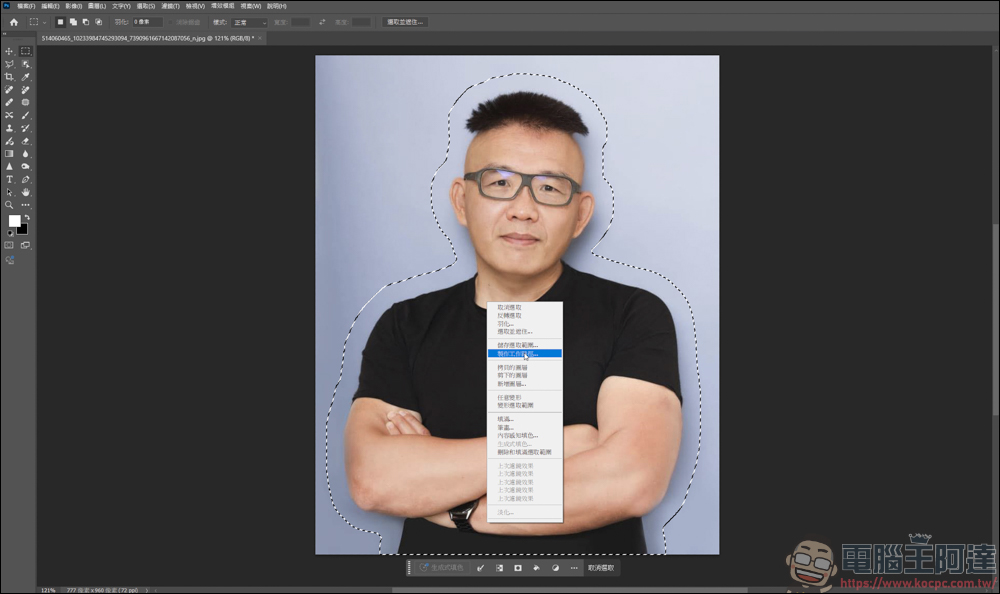
The value entered affects the line generated below:
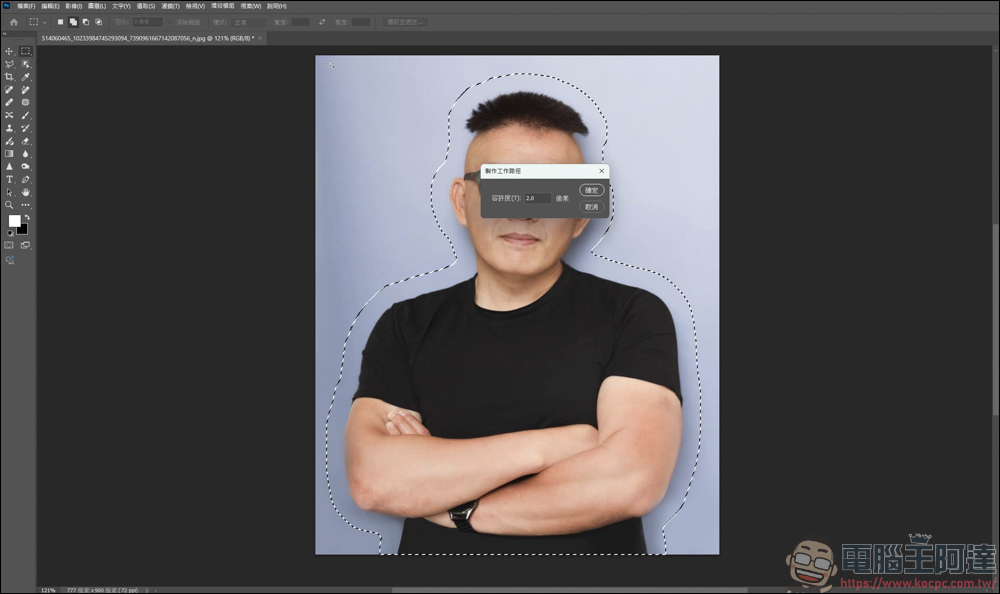
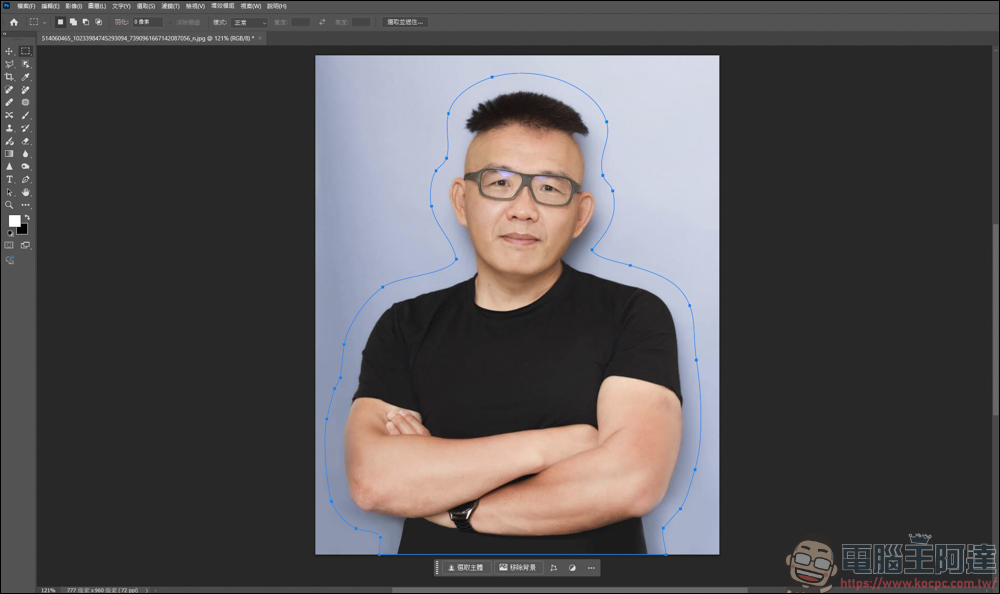
After inputting, the original dotted line will become a solid line with nodes:
Then select the text tool and click on the solid line, you can see that the text input box has followed the line:
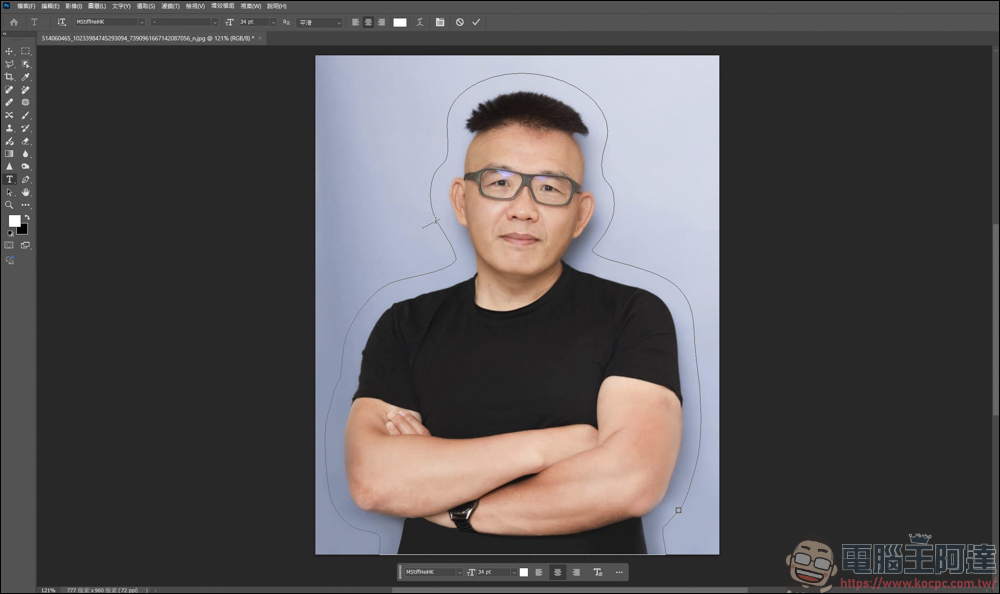
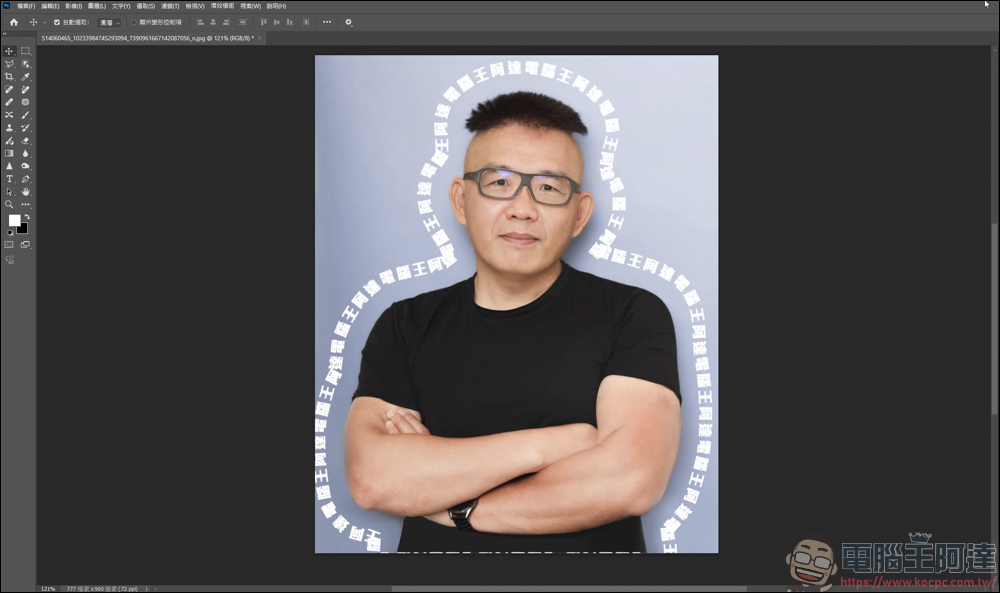
Finally, enter the text content you want to complete the effect of text surrounding the character. If you are not satisfied with the rendering effect, it will be better to adjust the values ​​again:


Source: KOCPC Chinese

Tags: Photoshop

Recent Posts

  • The Xiaomi Pad 8S Pro has passed network access certification and will debut with the self-developed XRING O3 chip.
  • The entire Google Pixel 11 lineup has been leaked! Official promotional renders of the Pixel 11 Pro XL have also surfaced
  • Are Chinese phone battery capacities falsely labeled? A brief look at the “capacity locking” phenomenon in Chinese silicon-carbon batteries.
  • NCC is leaderless, recklessly sending out national-level alert messages!?
  • What does “QR” in QR Code mean?

Recent Comments

No comments to show.
  • About Us

We welcome partnership inquiries and product review opportunities from smartphone manufacturers, iPhone accessory brands, and app developers.koc kocpc.com.tw|Privacy Policy |Hosting & Maintenance: Fast Line Taiwan, A-Chang Digital Technology

No Result
View All Result
  • Home
  • Tech News
  • AI News
  • Apps & Tutorials
  • Mobile & Telecom
  • Lifestyle
  • About Us

We welcome partnership inquiries and product review opportunities from smartphone manufacturers, iPhone accessory brands, and app developers.koc kocpc.com.tw|Privacy Policy |Hosting & Maintenance: Fast Line Taiwan, A-Chang Digital Technology