


iPhone There is a built-in application called “Files”, which is a file management tool that you may use to access, organize, and manage files stored locally or in iCloud. The Files App can do more than you think, from allowing you to access files stored on external devices and other cloud storage services to simplifying daily file operations. It can handle a range of tasks with ease.

iPhone Files App is more convenient than you think! These functions are very useful
Instant preview of common file types
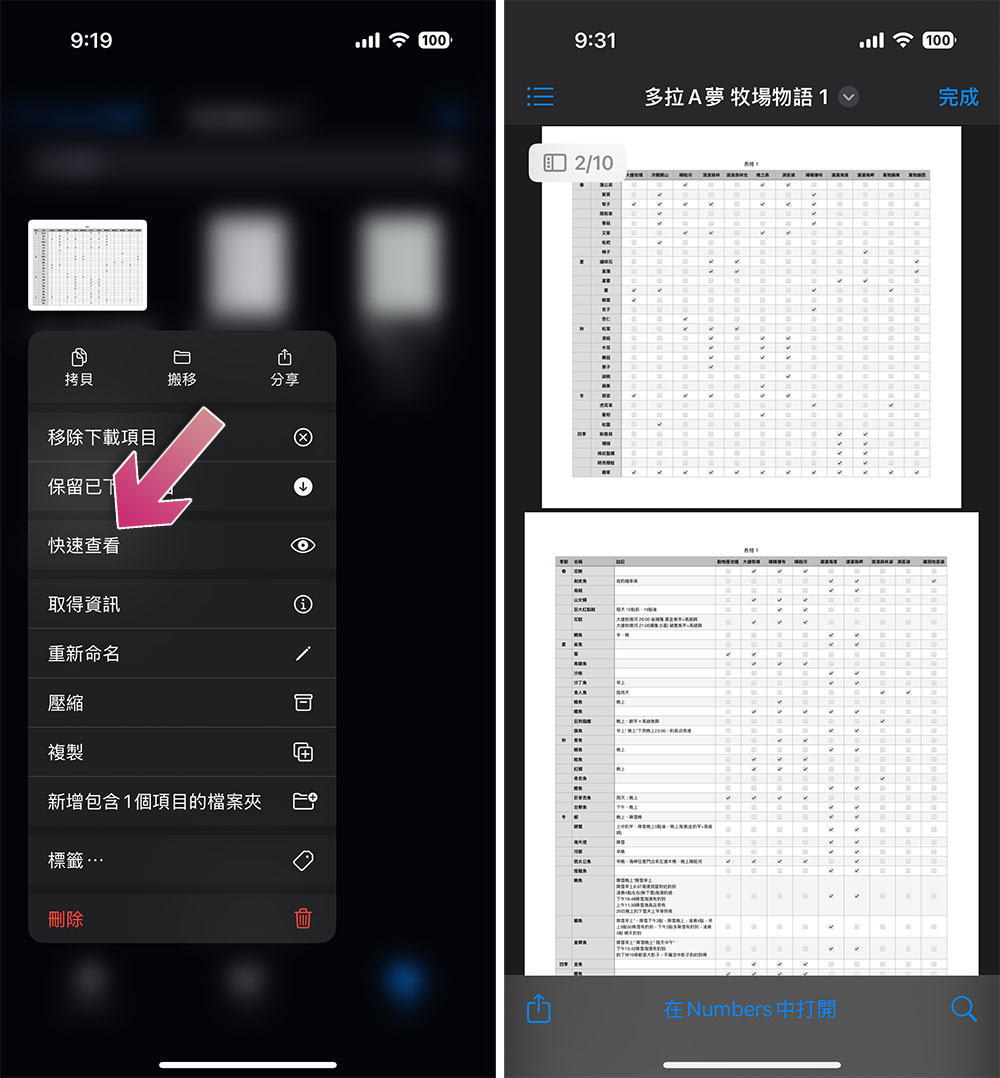
Apple’s Files application has a “Quick Look” built-in preview system, which supports multiple types of files, including images, videos, audios, files, documents, etc. With it, you can directly preview files and edit them without using additional tools.
This feature works regardless of whether your files are stored on your iPhone, in iCloud, in a third-party cloud space, on an external storage device, or on a remote server. How to use it:
- Open the Files app and click on the folder where the file is stored.
- Press and hold the file you want to preview, then select Quick View from the menu.
Annotate PDFs or images with built-in markup tools
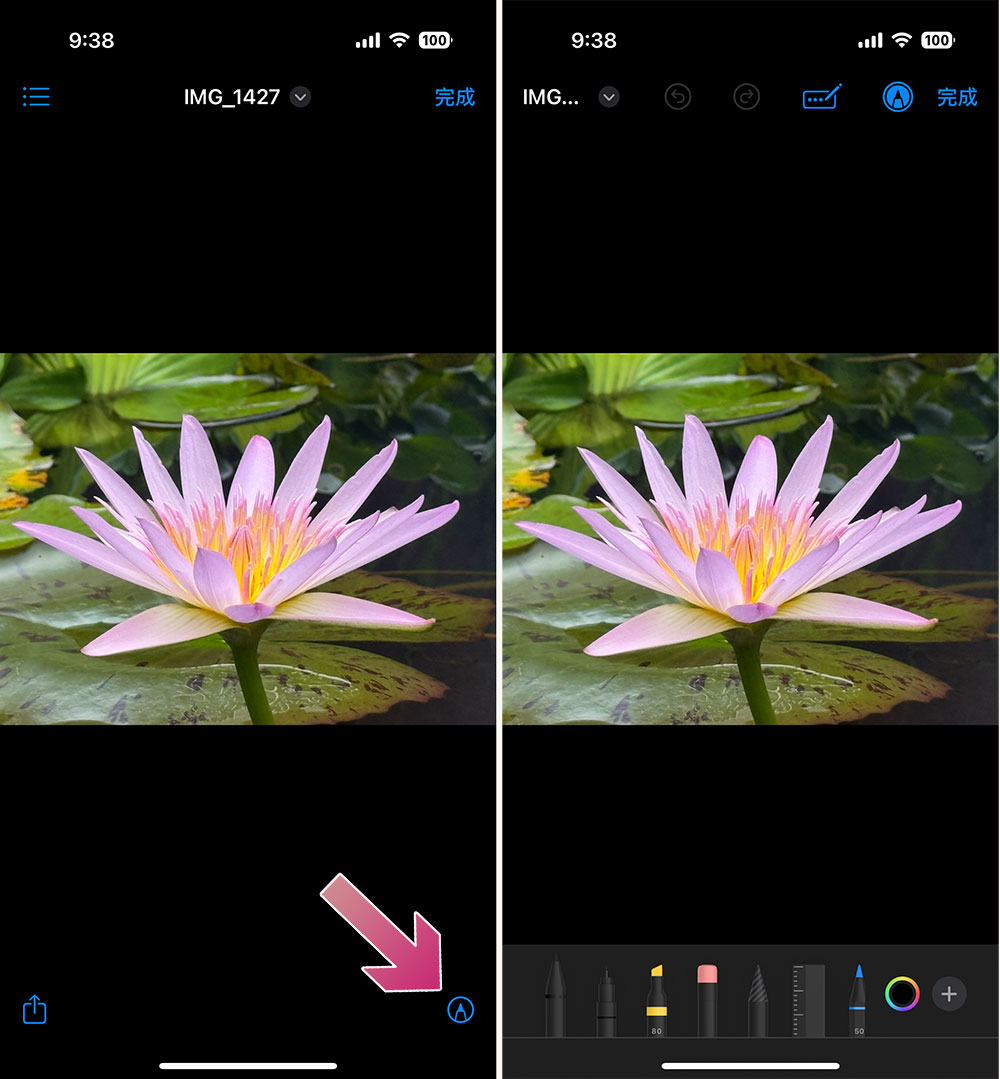
In addition to quick viewing, the Files app integrates built-in markup tools for all your markup needs. You can use it to annotate, draw, highlight, or add text and signatures to your photos or PDFs without the need for third-party apps.
- After long pressing on the file you want to mark, select “Quick View”.
- In preview mode, click the “pen tip” icon in the lower right corner.
- Next you can see brushes and annotation tools appear on the screen.
- If you want to add a shape, text, or signature, click the “+” sign on the far right of the brush to select the appropriate option.
- After completing the annotation, click “Done” in the upper right corner. Please remind everyone that after saving the changes, you will not be able to restore them. If the original is important, be sure to make a copy first and save it.
Easily compress or decompress files
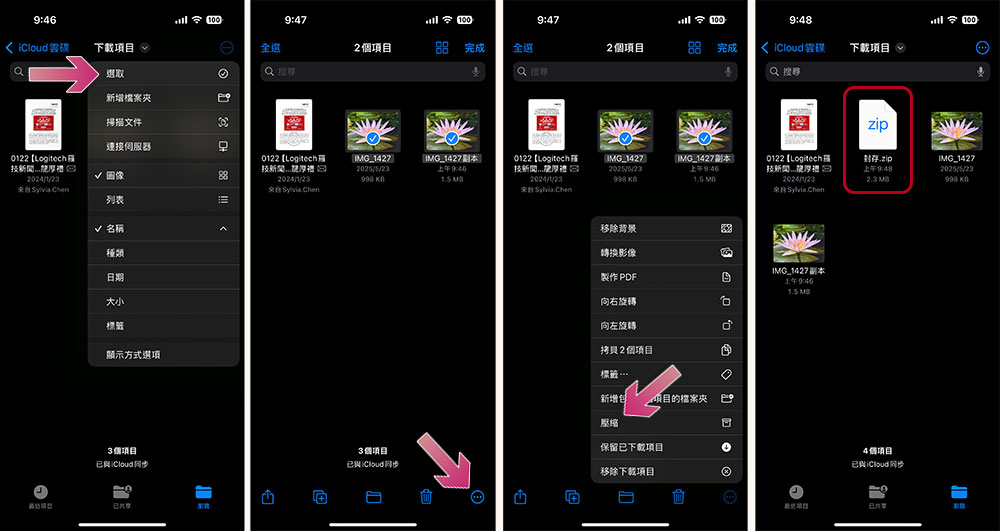
Sometimes you’ll need to compress or decompress files when working with them, and the Files app is equipped with the tools you need to easily do this directly on your iPhone without having to download a third-party app.
- Go to the folder where the file you want to compress is located, and then click the three-dot menu in the upper right corner.
- Click “Select” from the list and check the required files.
- After selecting the file, click the three-dot menu in the lower right corner and select “Compress” from it. The File app will create a zip file and save it in the same folder, ideal for transferring multiple files at once.
Decompressing in the Files app is also very simple. Just click directly on the file you want to decompress, and iPhone will decompress it directly for you at the same location without too many additional operations.
Seamless access to third-party cloud storage
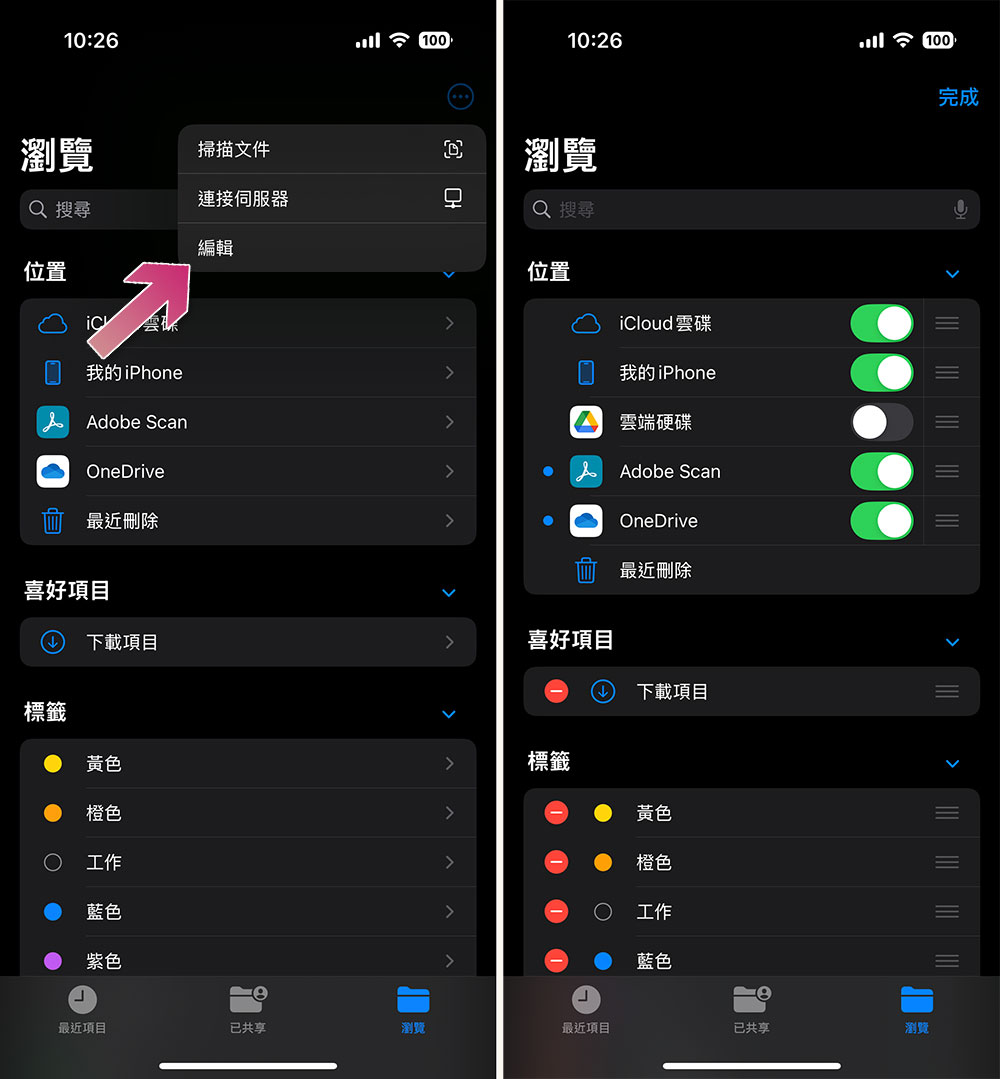
If you don’t use iCloud, or use it with other cloud services, you can integrate it directly into the Files app and access and manage all files stored in it at once. File support integration with various third-party cloud storage services, including Google Drive, Dropbox, OneDrive, etc. If you want to integrate services, you can follow the following methods:
- First make sure your preferred third-party cloud service app is installed on your iPhone.
- Open the Files application and switch to the “Browse” page.
- Click the three-dot menu in the upper right corner and select “Edit”.
- Under the location, turn on the switch of the cloud service you want to integrate, and finally click Finish.
Apple’s Files app is very powerful and can help you do many things on your iPhone, but it still has some limitations, including weak search capabilities, limited batch processing options, and a lack of support for many file formats. It would be more convenient if Apple could strengthen these aspects.
Source: KOCPC Chinese