


Many people will definitely want to make a LORA model for themselves or their friends, and use it with Flux to generate some AI images. A while ago, I was researching whether there is any way to quickly train without affecting the local computer? Otherwise, every time you train, the computer won’t be able to do anything.
Finally found it MimicPC This website not only trains directly on the Internet, but it is also very fast. It takes about more than an hour to complete. I tested the trained model and the effect was quite good. I will share it with you below.
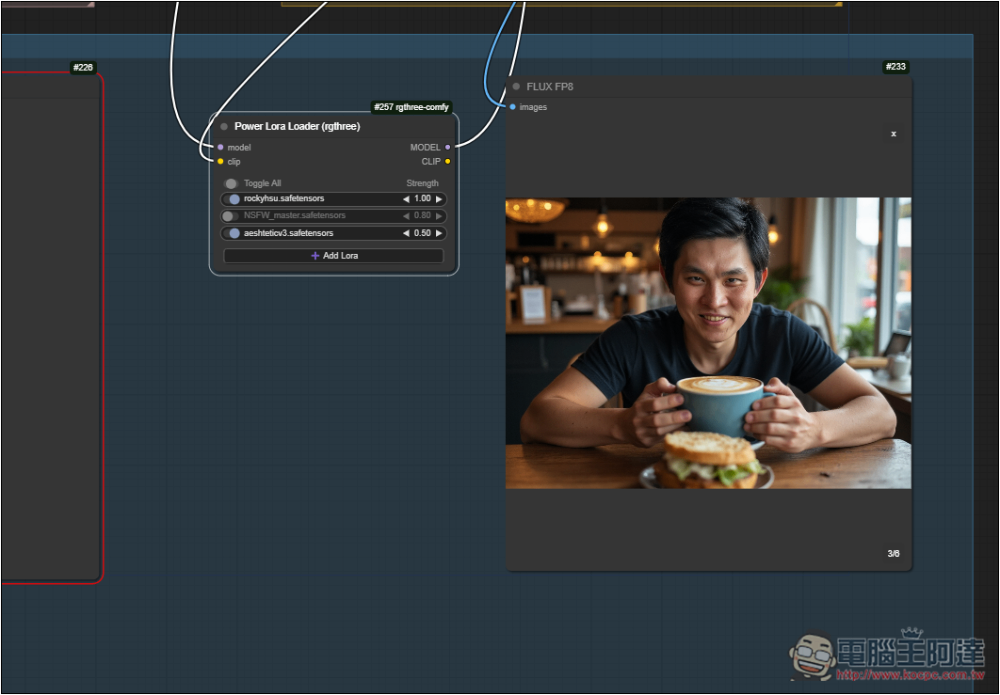
How to train your own LORA model?
There are many ways to train LORA models. If you don’t mind paying 1 to 2 US dollars, MimicPC is highly recommended because it is really simple.
- Go to MimicPC website
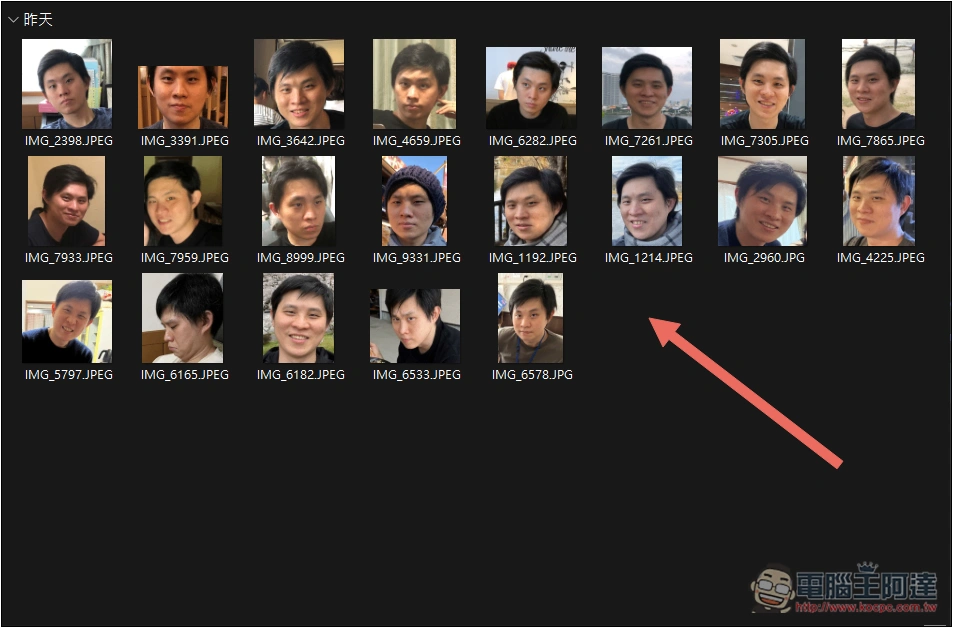
First, you need to prepare 20 photos of the head from various angles. The more angles, the better the training effect will be. The number of photos can be more, but I think 20 photos is about the same. I have tested the effect of using 25 photos, and it is not much different from 20 photos.
Like this, the photo only needs to capture the head:
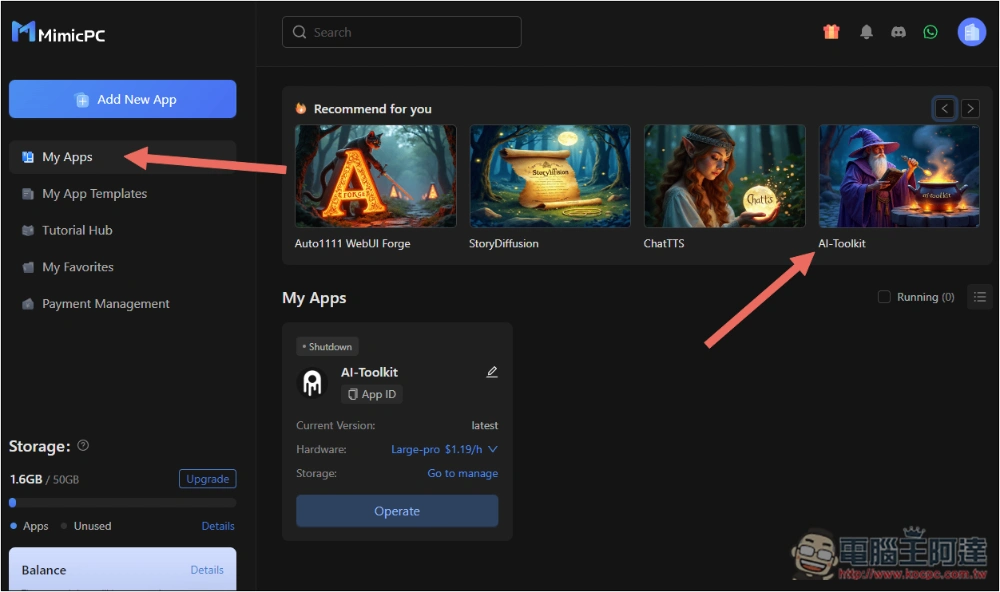
Then open MimicPC websiteAnd register an account, in MyApps, select “AI Tookit”. As a reminder, this is a paid service, not a free service, but training a model only costs about US$1.50, which is about NT$50. I think it is a good deal because you don’t need to buy an additional stronger graphics card, and the training process will not affect your computer performance:
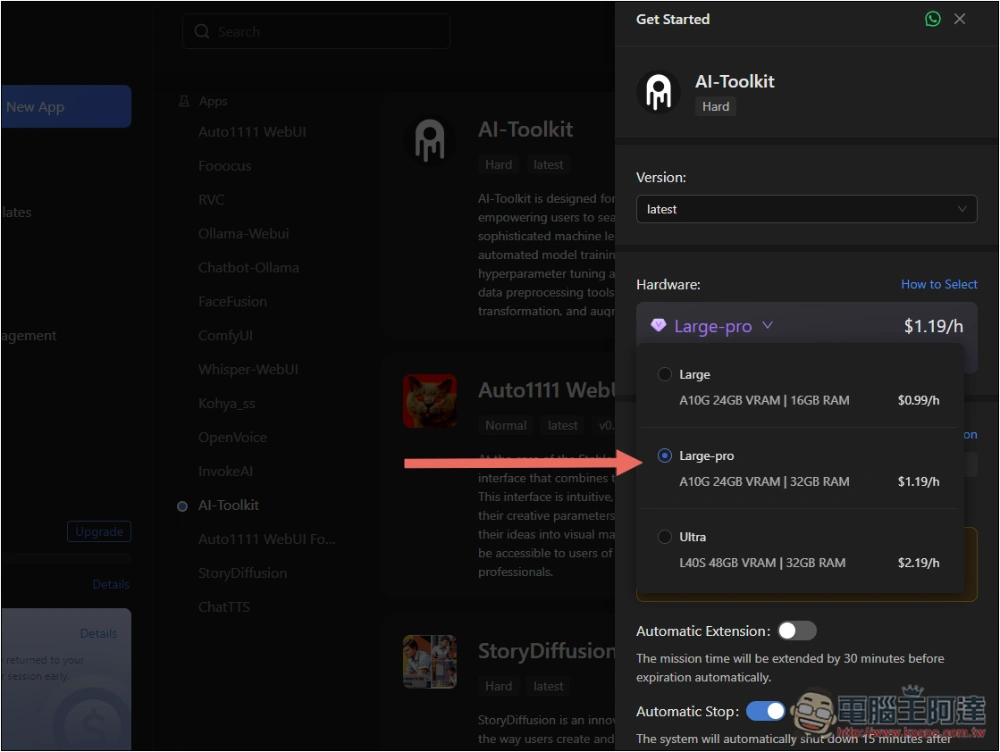
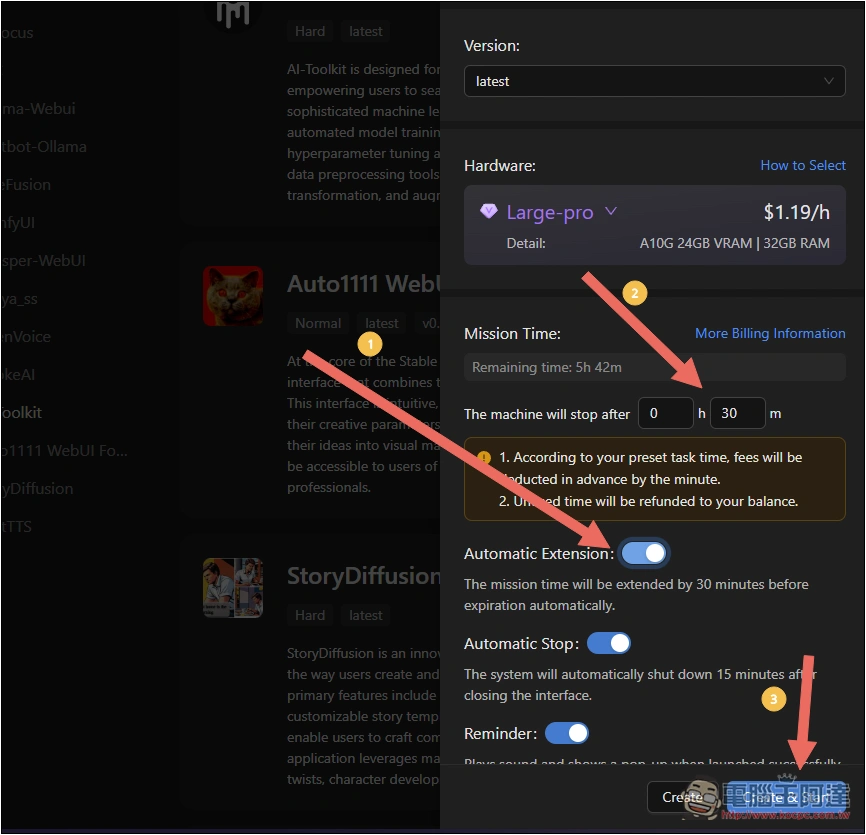
The hardware default is Large, and it is recommended to choose Large Pro. Although it costs US$1.19 per hour, the memory will be doubled, and the training speed will be almost twice as fast as Large, so you can actually save more:
The Mission Time time part of 1 hour and 30 minutes is safer, but I recommend turning on the Automatic Extension function below, so that you don’t have to worry about the set time being insufficient, causing the machine to automatically shut down. If you turn it on, you don’t have to worry about Mission Time. After setting, click Create & Start below:
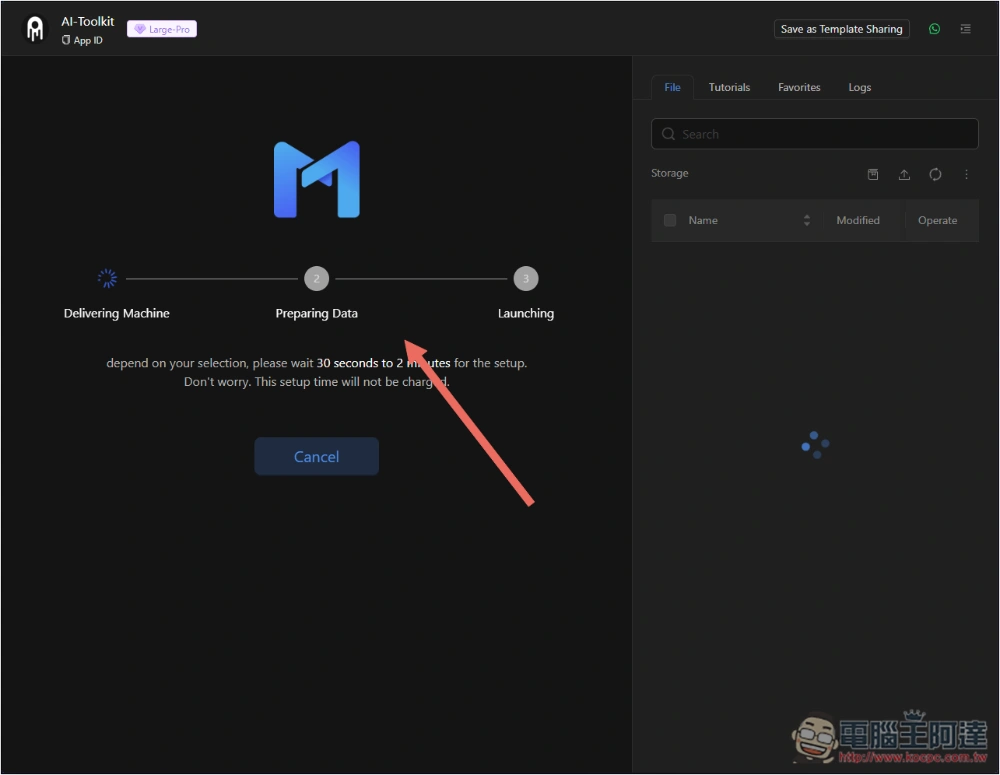
Then the machine will start to be enabled, which will take about 2 minutes to complete, and no time will be deducted here:
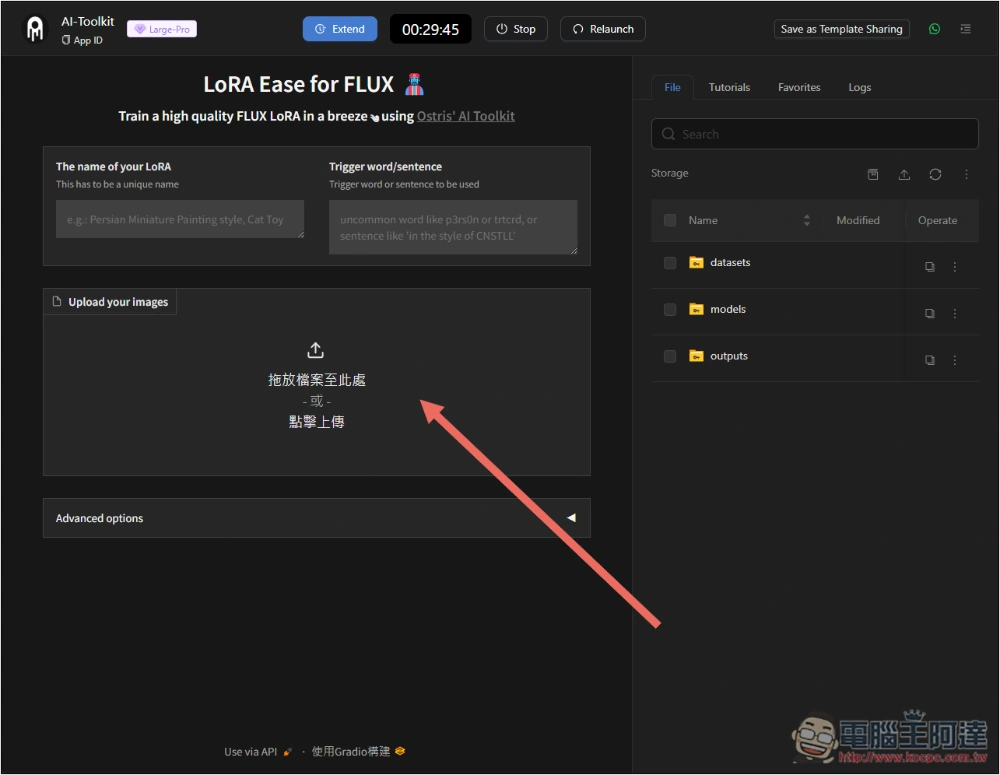
After entering this screen, the time will start counting. Upload all the photos you have prepared:
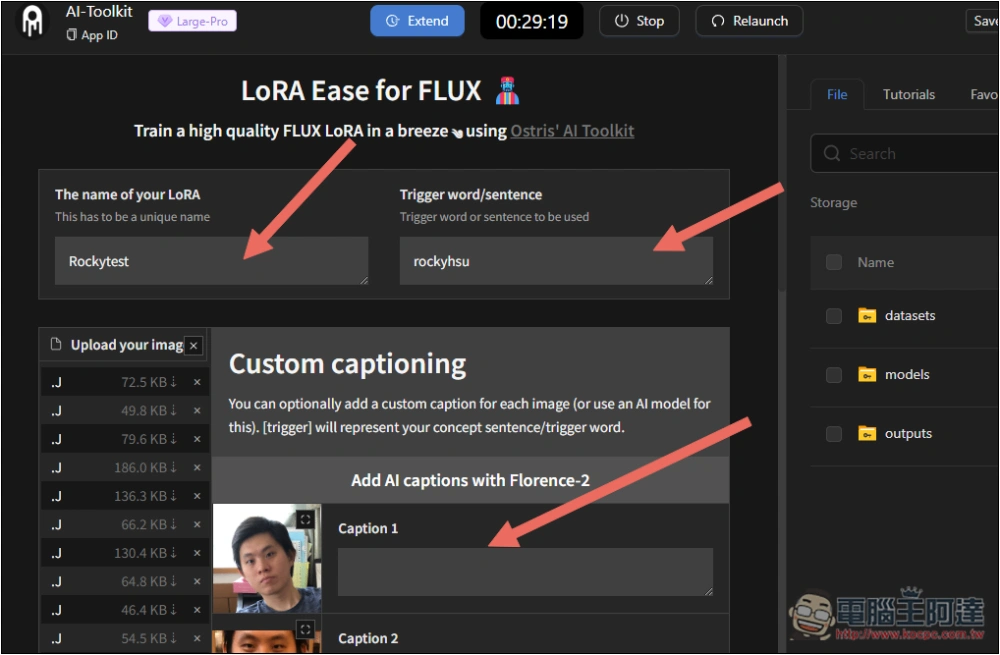
Set the project name, and then the very important Trigger word. I choose rockyhsu. In the future, as long as my Prompt description contains rockyhsu, this model will be enabled. There is no need to fill in the Caption of each photo below. I have tested that the effect is very good if it is not filled in:
Once everything is set up, press Start training and training will begin:
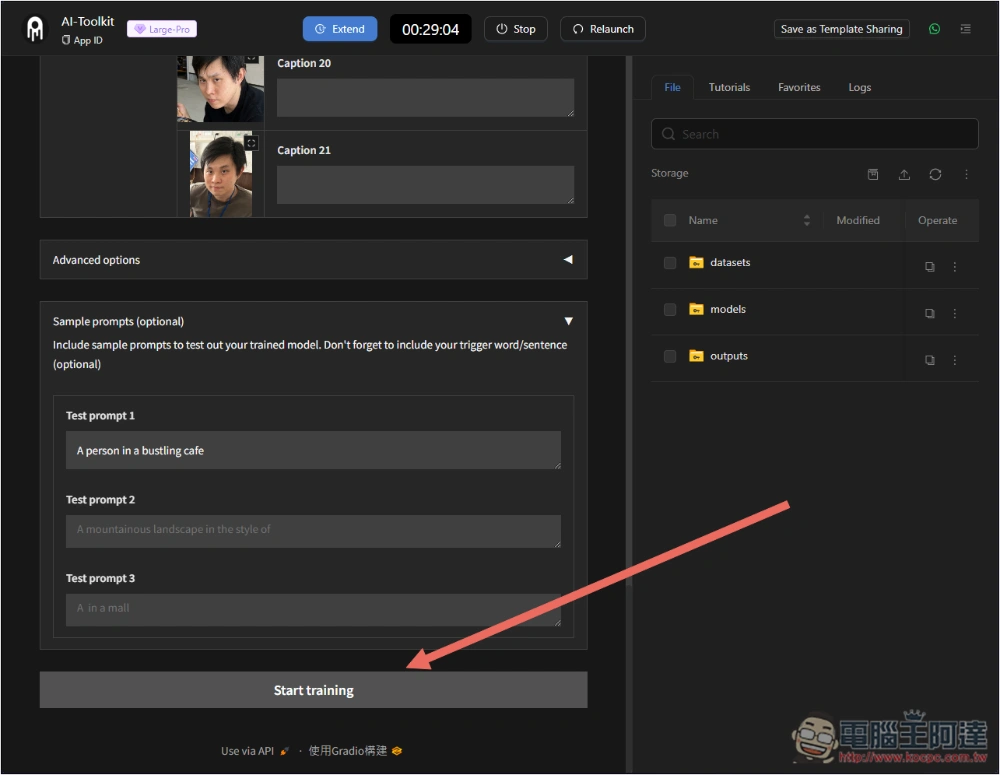
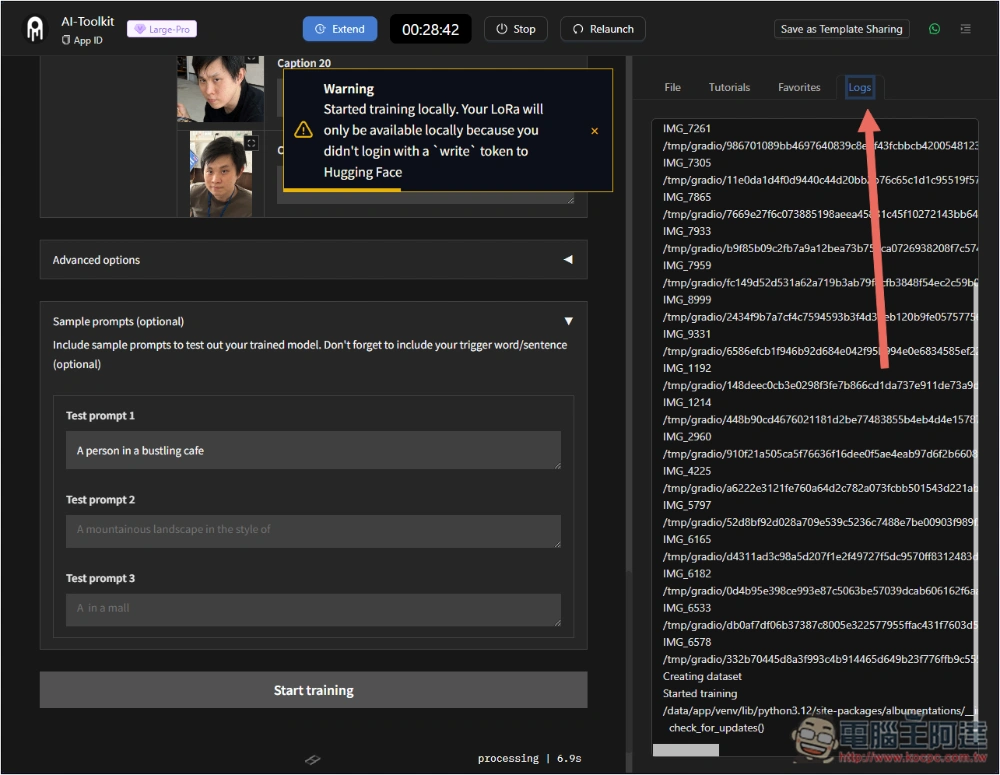
You can view the current training status in Logs on the right:
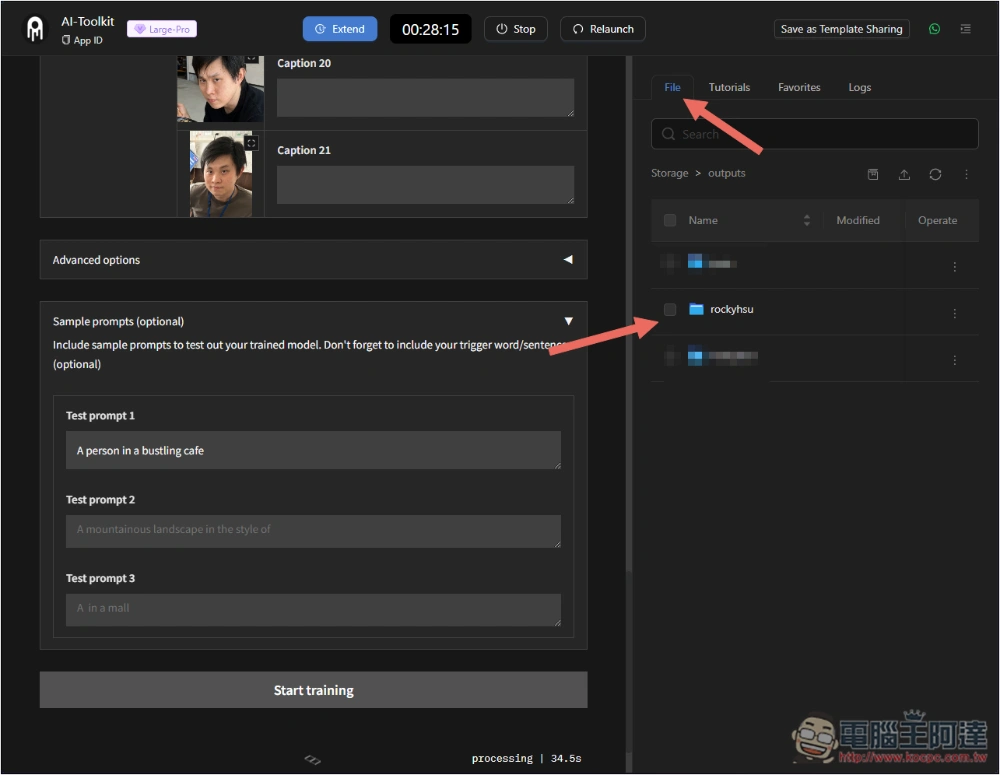
After training, remember to press Stop above to stop the machine. The model file can be found in the outputs folder in File and will be the project name you selected:
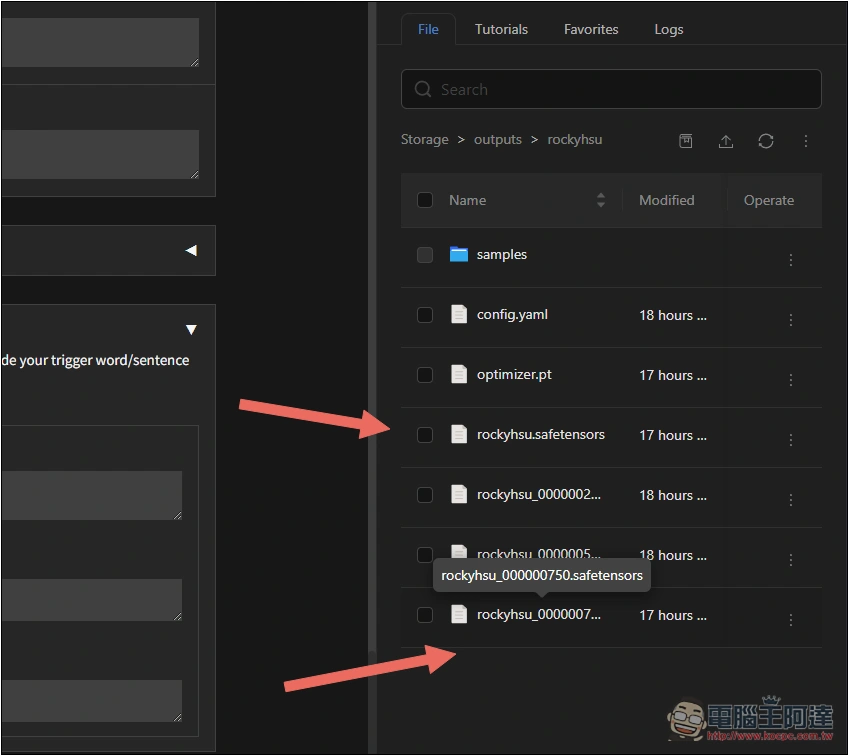
After entering the folder, you will see several model files. Basically, you only need to use the last one, which is xxxx.safetensors. Of course, you can also try the 750 model:
Check the model file you want to download, click the menu on the upper right… and you will find the download function:
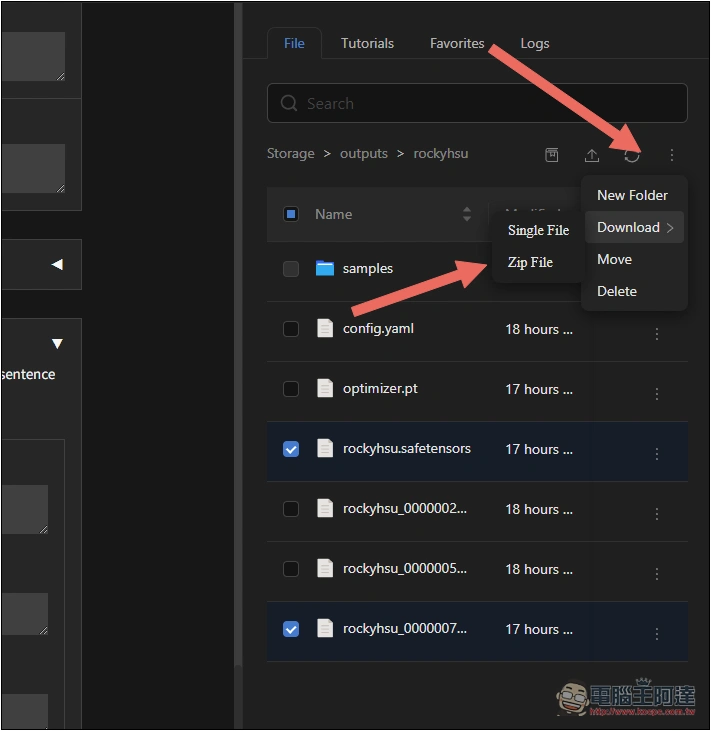
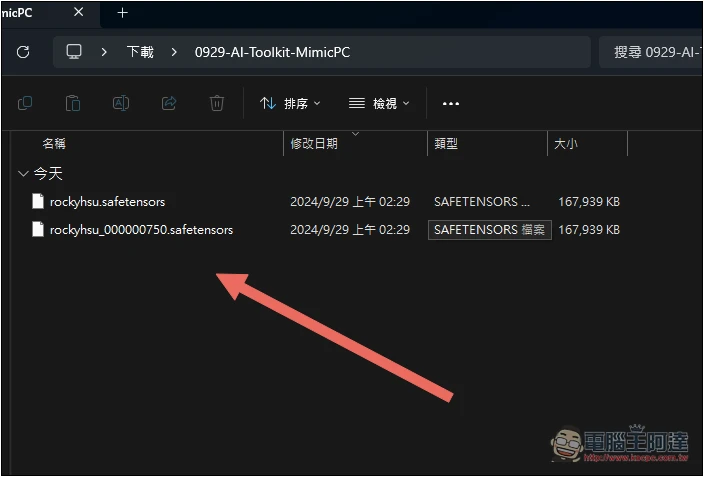
After downloading, unzip it and move the model file into the program you use, like I use ComfyUI:
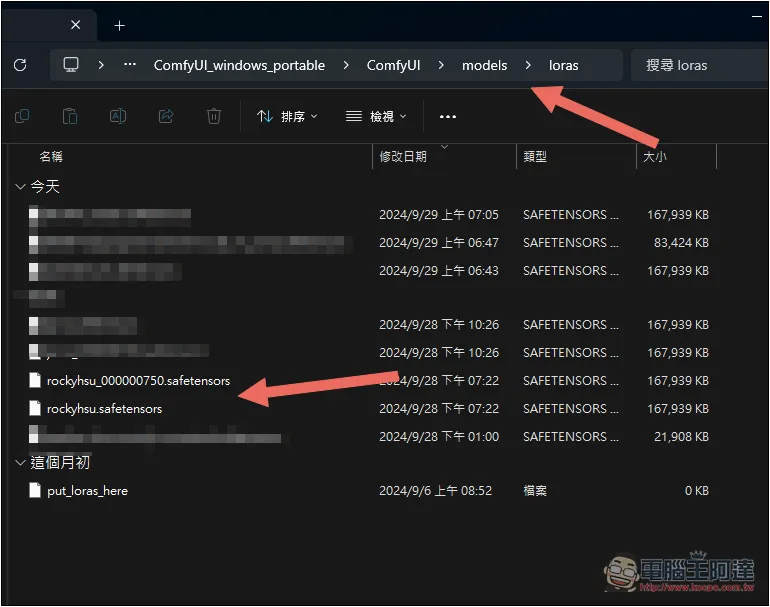
Place it in the Model > loras folder under ComfyUI, or if you have installed other Nodes, see where the loras folder is:
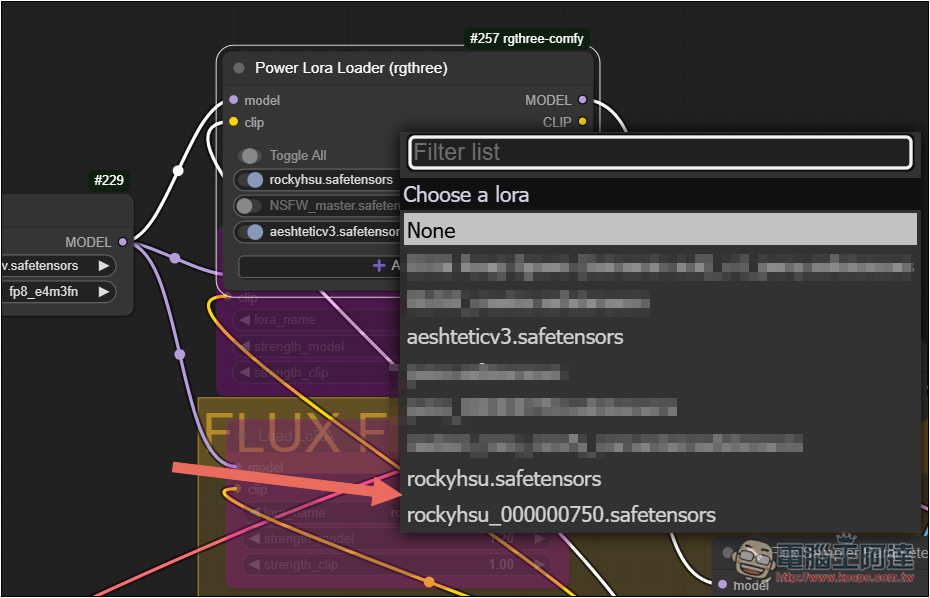
Open ComfyUI, you can select this Lora model to start generating images:
If you are not confident in your prompts or want to get higher quality prompts, you can use this “Flux Prompt Enhancer“Free tool, enter a simple prompt, it will automatically generate a more detailed prompt, and you can also choose a style. However, it should be noted that the generated Pmopt should also be checked. Like the one I generated, it confuses the gender. You should use he or his:
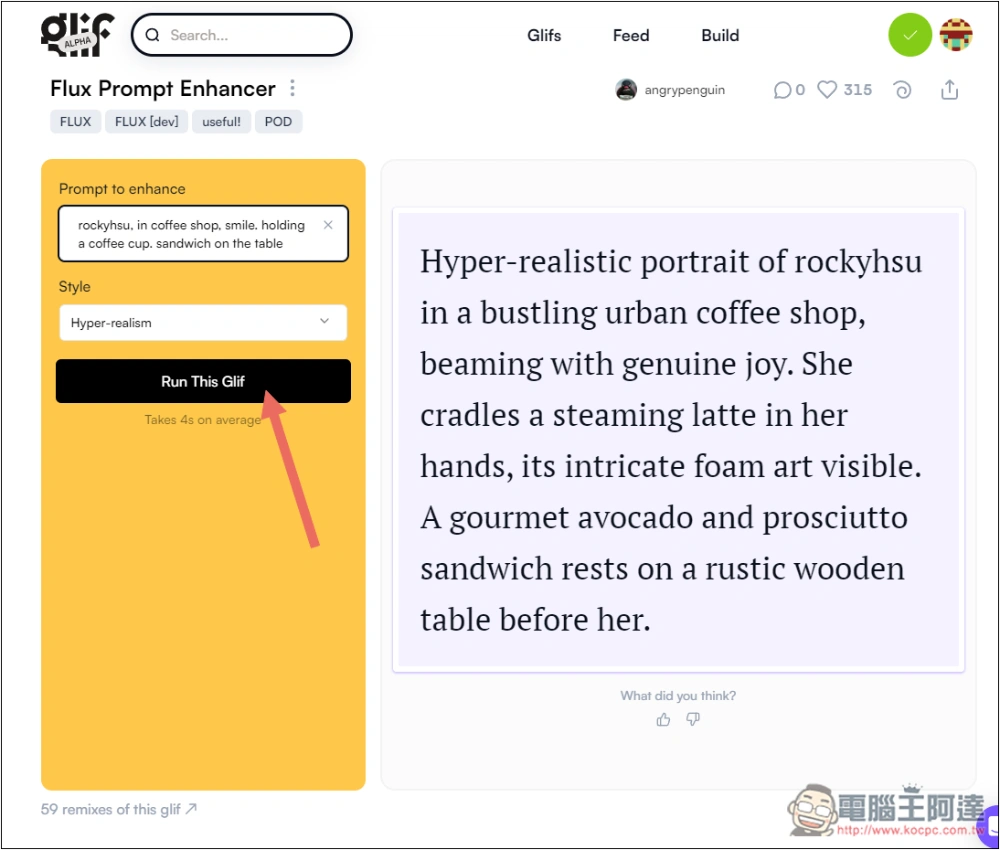
Then you can throw it into ComfyUI and generate it.
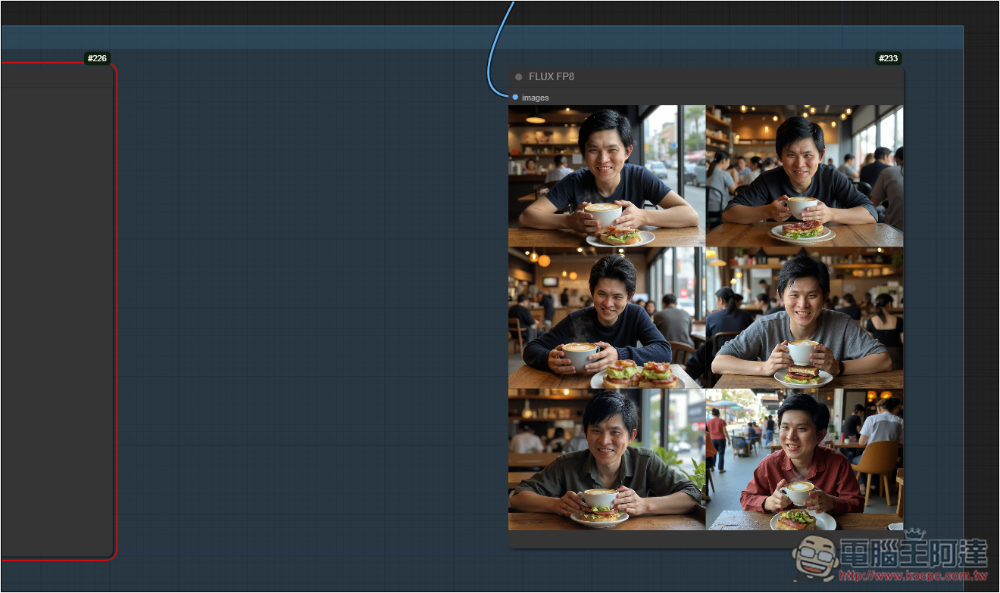
How ComfyUI uses Flux and LORA models to generate AI images
If you still don’t know how to set up ComfyUI locally to use Flux and LORA, here’s a quick explanation.
You need to prepare several files
- ComfyUI free installation package
- ComfyUI-Manager
- Flux model and required files
- LORA model
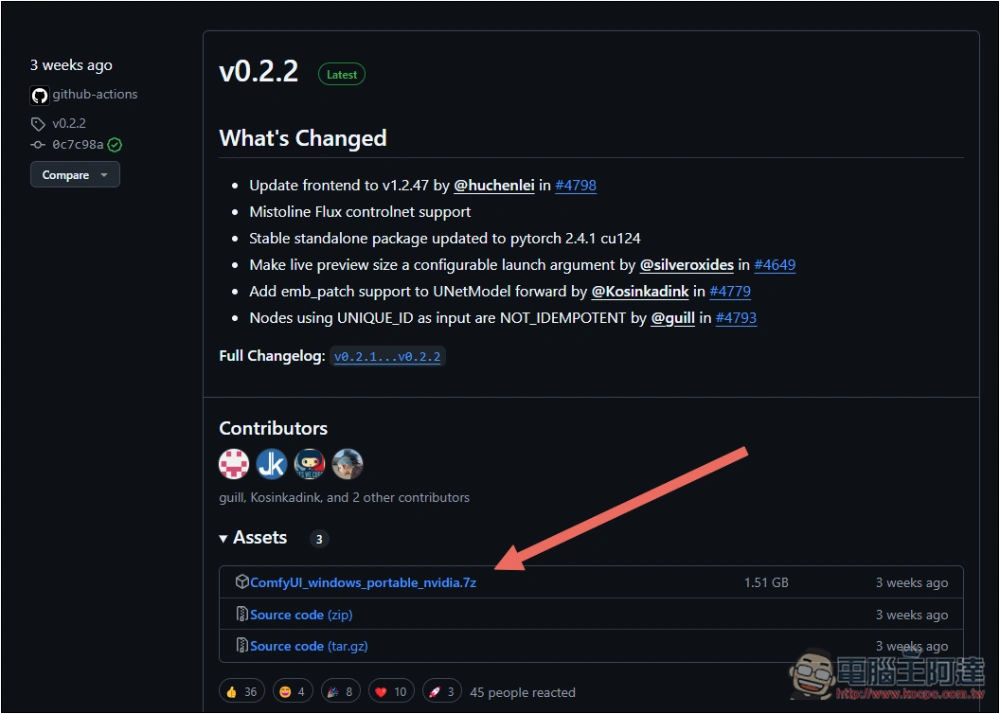
ComfyUI free installation packageYou can download it from GitHub, download the .7z one, and unzip it after downloading:
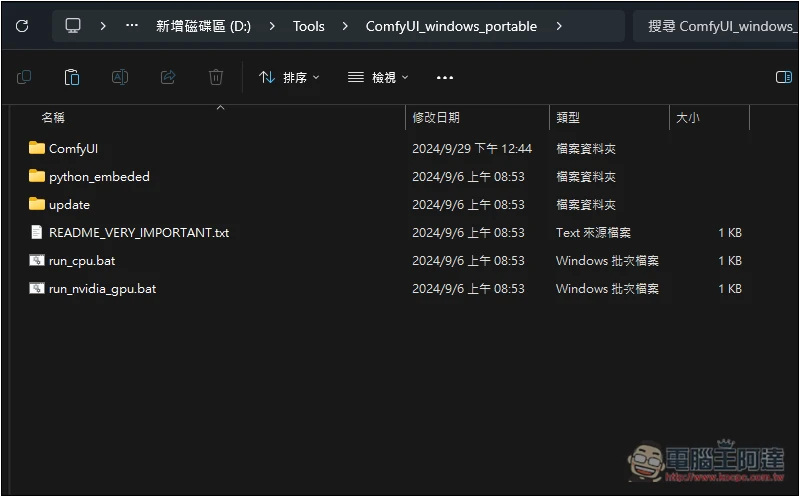
The content inside is worth noting that the two files run_cpu and run_nvidia_gpu both execute ComfyUI. Those who have NVIDIA graphics cards remember to use run_nvidia_gpu, and those who do not have them use run_cpu. The CPU will be used for calculations, and the speed is slower:
ComfyUI-Manager The same is downloaded from GitHub, open the Code menu on the upper right, and select Download ZIP:
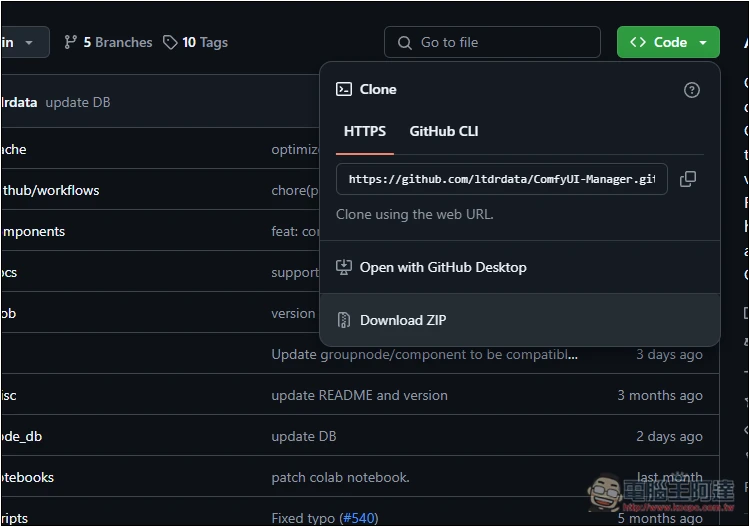
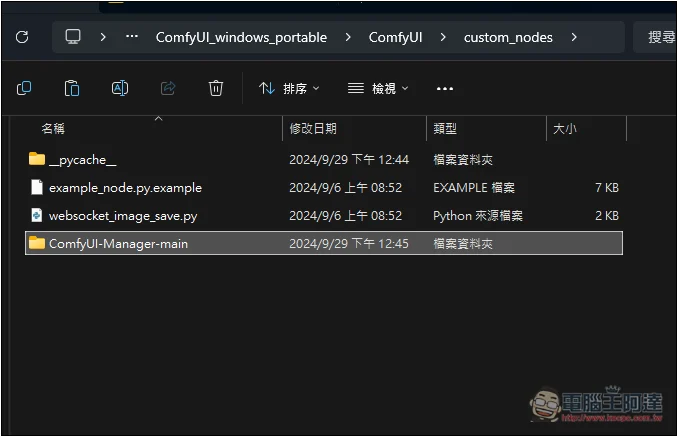
After decompressing, put the folder into \ComfyUI\custom_nodes, as shown below:
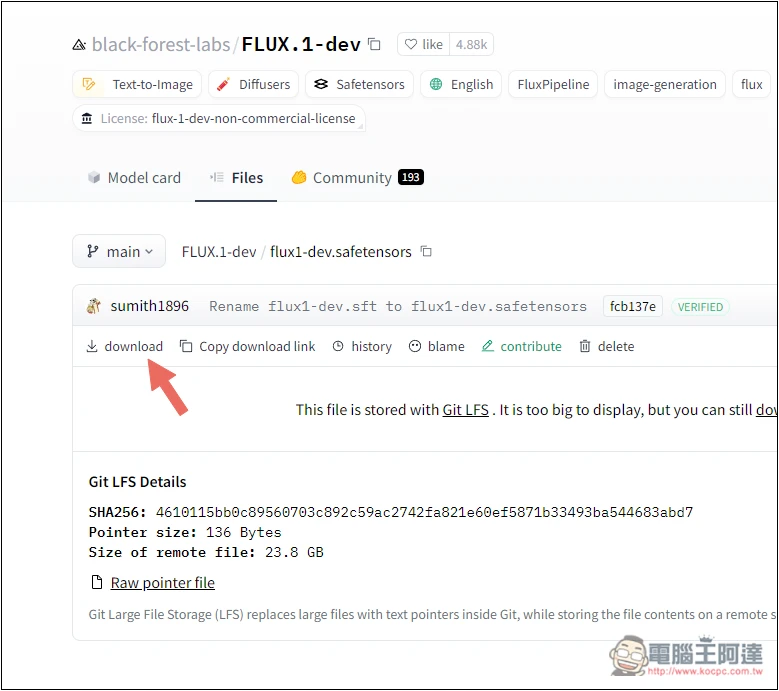
There are many Flux models, download them according to your computer hardware:
- FLUX.1-dev(Recommended to use 12GB VRAM or above)
- FLUX.1-schnell(It is recommended to use 12GB VRAM or above), the generated effect will be more animated
- flux-dev-fp8(This is recommended for 8GB VRAN and below)
- flux1-schnell-fp8(This is recommended for 8GB VRAN and below), the same effect is better than animation
Press the Download button next to it:
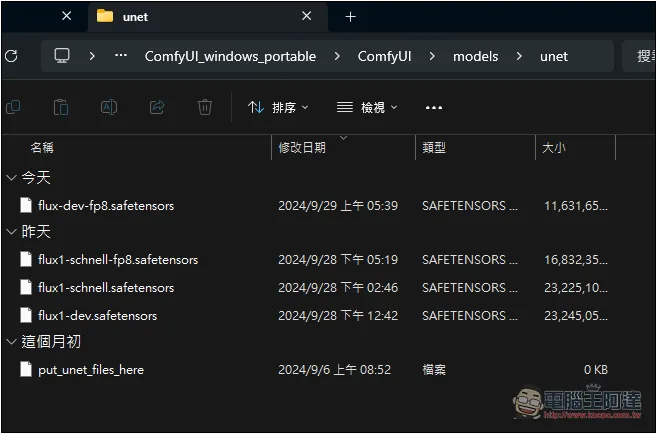
After downloading, place the model file in ComfyUI\models\unet:
Next is vae, download ae.safetensors:
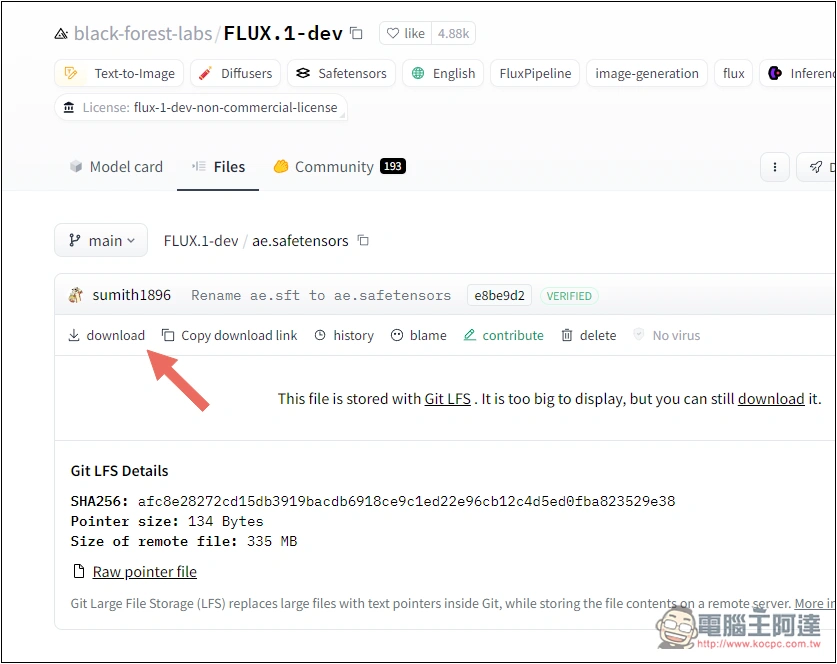
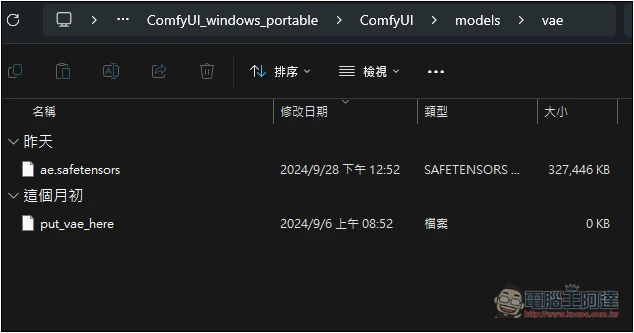
The file is placed in ComfyUI\models\vae:
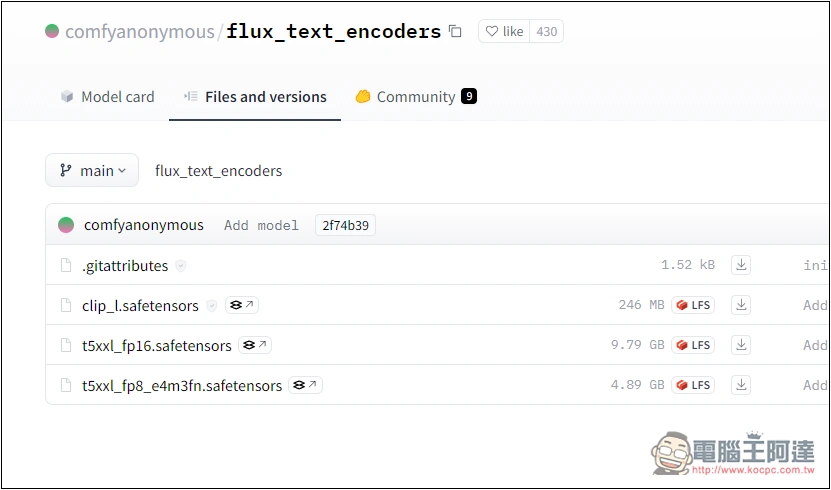
Still need to download clip, clip_l.safetensors must be there. If the t5xxl computer specifications are not good enough, you can download fp8, and if the computer specifications are good, you can download fp16:
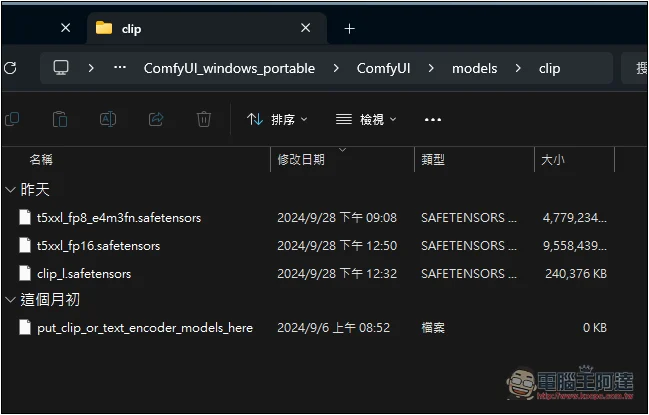
Put clip_l.safetensors and fpi8 or fp16 in ComfyUI\models\clip:
The last thing is to make sure your Lora model is placed under ComfyUI\models\loras.
After everything is completed, open ComfyUI, execute run_cpu and run_nvidia_gpu, and then the browser will open this page:
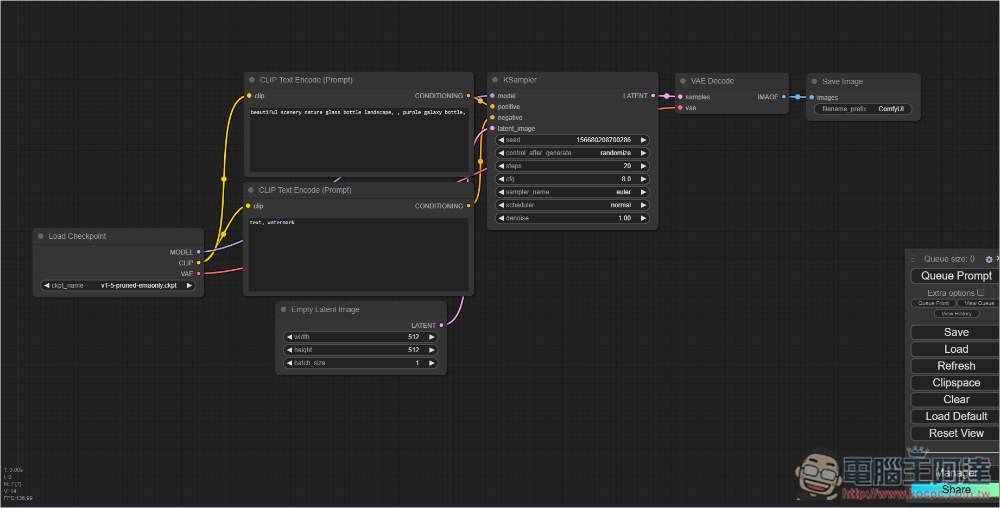
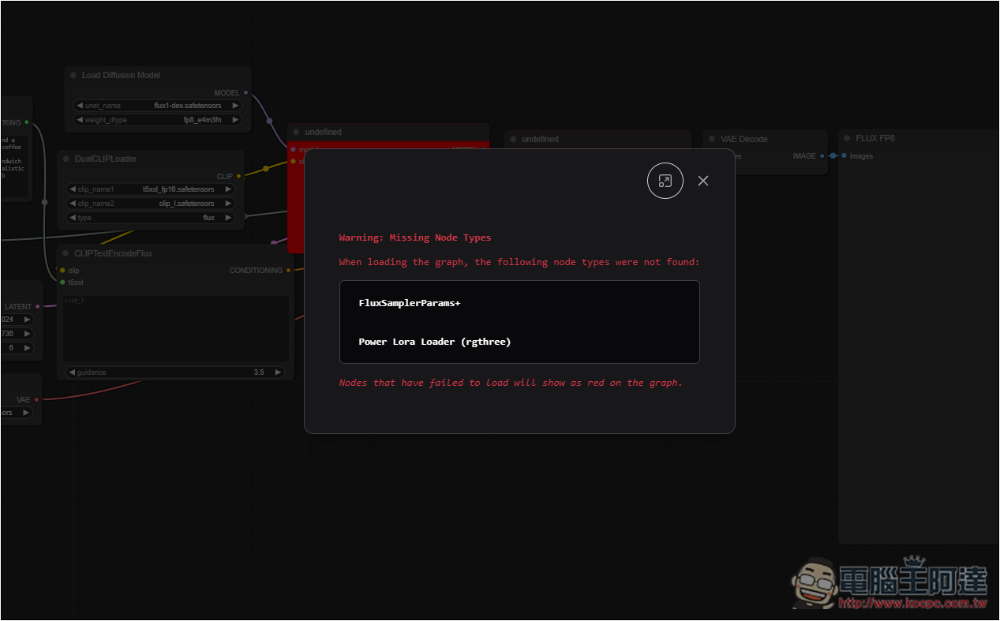
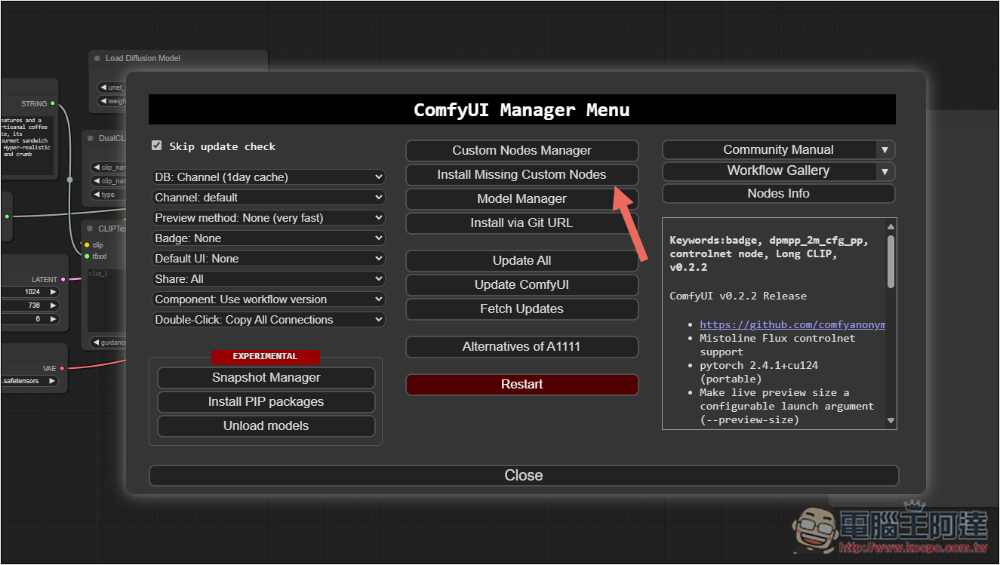
At this time, you need to set up the Workflow of Flux + LoRA. You can set up the Workflow yourself, or grab it directly.My Workflow, after downloading, drag the file into the ComfyUI window, and your original Workflow will be overwritten. After overwriting, a red block will appear, indicating that some Nodes are missing. Go to the Manager on the lower right:
Press Install Missing Custom Nodes:
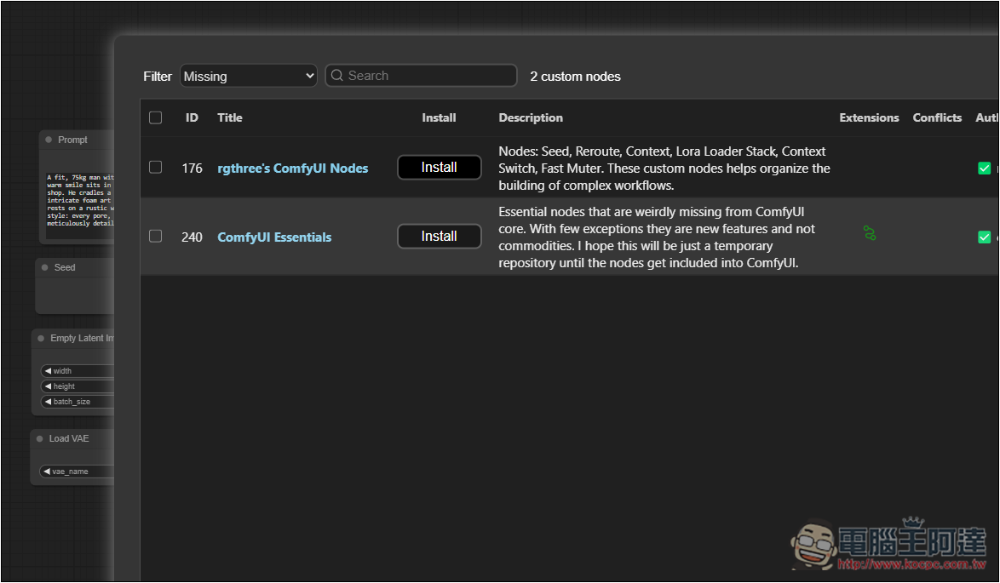
Install both listed on the screen. You will need to restart after installation:
The red blocks and warnings have disappeared, and you are ready to start generating AI diagrams:
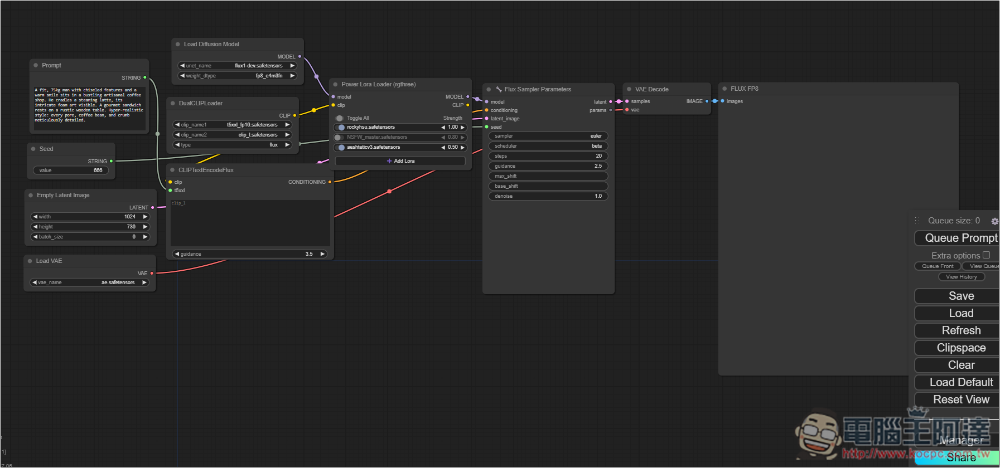
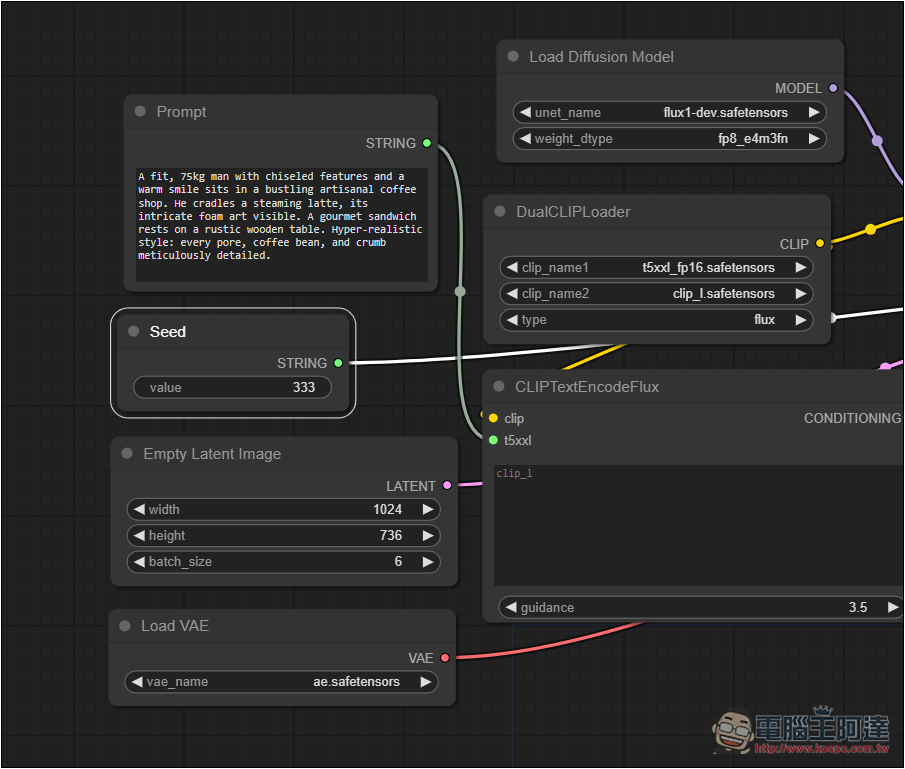
Enter the image description in Prompt, Empty Latent Image is the image size and number, and Load VAE ensures that ae.safetensors is selected. Load Diffusion Model is the Flux model you just downloaded. DualCLIPLoader is the two clip files just downloaded. CLIPTextEncodeFlux can be left blank:
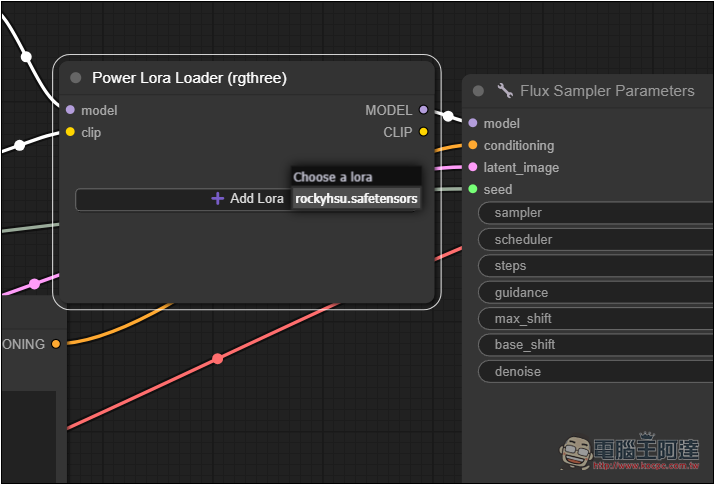
Power Lora Loader on the right selects your LoRA model:
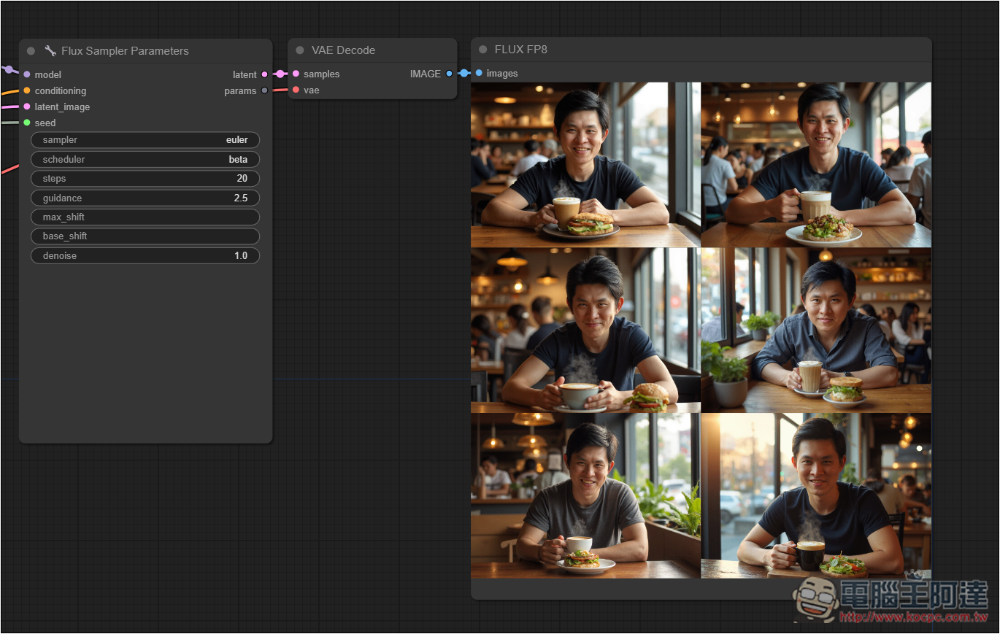
Flux Samplder Parameters will affect the final generated image. You can play it by yourself or keep the default, but remember to change the Step. If the dev model, the official recommendation is 20, schnell is 4. Finally, press the Queue Prompt on the right to start generating, and the final image will be displayed in FLUX on the right. If you like, you can press the right button to save and download:
Source: KOCPC Chinese