


At this WWDC developer conference, Apple announced that it will use the Final Cut Camera app, an extension of the Final Cut Pro professional editing software, to make the original iPhone shooting interface no longer stupid. Now it’s officially launched. Continue reading Apple’s free Final Cut Camera advanced photography application is officially launched for hands-on play, and Final Cut Pro 2, which can wirelessly monitor up to four iPhones, is also reported.

Apple’s free Final Cut Camera advanced photography app is officially launched for hands-on play, and Final Cut Pro 2, which can wirelessly monitor up to four iPhones, is also here
The iPhone, which continues to move towards the “Pro” field of professional videography, has proven through several consecutive Apple conference videos that its camera system is fully capable of handling such professional applications.
At this WWDC developer conference, Apple also announced that it will extend the Final Cut Pro professional editing software to a shooting application, the Final Cut Camera app, so that the original iPhone shooting interface will no longer be stupid. Support for advanced shooting functions including manual exposure, color temperature, even manual focus and external microphones will be provided through a free app.
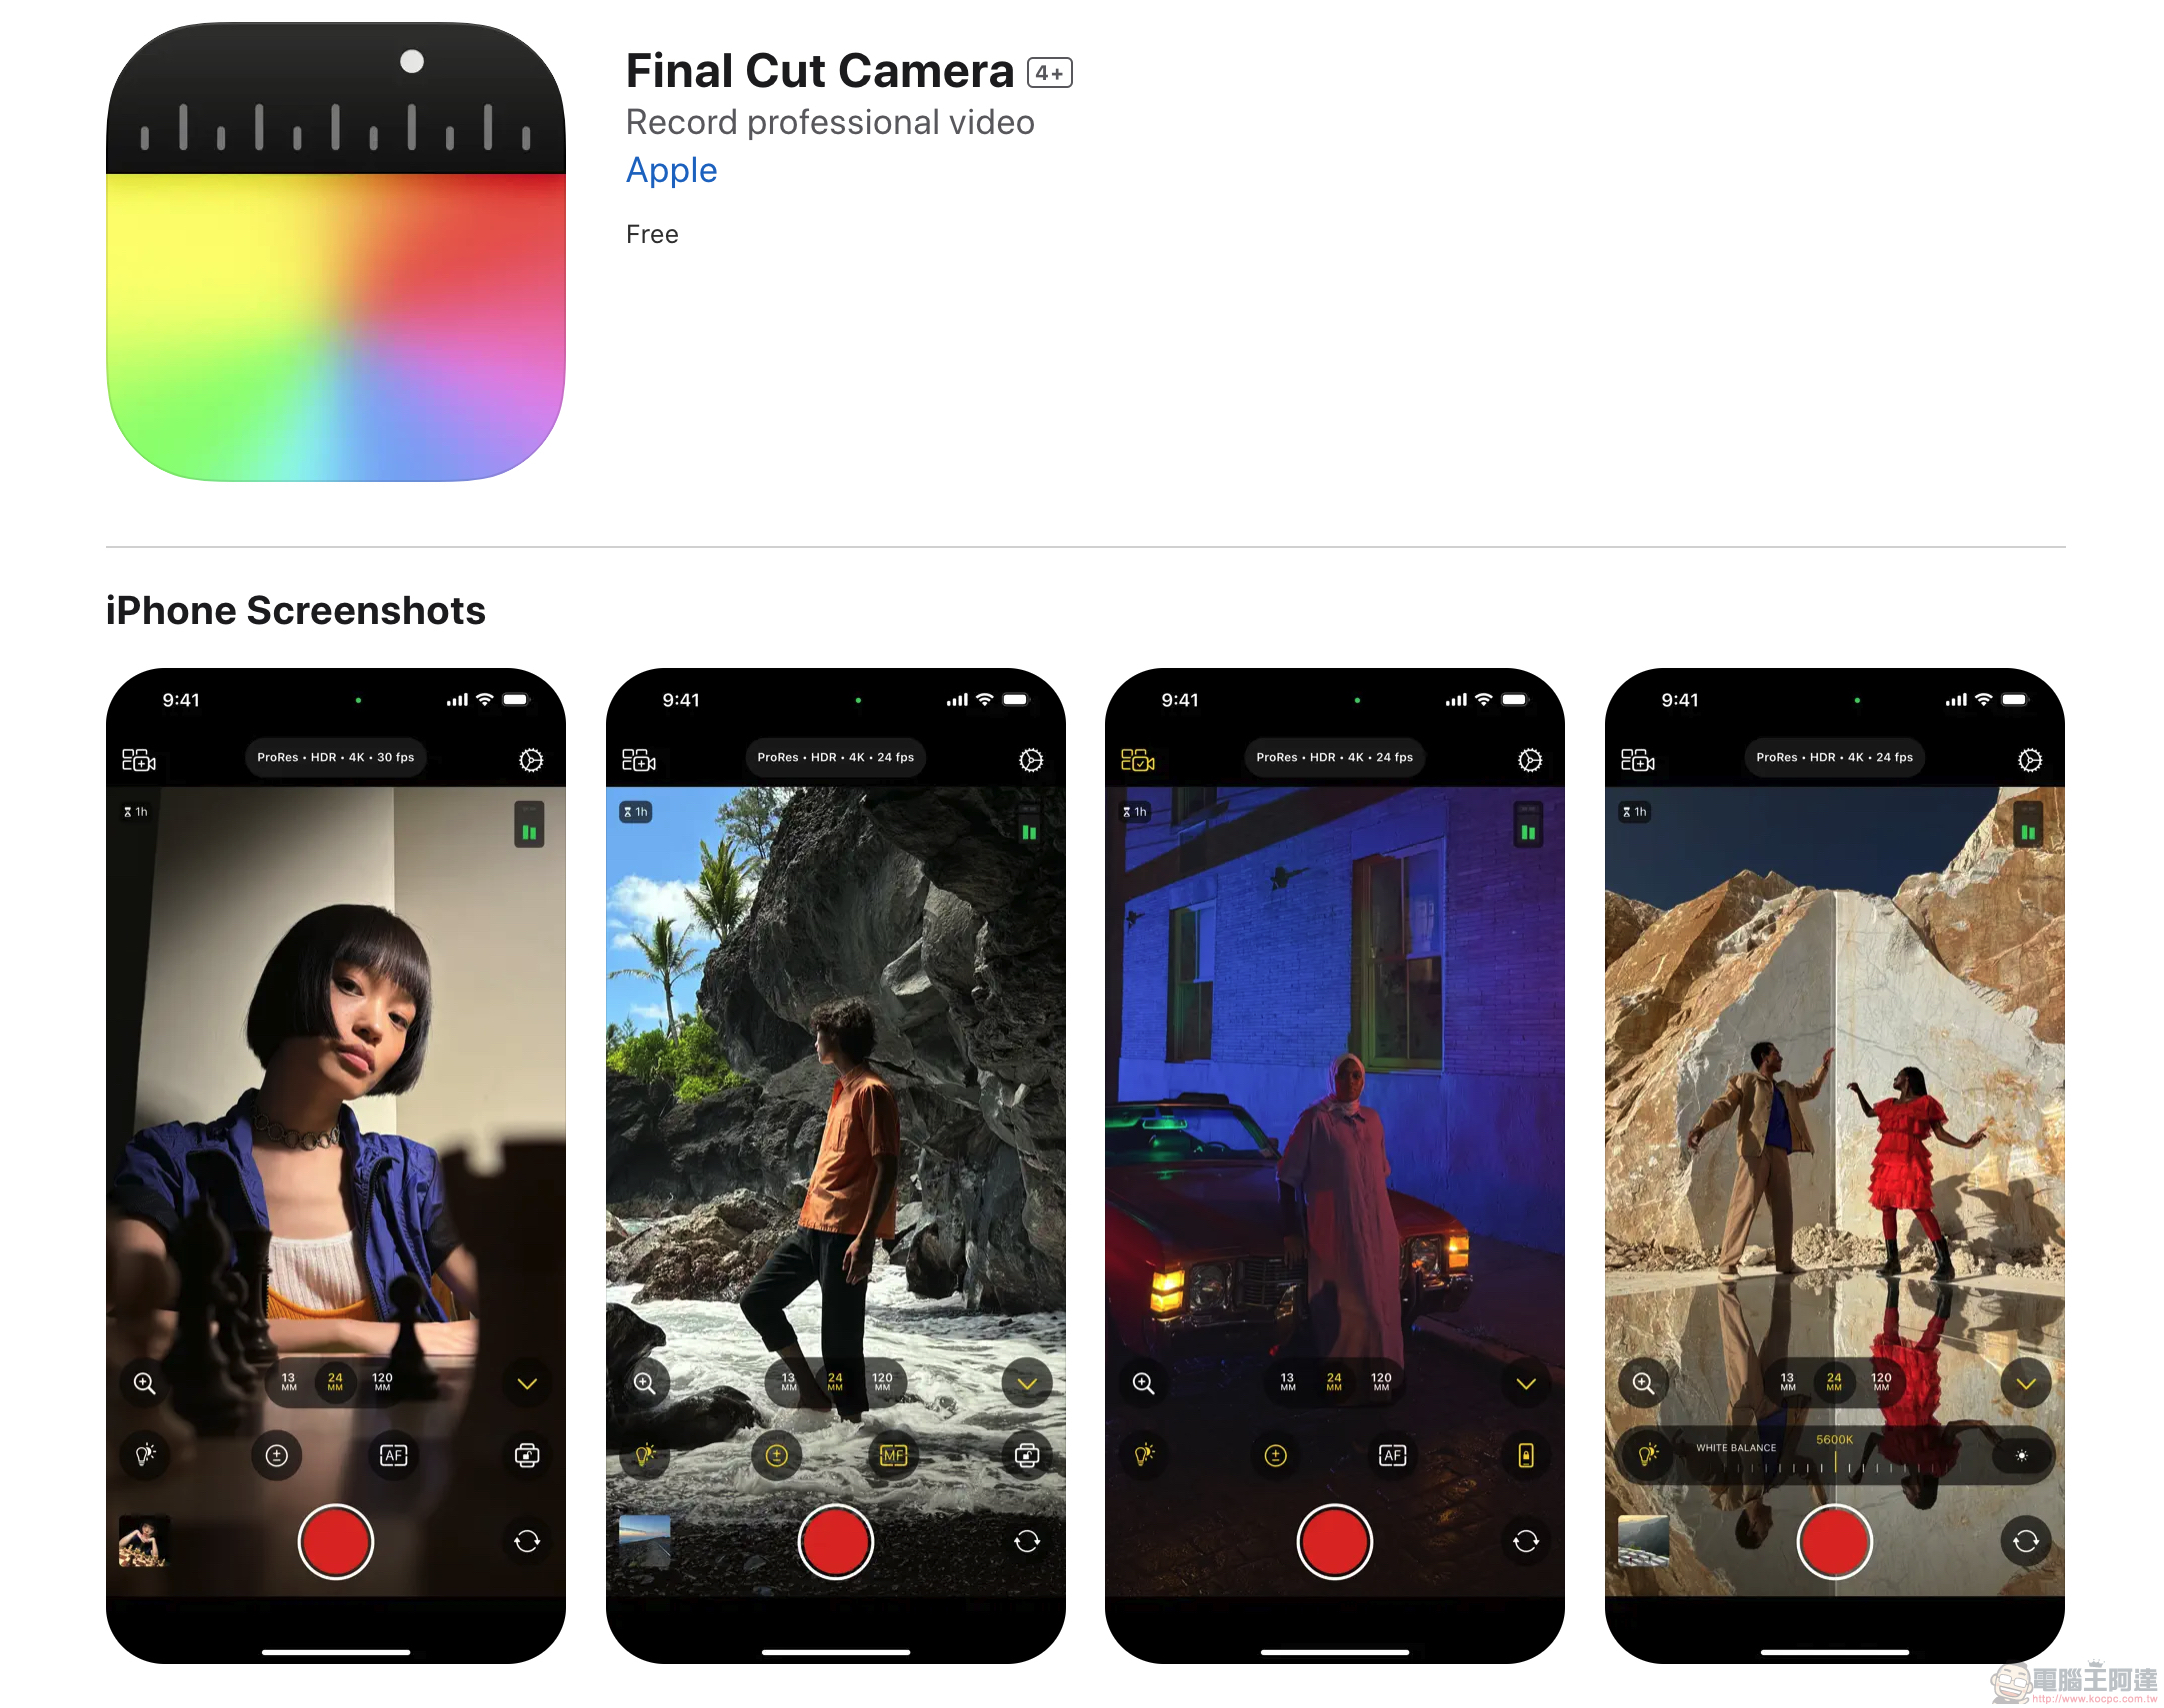
For those who want to shoot professional videos on their iPhone, the Blackmagic Camera app has become theApple Scary Fast conferenceAfter launching the “Real. Shot on iPhone” shooting application, you can now download the advanced video recording application Final Cut Camera provided by Apple directly from the App Store to “start shooting” (the previous one is Final Cut Camera App Store download link Please click me).
Computer king Ada also came to quickly test this original professional-grade iPhone photography application that has been highly anticipated since its announcement at WWDC 2024.
Final Cut Camera Quick Play
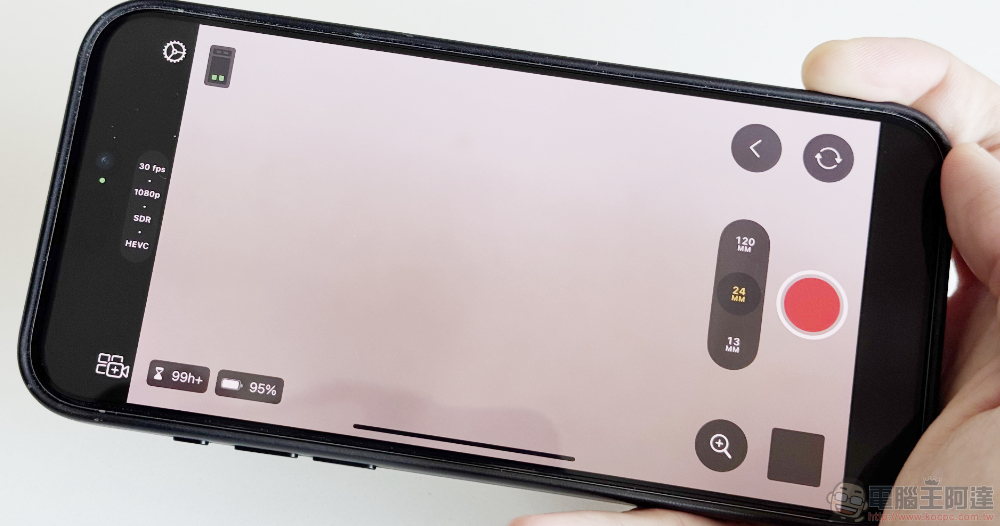
Final Cut Camera supports iPhone Xs and later models running iOS 17.4 or above and iPad models running iPadOS 17.4 or above. Basically, there is no limit to the “Pro” model that can be used – after all, there was no concept of a Pro version of iPhone in the Xs era.
After downloading and going through a series of consent permissions, you will see the shooting interface above.
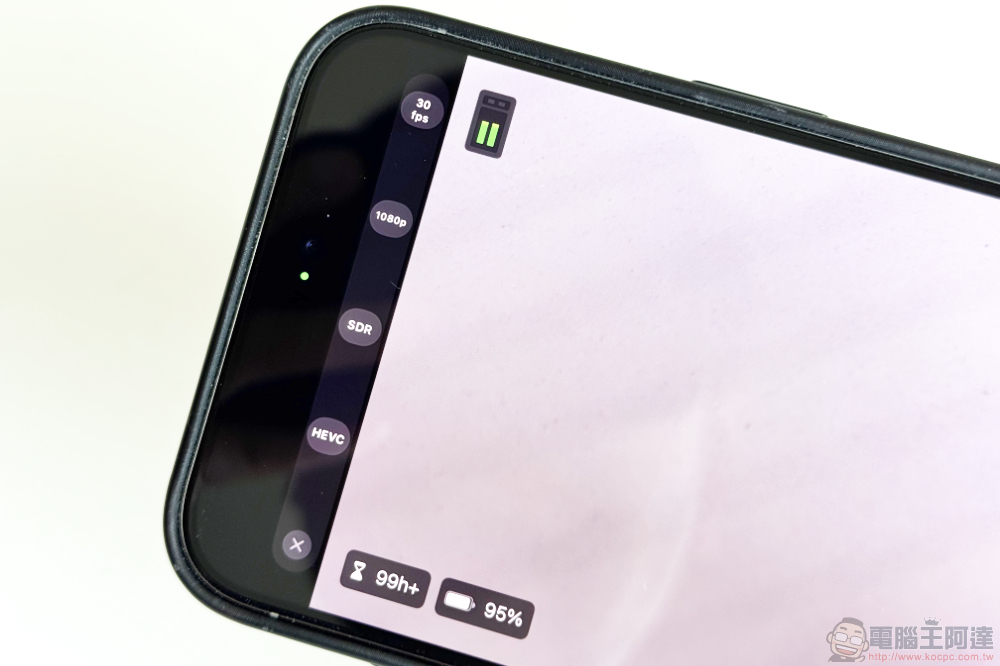
On the left side of the screen, you can perform functions including multi-screen monitoring (requires Final Cut Pro 2 for iPad) connection, application settings, and quick switching of image quality; next to the shooting preview screen, there are left and right channel monitoring displays, and in the lower left corner is the recording time and the current battery level of the phone.
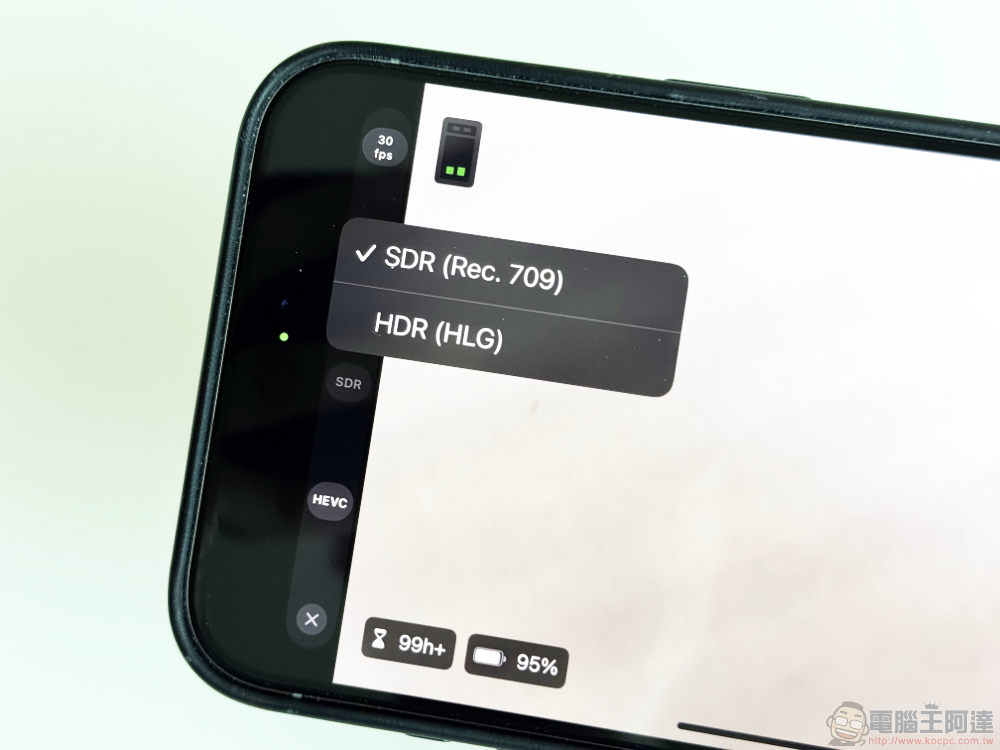
You can switch whether to shoot in HDR (the default is HDR HLG).
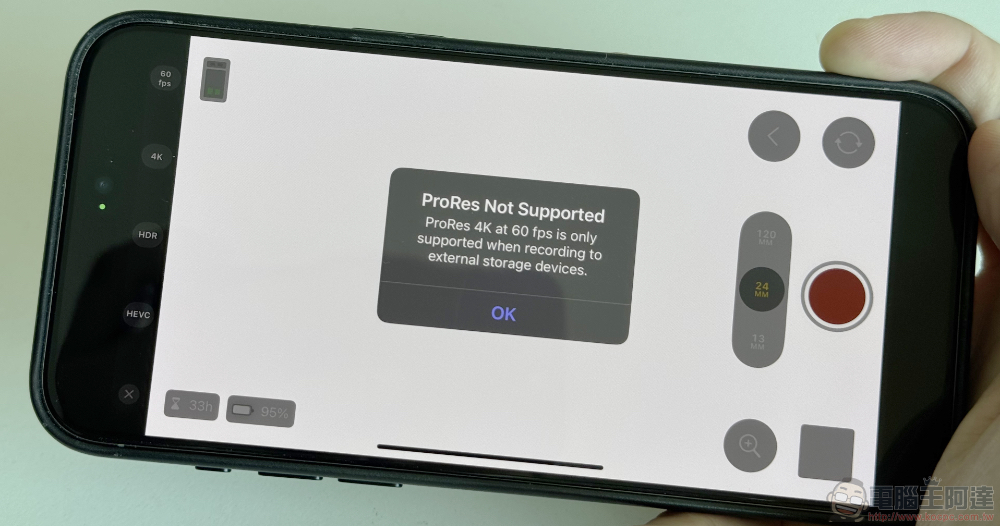
And ProRes recording is the same as the original application. You need an external storage device to record 4K@60 specifications – Oh, by the way, there is no “movie-level” option (I don’t know if you are as curious about this as me).
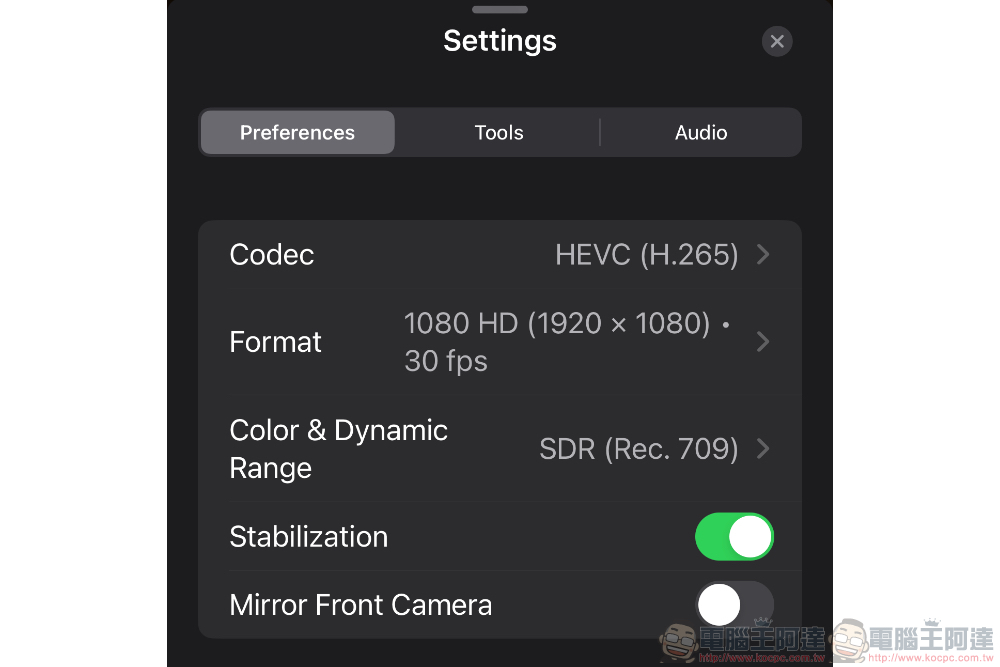
I personally believe that many people may feel that they need to test it themselves before reading the article. So I would like to mention it here first. It is recommended that you first go to the settings and turn on the anti-shake (Stabilization).
Yes, the default is off. So if you don’t often shoot on a tripod or stabilizer, it is recommended to turn it on first to ensure the stability of the shooting – speaking of it, Apple either gives you a super fool-proof and easy-to-use interface, or it is so professional that you have to learn from your mistakes (mistake).
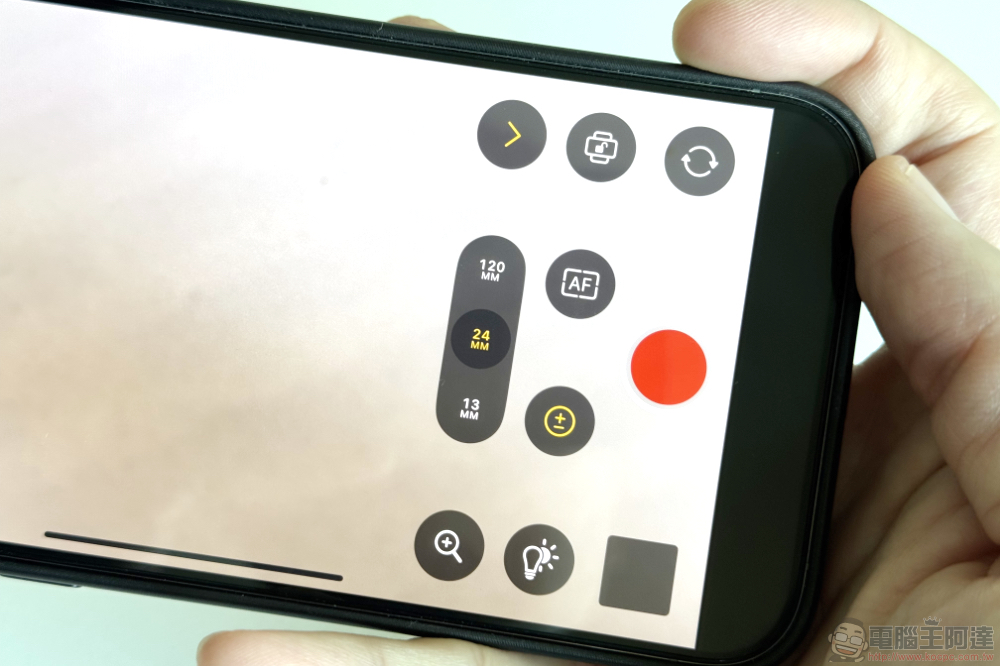
Returning to the menu on the right – you can find that even if the focus, exposure and color temperature functions are brought to the interface, Apple can still give people a very easy-to-use interface design. If you don’t see this advanced interface, you can use the “<” button at the top to open the drawer of this advanced shooting function.
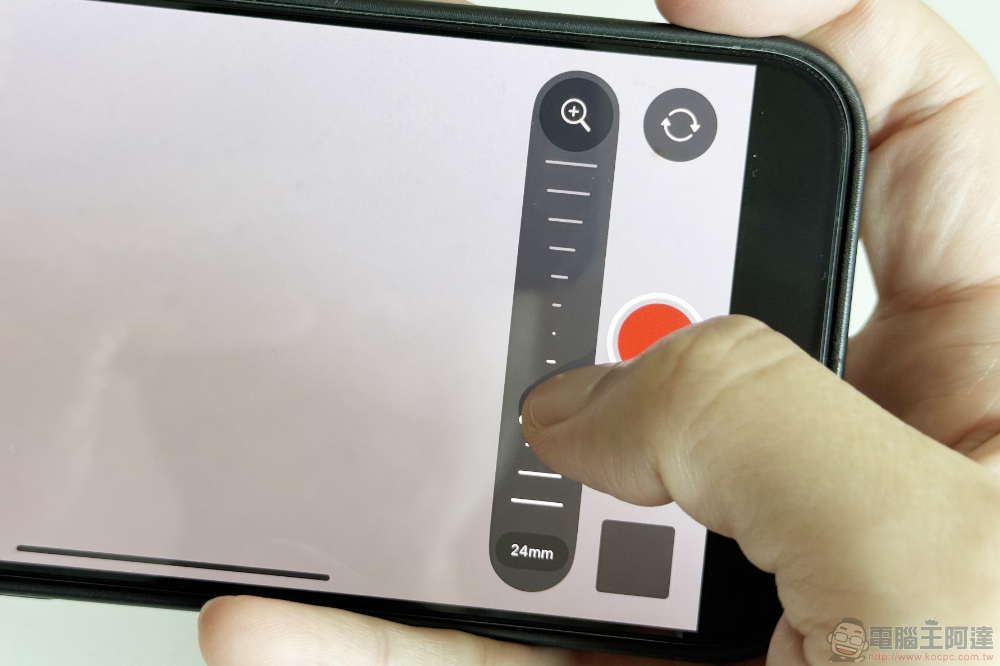
Those of you with sharp eyes may have noticed that there is no longer a seamless switching experience between ultra-wide-angle, wide-angle and telephoto lenses in Final Cut Camera. However, when switching to different lenses, you can still use the “+” button to activate the digital zoom function that supports a similar electric zoom experience.
That is to say, after trying this function, I found that it seems that if you use a relatively slow digital zoom, you will still feel the magnification feeling. But if you exceed a certain speed, you won’t feel it. For reference, the iPhone 15 Pro Max’s 24mm equivalent lens can be digitally magnified to 10x on Final Cut Camera.
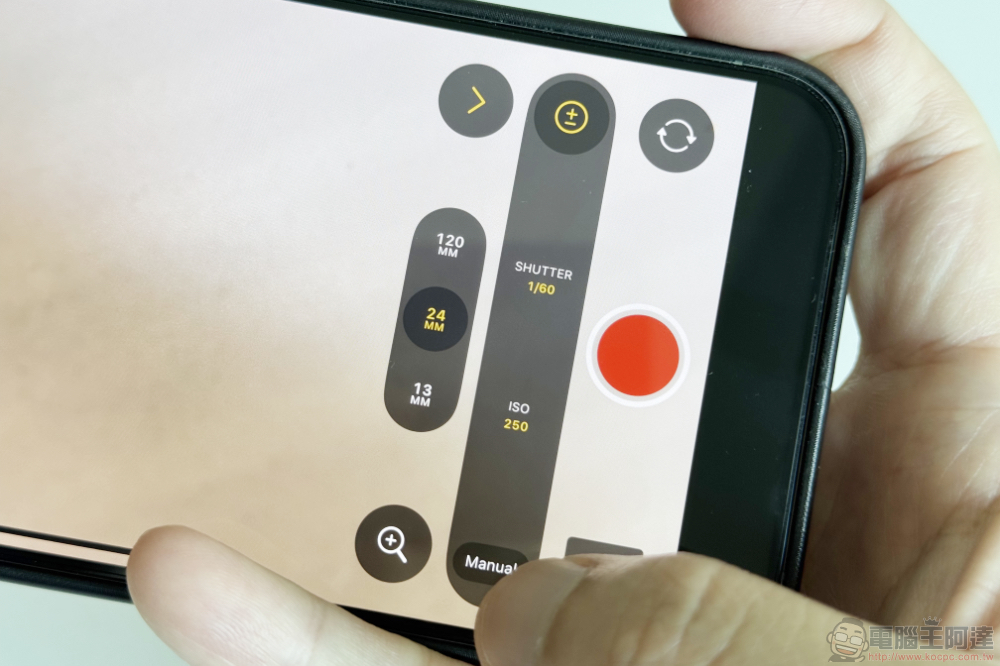
The manual shooting interface can be switched by clicking the “+-” button and then clicking the “Auto” button. Warm reminder: If you want to abide by the so-called 180-degree angle shooting principle, basically in addition to indoor light sources, you should use an ND filter to obtain normal exposure – after all, the iPhone does not support the hardware specifications of reducing the aperture. However, the editor is quite looking forward to the iPhone having a built-in ND lens function at least on the Pro series (I don’t know which one is more difficult to implement?).
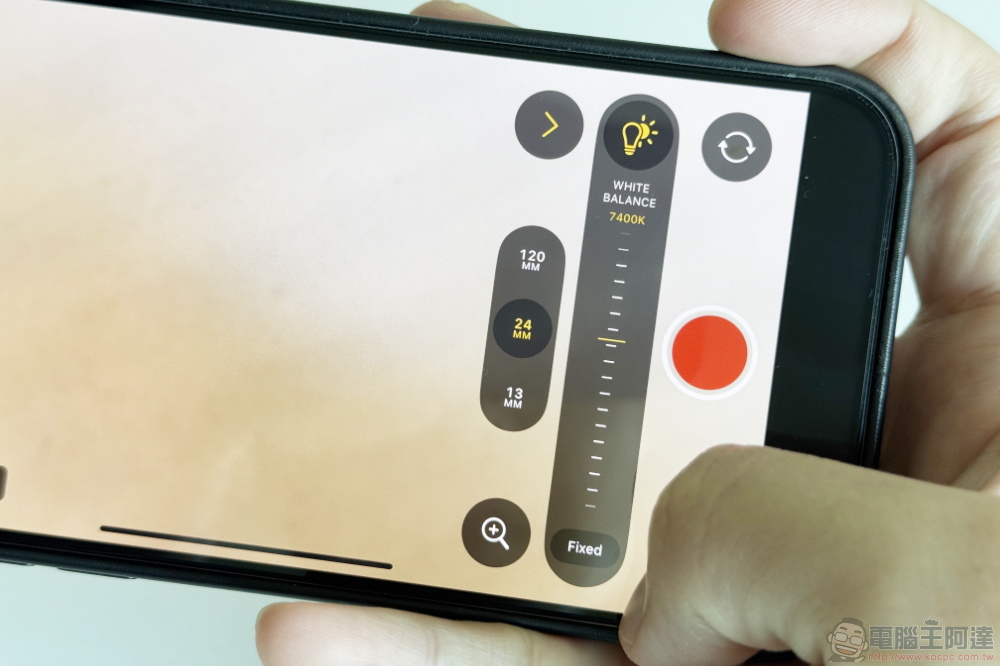
Seriously, if there is no need to control the shutter angle. Personally, I feel that with the focus and image quality performance of iPhone video recording, the only thing left is customizing the color temperature to produce a stable enough picture. And this button, which initially led me to misunderstand it as the exposure function, looks like a very bright light, is the custom white balance button that many people have been asking for in the iPhone.
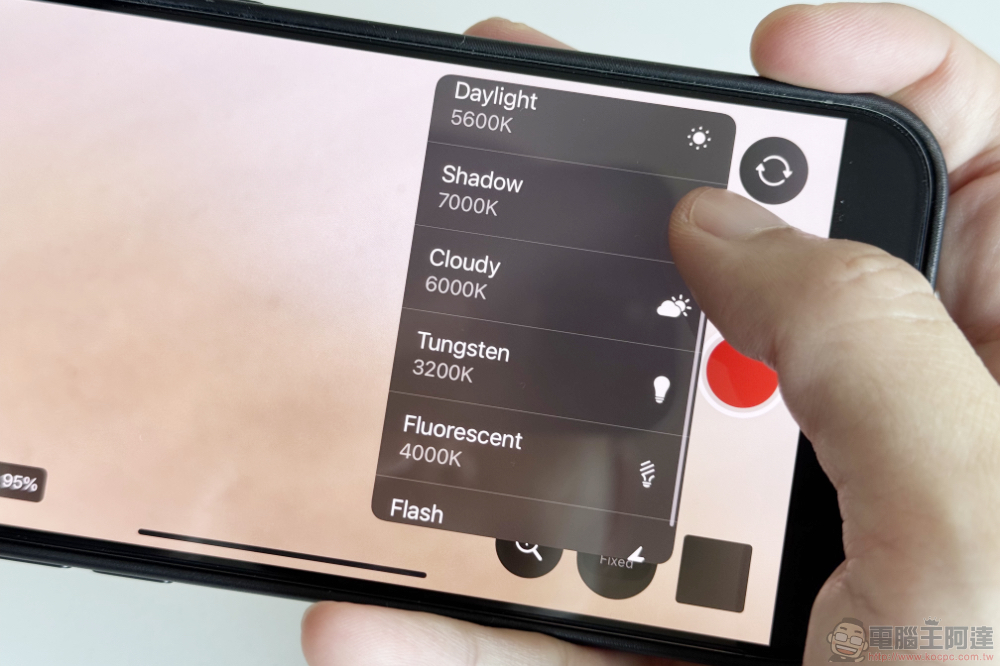
The interface also provides the function of quickly switching the specific color temperature values of different light sources through the “Fixed” button at the bottom.
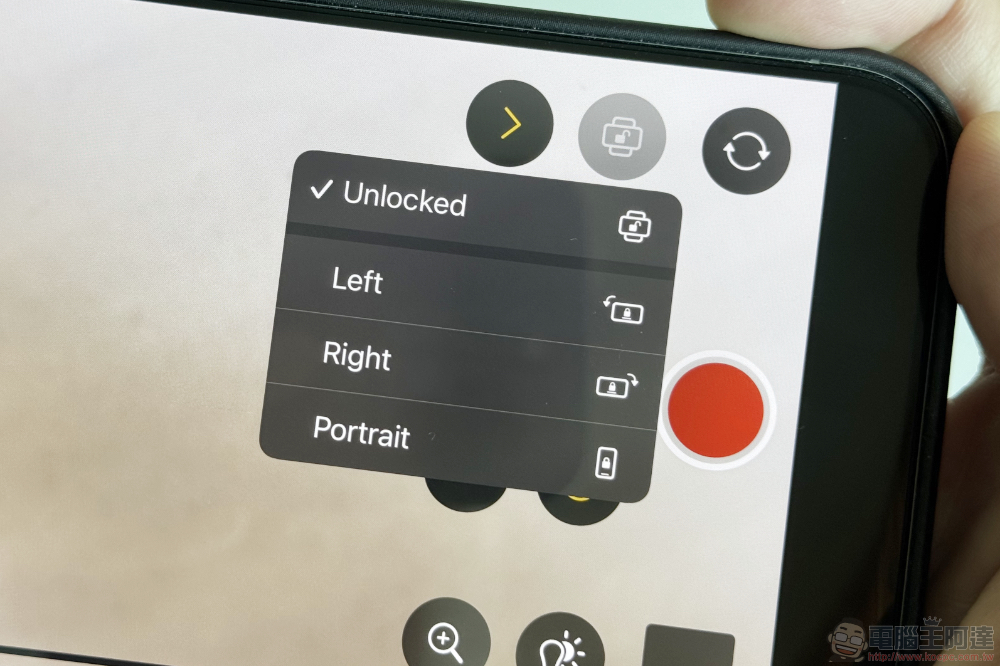
It means that the top-ranked function is actually the function of locking the direction of the shooting interface – I guess it doesn’t hurt to put this in the application settings menu, right?
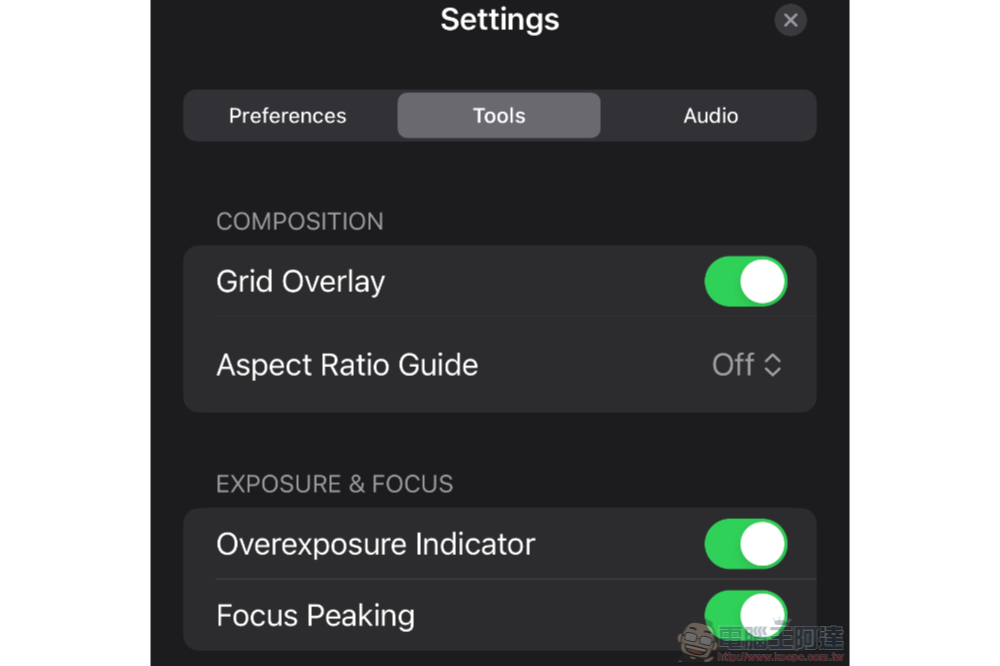
After reading the shooting functions, let’s finally look at other setting functions not mentioned earlier.
You can see that it includes overexposure display and focus peaking functions – but it seems that the display effect of focus peaking cannot be adjusted; grid lines can be added, and the grid format can be switched between 1:1 square or 4:3 (if you want more advanced external lenses and ratio support, you may still have to rely on Blackmagic).
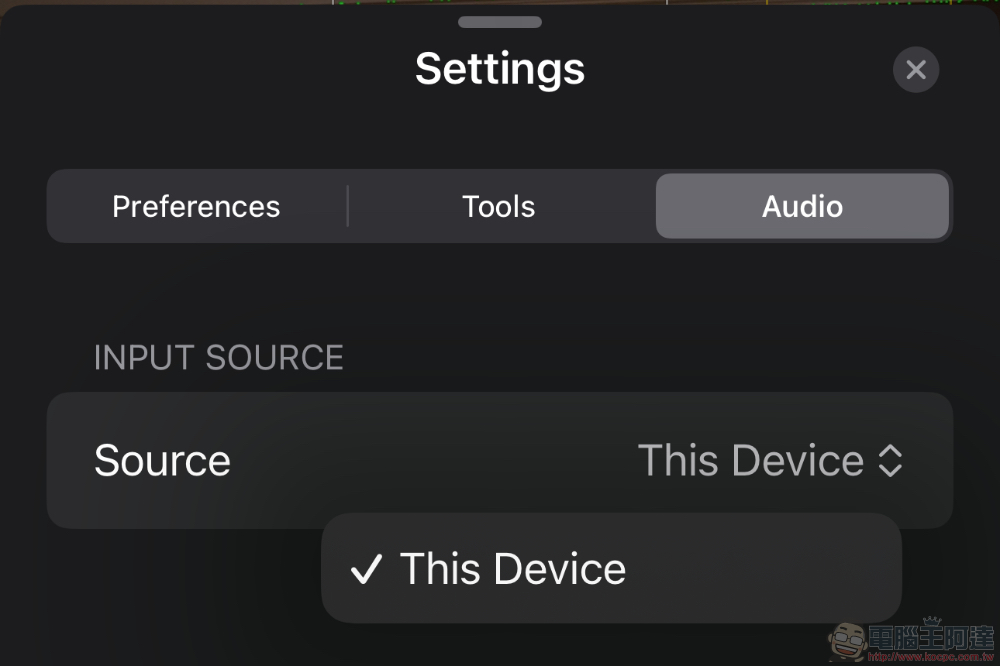
Finally, there is the audio setting part that made me a little happy at first, but after actual testing, I felt a bit regretful.
I originally thought that like third-party applications, it would also support Bluetooth microphones such as DJI MIC 2 or even AirPods for recording via Bluetooth connection. However, it is not detected in the actual test, and it still needs to be connected through USB to be displayed in the interface (the DJI MIC first generation is detected by USB connection in actual test). In addition, iPhone cannot be specified like other third-party applications. A single microphone on the body collects sound.
Update: on YouTube channel iPhonedo trial videoHere, although DJI MIC 2 cannot be connected to the iPhone via Bluetooth, it can be used with the iPad.
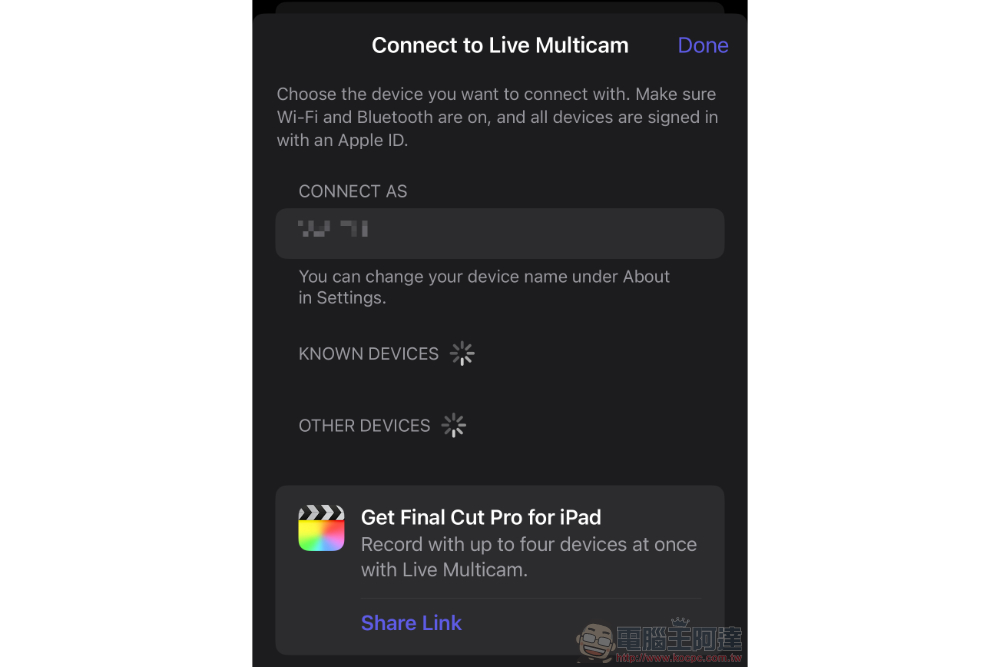
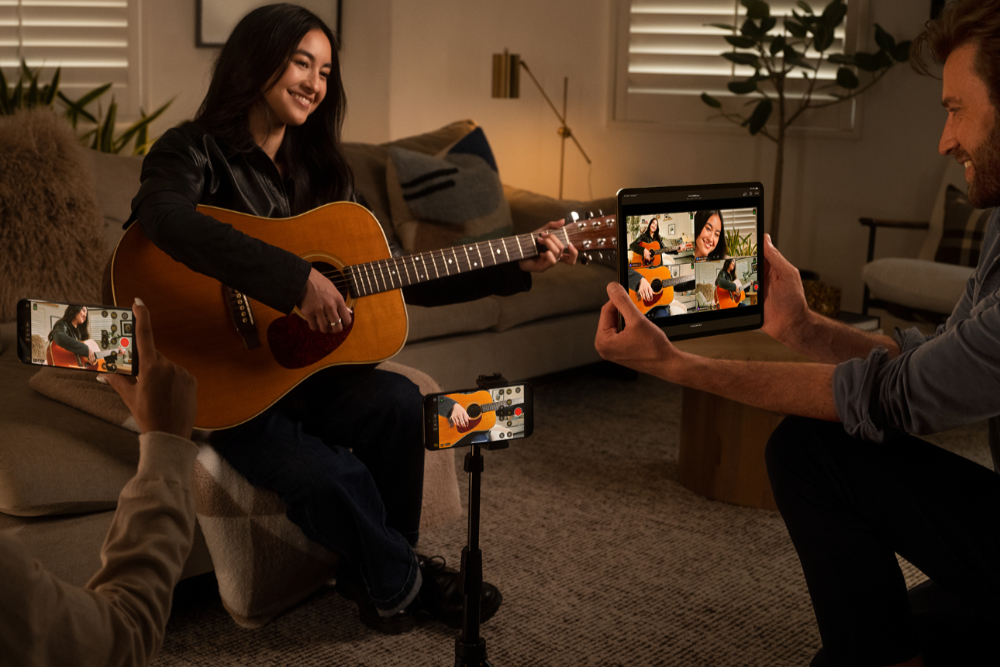
This time we did not try the Live Multicam function that allows the iPad version of Final Cut Pro to monitor the iPhone screen – you will have the opportunity to subscribe in the future to try it out! I feel like it’s also great for monitoring selfies.
Final Cut Pro 2 can also support external hard drives for video editing on iPad this time. And the new-generation Apple Pencil Pro supports the side-turning function in the Live Drawing tool. The Mac version also has several updates. Interested friends can view the detailed introduction in the press release citing the source.
Further reading:
Source: KOCPC Chinese