


If you frequently download a lot of documents, photos, or files on your Mac, you have to regularly delete files you no longer need to avoid filling your Downloads folder with junk files. Doing this manually can sometimes be cumbersome, and you might forget to organize it. Thankfully, there is a way to automate the process on your Mac, and we’re here to tell you how.

How to set up automatic deletion of downloaded files on Mac?
How to set up automatic deletion of downloads in Automator
Apple provides a preloaded Automator app with macOS on all Macs, which allows you to automate repetitive tasks on your Mac without having to do it manually.
Automator supports multiple types of tasks. This tutorial uses folder operation automation, which performs specified operations on the specified folder each time. The example we gave this time is “automatically delete all files and folders older than 7 days from the download folder”. Please follow the steps below to complete it step by step.
Action 1. Set folder operations
- To create a folder action, first open the Automator app on your Mac.

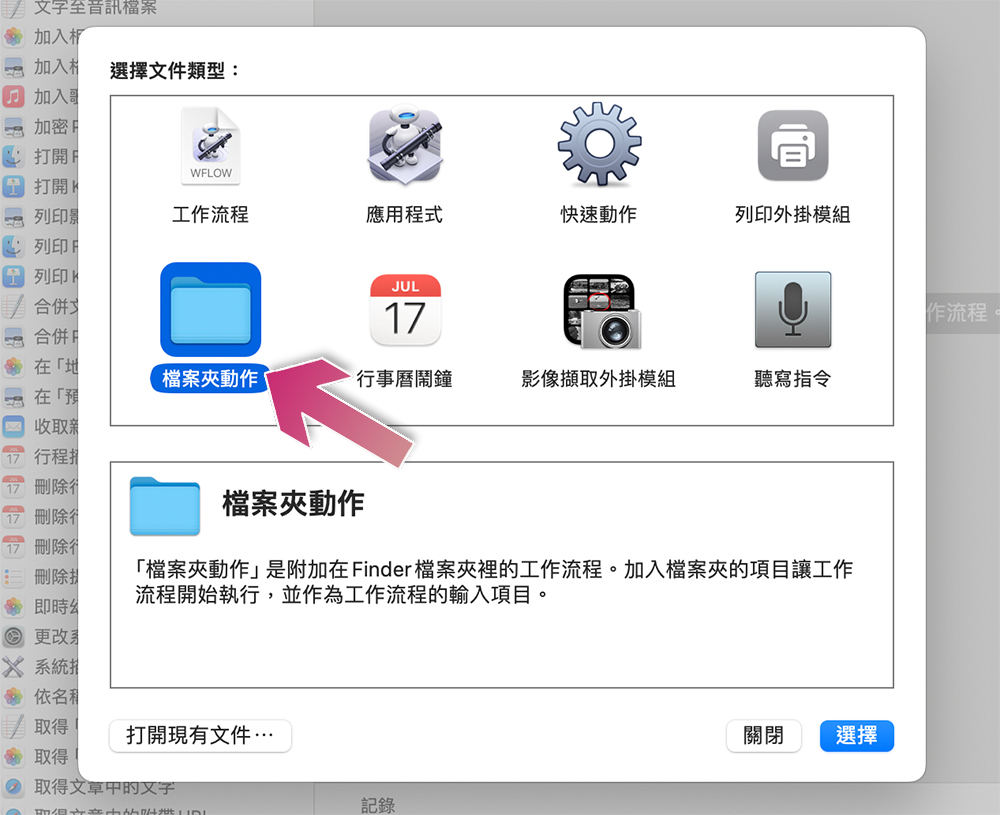
- In the Type section, click “Folder Action”.
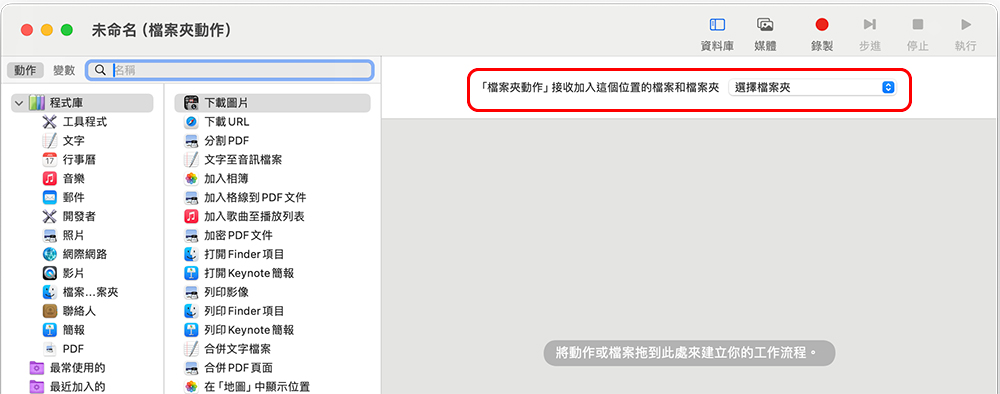
- Click the drop-down menu on the far right at the top, then click “Other” and then select the “Downloads” folder.
Action 2: Find the file to be deleted
There are two ways to find files and folders from the “Downloads” folder, one is to “find Finder objects”, and the second method is to use “Execute Shell Process Command”. Since the former doesn’t help this time, we teach you to use the latter.
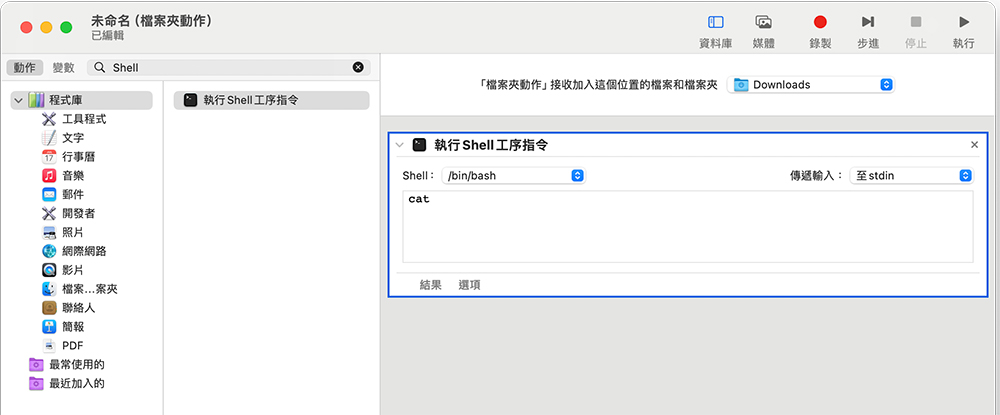
- Search for “Shell” above, and then drag the found “Execute Shell Process Instruction” to the rightmost sidebar.
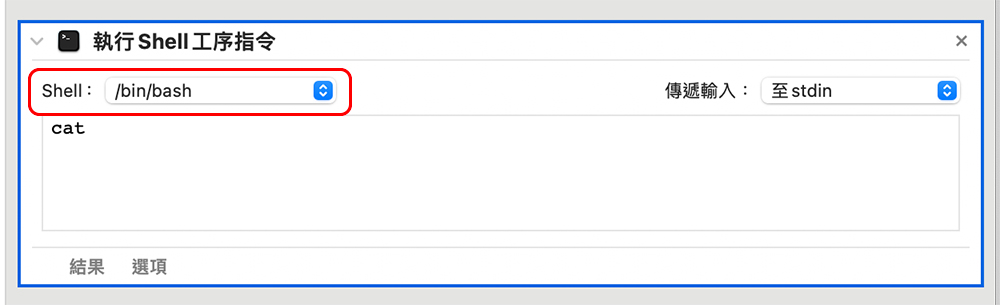
- Select “/bin/bash” from the drop-down menu next to Shell.
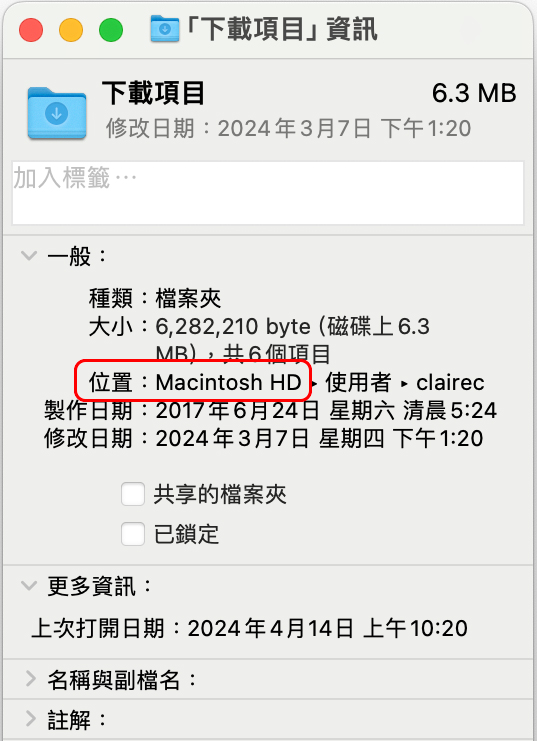
- Please copy and paste the following instructions into the input box below. “+7d” means the operation will look for files older than 7 days, and you can change this to any time range you like. For example, +30d will only delete files older than one month. You also need to modify the “Location of the download directory” and replace it with the path of the download folder on your Mac (open Finder, right-click on “Downloads” in the left sidebar to get information and view “Location”).
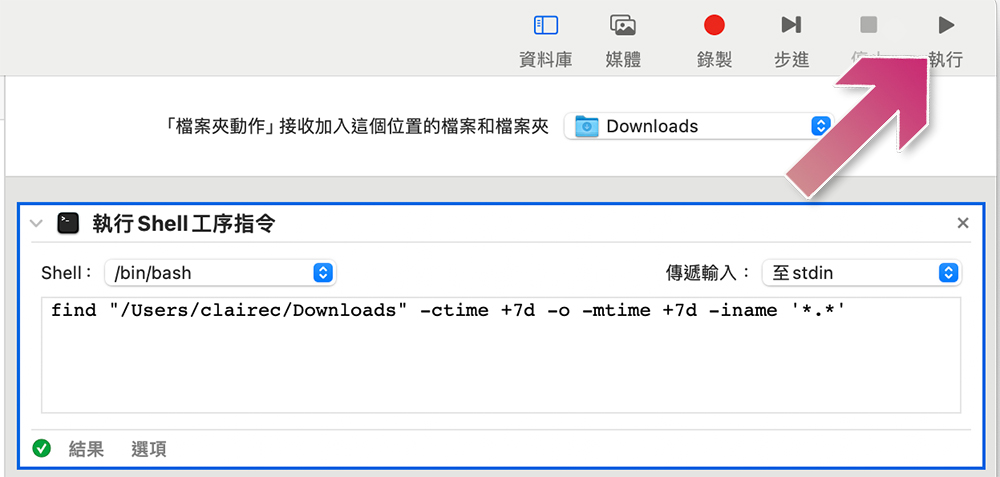
find “下載目錄的位置/Downloads” -ctime +7d -o -mtime +7d -iname ‘*.*’
- After pasting and modifying, click “Execute” on the top right.
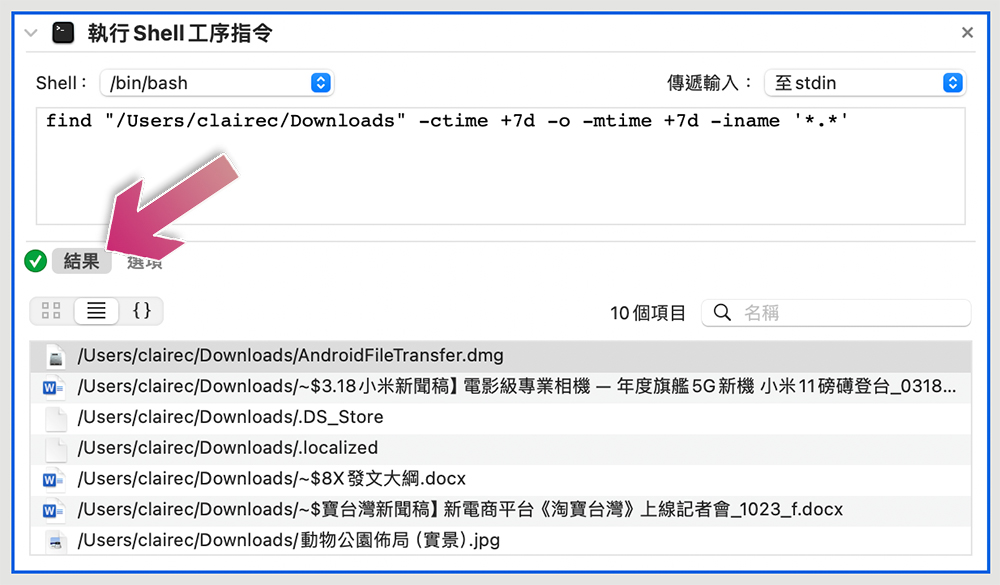
If you have done everything correctly, click “Results” after completion to view the files that meet the criteria found in the download folder.
Action 3: Automatically delete files
In the previous action, we have seen the ability to automatically find files that meet the conditions. Next, please continue to add the final automatic operation to the workflow.
- Enter “Trash Finder items in the Trash” in the search field, then drag it to the rightmost column and place it under the Shell we have set up in the previous action to create a linked workflow.
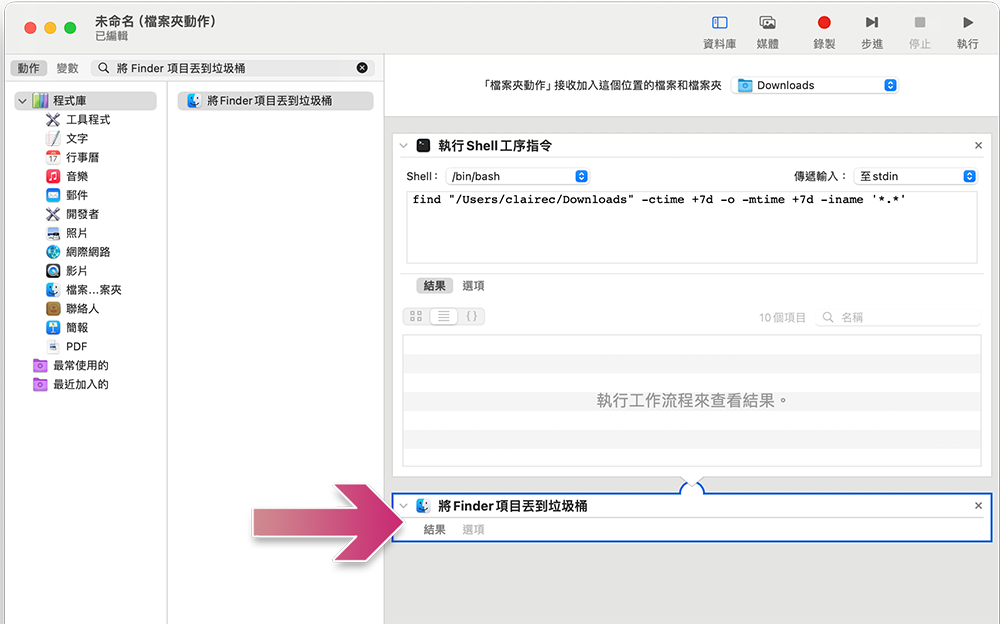
- Finally, click “File” at the top, then click “Save.”
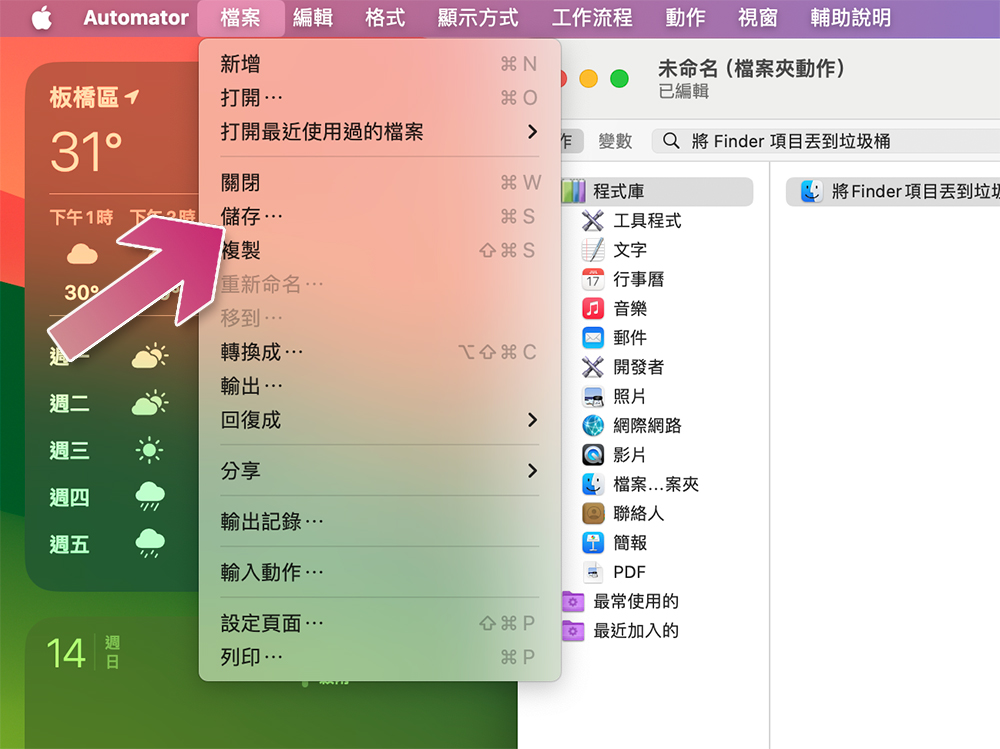
- Name the folder action and click Save. macOS saves all Automator folder actions under the path “~/Library/Workflows/Applications/Folder Actions/”.
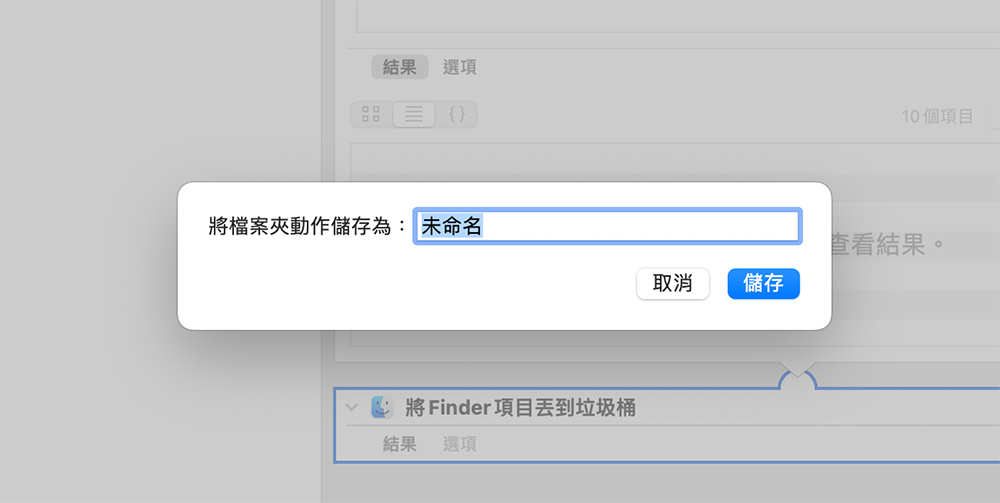
- After saving, you are done. Existing files that have been in the Downloads folder for more than 7 days will be automatically moved to the Trash.
Don’t forget to clean the recycling bin regularly too
Since the automated folder operation process we did above will throw files in the download folder that are older than 7 days into the recycling bucket, you must remember to clear the recycling bucket every once in a while, otherwise the recycling bucket will be filled with garbage. Of course, you can also follow the same pattern and set up an automatic operation to empty the recycling bin every 30 days. It all depends on your convenience.
Source: KOCPC Chinese