


The Files app on iPhone and iPad lets you quickly view and effectively manage files stored on your device and in online cloud services like Google Drive, Dropbox, iCloud, and more. The app has revolutionized the way iPhone and iPad users from novice to pro level access files and information, but people often don’t realize that the Files app can do more than just view files. This time, we’ll tell you how to make the most of the Files app, without having to download additional third-party tools!
Teach you how to make the most of the Files app on your iPhone and iPad
Whether you’re a seasoned iOS user or new to the iOS ecosystem from Android and haven’t explored the Files app yet, this project will help you take advantage of this powerful tool and turn your iPhone and iPad into hubs for most of your digital productivity needs.
★This demonstration uses the iPad interface for clarification. The iPhone operation method is the same as the iPad.
Find and manage files
The most well-known and critical feature of the Files app is its ability to help access files and images on your device and on iCloud. To query on an iPad or iPhone, all you need to do is open the Files app and enter a file name or keyword into the search field, which will launch a search of possible locations and pull out relevant results.
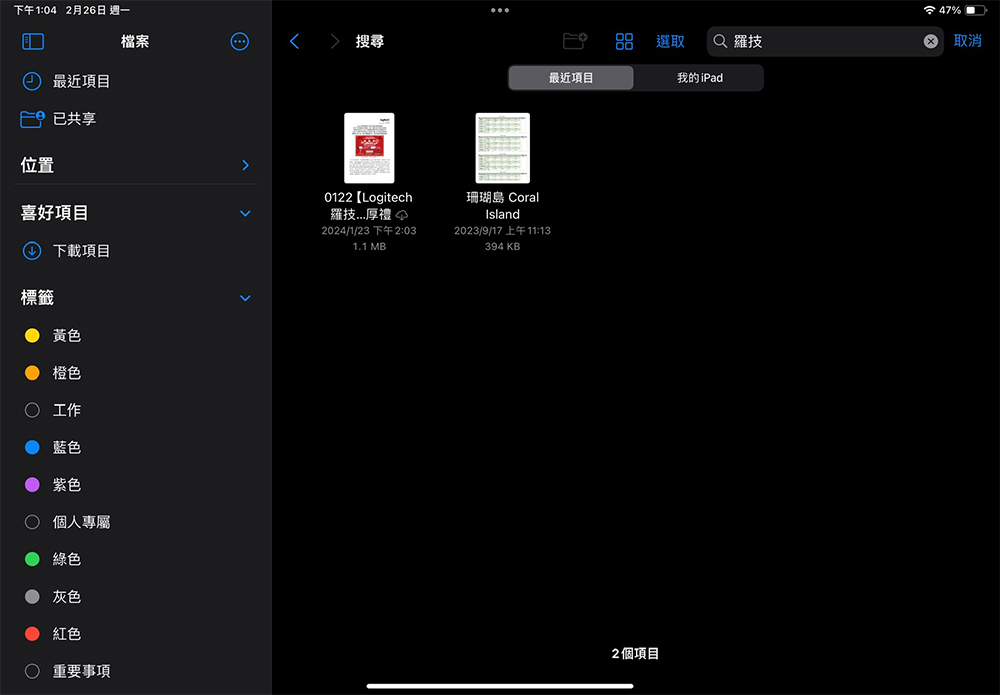
Additionally, the Files app offers many management features to help you organize your files, such as adding them to a new folder if you want to access them more quickly next time. You can access the folder by clicking the browse icon on the Files app, and you can click on a file to see when it was created and modified. Click on files or images in this folder to add tags to categorize them.
Edit/delete files and images
With the power of File App, you can edit documents and images through the application without relying on other editing software or applications. Editing features include options to rotate images, convert image formats (such as JPG to PNG), and remove backgrounds. To use these functions, just open the Files application, long-press on the file or image, and select “Quick Actions” from the menu to see all available options.
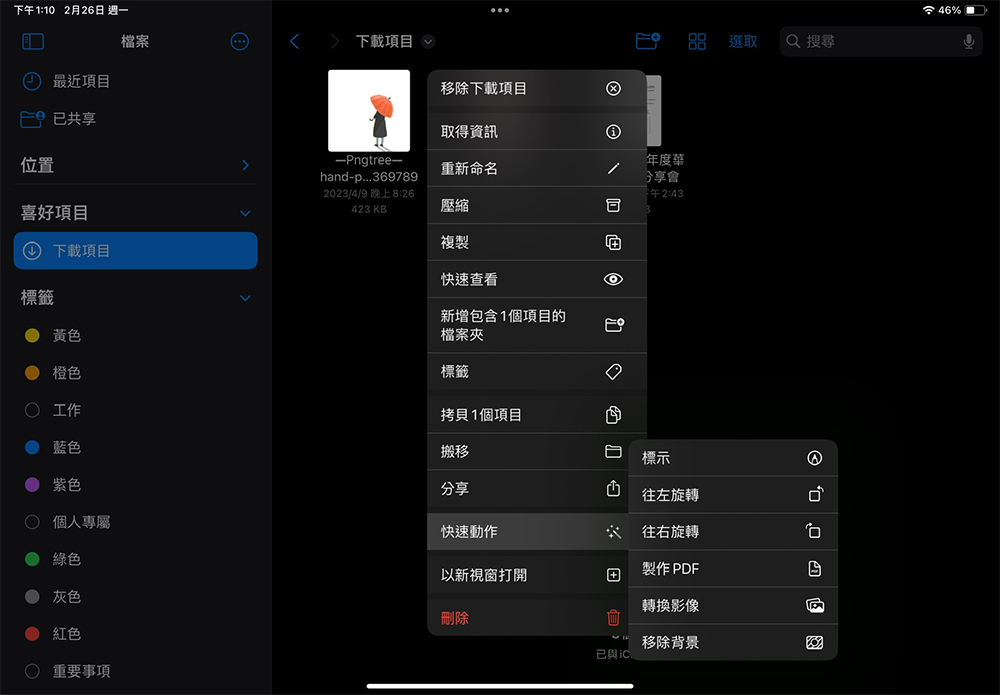
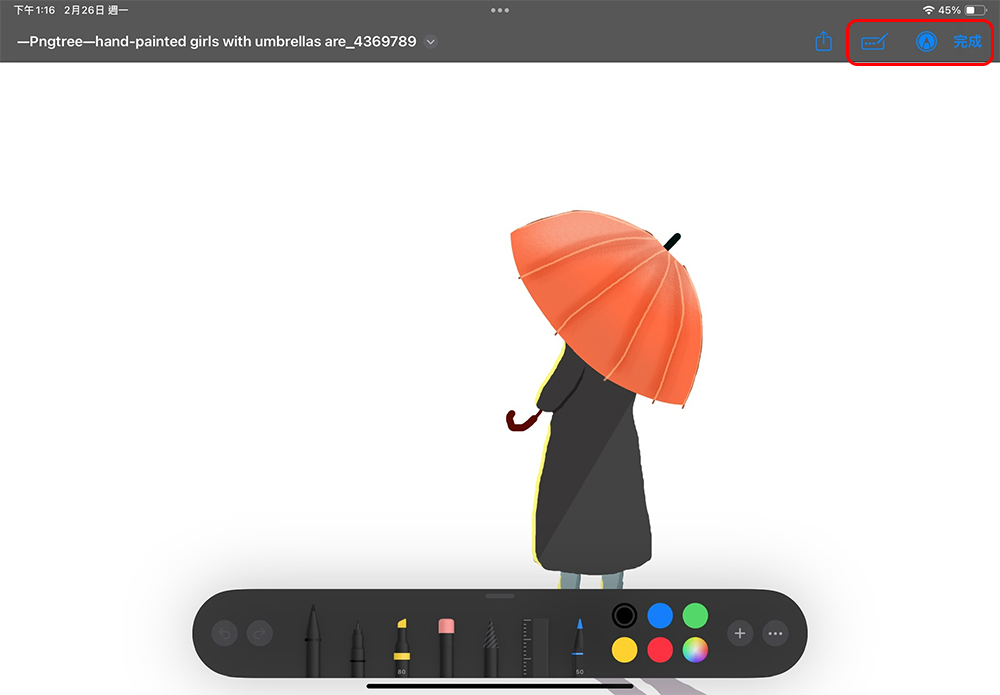
Additionally, the app offers built-in tools to add text overlays, signatures, annotate or highlight parts of a document or image, erase unwanted elements, and even enlarge text or images to improve readability; these features can also come in handy if you need to fill out or edit a form. To use these tools just do this:
- Launch the file application and open the target file or image.
- Click the “Edit” button, the pen icon in the upper right corner.
- Enter the editing interface and click the marking tool icon to call out the marking menu.
- Select the appropriate tool based on the action you want to perform, then click Done to save changes.
If you no longer need the file, you can also delete it from the Files app. Deleted files and images will remain in the “Recently Deleted” folder for 30 days before being permanently deleted.
Scan documents
If you’ve been using a third-party app to scan your documents, you’ll be happy to know that you no longer need to rely on an external scanning app. With the built-in scanner, you get a user-friendly tool that lets you securely scan sensitive files and manage scanned files in one place. By using Apple’s native document scanner, available in the Files app on iPhone and iPad, you’ll be able to scan documents and images and save them to the Files app for later access.
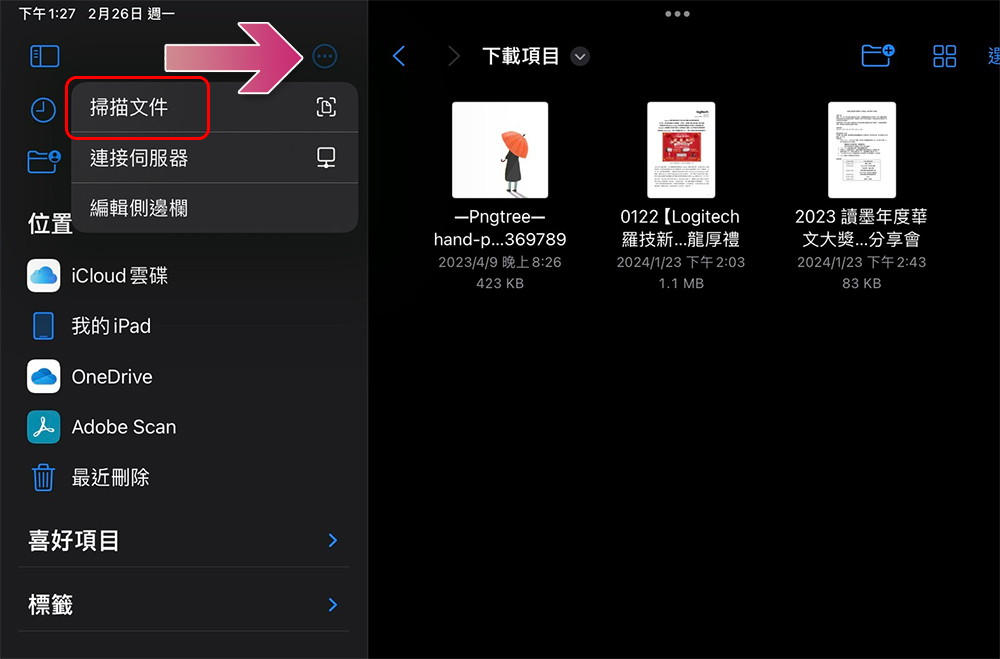
To scan a document on your iPhone or iPad, all you need to do is launch a file, click the ellipsis icon at the top, and select “Scan Document.” Once you’re done, point your camera at the document you want to scan and drag the corners to resize. You can choose to store the scanned image on your device or scan it again.
Connect to external storage or NAS
While you can access files stored on cloud drives like DropBox and Google Drive, did you know that the Files app also allows you to access data stored on pen drives, SD cards, and external hard drives? You’ll need a compatible cable to connect an external storage device to your iPhone or iPad and access your data. Once connected, the Files application automatically recognizes the storage device and allows you to access the content stored on the hard drive. Please note that external storage devices may require external power when used with iPhone.
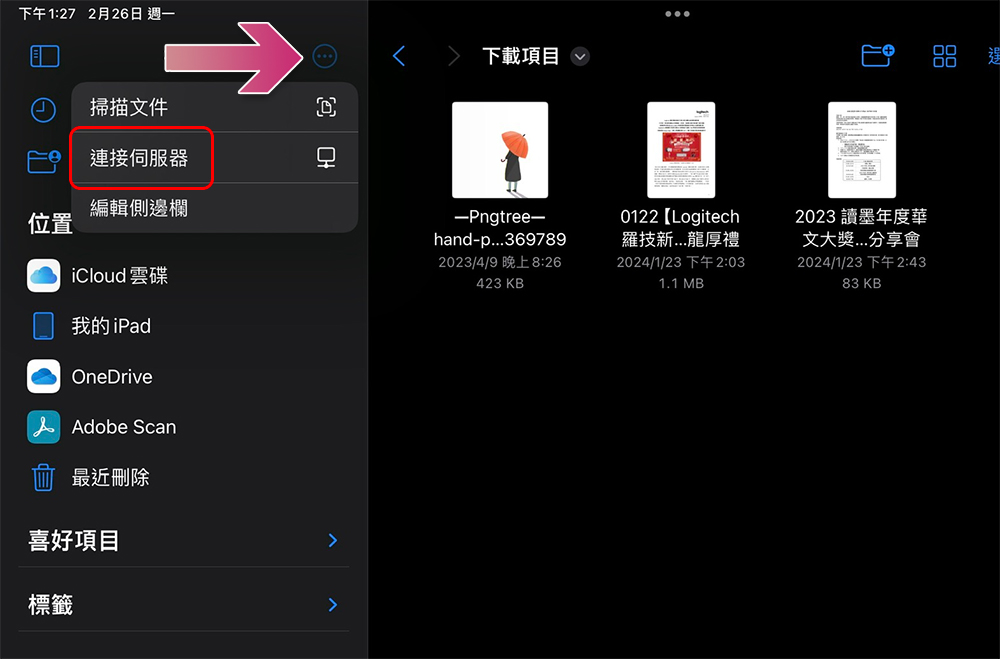
If you have a NAS, you can use files to establish a connection and continue accessing your data. To set up this connection, open the Files app on your iPhone or iPad, tap the three-dot ellipses on the screen, and select “Connect to Server.” In the subsequent dialog window, enter the IP address or name of the server, and choose whether to connect as a guest or a registered user (you need to enter your name and password to log in).
Compression and decompression
If you’re trying to share multiple files with someone else, you can use the Files app to compress them before sending. Not only does this reduce the overall file size, but it also makes it easier to store large amounts of data on your phone or iPad, since compressed files take up less space. Additionally, this is a great solution if you wish to share data privately with others.
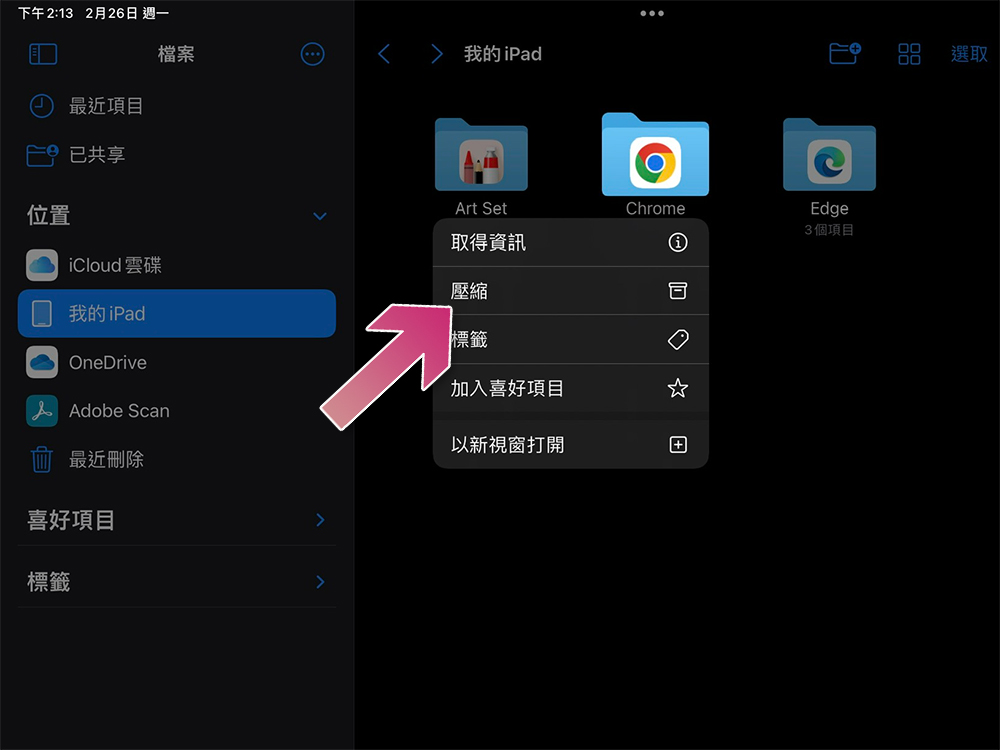
To compress a file, open the Files app, long-press on the folder you want to compress, and select Compress from the drop-down menu. The file will create a compressed folder that you can share via email, messaging apps, or AirDrop. You can even upload the folder to an online cloud service.
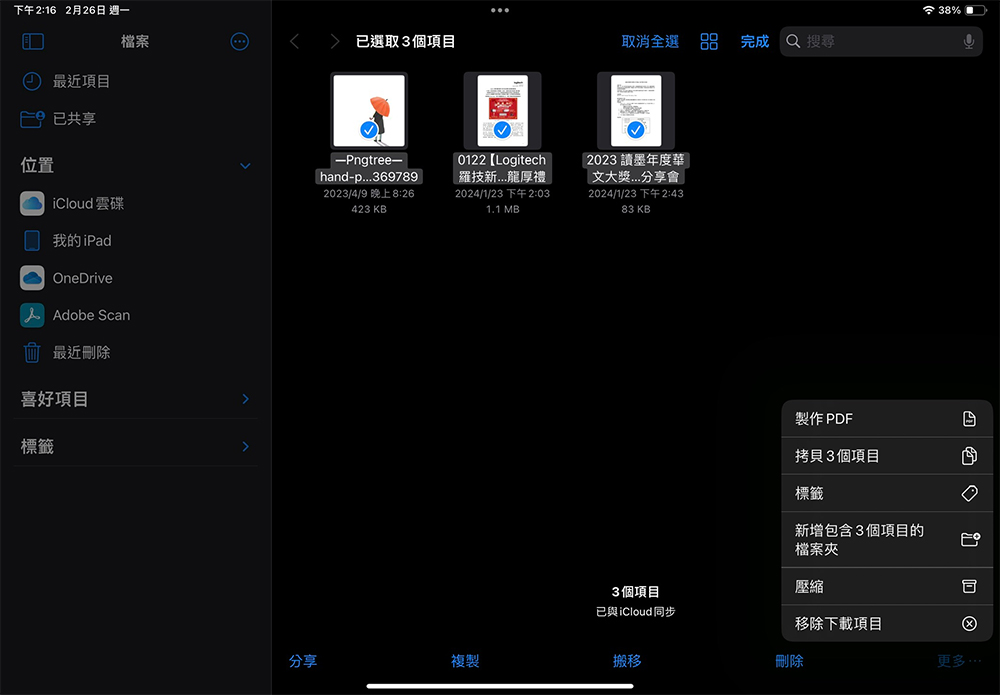
If you’re trying to compress a series of individual files or images, click Select (or press the ellipsis icon and click Select on an iPhone) and start selecting all the files you want to compress. Then, select More… at the bottom and click Compress.
If you just received a compressed folder, you can also use the Files app to unzip it. Again, to do this, you need to go to the Files app, long-press on the folder, and select “Extract” when the drop-down menu appears. However, before you unzip the folder, make sure you have enough space on your device.
Source: KOCPC Chinese