


Google Chrome is one of the most popular browsers that is a household name, however like any other browser, it can sometimes go wrong. Chrome users occasionally encounter “out of memory” alerts, indicating that the browser has run out of available system memory, causing performance interruptions or even crashes. When this happens, Chrome struggles to allocate enough memory for its tasks, resulting in slow response times, unresponsive pagination, or the browser closing suddenly.

5 Ways to Fix Out of Memory Error on Google Chrome
There are many reasons for triggering out-of-memory prompts, including accumulated cache data, cookies, and a large number of open tabs that may occupy a large amount of memory. Resource-intensive websites, especially those containing multimedia content or websites that are not well optimized for scripts, may worsen the problem. In addition, improperly coded browser extensions in settings may cause memory leaks or excessive resource usage. Your first step should be to reorganize the problematic tabs and close other unnecessary tabs, but if this doesn’t solve the problem, we have provided several solutions for your reference.
Clear browser cache and cookies
When you visit a website, your browser stores elements such as images and scripts in the cache to speed up access; similarly, cookies store information about your browsing session. Over time, if you have a lot of open tabs or browsing data that hasn’t been cleared, the accumulation of cache files and cookies can consume a lot of memory. This cumulative memory usage can cause performance issues and in extreme cases trigger out-of-memory errors, especially on systems with limited memory. To resolve this issue, try clearing your browser cache and cookies, which will free up memory resources and hopefully resolve the issue. However, be aware that clearing your cookies may log you out of the site, and you may lose some of your saved choices on the site.
- Click the three-dot menu in the upper right corner of Chrome and select Settings.
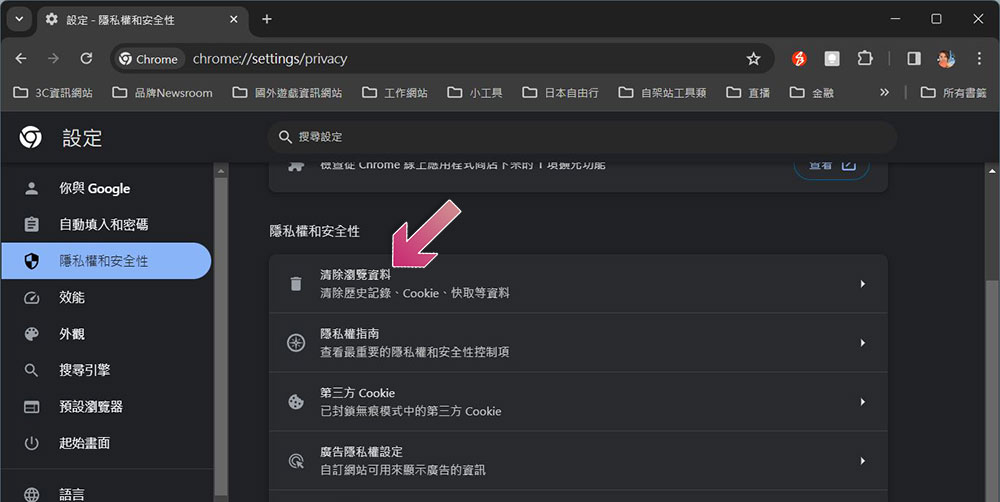
- Click “Privacy & Security” in the left sidebar.
- Click “Clear Browsing Data” on the main screen on the right.
- In the pop-up window, check “Cookies and other site data” and “Cache images and files.” You can also set the time to clear in the drop-down menu at the top. If you want to clear all, please select “No time limit”.
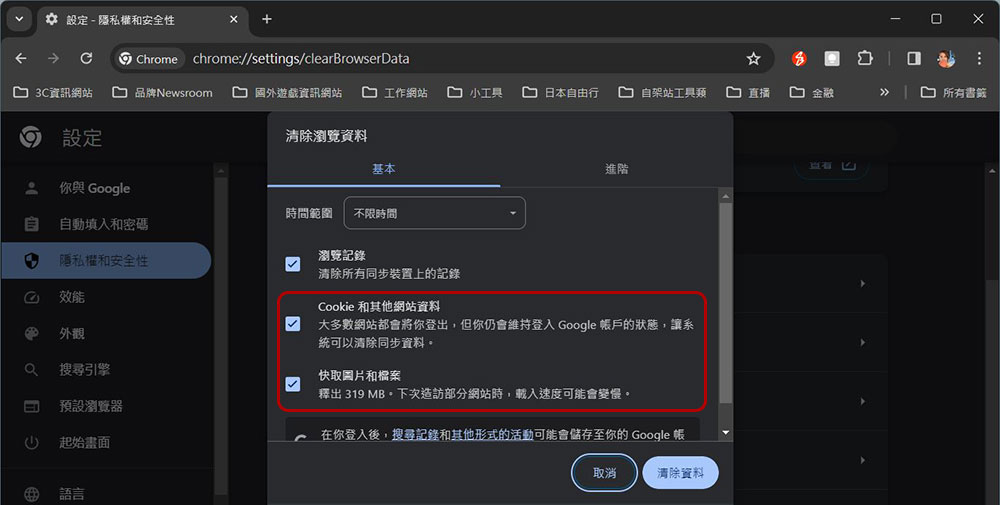
- Finally click “Clear Data”.
Once the cleanup is complete, try reloading the site to check if the memory error has been fixed. You can also turn off third-party cookies in Chrome to avoid this problem in the future.
Disable unnecessary extensions
You may also encounter memory errors when you use too many browser extensions. These extensions run in the background and may increase memory usage if not optimized properly. If you add multiple extensions, especially those that are used to run continuously or perform complex tasks, they may collectively occupy the system’s memory, causing an out-of-memory error. To mitigate this, consider disabling or removing unnecessary extensions. This will allow your browser to run more efficiently and consume less memory. You can use the built-in task manager in Chrome to check which extensions are consuming more resources.
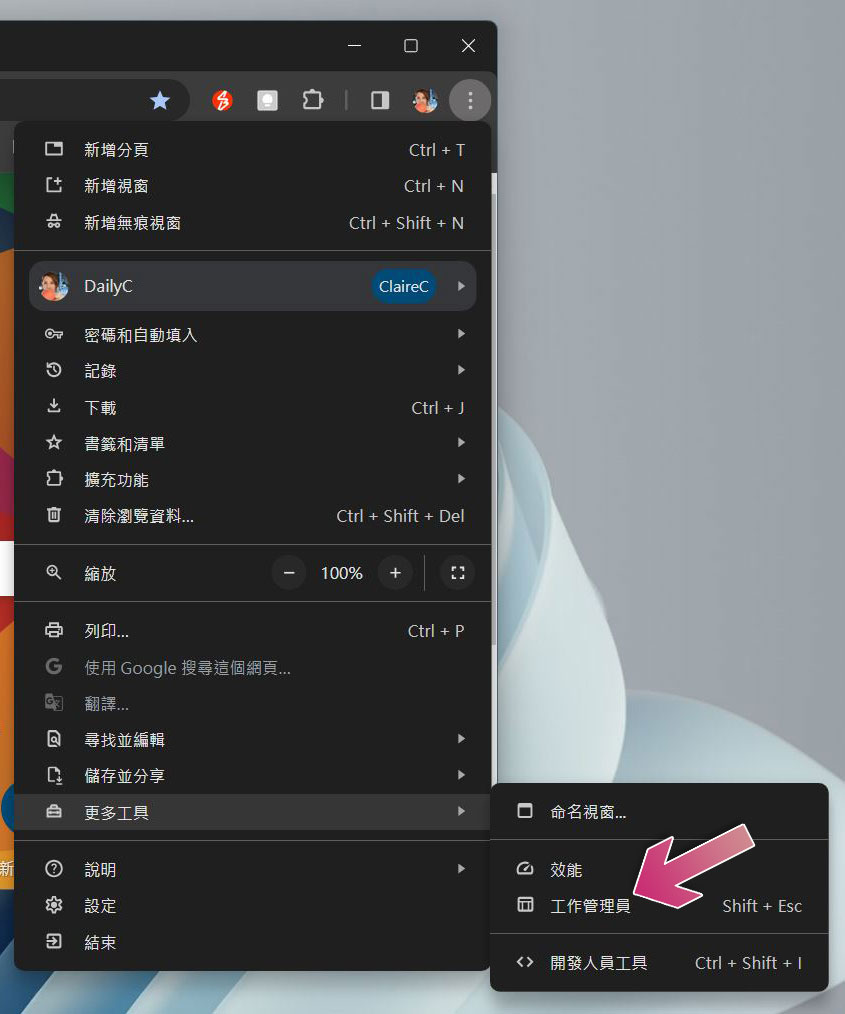
- Click the three-dot menu in the upper right corner of the Chrome browser, hover your mouse cursor over “More Tools” and click “Job Manager.”
- From the job manager, you will see a list of all active processes and resource usage including extensions. Look for entries with “extended functions” in the pages occupied by the memory, which are various ways to extend the use of resources. You want to target extensions that use more memory.
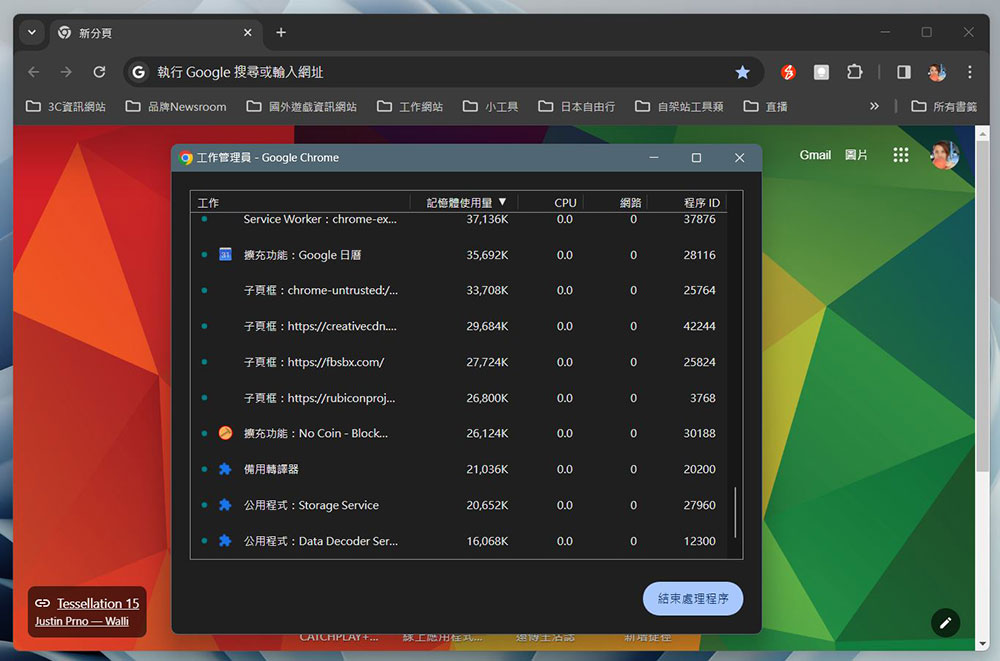
Once you have identified resource-intensive extensions, you can disable them by following these steps:
- Click the three-dot menu in the upper right corner of the Chrome browser, hover your mouse cursor over “Extensions,” and click “Manage Extensions.”
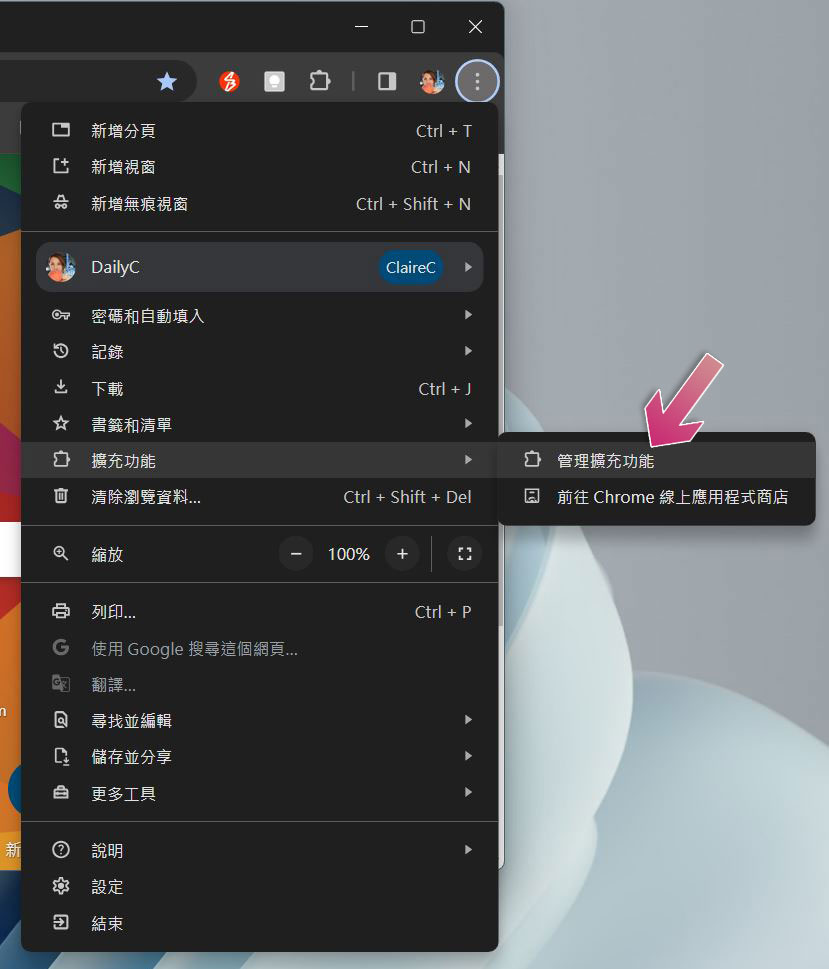
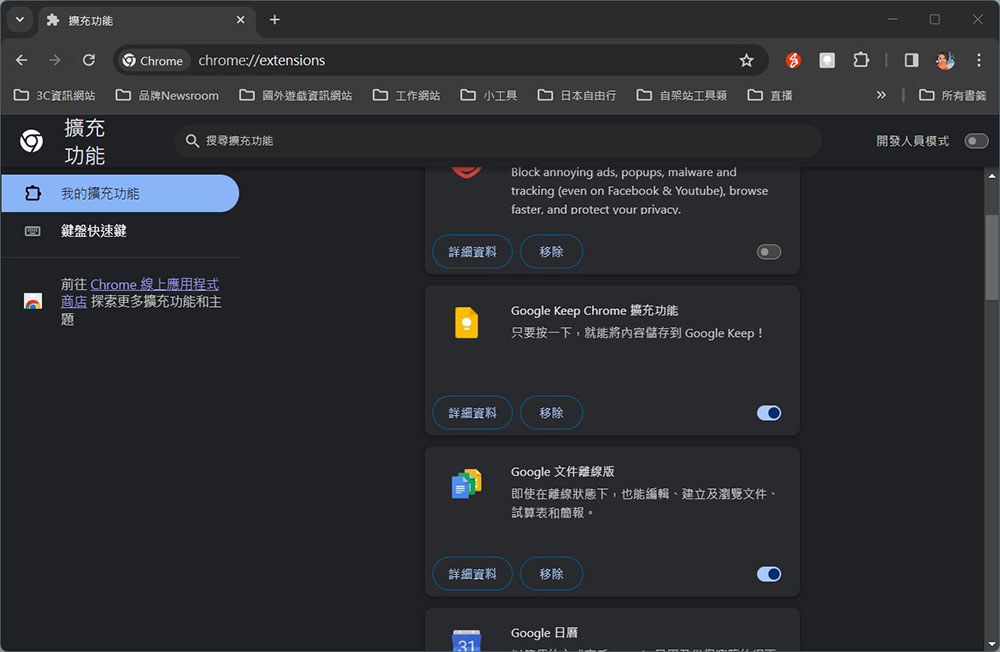
- You should now see a list of all installed extensions. To disable the extension, just turn off the switch next to the name; if the extension is no longer needed, click Remove.
Disable hardware acceleration in Chrome
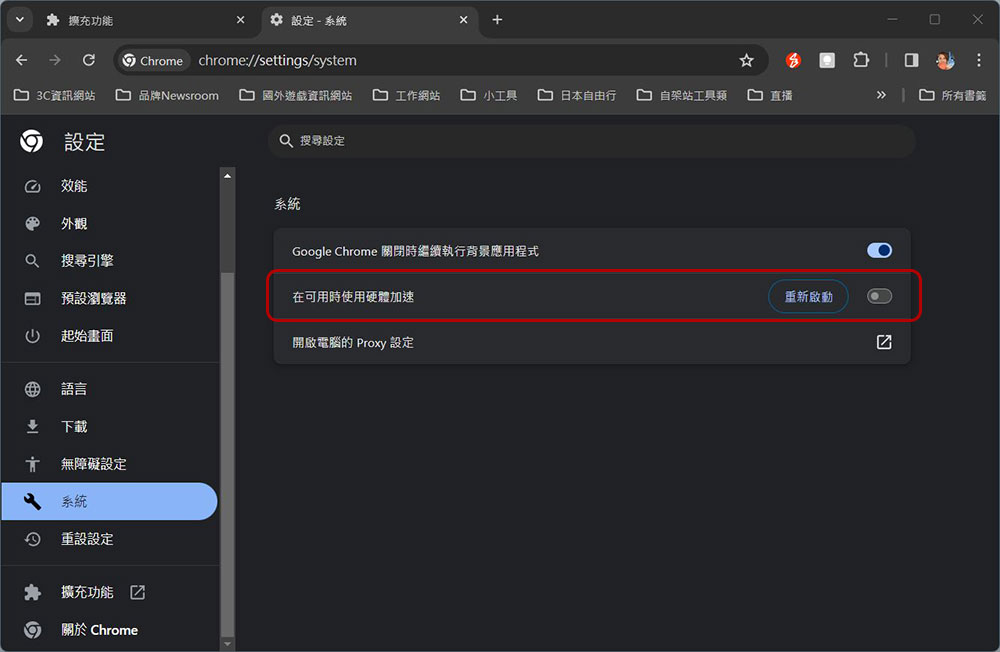
Hardware acceleration works by offloading the processing of graphics and multimedia content from the CPU to the GPU. While this can improve performance in many cases, some graphics drivers or hardware configurations may not handle it well, which may result in increased memory usage or instability, resulting in memory errors. To disable hardware acceleration, follow the steps below:
- Click the three-dot menu in the upper right corner of Chrome and select Settings.
- Find “System” in the left sidebar and turn off “Use hardware acceleration when available” in the right sidebar.
- Then restart the browser.
Update Chrome browser
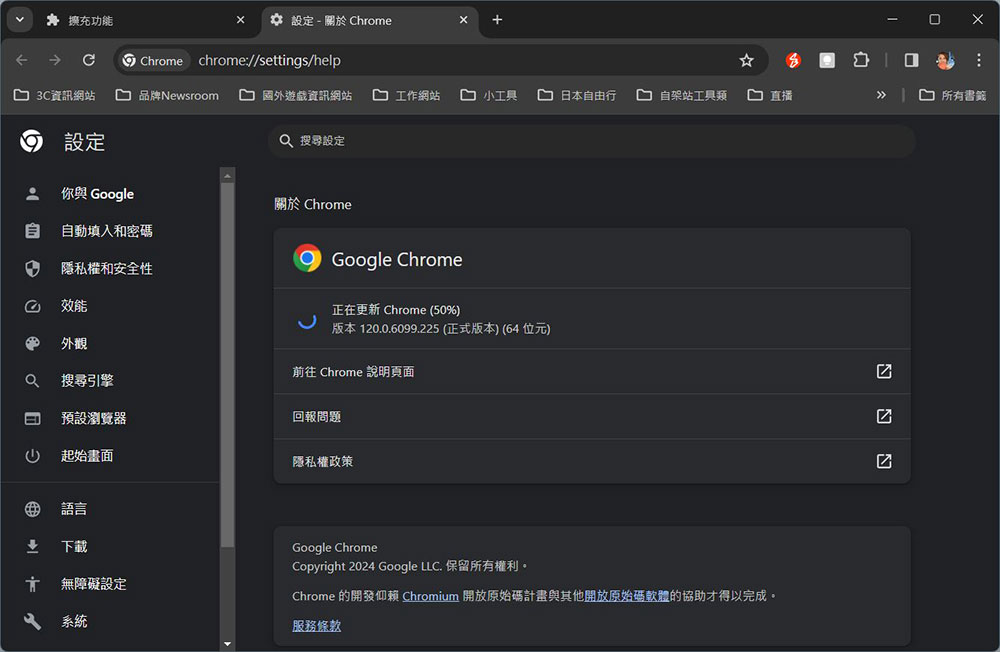
Are you using an outdated version of Chrome? Older versions may expose you to issues such as memory leaks or poor resource utilization, which causes the memory starvation you see. To resolve this issue, update Chrome to the latest available version. Newer versions often include optimizations and bug fixes to enhance the browser’s performance and memory management capabilities.
- Click the three-dot menu in the upper right corner of Chrome, hover over Help and click About Google Chrome.
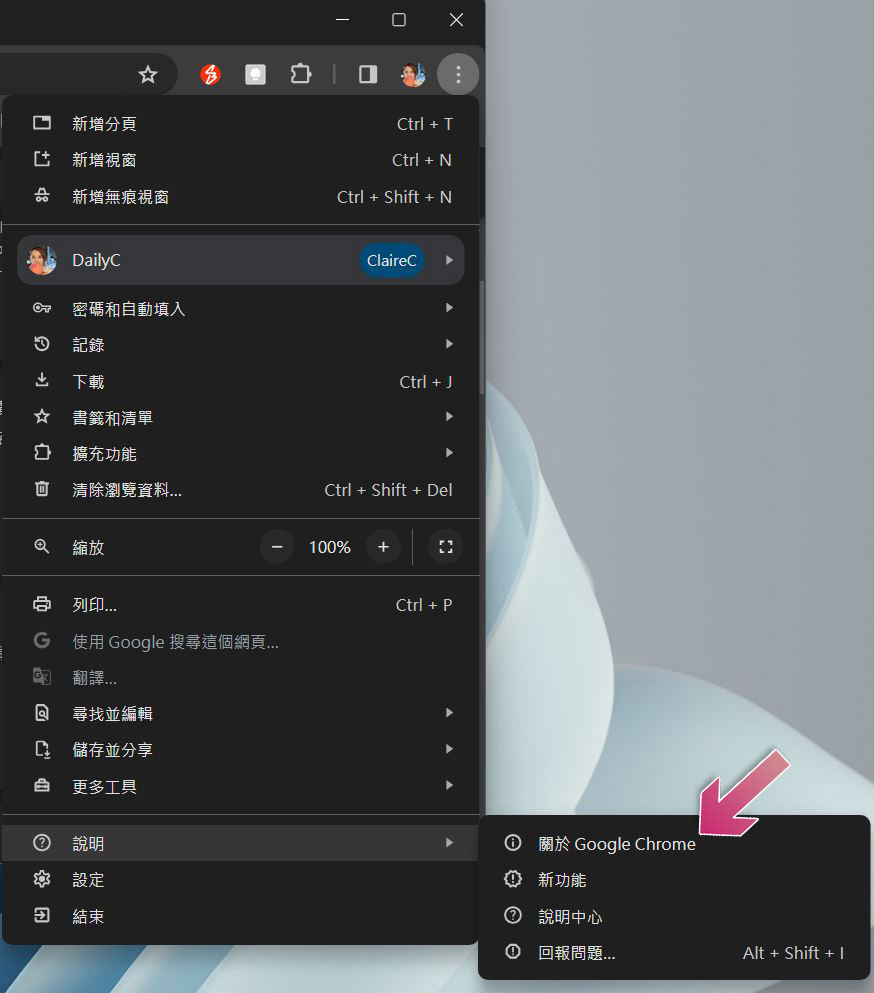
- When you open this page, it will basically be automatically updated and installed. If not, please click the update button manually. Some updates require restarting the browser after completion, while others do not. The update will be completed after completing this procedure.
Expand virtual memory
When physical memory is fully utilized, the operating system uses virtual memory to store unimportant data that is not actively used. If you’re low on physical memory, you can try expanding virtual memory to make more space for Chrome and other apps to store temporary data. What we provide below is the operation for Windows computers:
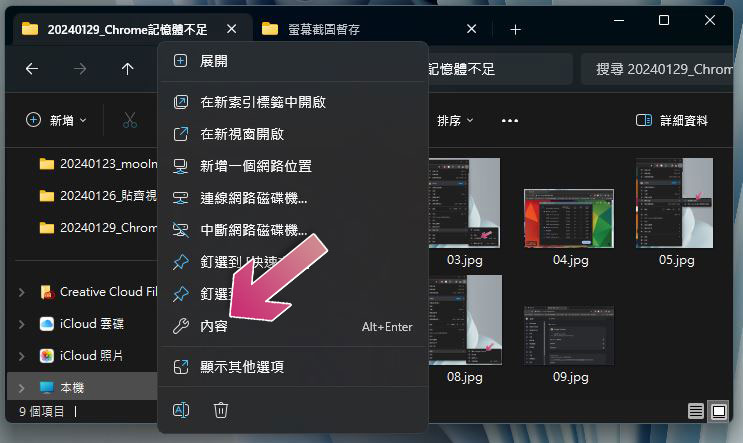
- Open File Manager, right-click “This Mac” in the left sidebar, and select “Content.”
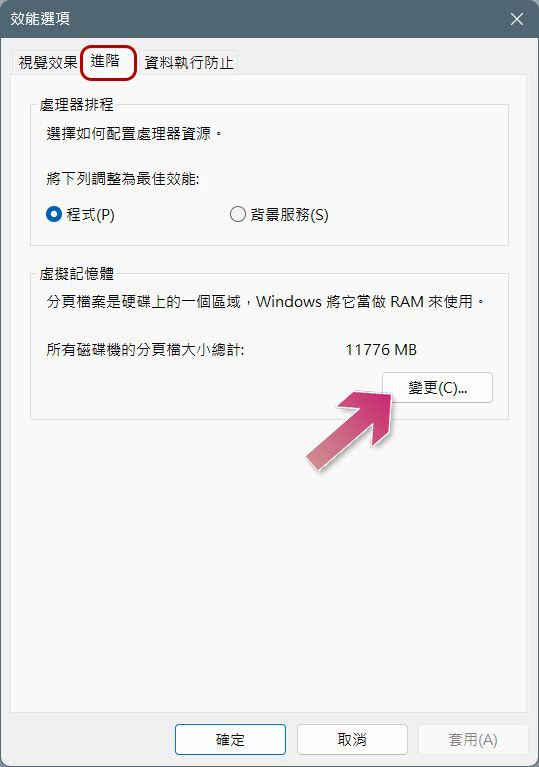
- Switch to the “Advanced” tab and click the Settings button under the “Performance” category.

- Switch to the “Advanced” tab and click the “Change” button under the “Virtual Memory” category.
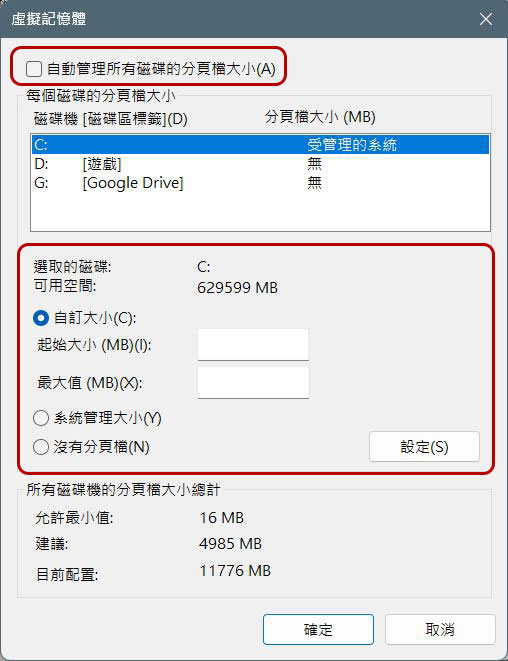
- First, uncheck the “Automatically manage paging file sizes for all disks” at the top, then select the drive (usually C), then select “Custom size” to enter the new minimum and maximum values. If you don’t know how to fill it out, you can select “System Management Size”. Click Settings next to it, and finally click OK below, then restart the computer.
Keep in mind that while adding virtual memory can be helpful in some cases, it is not a substitute for having adequate physical memory. If you frequently experience memory-related issues, consider upgrading the memory in your computer for a more complete solution.
Source: KOCPC Chinese