


Want to train your own custom AI voice model? This complete GPT SoVITS v2pro tutorial makes it easy. GPT SoVITS v2pro is a powerful, free, open-source voice cloning tool. Simply prepare audio files of your speech in advance, then follow the software’s steps to easily create your own custom voice model. Whether you want to produce video narration, news broadcasts, or build a personal virtual character, this software can handle it all. This article provides a full, hands-on walkthrough to teach you how to turn your voice into AI:
(Image source: GPT generated)
GPT SoVITS v2pro Download Tutorial
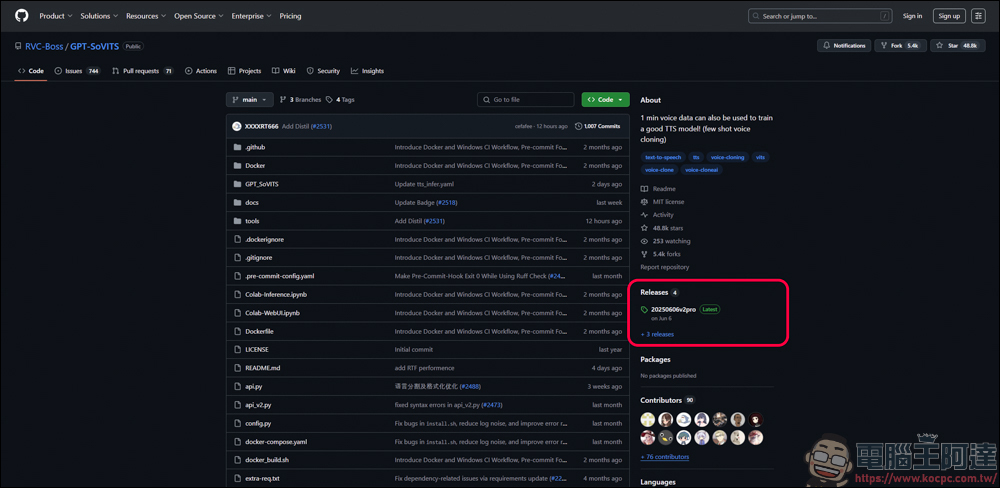
GPT SoVITS v2pro is a free open-source model. After clicking the URL above, find the area marked with a red circle and click to download:
Currently only runs on Windows. If your GPU is a 50-series version, remember to grab software that supports 50-series GPUs; it will say so in the name:
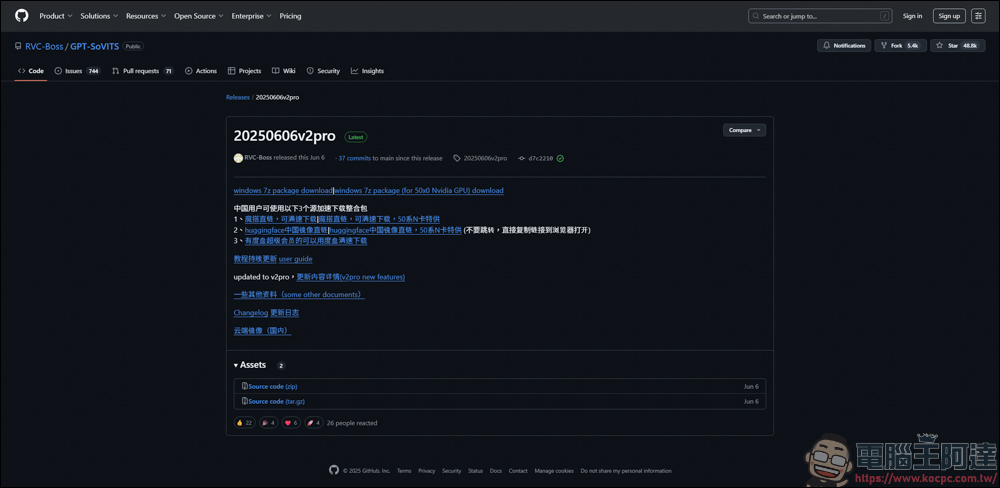
Download :
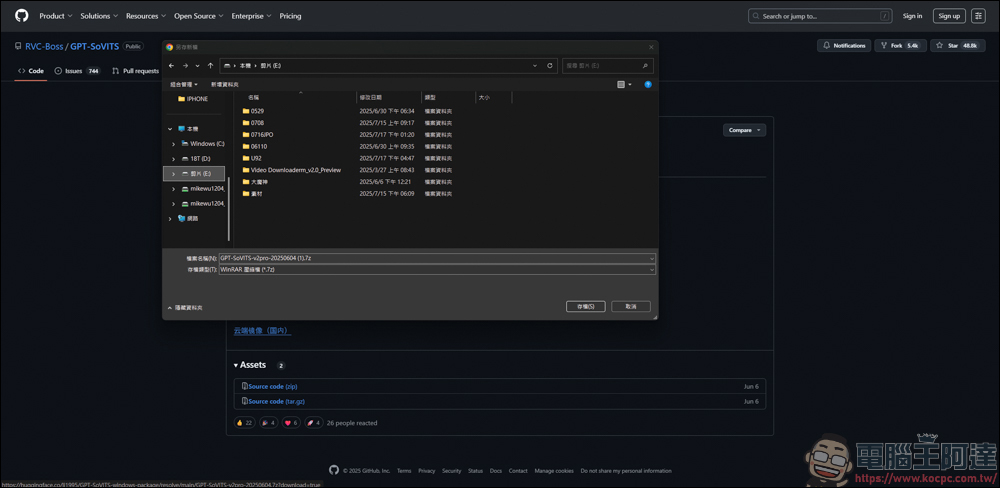
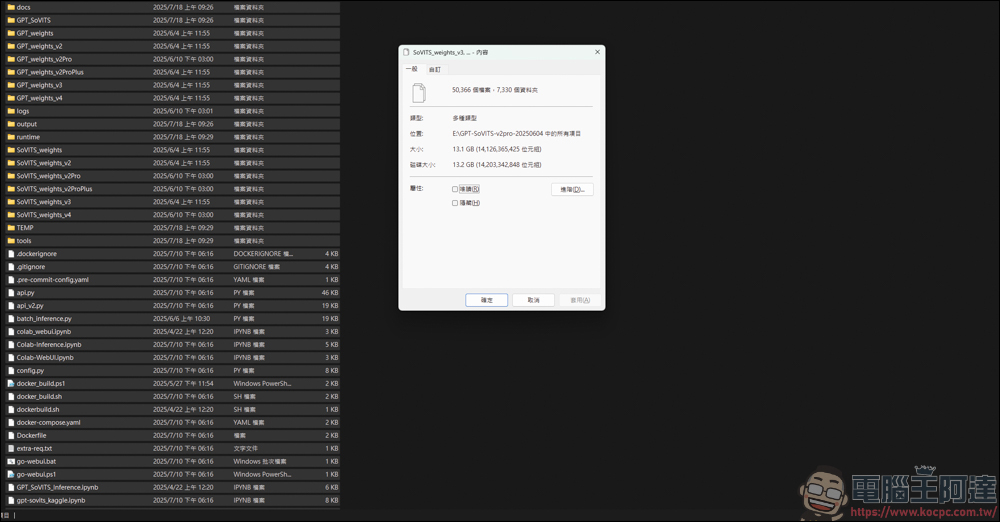
The file is quite large, around 13.1GB after extracting:
GPT SoVITS v2pro Usage Tutorial
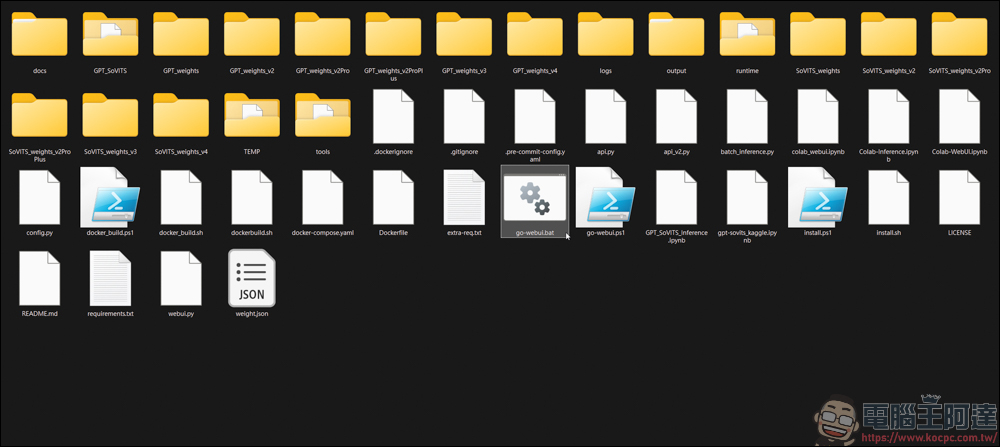
After decompression, you can start using it. Double-click go-webui.bat to run GPT SoVITS v2pro:
The system will first run a DOS window, then the main training page will pop up. You must remember that the DOS window absolutely cannot be closed—if you close it, the main training page will be completely non-functional.
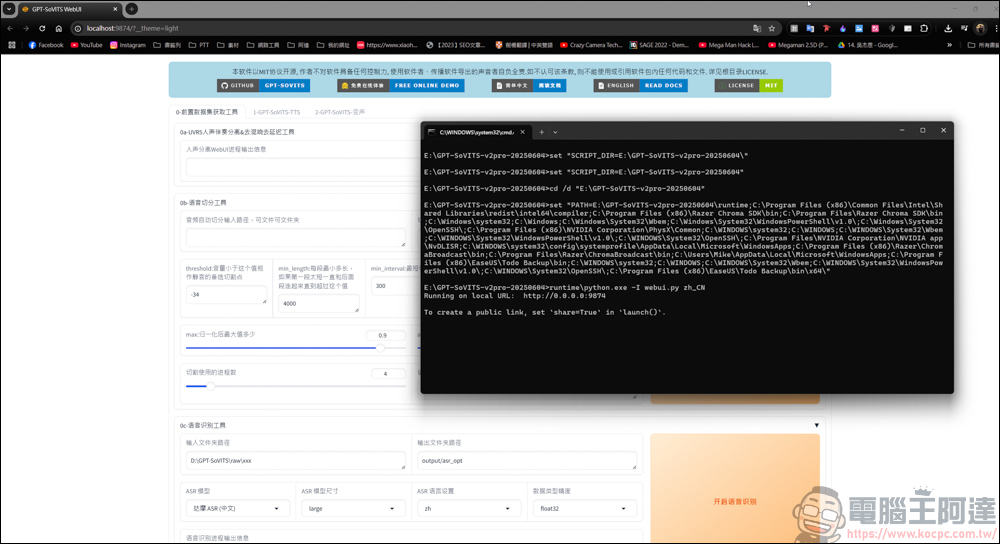
It is recommended to simply minimize the DOS window to avoid accidentally touching it during the training process.
Before starting voice training, you must first prepare the voice material. You can use a camera or phone to record speech. The longer the recording, the more accurate the trained model will be. Here, I’ve prepared a pure speech audio file of 1 hour and 27 minutes for training. I recommend creating a separate folder to store this audio file alone, as you’ll need it when specifying the directory later.
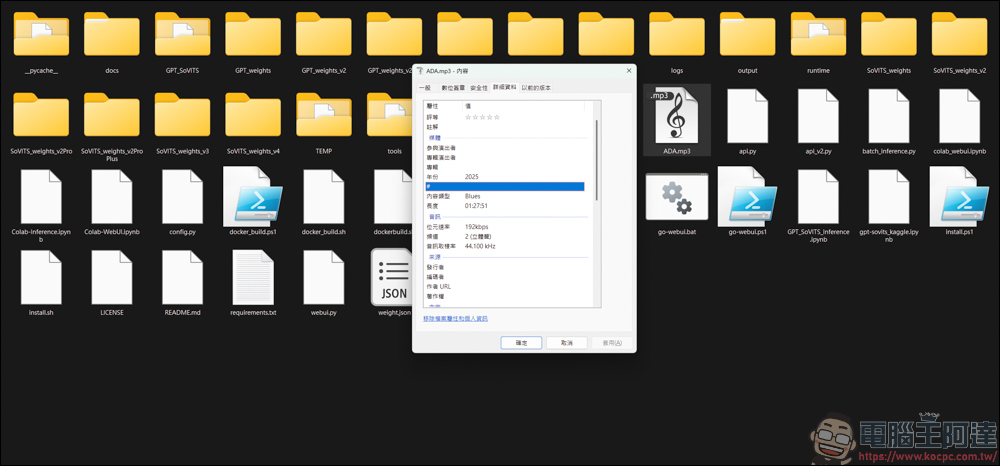
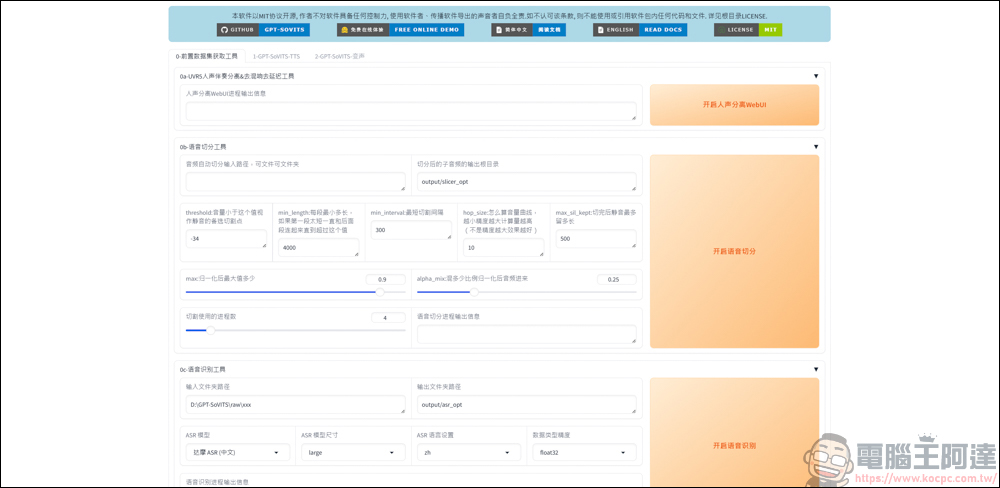
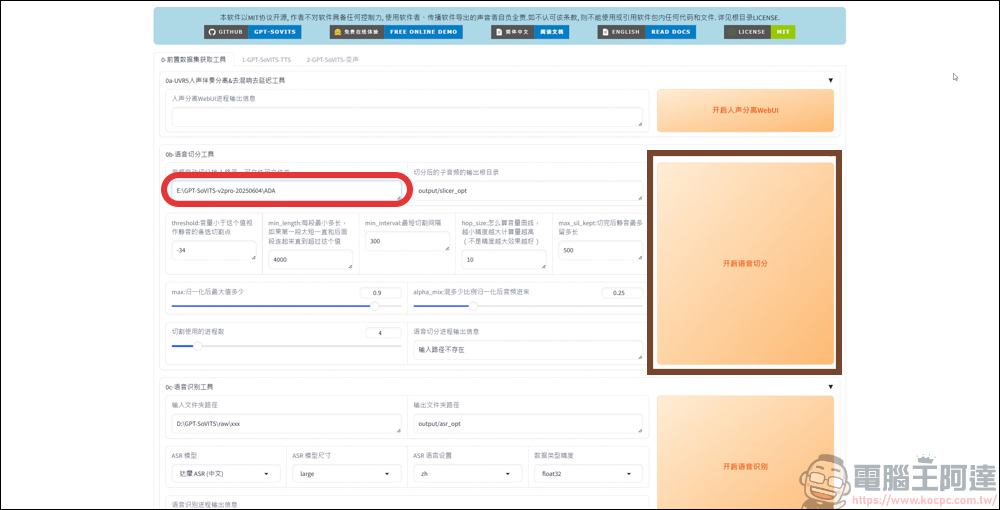
After the materials are prepared, the next step is to train the voice. In the first option, there is the UVR5 vocal and accompaniment separation & dereverb and delay removal tool. If your audio file has background noise, you can use this function to remove it. But since the material I prepared today is pure speech, I’ll skip it directly.
Go directly to the speech segmentation tool, paste the folder location of the audio file from above into the red box, then click the brown box on the right to start segmenting the audio.
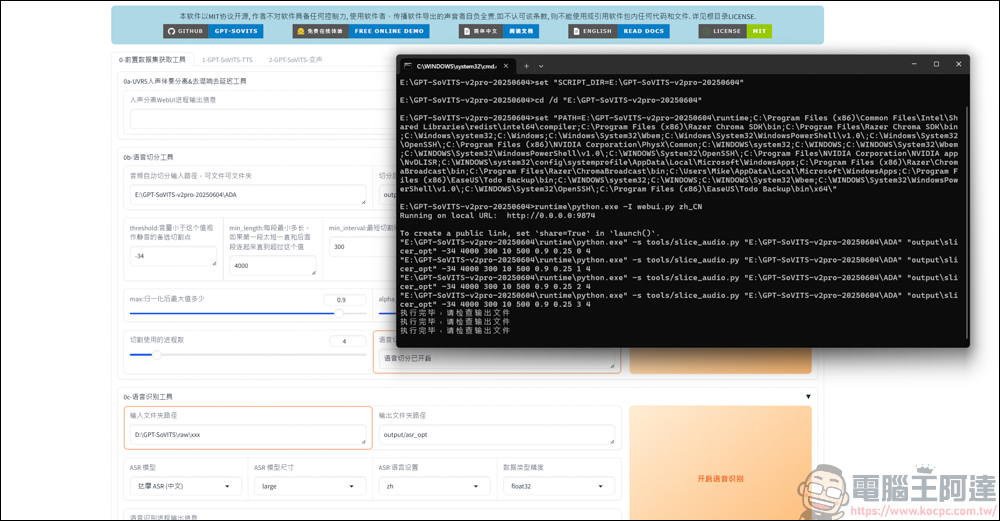
After execution is complete, DOS and the main page will display that the execution is finished.
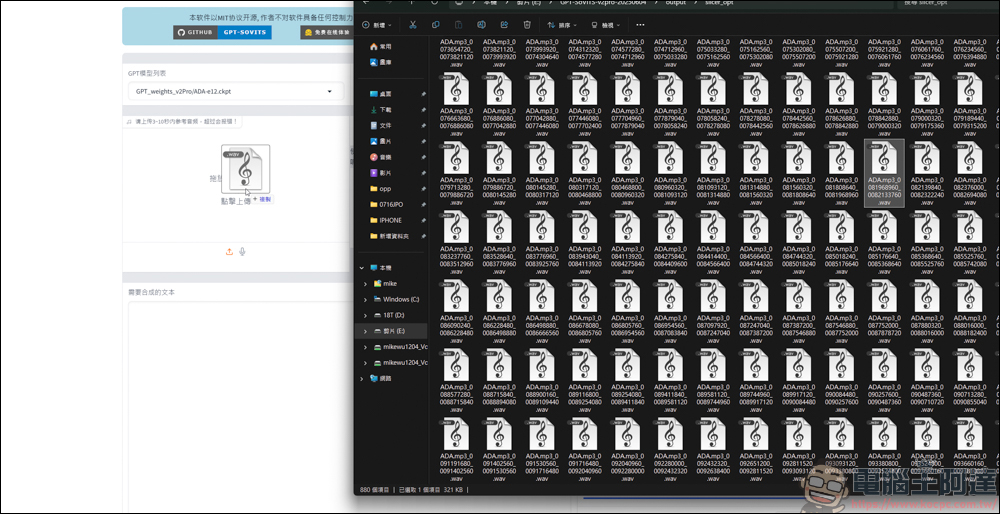
You can go to \output\slicer_opt to view the audio files that were just sliced.

Next is the speech recognition function. Basically, you don’t need to change the settings, unless your speech is a mix of Chinese and English, in which case you need to switch to Faster Whisper. Here I’ll use Chinese as an example. After selecting it, click the “Enable Speech Recognition” button in the red box:
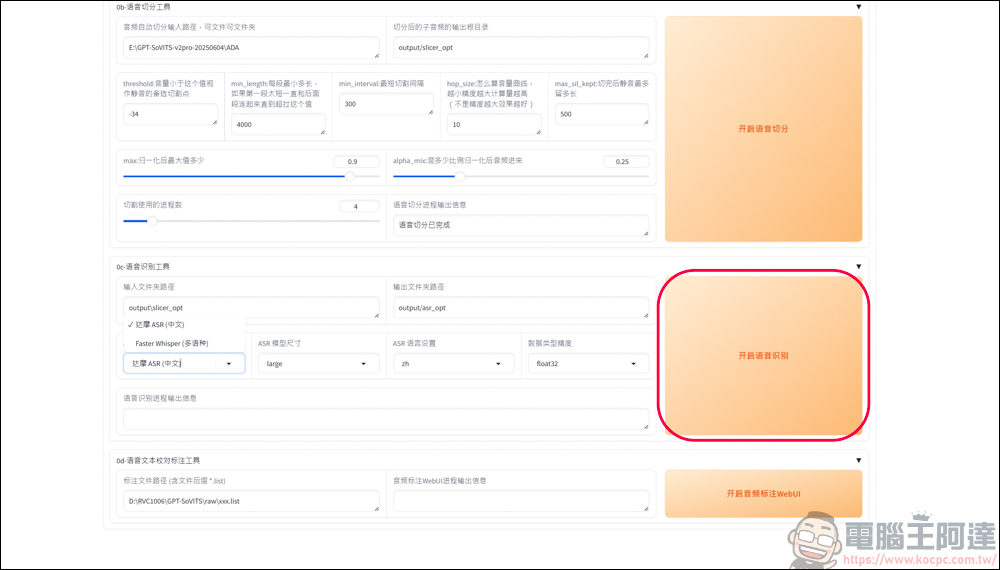
Awaiting recognition
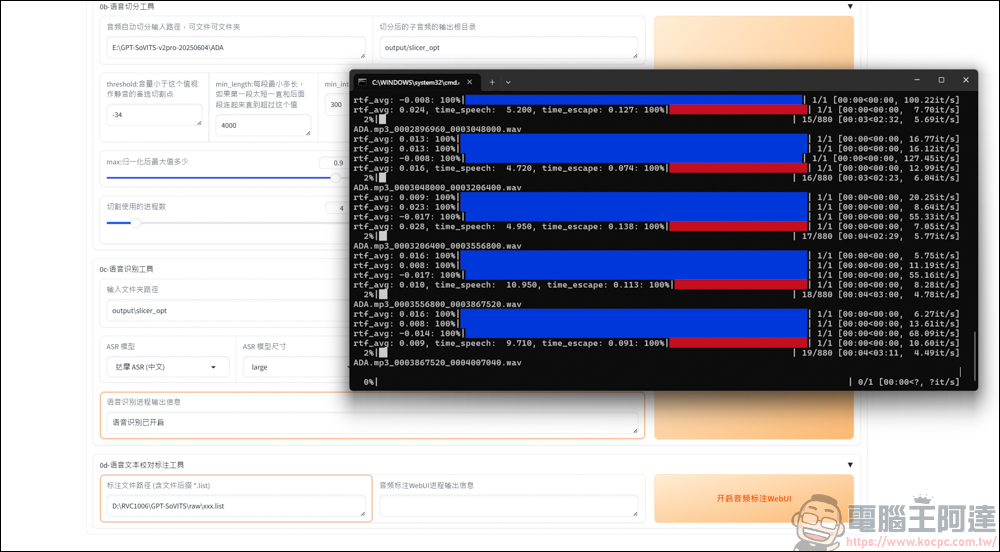
After recognition, in the voice text proofreading annotation tool in the options below, paste the location of your GPT-SoVITS-v2pro\output\slicer_opt (for example, mine is C:\Users\Mike\Desktop\GPT-SoVITS-v2pro\output\slicer_opt). After pasting, click the “Open Audio Annotation WebUI” button in the red box.
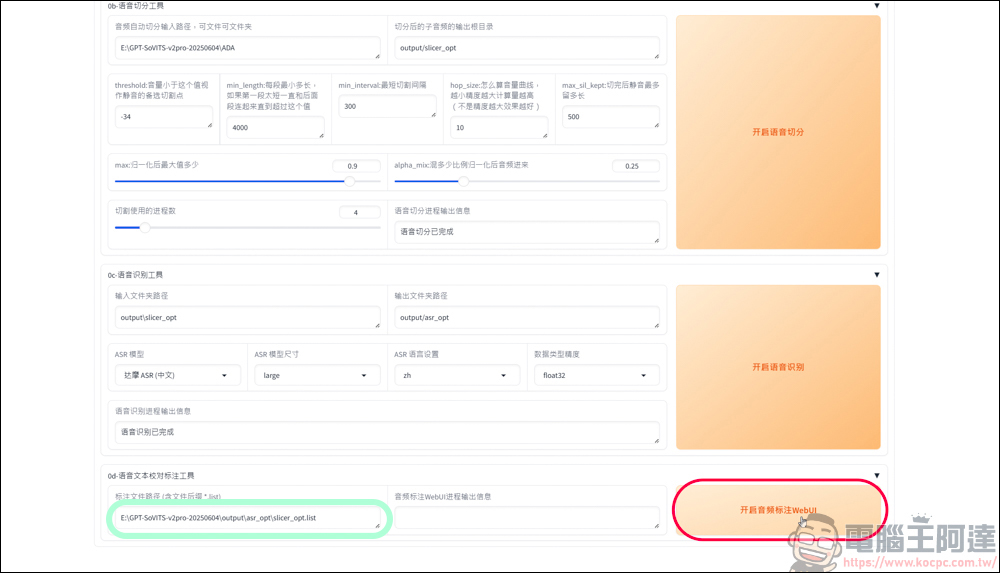
In the audio annotation feature, you’ll see several segments of the audio you just cut. Although the system has already transcribed the text for you, users still need to listen through each segment to verify the accuracy of the text, which is how AI precision can be improved:
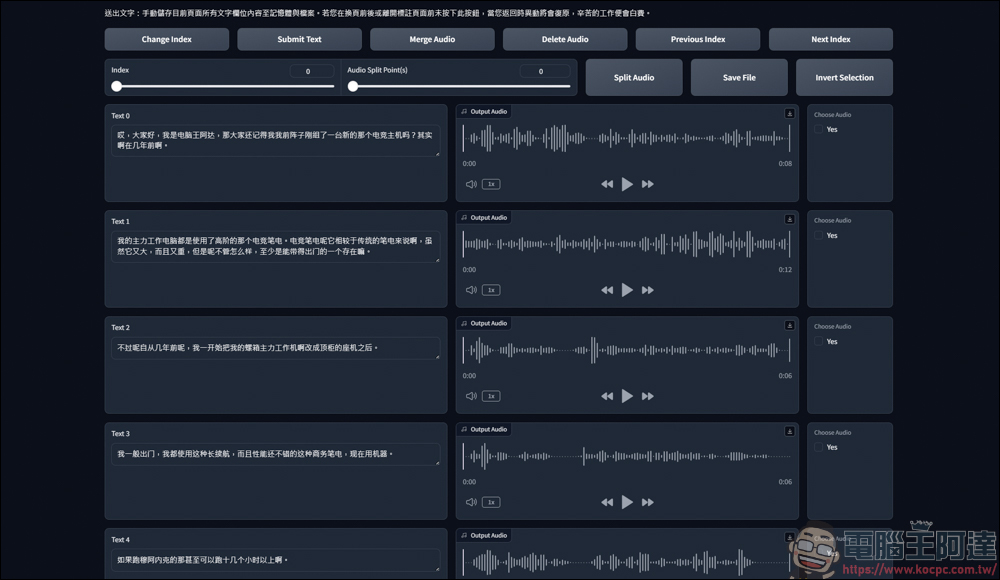
You can watch this demonstration:
Once everything is adjusted, click Save File:
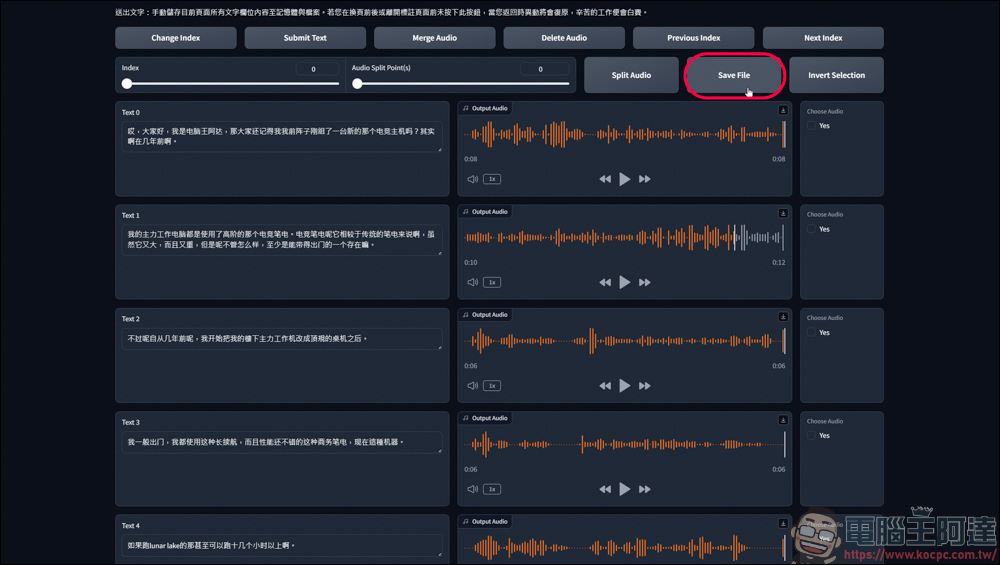
After returning to the previous page, press close on the audio annotation WebUI:
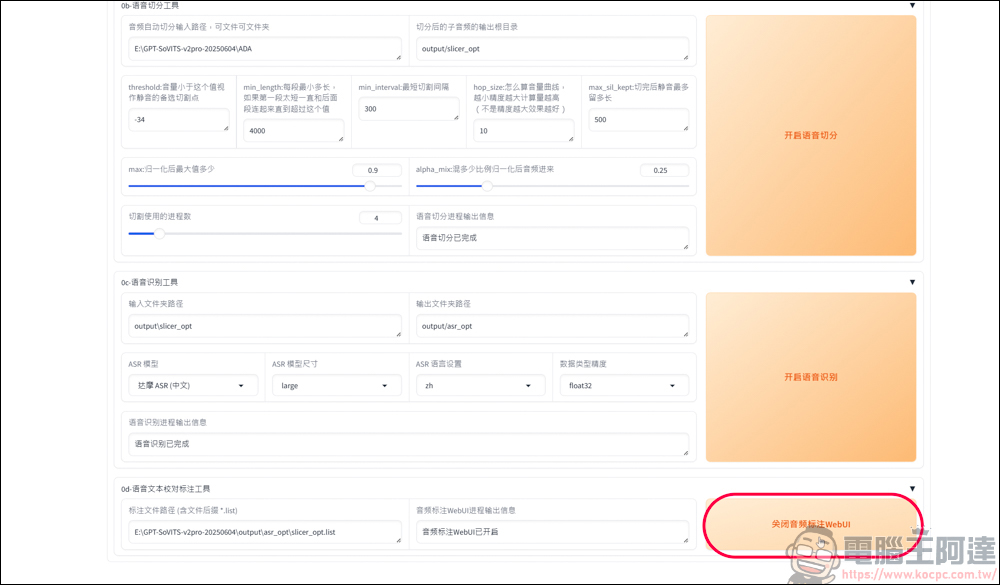
After processing is complete, scroll up to the top, click GPT-SoVITS-TTS in the red box, and it will take you to the screen below:
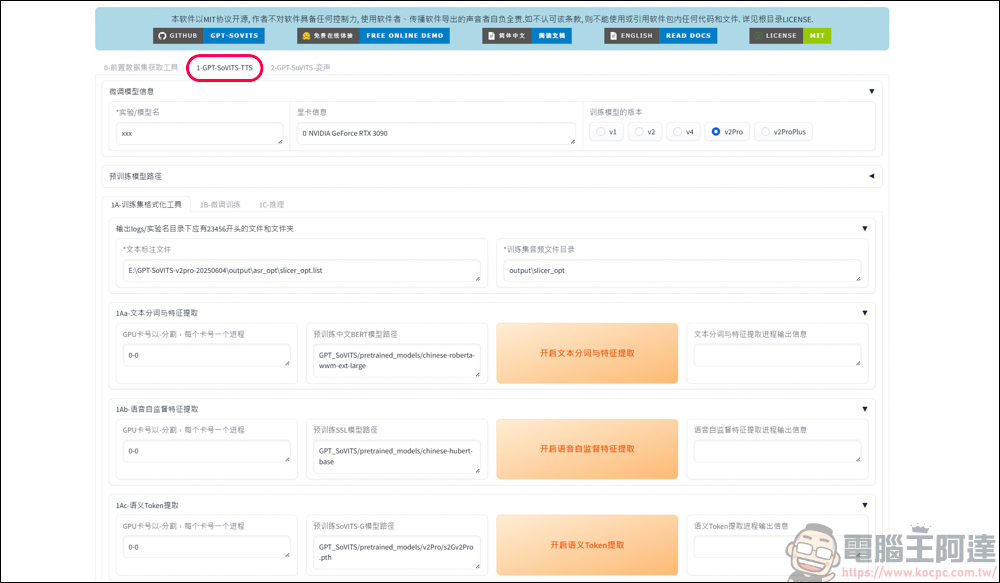
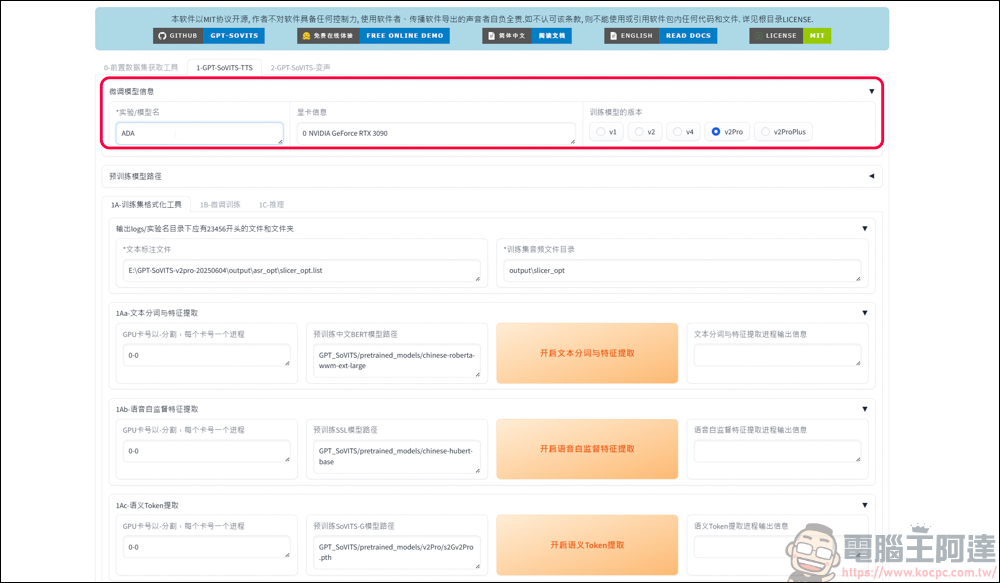
At the boxed red circle, you can enter the name of this training model and select the model version to use. This time, I’m using the v2Pro model as an example:
Basically, the previous function is properly implemented. The parameters and model paths above will be automatically configured for you, so there’s no need to adjust them one by one. Users can simply scroll to the bottom of the page and click to start training and formatting — a one-click triple combo.
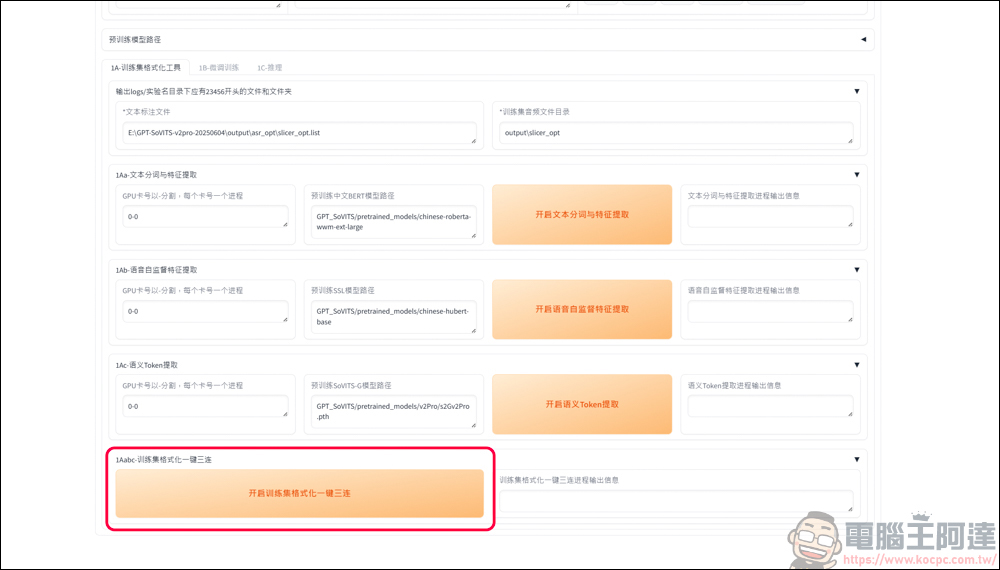
Next, the system will train on the audio that was just segmented.
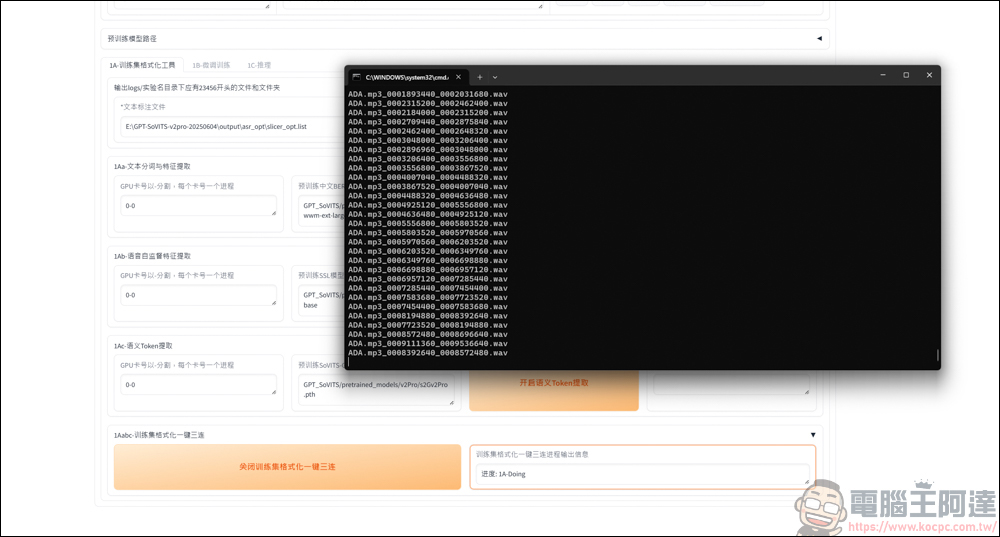
When ‘Completed’ appears below, it means it’s done :
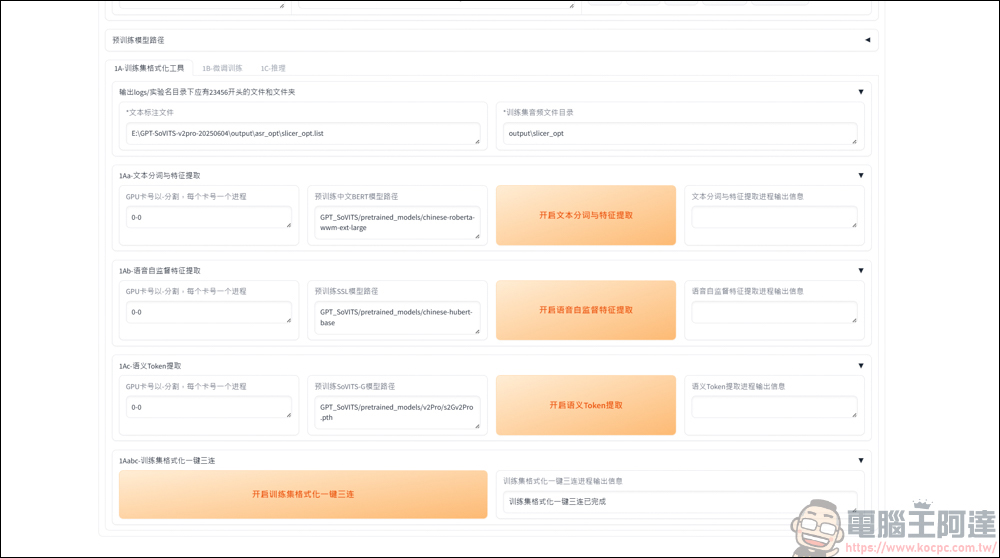
Then scroll the window up and find the “1B- Fine-tuning Training” at the red circle.
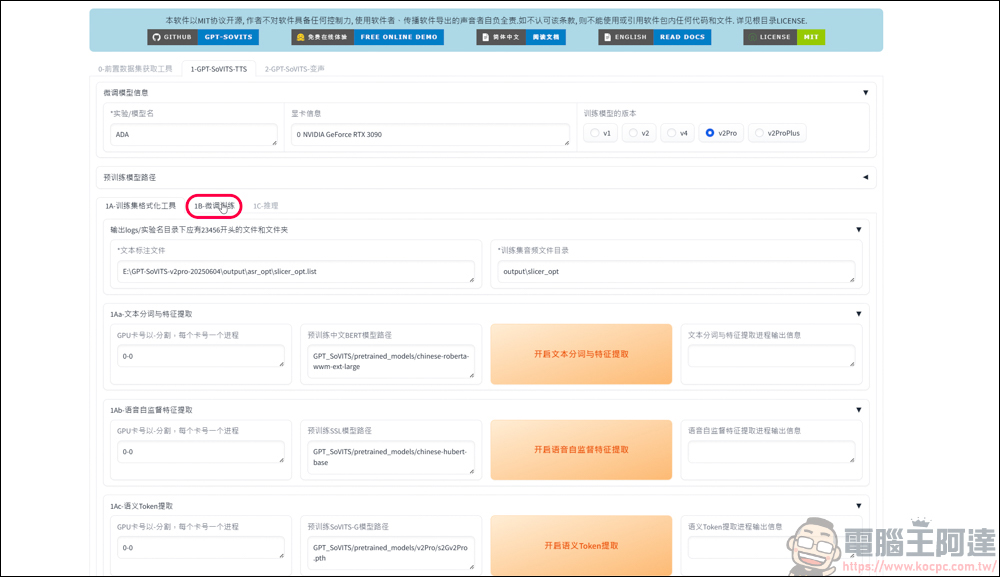
On this page is where you actually train your voice conversion and cloning. The settings on this page are very GPU-intensive. If your graphics card doesn’t have high computing power, I don’t recommend following the numerical settings I provide below.
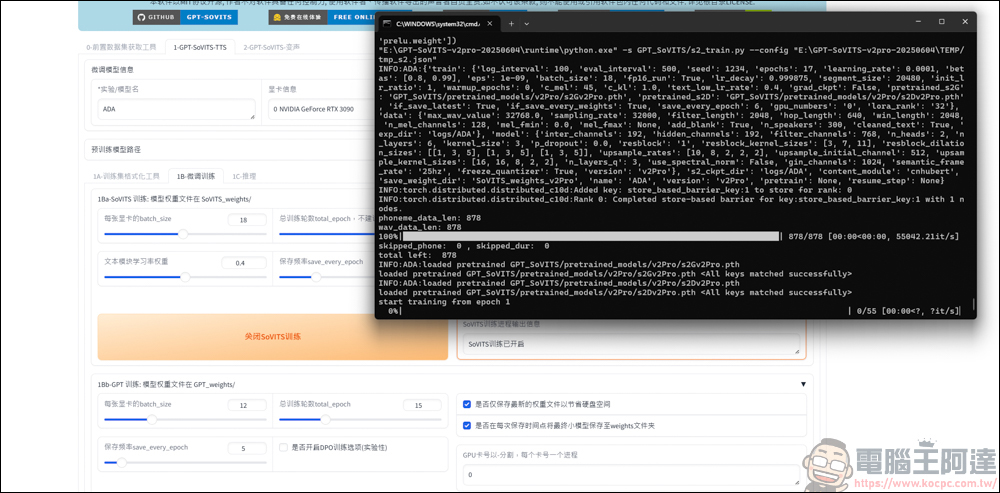
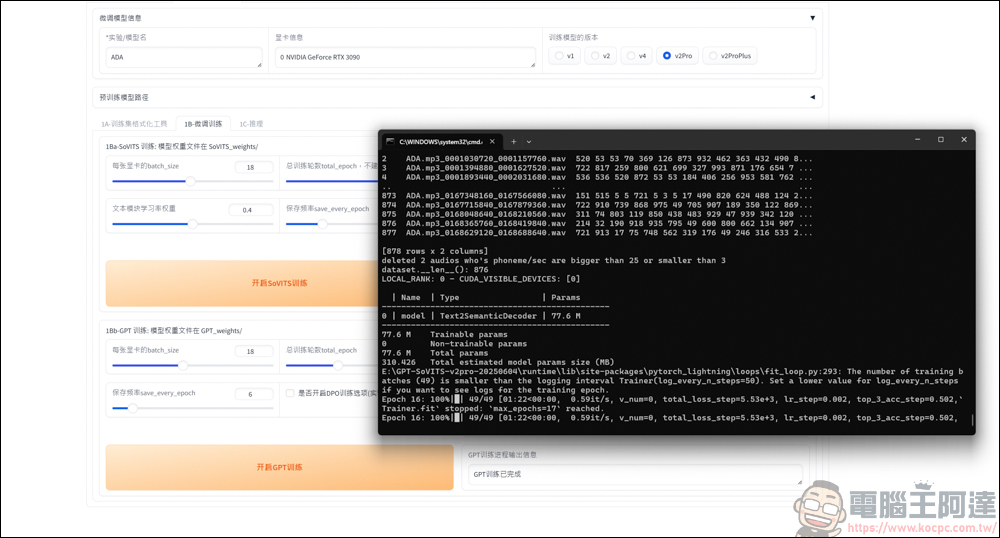
First, let’s start with So-VITS training. My computer’s graphics card is a GeForce RTX 3090 VENTUS 3X 24G OC, which has very high computing power, so I’ve set the batch_size to 18 for now. This value depends on your graphics card’s memory. On the right, I’ve set the total training amount, total_epoch, to 17. The system suggests not setting it too high, but a higher training value will be more accurate. For the save frequency, save_every_epoch, it just depends on how many times you want to save the model within the total_epoch value.
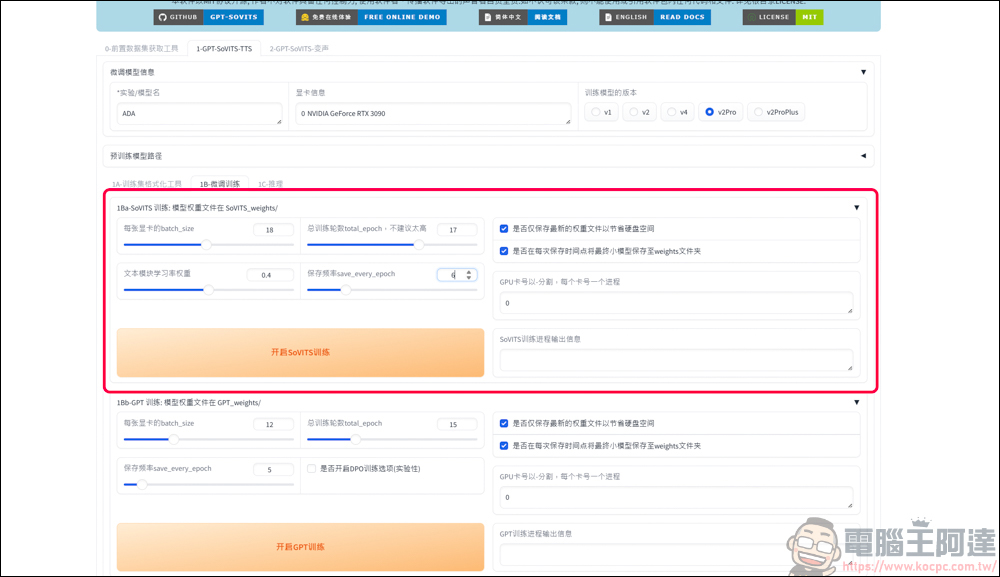
After selecting it, click So-VITS, and it will run a long training computation. With the values I set above, it took about 20-30 minutes to finish training. It all depends on how fast your graphics card runs.
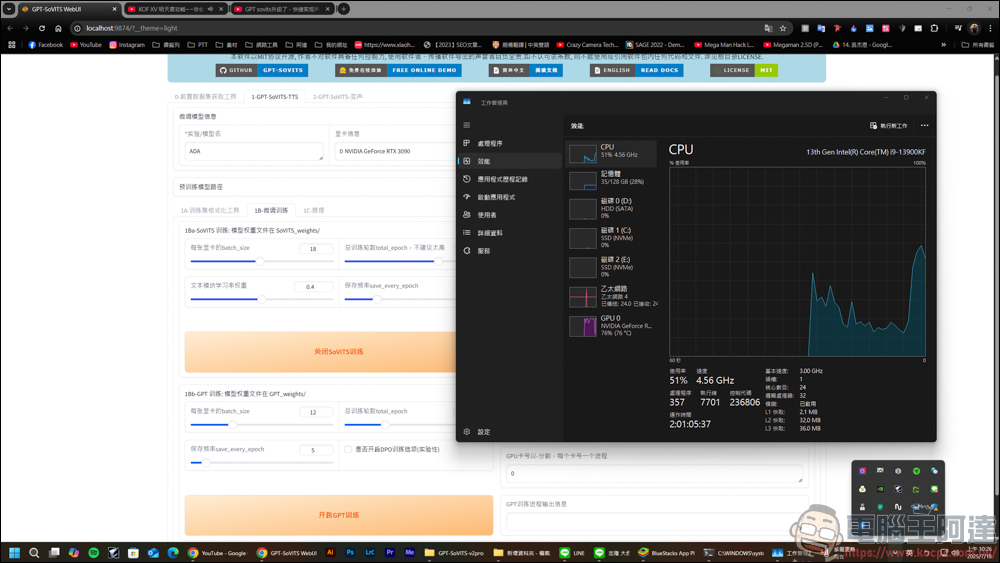
You can see the GPU is running continuously, but it’s not fully utilized. Looks like the batch_size value could be a bit higher :
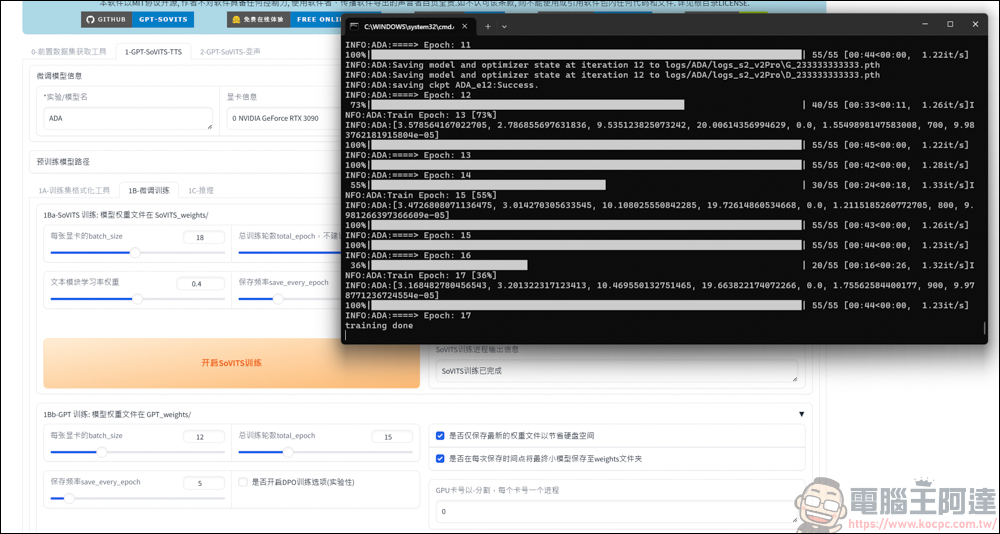
After training is completed, both DOS and the page will display the completion message:
Next is GPT training. You can use the same values as above. After confirming, click to start GPT training:
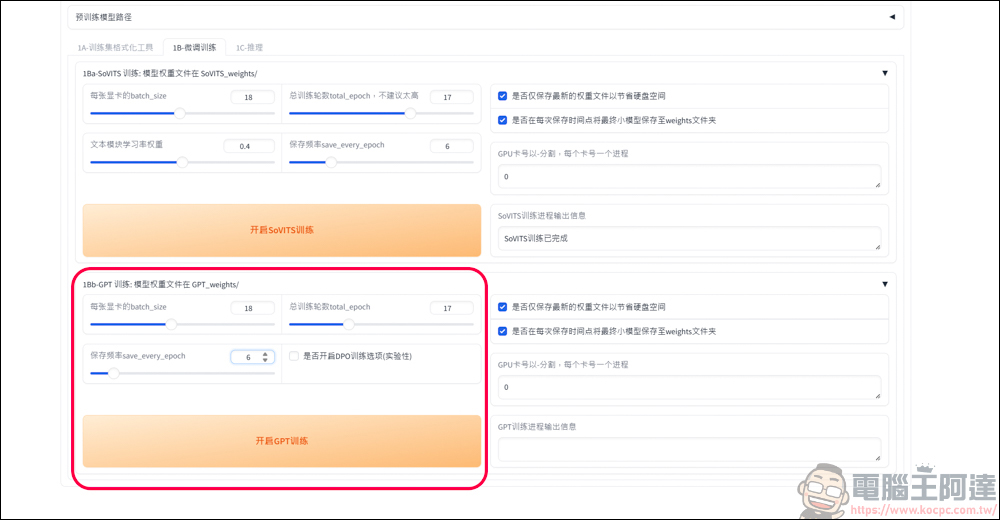
GPT training will take a bit longer, so it’s recommended to just run the training when your computer is idle :
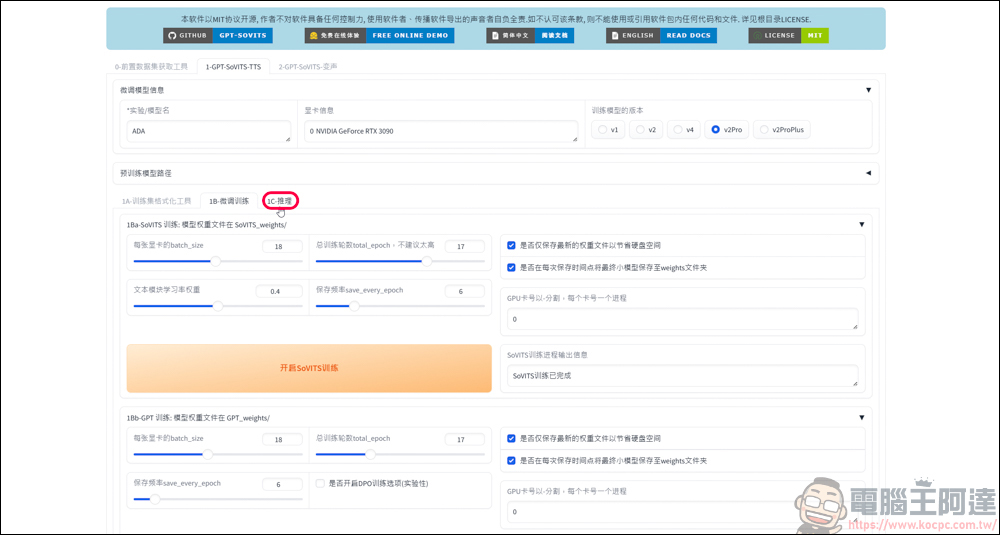
After completing the two functional trainings, go back to the top and find 1C-Inference:
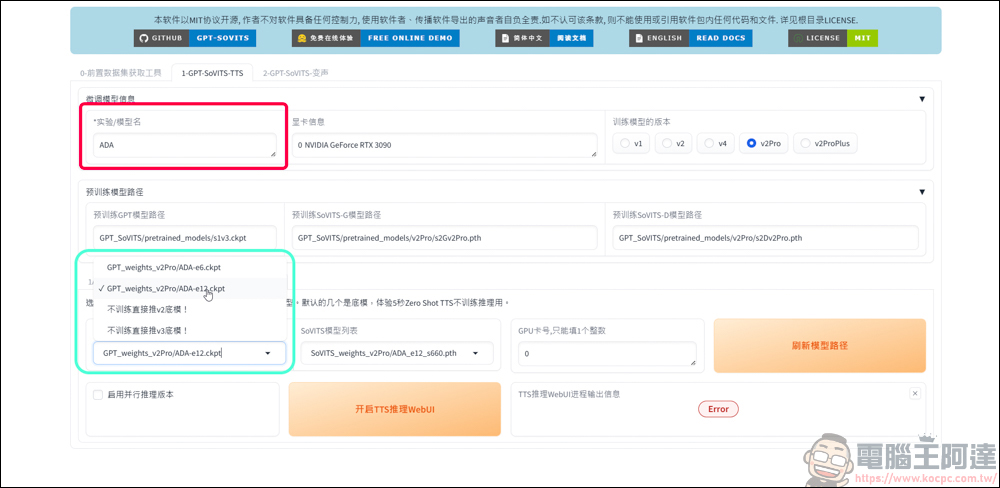
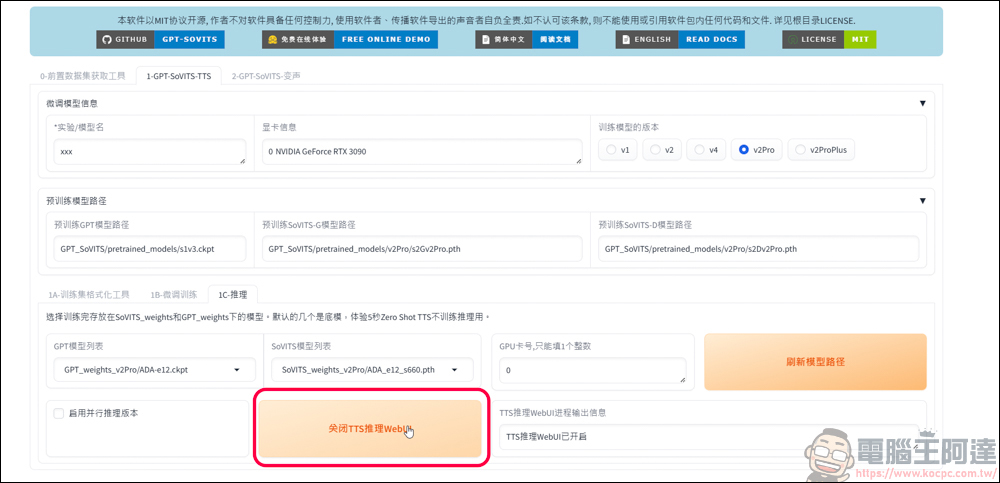
Inference is set up to have the robot read the text you specify: enter the model name in the red box, then select the trained GPT model in the green box—models ending with numbers are the ones just trained, and you can pick one to run a training test.
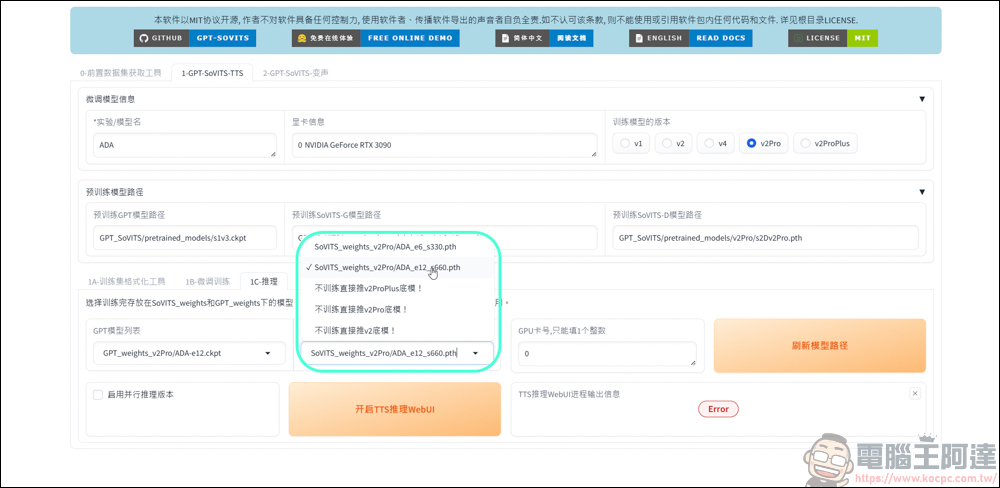
Another So-VITS model also needs to be selected the same way:
After selecting, click to open the TTS inference WebUI, then wait a moment :
Then a TTS inference WebUI will pop up separately:
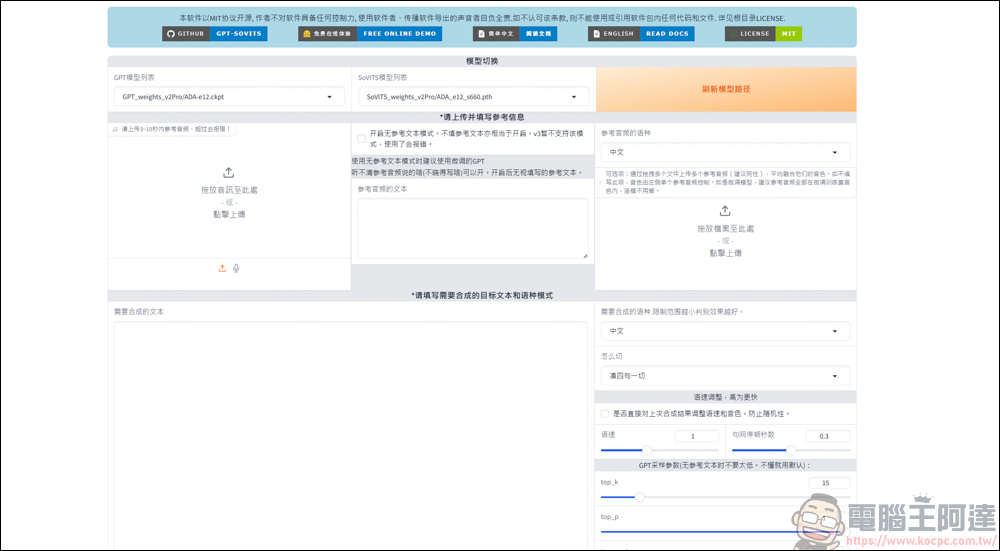
On this page, first load the user’s audio file. You can select a just-trimmed audio file and drop it into the top-left corner:
After dropping it in, just like the audio annotation feature from earlier, type the text content of the audio file in the green box into the red box, and remember to include punctuation.
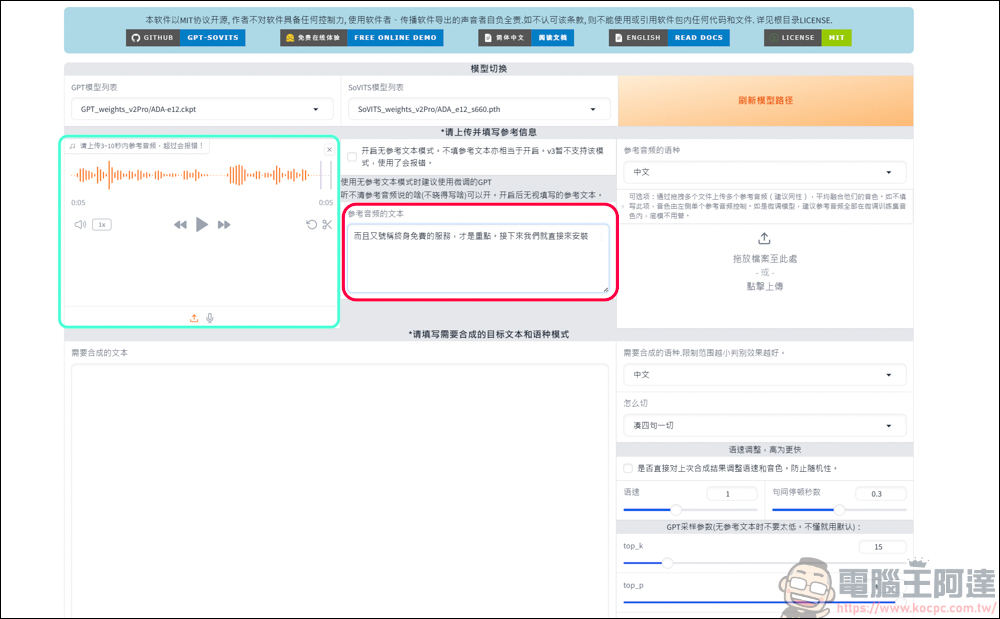
On the right side, select the language to synthesize. Choose Chinese here.
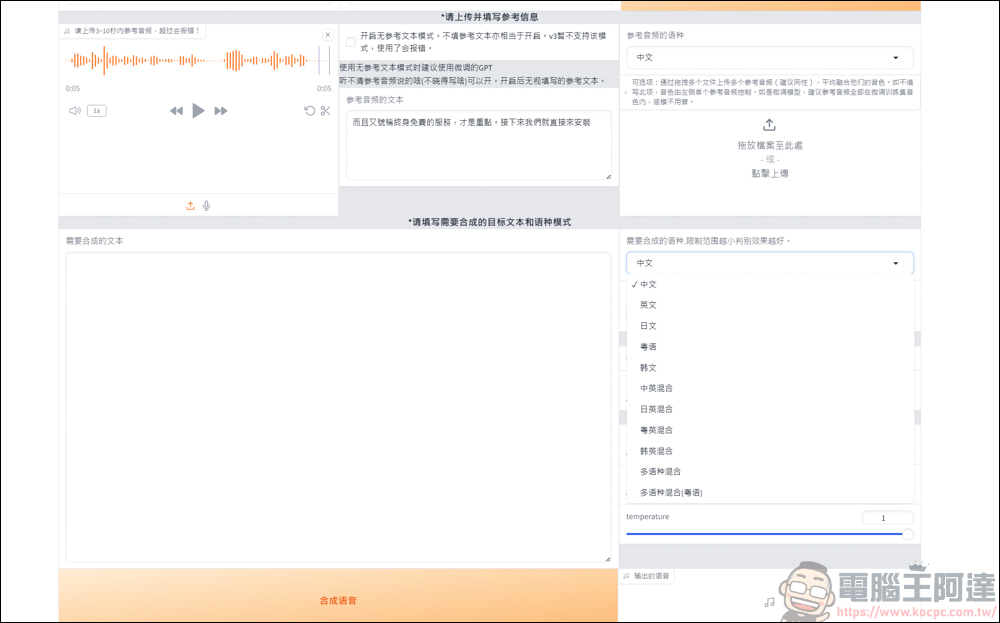
Then in the blank space on the left, enter the text you want the robot to say :
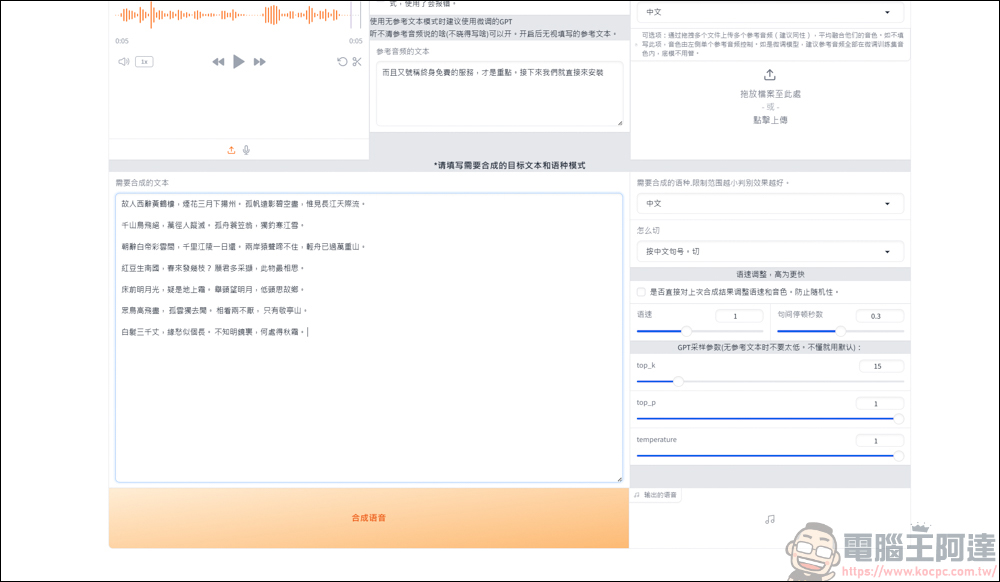
Press the speech synthesis button to easily clone your voice for reading scripts.
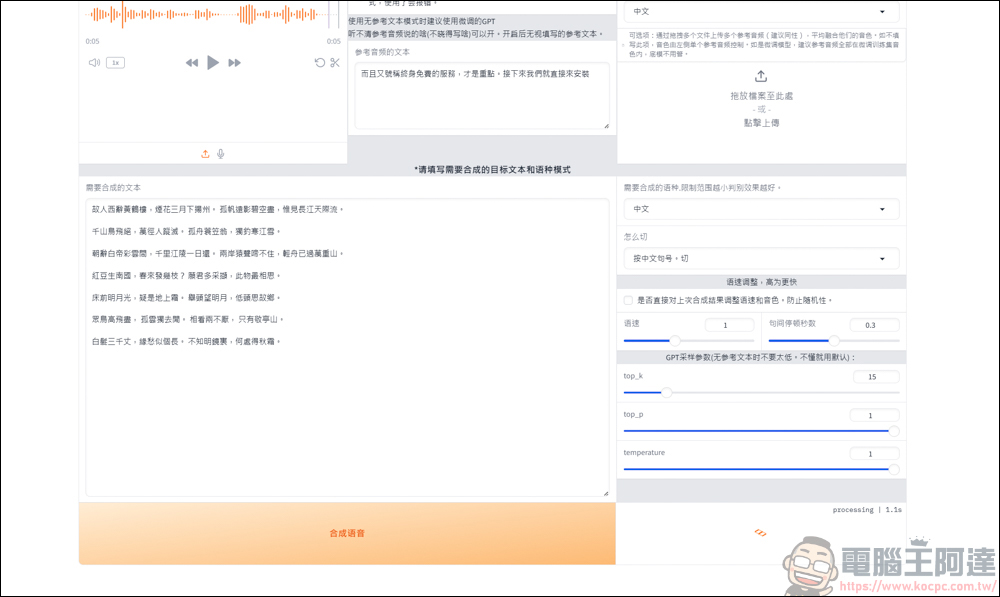
The effect after generation can be seen in the example video below. Although the speech isn’t as perfect as a real person’s, the effect is actually quite good. If you want to use it for making short videos or quickly introducing news, this method works well. Anyway, it’s generated with your own voice XD.
If you’re not happy with the speed or phrasing, you can also fine-tune it and regenerate, then keep testing to find the pace and tone that work best.
Of course, if you’re not satisfied no matter how you adjust it, I’d suggest retraining the model. It’s likely that the material you used for training is too short, which leads to low accuracy. Like in the example below, I directly extracted the audio from our edited video. Because the video itself was cut somewhat choppily, the robot’s speech intonation was a bit unnatural, so I might train it again separately.
Additionally, when generating a new text later, after opening go-webui.bat, just go directly to 1C-Inference to access the speech synthesis function mentioned above. Don’t foolishly think you need to retrain the model again.
Source: KOCPC Chinese