


The “Low Latency Profile (Low Latency Profile)” feature that has been unveiled before has finally begun to be gradually pushed by Microsoft, but this time it is added to the Windows 11 KB5089573 version first. This version is an optional update, which means that each user will not be forced to update and needs to be manually enabled. At the same time, after the update, Low Latency Profile is not enabled by default and needs to be enabled through ViveTool. Those who want to experience the difference first and do not find it troublesome can follow the steps below. Those who are not in a hurry can wait for the official security update in June.
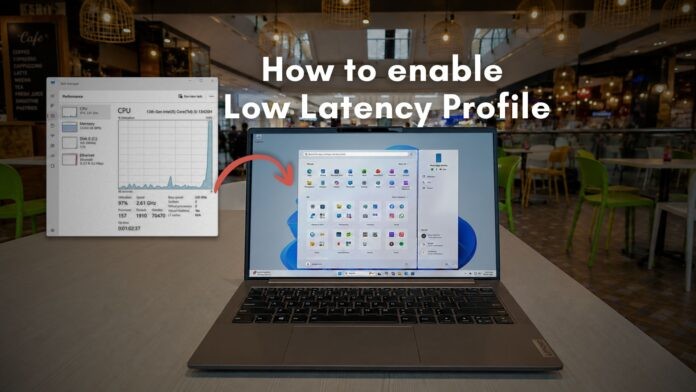
Image source:Windows Latest
What is Windows 11 Low Latency Profile?
For those who are not familiar with the Low Latency Profile function, here is a brief explanation.
The function of Low Latency Profile is that when you open the Windows 11 menu, notification center, search and other system interfaces, it will increase the CPU clock speed and usage for a short time, allowing the interface to start quickly, and then the CPU returns to normal state. This is the so-called “Race to Sleep” or “Race to Idle” concept. It will not put the CPU under high load for a long time, but will complete the work in a short time and then return to low power consumption as soon as possible.
This new feature has previously caused some discussion. Some people think that it is like using CPU violence to cover up the lack of optimization of Windows 11. However, Microsoft’s Scott Hanselman has responded that modern operating systems will inherently use similar methods to reduce interaction delays, and macOS, Linux, and mobile systems also have related mechanisms.
The only thing to note is that this improvement is currently mainly for the Windows Shell experience, that is, system interfaces such as the start menu, search, right-click menu, etc. It will not increase the game FPS or make third-party software launch faster. It’s more like making Windows 11 less dull to use. For low-end or older computers, the motion feeling may be more obvious.
How to be the first to experience the Windows 11 Low Latency Profile feature?
If you want to be the first to experience the Low Latency Profile feature, you must first install the May 2026 KB5089573 optional update, which is applicable to Windows 11 25H2 and Windows 11 24H2. However, this update is currently being pushed gradually, which means that not every user has received it. Like me, it has not yet been received, but my friend’s computer has already been received, so if you don’t see it, it means you need to wait a little longer. Next I will talk about foreign media Windows Latest Screenshot to illustrate.
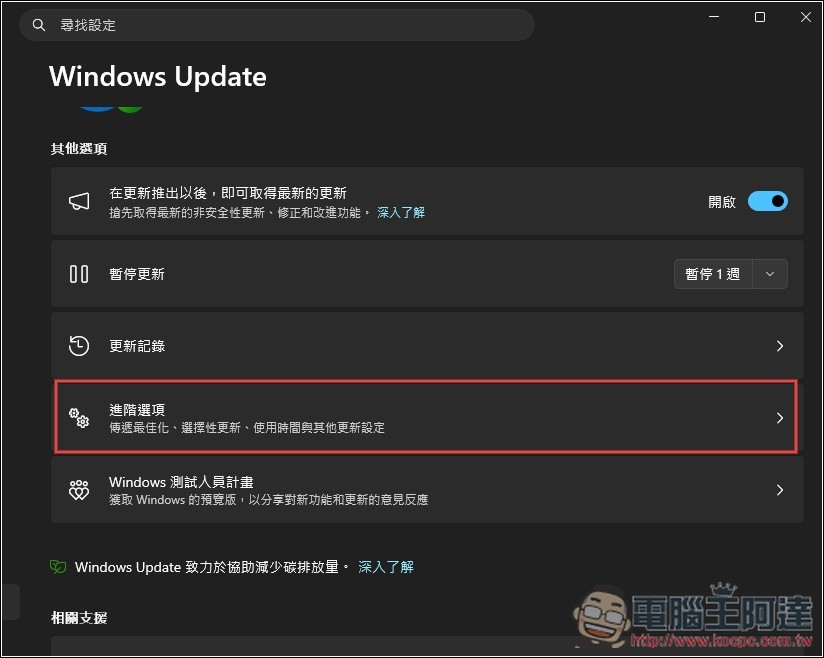
Open Windows Update in settings and go to “Advanced Options”:
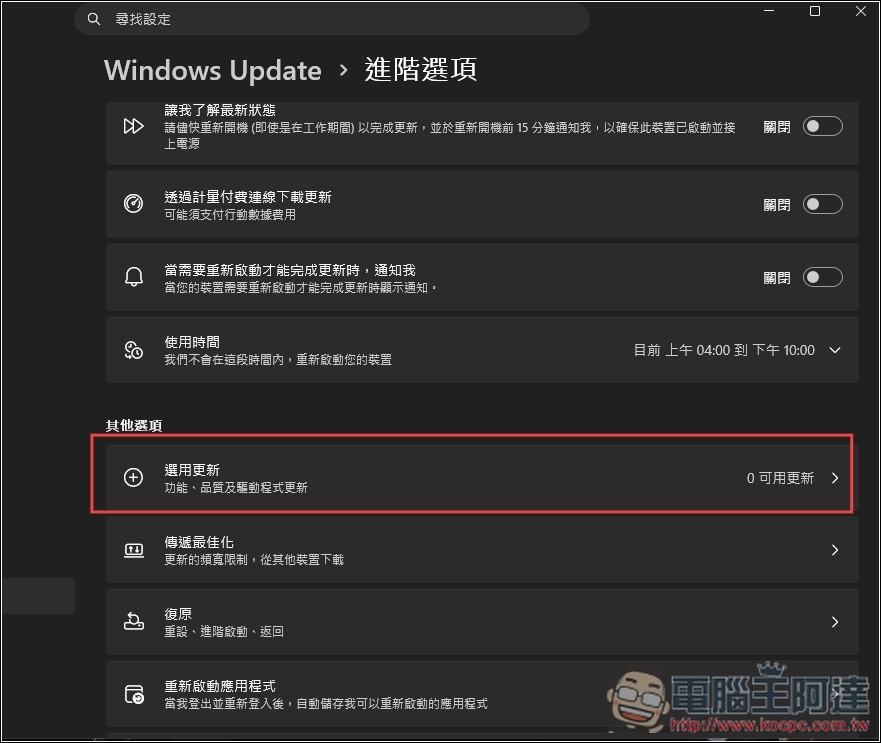
Then you will see “Select Updates”. I don’t have it yet, so the quantity on the right shows 0. If yours has been received, other numbers should be displayed:
Once you press Update, Windows Update will begin processing:
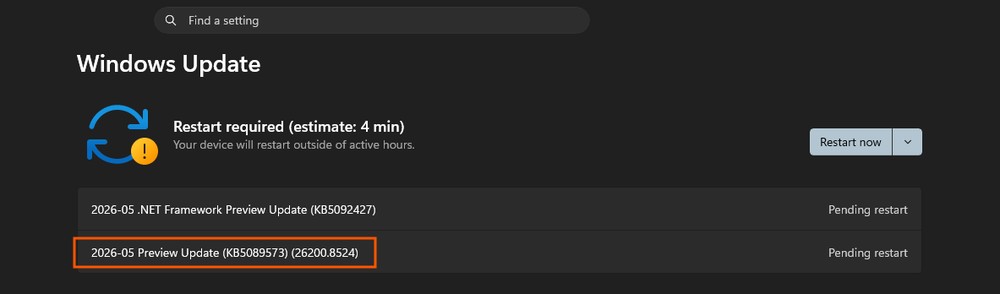
Image source:Windows Latest
After the installation is complete, it is recommended to restart the computer. Then you can first go to “Settings” → “System” → “System Information”, go down to find Windows specifications, and confirm whether the OS build is 26200.8524, 26100.8524 or newer.
Low Latency Profile may not be enabled immediately after installation, so it needs to be manually enabled through the ViveTool tool.
arrive GitHub Releases for ViveTool Download the latest version from the page and unzip it after downloading. For ease of operation, you can create a C:\ViveTool folder and unzip all files into it:
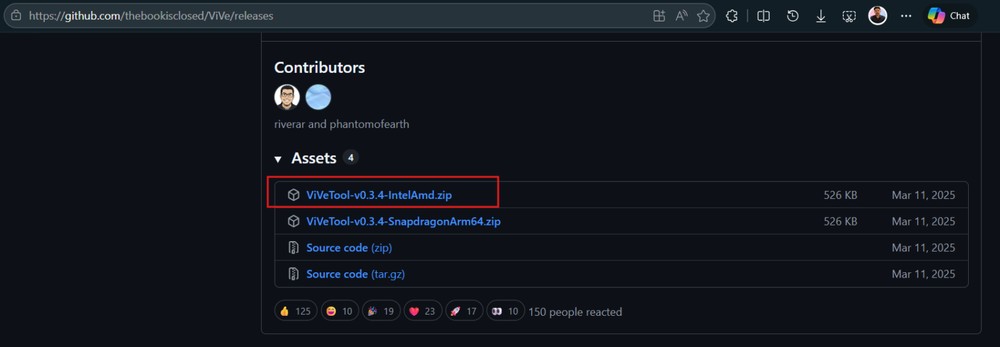
Image source:Windows Latest
Then open the start menu and search for cmd, right-click on the “Command Prompt” and select “Run as administrator”. After entering the command prompt, enter the following command to switch to the ViveTool folder:
cd C:\ViveTool
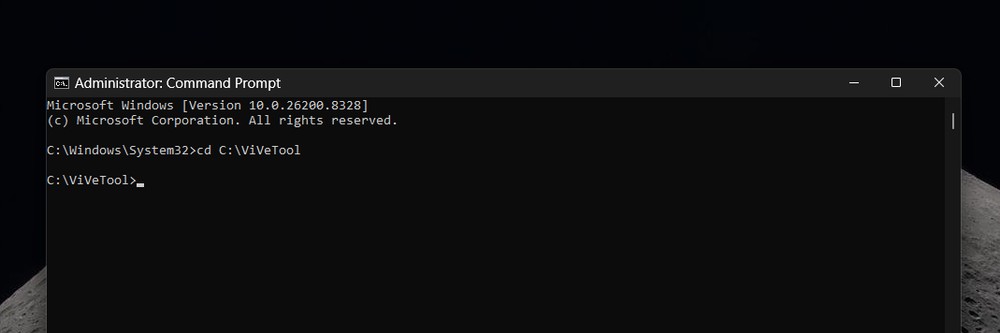
Image source:Windows Latest
Then enter this line of command to turn on Low Latency Profile:
vivetool /enable /id:58989092
After seeing the success message, remember to restart your computer for the settings to be applied.
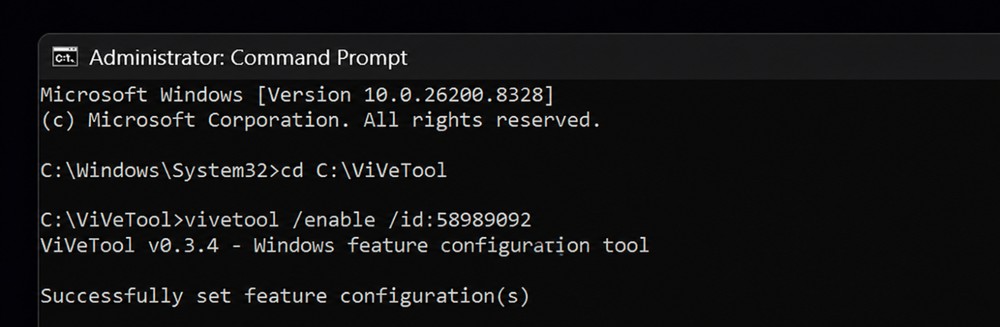
Image source:Windows Latest
If you encounter an exception after enabling it, or if you want to restore the original state first, you can also use the same method to open the command prompt with system administrator rights and enter:
vivetool /disable /id:58989092
So how to confirm whether Low Latency Profile is effective?
Unfortunately, Windows 11 currently does not provide a confirmation method, so you can only compare the somatosensory difference before and after it is enabled. You can try the Start Menu, Windows Search, Notification Center, Quick Settings, and Right-click Menu a few more times to see if there is less lag when opening, whether the animation is smoother, and whether the response is more immediate.
Source: KOCPC Chinese