


Microsoft Word provides a large number of tools to help you write and format most types of documents, but many people only know how to type or change fonts, leaving other functions idle and not making full use of them. It is really a pity. This time, the author has compiled 8 practical Microsoft Word tips for you, so that the documents you hand over will be more professional and formal than others.
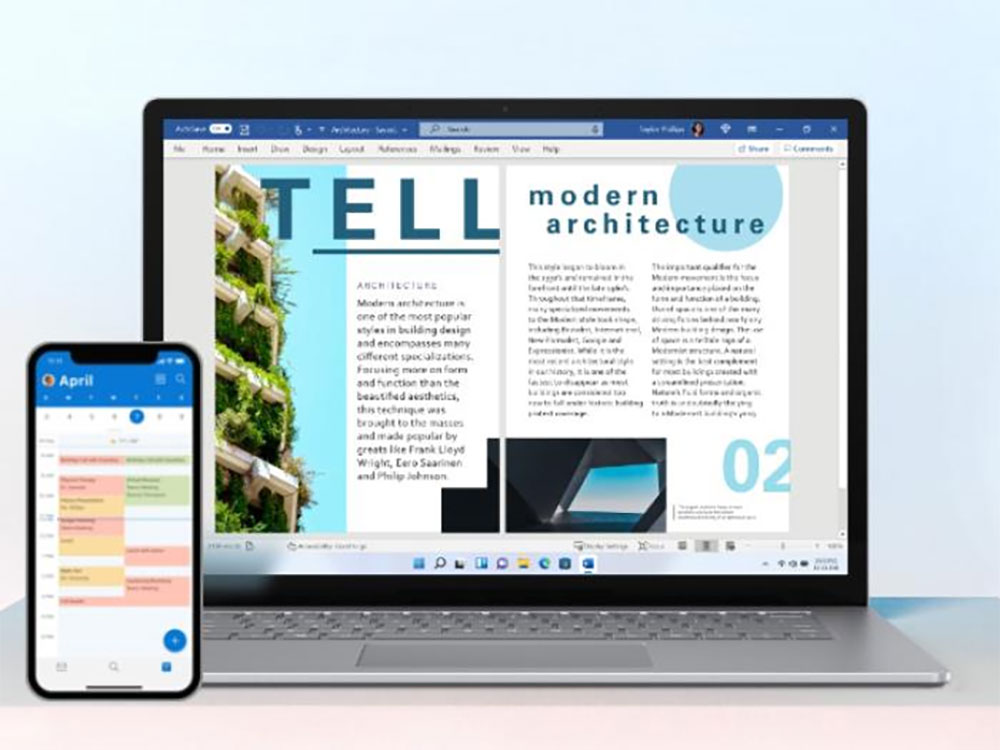
8 Microsoft Word tips to help you create professional-looking documents
When you write a document, you put a lot of thought and effort into it. Naturally, you want the reader to read it carefully and have the best impression. You must have worked hard to make your document stand out from the crowd. However, if you are writing a formal document, those tricks used to attract attention obviously do not apply. The 8 practical tips carefully compiled for you this time will definitely help you learn them!
- Choose the appropriate font for your document
- Adjust appropriate boundaries
- Set correct line and paragraph spacing
- Make good use of paragraphs and indentation
- Use field settings on appropriate documents
- Use titles to identify chapters
- Position images between text and paragraphs
- Use alignment tools with images and objects
Choose the appropriate font for your document
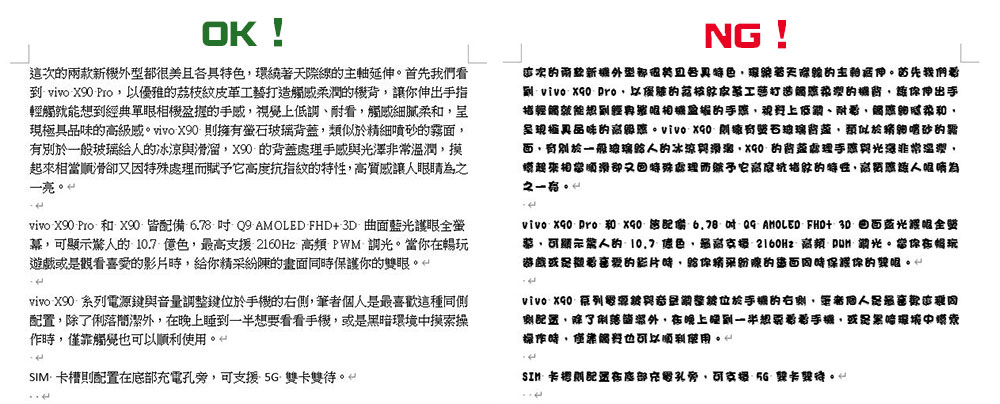
Whether you are writing business documents or school reports or papers, for the convenience of reading and first impression, please give up those unique handwriting and cute characters and choose fonts that are easy to read and have clear and clean strokes. In particular, Chinese characters have a lot of strokes. If the font is chosen improperly, some of the strokes may appear to be tangled together, making it difficult for professors, supervisors or partners to read, and it is also uncomfortable for long periods of time. Because the font library is not rich enough, some rare words or rarely used words are not perfect, so it is easy for them to be missing. Although you can use other fonts for these rare words, the whole document will look very messy.
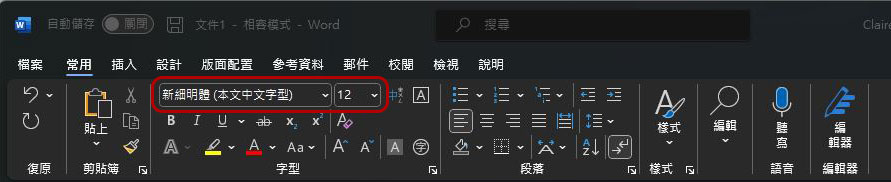
If you want to change the font style, size and color, please go to the “Common” tab in Word and select adjustments.
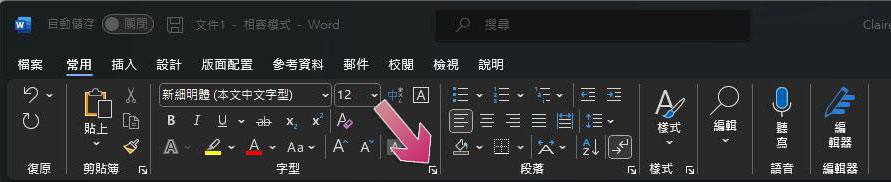
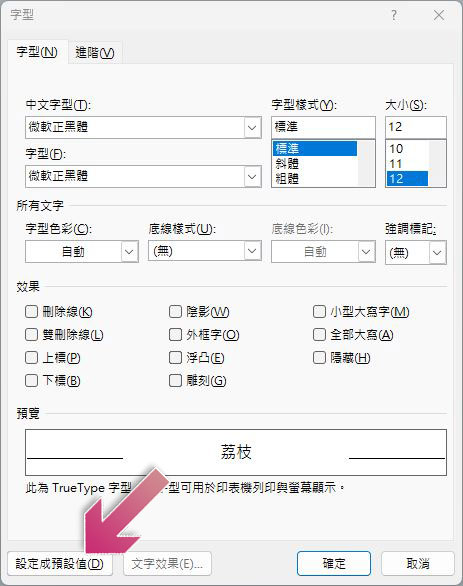
If you want to directly change the default font for all documents once and for all, click the small arrow in the lower right corner to open the font settings window.
In the settings window, after adjusting the title and text fonts you want, click “Set as Default” in the lower left corner, and then select whether only this document will use the default font or all future documents written based on this template will use the default font. After selecting, confirm, return to the settings window and click OK.
Adjust appropriate boundaries
If you have specific requirements for the border, you can adjust it to the required width through simple settings in Word; if not, the default standard is 2.54 cm top and bottom, and 3.18 cm left and right. Depending on the type of document you want to create, sometimes you may need narrower borders to maximize the document editing area to accommodate tables or charts, in which case you can choose a narrow border of 1.27 cm top, bottom, left and right. If you want to adjust the border, please switch to the “Layout Settings” tab and select it from the border.
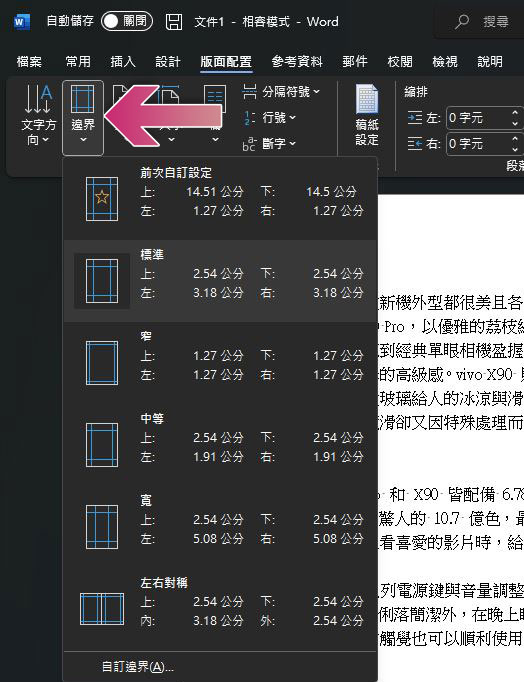
If you want to set a specific border width, click Custom Border at the bottom in the previous step to enter the setting window. From here you can customize items including top, bottom, left, right, binding edges, etc., and finally press OK to save the changes.
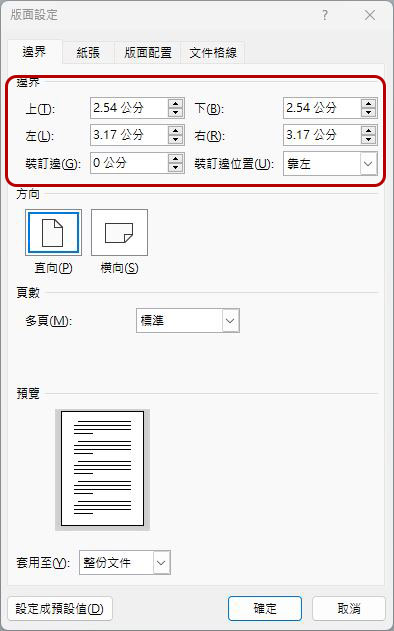
Note that there are additional options for custom borders in Word. You can apply margins to the entire document, to a section, or after an insertion point, based on page orientation, page type, and usage details.
Set correct line and paragraph spacing
Line spacing and paragraph spacing affect the readability of the entire document, so these are formatting options you must keep in mind. You may need double spacing like a college report or essay, but the default in Word is 1x spacing for most document types. You can select all text or specific text in the document. In the “Common” tab, click the “Line Spacing and Paragraph” icon (as shown below) and select it from the drop-down menu.
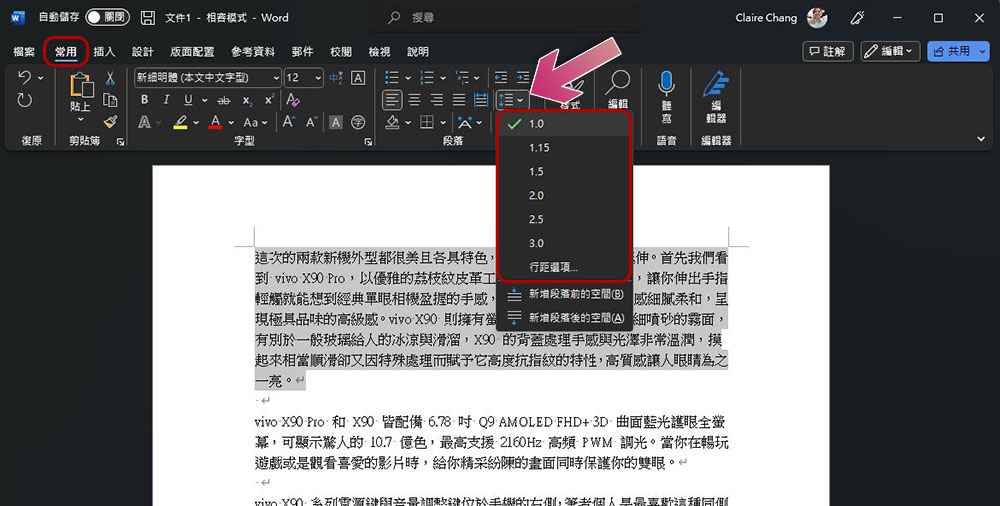
If you want to customize the line spacing and the height between paragraphs, click “Line Spacing Options”. In the settings window, you can enter the height between paragraphs and line height in the paragraph spacing item. The line spacing part can be selected from the drop-down menu.
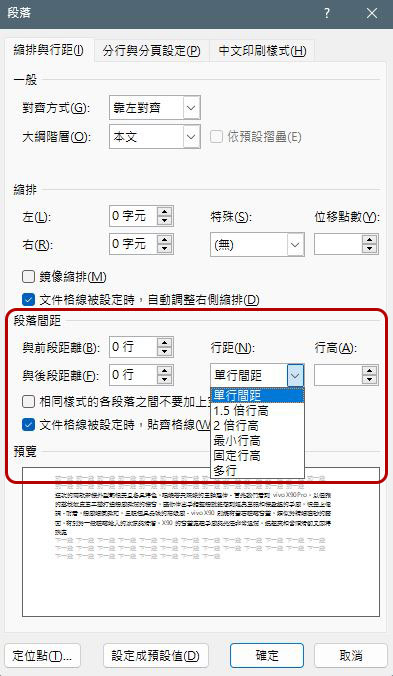
When making settings, you can also preview the changes below. When you are satisfied with your settings, please click “OK” to apply; you can also click “Set as Default” to have your settings applied to all future documents.
Make good use of paragraphs and indentation
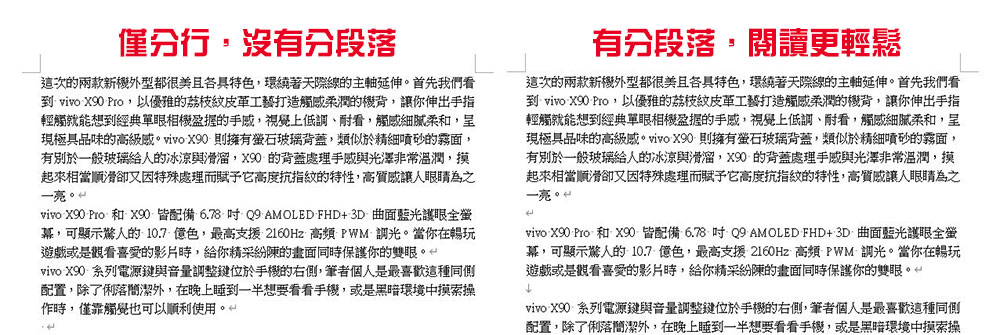
Although many documents are now arranged in a left-justified manner, if the article is long and contains a lot of content, and the paragraphs are not separated, the entire article will look very crowded, giving people a sense of pressure that they need to be read in one go, and it will be quite tiring to read. Under normal circumstances, if you want to change a paragraph, you only need to add an extra line of Enter after finishing the previous paragraph. Subdivided paragraphs not only make the layout more visually comfortable, but also separate each paragraph of different content.
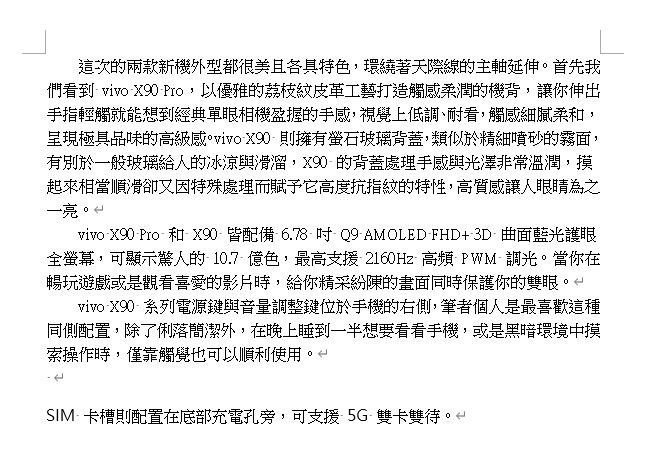
Next, let’s talk about indentation. You may want to use indentation instead of an extra line spacing as the way to express the beginning of a paragraph. This segmentation pattern is most commonly seen in books and magazines. This type is called “first line indentation” (as shown below). You can press Tab directly at the beginning of the first line of a paragraph to automatically indent.
Use field settings on appropriate documents
Although the column format is not common in general documents, it can often be seen in applications such as folding brochures, catalogs, etc. If you want to create a document with this type of content, you can go to the “Layout” tab and click the “Column” item to select the appropriate type from the drop-down menu:
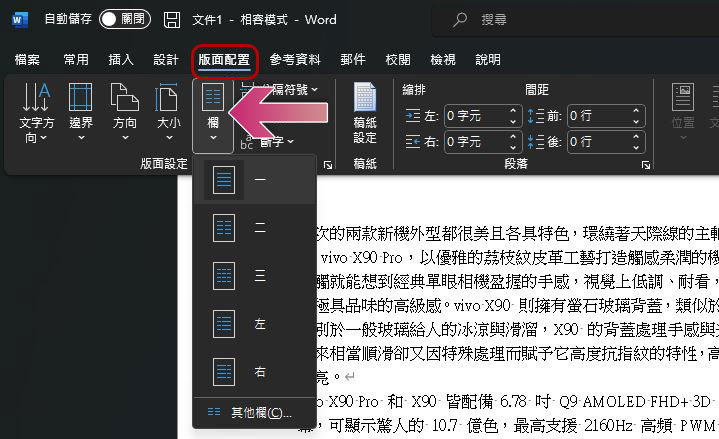
Of course, in addition to the default items, you can click “Other columns…” at the bottom to customize. In it, you can set the width and spacing of each column and apply these settings to the entire document or a certain part.
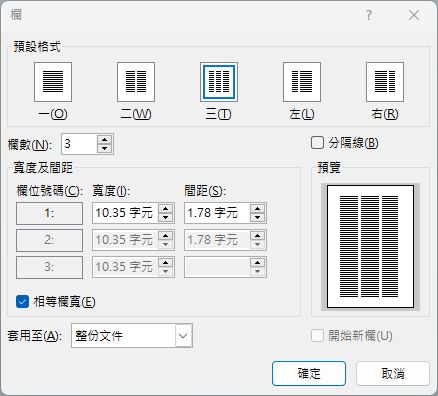
I would like to remind everyone that it is helpful to present your document in columns, so that your content can be presented in a newspaper-like manner. This is generally not suitable for school reports, papers, business proposals, etc.
Use titles to identify chapters
Documents such as reports will be very long, and you may put different contents into them. They may include completely different contents such as theme, marketing plan, budget preparation, results, etc. You can use titles as markers. Not only do headers help visually separate files for readability, they are also helpful when creating a table of contents.
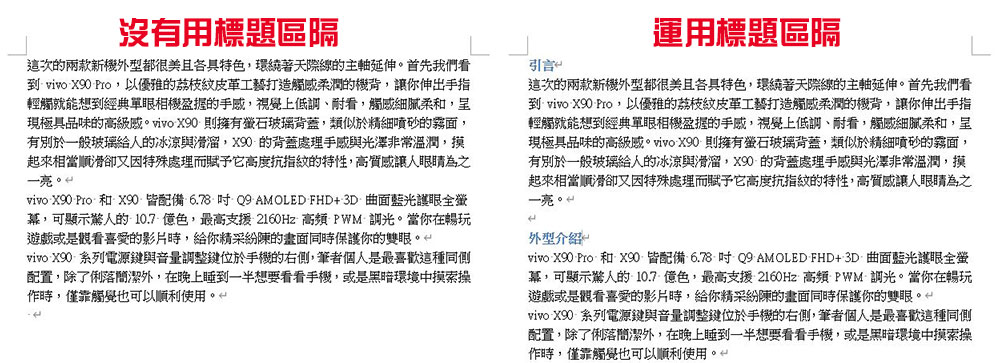
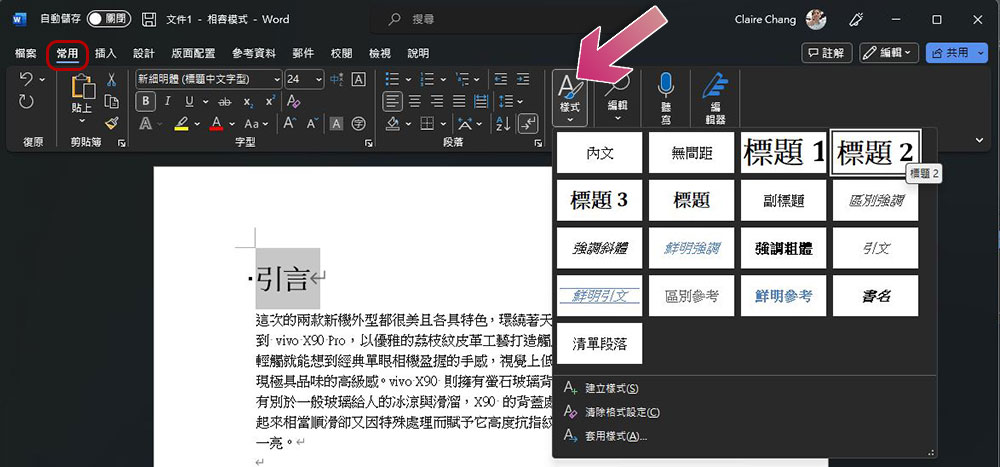
To set a title, first highlight the text you want to use as the title, then click “Styles” from the “Common” tab and select the default text style shown as “Title 1”, “Title 2” or “Title 3” to apply. (The title here refers to Headline, and the second row of the default style that only displays the title refers to Title.)
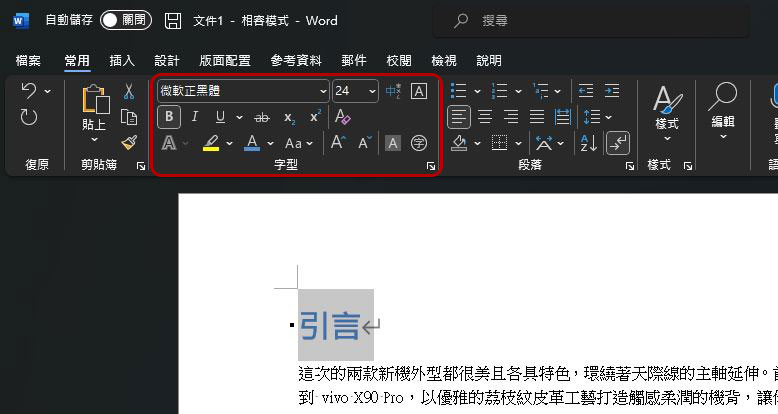
At the same time, you can also change the color or font of the title. For example, the default may be black, but if you want it to be displayed in blue, you can directly highlight it and use the “Font” in the “Common” tab to change it.
Position images between text and paragraphs
If you need to add a picture to your document, you can adjust the appearance of the picture in Word in a variety of ways. One of the most common methods is to set the position between the picture and the surrounding text. For example, you may want to place a small schematic image in the document that corresponds to the text for easy comparison. You can place it using the “text wrapped image” method; if you want to place a large image in the document, you can set it to be independent between paragraphs.

If you want to adjust the position and style of image placement, after you insert the image in the file, click the small image layout icon on the right side of the photo to select the style option you want to use.(Windows only)

Or arrange the “Position” and “Text Wrapping” items in the “Image Format” tab and adjust the settings with the drop-down menu options.
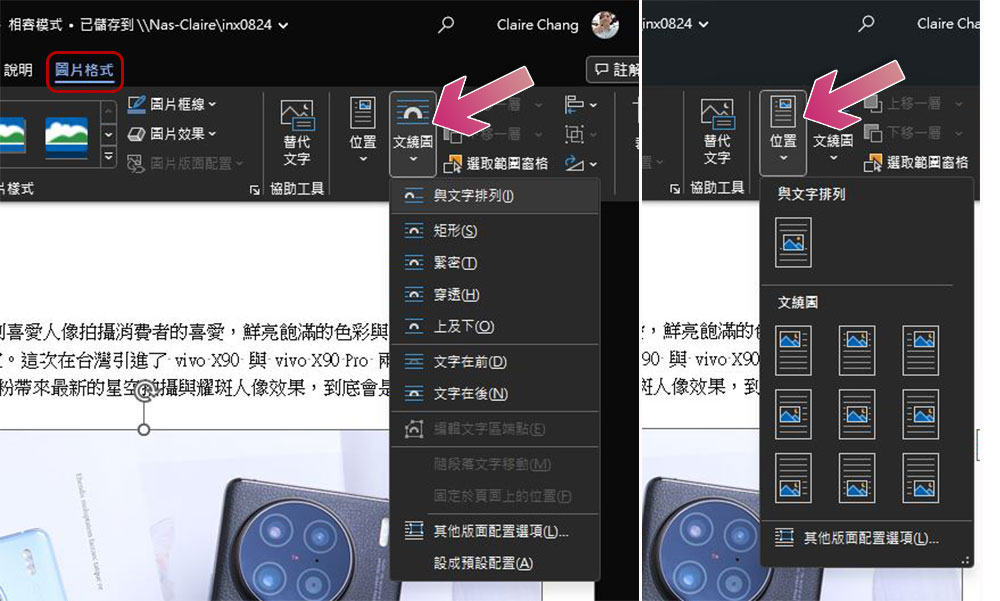
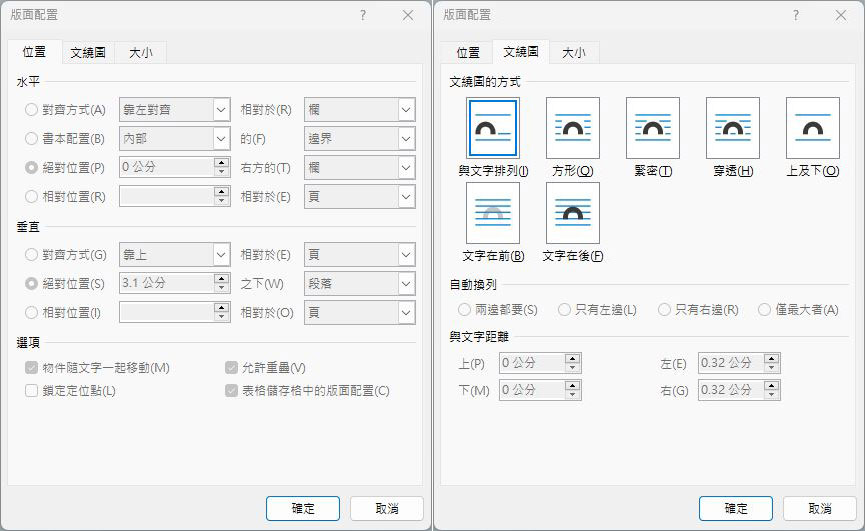
If you want to fine-tune the details of your image layout, both features have additional settings options where you can fine-tune various values.
Use alignment tools with images and objects
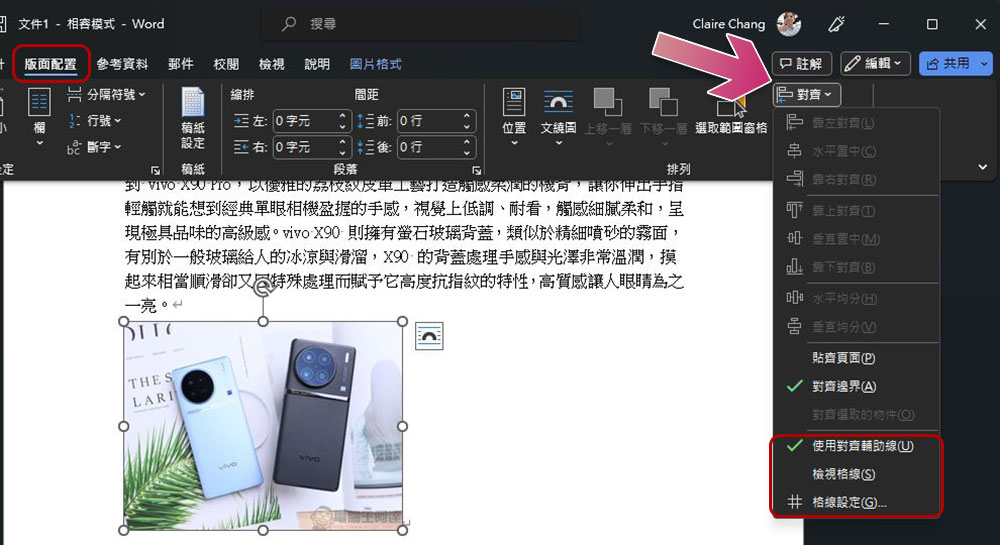
If you want to make your documents look beautiful and professional, you must learn how to use Word’s alignment tools on images, shapes, objects, etc. First, you can use alignment guides or grid lines. In the arrangement item in the “Layout” tab, click the “Align” icon to enable guide lines or grid lines.

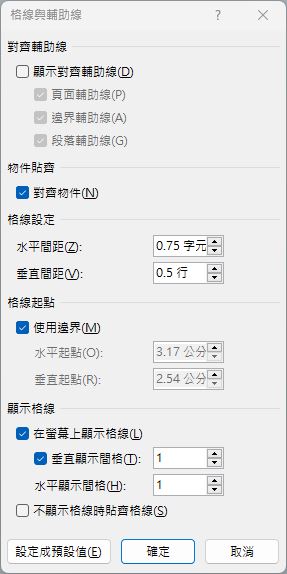
The style and size of the reference grid can be customized from the “Grid Settings”. Both the reference lines and grid lines will only appear when moving elements and will not affect reading and printing.
Source: KOCPC Chinese