


In the newly released official version of macOS Ventura, one of the main changes is that the original “System Preferences” has been significantly revised and renamed “System Settings”. The overall interface design is similar to the Settings application in iOS. This point is actually quite controversial. It may be a bit troublesome for macOS users who have been using it for many years because the functions they are used to are not known where they are. It doesn’t matter! This time we have sorted out 7 functions that may be important to you but have changed their positions, and let everyone learn about them together.
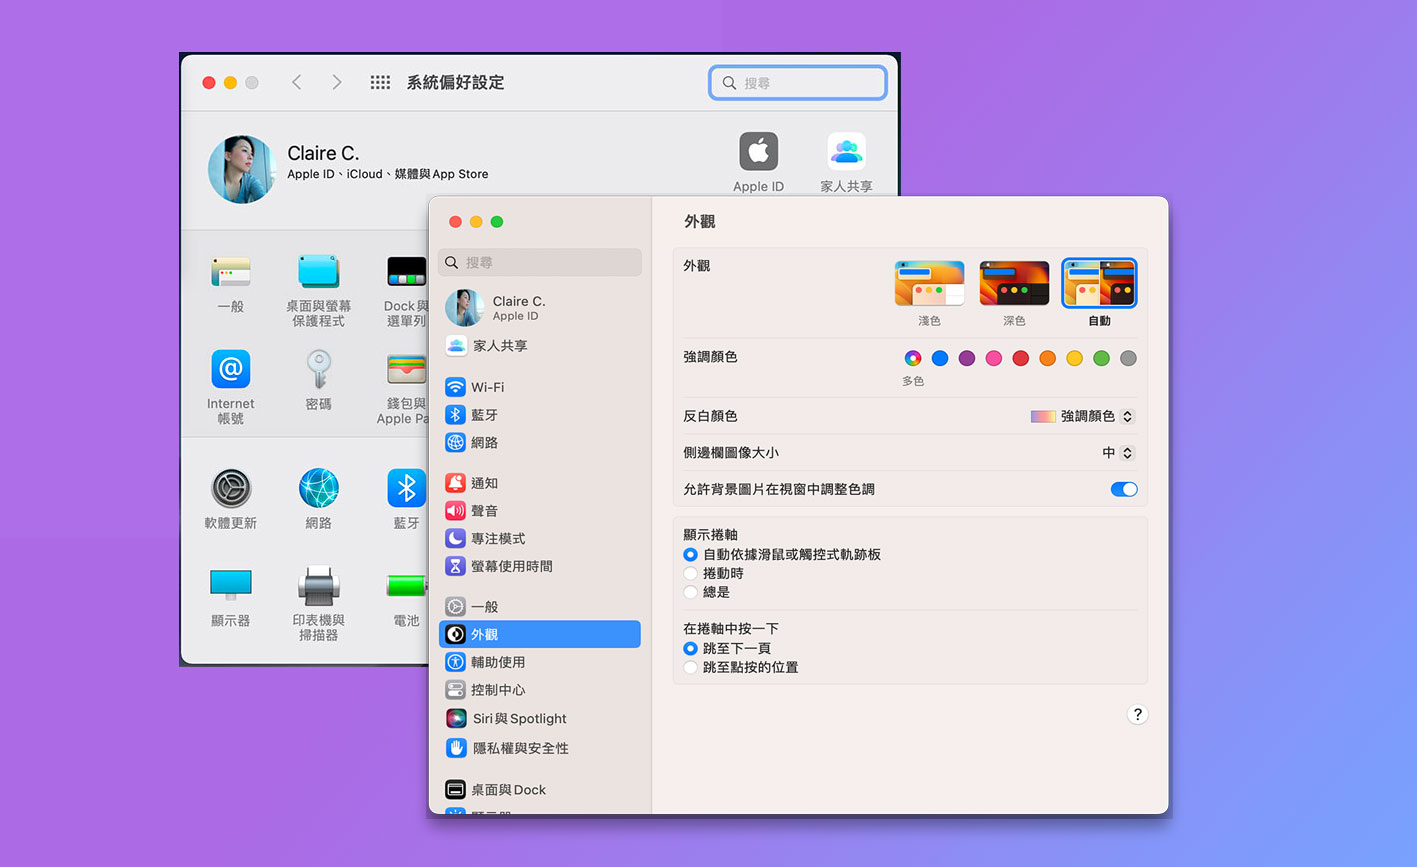
macOS Ventura “System Settings” overhaul, 7 important setting items that have been changed
Apple hopes to bring more common ground between macOS and iOS, but the problem is that for long-time macOS users, years of muscle memory will have to be relearned. You can find in advance most of the frequently accessed preference settings, such as Apple ID, battery, Bluetooth, sound, etc., but some settings have not only been given corresponding renames for iOS, but what is more noteworthy is that there are many more sub-menus and lists, so the setting items you need are often not where you think they are. With this in mind, the author has compiled some commonly used and important system setting items and where to find tutorials for your reference.
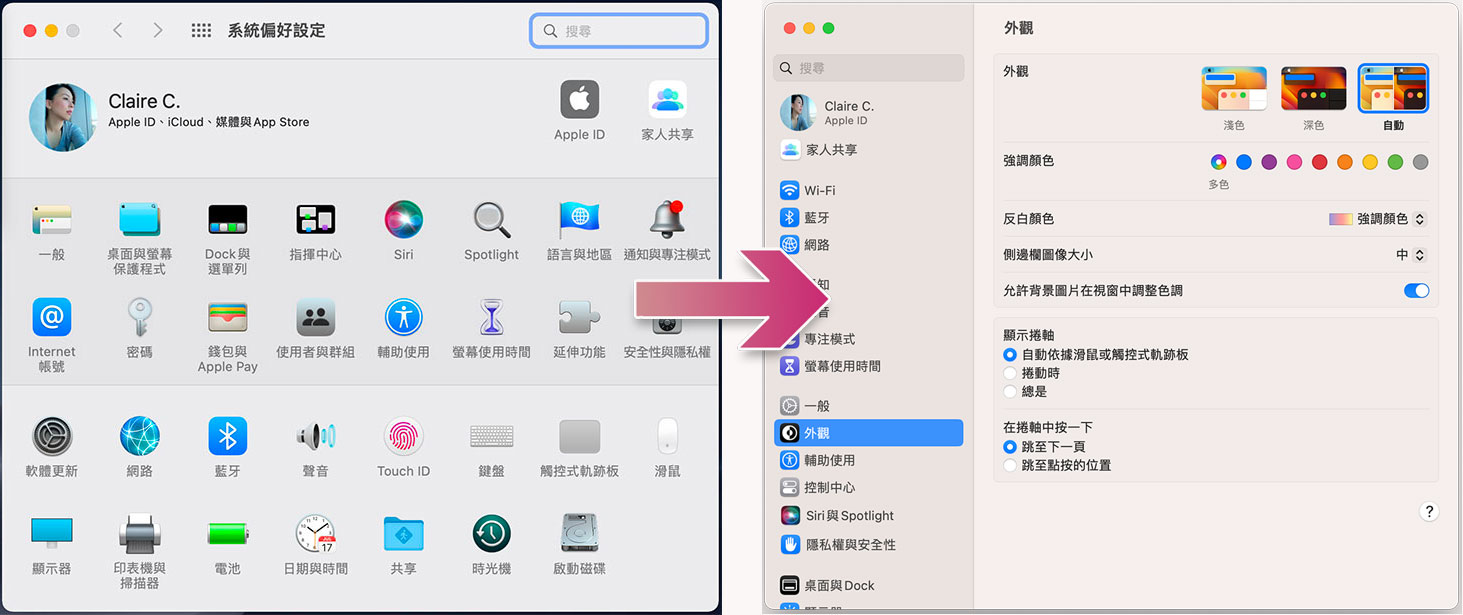
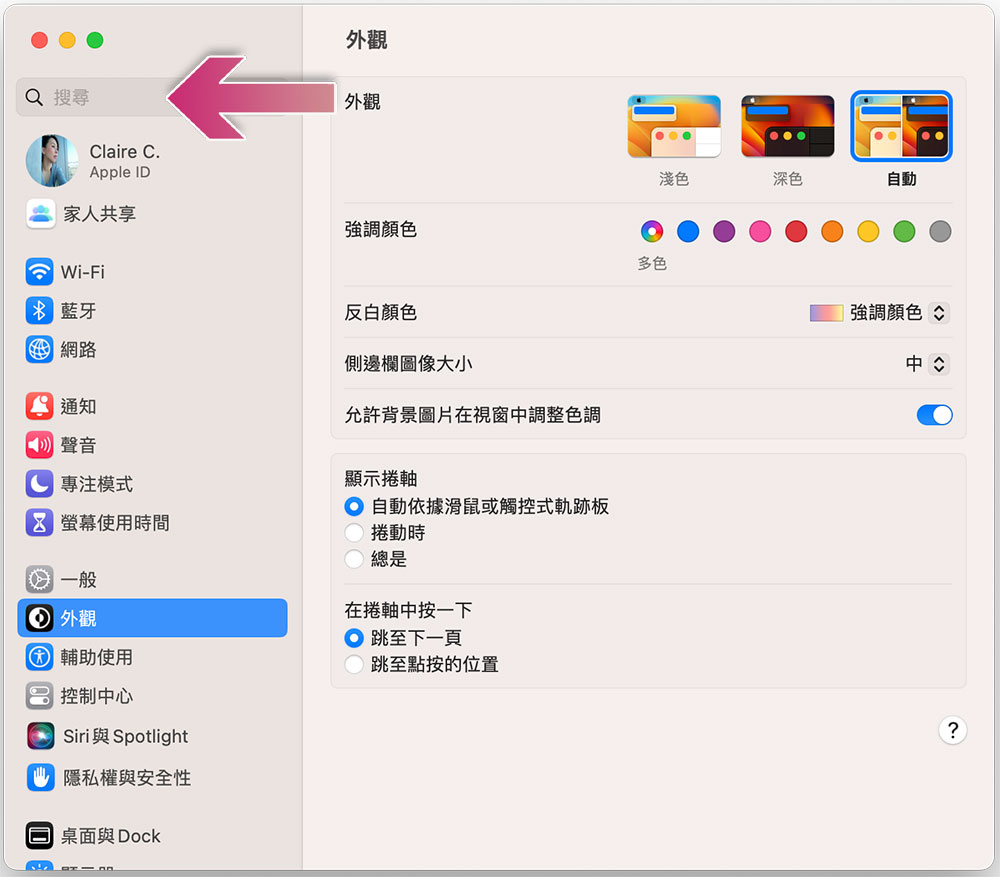
★Before we begin, there is an important point to explain to you. Although “Search” is provided in the system settings, sometimes the keywords you use do not match what macOS thinks, so it may be a little difficult to search, but this function is still very helpful.
storage capacity
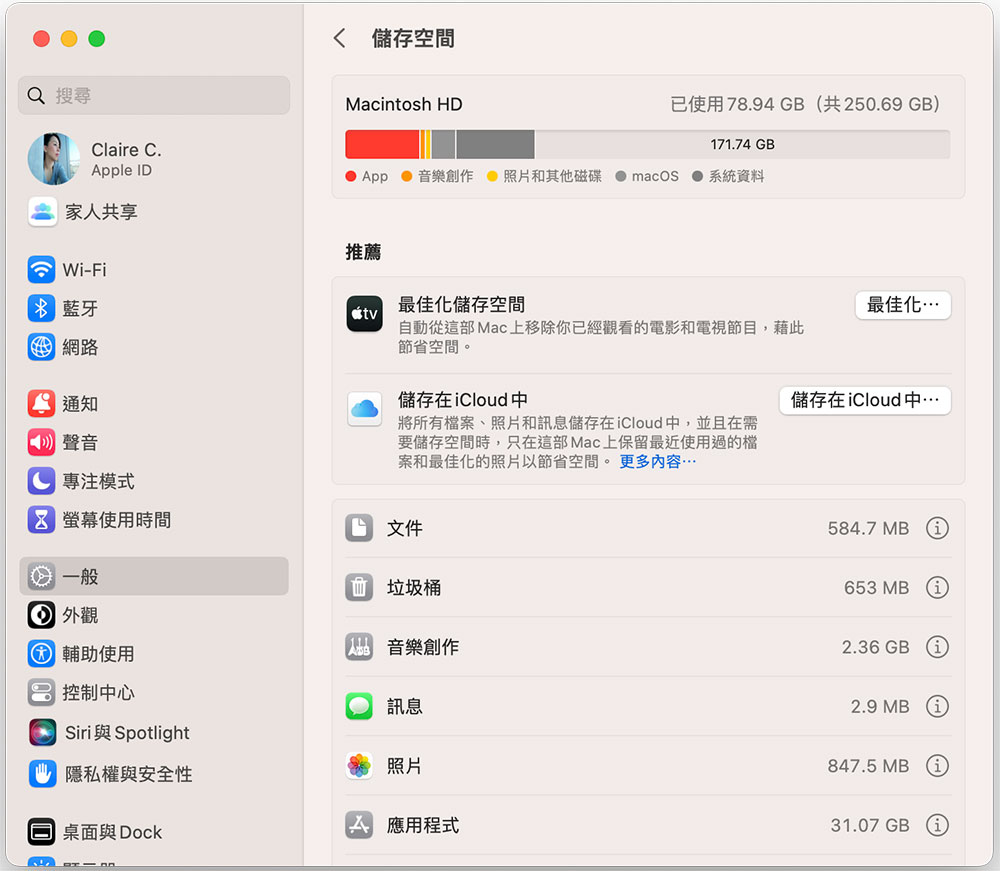
In the past, if you wanted to check the current remaining storage capacity of your Mac, click the Apple icon in the upper left corner of the control bar and enter “About This Mac”. You will see the obvious “Storage Space” paging button. You can enter and view the current detailed storage information and manage it. It can not only clean up space but also check how the storage space is used. This tool is no longer in its original location in macOS Ventura, but in a completely different place:
- Open “System Settings”, click “General” in the left sidebar, and click “Storage Space” in the main settings area on the right.
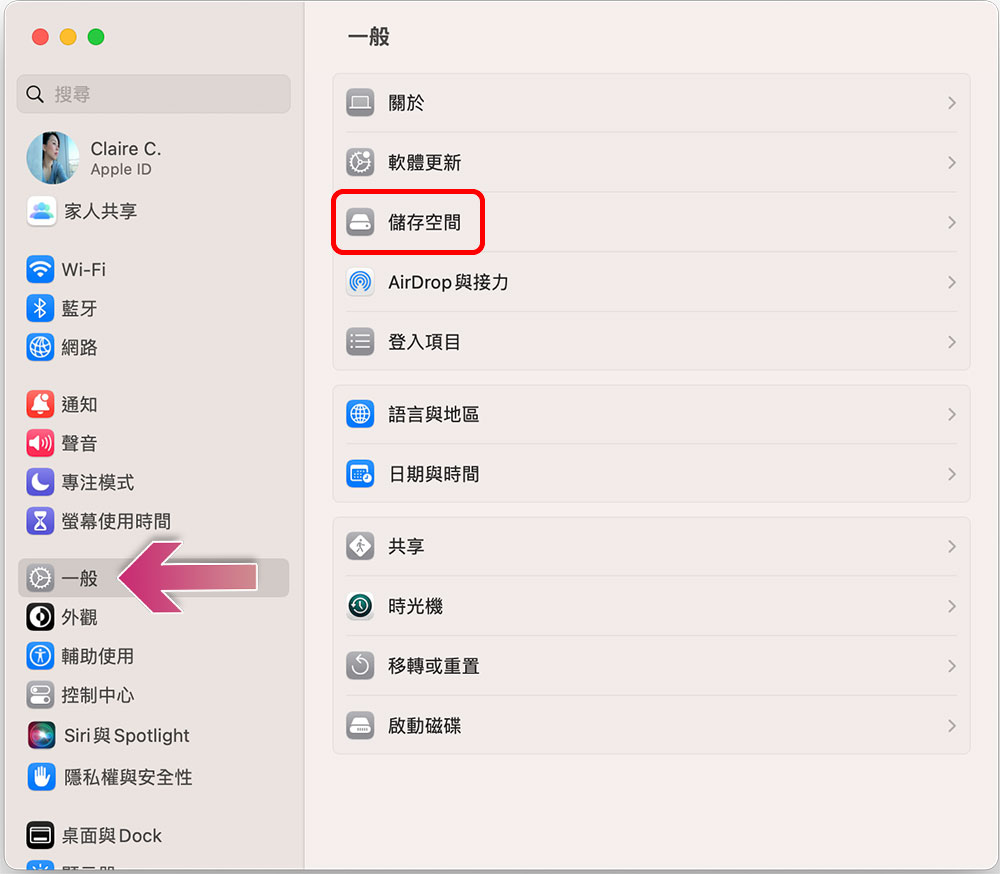
- From here you can view an overview of your current storage and optimize it.
screen hotspot
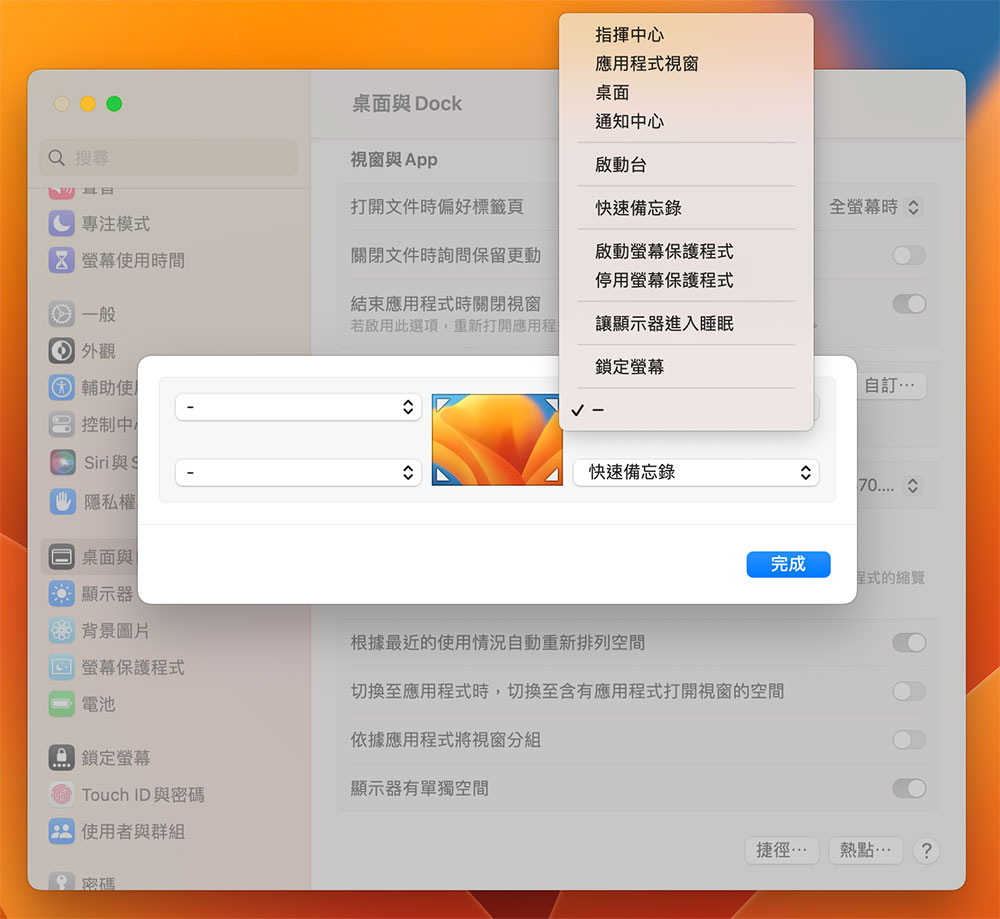
The hotspot mentioned here is not a WiFi hotspot, but an operation that is automatically triggered when you move the mouse to a certain corner of the screen, and this designated “corner” is called a hotspot. For example, the Quick Memo function has been imported into macOS Monterey. The default hotspot is in the lower right corner of the screen. When you move the mouse cursor to the lower right corner, you will see a white box peeking out there. You can click on it to create an instant note. Not only can you change the hotspots that trigger Quick Notes, but you can also set other hotspot operations on the screen.
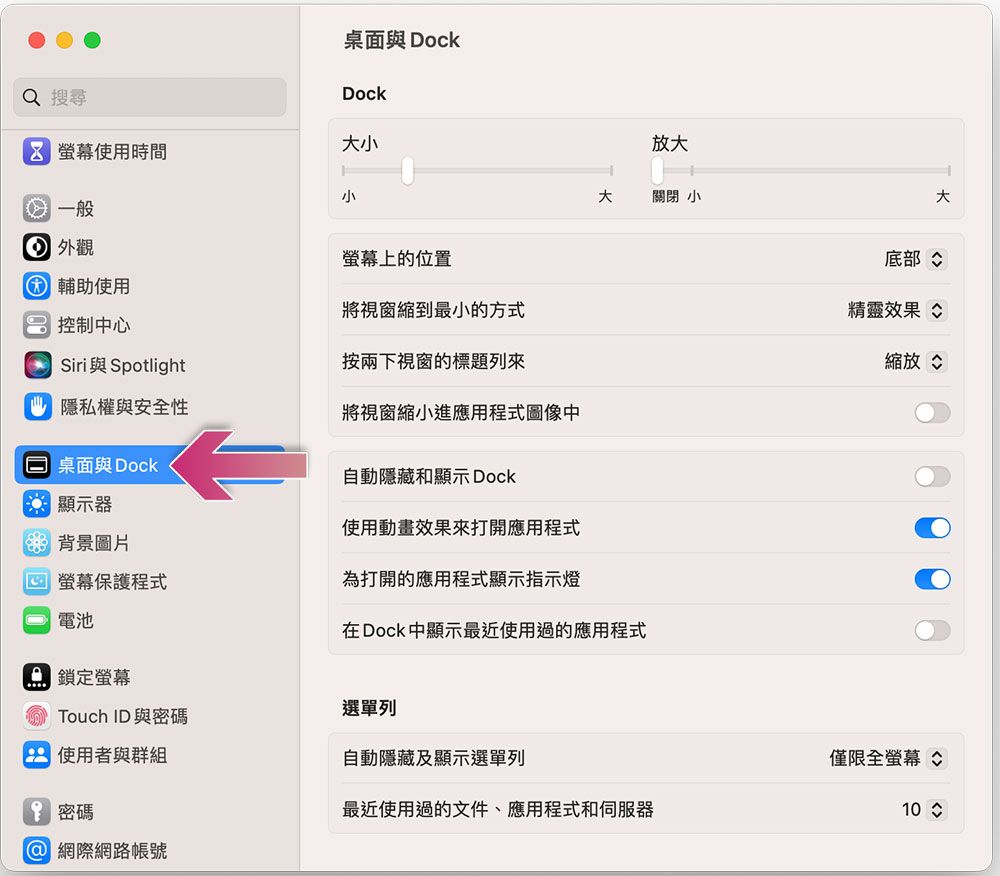
- Enter “System Settings” and click “Desktop and Dock” in the sidebar.
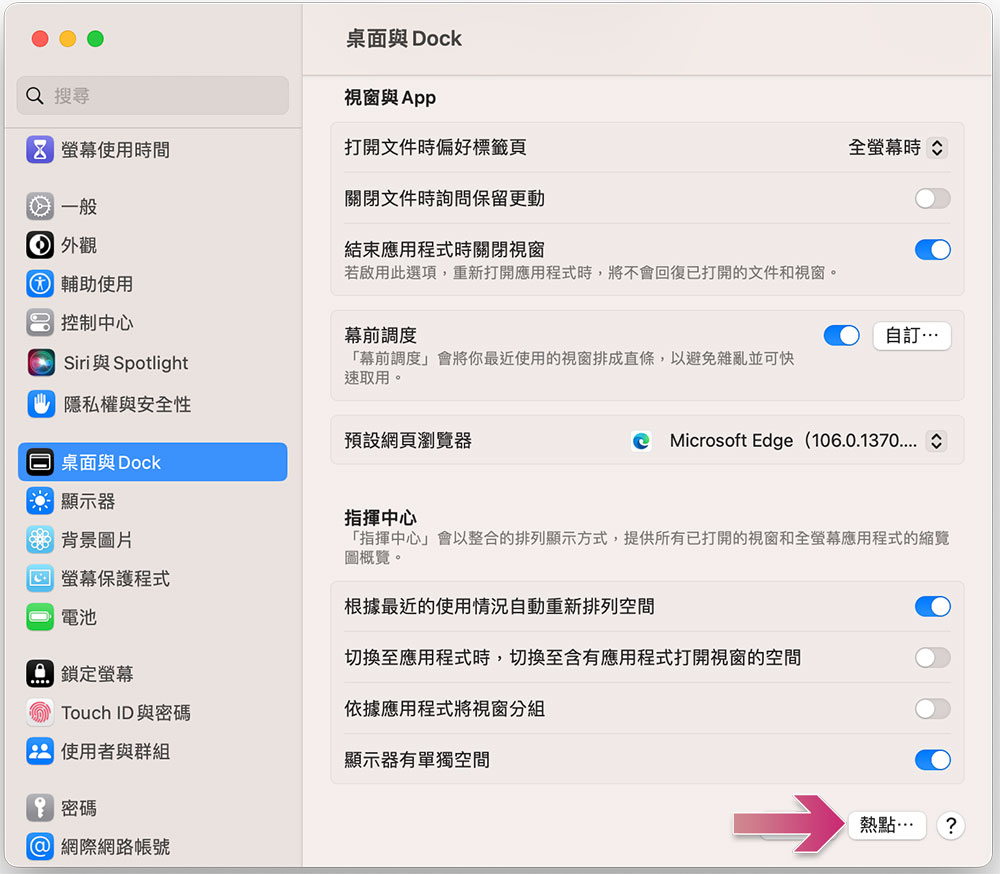
- Scroll down to the bottom of the setting options area on the right and click the “Hotspot” button.
- You can set hotspots for the four corners of the screen, and you can also change the default quick memo in the lower right corner, depending on your personal habits.
Extended functions
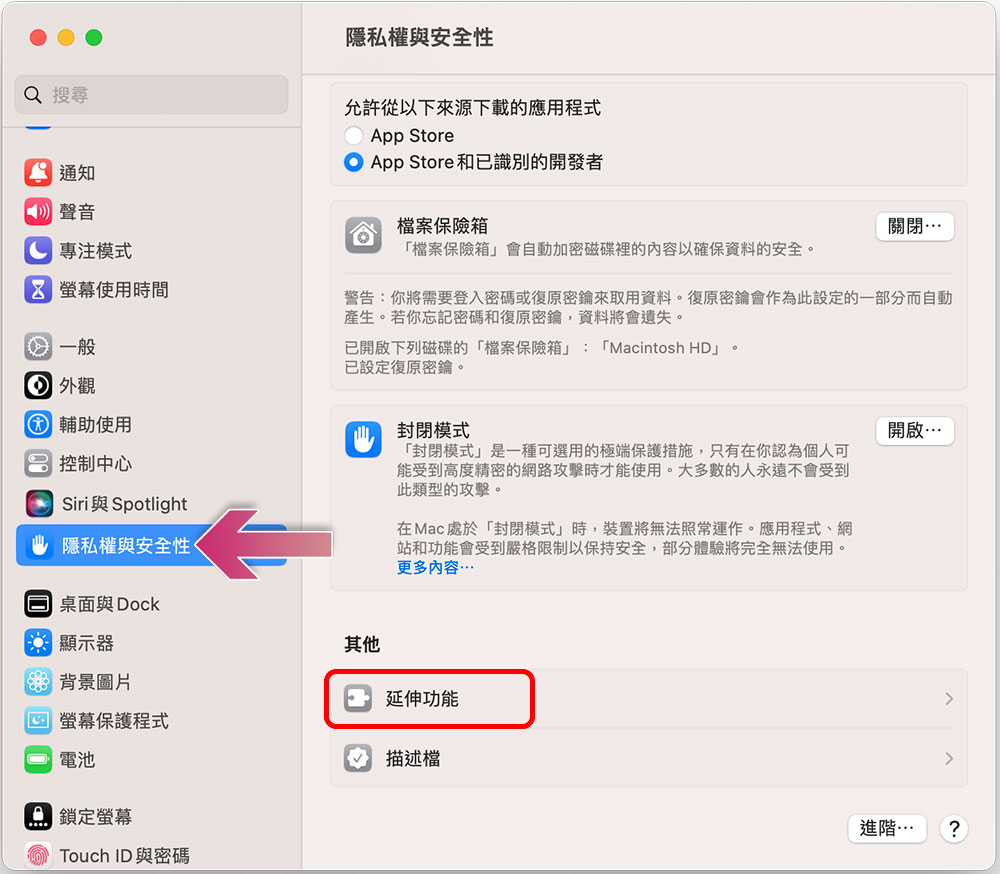
In previous versions of macOS Monterey, you could click on the separate “Extended Features” from System Preferences to add system-wide functionality to your Mac, usually when installing an application. But in macOS Ventura, it is placed in “Privacy and Security”, which is quite difficult to find without going through each item. Open “System Settings”, click “Privacy and Security” on the sidebar, scroll to “Others” at the bottom of the main settings block to see “Extended Features”.
command center
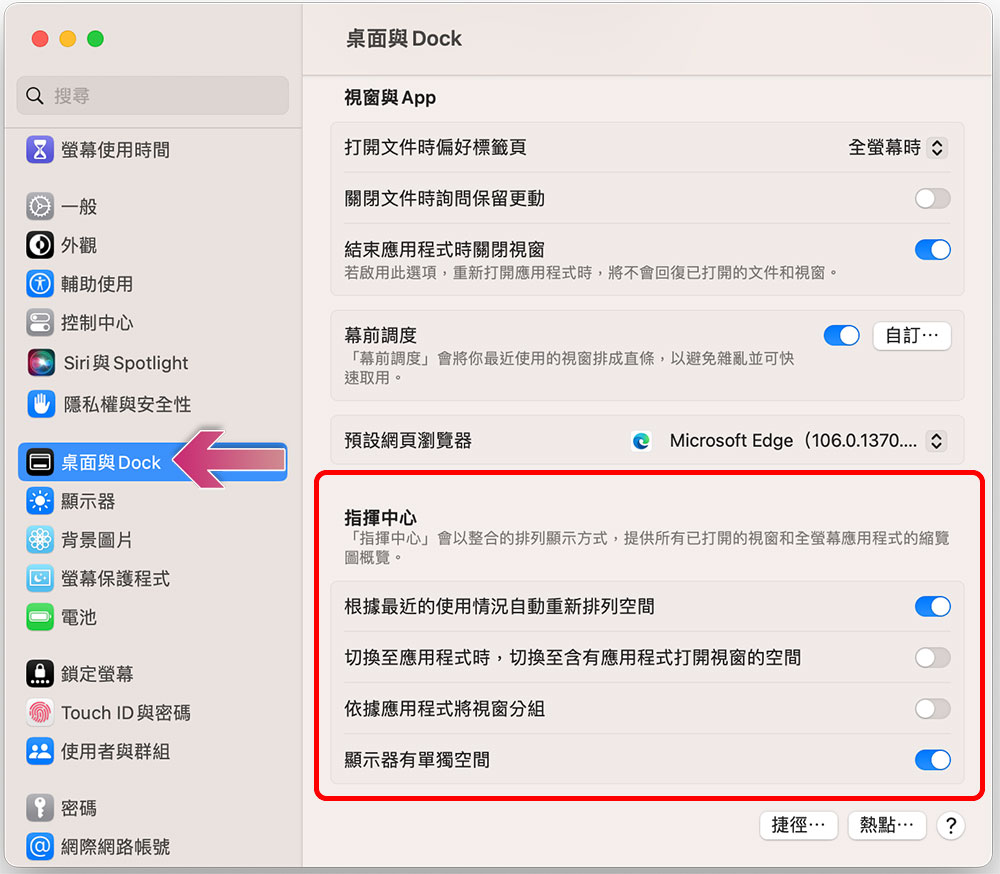
Command Center is very helpful for people who often open a lot of windows at once, and it used to be displayed as a separate icon in System Preferences. In macOS Ventura, the command center has been moved to the “Desktop and Dock” item.
Appearance
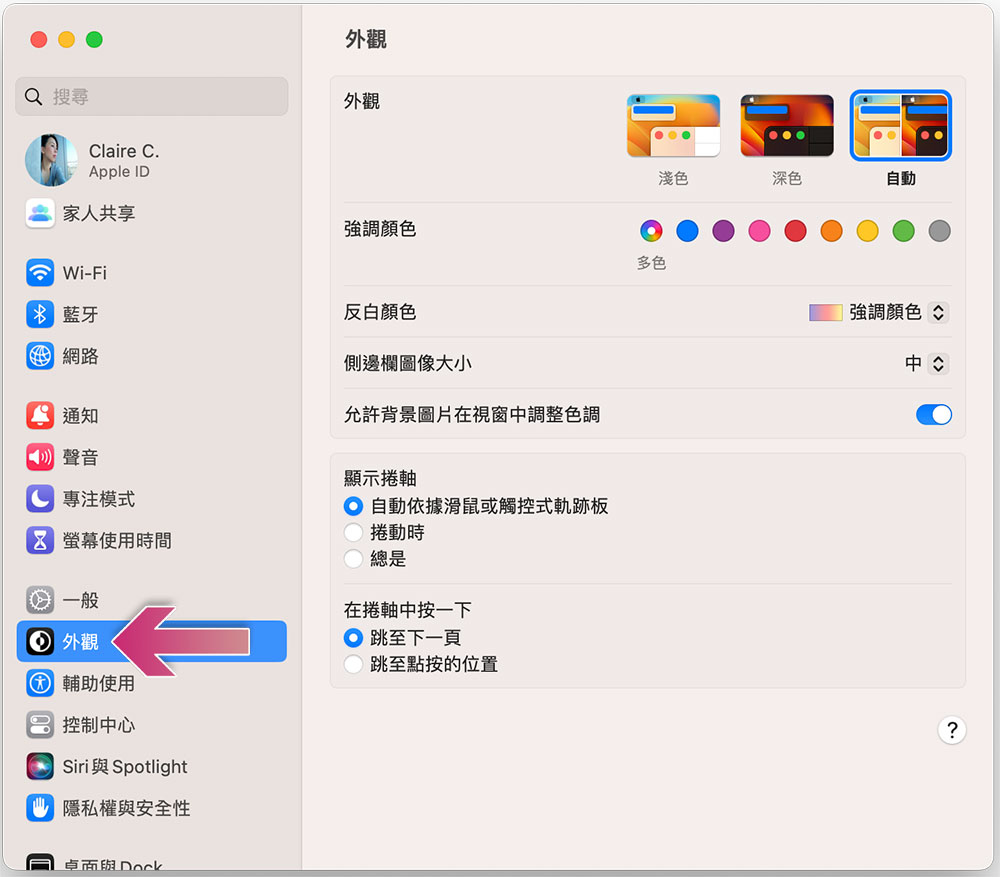
In macOS Monterey and earlier system versions, “Appearance” is part of the “General” system preferences, where you can switch between dark, light, or automatic modes, choose accent and reverse colors, adjust the size of the sidebar icon, allow the background image to adjust the color tone in the window, and adjust the scroll settings. But in the new macOS Ventura, the appearance has been separated into its own item, located just below the left sidebar.
time machine
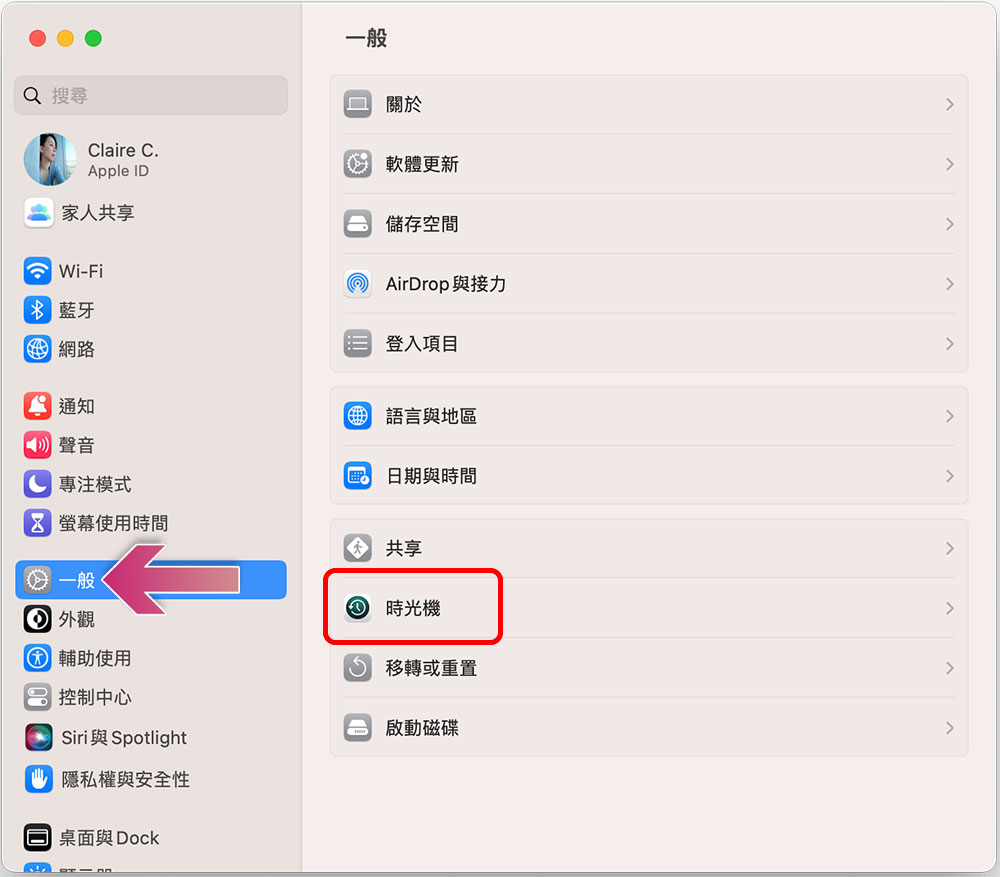
Apple’s approach to the “time machine” is the exact opposite of the “look” of the previous item. In the past it was a separate important feature, but in macOS Ventura it has been merged into General.
Warranty information
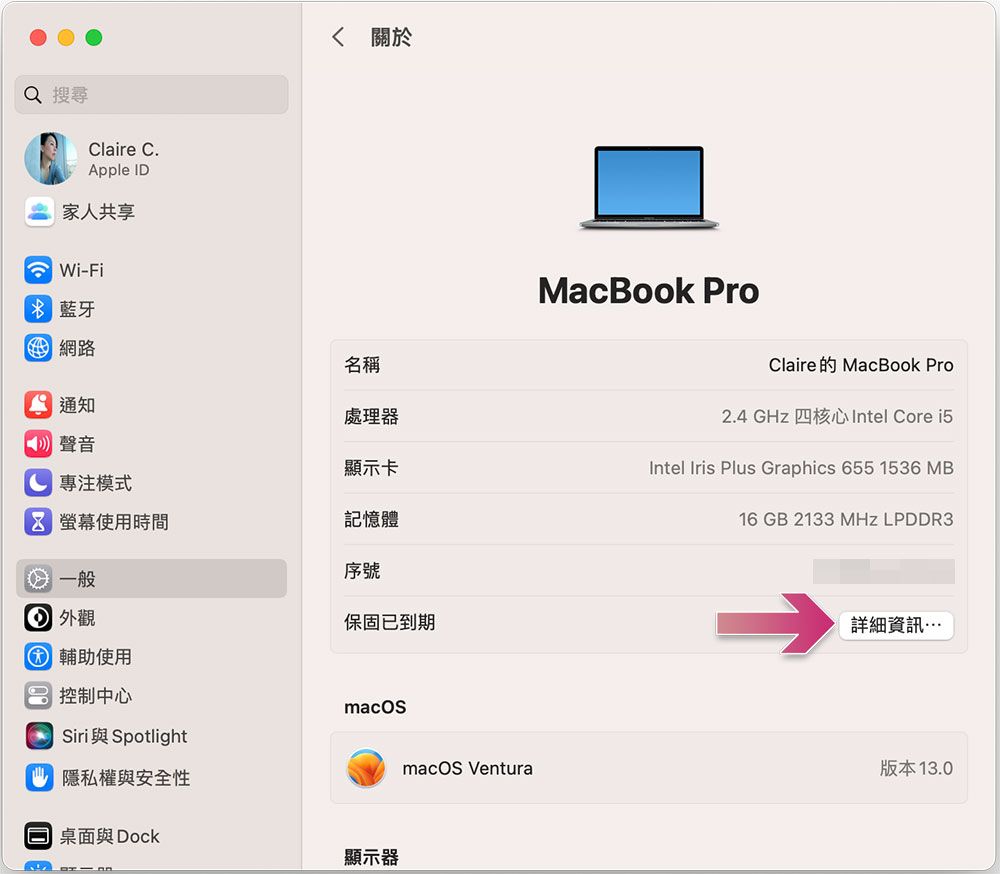
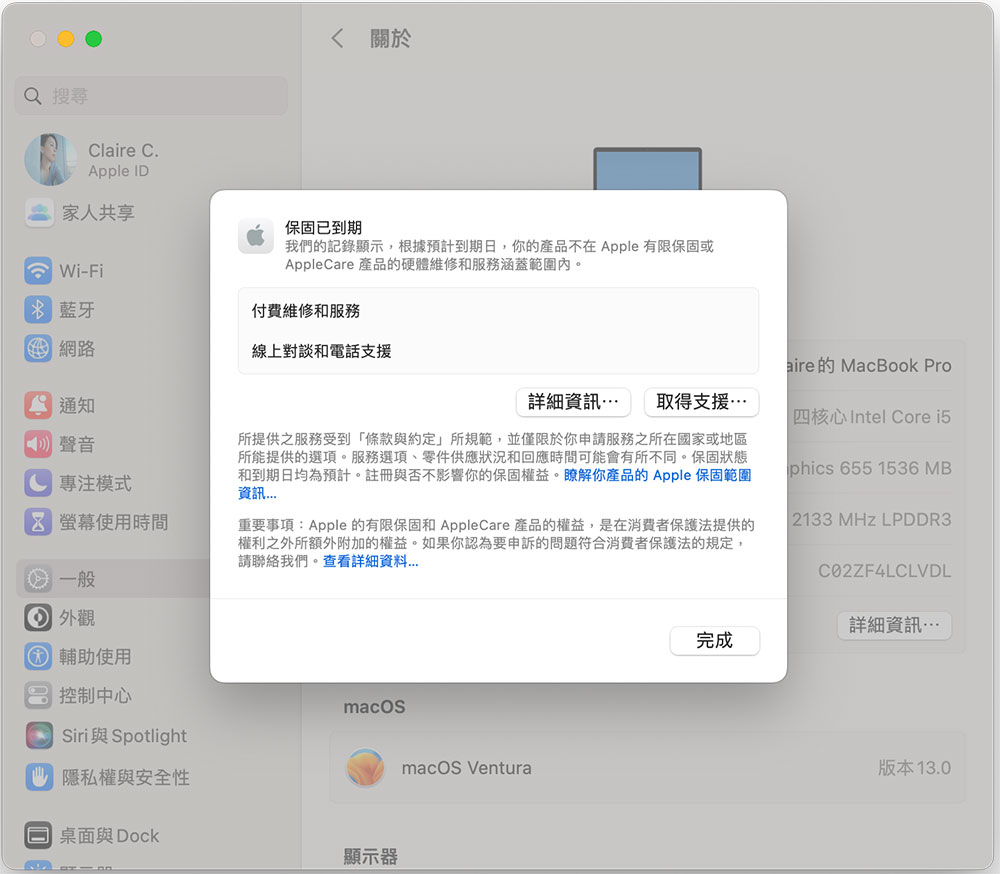
In macOS Monterey and older system versions, you can click the Apple logo on the far left of the control bar, then select “About this Mac” and switch to the “Support” tab to obtain warranty-related information for the Mac in your hand. In macOS Ventura, although it can still be found in “About this Mac”, it is not very obvious. For a faster way to obtain it, you can follow the method below:
- Open “System Settings”, click “General” and enter “About”.
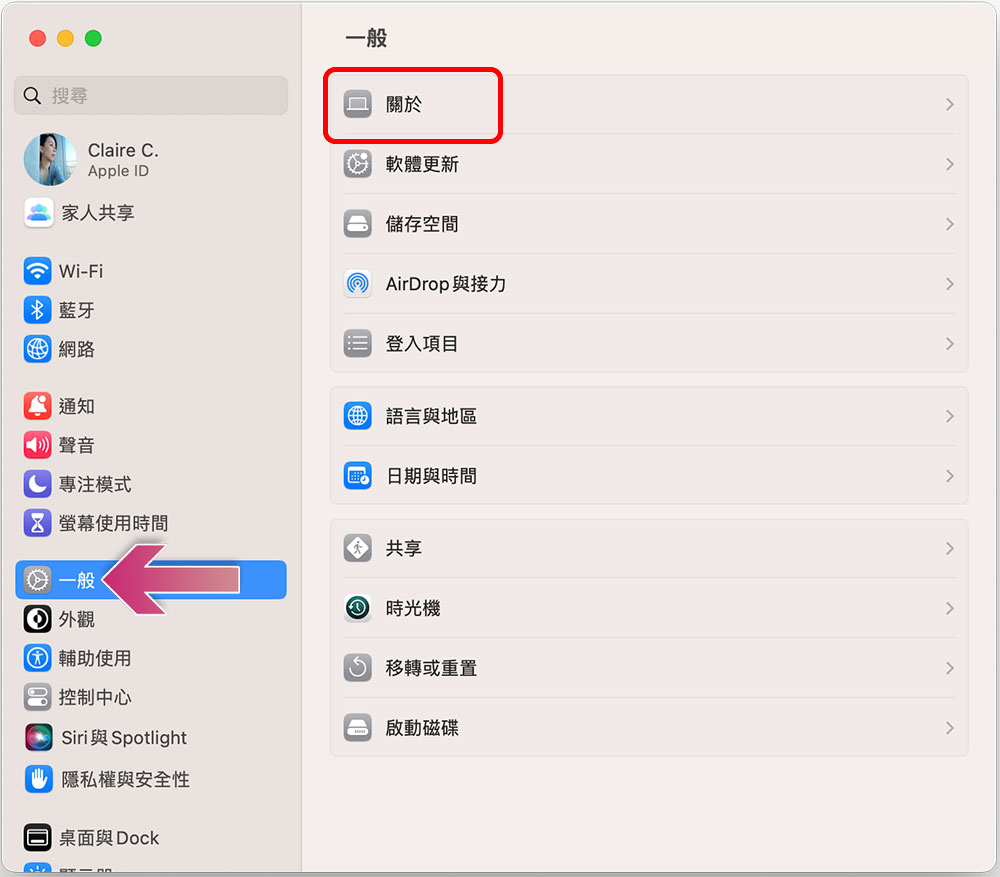
- You can see individual warranty items on this page. Click “Details” and you can also choose to contact online customer service for more help or repairs.
There are many functions that have been adjusted in the settings, but the overall interface is definitely familiar to you if you are an iPhone or iPad user. Although it may take some time to adapt to Mac users, generally speaking, I have used macOS Ventura since the beta version. There is nothing major wrong with macOS Ventura. As for whether you like the new features or not, it is a matter of opinion.
Source: KOCPC Chinese