


The “Photos” application on macOS is a tool that comes preloaded on the Mac series products, and it is also one that is often overlooked or underestimated by everyone. When macOS Big Sur was launched a few years ago, the UI of the Photos application was updated. No matter which model of the Mac series you are using, you can use the same tools in the Photos application to unleash your creativity.
4 must-know tips for using the built-in Photos app in macOS
Compared with professional image editing software, photo applications are more suitable for daily use. Although the functionality is relatively simple, if you just want to view and organize photos, photo applications are indeed more convenient and faster than professional image editing software. Today, the author has compiled a series of tips on how to use the photo app so that you can make the most of it!
Manually tag people
There are times when the Photos app is not very good at identifying people, such as in dim lighting, strange angles, or Halloween costumes. This can be a headache especially if you like to use the “People” option to filter and organize photos (after tagging people in the Photos app, you can directly search for moments that contain specific people in your photo library). No matter how effective the algorithm is, there will still be some things that slip through the cracks, and despite the best efforts of the photo app, a few photos will inevitably be missed and not tagged, but luckily you can manually tag them using this little-known trick. This technique of manually labeling people can help you better record who is present in each important moment:
- Open the Photos app on your Mac and double-click on the photo you want to tag the person.
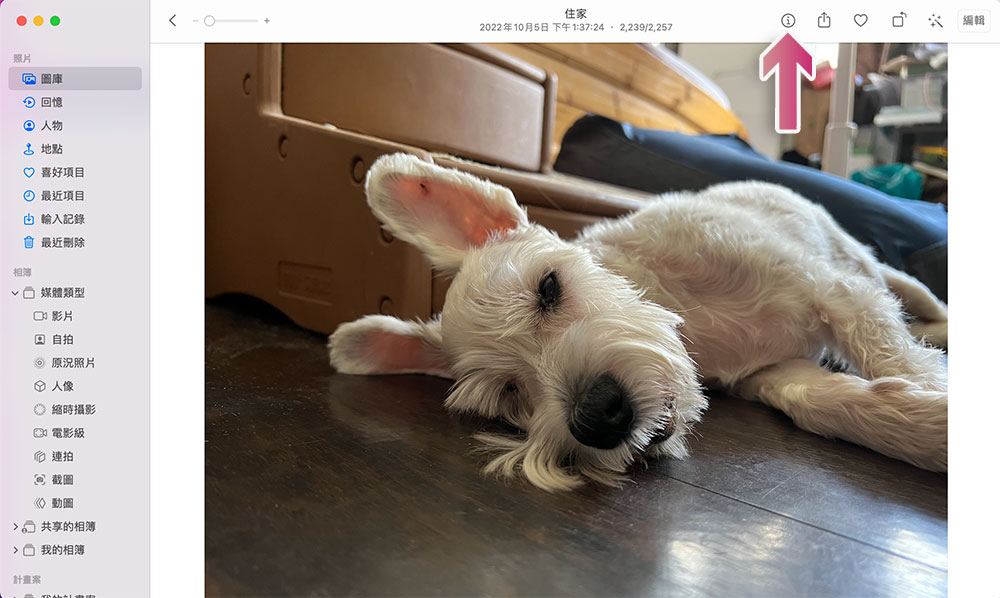
- Click the “i” in the upper right corner of the photo to see more information about the photo.
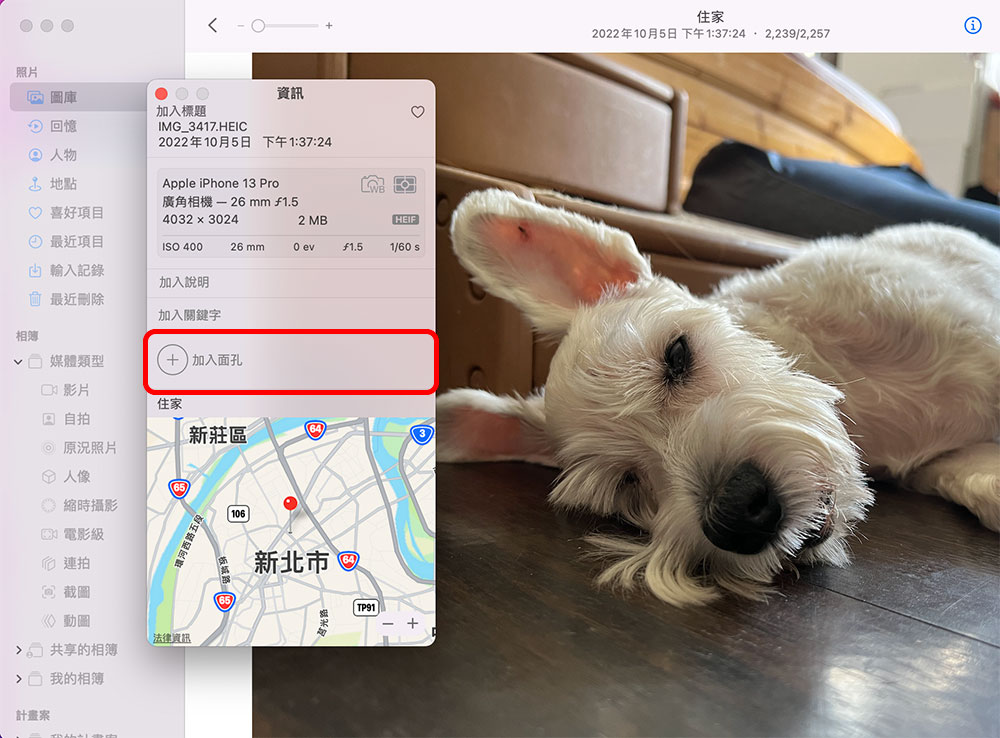
- Click “Add Face” in the small window of photo information to manually add people.
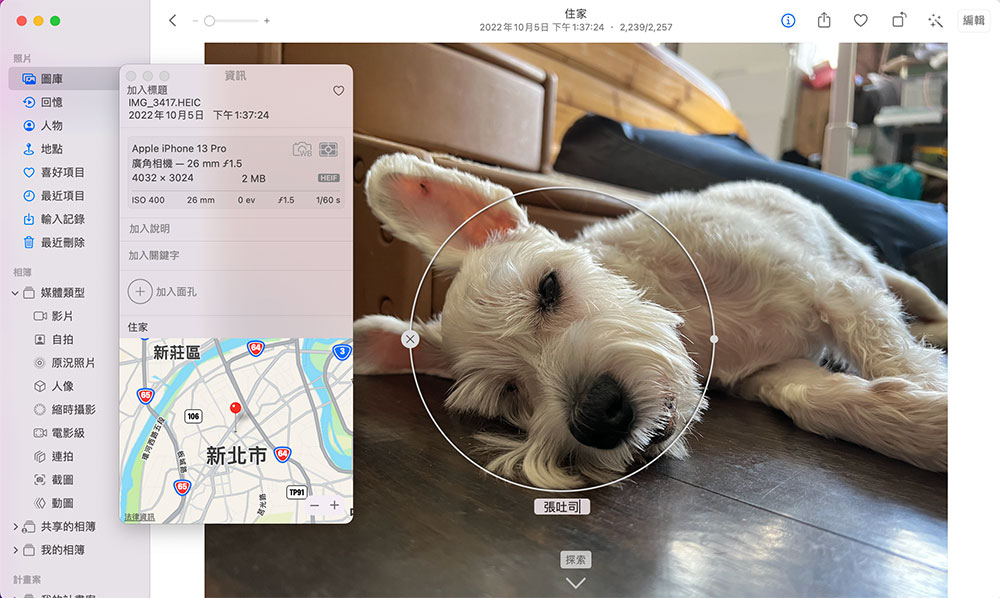
- Next you will see a circle appear on top of the photo. Drag the circle to the unrecognized person you want to mark. You can also adjust the size of the circle and enter a name below. Press Enter when finished.
Simple photo editing and defect modification
Sometimes the photos you take are not satisfactory, and you want to do some simple editing, such as applying a filter to change the photo style, or adjusting the color, cropping or beauty, etc. to make the photo look better, especially when your selfie photo also includes the small acne on your face. Although there are third-party applications that can help you do this, not everyone has those photo editing skills. The Photos app on macOS offers an easier solution for retouching photos, using machine learning to help you fix spots and small blemishes you want to remove based on surrounding colors and patterns.
- Open the Photos app and double-tap on the photo you want to edit to open it.
- Click the “Edit” button in the upper right corner of the photo.
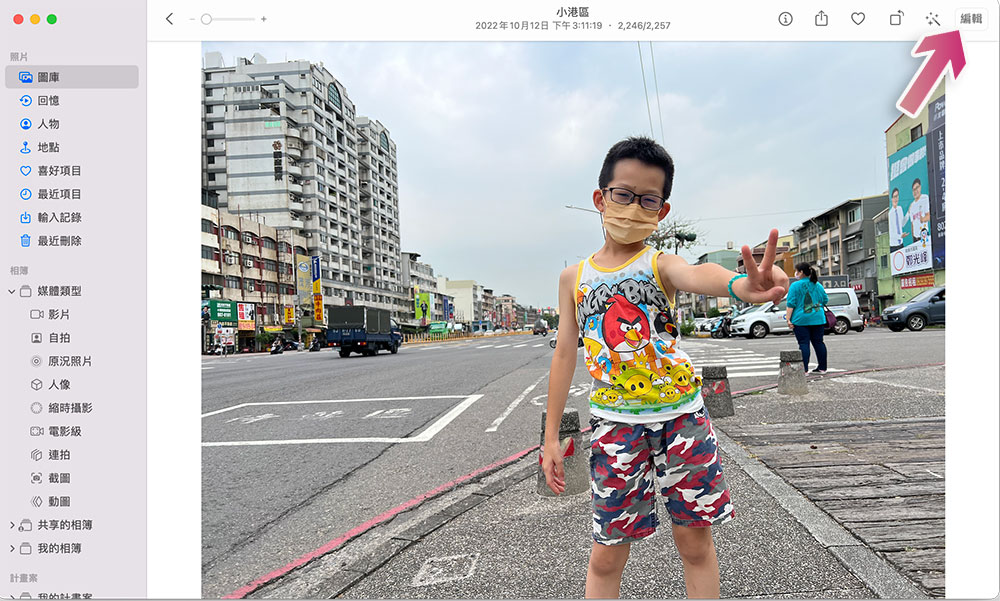
- There are a total of three tabs in editing, namely adjustments, filters and cropping. In the Adjustment tab, you can fine-tune the color of the photo or make some beautifying edits; in the Filter tab, you can apply different styles of filter transformation effects to the photo; in the Crop tab, you can help you cut off unnecessary clutter and flip the photo.
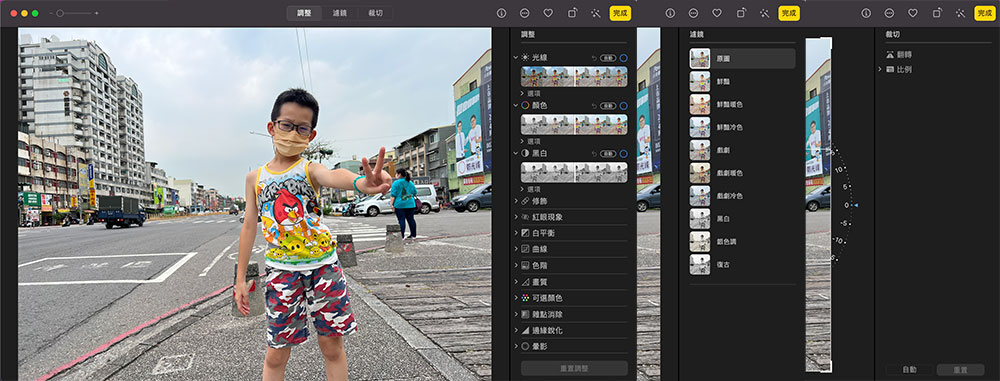
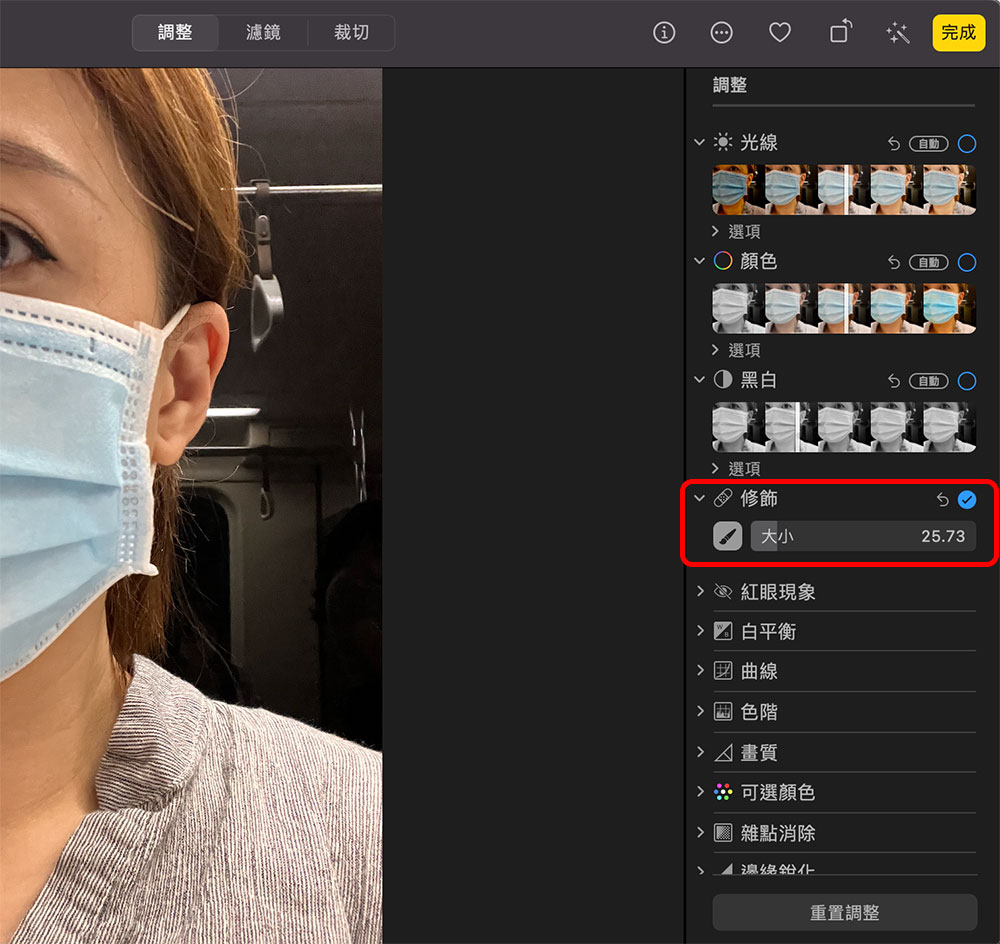
- If you want to repair stains, or remove small acne, spots, etc., you can find the “Retouch” item in the adjustment tab, then select the brush size, apply and click on the stain you want to remove. You can also press the Option button and use the mouse to click on the source area you want to sample to fill in the color.
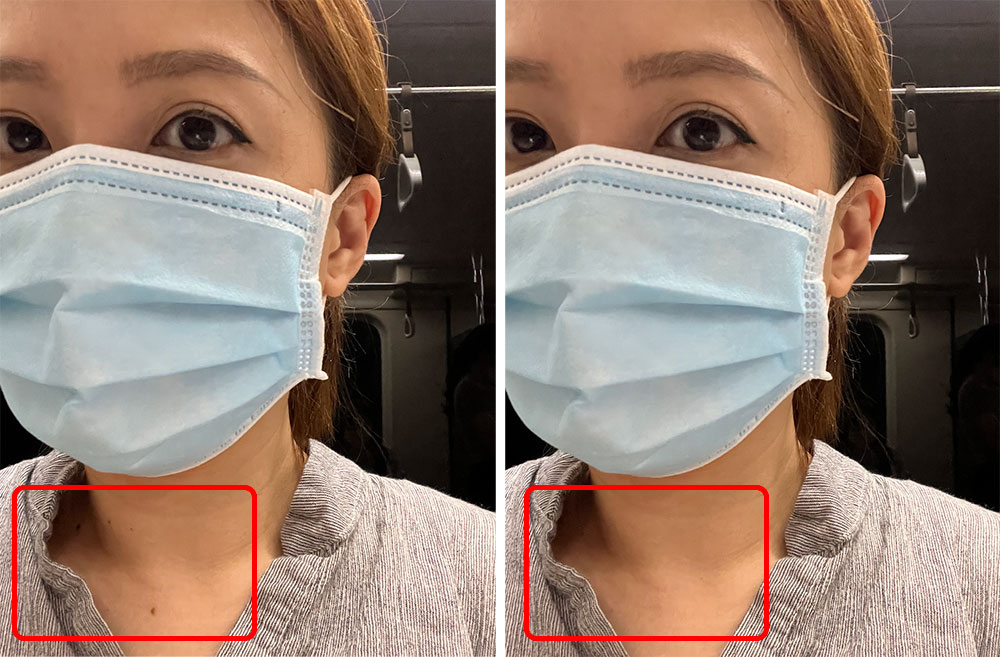
- You can take a look at the results below. The left side is the original photo, and the right side is the photo after using a retouching tool to remove the mole on the neck (note the red box in the photo). The result is quite natural.
Create a unique plan
You may want to use photos to create a special memory, diary or souvenir book, such as food notes, children’s growth records, etc. The macOS Photos application allows you to use the right tools to create your favorite plans. “Plan” is a part of the Photos application where you can select categories, calendars, cards, wall decorations, slideshows and other items, and then the system will take you to the App Store and display applications that can create the selected category. By default, Photos only supports creating slideshows and does not support any third-party applications.
- Open the Photos app and move your mouse cursor to “My Plans” in the left sidebar. You will see a “+” sign appear next to it, click on it.
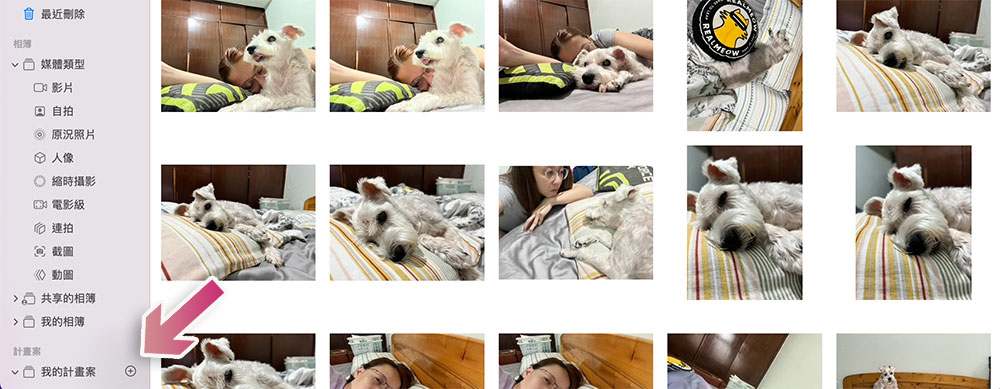
- Select the type of plan you want to create from the menu that appears.
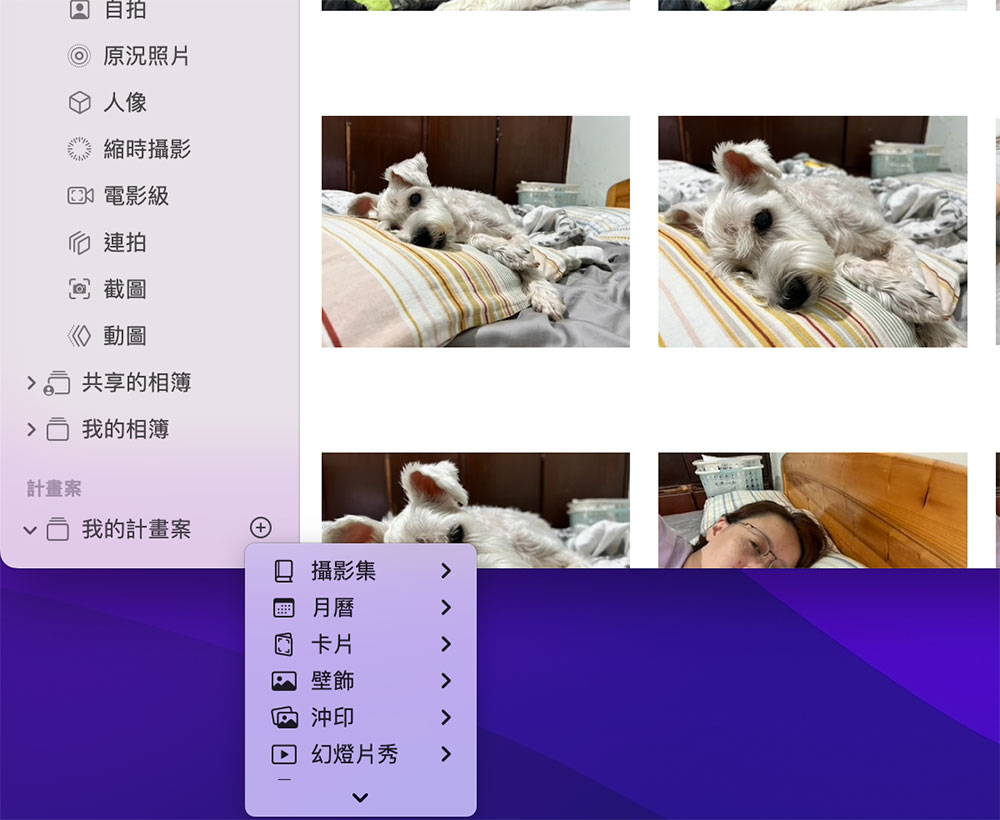
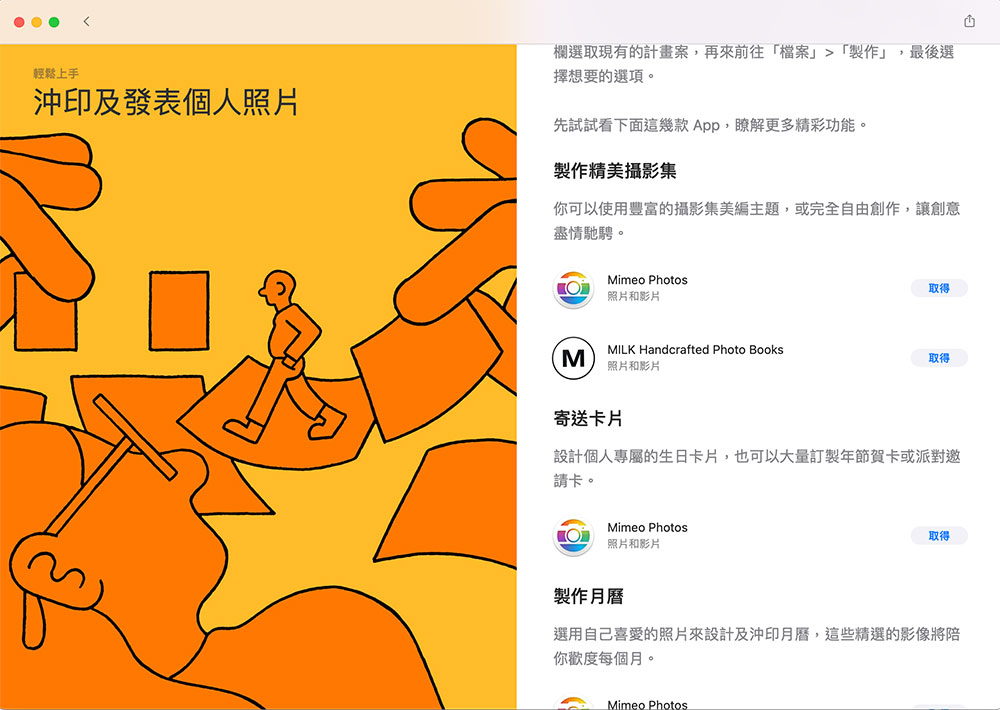
- Next, if there is an editing application installed on your computer that can execute the selected type of project, the system will display a list of available applications; if it is not installed on the computer, you can click the App Store button to download the available application. After downloading and installing, you can create the content you want. When you are done, you can save it as a digital copy, or develop and print it out. No matter which method you use, it will be the best memory!
Take photos to memorize
macOS Ventura (currently in beta and coming soon) introduces the ability to easily remove objects from photos, making your photos cleaner and removing anything that interferes with focus. If you like adding custom thumbnails to YouTube, you might like this feature. This feature is also available on iOS 16 and iPadOS 16.
- Open the Photos app on macOS and double-click on the photo you want to open it.
- Right-click on the photo to call up the menu and click “Copy Subject”. You can see a circle of flowing white light around the subject.
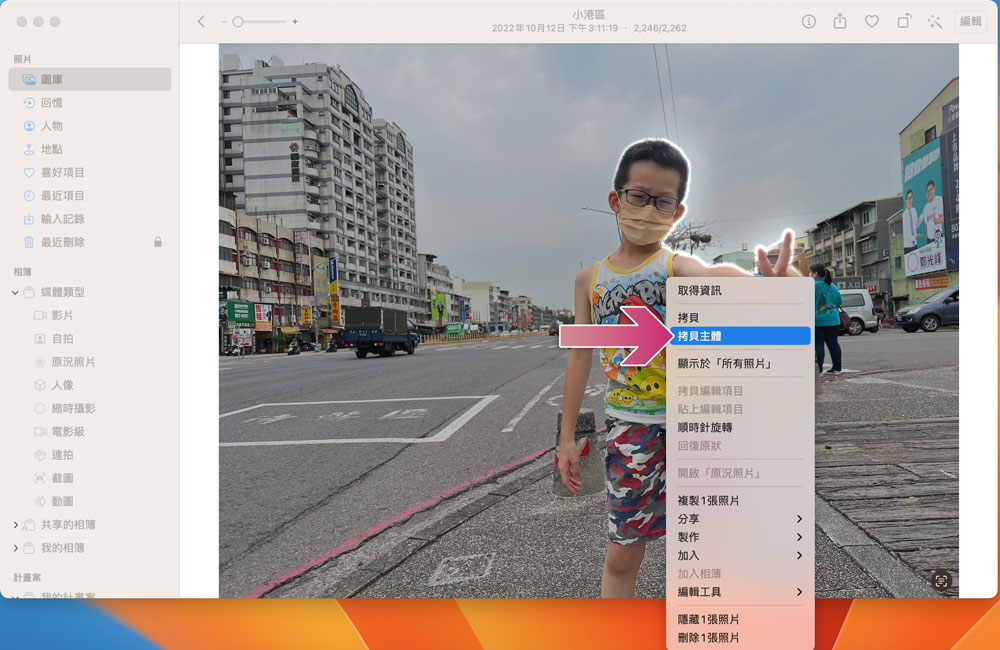
- Then you can paste the theme anywhere.
Overall, for obvious reasons, the Photos app on macOS is far richer and more powerful than the mobile version on iOS. In addition to the techniques mentioned above, there are many things worth trying, such as more complex color adjustments and other functions, which are very useful for editing or archiving. You can give it a try.
Source: KOCPC Chinese