


Everyone must have encountered this situation. When you use a MacOS system and give a flash drive to a friend who uses a Windows system to access files, you find that the other party cannot use it. There is a difference in the “taste” of the format between the two. When you have to collaborate with colleagues, it is very important to ensure that both systems can read and use it, so this time we will learn to make a shared flash drive that can be used by both systems.
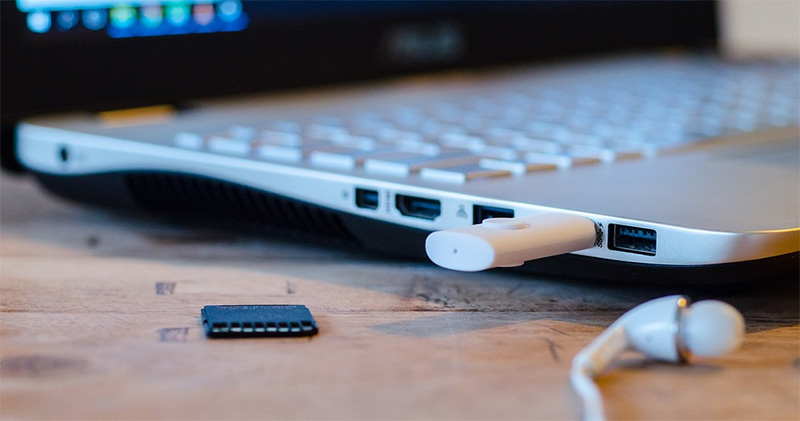
How do I format a pen drive that can be shared between macOS and Windows?
While there’s a lot of interoperability between Apple’s macOS and Windows systems, not everything is seamless, and one of the biggest areas of concern is data sharing. Of course you can also rely on a network connection, NAS or other devices to handle data storage between the two parties, but these are personal choices. In some cases you have to rely on a pen drive or external hard drive and connect it to every device to transfer data, especially in situations where large amounts of data are transferred, such as video editing, where wired transfers are always much faster than network transfers. Although formatting is easy, there are some things you must understand first. In this article, we will guide you from the cause to the implementation in the simplest way to create a shared format storage device.
file system
Although hardware problems are fairly easy to solve, and today’s flash drives and external hard drives are actually relatively inexpensive, there is an additional factor that can confuse users. The file systems used on Windows and macOS are completely different, and security and other factors have become the furthest distance between them. For example, if you format a pen drive into NTFS, the file system favored by Windows, you can only read from the pen drive but not write directly to it when using it on a Mac. In the same way, if you format it to APFS, a system that Mac likes, you must do some additional actions to use it on Windows, and you cannot operate it directly and quickly.
If you want to be able to take advantage of both and move between the two platforms, the best answer is “exFAT”. This is a format used to replace the old FAT32 files. In addition to far exceeding FAT32’s 4TB maximum file limit and 8TB partition limit, exFAT is also optimized for pen drives and external hard drives. Conveniently, both Windows and macOS can write and read exFAT just fine.
As a general rule, if you are using a flash drive with a capacity of 32GB or less, it should be set to MS-DOS (FAT), while a flash drive with a capacity of more than 32GB should be set to exFAT. But since we’re seeing fewer and fewer flash drives under 32GB, FAT is almost no longer a concern.
format
You can format exFAT in macOS or Windows, and since it’s a common format for both, you can do it no matter which platform you’re on.
Do it in macOS
- Insert the pen drive/pen drive into a port on your Mac.
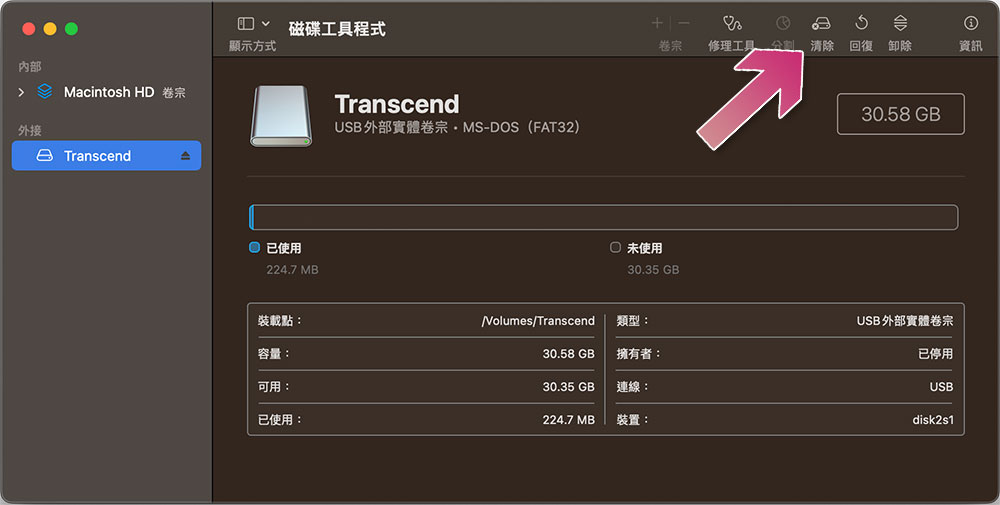
- Open the built-in Disk Utility program in macOS.
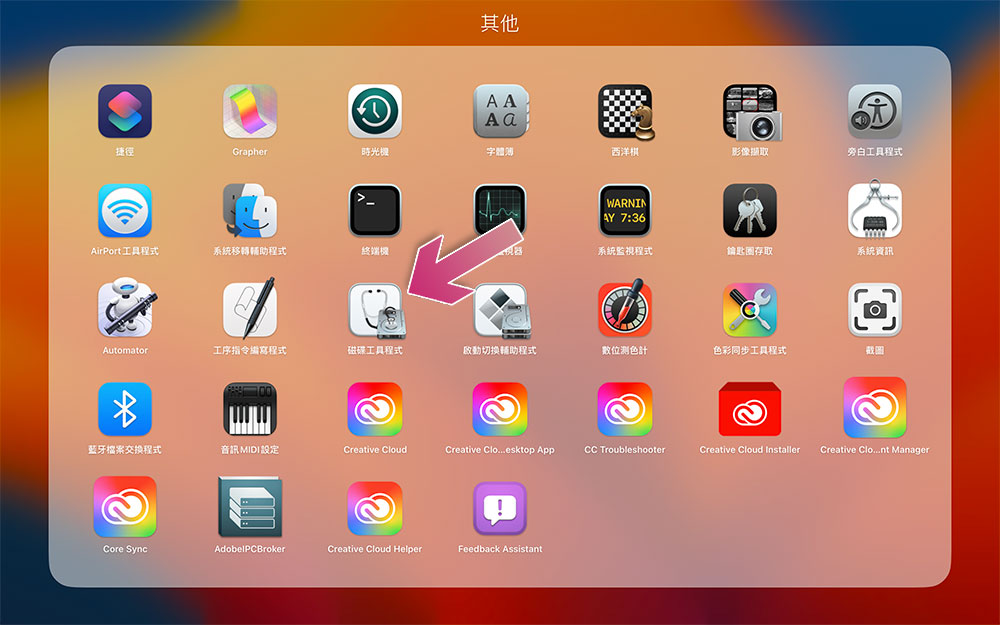
- In the left sidebar, click on the flash drive/hard drive you just connected, and then click “Clear” in the upper right corner of the book.
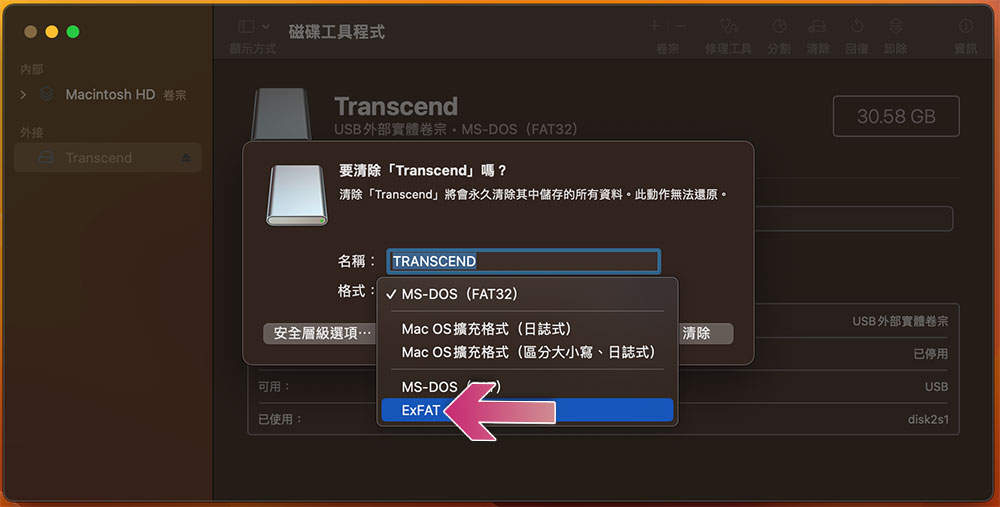
- After selecting the “ExFAT” item in the format field, click “Clear” in the lower right corner and wait a moment to complete.
Do it in Windows 11
- Insert the pen drive/pen drive into a port on your Windows computer.
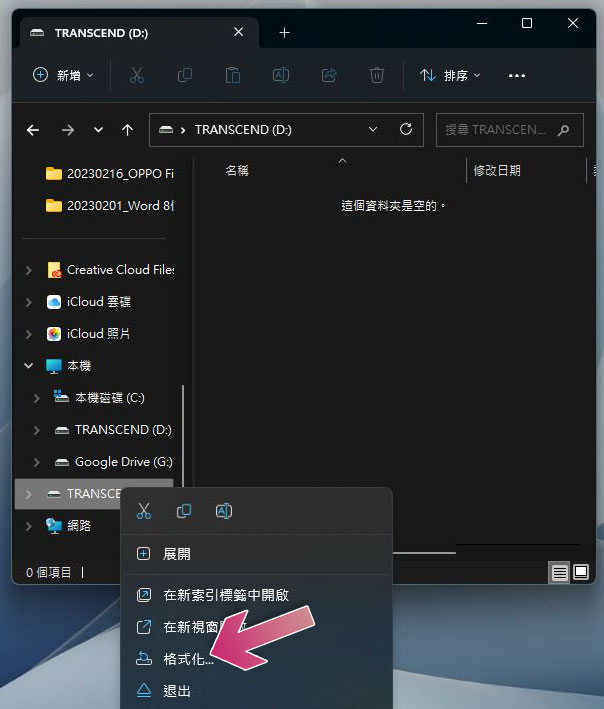
- Open a “File Explorer” window, find the name of the device you just plugged in in the left column, right-click on it and select “Format”.
- Select “exFAT” in the file system field.
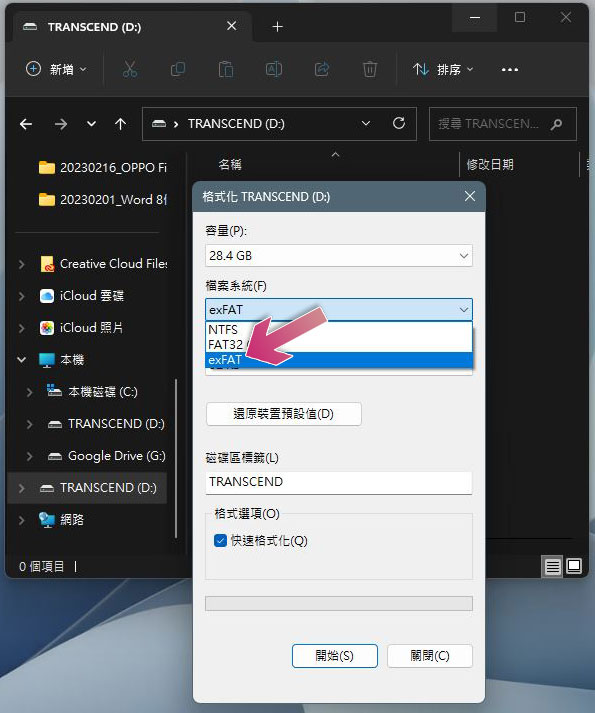
- The allocation unit size refers to the space that can be used by the file. For the sake of safety, set this item to the “default allocation size”. Click Start and wait for a moment to complete.
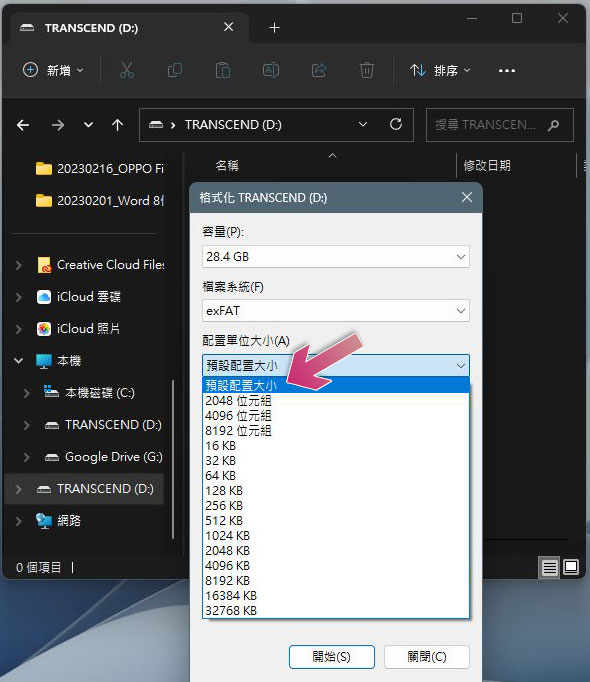
The formatting process on computers with both systems is very simple. The only difference is where to find the function options. You can give it a try!
Source: KOCPC Chinese